Behind the Scenes: Osborne

INTRODUCTION
Hello reader!
My name is Travis Yee, and I’m a 3D generalist living in the Bay Area, California. When I post online, I go by the moniker ‘Tarot Frank,’ a homage to the name my grandfather took when he immigrated from China, and a nod to my interest in the archetypes and symbolism found in the tarocchi, or tarot.
I discovered Blender during the pandemic and used the time I was stuck at home to throw myself into 3D. After a year or so of consistent practice, I was fortunate enough to get my first substantial work contracts and since then, I’ve been working professionally as a freelance 3D artist and designer for ad agencies and smaller independent clients looking for creative renders and animations for their brands and products.
INSPIRATION
While searching for inspiration online, I came across a model of a very early computer design, the Osborne Vixen, by an artist named Denis Stephane on Sketchfab.
In my personal work, I typically like to design the hero asset from the ground up, but I immediately took interest in this design and knew that it would fit perfectly into the retrofuturist aesthetic I love to tie into my work. I thought it would be an interesting opportunity to take this design and build a surrealistic, sci-fi environment to tell a story with it.
PROCESS
My hero asset had already been modeled for me, but I wanted to rework the textures of the original model from the ground up in Blender and add grunge, dirt, and imperfections to create a sense of nostalgia and realism.
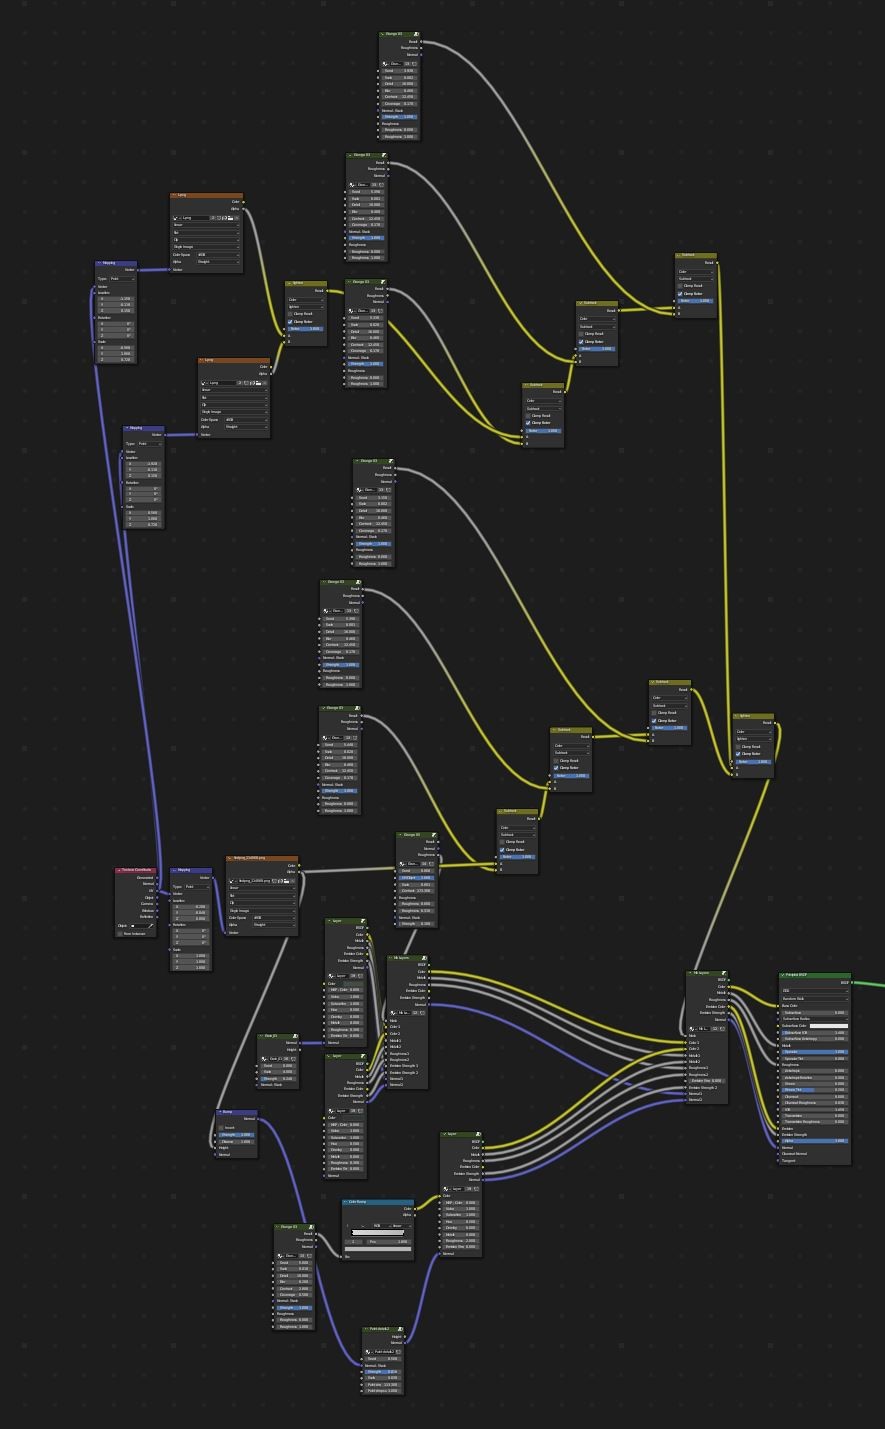
Texturing
For this, I used an excellent texturing add-on called Fluent Materializer, a material tool suite that streamlines the creation of procedural textures with helpful nodes for layering on specific textures and effects. I combined these with surface imperfections from my own asset library to create the results I was looking for on each part of the model.

I chose to change the branding of the model and created an imaginary product name, “DEUSPLUS,” to tie into the overarching story of the render. I also added a few additional decals and assets to the computer to further remove it from the original design, and AI generated imagery for the screen graphic.

I have been experimenting with ways to generate useful 2D image assets with AI, while this emergent technology is unpredictable and controversial, I believe it has a lot of potential to push the creative capabilities of artists when used appropriately. The screen design, pictures on magnets, and poster in the back were all images generated from Midjourney.

For the pictures, I applied additional textures on top to create a sense of wear. I also used an AI model called Calligrapher.ai to generate handwriting assets for sticky notes.

Modeling
Additionally, I modeled out and gathered more assets to compose the scene. I experimented with an unusual shape for the desk, carving out a space that felt like it was designed for this specific computer to be able to rest in.

With the desk and computer placed, I adjusted the camera position and focal length until I found something that felt strong. Once this foundation was established, I began to model and source additional assets to fill out the scene, placing these assets along with the AI generated imagery.

Composition
I typically spend the most time on the composition stage, and will carefully adjust each element’s position and texturing in order to create something that feels very detailed and intricate while still remaining cohesive. I make heavy use of the hue/saturation node to carefully de-saturate and adjust the brightness of background elements so that they command less attention.

I like to establish the camera angle before composing the shot because it’s often unnecessary to totally build out environments in order to create a sense of completeness or realism within them, especially if the camera is static. You can focus your efforts on what will actually be seen, and when juggling professional and personal work, I feel that finding ways to save time is absolutely crucial.

And of course, I wanted to include a small lego figurine representing my moniker. The base model was sourced from Mecabricks which was then exported into Blender, cleaned up, and modified. I adjusted the original torso texture in Photoshop.

Lighting
I experimented with using image projection in my lighting, using an AI generated imagery blended with a mask of alternating black/white bars to create an impression of light coming through slightly open blinds.


It may seem strange to use an image of people for this, but the positioning and configuration of the spotlight projector blurred it quite significantly and created the effect I was looking for.


When lighting “realistic” scenes, I like to make heavy use of Blender’s blackbody node to ensure that the colors I’m tinting my lights with are based in reality. Rather than combining very saturated, artistic/stylized colors, I like to contrast different sides of the blackbody spectrum, using cooler fluorescent lighting with warmer halogen lighting.


Lastly, I took the raw render into Photoshop and did some post-processing to get the colors and levels where I wanted them, and to add a little bit of film grain and dust to taste.
RENDER – Osborne

Thank you for reading the article. Feel free to explore more of my work on my social media accounts. Have a wonderful day!
About the Artist
Tarot Frank is the moniker of Travis Yee, a 3D generalist based in California, United States.


