
Behind the Scenes: Small Island
INTRODUCTION
Hello! My name is Gustavo Mazzia, and I’m 22 years old. I live in Brazil, and I’m a self-taught 3D generalist who works for a company creating pre-visualization and final renderings of various types of metal products like bracelets, pendants, keychains, religious adornments, etc.
My journey with Blender started a little over four years ago. After tinkering a lot with Andrew Kramer’s After Effects tutorials, I decided to dive in deeper and finally stumbled upon the other Andrew when I watched the OG donut series back in 2018.
INSPIRATION
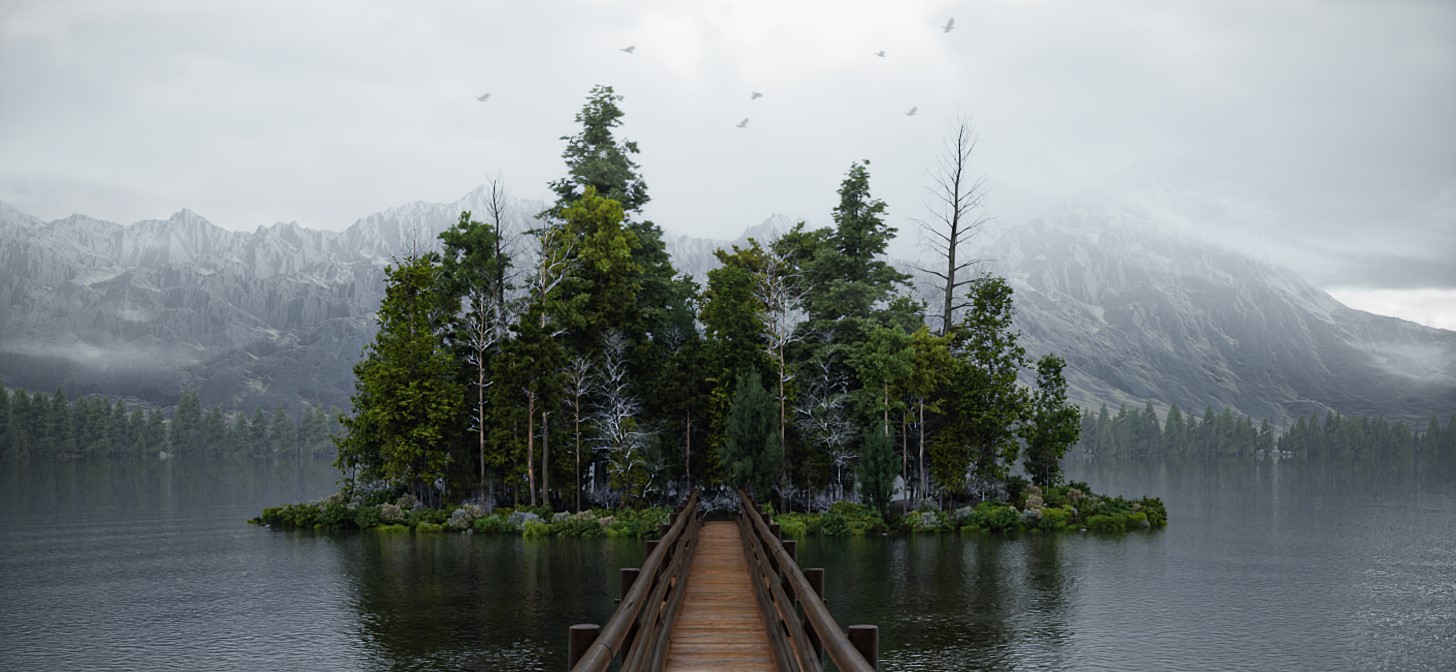
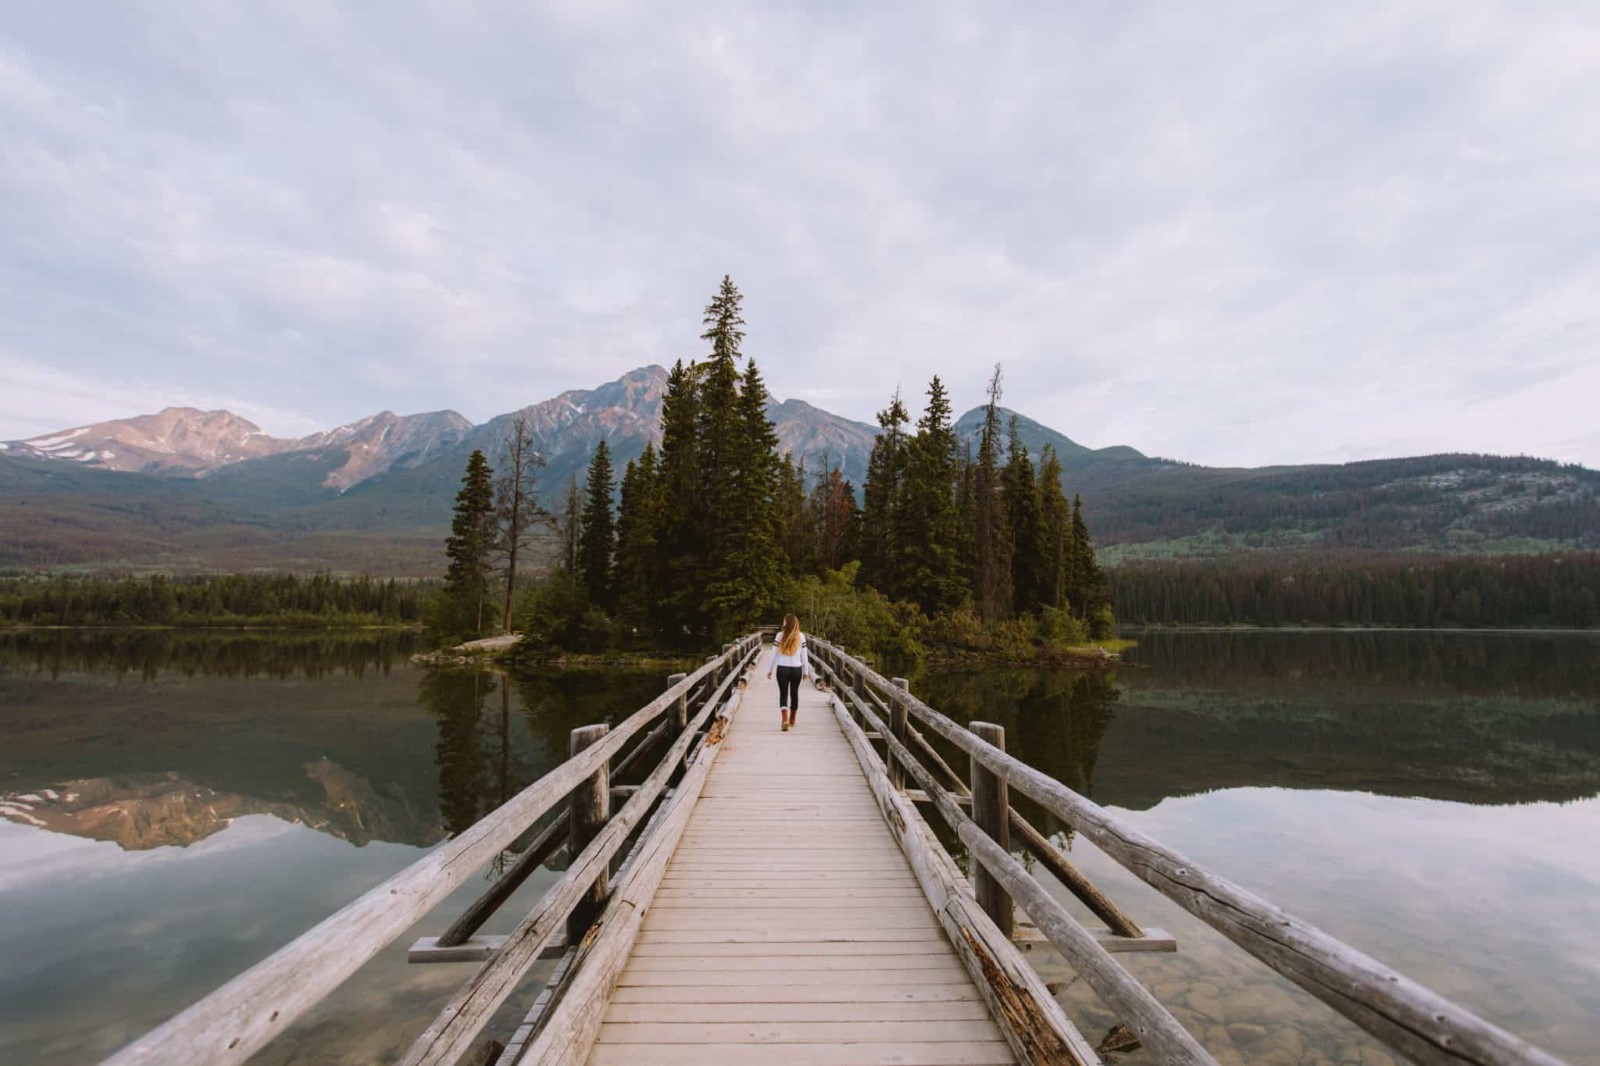
Even though it’s not something I do much, I absolutely love the idea of creating a virtual representation of something as beautiful as nature. For this particular scene, I was heavily inspired by Jasper National Park in Canada.
MODELING
To create and render this scene, I used a Ryzen 7 5700x and an RTX 2070, coupled with 32GB of RAM.
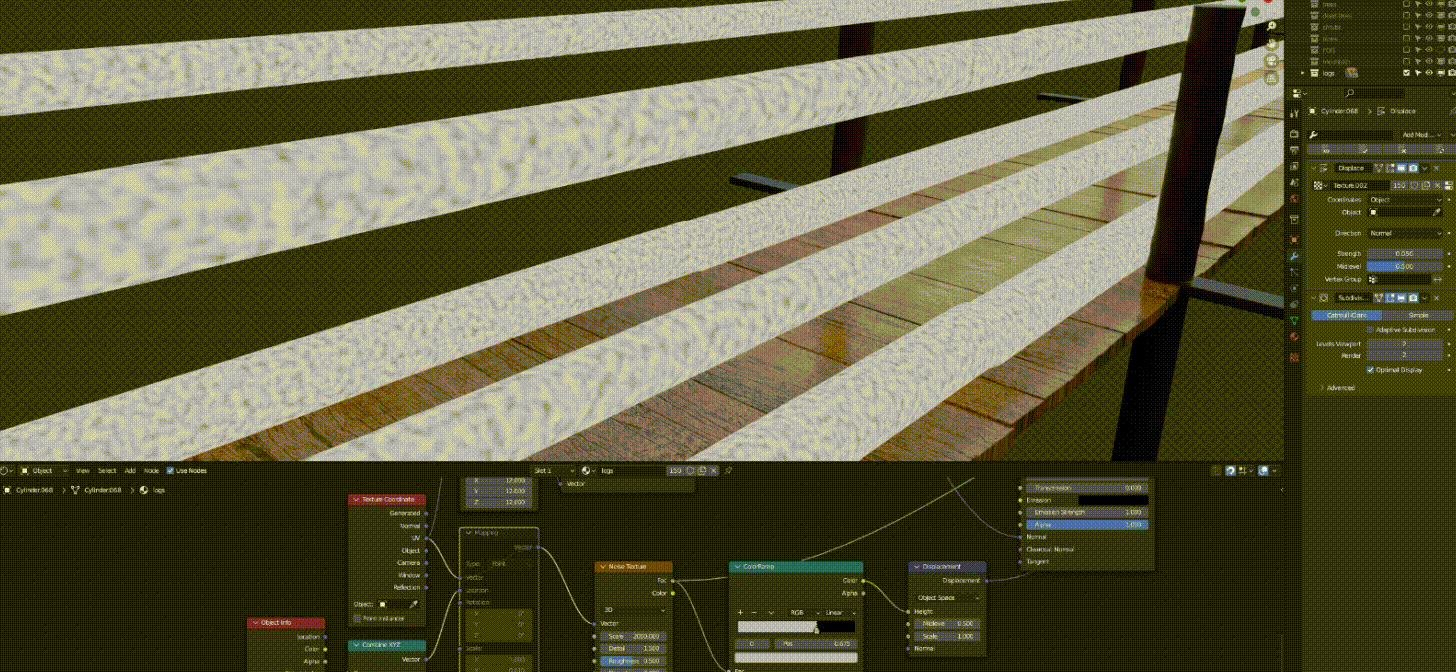
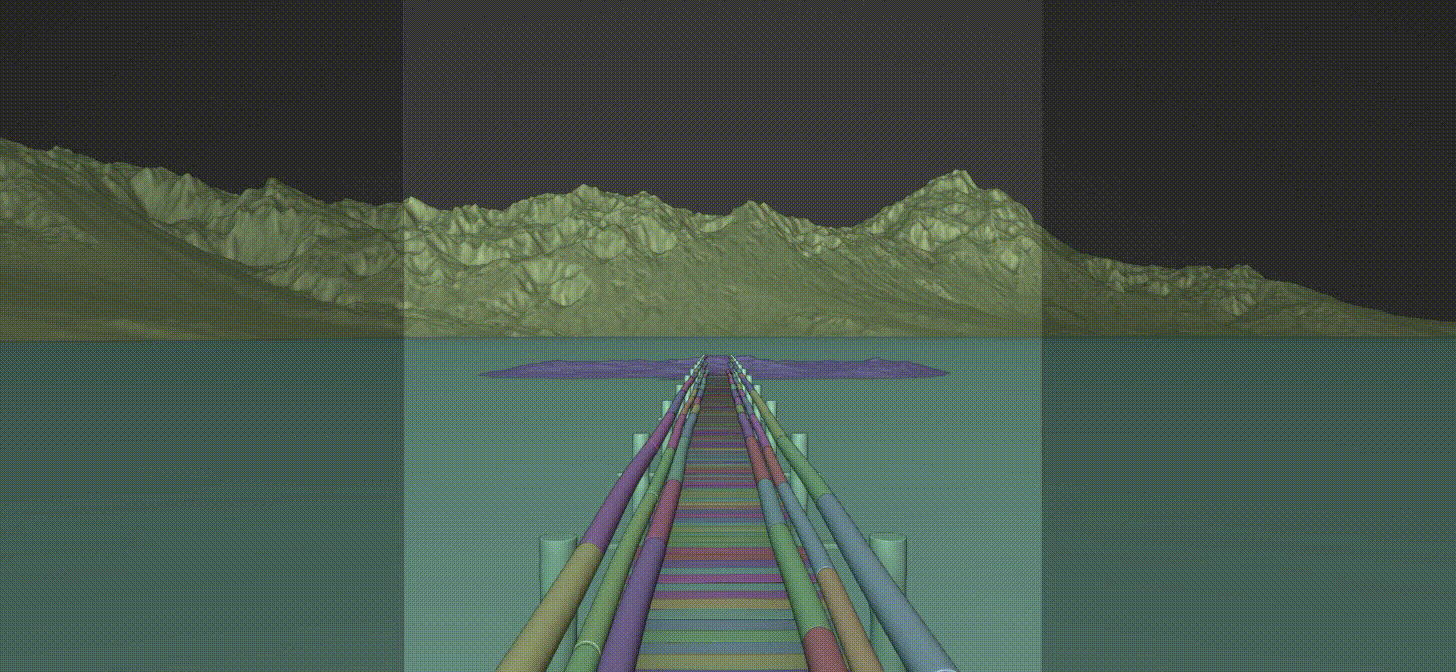
The process started with adding placeholders for the mountain, island, and setting up the camera. Then I modeled the bridge by creating a single plank, using the Array Modifier to achieve the desired length, and then applying it to access the geometry and randomize each plank’s rotation individually.
The rail guards were created the same way, with simple beams going up, a horizontal plank on the bottom, and an Array Modifier. Both the planks and rail guards use the same material with color adjustments, plus a clamped and stretched Noise Texture that was used as displacement to get the cracks along the parallel logs.
ENVIRONMENT
The island is a plane that was manually edited to ensure it protrudes slightly above the water. Its material contains no textures, just a dark brown color and a high roughness value. The trees and bushes are from the Vegetation add-on, plus a pine tree model I had lying around from an unfinished project, which was created using Speedtree software.
The mountain was created using World Creator. Nothing too fancy; a few erosion filters were used, but I mainly looked for a seed value that would give me a shallow parabola shape, which I wanted to keep the overall symmetry of the shot. The pine trees in the background are all the same single model used on the island.
WATER
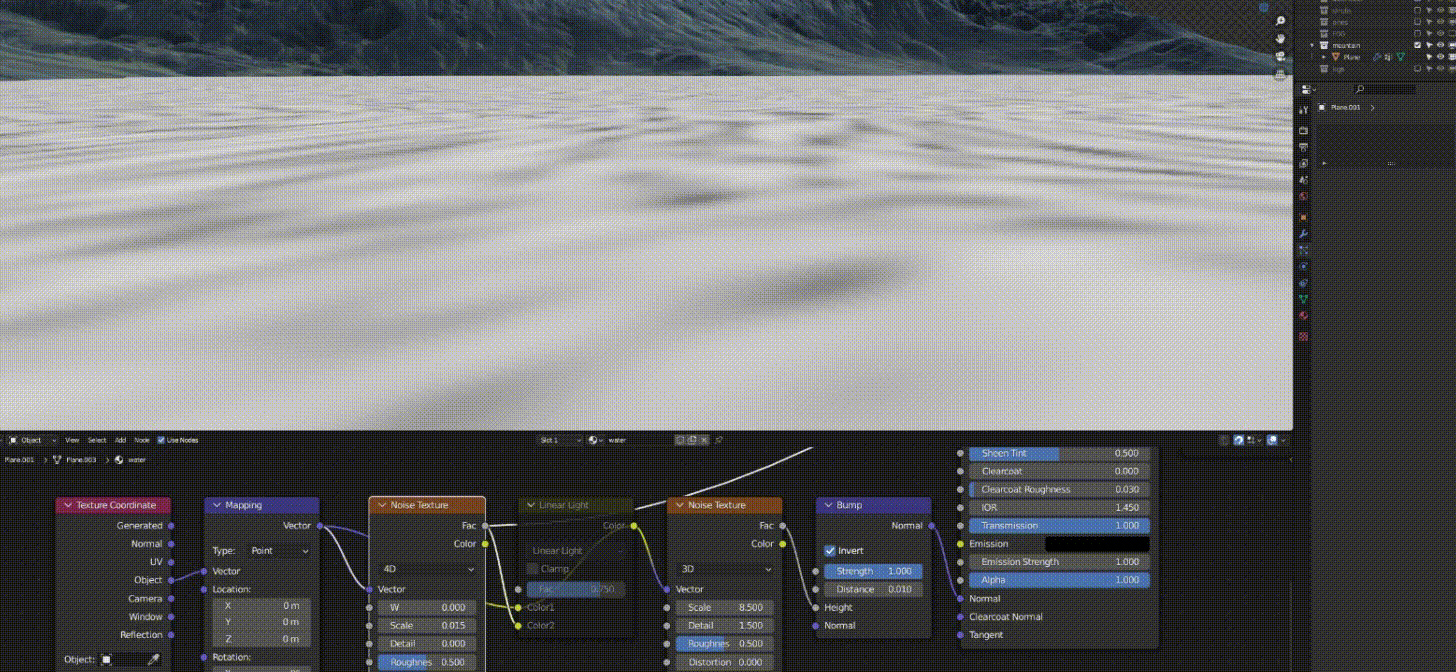
The water shader uses two noise textures to achieve this subtle, non-uniform rippling. One has a high frequency to give the water its natural, wavy appearance, and the other has a much larger scale and is, in fact, used to slightly distort the texture coordinates of the first one, achieving this “difference in direction” in the bump map, which nicely gives off the impression of different wind speeds on the surface of the lake.
FOG
The fog/mist is also done in-engine by using two volumes. One has a very low, consistent density (I feel like the fixed value works better at selling a natural misty look since in real life fog doesn’t get thicker when it’s farther from you) and hovers right above the water up to the top of the mountain. The other one is essentially the same, but with a density gradient that goes up to around 2 mountains tall and is used to “hide” the summit.
POST-PROCESSING
For the post-processing, I usually have a few filters set up in Photoshop to achieve a somewhat “realistic” effect. The order in which the filters are applied is important, as I tried to capture how they happen in real life by making a few semi-educated assumptions of my own:
- Motion Blur: Comes first since it happens right when the image is being captured. I often set a diagonal value of 1-3px depending on the resolution.
- Camera Raw Filter: I use it to adjust the color balance, add texture, turn down the vibrance a notch, and add grain. It seems to be the logical “second step” when the sensor actually gets exposed to the light.
- Reduce Noise: Comes third because it’s a post-processing effect. This filter helps to give that “denoised” feel that most smartphone pictures (and “baked” jpegs in general) have due to post-processing chewing away some details and desaturating certain highlights due to “considering” it was color noise.
- Unsharp Mask: Comes last because that’s when the software tries to compensate for the lost details during denoising. Unsharp Mask is my personal favorite way of adding sharpness; there may be a better solution here, of course. I tend to use something between .7 and 1.5px with strength varying between 50% and 150%.
I then painted the birds with a stencil brush using a darker color sampled from the sky and added a few subtle mist clouds on each side of the island to make it look more interesting and non-uniform.
SMALL ISLAND


Thank you for your time, I hope you enjoyed reading this article and learned something useful from it.
Have a nice day!
About the Artist

Gustavo Alexsander (LXSander) Mazzia, a 3D generalist from Brazil who works in the metal casting industry, trying to squeeze out a personal project every now and then.


