
Behind the Scenes: P. Tinto, Spanish film tribute

INTRODUCTION
Hi! I’m Nacho from Aranjuez, a town south of Madrid, Spain. I’m a self-taught artist and hobbyist who began working with 3D around 1996 using 3D Studio under MS-DOS
During all this time, I have sporadically worked in the industry with many programs (Max, Maya, XSI… plus Blender many years ago), and I have also worked as a 3D teacher several times.
For years, I wanted to establish myself in the Open Source world definitively so one day, I made the switch, grabbed a Linux Distro, and kept on Blender under Linux entirely. I like the freedom to not need anything else very much.
Actually, I’m the owner of a Fine Arts shop. I do 3D stuff in my spare time and am open to collaborate with any project that may arise.
INSPIRATION
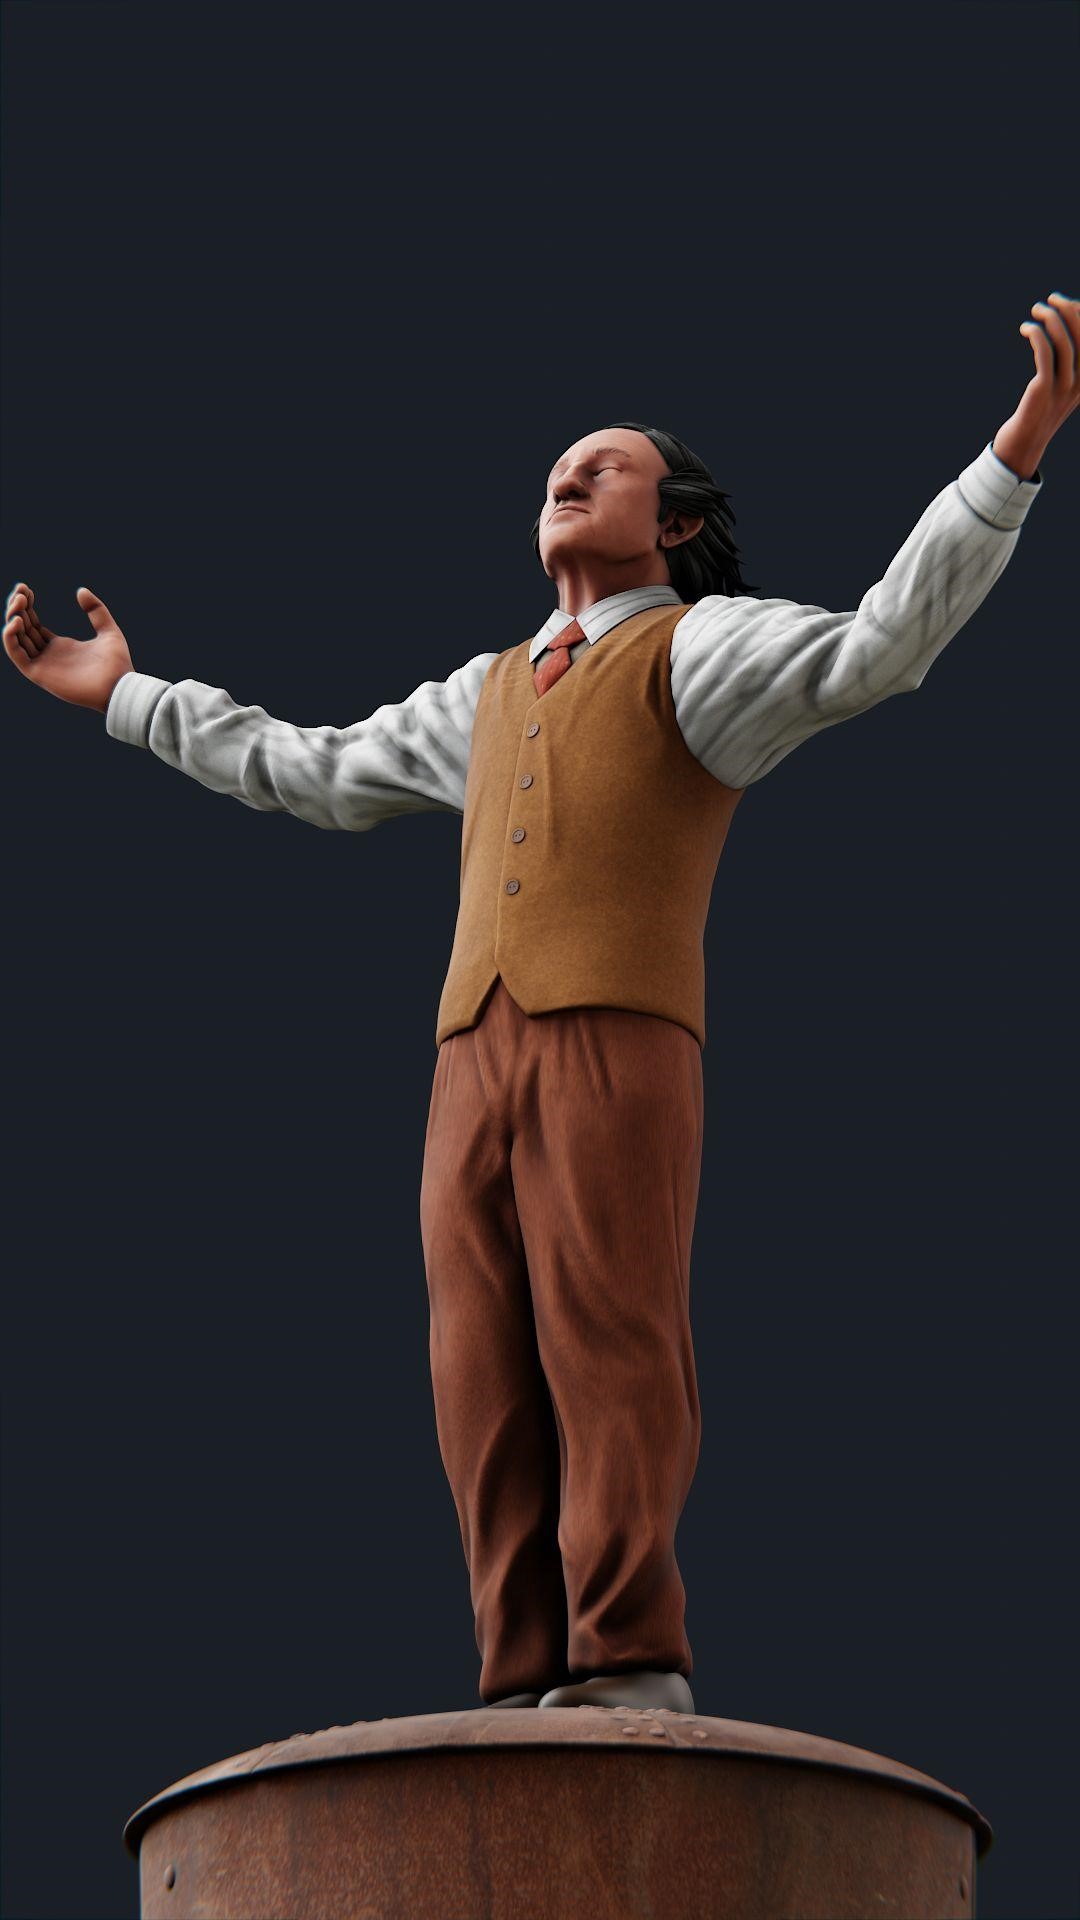
The inspiration of this project is a Spanish movie from 1998—not a typical movie, for it’s very special with its own sense of humor which I have a lot of affection for.
The title is “P. Tinto’s Miracle” (“El Milagro de P. Tinto” in Spanish), directed by Javier Fesser, starring Luis Ciges, a very important Spanish actor who died years ago.
Many things happen in the movie—a lot—but I keep with that final scene, in which Luis is up the water tower, saying “…That’s why I’m here standing high, very high, near where wishes are kept.” Those are the words on the plaque of the pedestal in Spanish.
That love is what defines the movie for me and is the inspiration of this piece.
PROCESS
I used Blender only as much as I could. If I need to create or paint a texture outside Blender, I use Krita but I try to paint it all directly in the viewport. The renders and viewports are always EEVEE and the Color Management is set to Filmic.
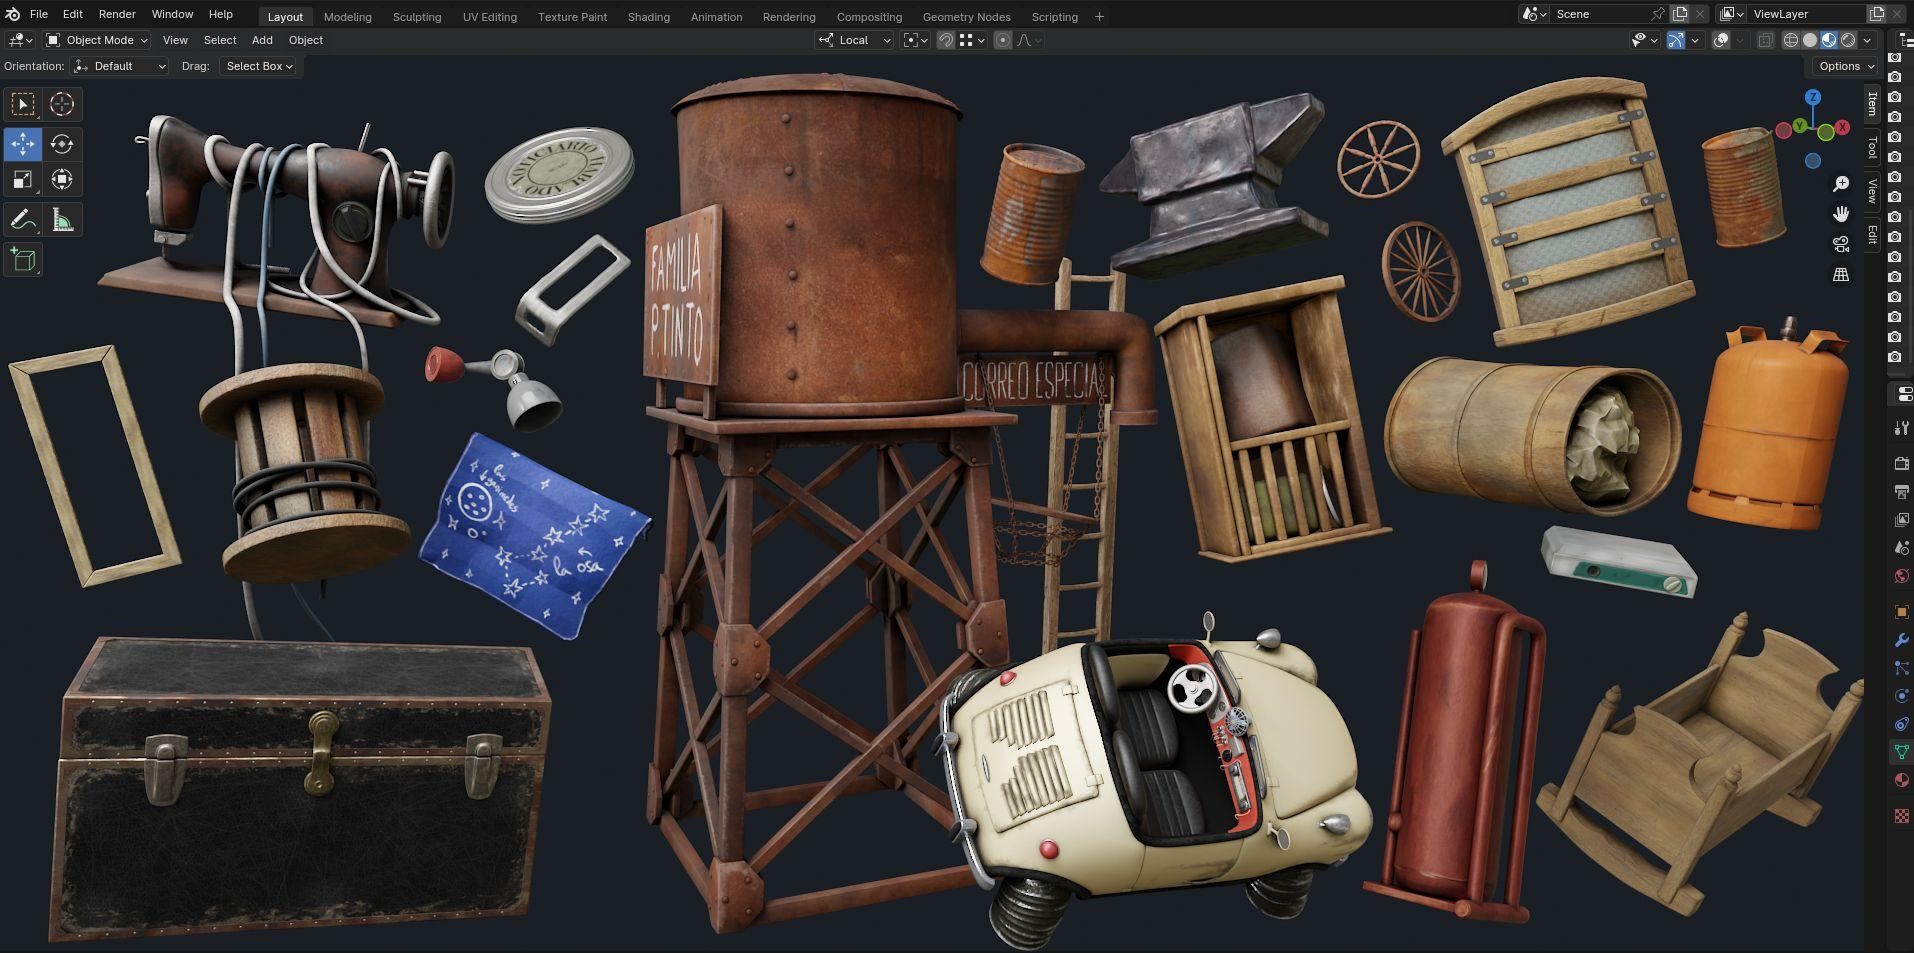
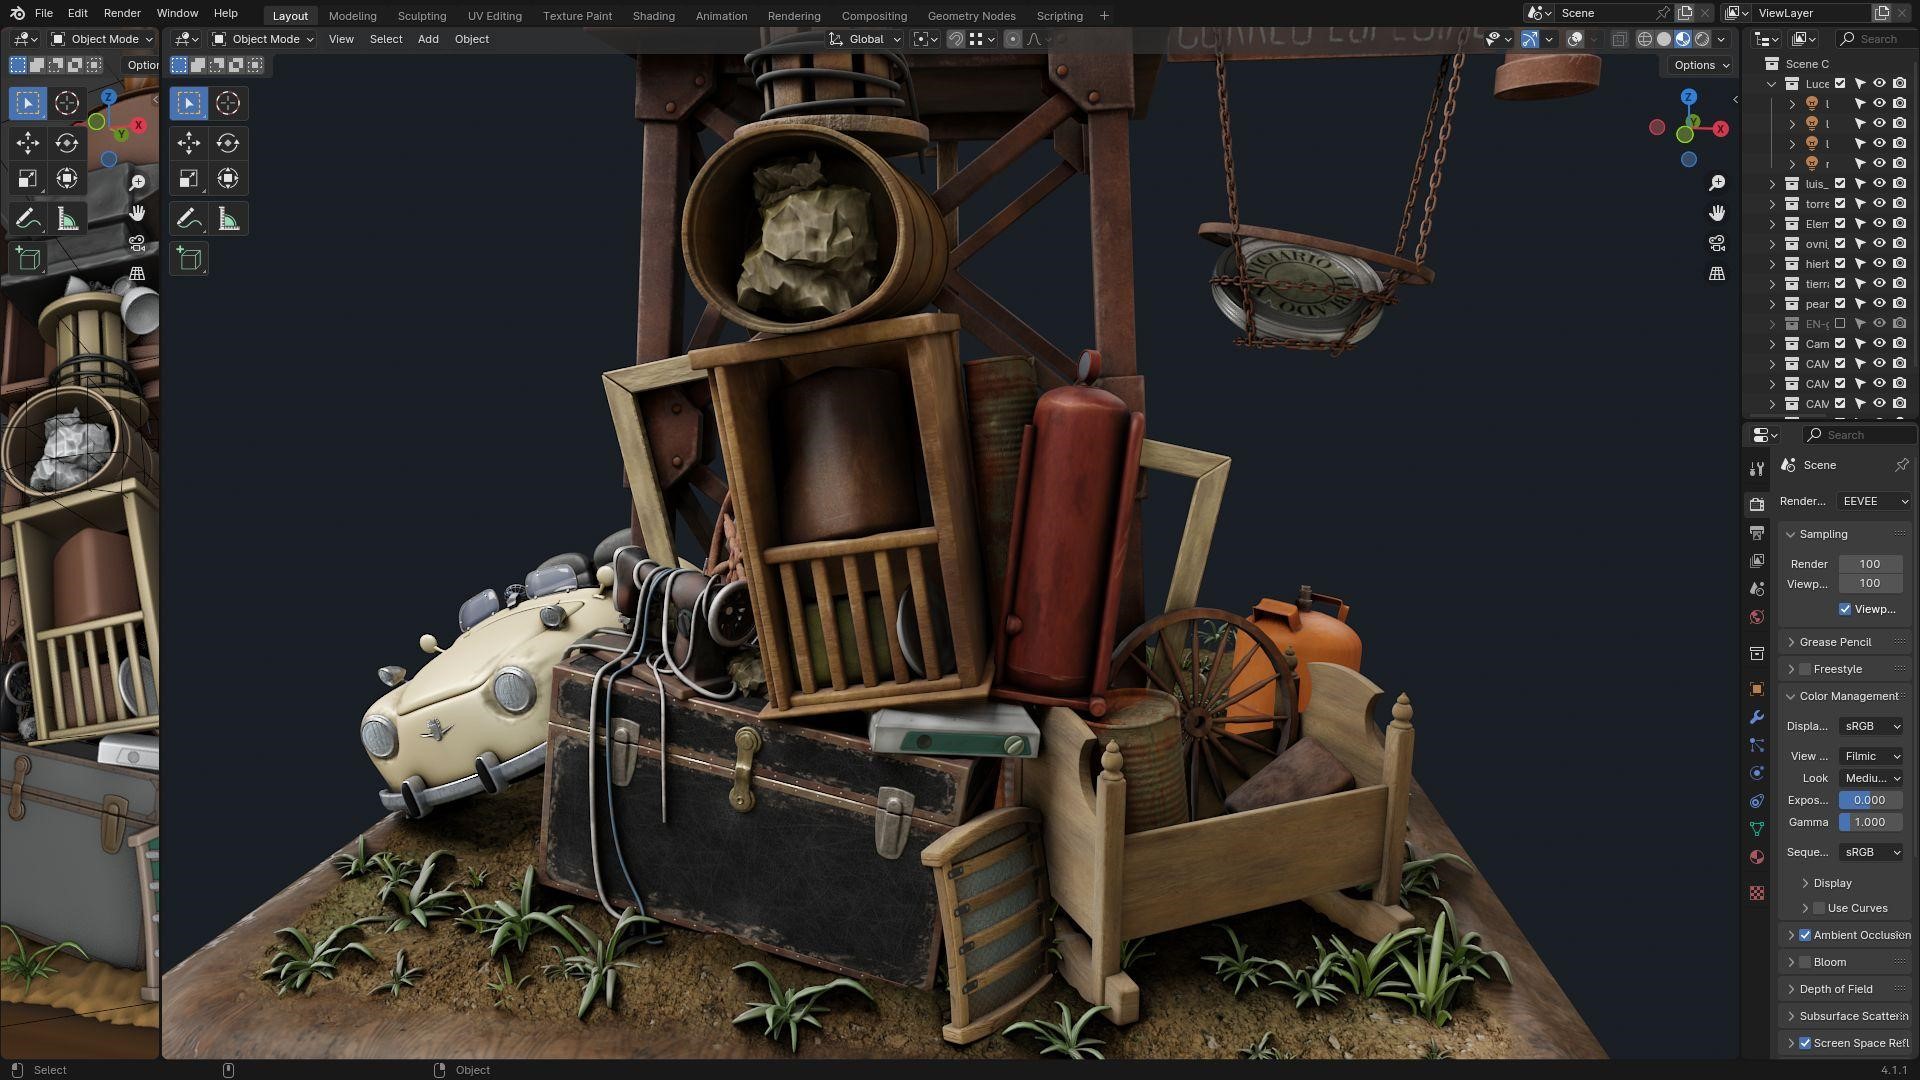
Models
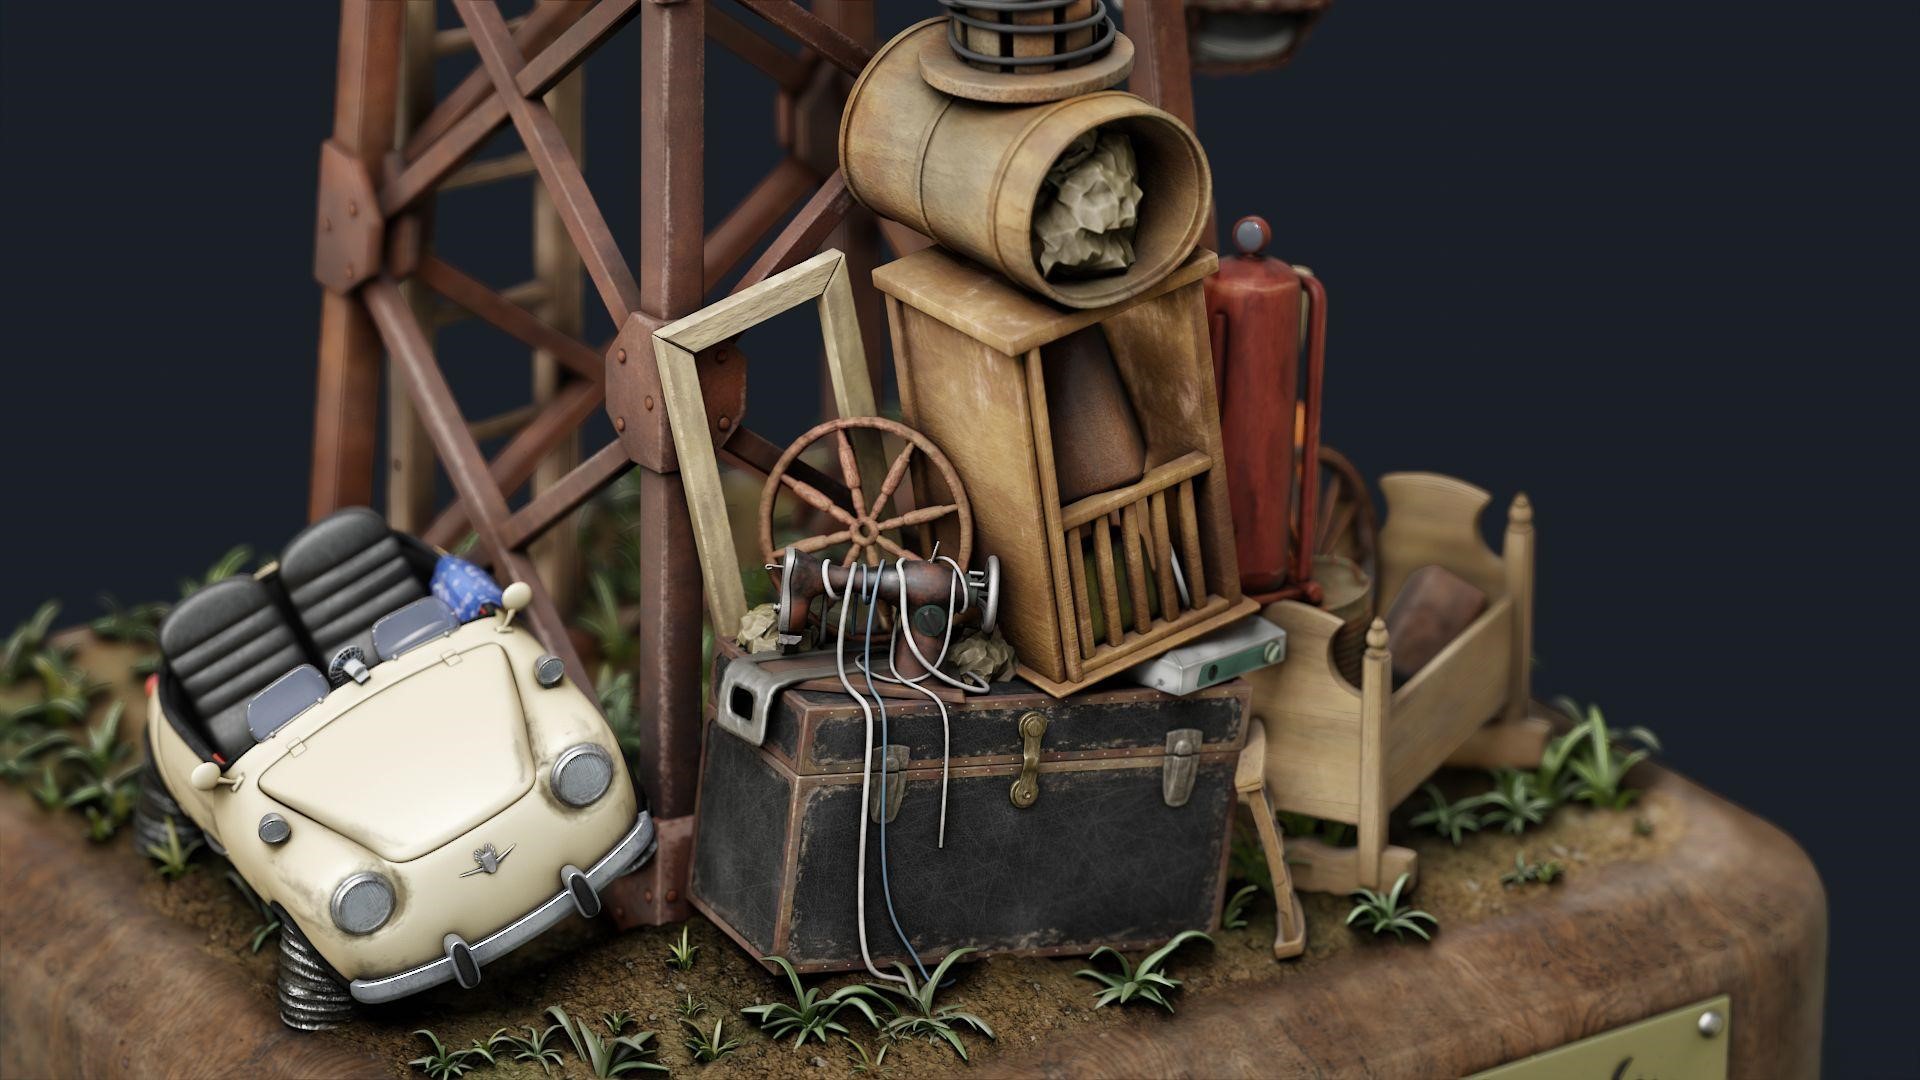
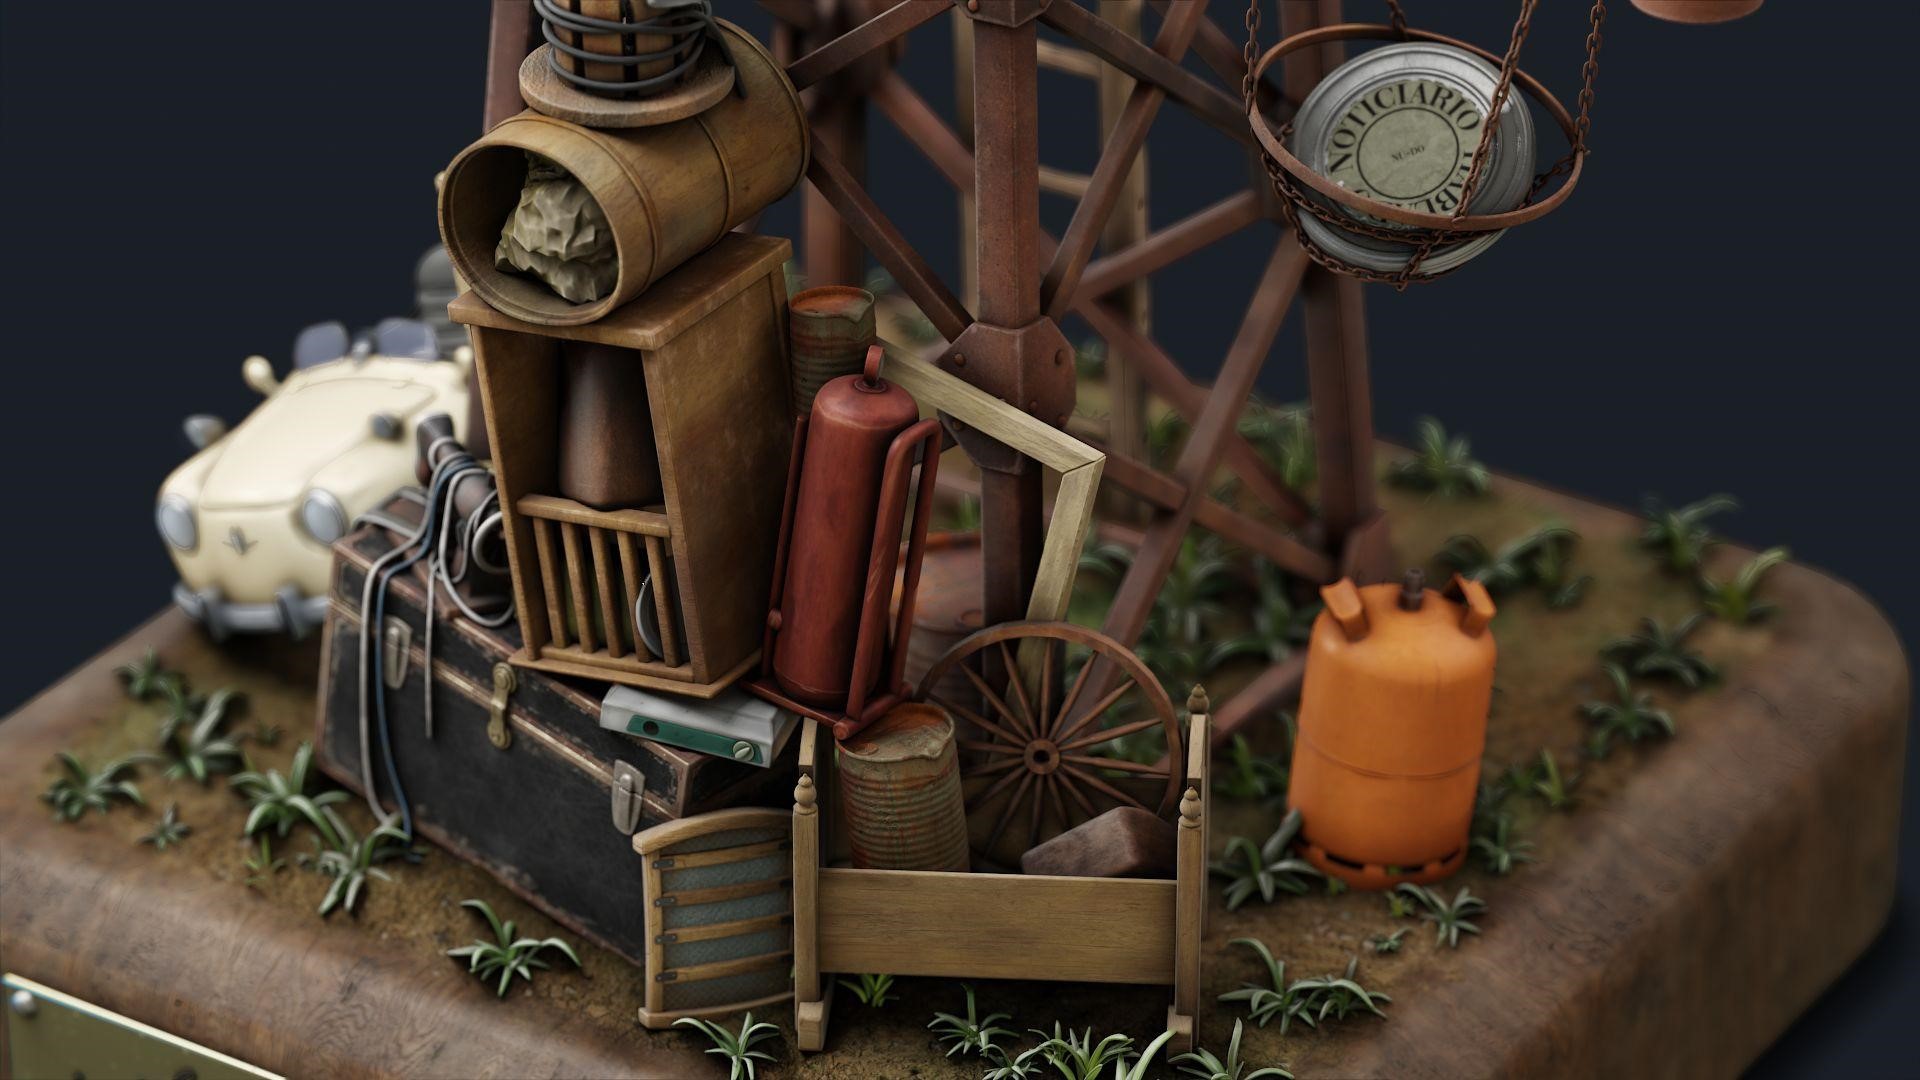
These are all the props I modeled for the scene:
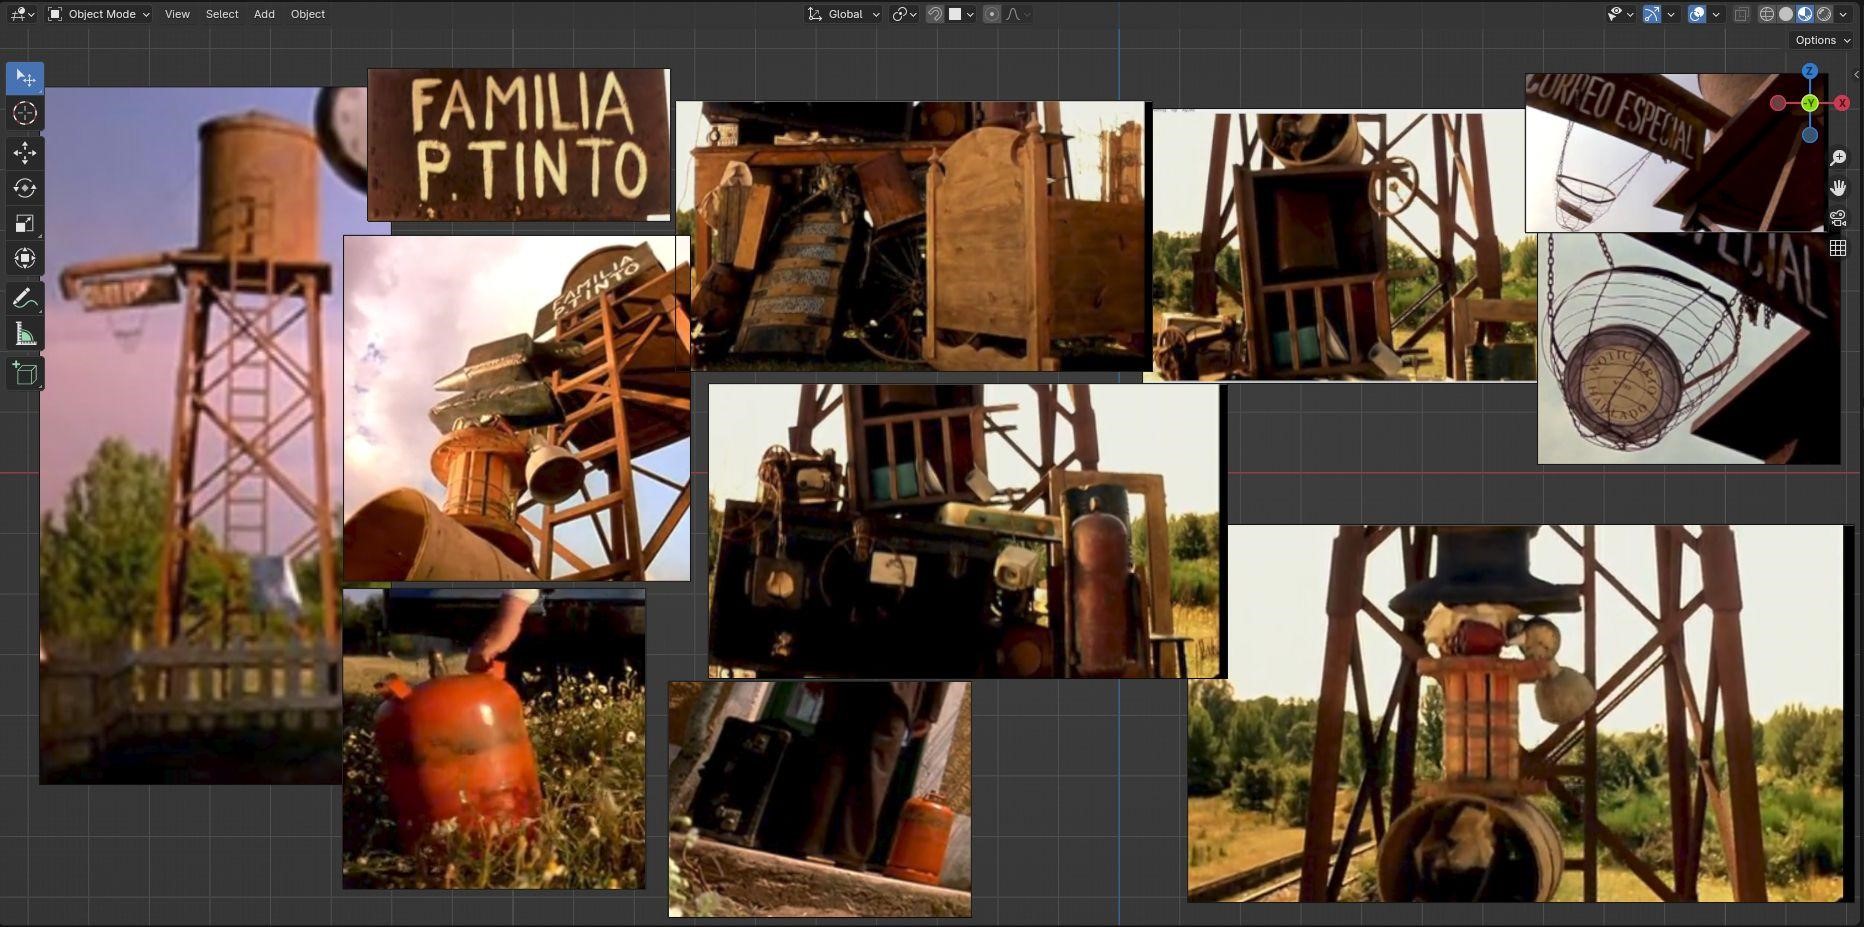
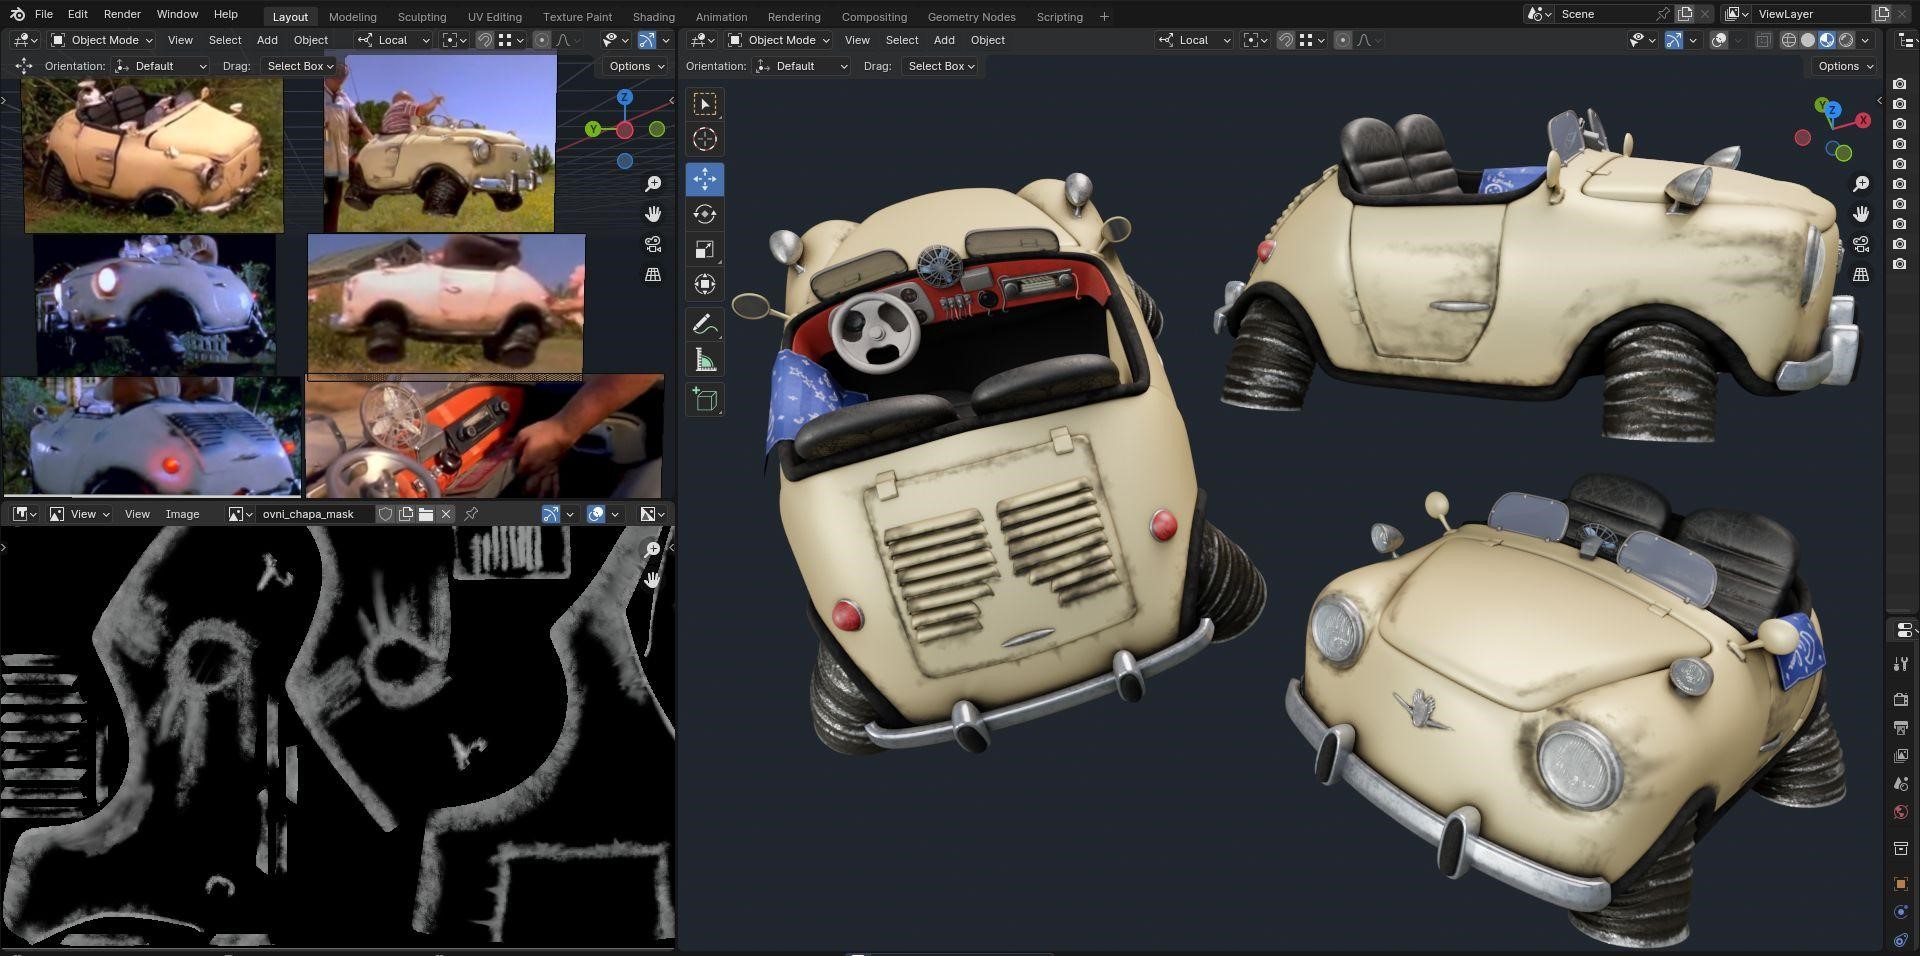
And these are the References extracted from the film—sorry for the quality.
Character
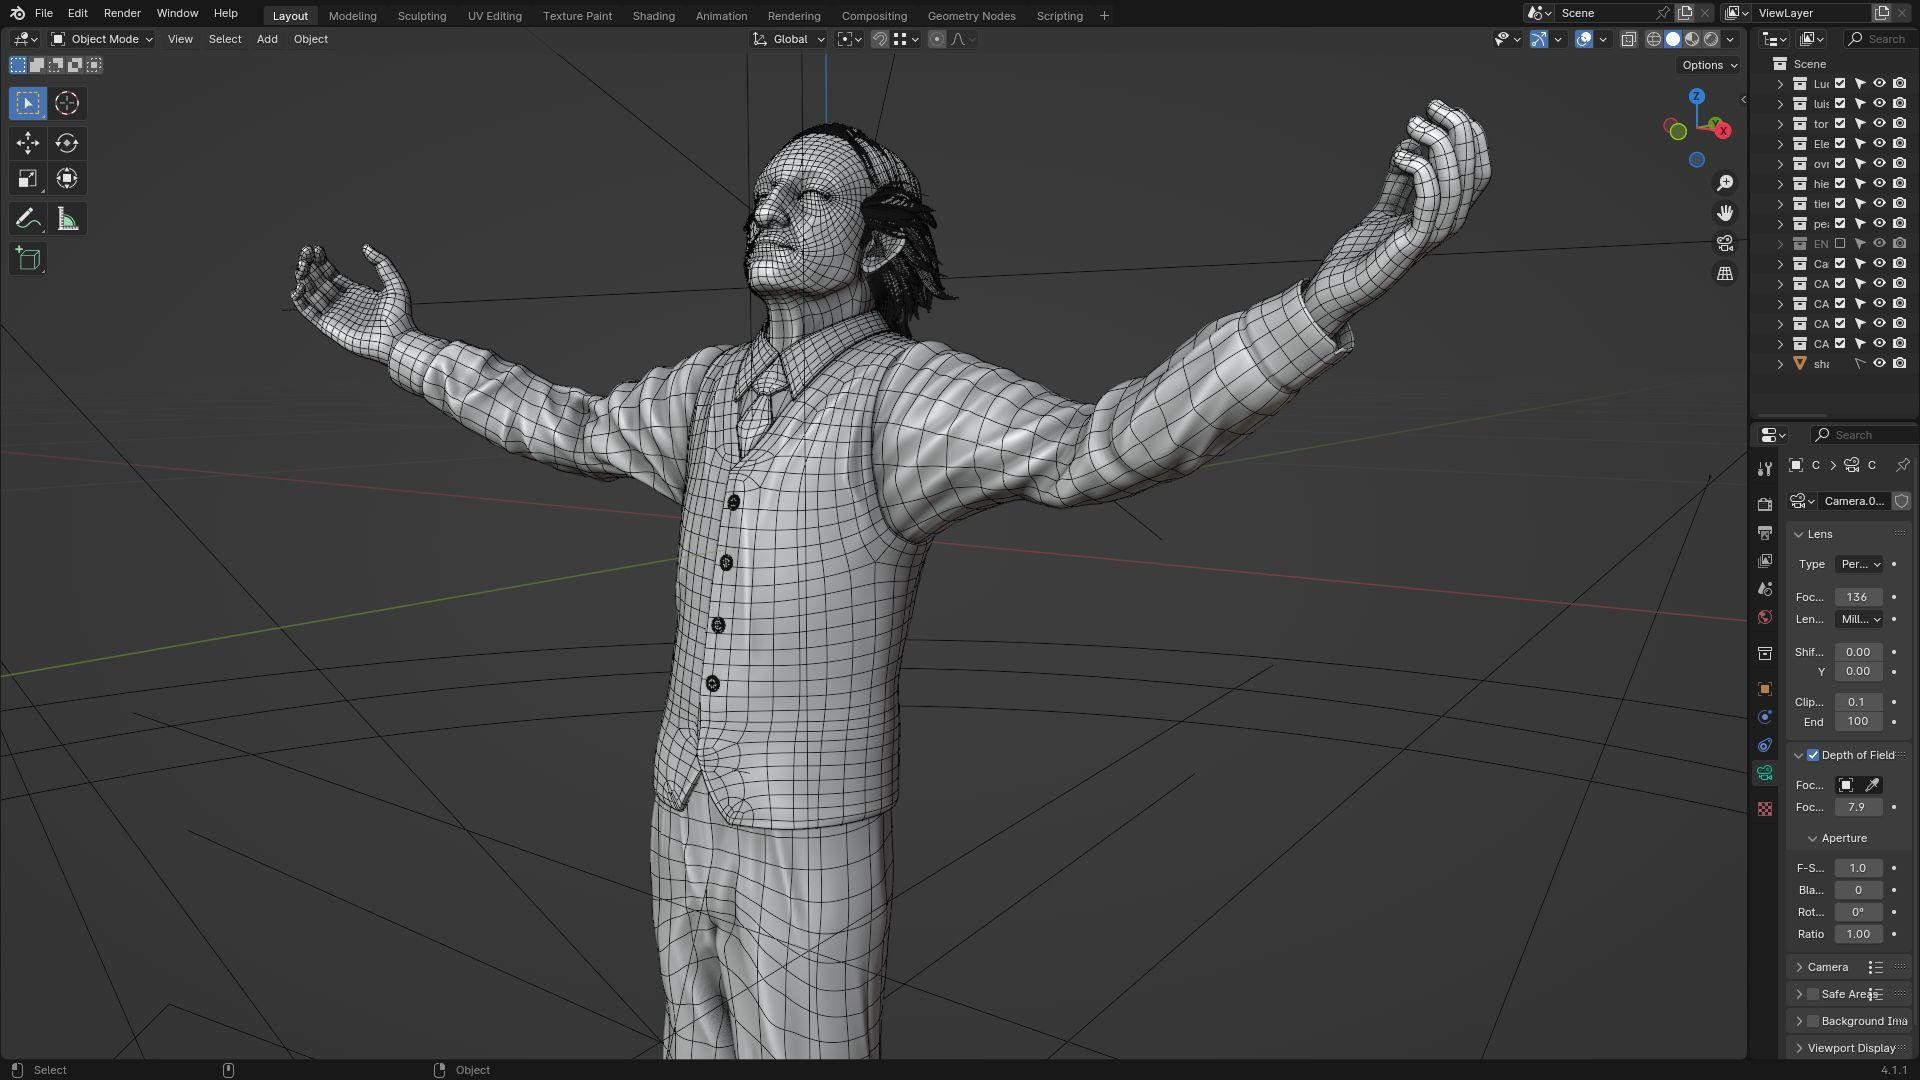
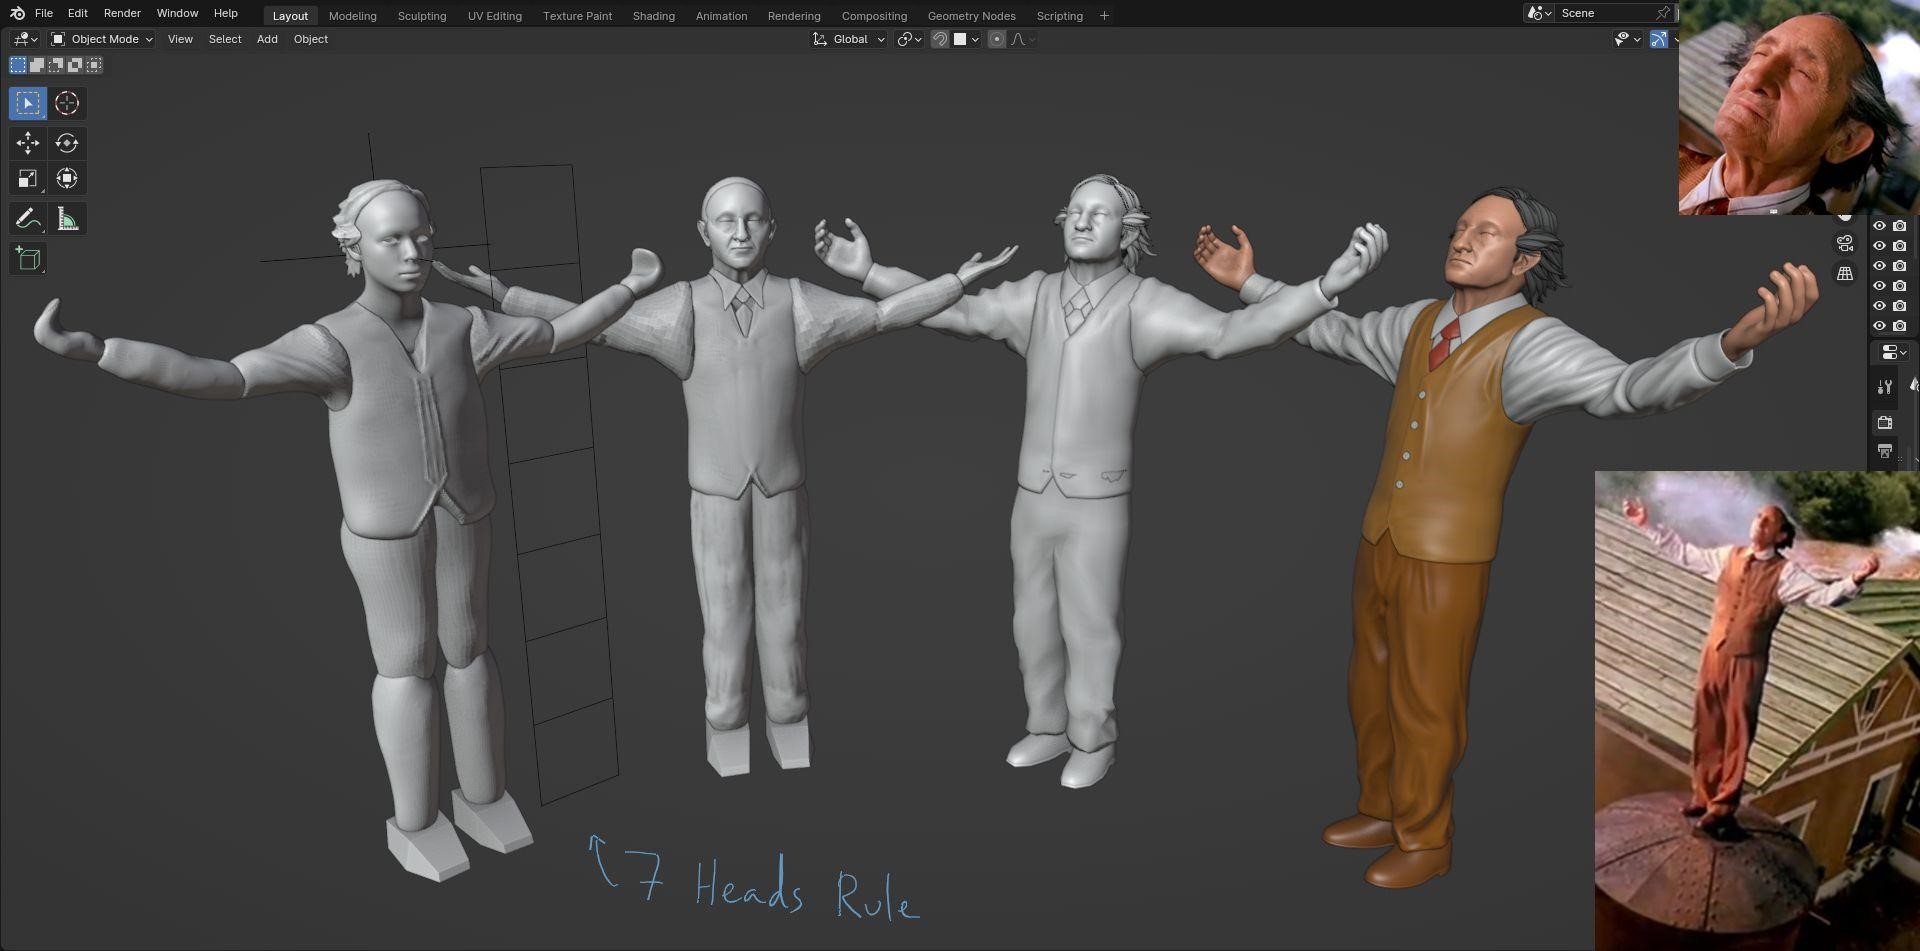
Sometimes, I model the character in A or T pose, but this time I went directly into final pose, starting with a generic head and a 7 heads rule, and modeled the main shapes.
Depending on what the piece is like, I start sculpting a sphere or create a simple base mesh any way I like, always to end with a clean topology and a multires modifier to add detail (even if it is not necessary for animation).
Later, if I need some minor adjustments, I create simple bones to make final deformations and pose the hands. For example, I use mostly the Pose Sculpt brush with the help of Face Sets created in the fingers.
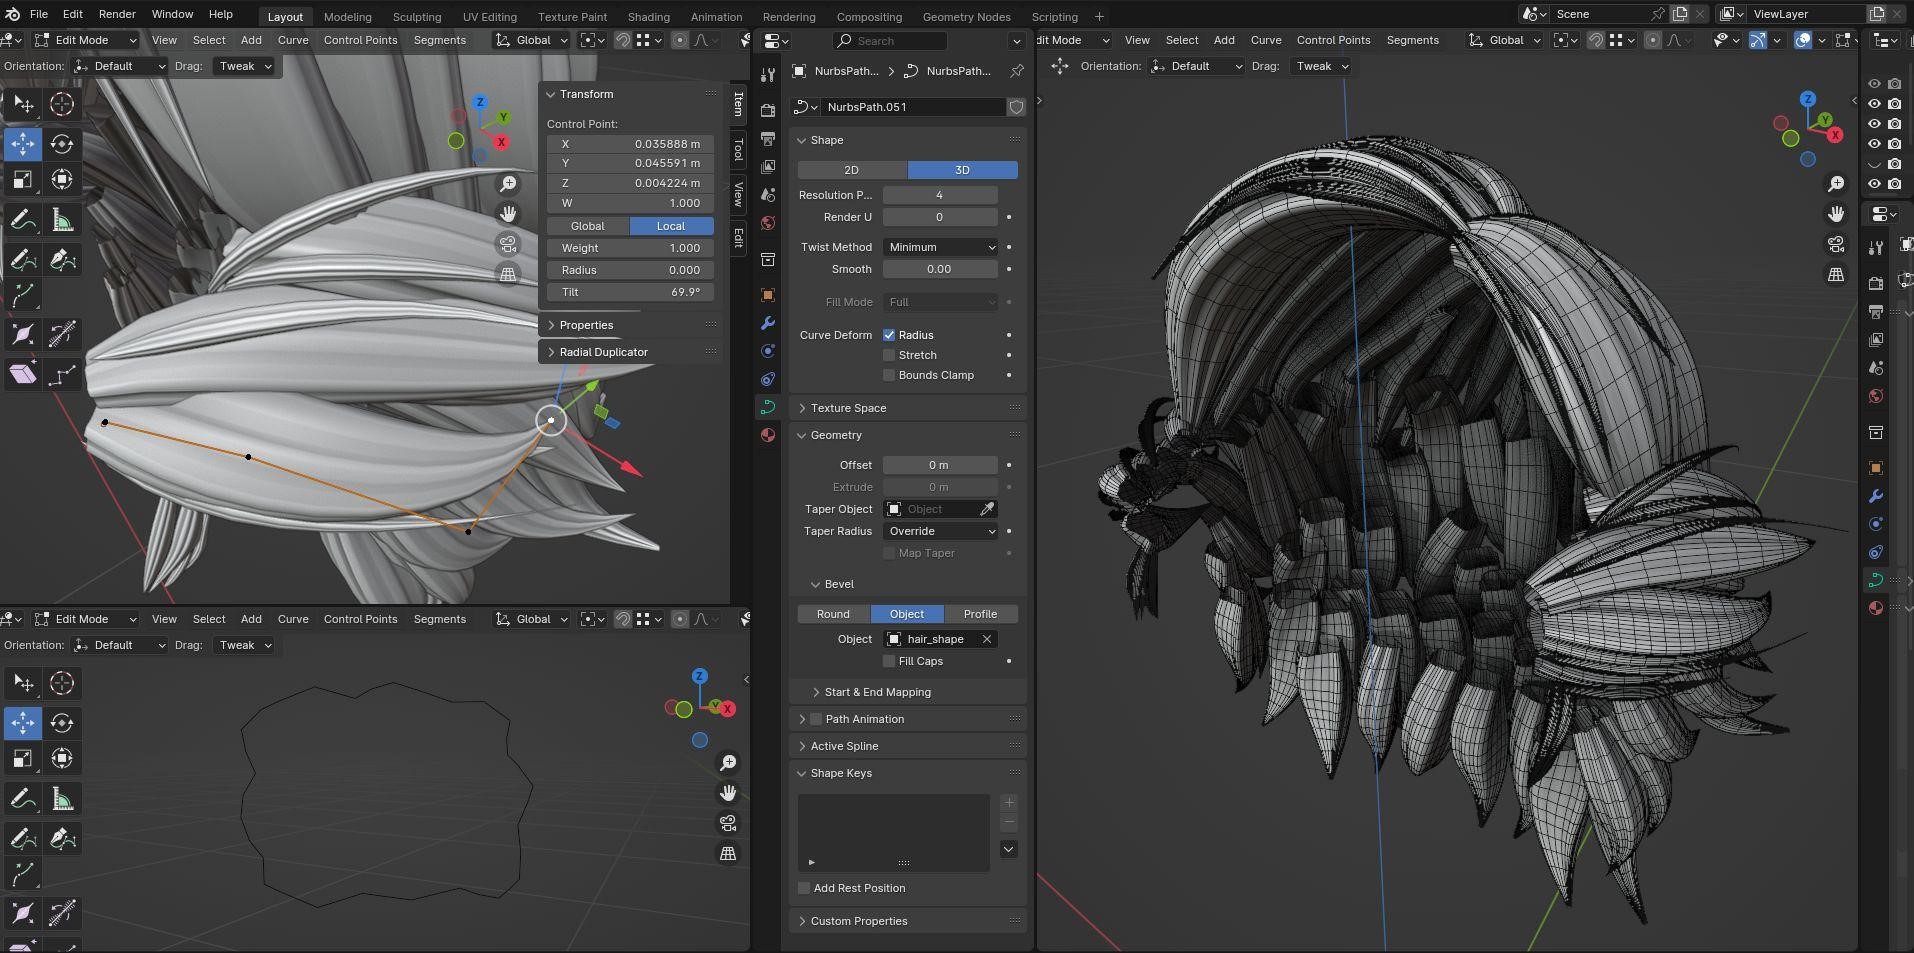
The hairs are shapes driven by curves, which I then convert to mesh to have UV information in creating the shader as follows:
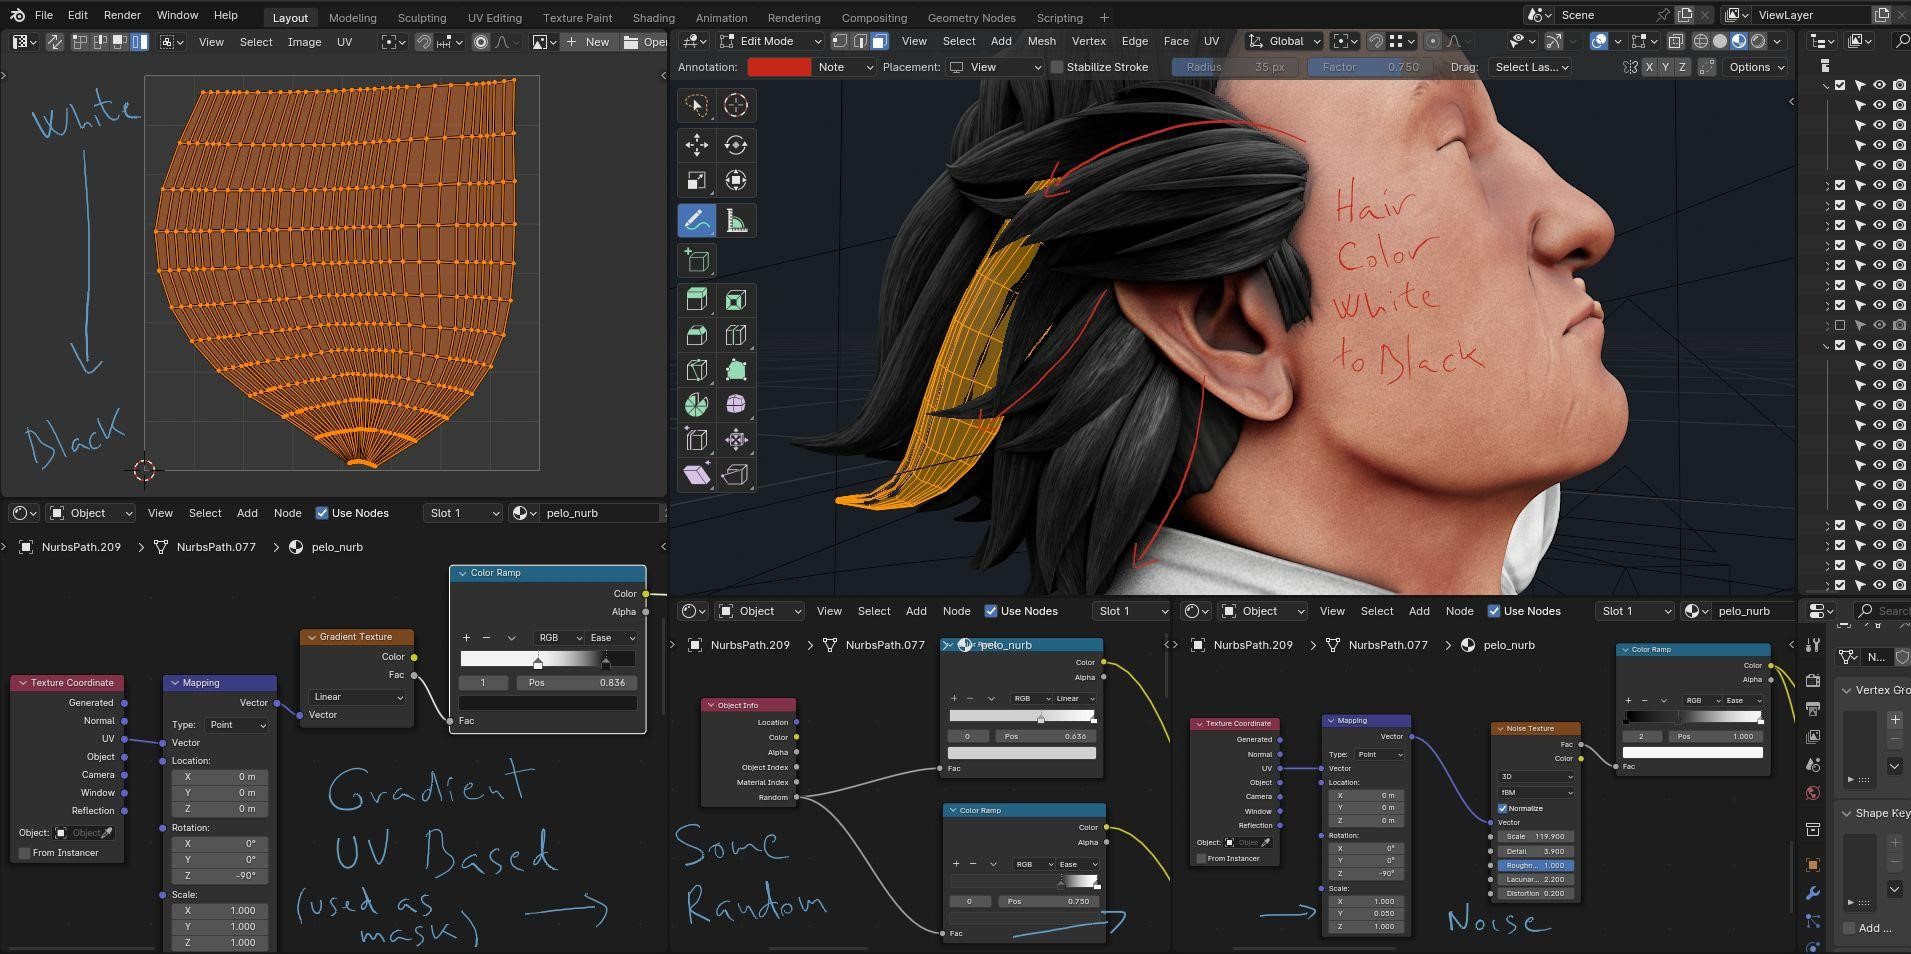
This is the skin shader; nothing complex. Its purpose is to not be in the foreground, but I wanted to focus on the use of a Baked Pointiness map that I moduled to get different light and shadows tones on the skin:
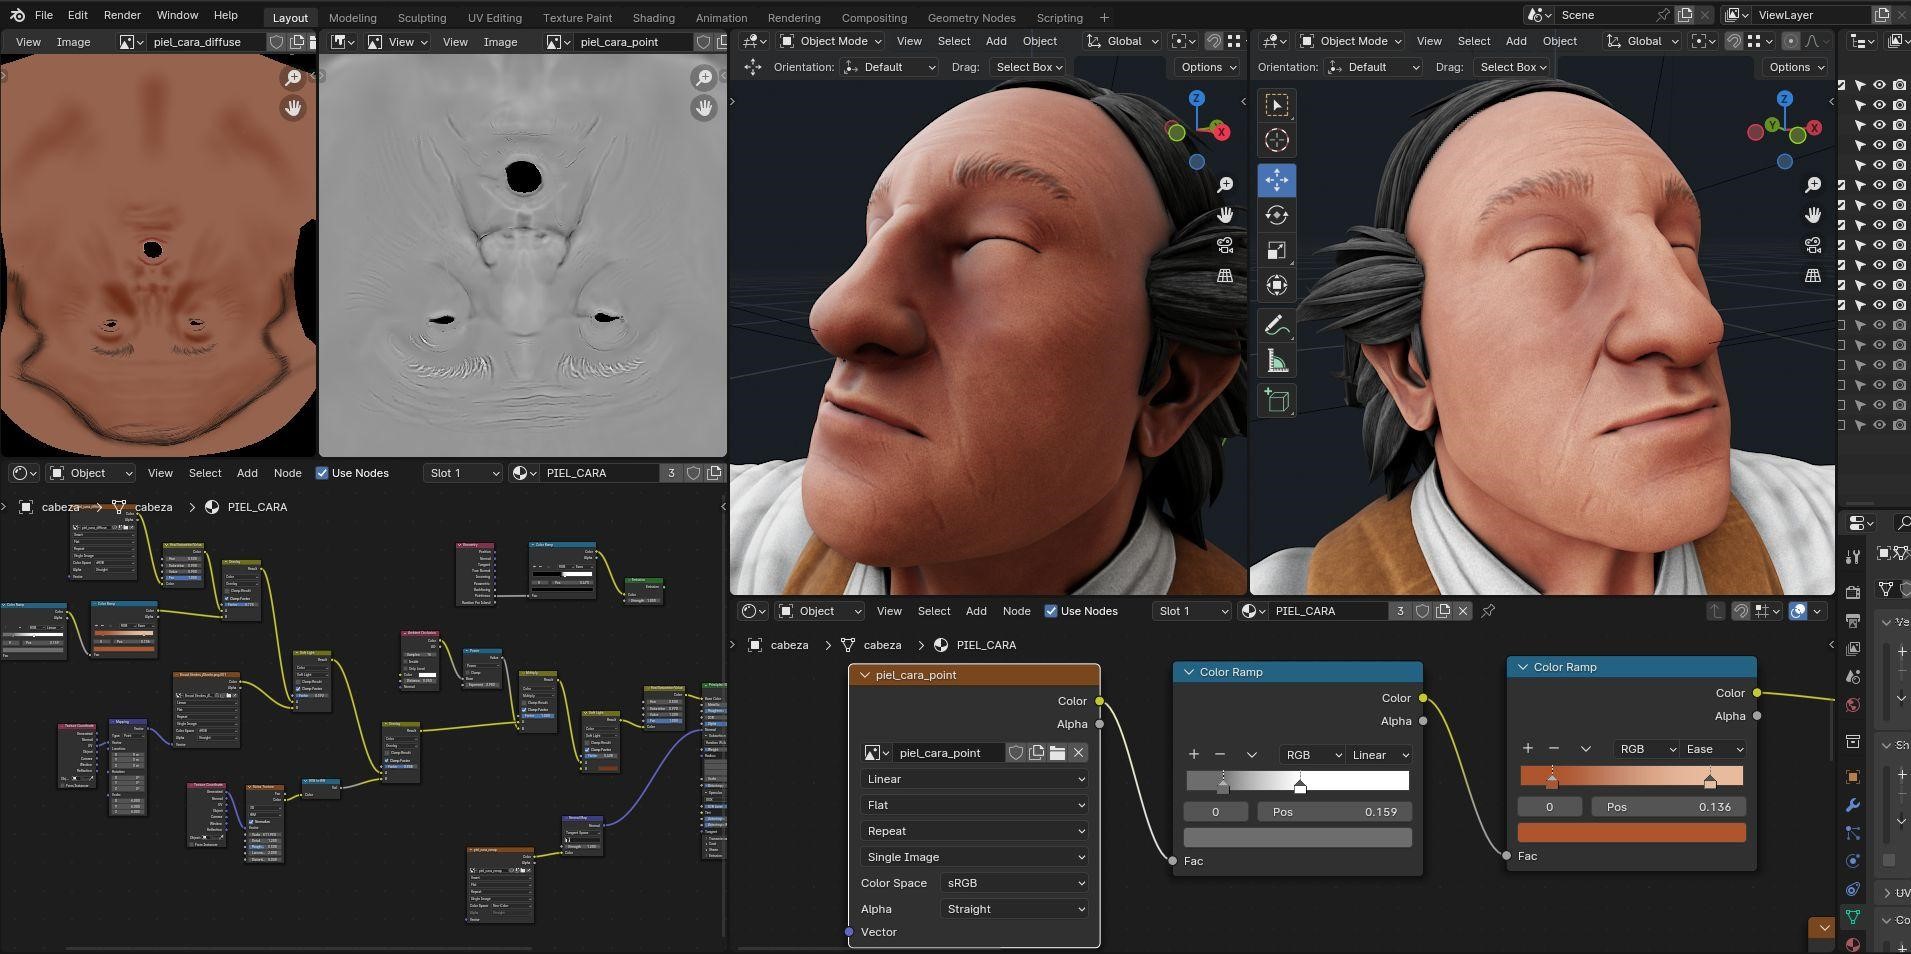
I used this technique very often in previous projects because it “pops” the sense of depth and detail in the final mesh (baking the Pointiness from a high level multires info). In the case below, I show the shirt, bandana, and face maps:
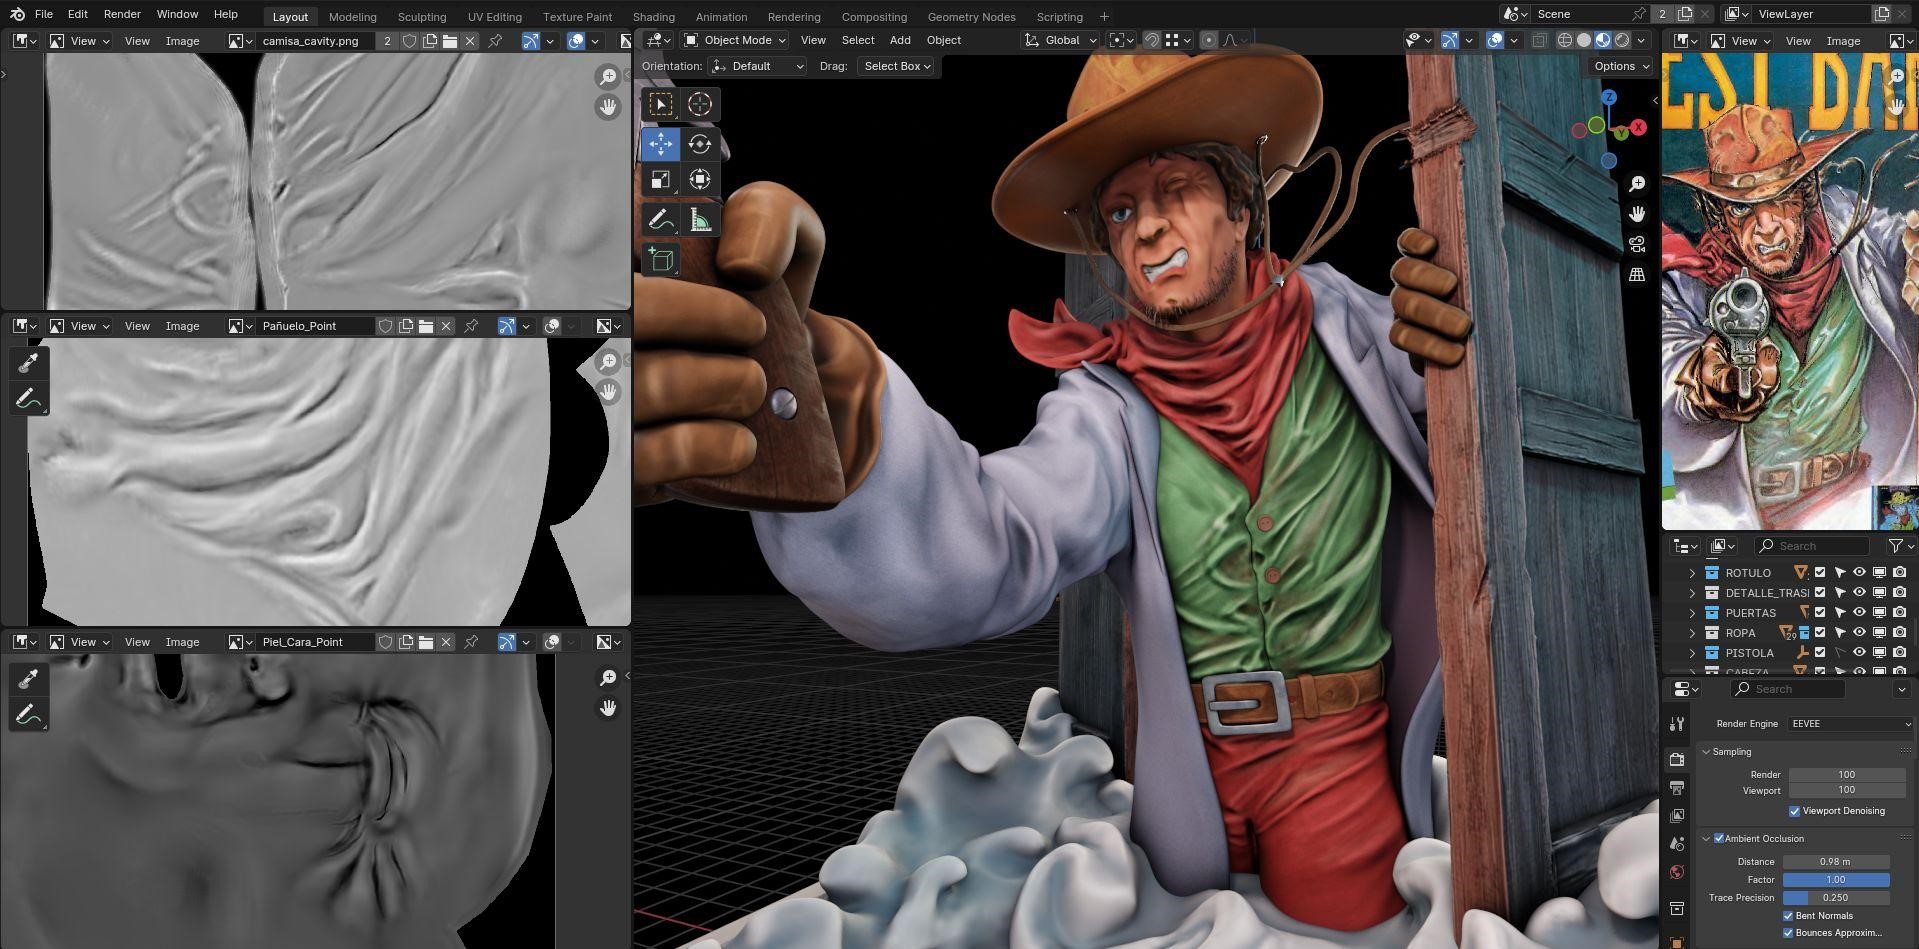
(Yeah, sometimes I call it “point” and sometimes “cavity” but in the end, it is the same.)
Don’t be afraid to “lose” a little time creating nice UVs. You can always choose the mapping type and be able to hand-paint unique details on it. One great help to manage UVs in an efficient way is (including the built-in tools in Blender) this addon: TexTools.
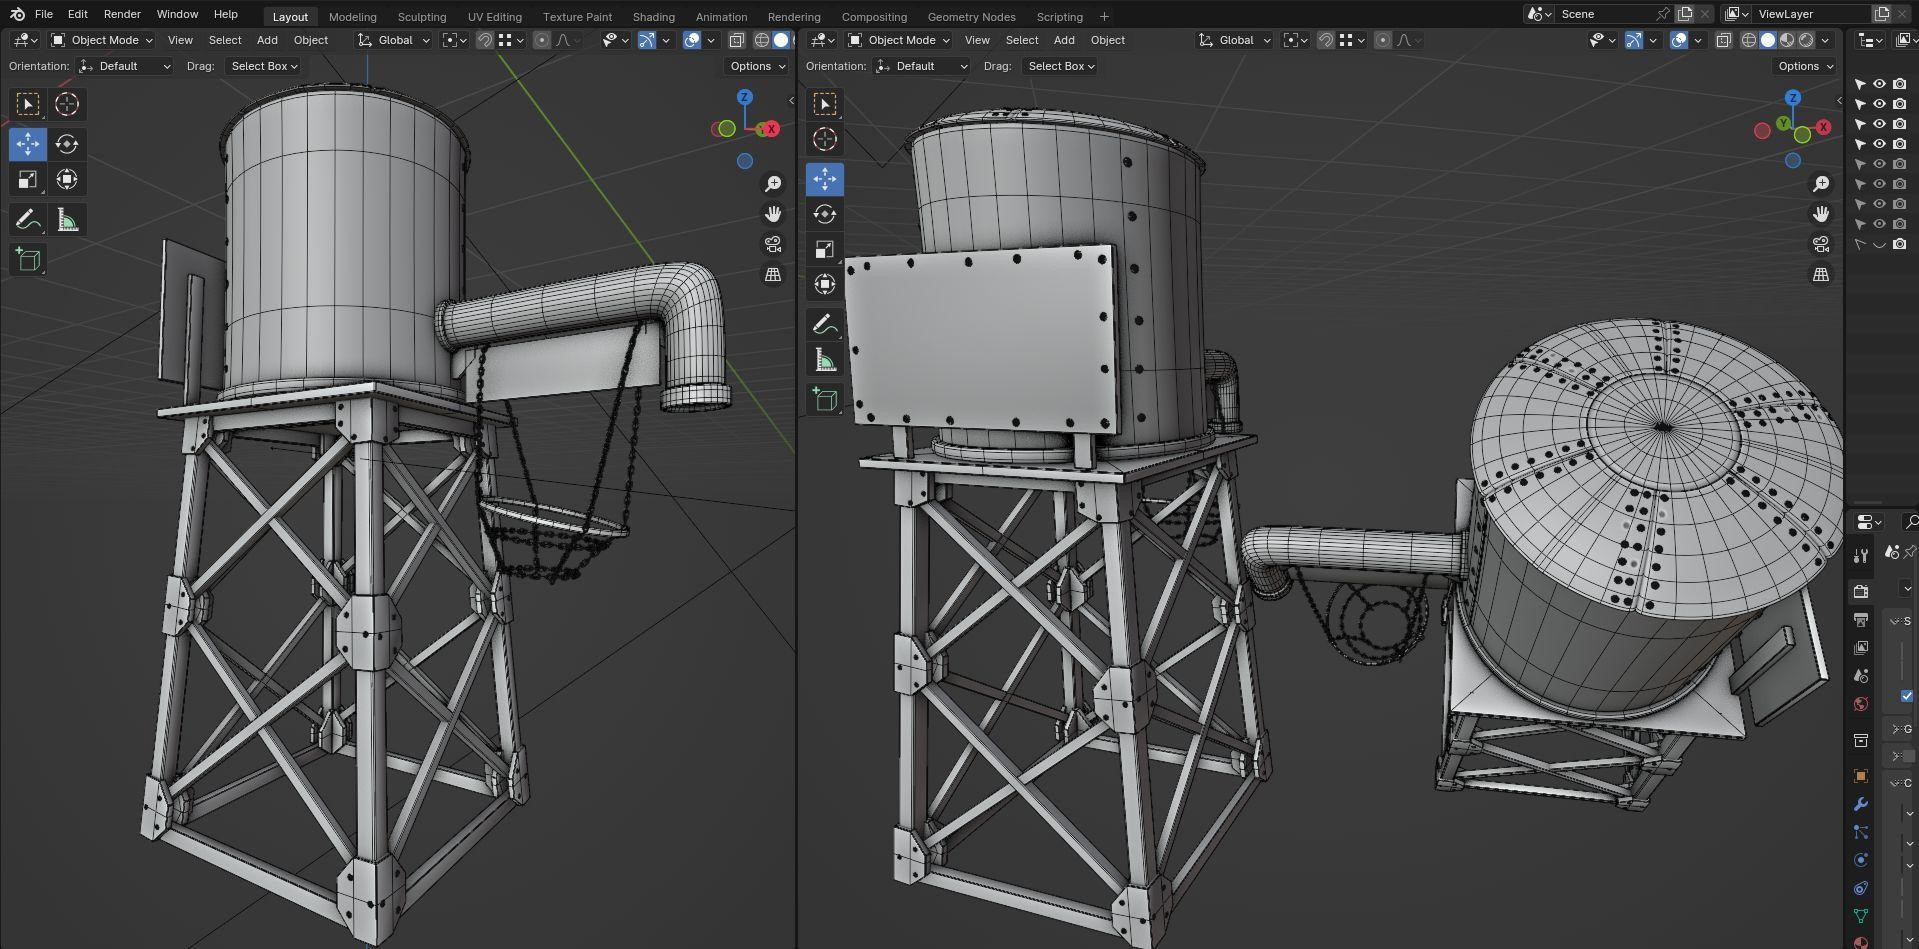
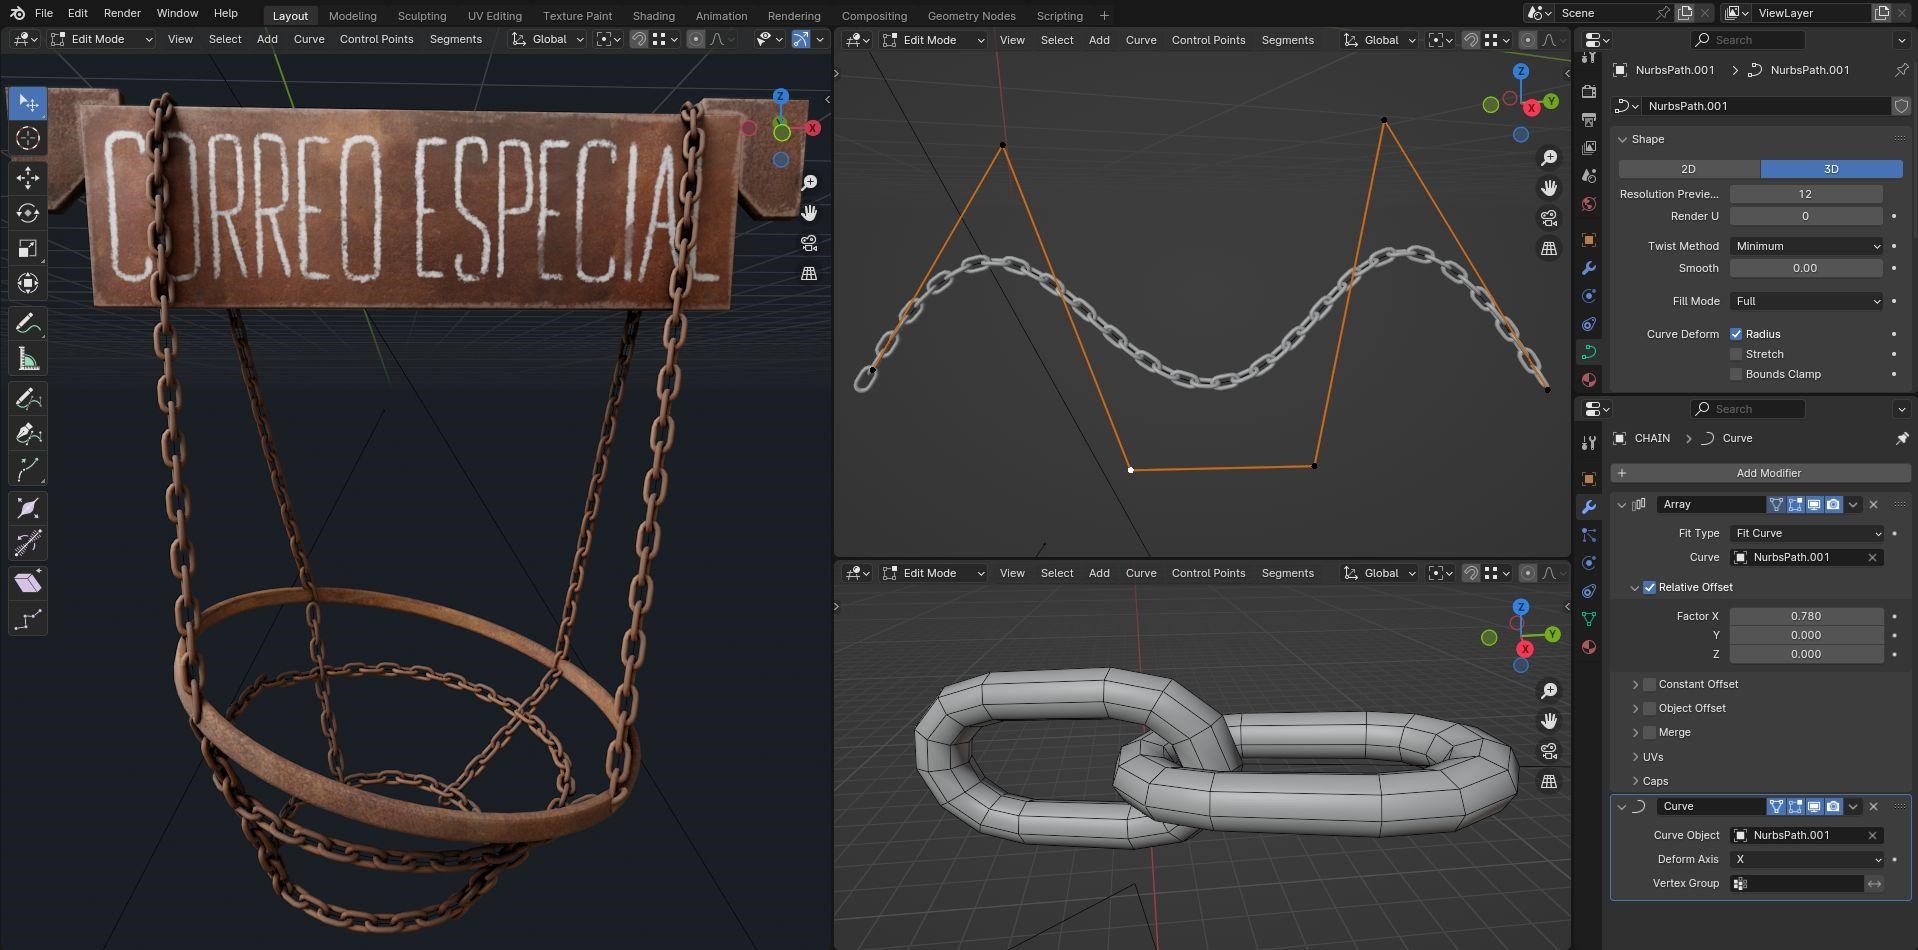
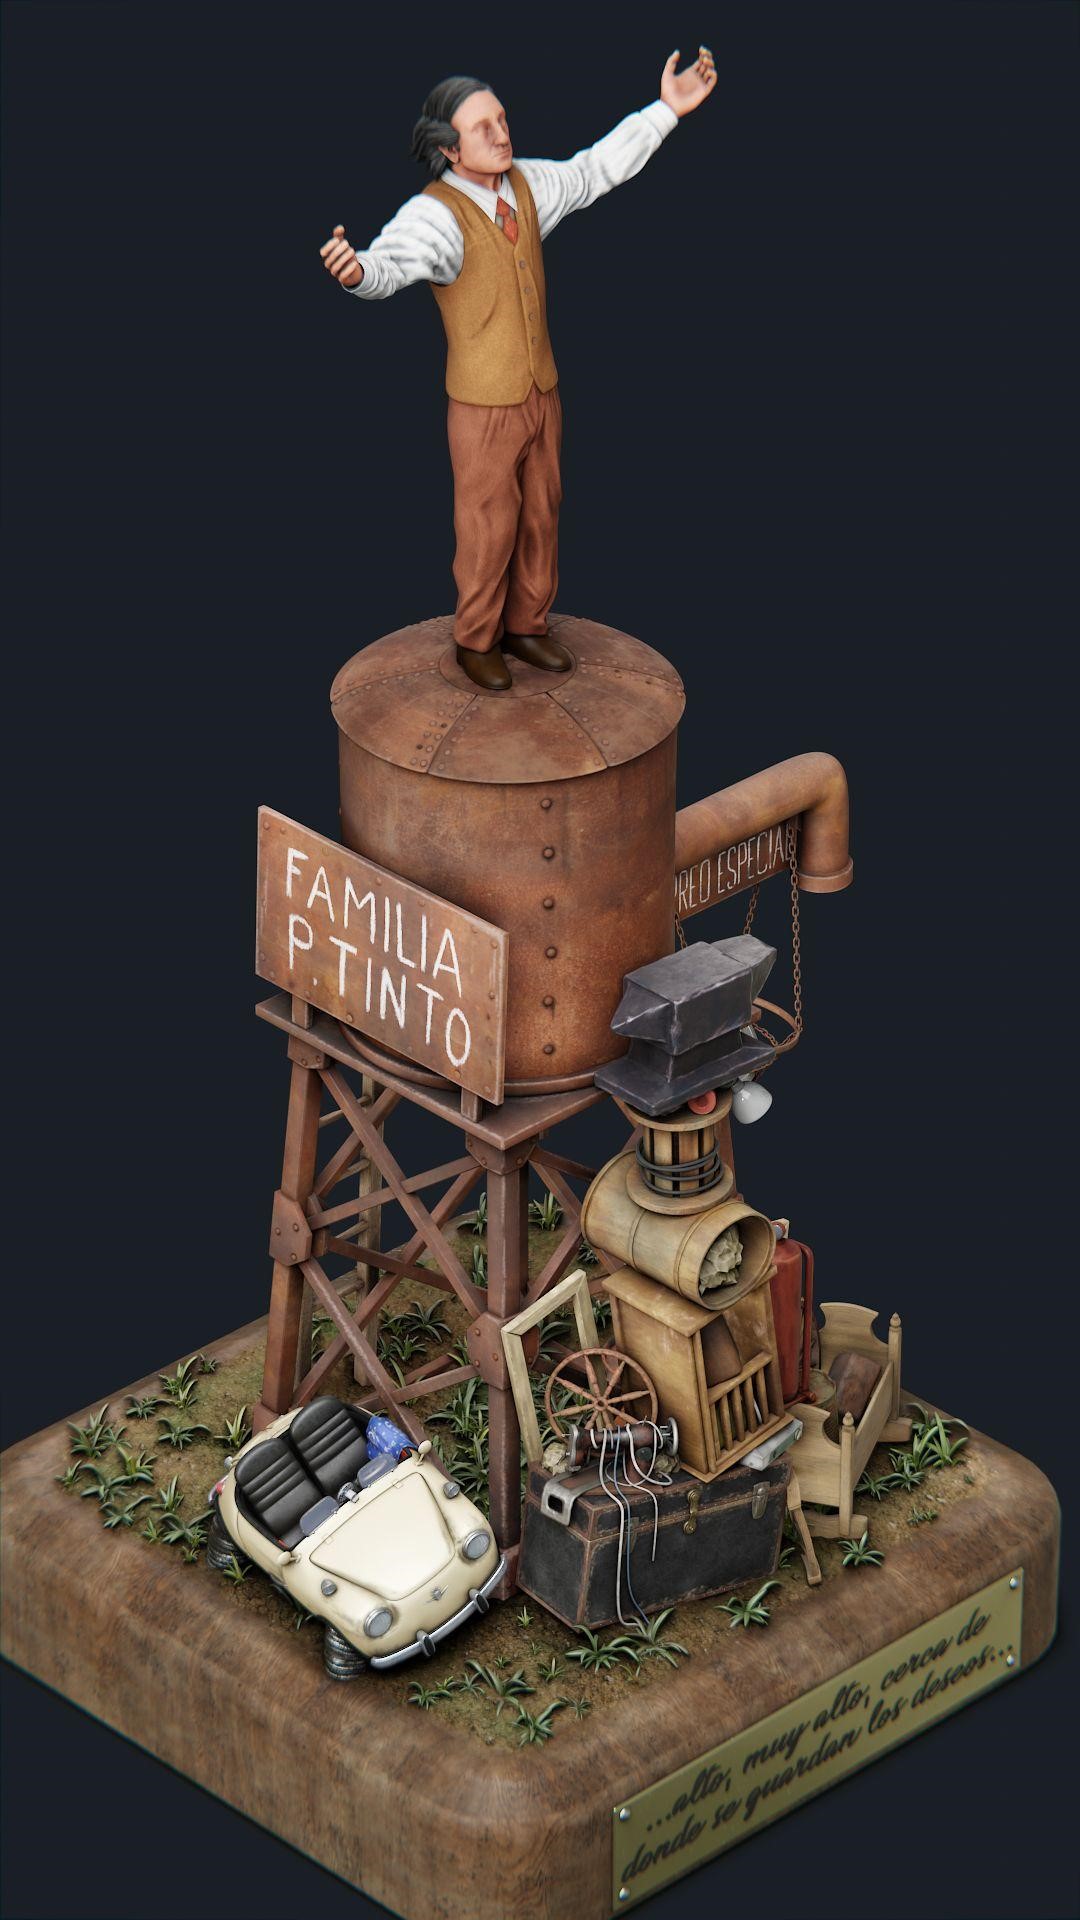
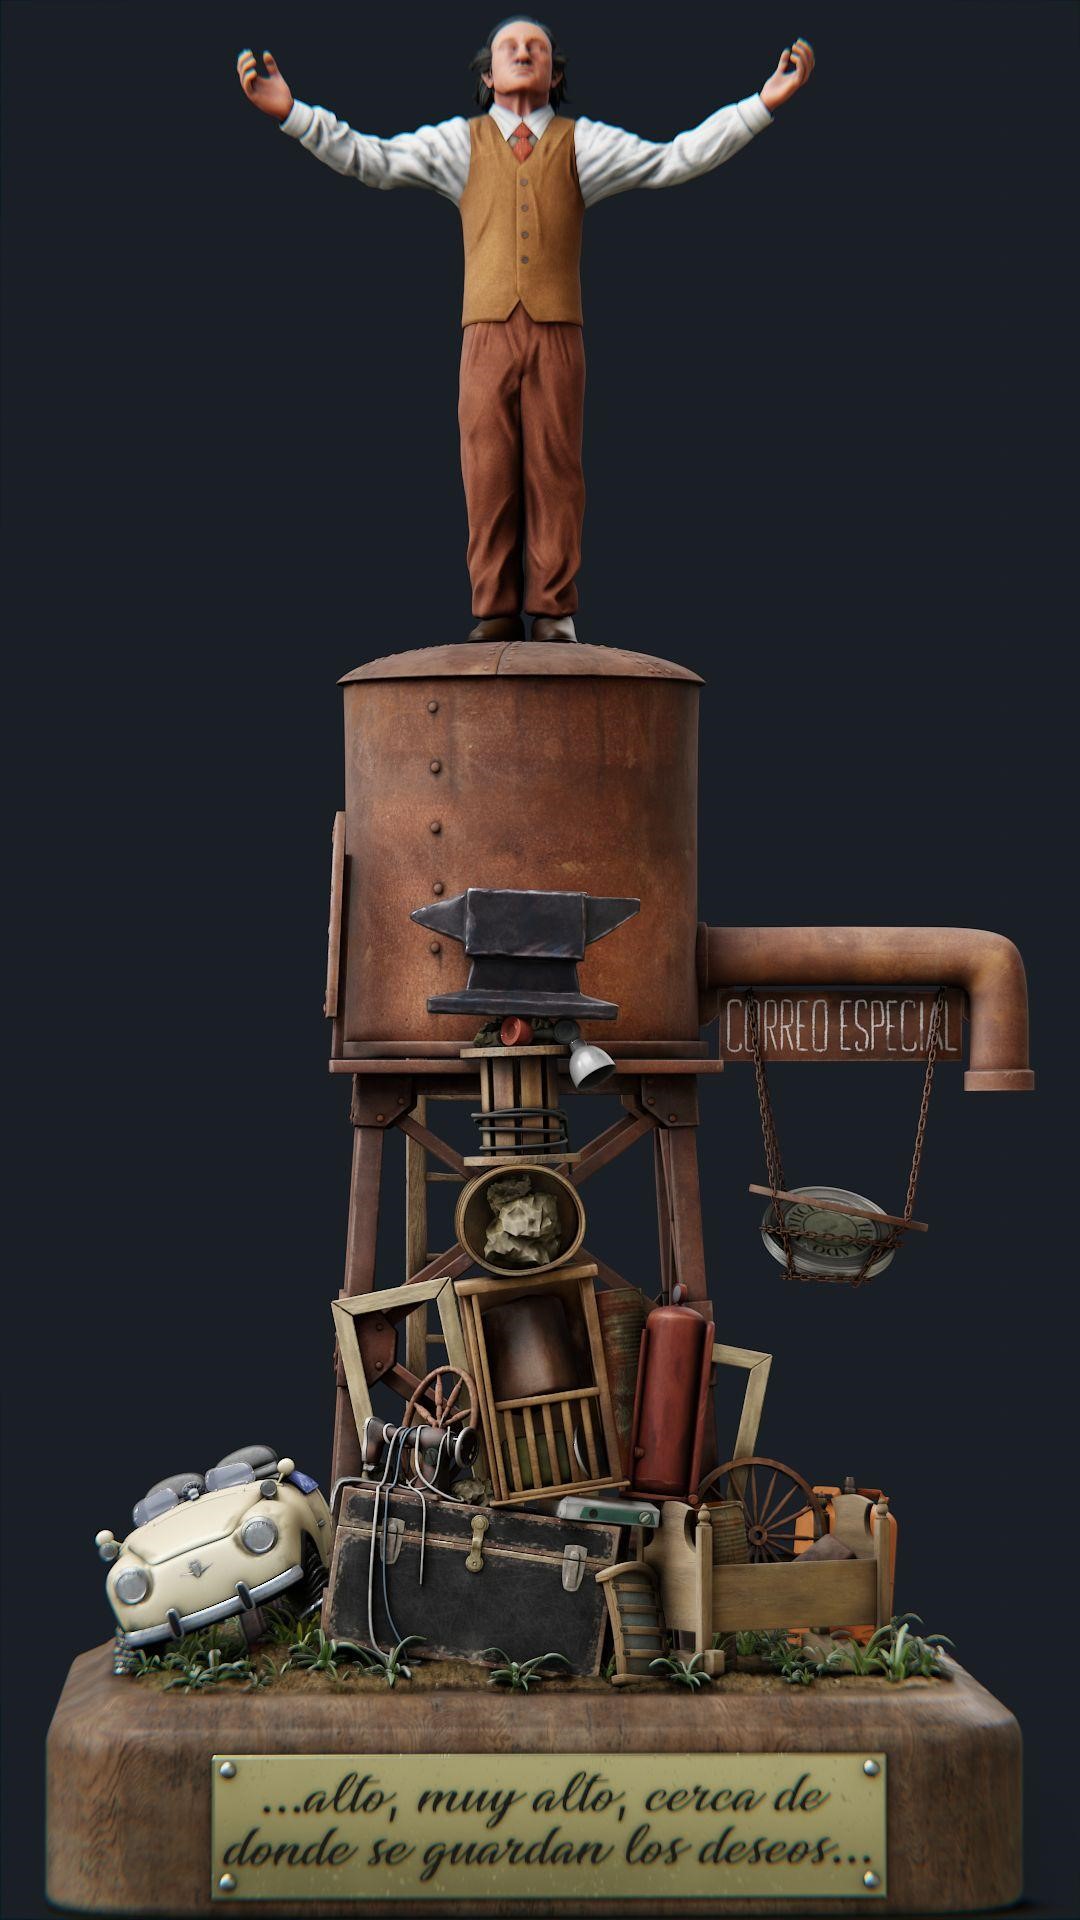
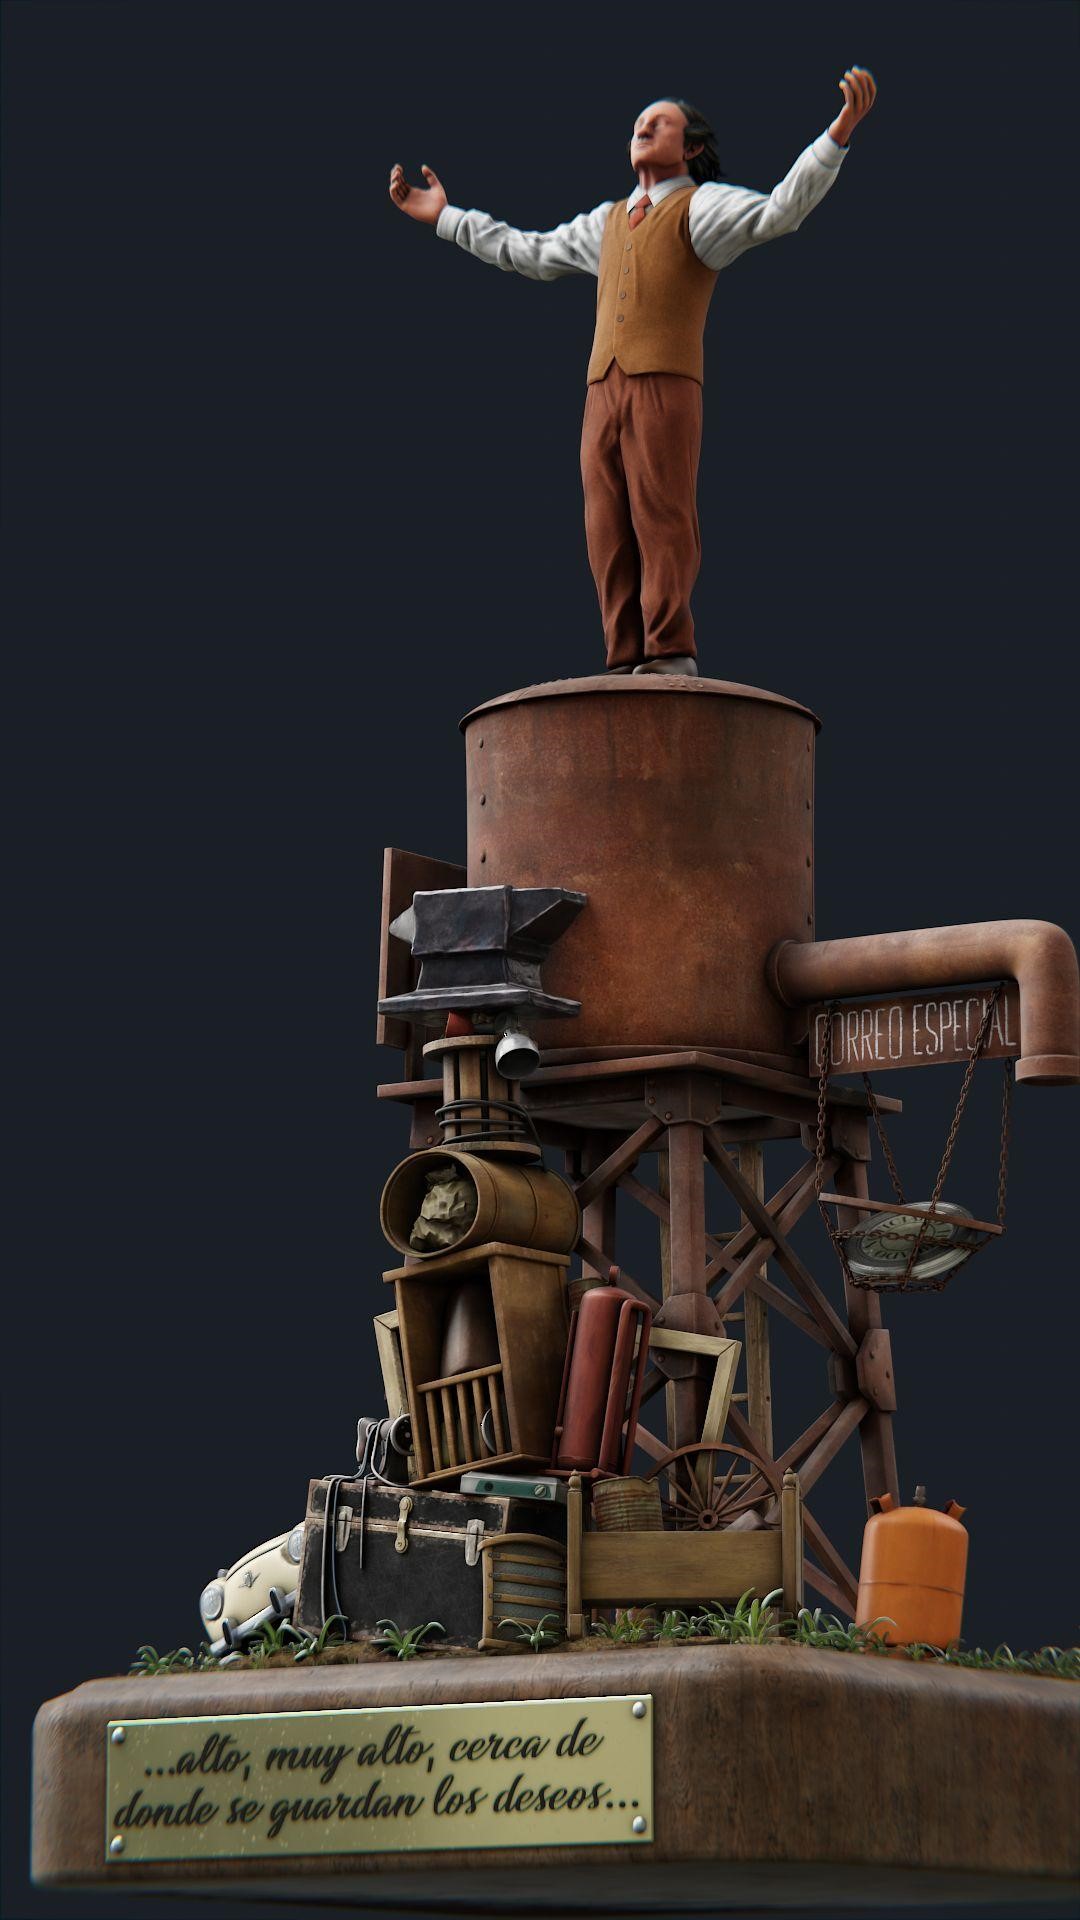
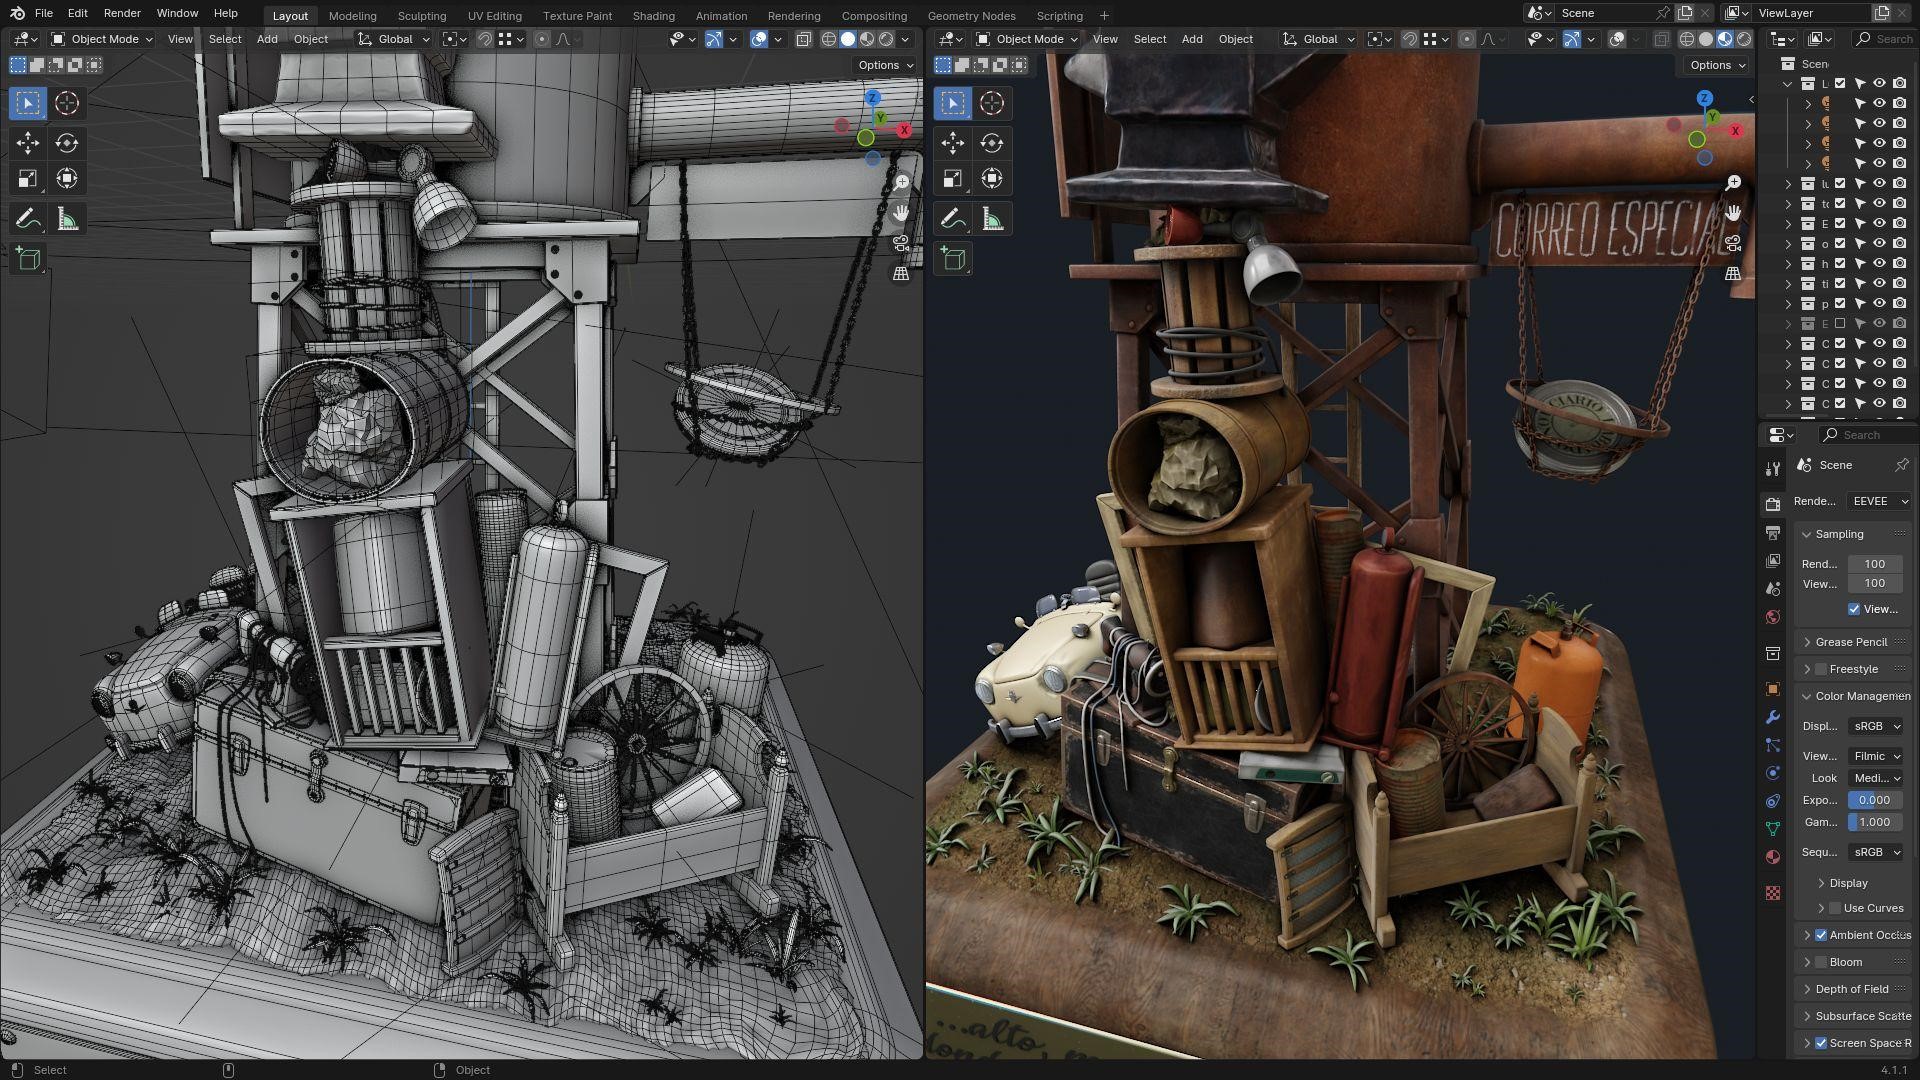
Water Tower
The water tower is the big central prop of the scene. The modeling is pretty simple, using mirror modifiers for the lower joist structure and radial arrays for the bolts in the upper part.
Then, adding details with multires modifiers, move some pieces to get rid of the “straight” look and freely hand-paint details like the leaks and letters you see below:
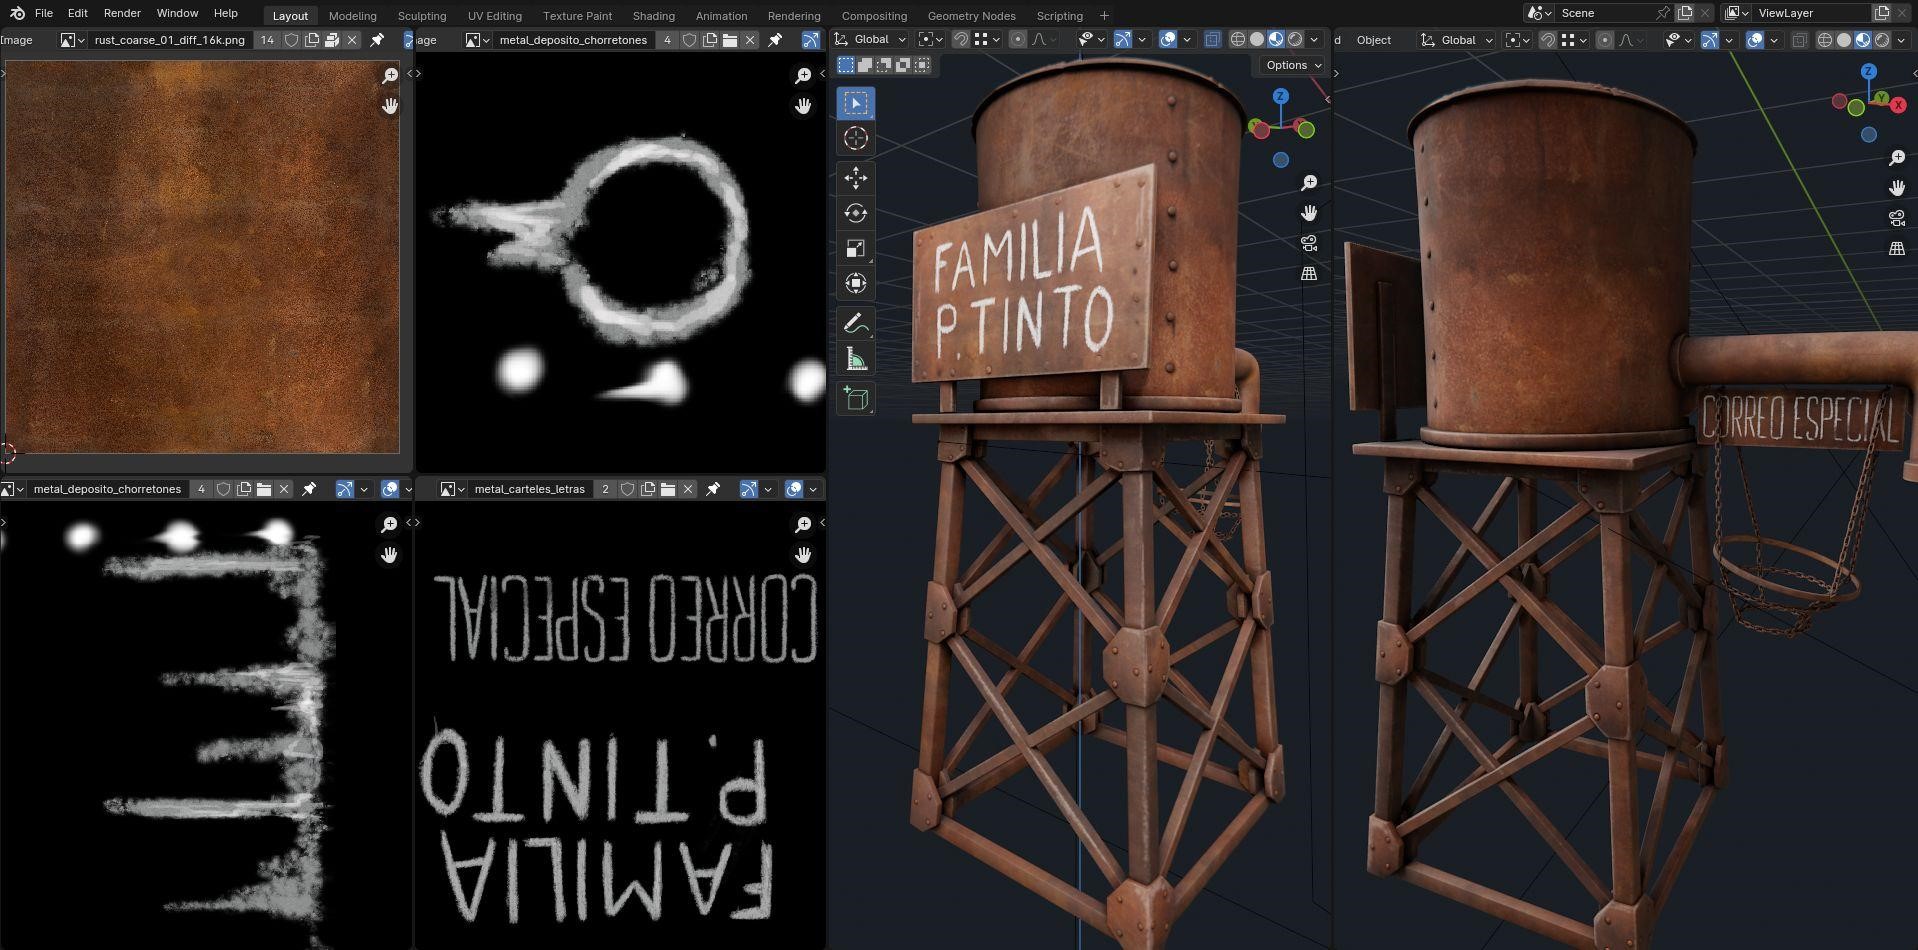
The bolts in the “FAMILIA” panel are different because they are sculpted as smashed ones, like heavily hammered.
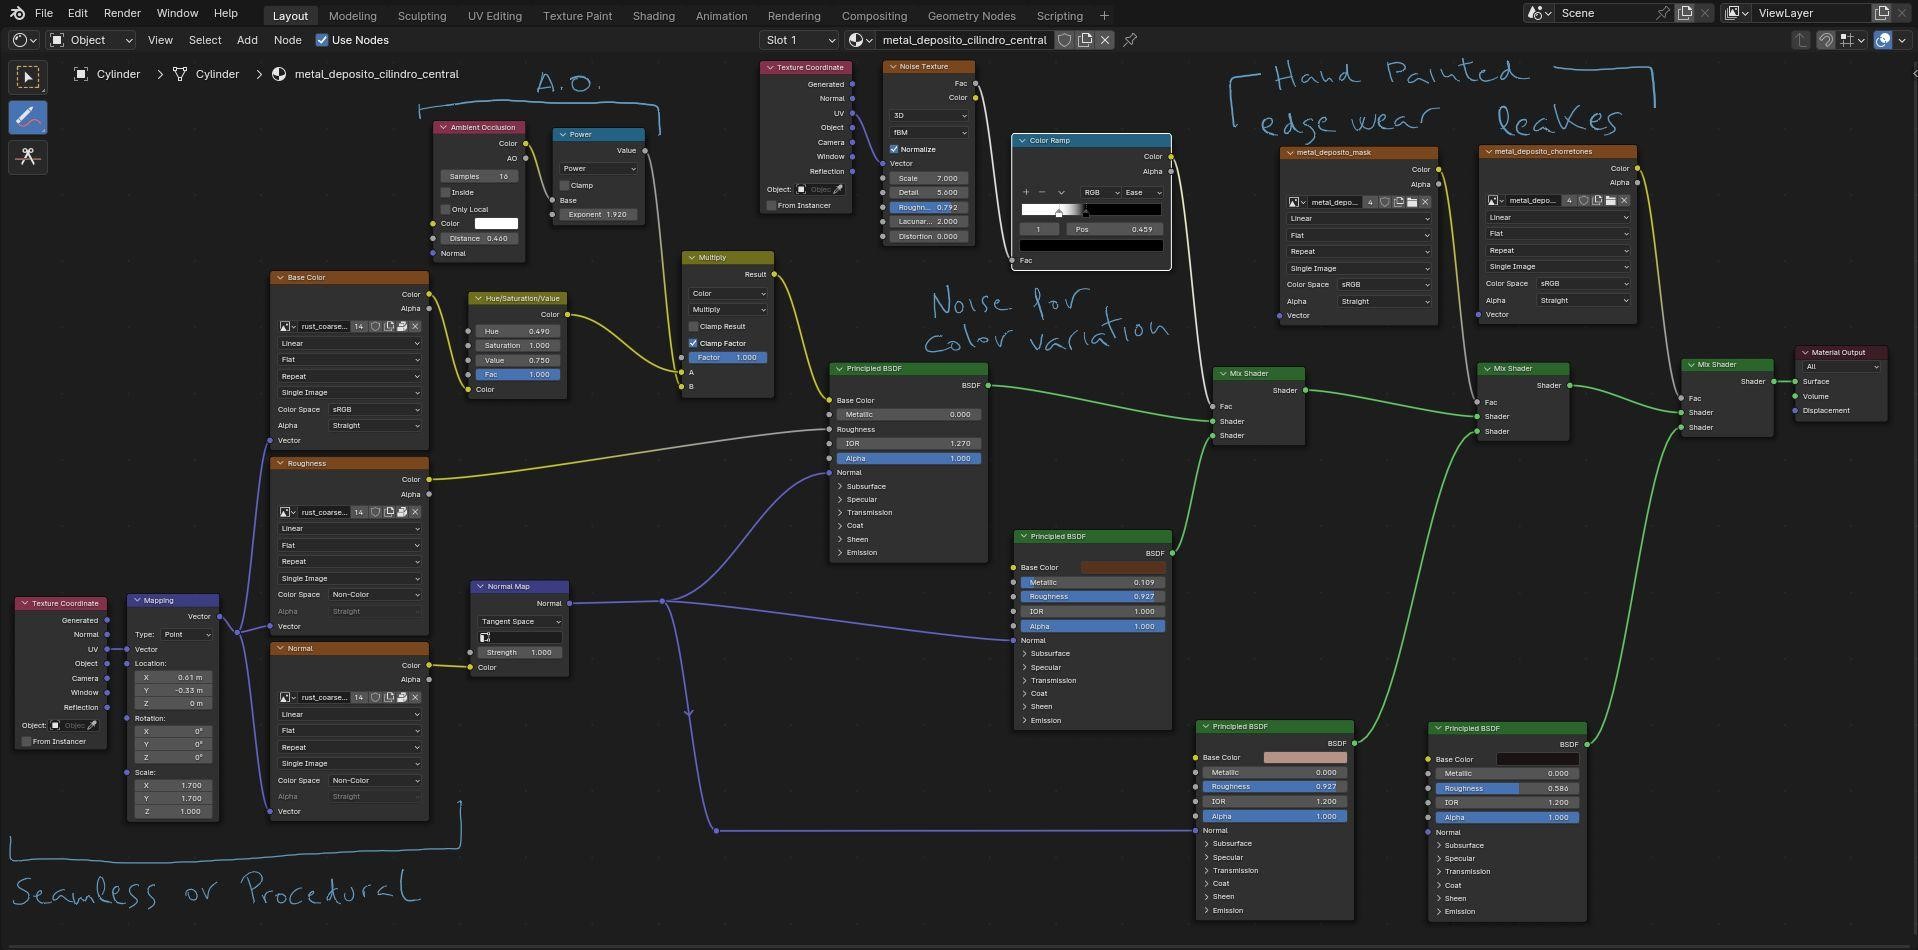
The water tower shader, starting with a rusty iron seamless texture (from the “Charge” free asset material library , follow color variations driven by procedural noises and final touches with hand-painted details: (Usually, I don’t use the Pointiness map as baked for I always like to repaint it.)
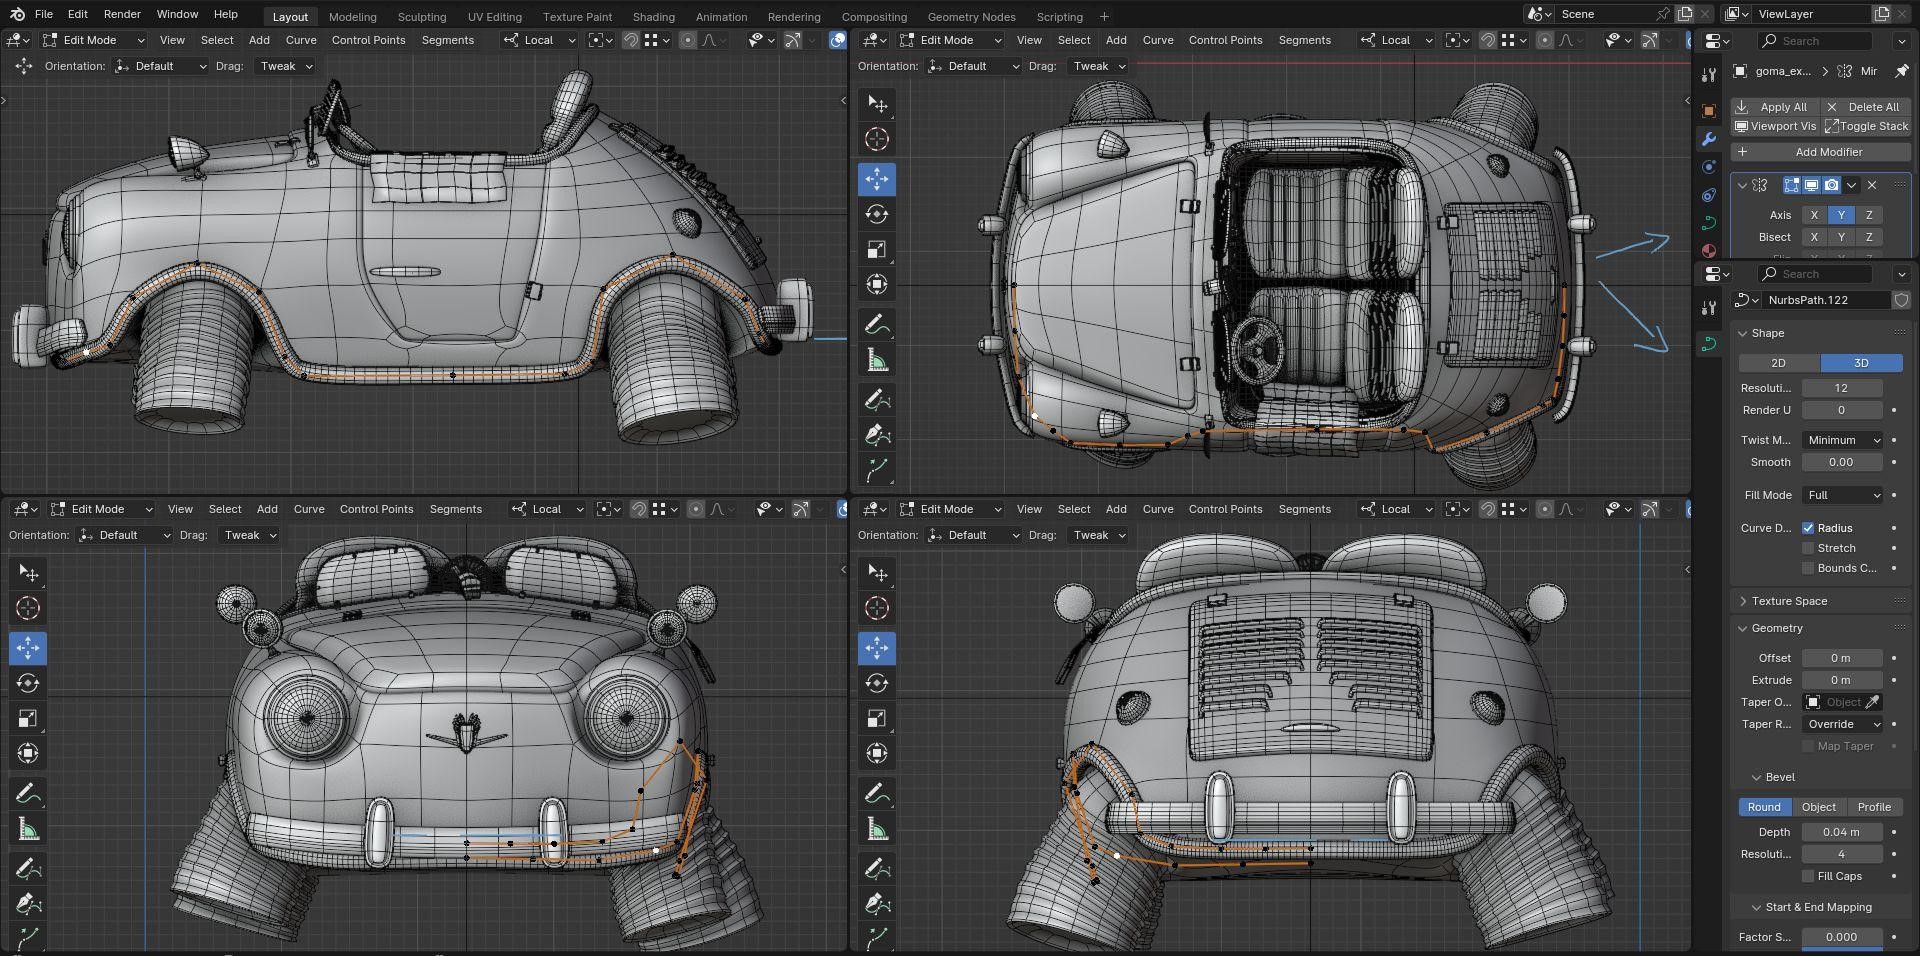
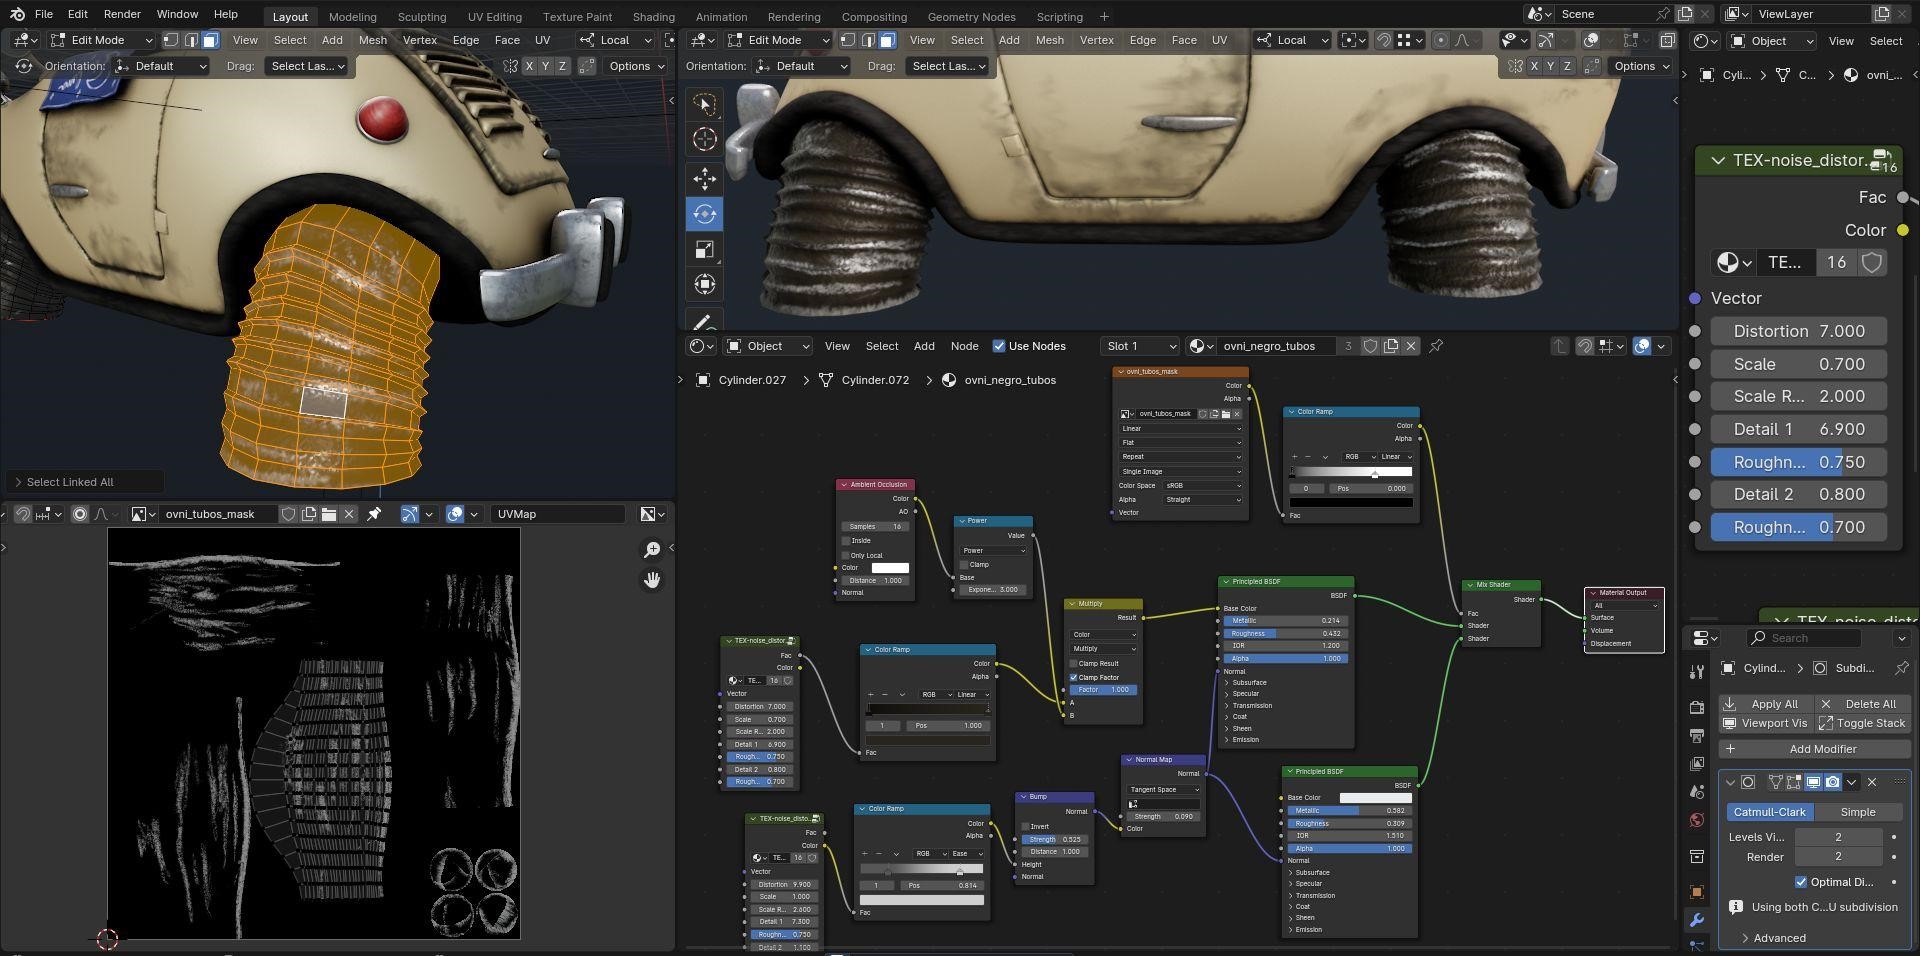
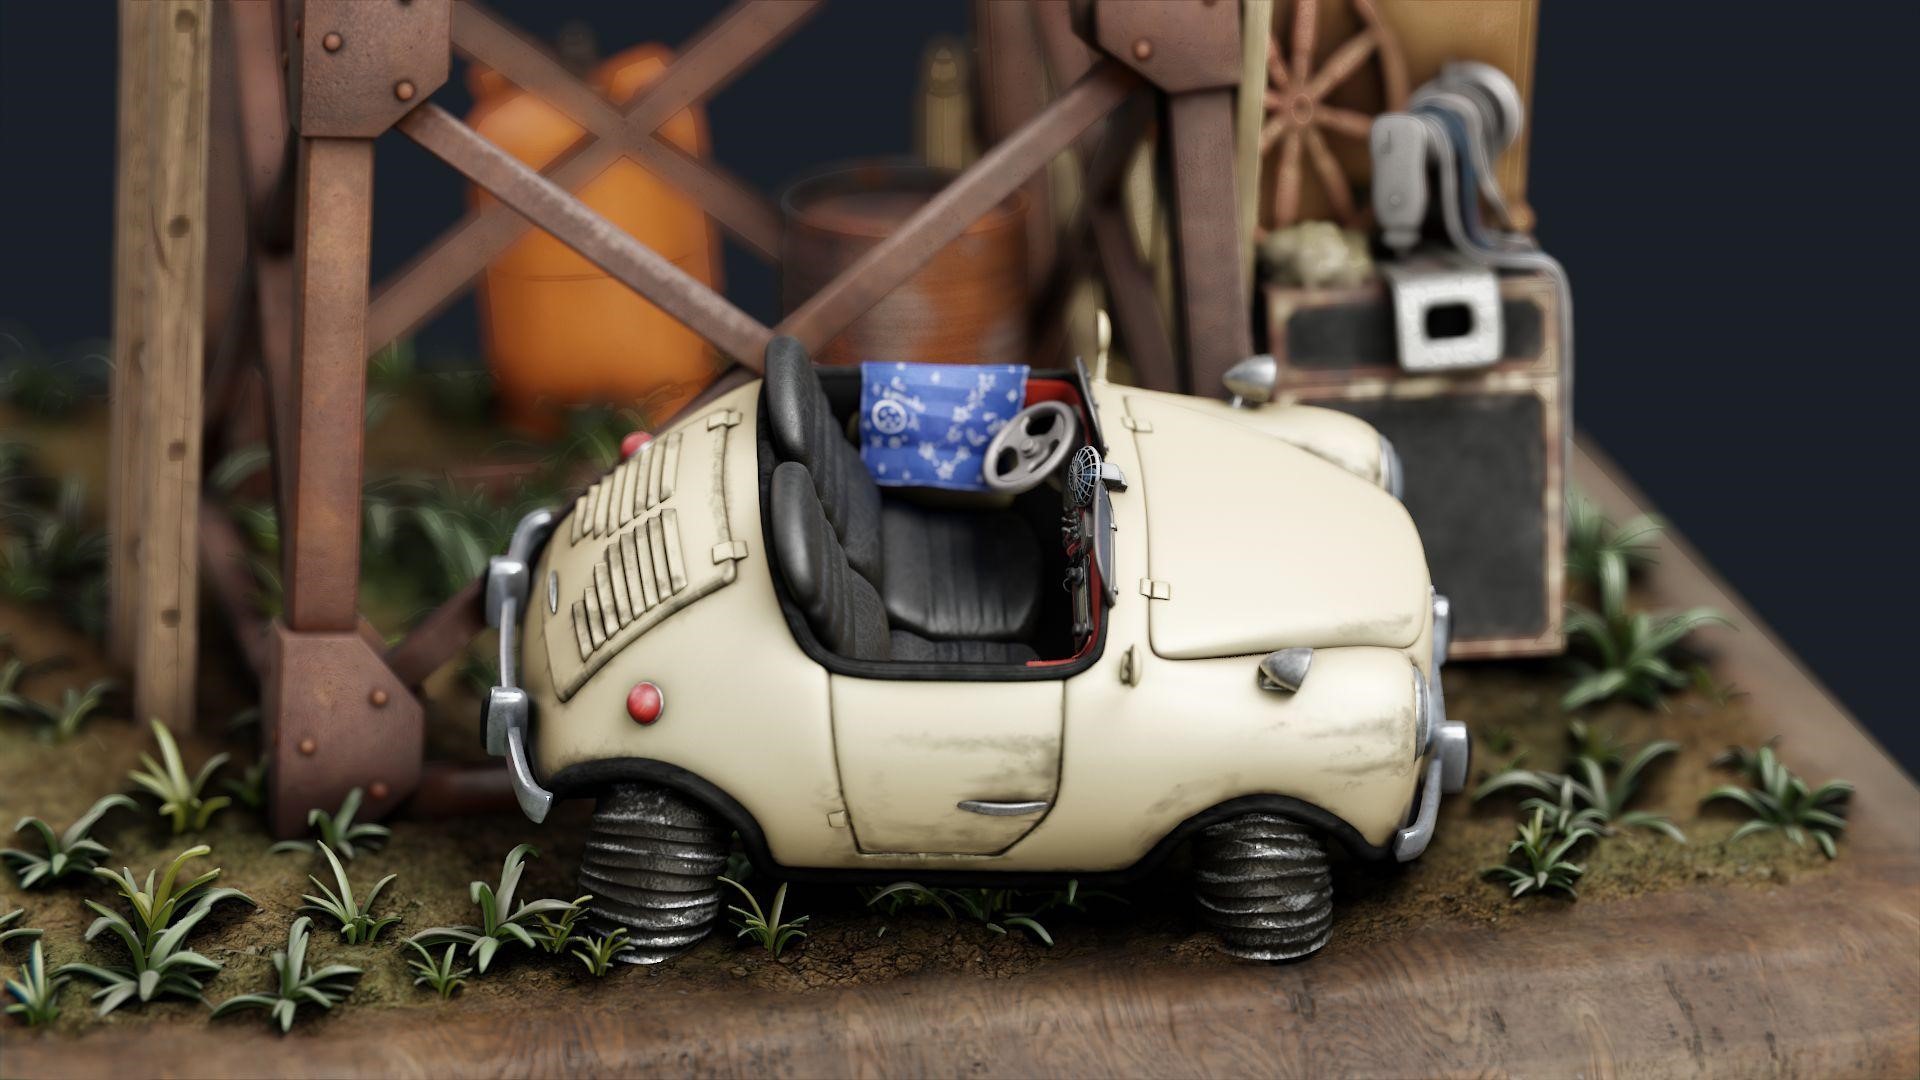
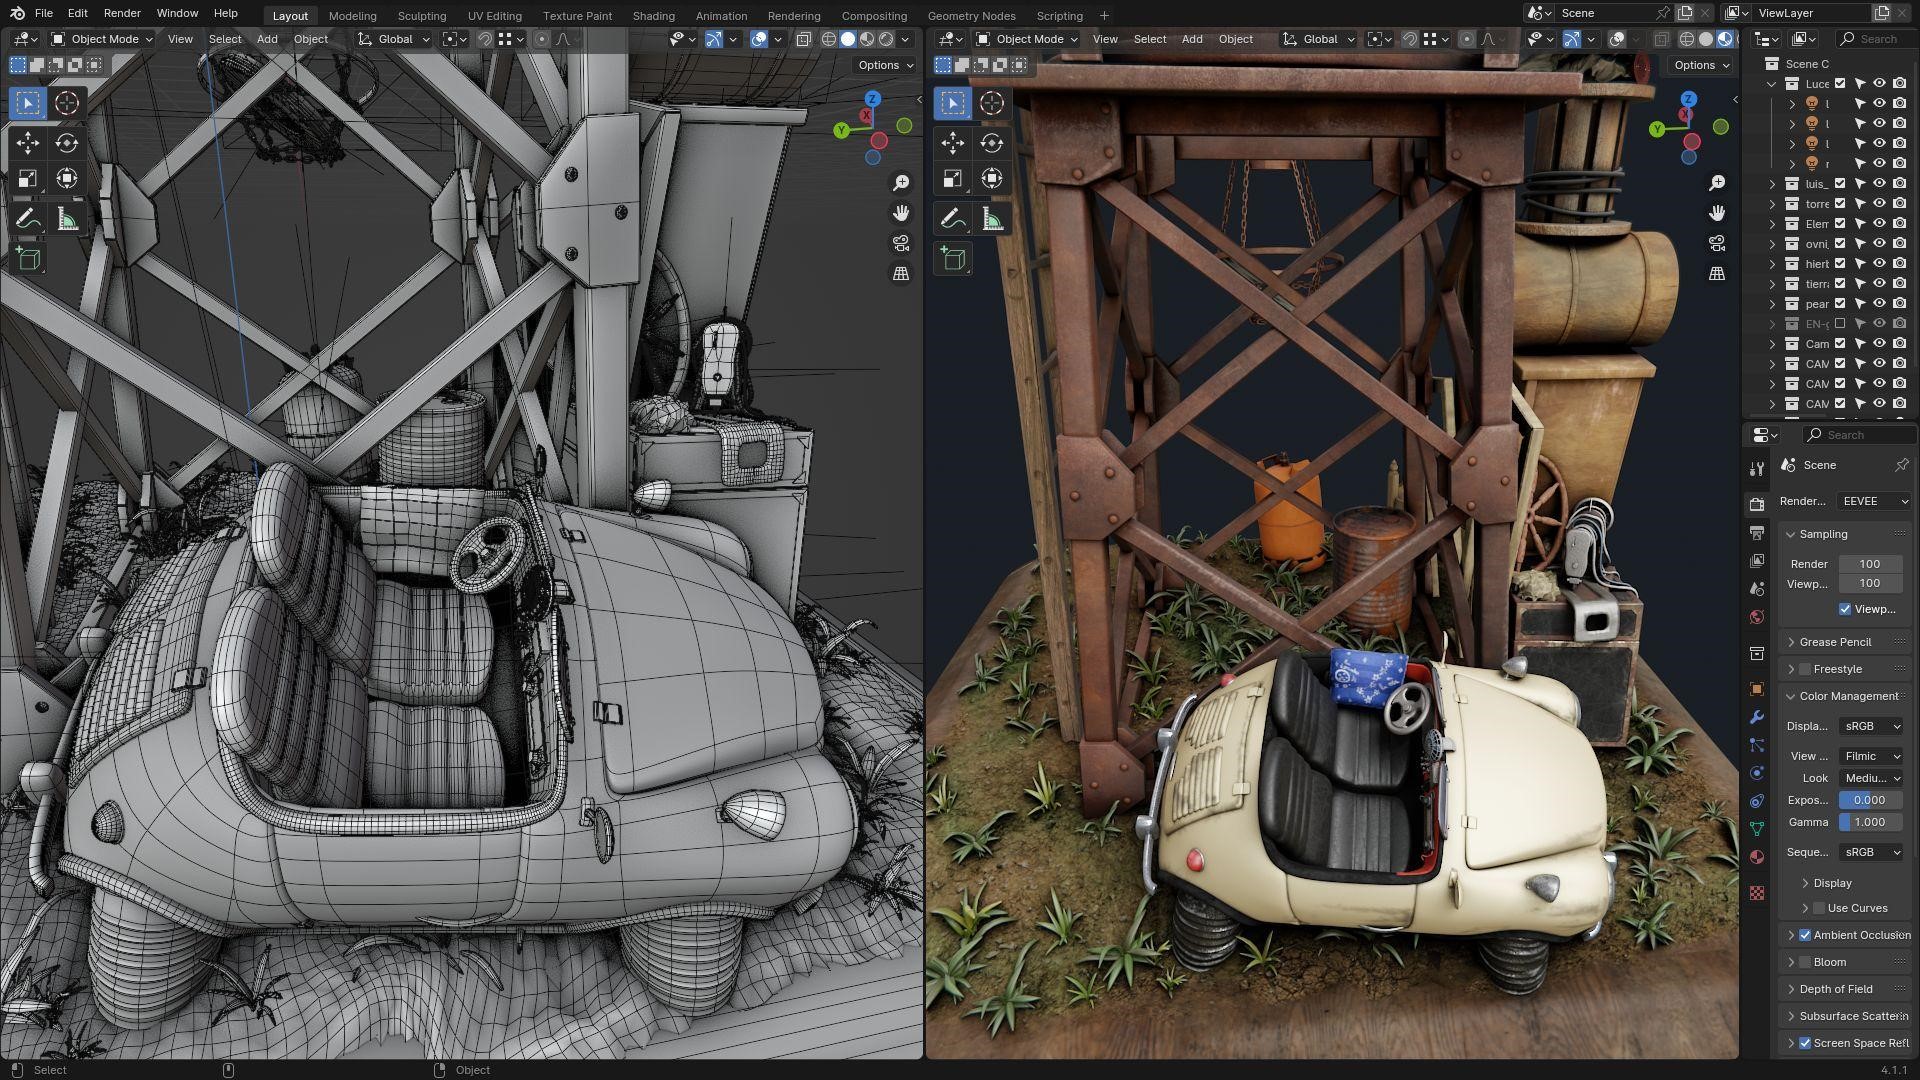
U.F.O
This is the U.F.O, based on a “Seat 600” car. Again, clean modeling, simple shaders, and some UV work to hand-paint details.
I try to keep things simple, mostly with a non-destructive workflow. For example, the base rubber is a curve with a mirror modifier, and generally all pieces have a mirror/subdiv/solidify workflow.
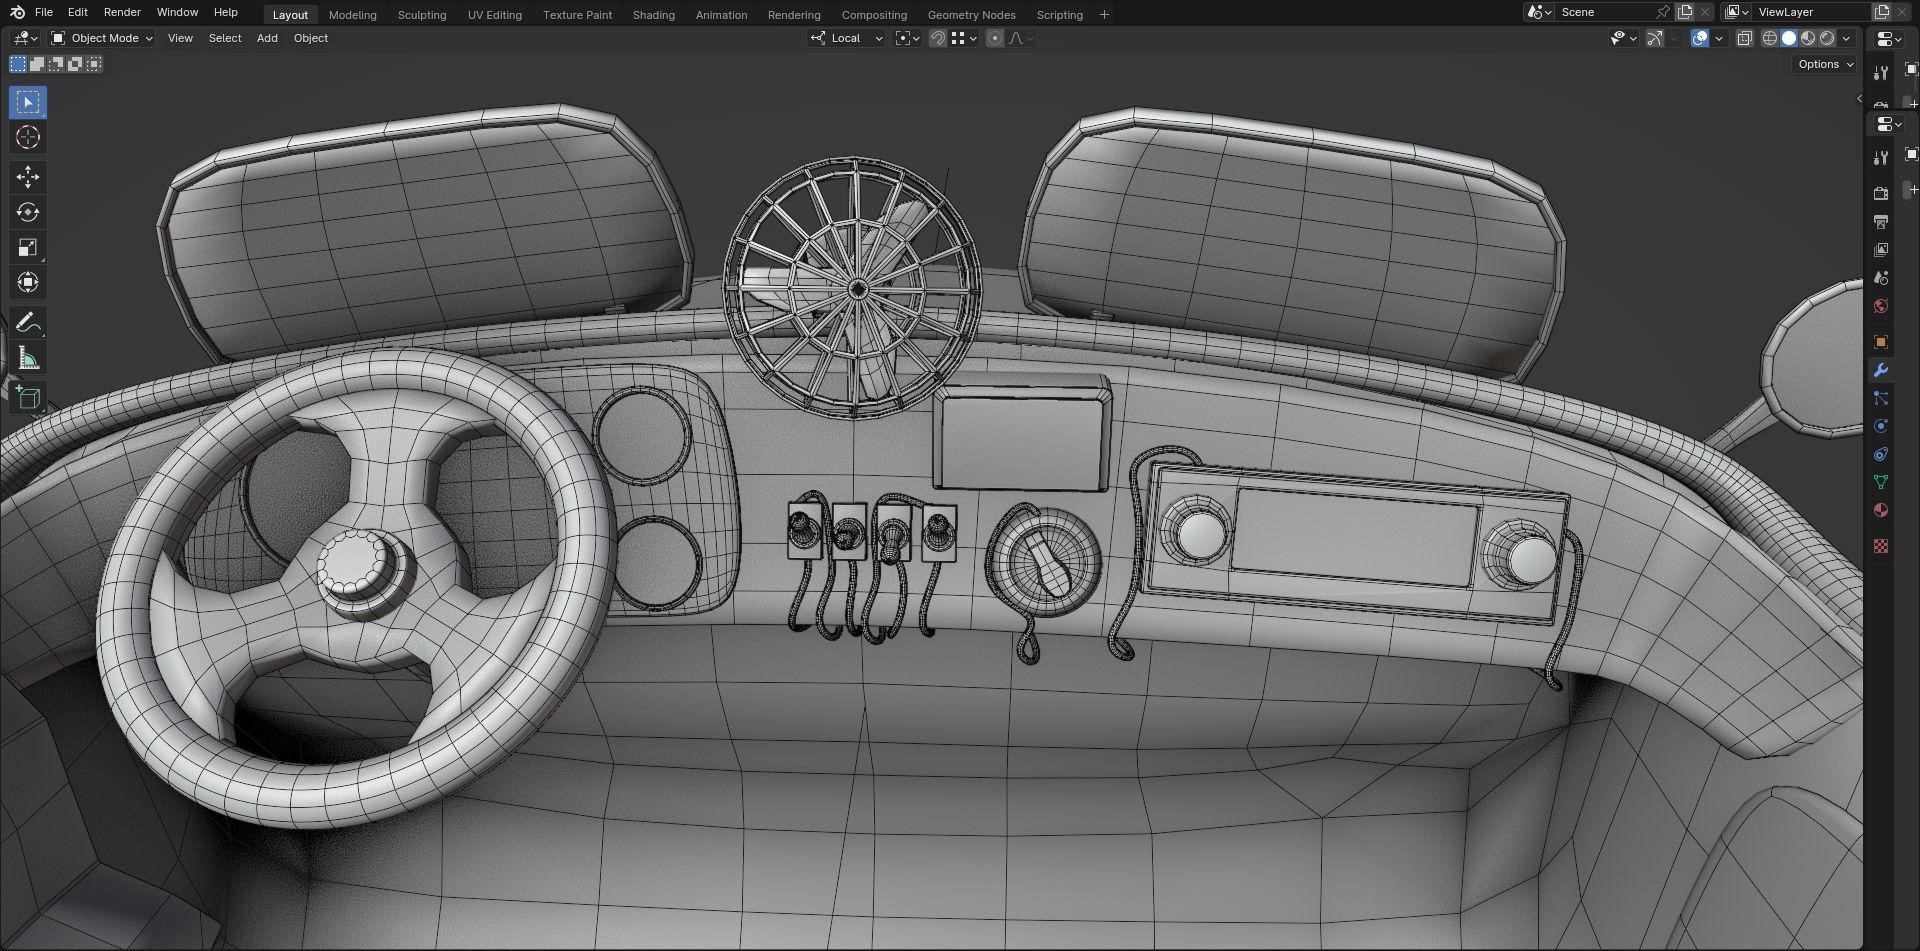
Yes, an air fan and a radio are essential for traveling through space, you know…
The shader of the “thrusters” is a procedural base mixed with hand painted details. I found the “TEXT-noise_distorsion” node group on the “Charge” Material Assets which is very, very useful.
Environment
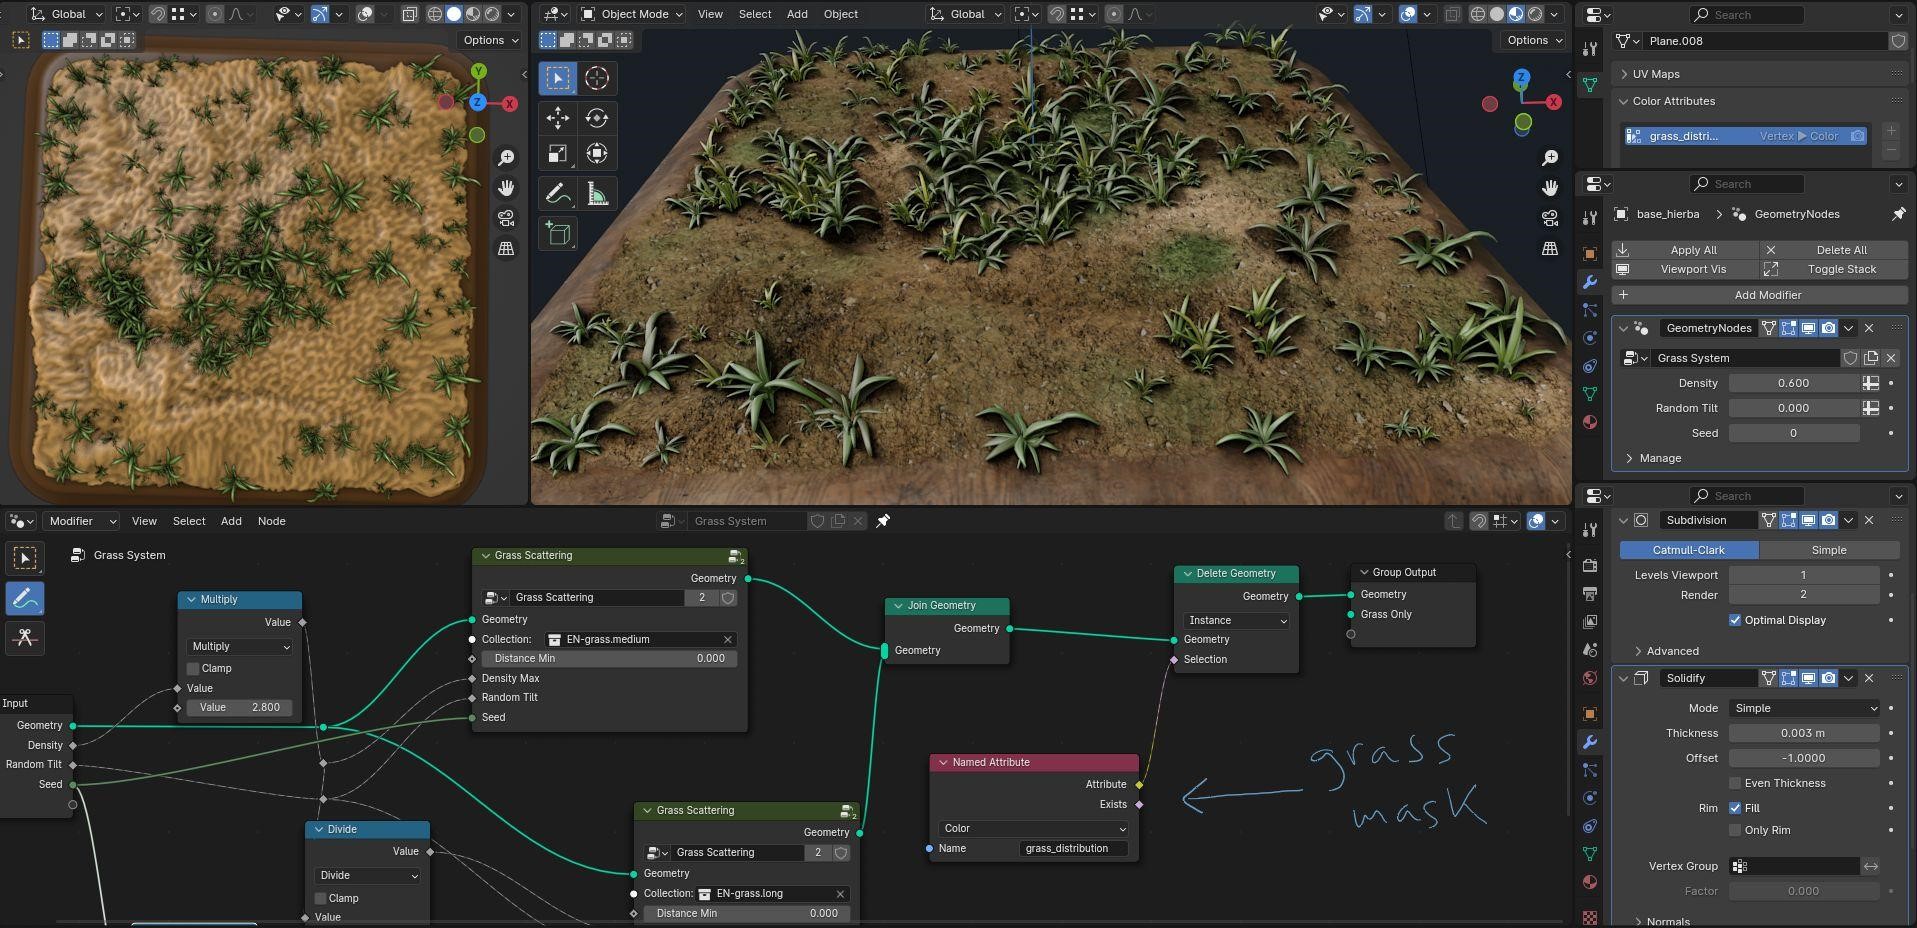
The ground is a sculpted plane with an alpha channel to play with the pedestal integration, and the grass is a modified version of the Geometry Nodes Example, with a Vertex Color mask to drive where the grass appears and a solidify modifier to make it more consistent:
This time, I wanted to do a frontal composition of the elements. I imagined and prepared it to be on a piece of furniture, or a shelf of books:
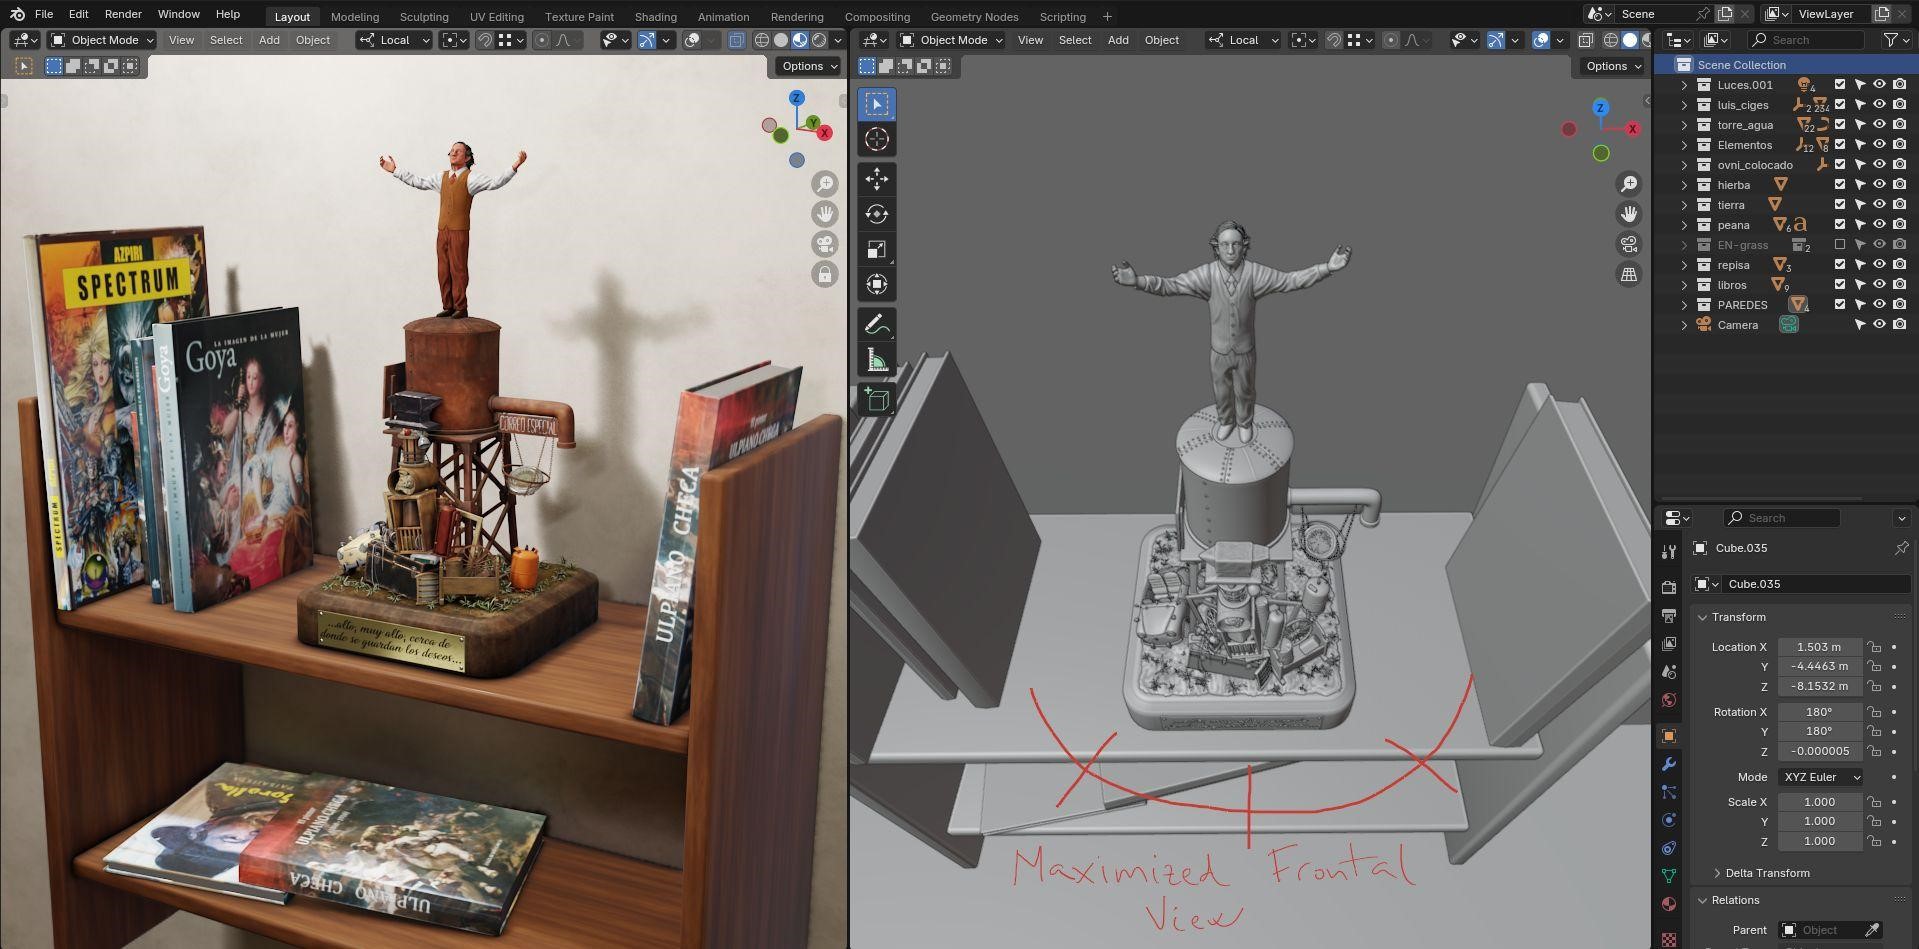
Unlike other previous works of mine in which I made 360º compositions.
Lighting
Mostly using a 3-light layout with some HDRI support (at very low power), I turned off the “Back Light” in some shots to emphasize volume (specially the one which rotates near the principal character in foreground).

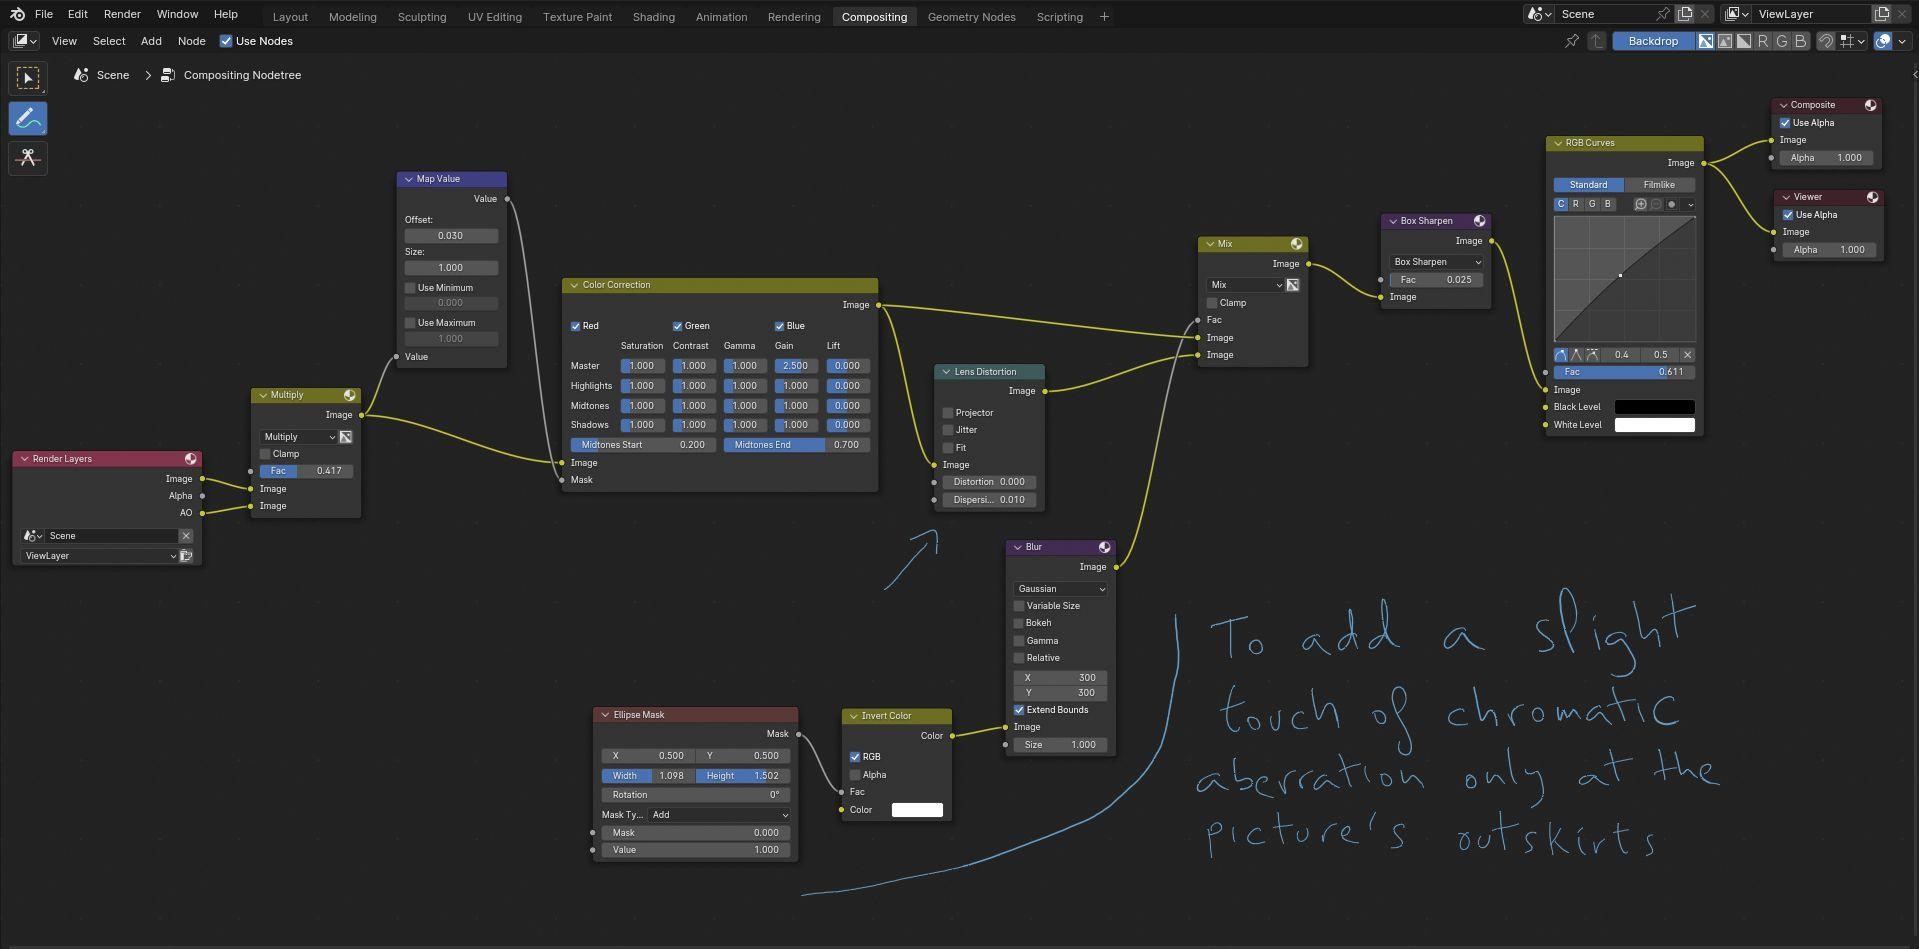
Composition
Color corrections, box sharpening, curves… and an ellipse mask to create a touch of chromatic aberration only at the outskirts of the picture.
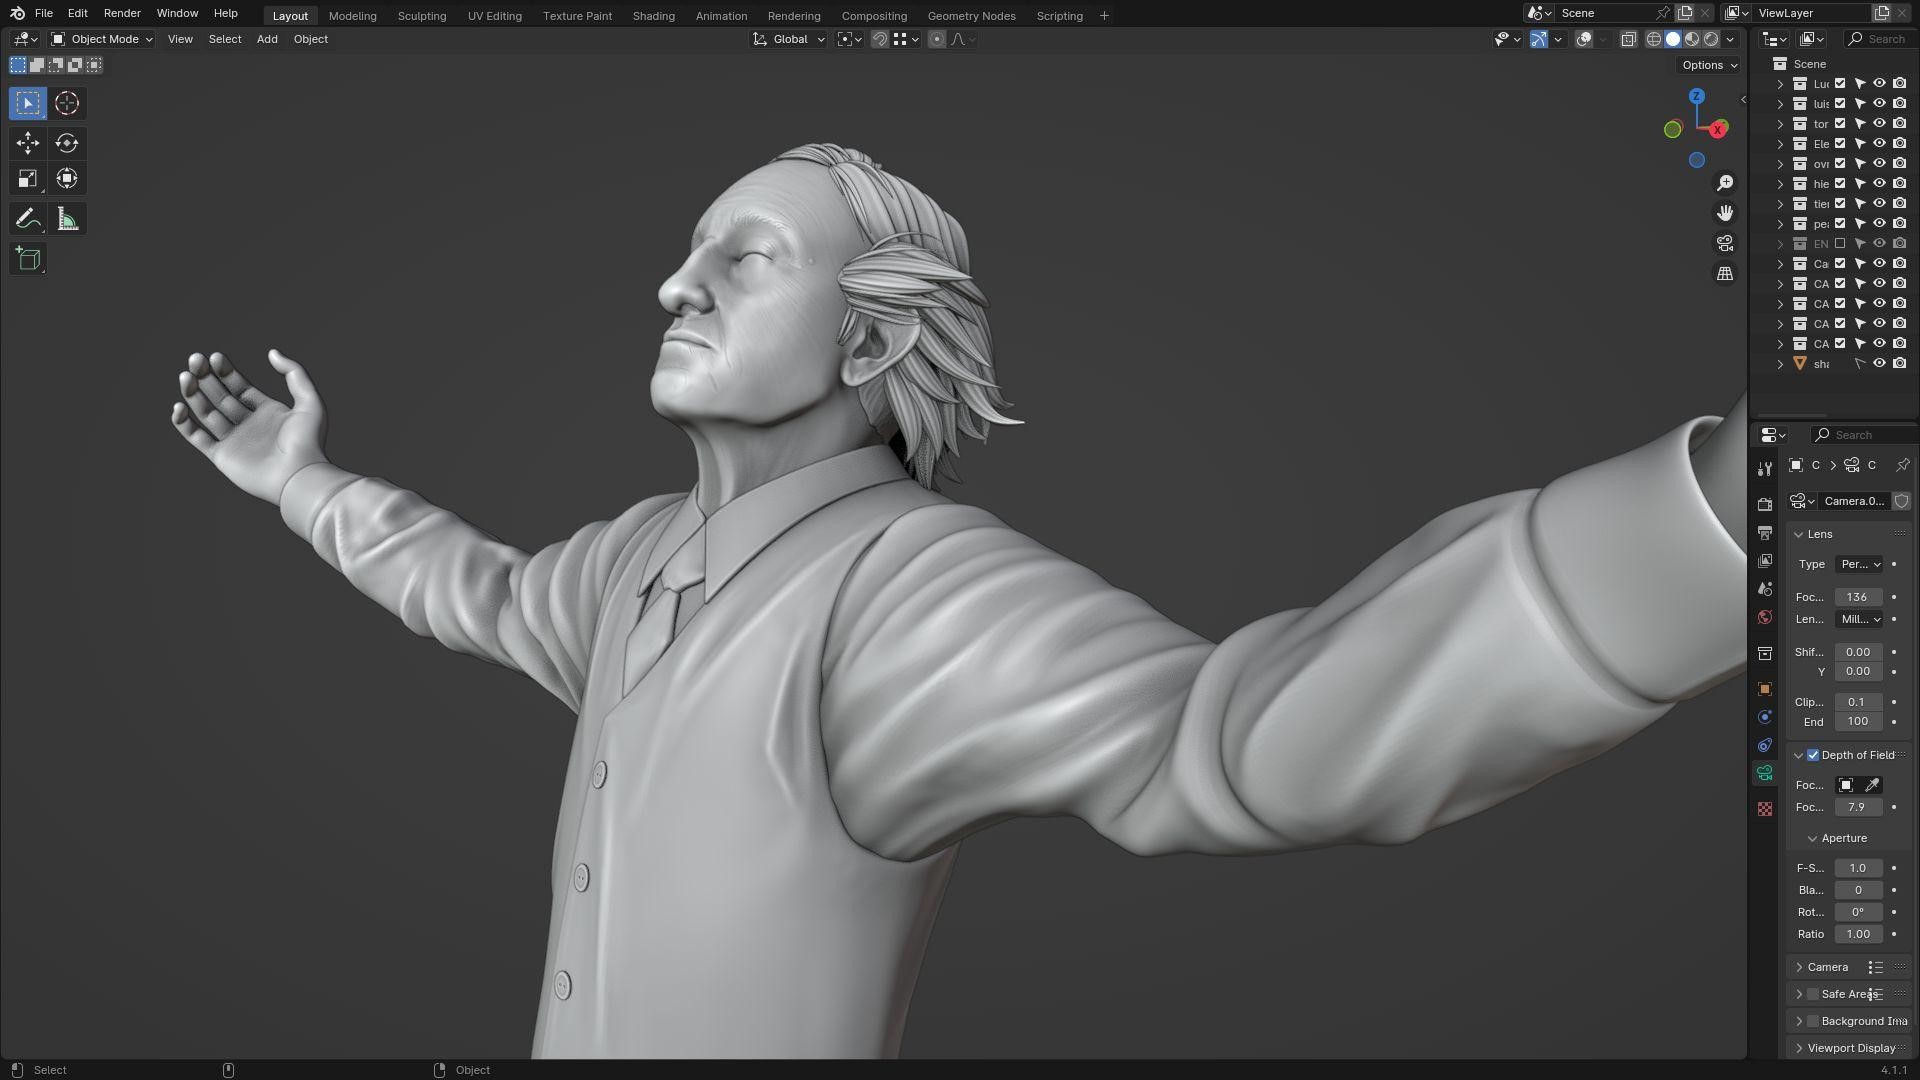
The depth of field on the renders were done directly through the camera settings (no postprocess).
And that was it! Below are the final renders.
RENDER: P. Tinto, Spanish film tribute
Some Renders:
The presentation video:
Some viewports and wires:
I have a few more images and info in my links. Thank you for reading my article, and I hope you liked it!
About the Artist
Nacho is a 3D artist from Aranjuez, Spain. Despite not working currently in the industry, his free time is spent creating with Blender and collaborating with projects.


