Behind the Scenes: Cute Medieval Environments, Pt. 3
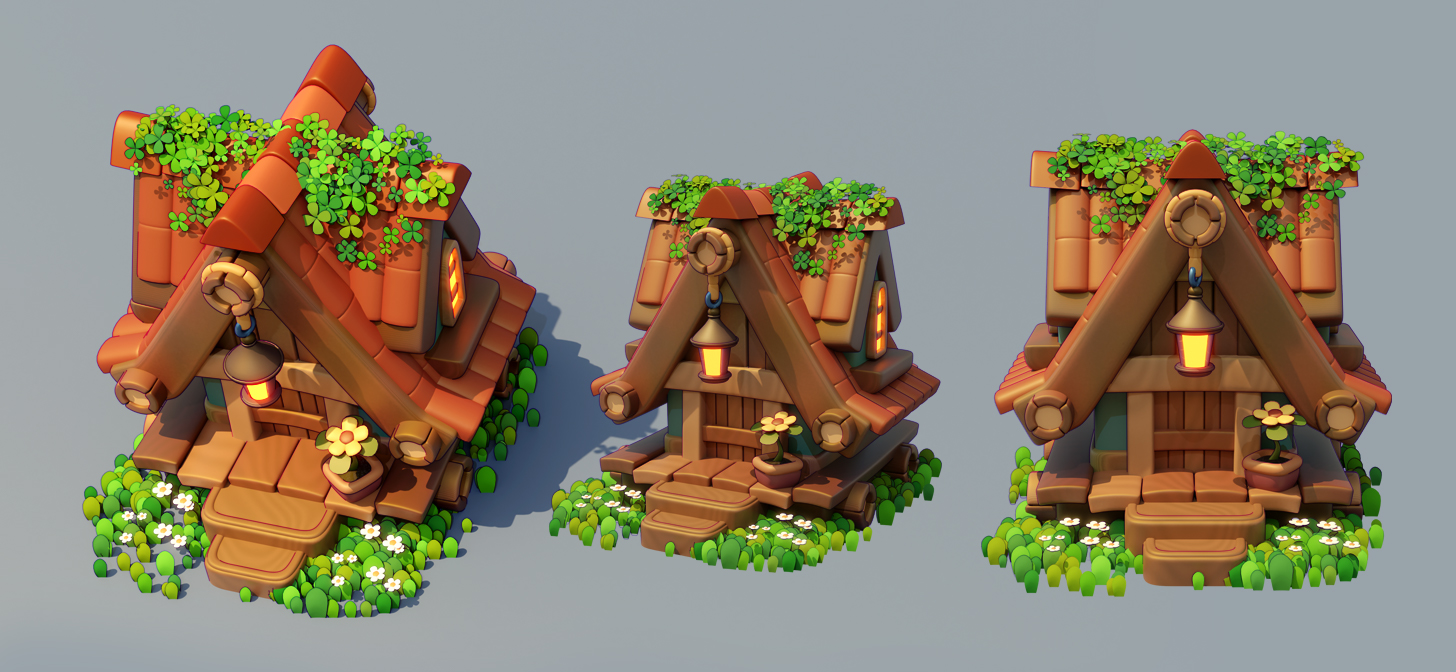
Hi, I’m Carlos Cavalcante. This is Part 3 of my three-part tutorial on how to create a cute medieval house. You can find Parts 1 here and Part 2 here.
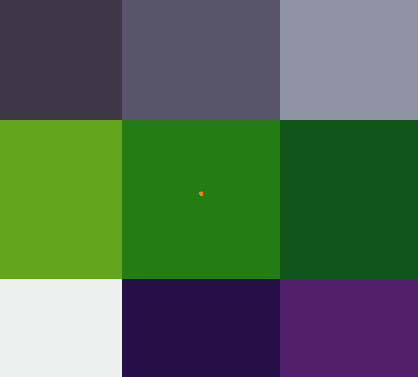
10. Basic Materials Setup
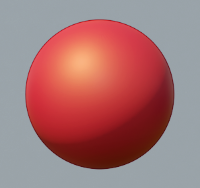
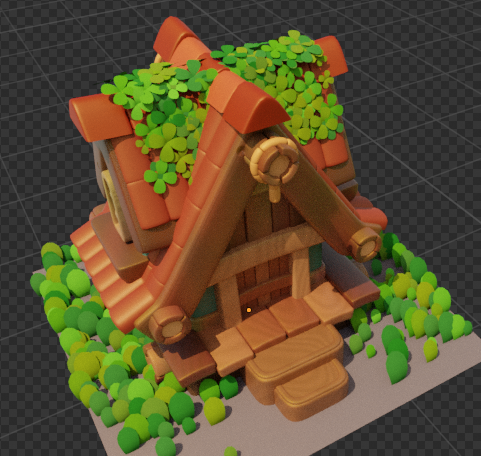
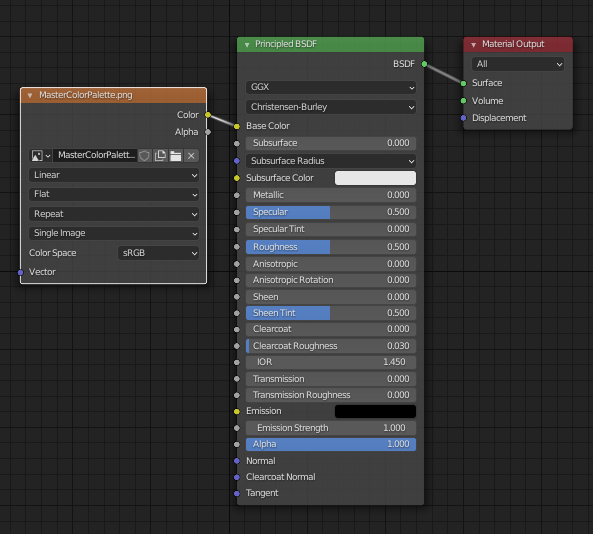
The first thing I do when approaching material is to achieve one basic shading that will guide all the others. Basically, I create one material called Master and all the other materials (metal, wood, plastic, etc) are going to be created from a duplicate from Master.
In this specific case, the Master should look a bit like a toy, but not have a heavy plastic look. It also should look organic and convincing.
- The base color uses my color swatch texture inside an Image Texture node.
- I mix shaded a darker yellow tone to give a bit extra sunbath glossiness to the props.
- I keep the roughness in the middle, so the object does absorb and reflect light, but it does not look super reflective.
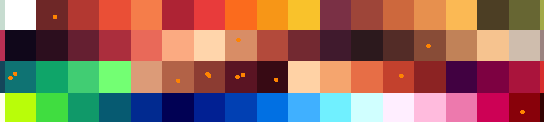

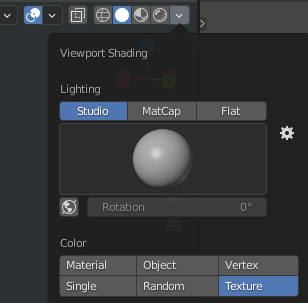
With this base material set, we can UV Unwrap our house and assign our base colors. But we’re going to do it the quick way…some call it Lazy UV and I love it. :D
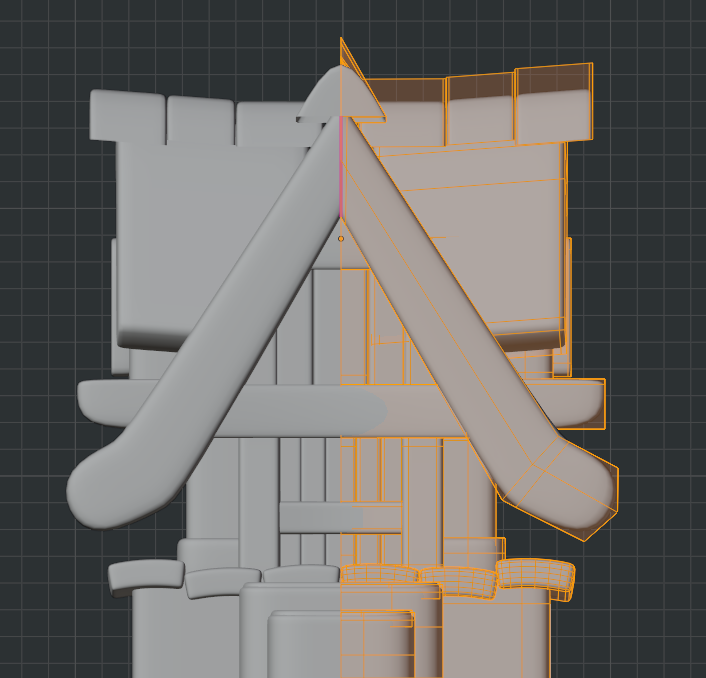
- In Edit mode, select your whole house (A).
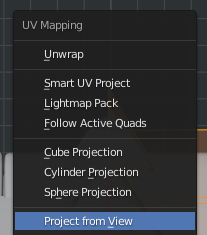
- Press (U) to open the UV Mapping context menu and select Project from View.


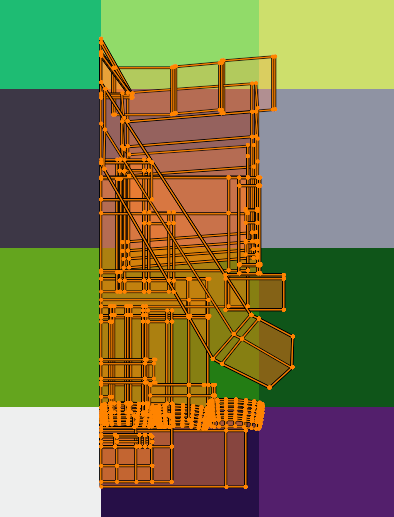
- In the UV Editor, this is what you’re going to see. This is your house UV Island projected from view.
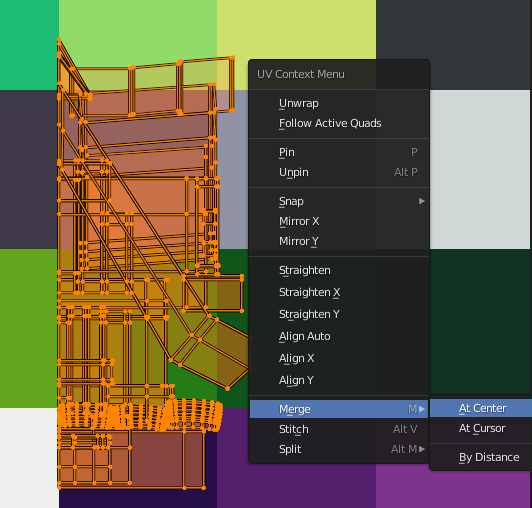
- Select the whole island in the UV Editor (A) then (W) and select Merge at Center.
- Your whole UV Island will turn into a small orange dot.


- If you switch your solid view to Textured, you’ll see that your house now has a color (the one color on the swatch where your entire UV Island is).
- In Edit mode now you can start to select (hover your mouse on a mesh and press L to select it. SHIFT+L to deselect) and in the UV Editor, you move it to the color you want. As simple as that. Assign your base colors and let’s move forward!


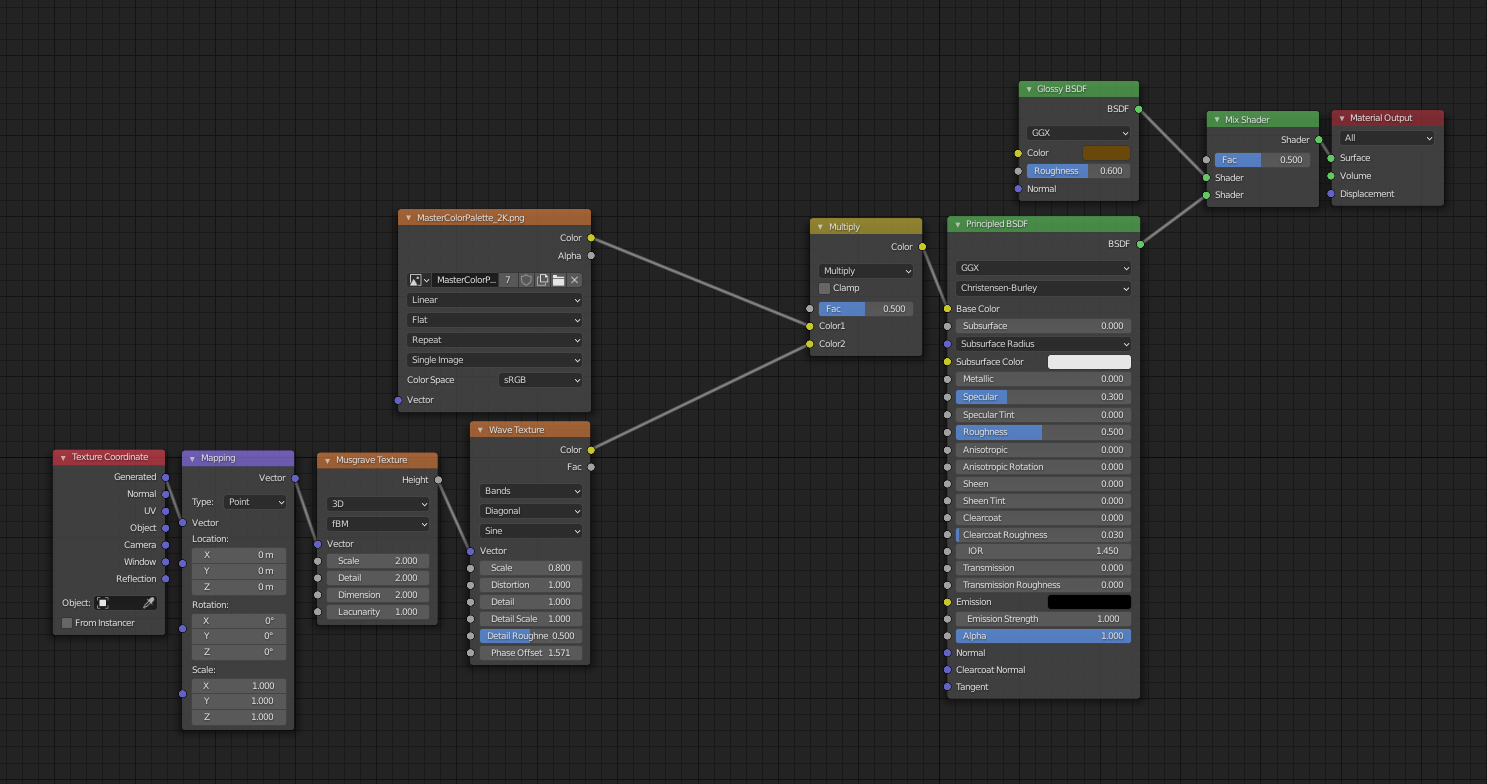
For the wooden material, I duplicate the Master material, click the + button in the Material Tab, and assign Master to this new material slot, but remember to click on the number next to it to create a copy.

MasterWooden has the same core structure as Master, but we want to add these procedural wooden patterns to it, without the need to hand paint it.
- Add a Mix RGB node and plug it between the color palette texture and the BSDF shader. Set its blend to Multiply.
- Make sure your texture is plugged in the Color 1 slot.
- Plug a Wave Texture (SHIFT+A and search for it) into the Color 2 slot. Now, this node is blending your base color texture with a procedurally generated wave texture.
- SHIFT+A again and find a Musgrave Texture, then plug it into the Wave Texture vector. Now your wave texture is being mixed with a Musgrave, so you can use musgrave distortion on top of your wood pattern.
- Add a Texture Coordinate and a Mapping node. Plug the Generate from texture coordinate to the Mapping vector. The texture coordinate dictates how these procedural textures are going to be assigned (by normals? objects? UV-based? camera-based?). Here we use it as Generated so it automatically generates these textures based on the vertex positions without deforming it. The Mapping node allows us to manipulate position, scale, and rotation of these textures procedurally.
- Plug the mapping into the Musgrave Texture vector.
Now assign the MasterWooden material to the mesh parts you want. In Edit mode, select all the parts you want, hovering on them and pressing using (L) or SHIFT+L to deselect a part.
Then, with the parts selected, go to the material properties tab and press Assign.


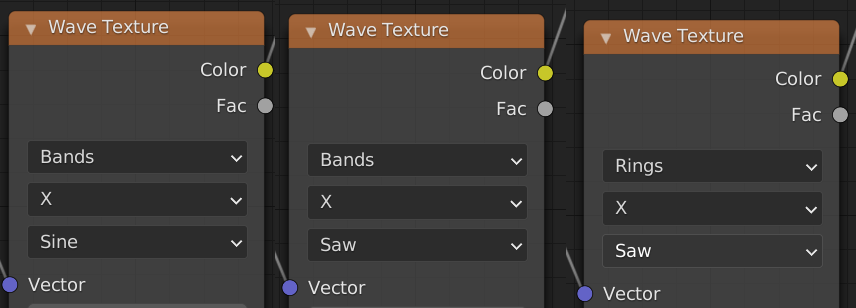
Play around with the Musgrave and Wave textures values. See what they do, and how each of the settings changes things. These are the Wave Texture settings that I use the most. Saw Rings are so awesome for wooden materials!
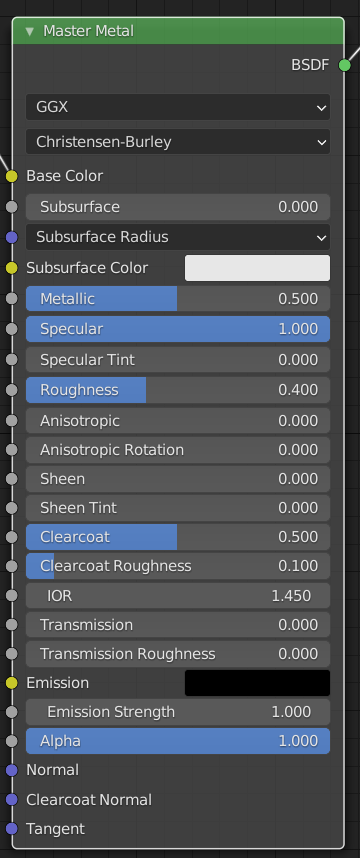
And for the main materials that’s pretty much it. The rest just adds a bit of variation to Master’s roughness, specular, metallic, and clearcoat settings.
For our beautiful grass and clover, we’ll use the following material setup:
- Most of our Principled shader properties are set to 0 and roughness to 1. This means that the grass and clover are not going to absorb and reflect light.
- To the base color we add a Color Ramp node, and using the + button in it we are going to add a few different tones of green.
- Then we add an Object Info node and we connect the Random socket to the Color Ramp’s Fac.
- This means that every time our grass and clover are duplicated, the color is going to be randomly assigned across the colors you added to your color ramp.
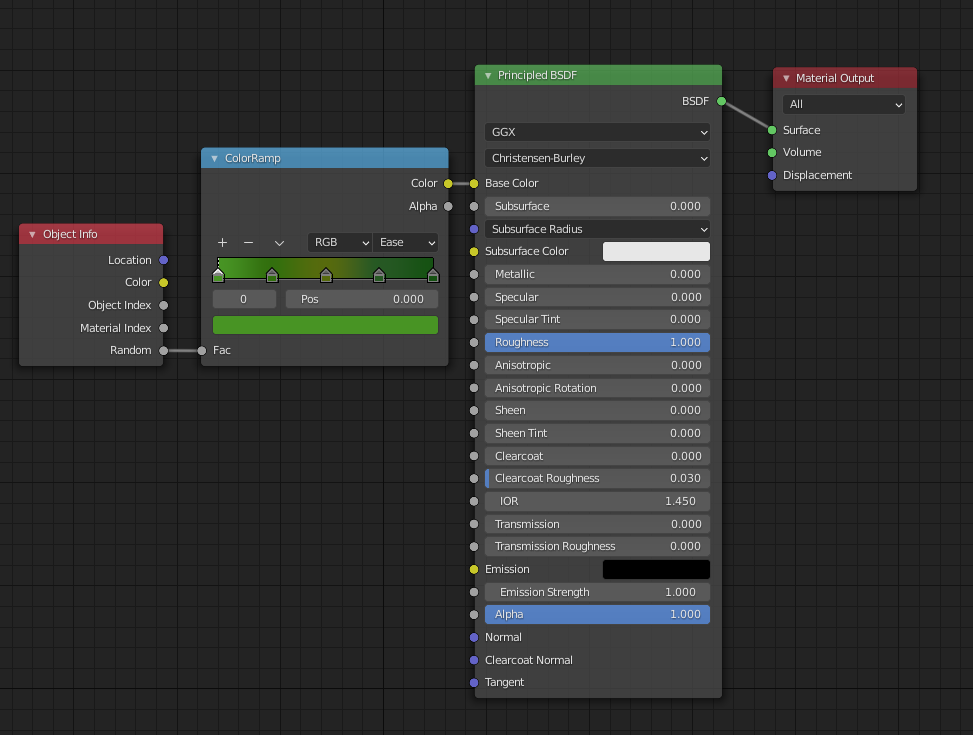
And that’s how we get this nice color variation!
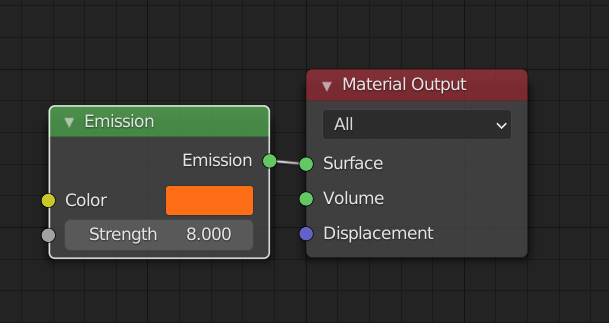
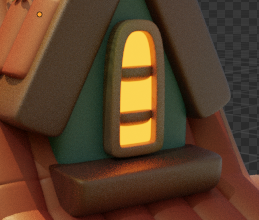
If you want to make light come through your window, just create a basic Emissive setup and assign it to the window plane we created before. Tweak your emission strength and color.
11. Render Setup and Post Production
The very first thing I do when starting a new scene is to set my render settings. So, it’s quite straightforward in Cycles.
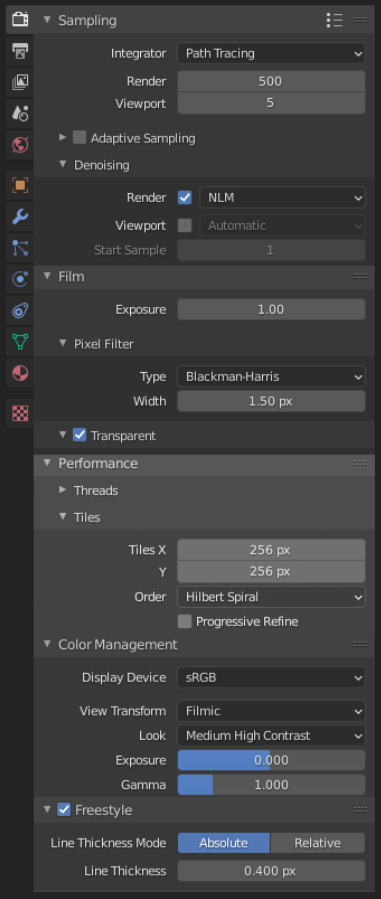
In the Render Properties:
- I set my Render Samples to 500 and Viewport to as low as possible (usually 5).
- If I use Subsurface Scatter in any material, then I set the render samples to 1000.
- Render Denoising On!
- I enable transparency under Film.
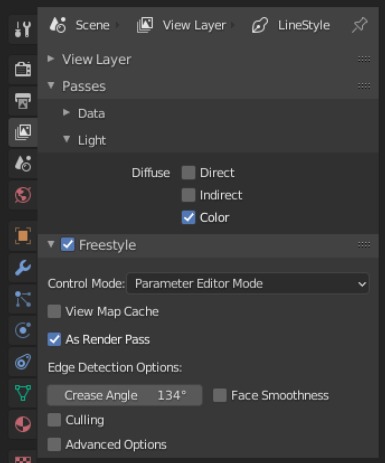
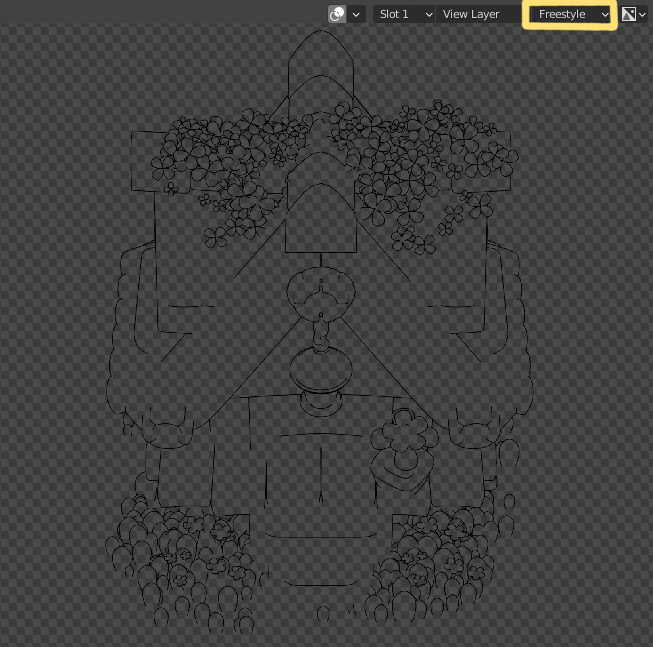
- Enable Freestyle to get fancy outlines after render. Usually I don’t go over 0.4 thickness, but that’s personal preference.
- I set my Performance tiles to 256 x 256.
- And I also change my Color Management look to Medium High or Medium Contrast depending on the scene. By default it comes set as None, but this can produce quite washed-out colors.
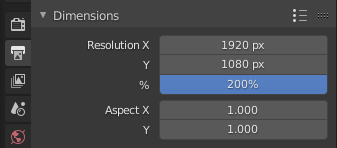
- I rendered it with 4K resolution size.
On the Render Passes:
- I export a Diffuse Color pass, in case I want to use it to mask certain areas in Photoshop.
- I set the Freestyle to be Rendered As Pass so we get it separately to composite in Photoshop.
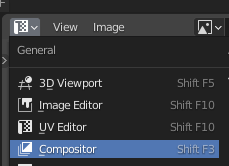
Before rendering, let’s switch our second working area to the Compositor, then select it to Use Nodes.

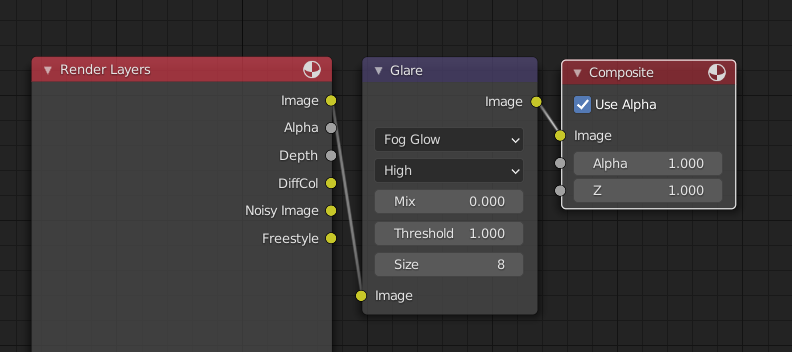
The same way we add new nodes to the Shader and Geometry Nodes editor (SHIFT+A and search) do the same in the Compositor and find a Glare node.
Place it between the Render Layers and the Composite nodes, make sure all the Image nodes are connected properly.
Set the type to Fog Glow and quality to High. This node is going to make your Emission materials bloom quite nicely!
Back to your viewport, Press SHIFT+A and add a Camera.
Press (N) to bring the tools to the right side, then go to the View tab and enable Lock Camera to View. After that you can just move and zoom around freely to place your camera. Once you’re happy with it, don’t forget to turn this option off!

Then SHIFT+A again and create a plane, scale it a lot to serve as a base for your scene. I used this simple material setup to do it, projecting from view and merging the UV islands to a specific blue/gray color on my swatch.
Now hit F12 to render and go grab a coffee!
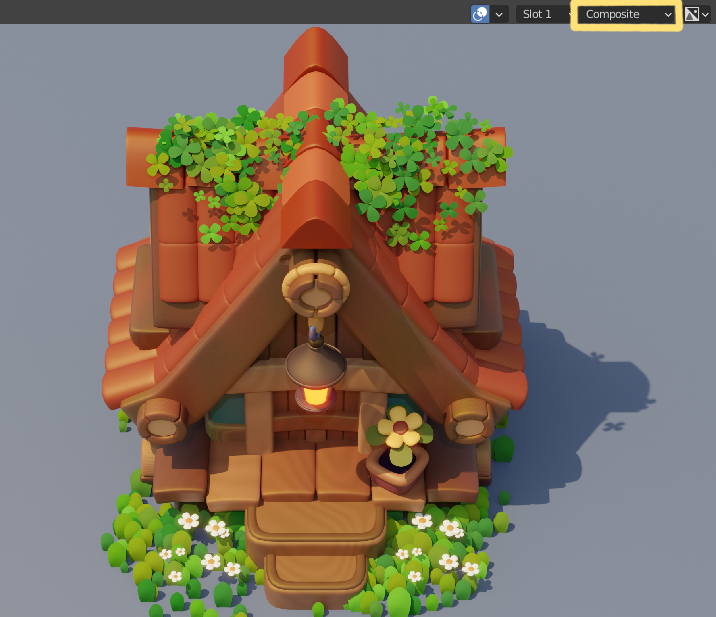
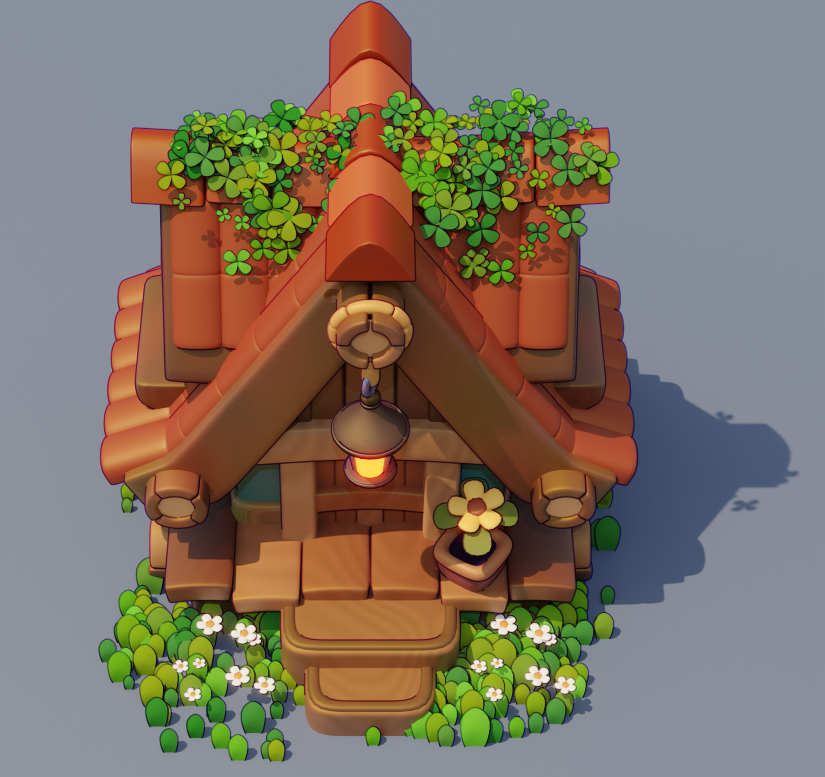
This is what you’re going to get. This first render result shows the combined render, with the Composite glare acting.
Press ALT+SHIFT+S to save this as an image.
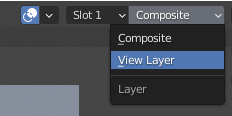
Then on the top right part of your render result, you can switch to View Layer and select your Freestyle render pass. ALT+SHIFT+S and save it as a PNG image.
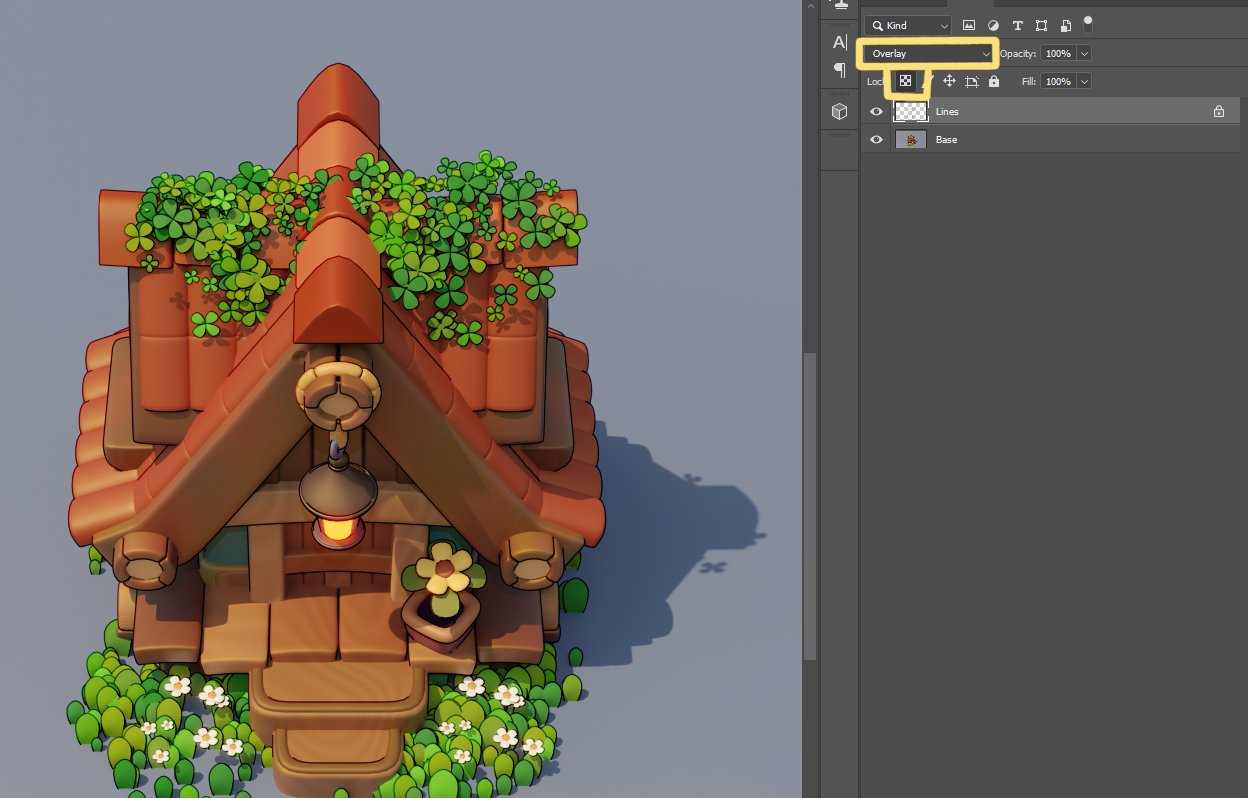
12. Photoshop Post Adjustments
In Photoshop I import both images:
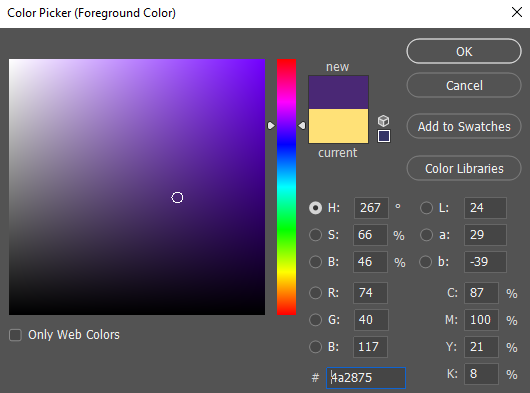
- Lock the transparent pixels for the Lines layer and switch it to Overlay blending mode.
- Then I take a not-so-dark purple and ALT+DEL to paint the whole outline with it. Sometimes I even set the lines opacity to 80-90%.
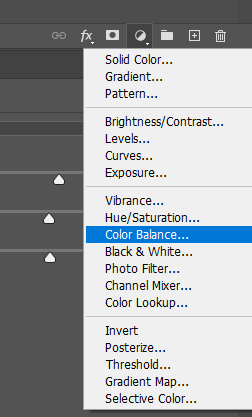
- Add an exposure adjustment layer for the Base and set the exposure to 0.3–0.5 depending on how saturated my colors are.
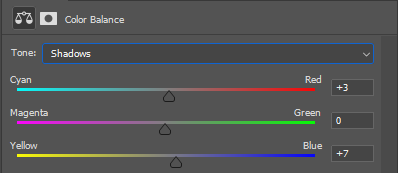
- I add a color balance adjustment layer and I reinforce my highlight yellow, midtone yellow and red, and shadow blue and red settings.


If you want to paint something extra, you can export your DiffColor the same way you selected your Freestyle pass after the render, then import it to Photoshop and use the Magic Wand tool to select the areas and mask them.
I hope that was helpful and not too rushed. I know some parts are missing information, but I’m pretty sure that with all the information above you can do all the other missing details (lamp, flowers, etc.).
Feel free to ask me on Twitter if you have any doubts or suggestions.
See you next time, thank you so much!
About the Author
 Carlos Cavalcante, Game Artist in the mobile games industry and Blender enthusiast


FANTASTIC series! Thanks so much for sharing it.
Thank you for this series!
I love this art.
Make a course plis.
gratitude for sharing this series of processes; beautiful work
Again a great article. Very interesting to read. Thank you very much !