Behind the Scenes: Cute Medieval Environments, Pt. 1
Hello! I am Carlos Cavalcante, 33 years old and I am a Brazilian game artist currently living in Helsinki, Finland. I’ve been working in the mobile games industry for 10 years, both doing hands-on art or art directing/team managing, but mainly 2D games.
In terms of 3D art, I am quite new to it. I started to learn 3D around 3 years ago for a specific project in our company. I decided to go with Blender, and it changed my career focus completely.
Idea
To come up with these props, the main idea was to create a big village scene that has a peaceful and colorful vibe, with a nice medieval feel to it. I did not have a specific concept in mind.
Preparation
My process to come up with such assets and mockups is to try it straight in Blender (usually that’s how I do 99% of my personal projects). I don’t remember the last time I actually drew something as a concept for my stuff. For me, it is faster and more effective to do that straight in Blender with basic primitives and subdivision surface modifiers to blockout main shapes and structures.
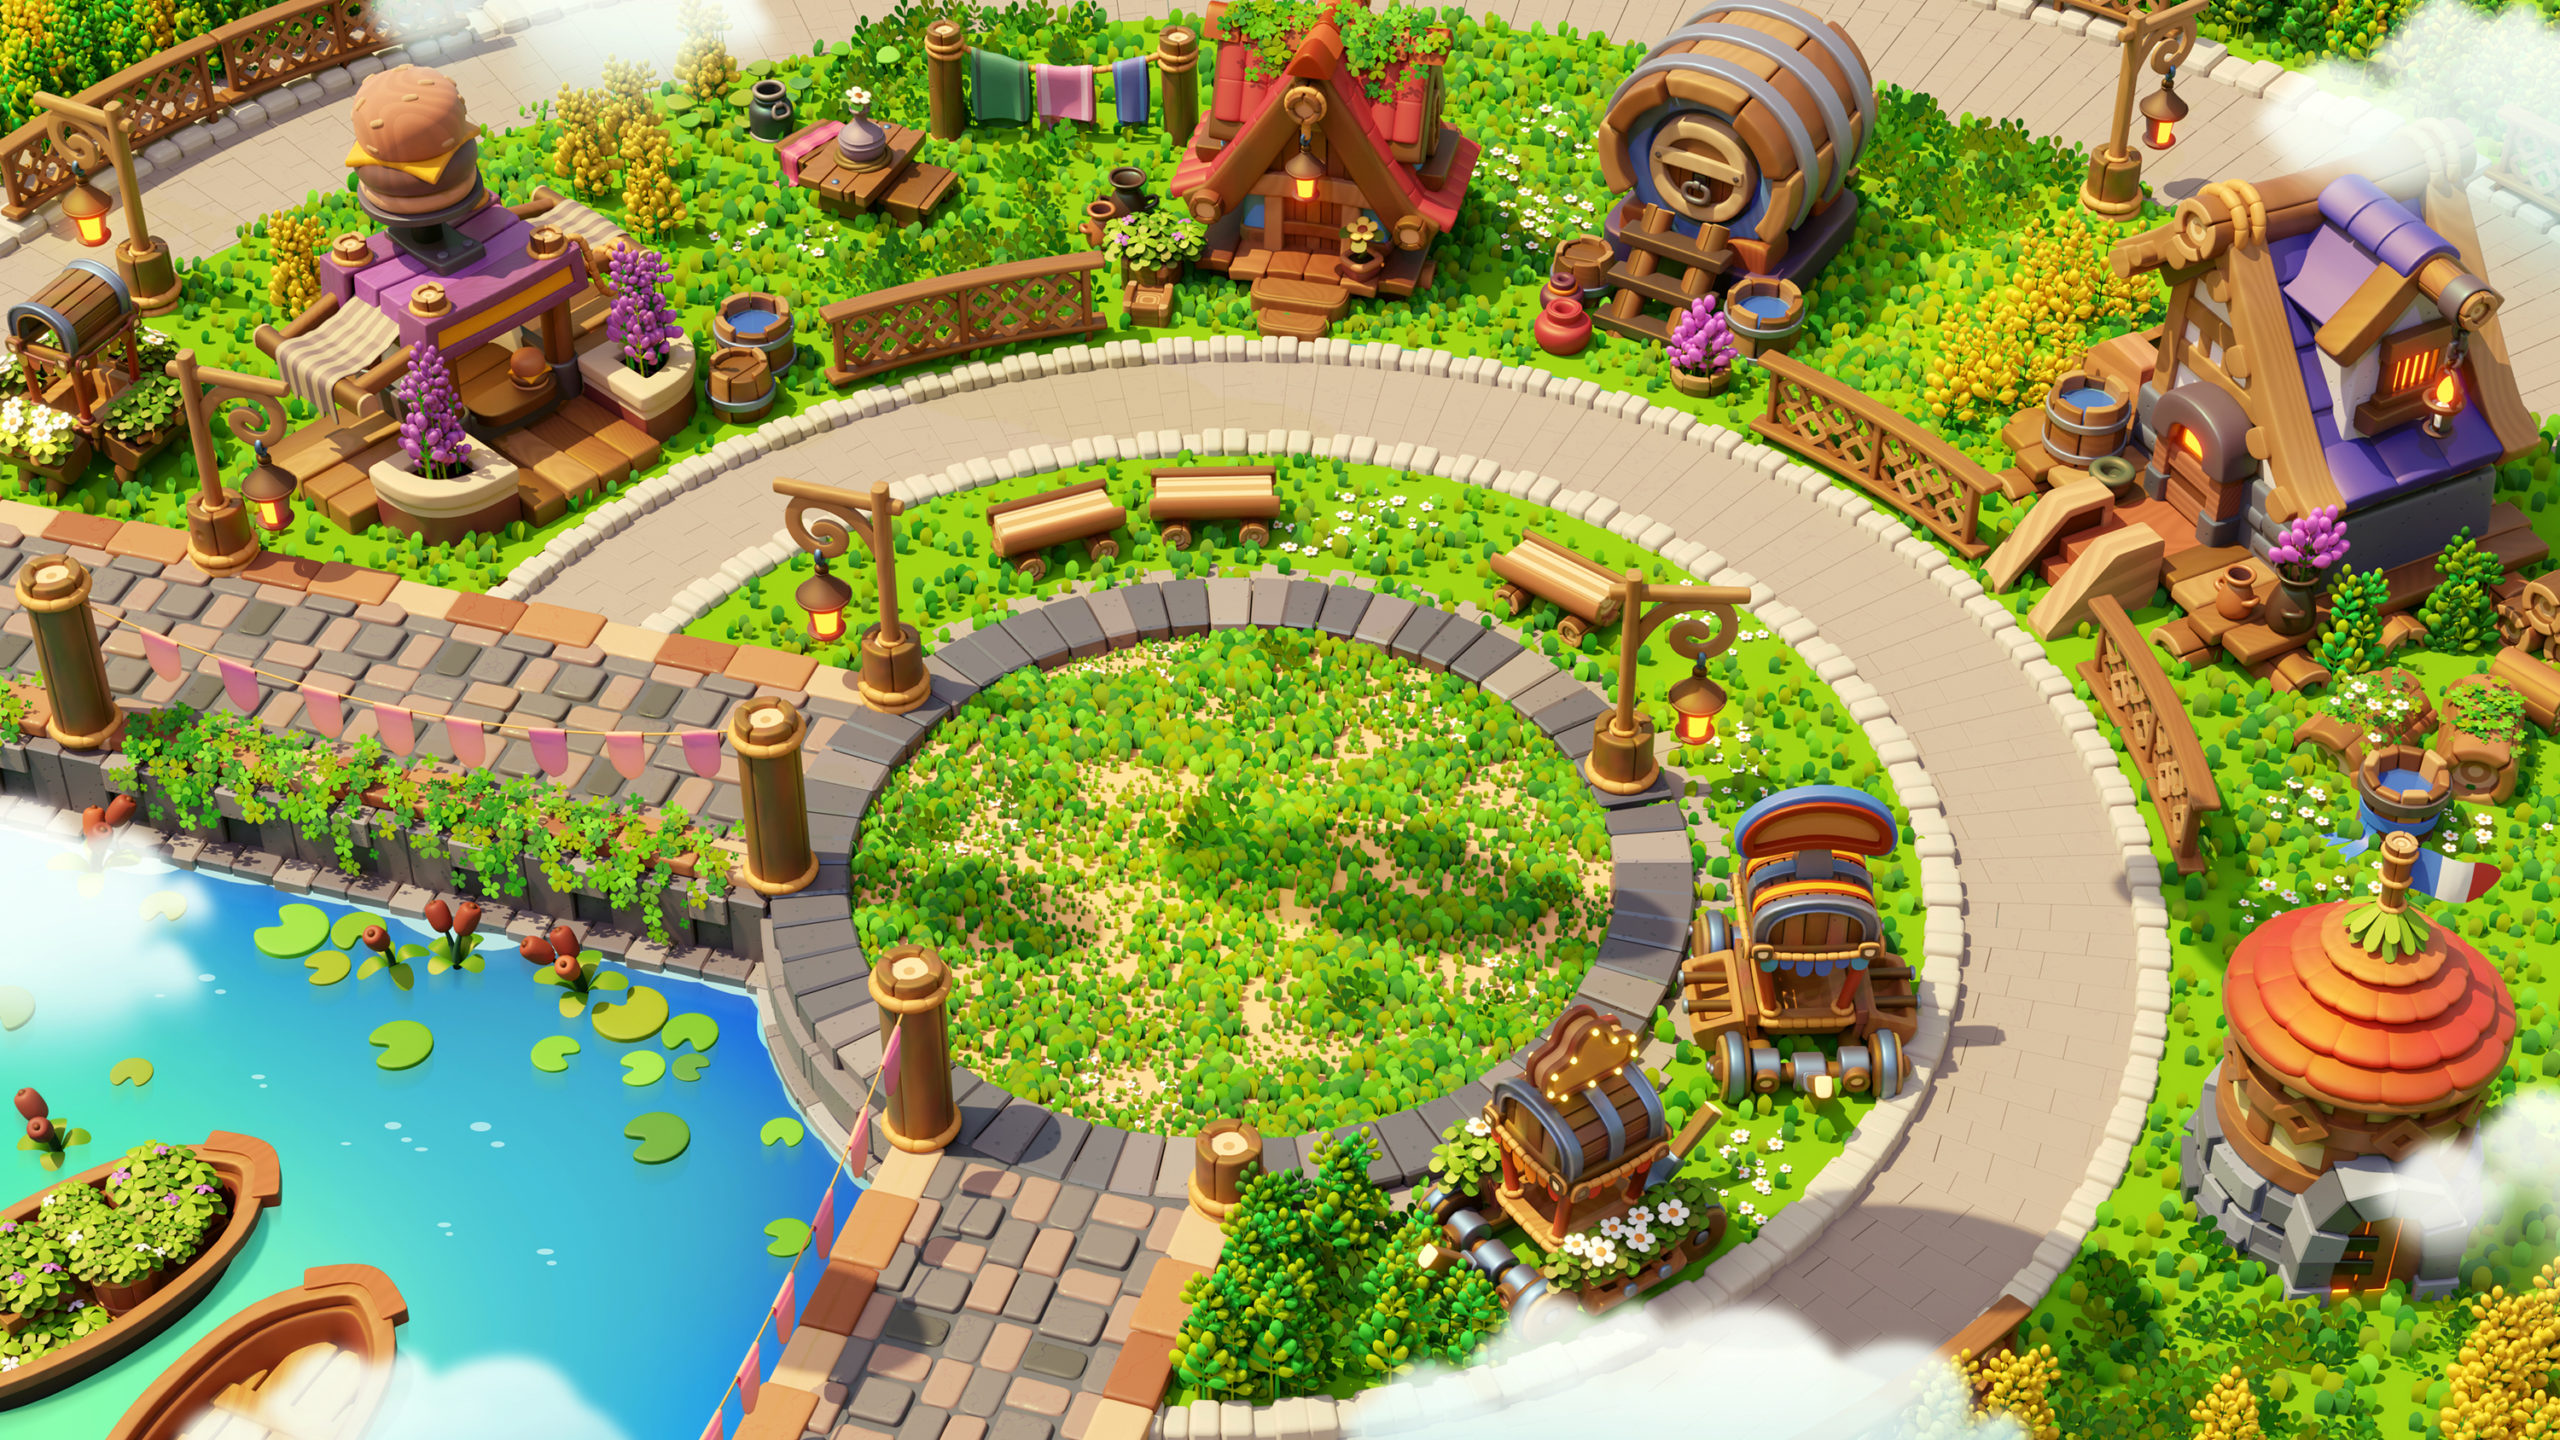
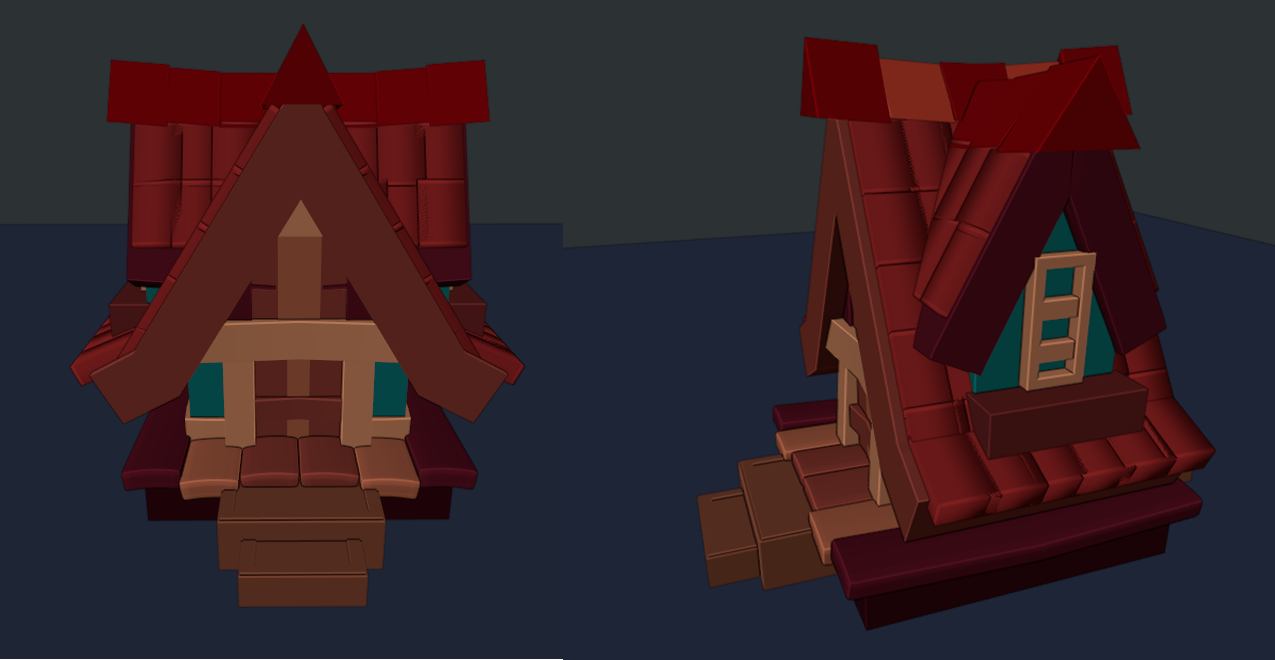
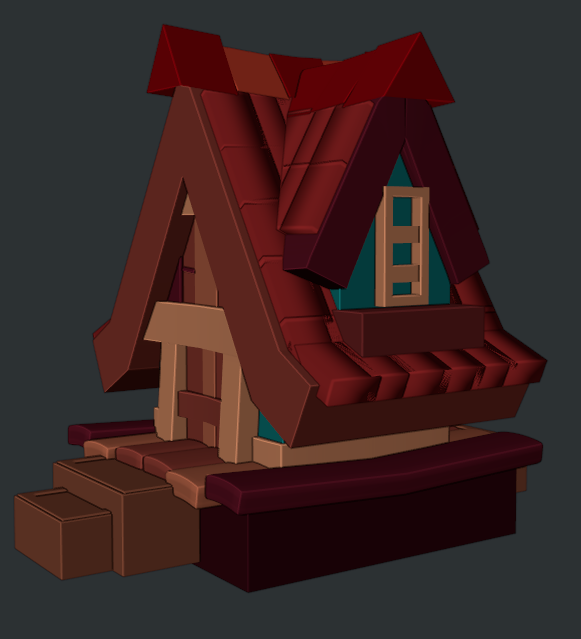
This is the scene where the props belong. All these were done using pretty much the same workflow. Of course, there are some changes here and there, but the core is quite the same.

I start creating a color palette that has all the tone ranges I might need, so usually, I have one master color palette image for that. Sometimes I can use this color palette as gradient stripes, but for this scene, I just went with simple flat color swatches.

Next, I set a nice HDRI image for my world space illumination. HDRI Haven is the place where I find the best images for that. In this scene, I used Sunflowers4K by Sergej Majboroda.
For the basic environment texture setup, I doubled the strength and added a mapping node to control the light direction.
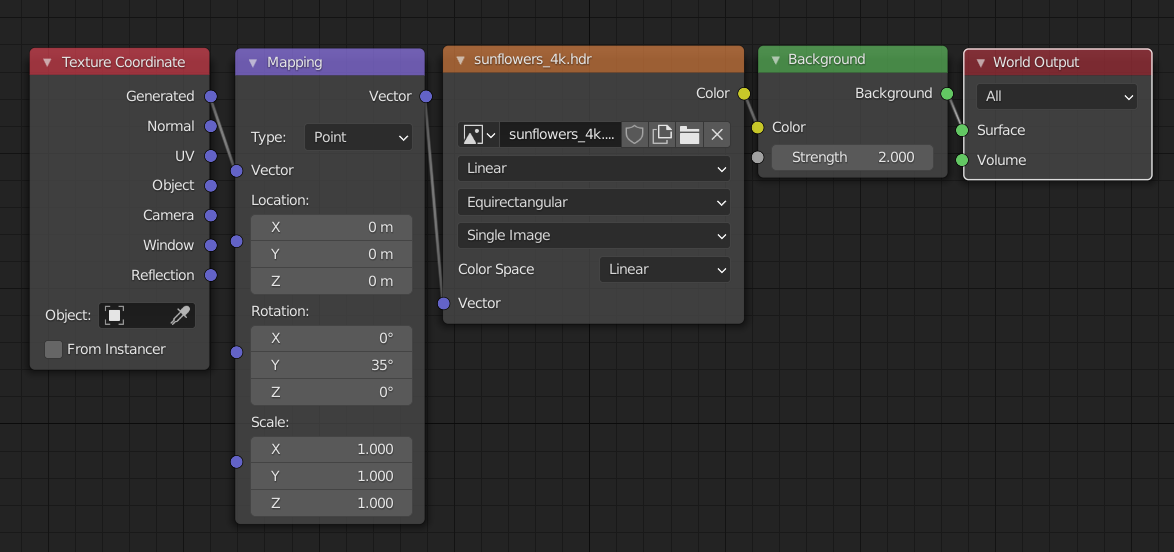
This is the point where I decide if I’ll go with EEVEE or Cycles. In this case, I went with Cycles to get better shadows and nice bouncing lights. With the basic environment lighting set, I started to focus on the creation of the props.
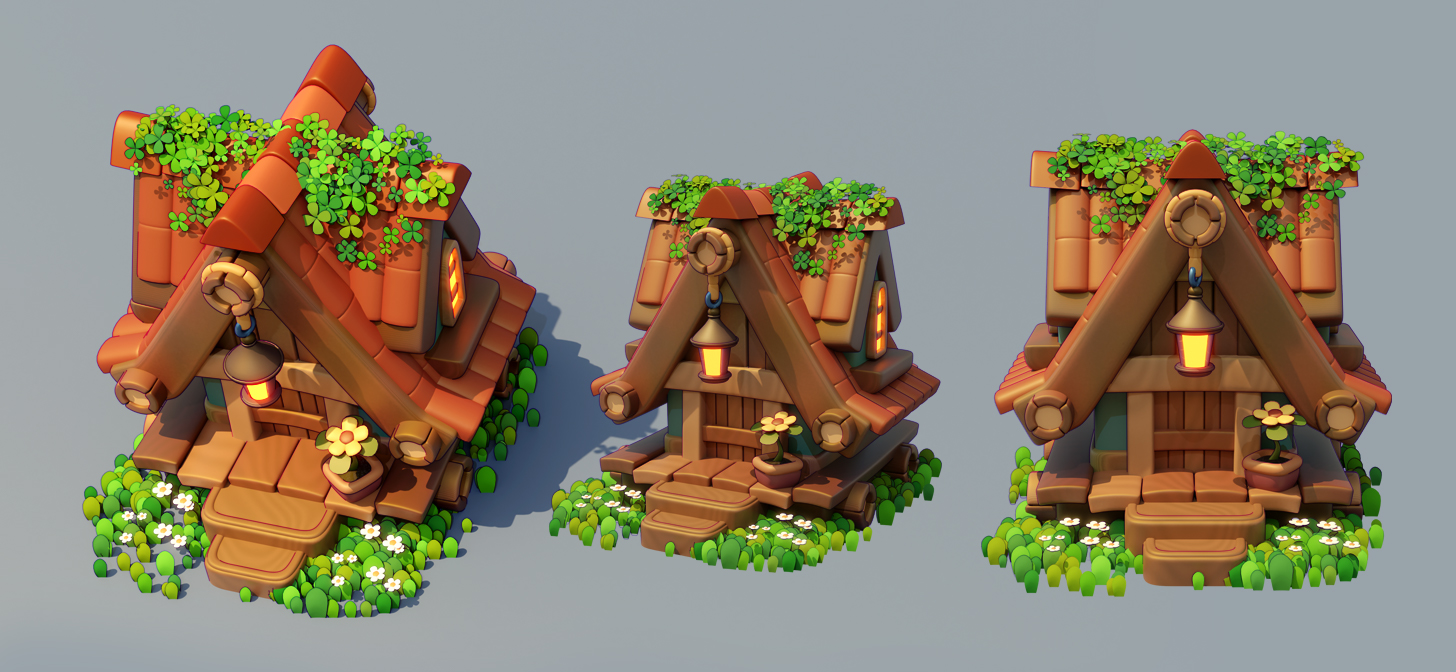
A house
I’ll show you now how I built this specific house. I decided to use a mirror modifier on the X and Y axis for the core structure. Set the mirror clipping on and let’s go!

1. Overall Blocking
Everything starts with the blocking for the roof silhouette. This will lead me to build the rest following this direction.
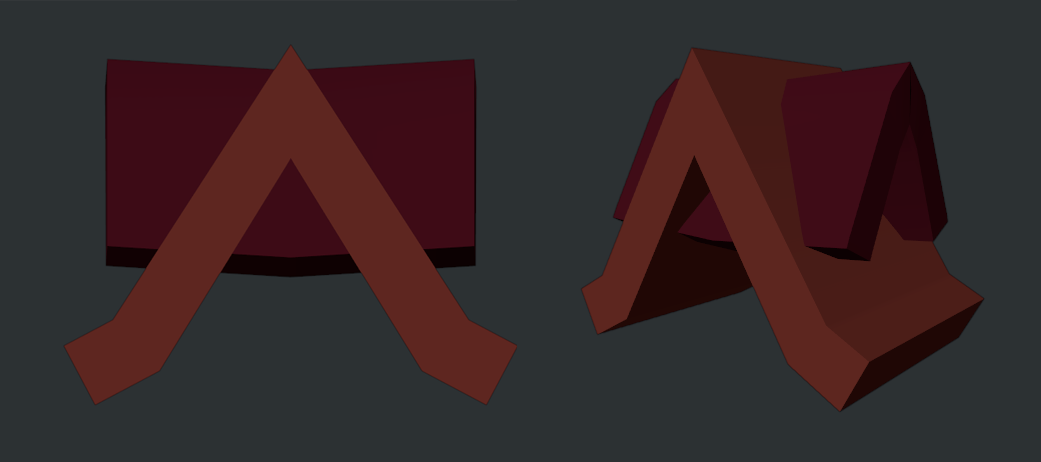
After that, I start to block the basic shapes for the house. Don’t go too deep into details at this point, the main goal here is to get your shapes right and to build a nice silhouette.
When doing the blocking I also think about stylization, and I also define some keywords that might help me to stay focused on a goal. For this scene, my keywords were thickness and roundness.
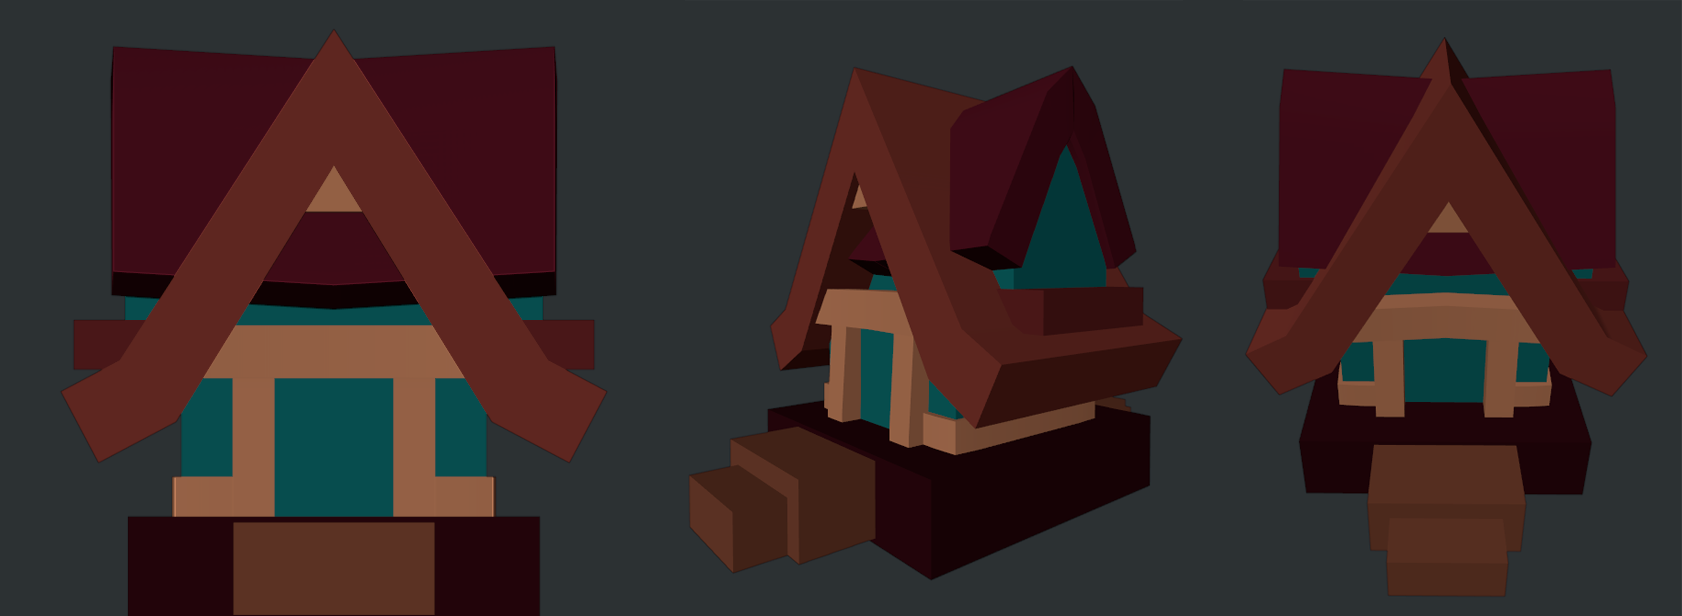
Now I start to think about the first layer of details. I still use simple primitives to block these details. In this case: roof tiles, floor and walls planks, door, window, and entrance steps.
2. Roof and Planks
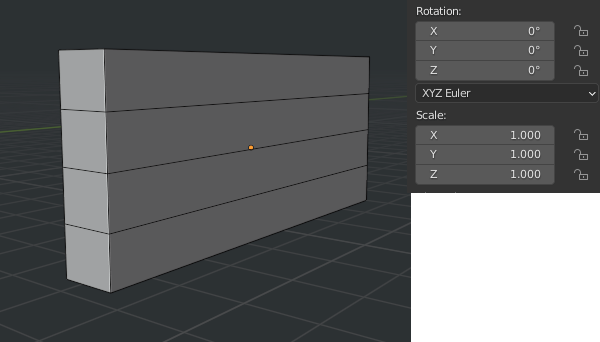
To build the curved planks and roof tile, you can use the same workflow for both. Create a simple rectangle and then add a couple of edge loops (CTRL+R) following the curvature you want to apply. Make sure that your scale is 1,1,1 and rotation is 0,0,0. If not, press CTRL+A and apply scale and rotation.
Go to the modifiers tab, and assign a Simple Deform modifier, then bend it the amount you need, on the axis you want.
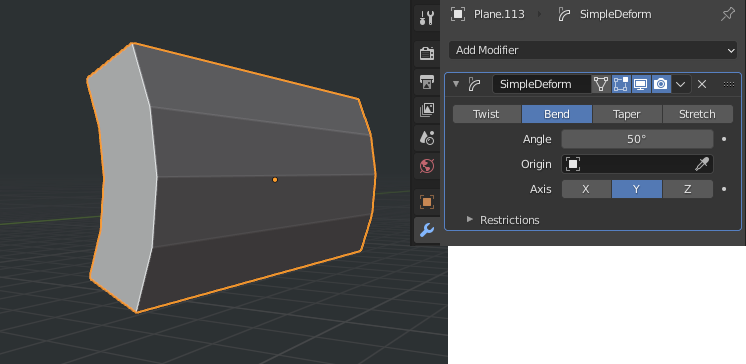
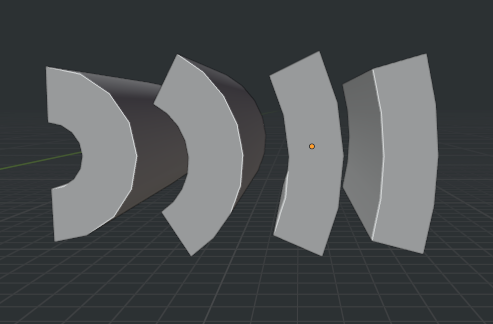
I usually create a couple of variations so I can use them depending on my need. You can add a bit more loop to get smoother deform results.
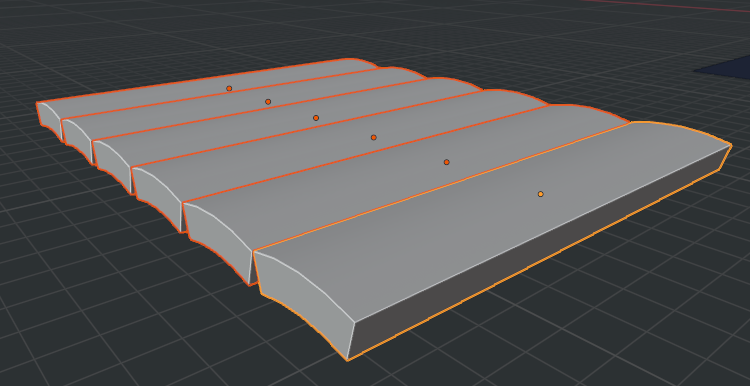
Since this is not such a complex structure, we can just manually duplicate the planks to build the floor base. Select all the planks you duplicated and in Edit mode make them look a bit irregular, to avoid repetition and the feel of tiling.
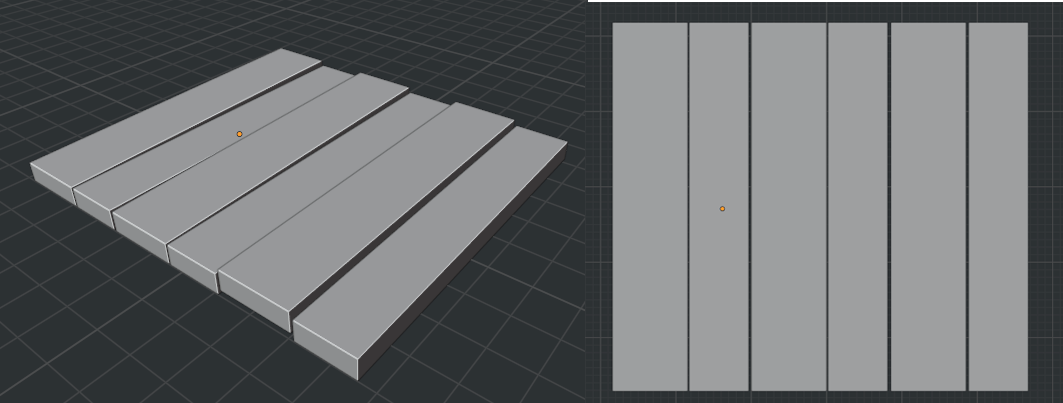
You can go to the wireframe top view (Z) or turn on the X-ray (ALT+Z) and box select (B) different loops, then scale and move them around a bit to break symmetry and give it a bit more life.

For the wall planks, I use the same principle, but I delete the Simple Deform, and also make the width of the planks different by scaling some of them on one axis.
I select one of the curved assets that I created above to be my roof tile. Then I apply the modifier to make the mesh naturally curved.
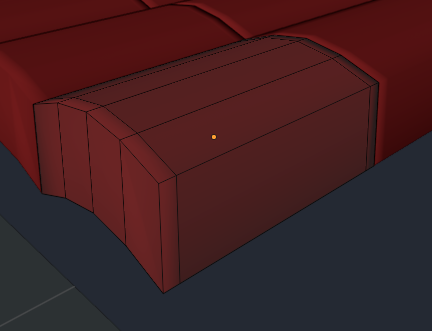
Add an Array modifier to repeat the tile across the roof length. I named this ArrayY.
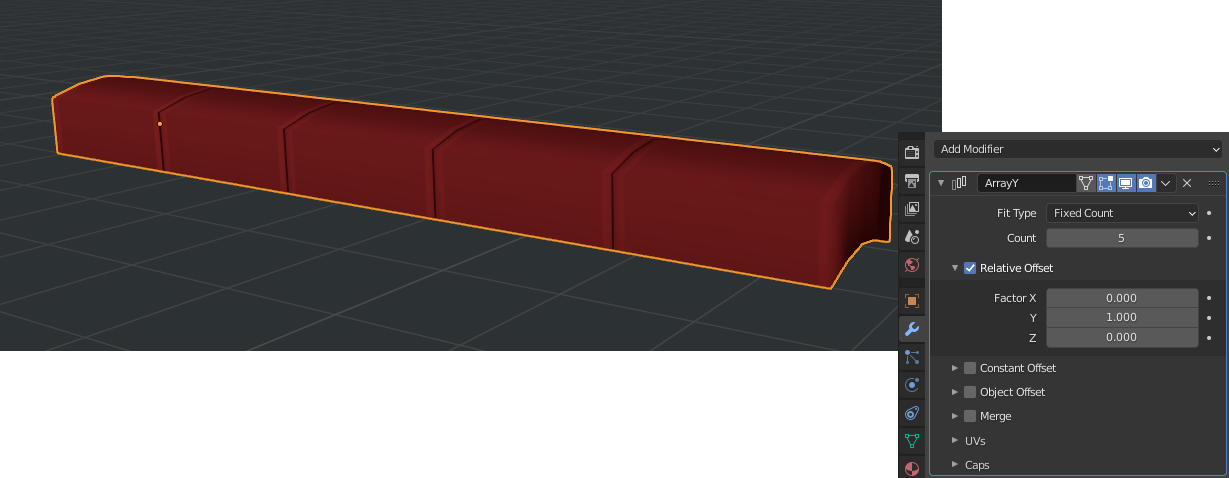
Then another Array modifier to repeat the tile across the roof width. I called this ArrayX.

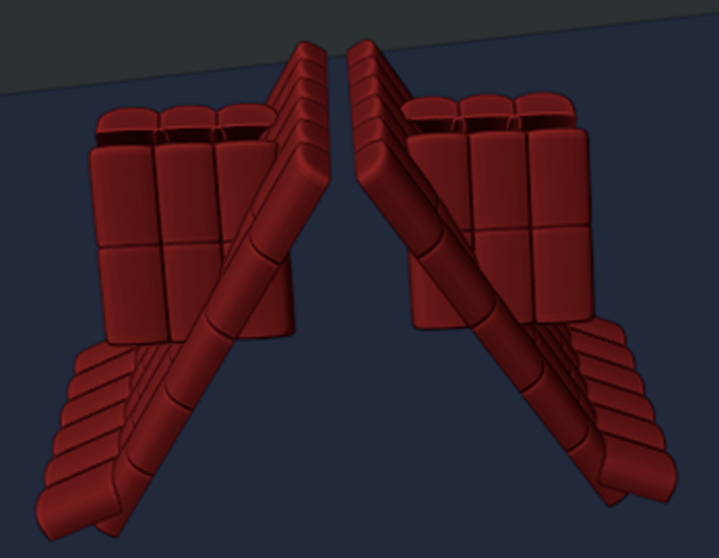
Duplicate and rotate these to fit your roof layout, also tweak the array count depending on the roof section.
The top detail on the roof is built using a triangle asset made out of a simple cube. Merge the top vertices to center.
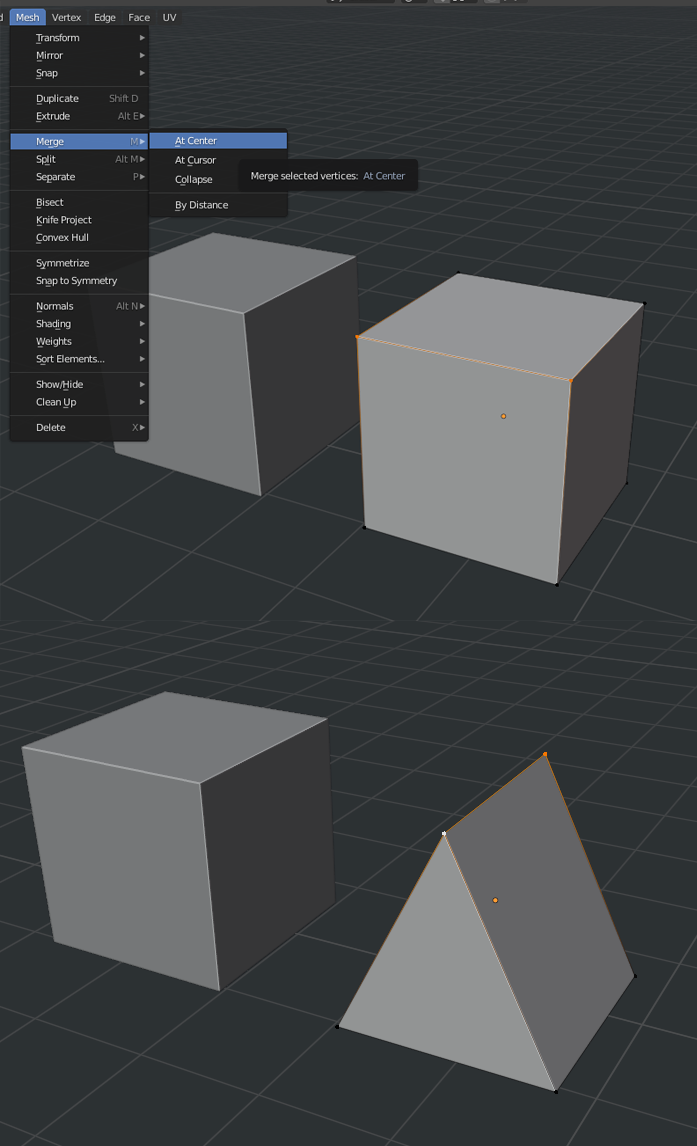
Manually duplicate this triangle and place it following the roof layout. The same way I broke symmetry and repetition on the plank tiles, I also do the same here.
Select some edges and move them up or down to create variation in the silhouette.

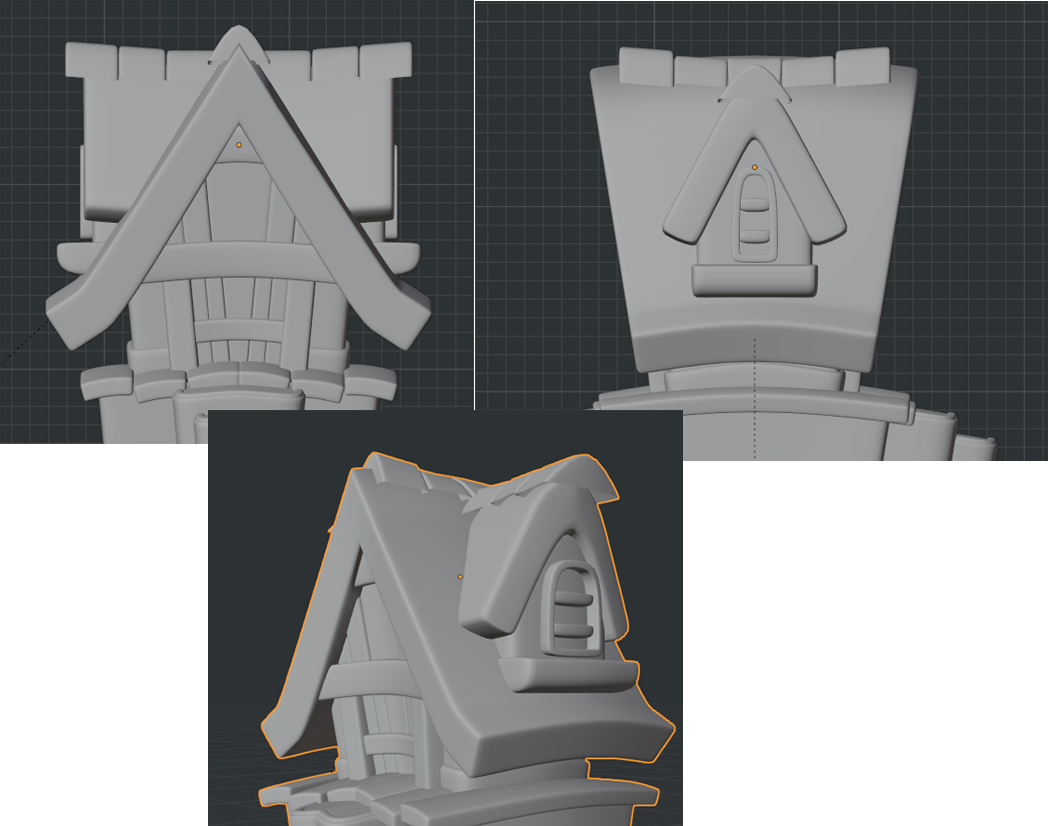
Now we have a quite nice rooftop structure!

3. Door, Window and Entrance Steps
Reusing the planks I did for the wall, I create the main door. Then I duplicate one plank and rotate it to add the horizontal detail.

Usually, for windows, I start with a simple plane, then scale it in a way that it fits the window frame width, then I Extrude edges to build it almost like a bookshelf. Select the top face, and duplicate it twice to create the division details.
In Edit mode, apply a Solidify Faces (I use this A LOT) but remember to keep the thickness consistent with your overall style. If your building is full of thick details, and then you add something thin to it, it’ll look a bit out of place.
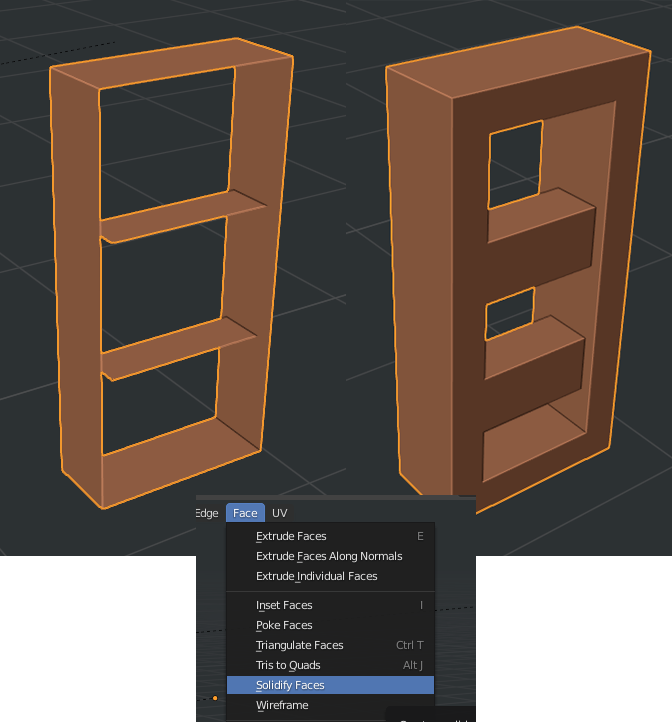
Still in Edit mode, select one of your window faces, and rotate, scale, and place it in a way that it closes the window hole. We’re going to use it to either make a glass window, either with light coming out or total darkness.

For the entrance steps, I just reused the top face from the blocked object (I also do that A LOT) and shaped it to look like a frame, and applied the same Solidify from the previous step.
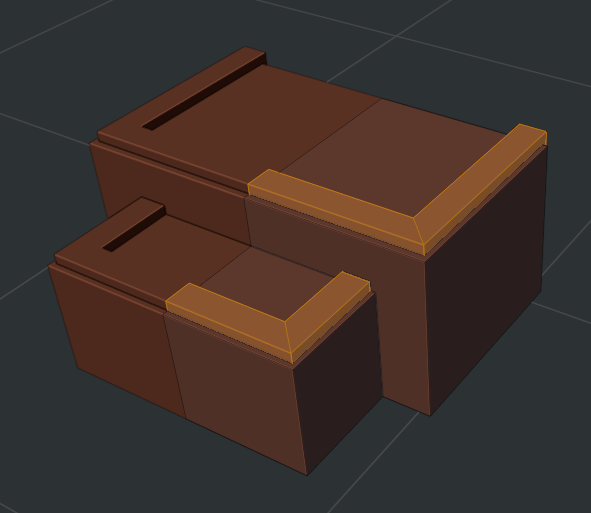
Now we have a front door, steps and a window!
4. Adding Roundness!
It’s time to start giving roundness to the house! For that I use the Subdivision Surface modifier.
Let’s try to stay around 2 levels of subdivision (render and viewport). You don’t need to go over 3, after that you don’t really notice drastic changes, and it becomes quite heavy!

After assigning the modifier, you’ll notice that most of your silhouettes will get destroyed. That’s because you need to add some extra loops to support this modifier to work nicely. This roof tile, for example, still has the very basic geometry from the blockout, so the modifier is smoothing out such simple geometry that it’ll lose the core shape from the primitive.

But if we add some supporting loops around the edges (CTRL+R) then you’ll notice that the modifier behaves quite well and starts to give that roundness and silhouette I wanted to achieve with this project.
This step is one of the most important ones to define stylization and identity. Try to keep it as consistent and clean as possible with the supporting loops.

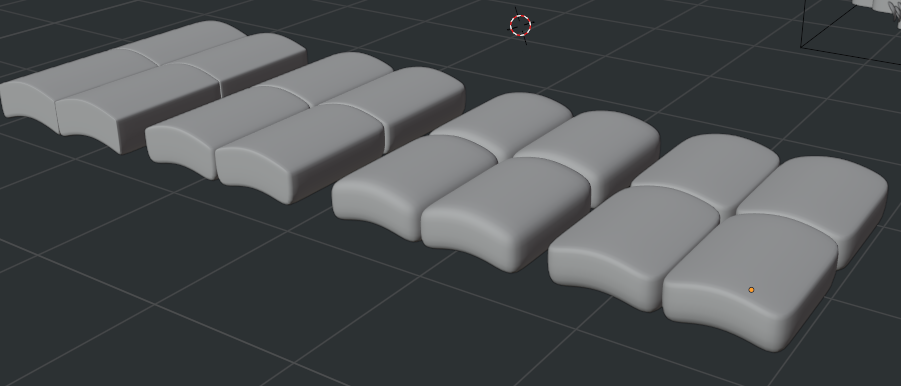
Here’s an example of the default cube using the modifier and how the placement of edge loops can help you to stylize it in different ways. Also, it shows well how the modifier works.
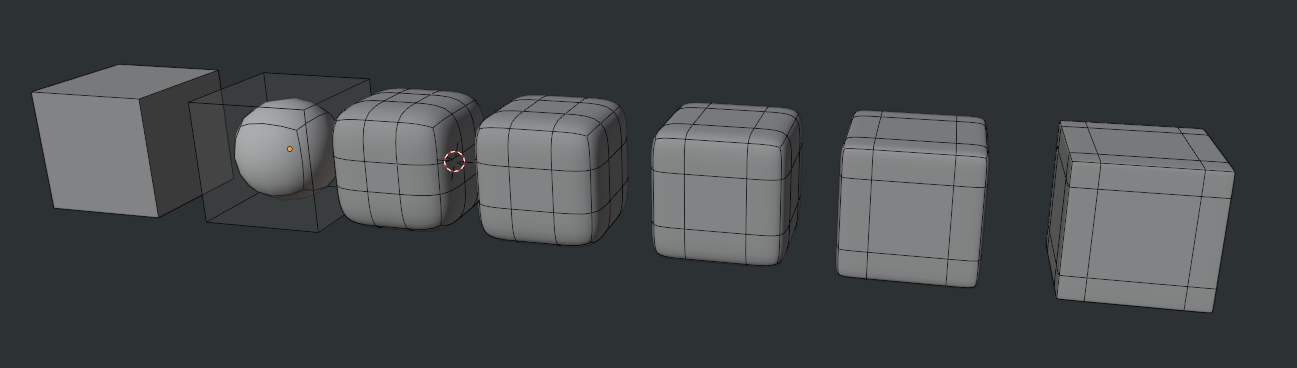
Putting it to our roof tile context when defining stylization using the modifier:
Important reminder! Remember to drag the Mirror modifier to be on top of the Subdivision Surface modifier. Otherwise, you’ll see some weird clipping happening.

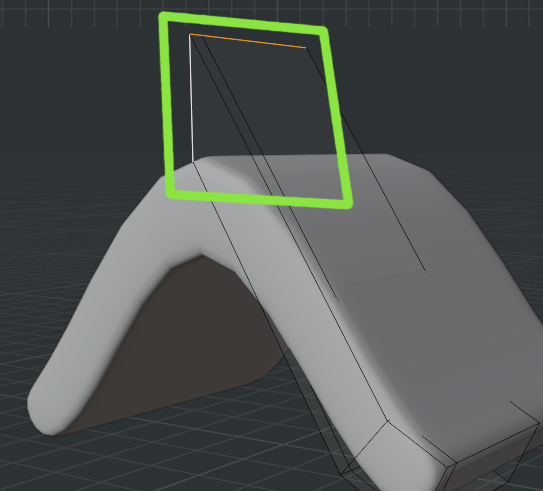
It is quite possible that this happened to your roof structure after you added the modifier. Let’s adjust it by selecting the main edge loop that clips the mirror on X (or Y depending on how you built it).

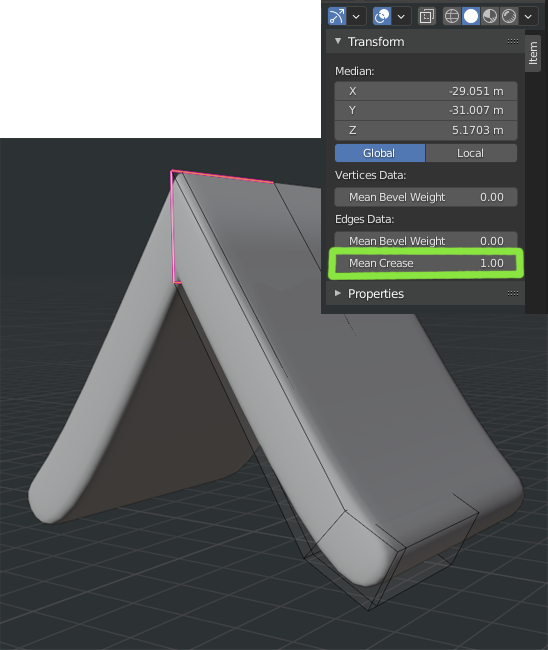
With your inner loop selected (marked in green), press N to bring the tool shelf on the right side of your viewport, and under the Item tab, set the Mean Crease to 1.
This will turn the edge loop to pink, meaning that it has a crease applied to it and this loop will remain sharp no matter what the subdivision modifier says.
Add your supporting loops to create the roundness you need and keep going!
One nice way to add consistent supporting loops is to use Inset (I). Select the loop of faces you want to add the supporting edges and press i to inset faces.
Since we are using the mirror it will not do it properly, so in this case (when using mirror) you press (i) to inset and then B to make the inset clip with the mirror modifier.
After pressing (i) you need to move your mouse to define how the inset will act, then click to confirm.
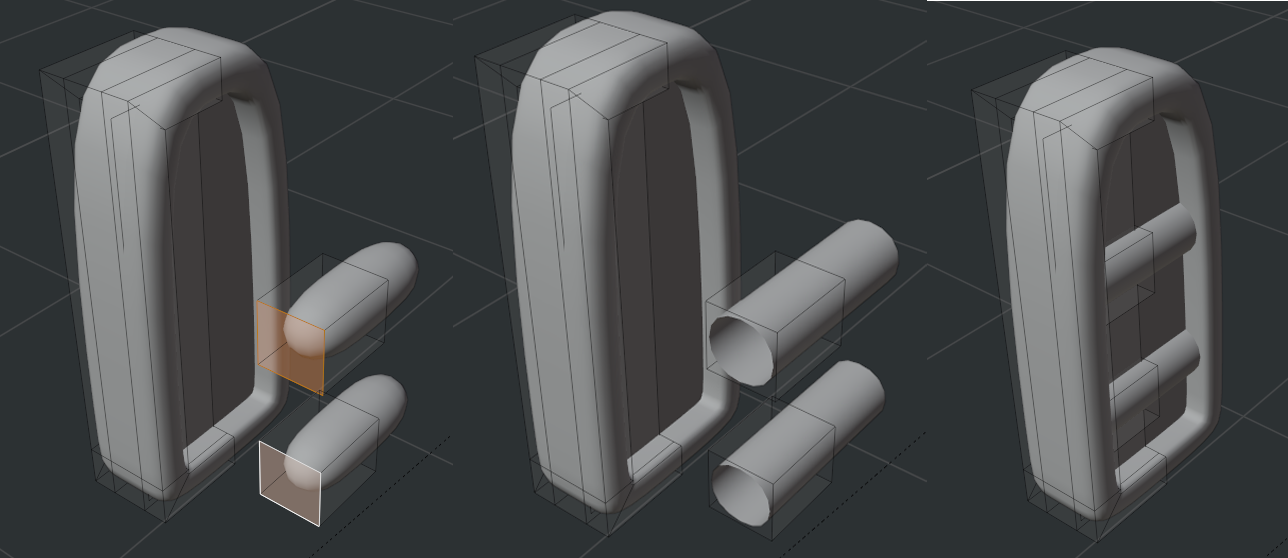
You can also delete hidden faces to create cylinder-shaped details for this window.
5. Mirror + Subdivision Surface Modifiers Tip
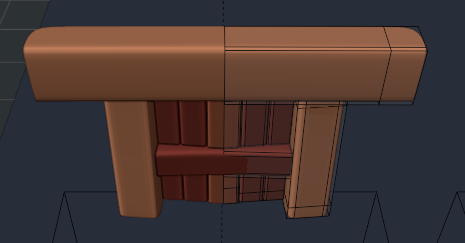
One thing that I do to make some props more stylized is to combine mesh rotation in Edit mode with subdivision surface and mirror modifiers. Check the current door (image below)—it looks cute, but it could have some extra wackiness to it.
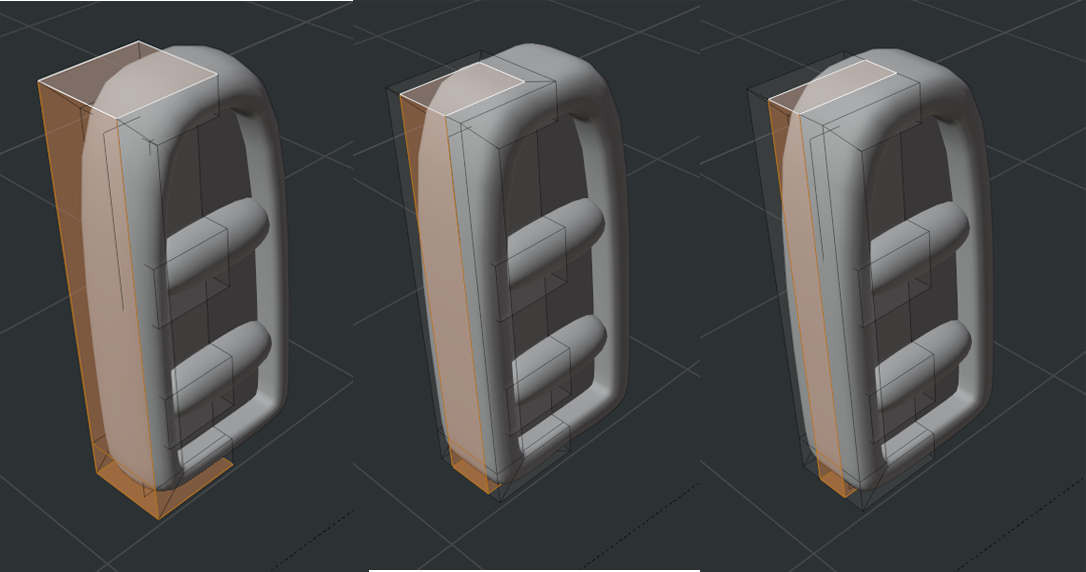
But if I go to Edit mode, I can select the whole thing (A), then slowly start to rotate it on the Z-axis to give it a bent feel (first example below). But you can also rotate only some elements just to break symmetry (second and third examples below) where the door and pillars remain straight but the arch and middle plank are bent.
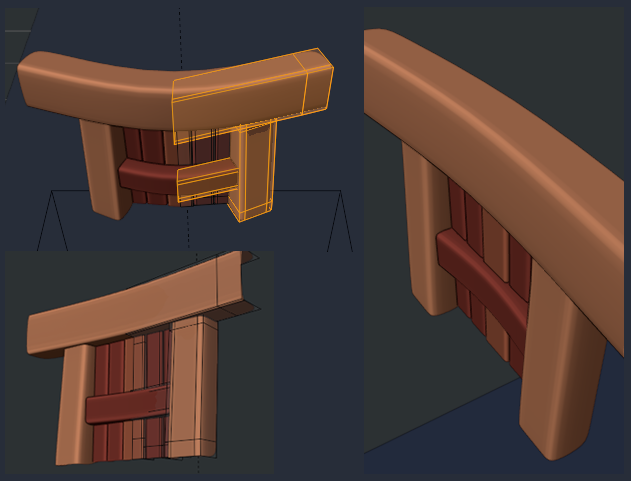
It can even be done to your entire house if you need to make it look wacky and exaggerated.
One important thing to note is to disable your mirror modifier from time to time and check if you have faces where the mirror clipping happens. If you do, remove them; otherwise, you’ll get some undesired shading artifacts.

Check back Wednesday to see Part 2!
About the Author
 Carlos Cavalcante, Game Artist in the mobile games industry and Blender enthusiast


Thanks for the tutorial! Really smart and simple solutions! I hope you’re enjoying Finland and Helsinki – tervetuloa!
Thanks a lot Petri. 4 years in here, amazing place! Kiitos paljon!
Great
Thank you Eddy!
Ótimo tutorial! Parabéns Carlos!
Adoro as suas criações!
Obrigado Fábio!! Tem mais duas partes pra sair logo mais ;)
Great article. Thank you so much for sharing !
Thanks a lot Rafael! Glad you liked it