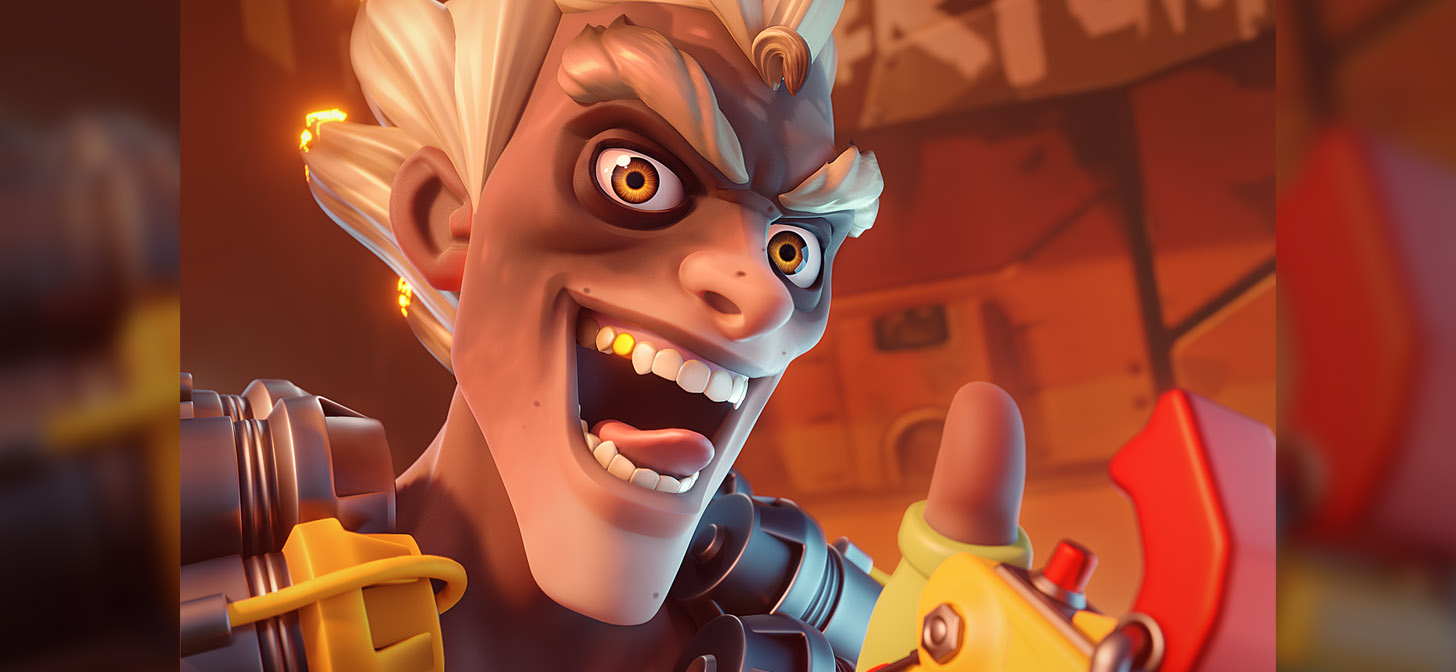
Behind the Scenes: Junkrat Overwatch Fan Art
About
Hello! I’m a French character artist at Oh Bibi and I love to sculpt/draw cute girls and cartoon/graphic design stuff. You can check my ArtStation.
I am curious about way too many fields—I guess I have this interior flame that always wants to be fed.
And I’m obsessed with rhythm games.
I studied graphic design with a major in 3D. I did some internships in advert/film studios and, after my degree, I worked as a freelance 3D generalist for 5 years.
But I always loved to create cute, cartoony characters, so I worked in my free time on some projects based on characters. I ended up working at Oh Bibi fulltime, no more freelance.
And honestly, it’s my dream job.
[sponsor id=”qarnot”]
Motivation
This Junkrat fan art is part of my Blender journey. About a year ago I wanted to switch from 3ds Max to Blender, because it’s free and the community and devs seemed very concerned about this software. So I jumped in! Thanks to Zack Reinhardt and CG Boost’s courses, I have been able to update my knowledge.
Recently, I decided to dive into sculpting and reproduce what I know about ZBrush but, once again, in Blender. So, I watched a few videos from YanSculpts and Julien Kaspar. I made a demon bust, just a simple white clay bust. Then I worked on Sailor Moon fan art, centuries after everyone.
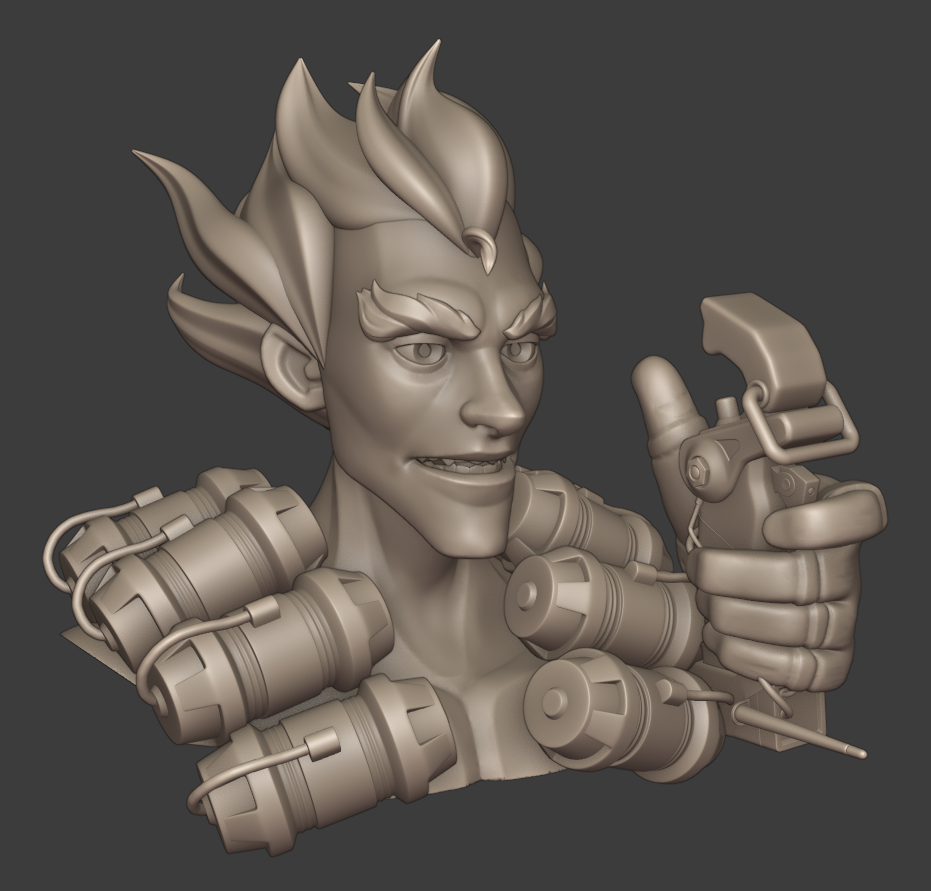
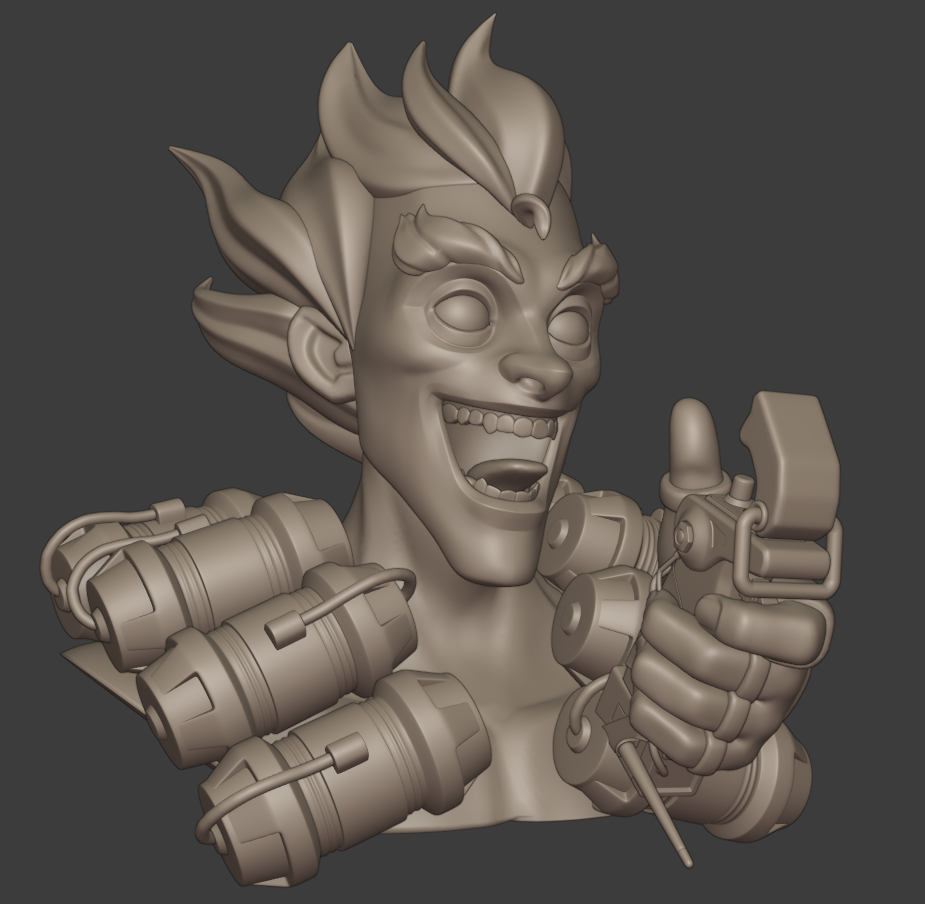
But I wanted to add steps to the pipeline, like vertex colors and pose. And the last one, Junkrat, was about pushing a bit more everything. (Add a hand, better eyes, skin and hair shaders, more elements and better character likeness.)
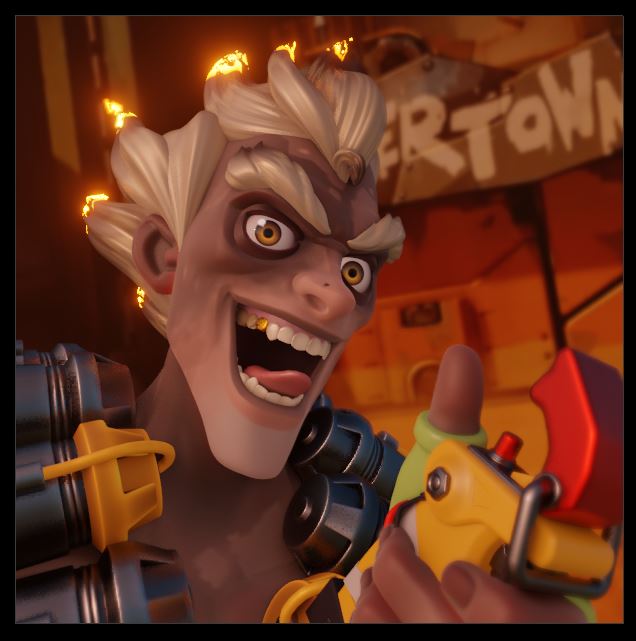
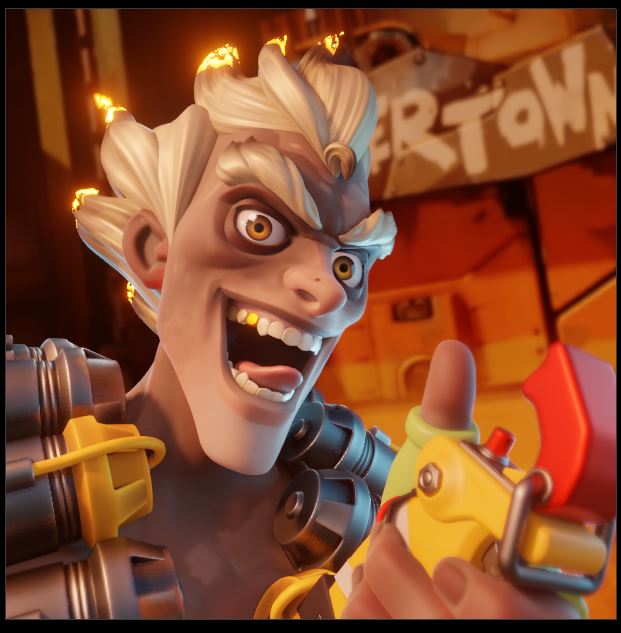
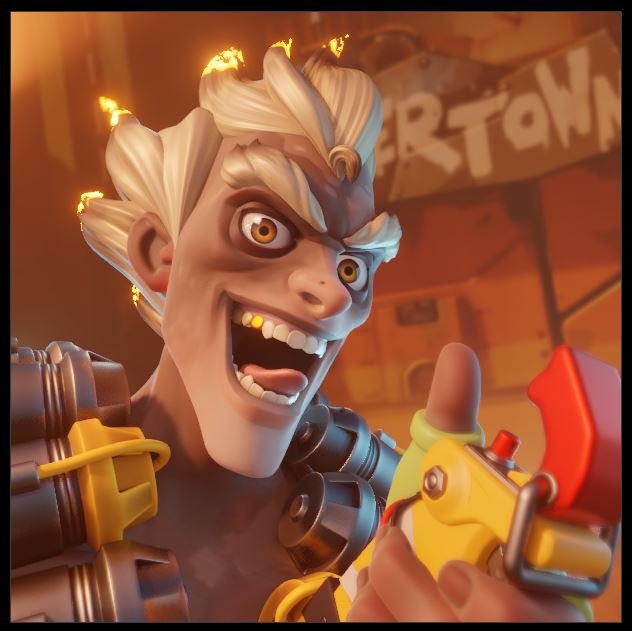
But why Junkrat among all the cast of Overwatch?
I love D.Va, but I wanted to create a guy with a certain range of facial expressions.
So, I could not think about anyone else but Junkrat.
Tools
I just used Photoshop to edit my render, but only Blender for everything else.
About the process
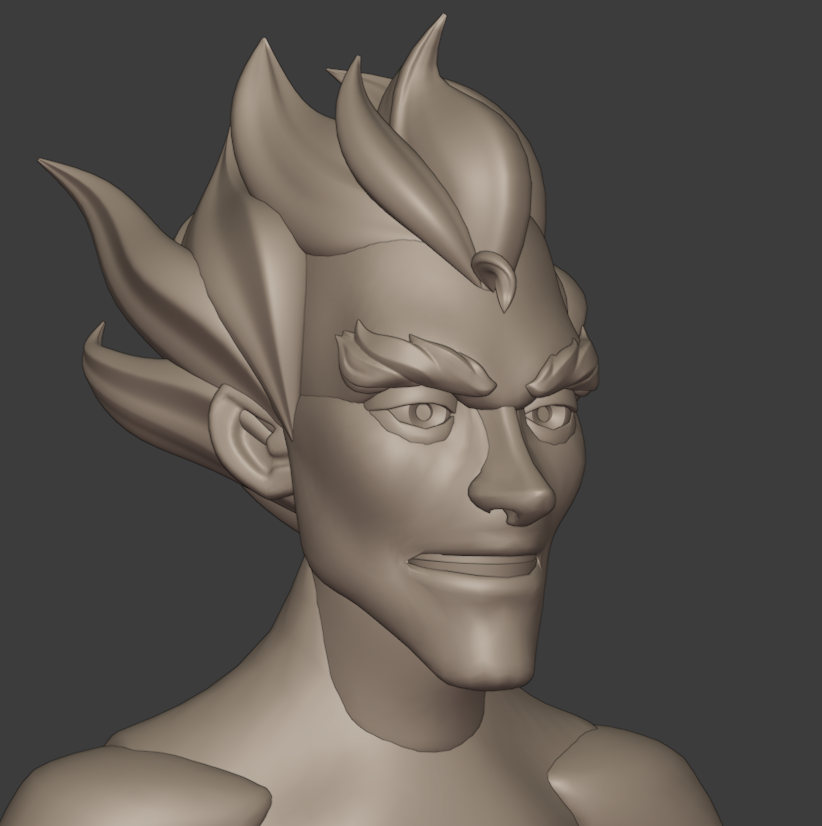
First, I gathered references to answer this question: who is Junkrat?
Fortunately, I found model sheets, so it was easier to match the original character in terms of proportions.
I used Brice Laville Saint-Martin’s base mesh to quickly create the face.
The key to everything (almost) is to start with simple shapes.
Then, I sculpted the character the best I could, used QuadRemesh to easily give him an expression, and painted the model.
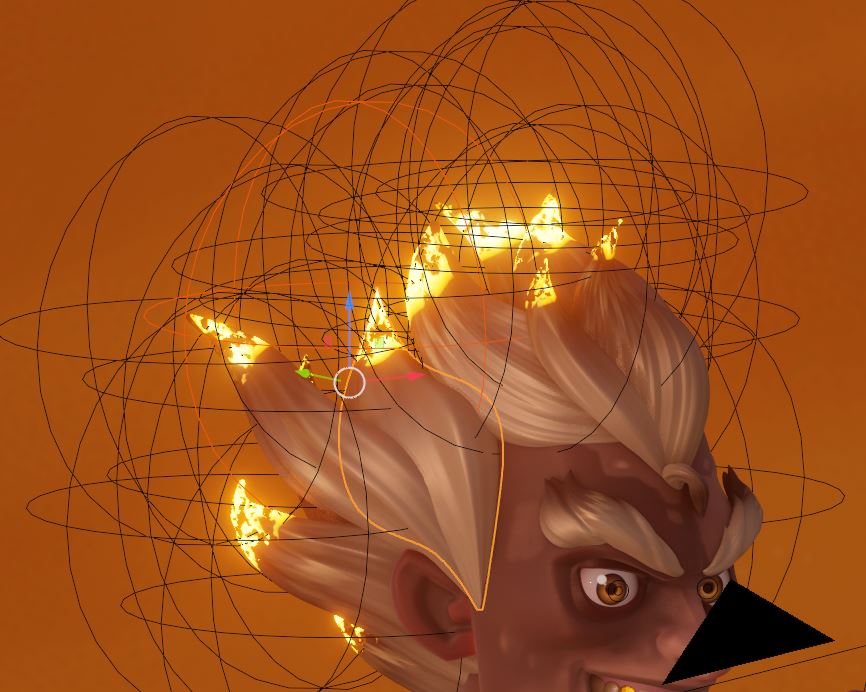
The hair
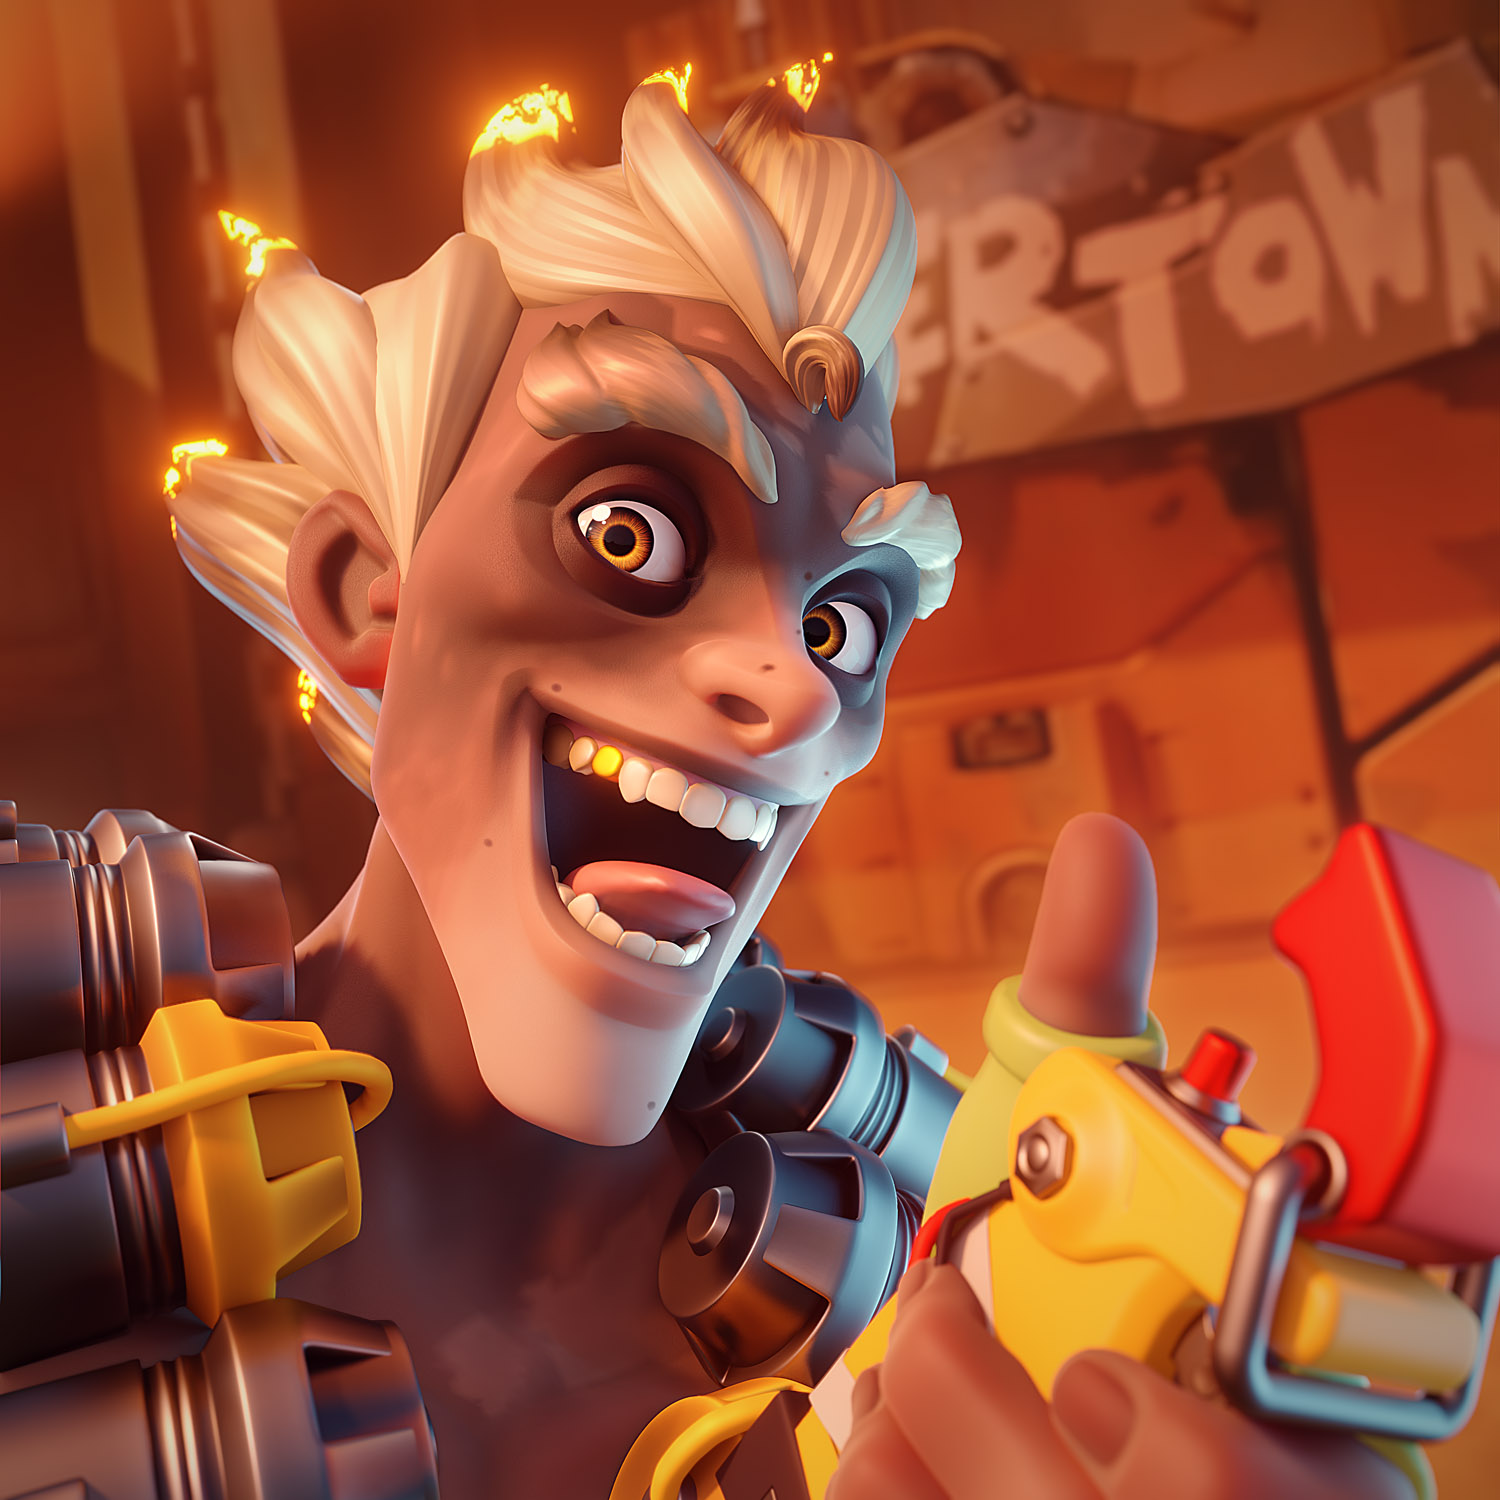
I wanted to add a subtle anisotropic look to the hair.
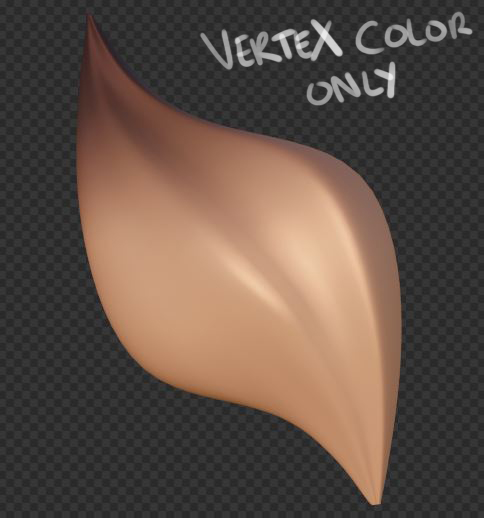
So, I had to unwrap every single hair part because anisotropy has to follow the right axis.
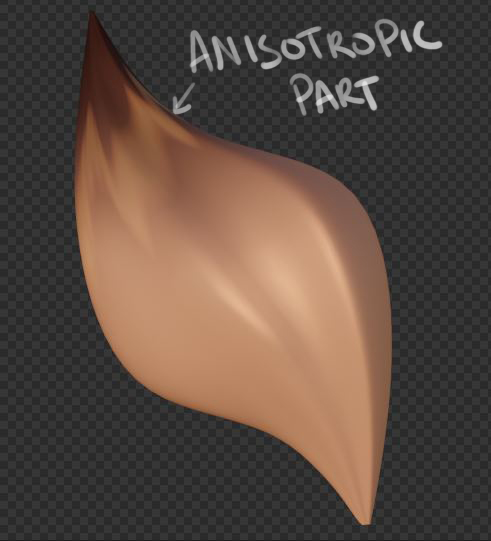
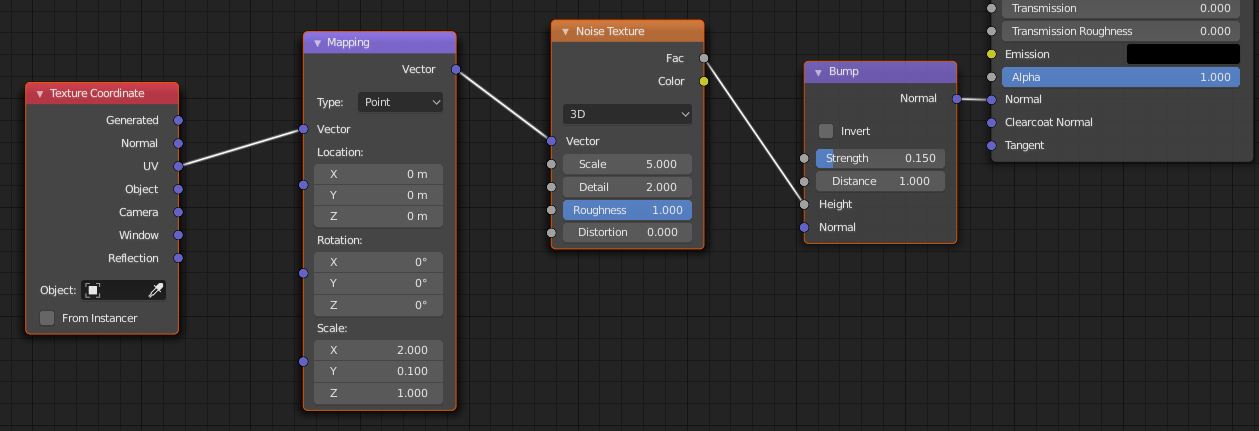
You can see all shader nodes here!
I have also plugged some noise and bump into the shader to add volume without adding mesh.
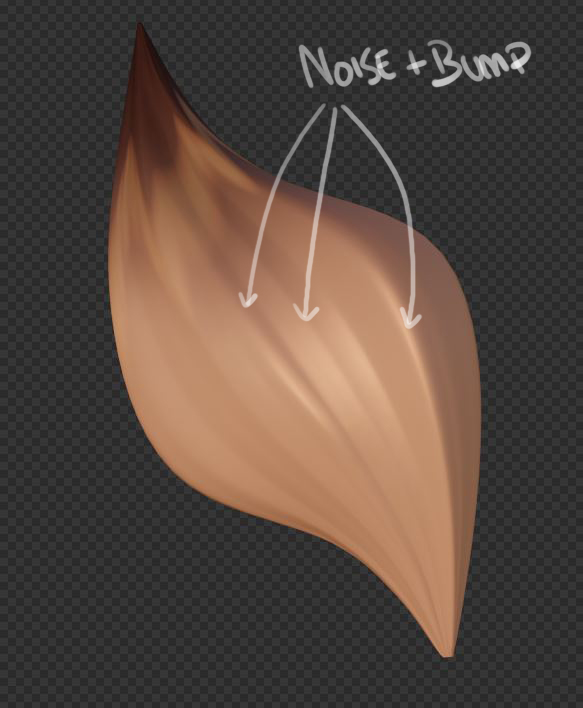
To speak a bit more about the fire on the tips of the hair, I have a controller I can move to achieve the right amount of fire.
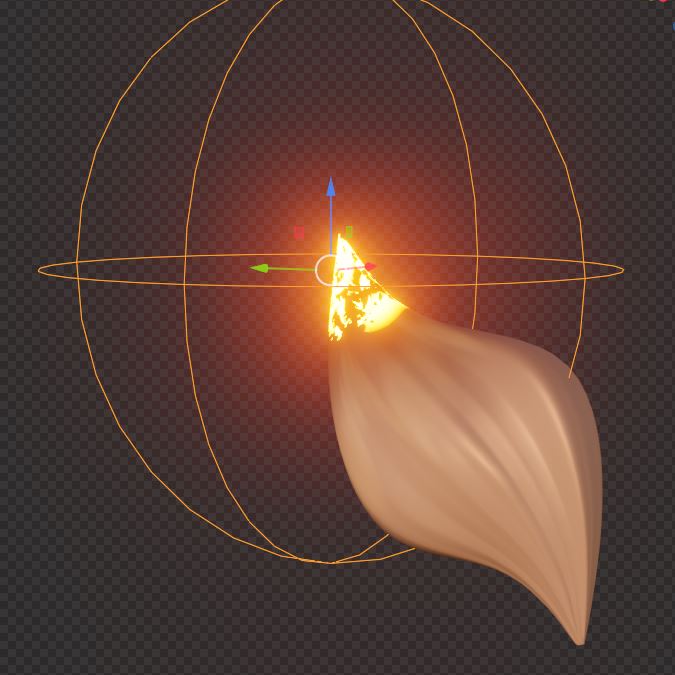
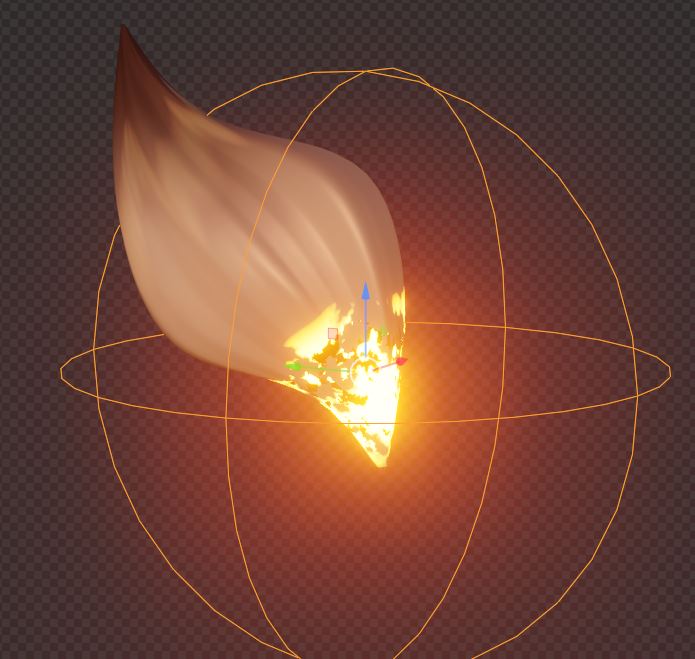
The fire effect is based on this shader:
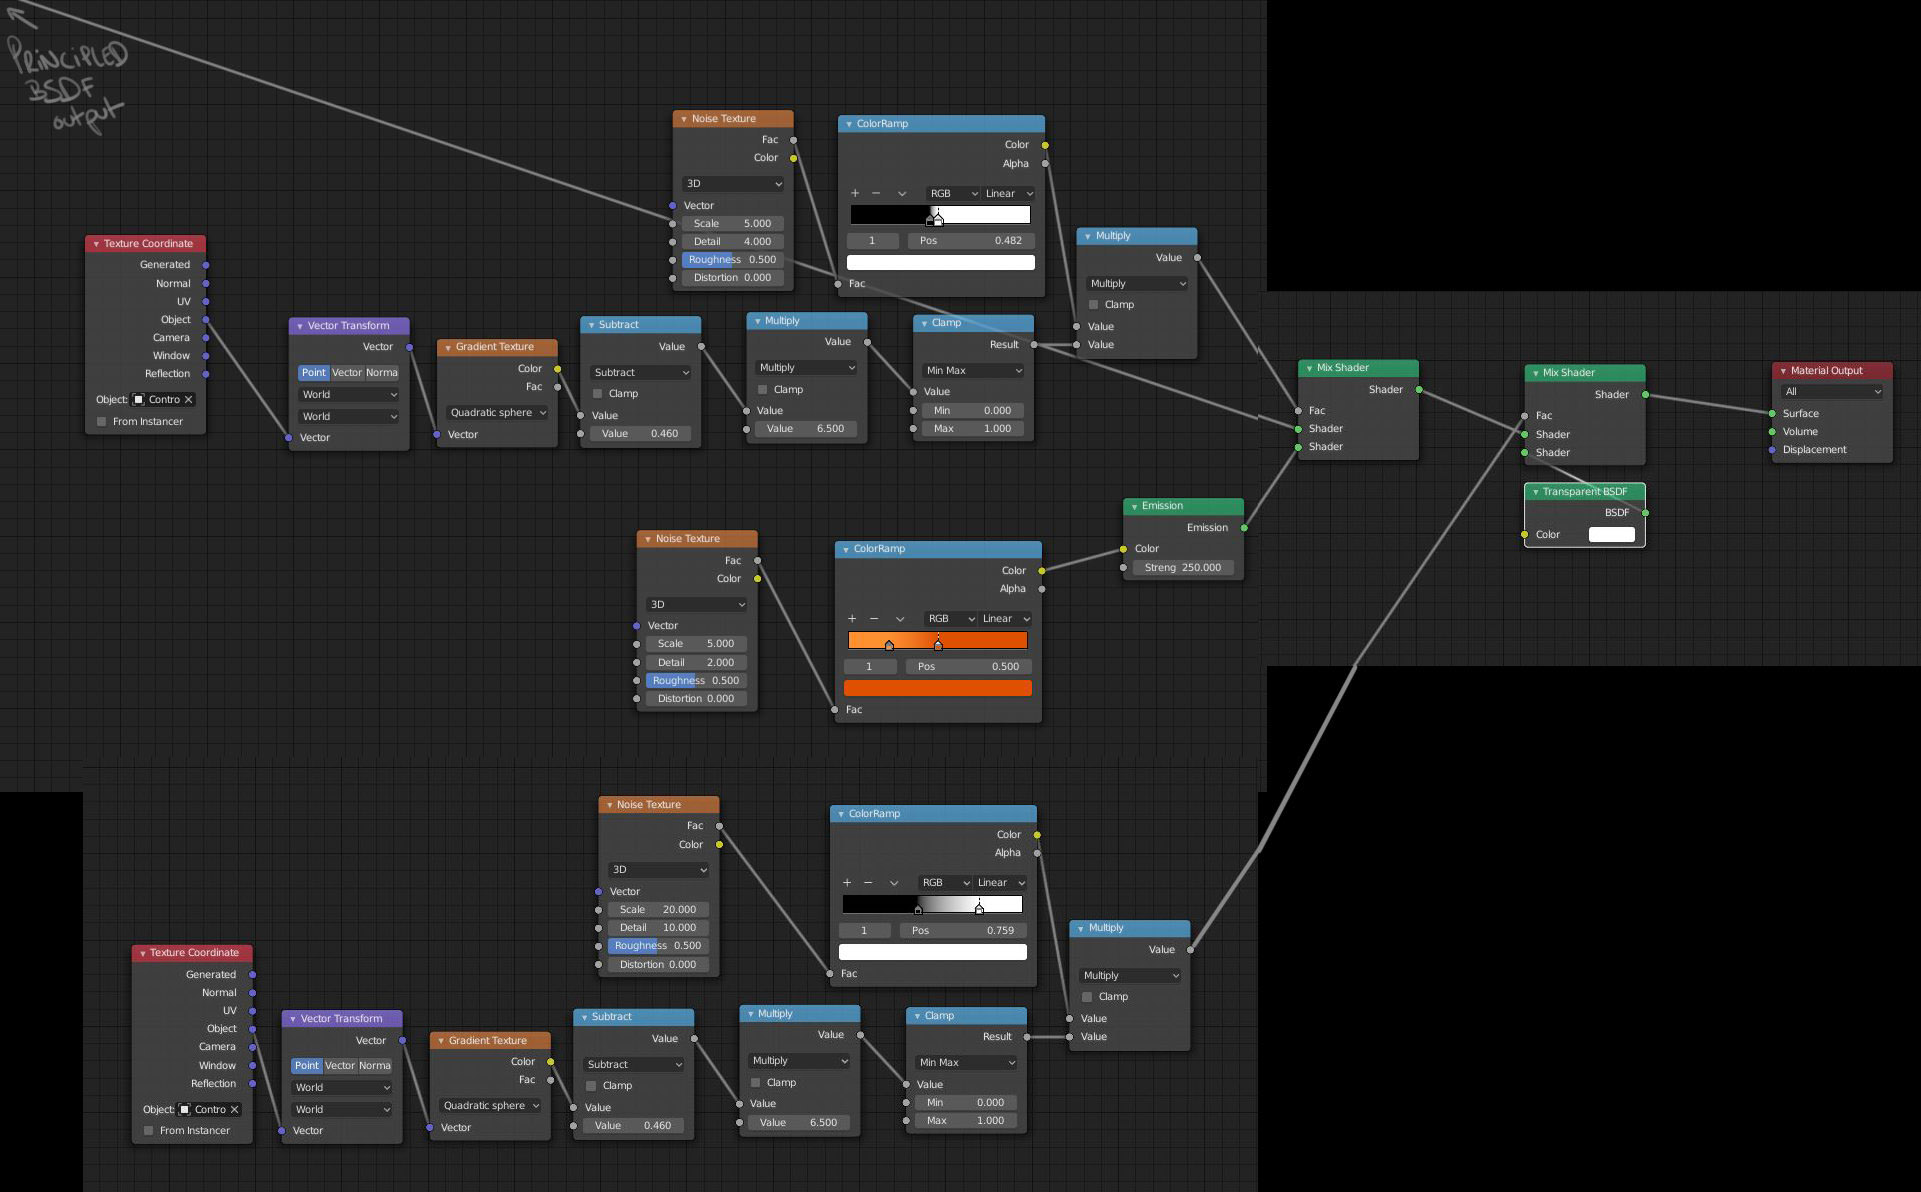
I confess, in the end, it was a mess!
If you want more detail about hair anisotropy and the burning fire effect, feel free to check this tutorial from LightningBoyStudio and this one from Pavel Olivia.
I also watched this tutorial from Giulia Marchetti that helped me to create a decent skin texture.
So thanks to them!
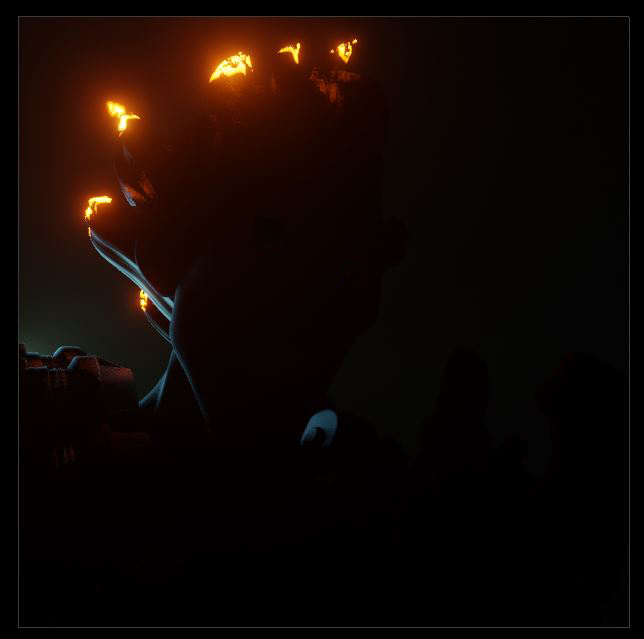
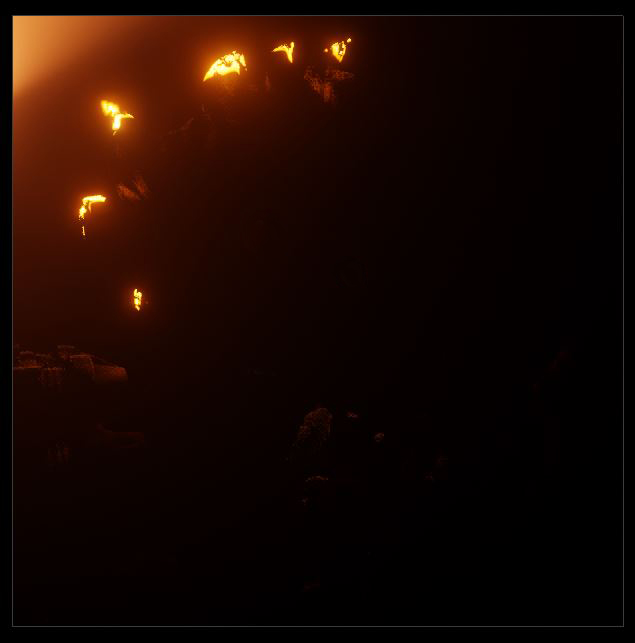
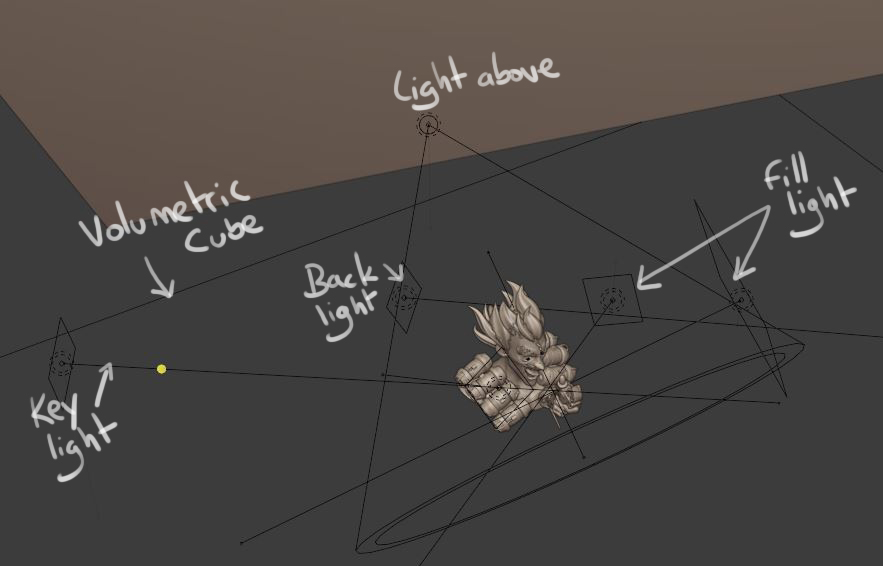
Lighting
Finally, I created my render setup: an HDRI, one bright light on one side and a much dimmer light on the other side.
There are also some tiny rim lights at the back of the model.
It was a pain to find a good angle, not because it was difficult, but more because possibilities are infinite. So I had to manage myself and choose one angle.
Here a quick break down of my light setup.


What it looks like in the viewport:
I’m already working on my next project. It will be a fanart again, but a full-body character this time. :D


About the Author
 Mickaël Junot, the dude abides


That hair is a lot of work!
thank you for sharing your workflow! It really inspires!