
About
Hello! I’m a French character artist at Oh Bibi and I love to sculpt/draw cute girls and cartoon/graphic design stuff. You can check my ArtStation.
I am curious about way too many fields—I guess I have this interior flame that always wants to be fed.
And I’m obsessed with rhythm games.
I studied graphic design with a major in 3D. I did some internships in advert/film studios and, after my degree, I worked as a freelance 3D generalist for 5 years.
But I always loved to create cute, cartoony characters, so I worked in my free time on some projects based on characters. I ended up working at Oh Bibi fulltime, no more freelance.
And honestly, it’s my dream job.
Learn more on qarnot.com.
Motivation
This Junkrat fan art is part of my Blender journey. About a year ago I wanted to switch from 3ds Max to Blender, because it’s free and the community and devs seemed very concerned about this software. So I jumped in! Thanks to Zack Reinhardt and CG Boost’s courses, I have been able to update my knowledge.
Recently, I decided to dive into sculpting and reproduce what I know about ZBrush but, once again, in Blender. So, I watched a few videos from YanSculpts and Julien Kaspar. I made a demon bust, just a simple white clay bust. Then I worked on Sailor Moon fan art, centuries after everyone.
But I wanted to add steps to the pipeline, like vertex colors and pose. And the last one, Junkrat, was about pushing a bit more everything. (Add a hand, better eyes, skin and hair shaders, more elements and better character likeness.)
But why Junkrat among all the cast of Overwatch?
I love D.Va, but I wanted to create a guy with a certain range of facial expressions.
So, I could not think about anyone else but Junkrat.
Tools
I just used Photoshop to edit my render, but only Blender for everything else.
About the process
First, I gathered references to answer this question: who is Junkrat?
Fortunately, I found model sheets, so it was easier to match the original character in terms of proportions.
I used Brice Laville Saint-Martin’s base mesh to quickly create the face.
The key to everything (almost) is to start with simple shapes.
Then, I sculpted the character the best I could, used QuadRemesh to easily give him an expression, and painted the model.
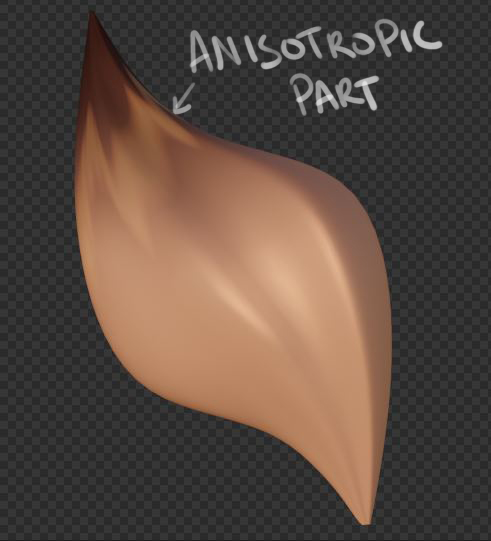
The hair
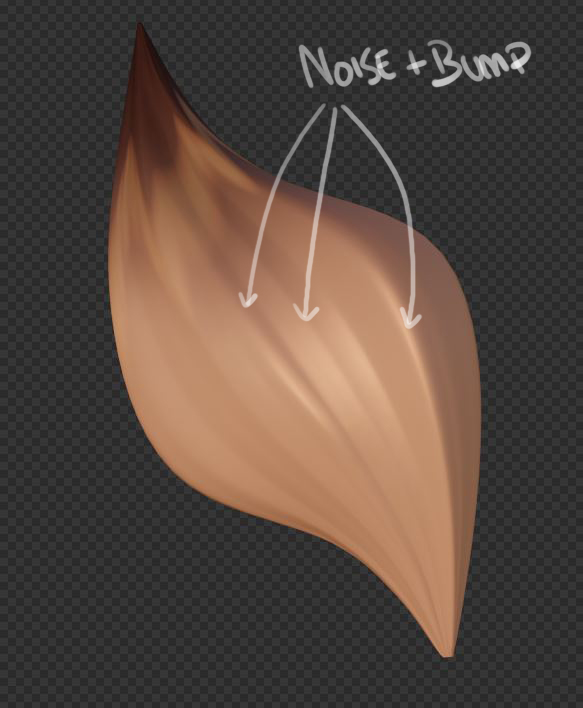
I wanted to add a subtle anisotropic look to the hair.
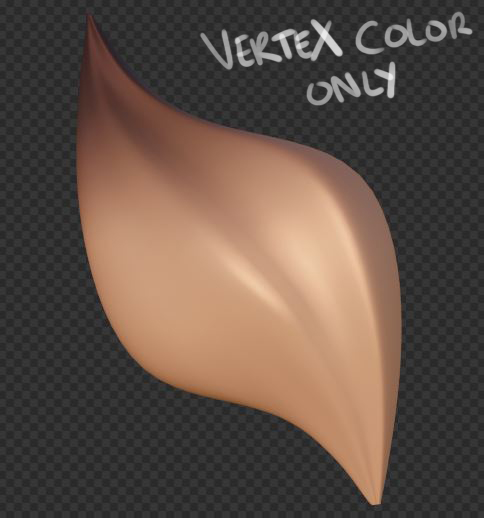
So, I had to unwrap every single hair part because anisotropy has to follow the right axis.
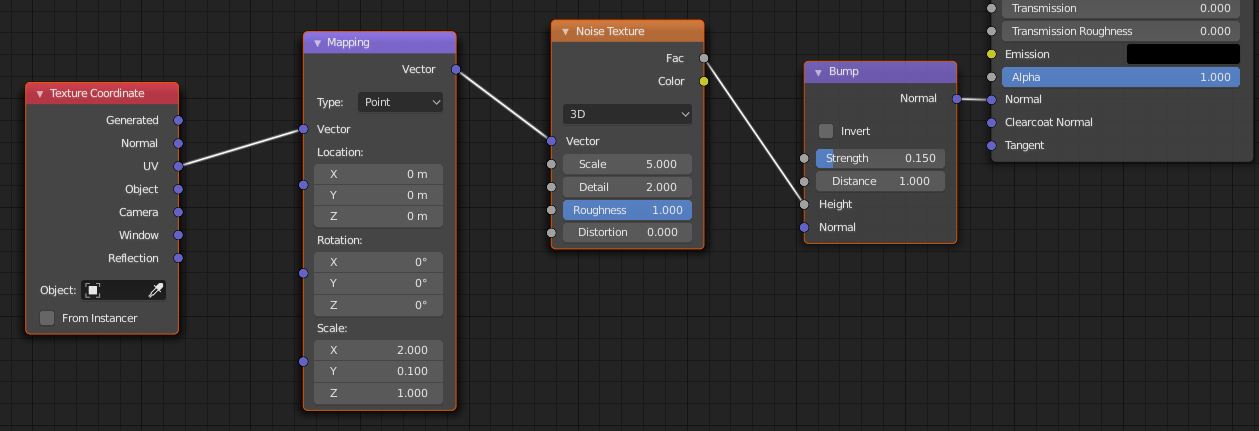
You can see all shader nodes here!
I have also plugged some noise and bump into the shader to add volume without adding mesh.
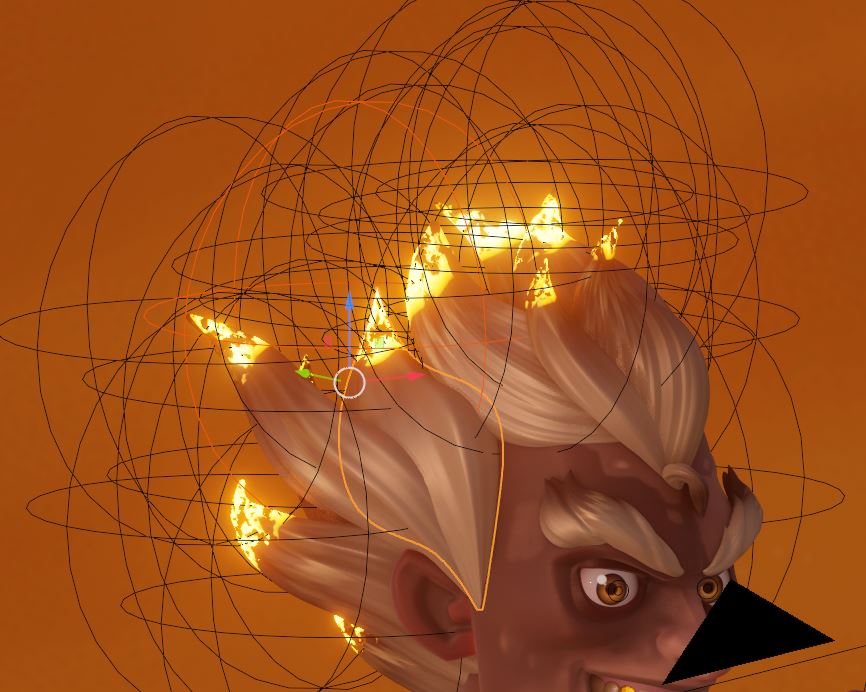
To speak a bit more about the fire on the tips of the hair, I have a controller I can move to achieve the right amount of fire.


The fire effect is based on this shader:
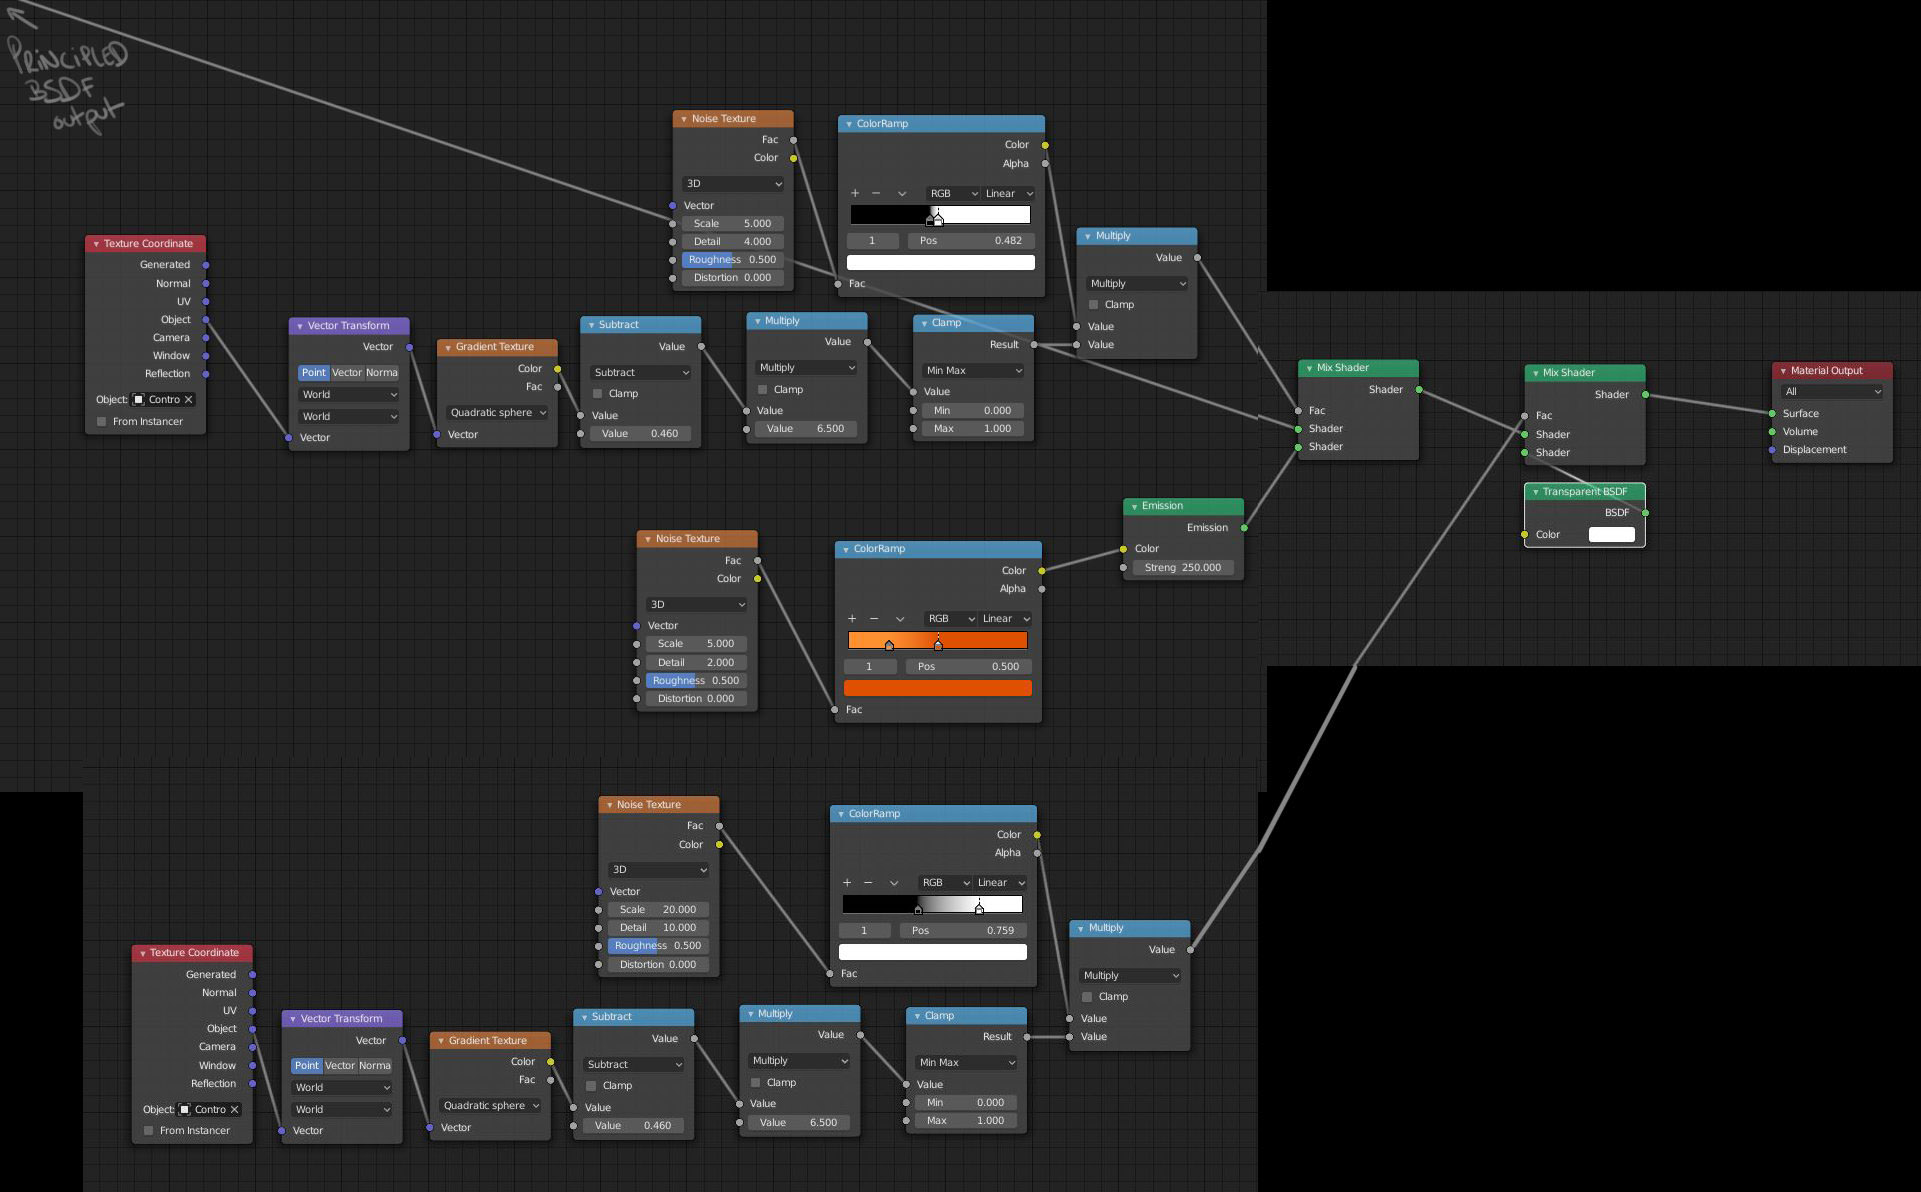
I confess, in the end, it was a mess!
If you want more detail about hair anisotropy and the burning fire effect, feel free to check this tutorial from LightningBoyStudio and this one from Pavel Olivia.
I also watched this tutorial from Giulia Marchetti that helped me to create a decent skin texture.
So thanks to them!
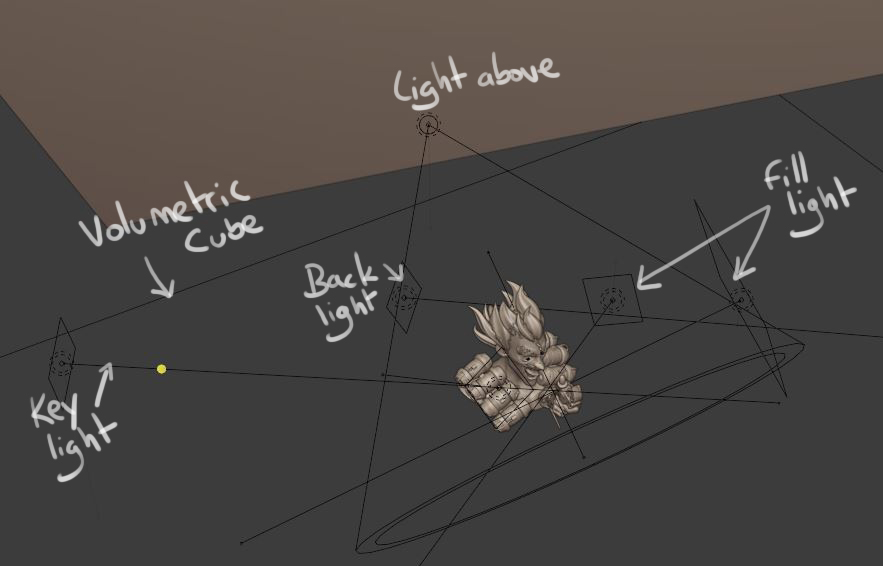
Lighting
Finally, I created my render setup: an HDRI, one bright light on one side and a much dimmer light on the other side.
There are also some tiny rim lights at the back of the model.
It was a pain to find a good angle, not because it was difficult, but more because possibilities are infinite. So I had to manage myself and choose one angle.
Here a quick break down of my light setup.


What it looks like in the viewport:
I’m already working on my next project. It will be a fanart again, but a full-body character this time. :D


About the Author
 Mickaël Junot, the dude abides
1 Comment
That hair is a lot of work!