The next version of Blender is here. Take our guided tour of its key features.
Although it's less than four months since the biggest release in Blender's history, development hasn't slowed down: Blender 2.81 has just been released – and it's far from a bugfix update. The release adds new features across the board, including experimental support for hardware-accelerated ray tracing on NVIDIA graphics cards, new sculpting and retopology tools, and a new file browser.
Below, you can find our run-down of the key changes in Blender 2.81. If you read the series of Development Watch stories we posted back in September, you may have seen some of them already, but others are completely new. At the end of the story, you can find a set of smaller changes that should make day-to-day work in Blender more pleasant, but first, here's our pick of the 10 major toolsets.
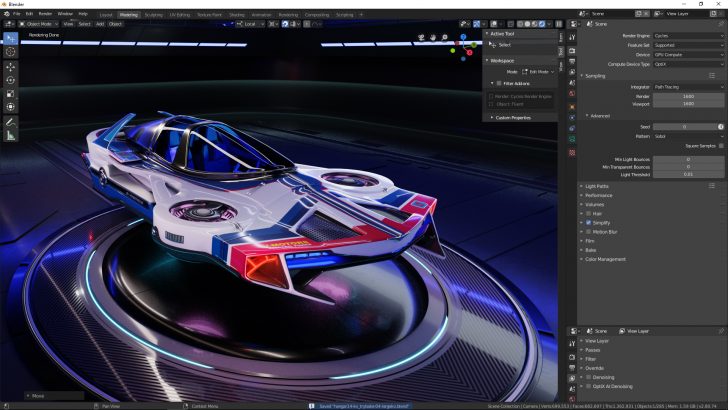
 The experimental new OptiX backend in Cycles in Blender 2.81 makes it possible to use hardware-accelerated ray tracing when rendering on NVIDIA graphics cards, providing you have the latest drivers.
1. Hardware-accelerated ray tracing
NVIDIA may only have become a backer of the Blender Development Fund last month, but the GPU manufacturer was collaborating with the Blender Foundation well before that, as the new hardware-accelerated ray tracing system in Cycles attests.
Although it's sometimes described as 'RTX ray tracing', it's actually based on OptiX, NVIDIA's broader framework for ray tracing on the GPU. While you can expect the best performance on NVIDIA's current-gen GeForce RTX and Quadro RTX graphics cards, older NVIDIA GPUs should work, too.

So how much faster will it make your renders? Test results posted by NVIDIA engineer Patrick Mours suggest that on a top-of-the-range Nvidia GeForce RTX 2080 Ti GPU, Blender’s standard benchmarks render roughly 30-100% faster using OptiX than the older CUDA API.
The OptiX backend is available on both Windows and Linux, and most of the features in Cycles that already run on the GPU will work with it, including hair, volumetrics and subsurface scattering. However, this is still officially an experimental system, and it currently lacks some features from the CUDA backend, including texture baking and combined CPU and GPU rendering.
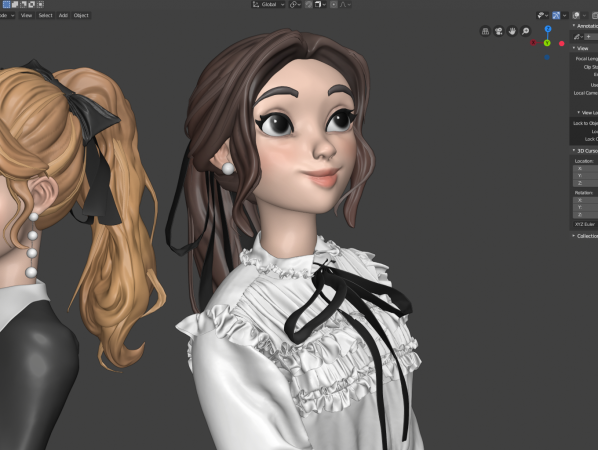
 Open Image Denoise, implemented in Blender 2.81, uses machine learning to train denoising algorithms, making it possible to remove noise from renders faster than simply raising sampling settings.
2. Open Image Denoise
Another important feature of OptiX is its AI denoiser. Now widely integrated into commercial renderers, it popularized the idea that, given a large enough set of source renders to work from, denoising algorithms could be trained using machine learning techniques.
While the OptiX denoiser is currently only available in Blender as an add-on, Intel's newer Open Image Denoise (OIDN) takes the same approach of speeding up denoising by evolving the algorithms using deep learning, but it runs on the CPU, not the GPU.
Don't expect miracles. Early tests suggest that the new OIDN-based Denoise node is good on renders with low numbers of samples, like quick previews, but that the existing non-AI-based Cycles denoiser preserves fine detail better. In addition, OIDN isn't temporally stable, so it isn't suitable for animation.
However, it does provide a way of getting to clean, noise-free output much faster than simply cranking up the sampling settings for a render, and it does so no matter which manufacturer's hardware you use.
Blender 2.81 adds new manual retopology features to the Poly Build tool. As a quicker alternative, the Voxel Remesh operator automatically generates a quad mesh based on the volume of a sculpt. Video: JayAnAm.
3. New retopology tools
Blender has some good third-party retopology add-ons, including RetopoFlow and newer contenders like DynRemesh and Quad Remesher, but Blender 2.81 aims to make it easier to convert dense 3D scans and sculpts into clean, animation-ready, all-quad geometry using only the software's native tools.
For manual work, the Poly Build tool gets new retopology features. They make it possible to draw a quad mesh over the surface of a source sculpt, although it means working one quad at a time.
For automated work, the new OpenVDB-based Voxel Remesh operator generates a new all-quad mesh based on the volume of a source mesh. (It also works in Sculpt mode as a way of getting good topology when blocking out shapes without the performance hit associated with dynamic topology.)
As an alternative, Blender 2.81 features a second automated remeshing system, QuadriFlow, also supported in DynRemesh. It's slower, but has the advantage that the edge loops in the quad mesh it generates align to features in the source mesh, generating better-quality results.
Blender 2.81 includes a lot of improvements to sculpting workflow, including three new sculpting brushes. The brush also now correctly follows the surface of a model in Sculpt mode.
4. New sculpting features
A recent addition to the stable release from the experimental Sculpt branch, Blender 2.81 features three new sculpting brushes. The most familiar will be Draw Sharp, which works in a similar way to the existing Draw brush, moving the vertices of a mesh in or out from its surface, but creates strokes with crisper edges, making it useful for sculpting details like wrinkles in skin or folds in cloth.
Once you have sculpted a character, the new Pose brush makes it possible to reposition its body and limbs as if they were mounted on a physical armature. The pivot point for the rotation is calculated automatically, based on the topology of the model, and the radius setting for the brush.
The most eye-catching of the new brushes is Elastic Deform, which makes it possible to grab a model and twist it into crazy shapes. It's the latest feature in Blender to be based on Pixar research, in the shape of work done for Finding Dory to create grab, pinch and twist brushes that preserve the volume and proportions of a character's body better than conventional sculpting tools.
However, the most popular change to sculpting in Blender 2.81 may simply be that the brush cursor now respects surface normals, meaning that it follows the surface of a model correctly, as you can see from the video above. There are also a lot of other nice workflow improvements, particularly when sculpting low-poly or subdivided meshes, and when working with masks.
 Eevee, Blender's new real-time render engine, now supports transparency effects and holdouts in the same way as the existing Cycles renderer, making it easier to use for final output as well as interactive previews.
5. Holdouts and transparency in Eevee
Eevee, the new real-time render engine introduced in Blender 2.80, continues to evolve in Blender 2.81. Some of the changes improve the accuracy of existing features, particularly shadows and bump mapping, but there is also a new feature, in the shape of the Holdout node. It works in the same way as its Cycles equivalent, making it possible for 3D objects to appear as transparent regions in a render: useful when you just need the shadows they cast on nearby surfaces to composite into live footage.
Eevee also now handles transparency in the same way as Cycles, making it possible to create more sublte render effects. As well as supporting the Transparent BSDF node, its old Additive and Multiply blend modes have been replaced by shader equivalents that are compatible with Cycles.
The Cycles renderer gets a set of new nodes in Blender 2.81, ranging from noise textures to new math nodes for use in technical art and motion graphics. Video: Blender Insight.
6. More nodes in Cycles
Cycles itself also gets a set of new nodes, ranging from new noise types to the Volume Info node, which provides access to key attributes when rendering smoke. For technically minded artists, the Math and Vector Math nodes have been redesigned, and now show all of the inputs required for an operation, and there are new nodes for clamping or remapping numerical values. The video above shows how the new features work, and how they can be combined to create motion graphics-style effects.

The Workbench preview renderer now supports multi-layer matcaps, making it possible to display more complex materials while modeling: just one of the improvements to asset development in Blender 2.81.
7. More look dev features
Artists using Blender for look development get a couple of important workflow features in Blender 2.81. First, when working in the Rendered viewport shading mode in Cycles or Eevee, it is now possible to use HDRI studio lights, which should provide a more accurate preview of how the model you're working on will look in final renders than using the direct lights in the scene or the world lighting. You can also display individual render passes in the viewport, including ambient occlusion and surface normals.
Second, the matcaps used by the new Workbench renderer can now be OpenEXR files with separate diffuse and specular layers, making it possible to display more complex materials while modeling.
Version 2.81 improves workflow in Blender's Outliner. Object selection now synchs between the Outliner and 3D viewport, and you can also drag and drop in the interface to parent multiple objects.
8. Better Outliner and file browser
The work being done to make Blender's user interface more familiar to artists coming to it from other 3D software has also continued in version 2.81, including a lot of usability improvements to the Outliner.
The biggest is synchronised selection: selecting an object or camera in the Outliner also selects it in the 3D viewport, and vice versa. You can also now navigate the Outliner properly with the arrow keys, box-select objects by clicking and dragging, and expand or collapse multiple groups simultaneously.
In addition, the file browser has been redesigned: it now opens in a floating window so that it doesn't hog the screen, and has a more standard layout, with interactive column headers, popovers for view and filter options. The mouse interactions are also now more standardized: left-click to select a file, double-click to open it, and right-click for a contextual menu.
Modelers get two new snapping modes in Blender 2.81: the self-descriptive Edge Center and Edge Perpendicular, which snaps to the nearest point on an edge, as shown in the image above.
9. Better transforms and snapping
Being able to manipulate geometry quickly makes a big difference to your working life, and Blender 2.81 has you covered. When snapping to objects, there are two new options: Edge Perpendicular, which snaps to the nearest point on the edge selected, and Edge Center, which snaps to the middle.
Other workflow improvements include the option to transform parent objects without affecting child objects in the scene, and to mirror objects in the Y and Z axes as well as the X axis.
10. Library Overrides replace proxies
The last feature we've picked out isn't particularly sexy, but it will be huge for studios working on large projects: Blender 2.81 replaces the old system of Proxies with a new system of Library Overrides. The change enables users to create custom overrides when reusing assets across scenes, which should make the process of linking and referencing files more production-friendly.
The new system is still considered experimental, and there is quite a long feature wishlist, so proxies won't be going away for a few releases, but if you use them a lot in production, it would be wise to start planning now: although there will be a manual operator to convert proxies to library overrides, it may not work perfectly on complex characters, and it won't automate the conversion process.
But wait: there's more...
Not all of the new features in Blender 2.81 are part of big toolsets. Here are five individual features and under-the-hood changes that should improve the way you work.
- New Grease Pencil features
The Grease Pencil 2D animation toolset has been updated again in Blender 2.81, adding new pen, pencil, marker and airbrush brushes, and a new Self Overlap option for paint strokes. - Animation and rigging improvements
Animators and character riggers get more control over rotation and scaling in bones, constraints and drivers. It is also now possible to set the default handle smoothing mode for F-Curves - Batch renaming
To help keep large projects organized, it is now possible to batch rename items, adding prefixes or suffixes or changing case. Support for expressions makes it easier to find and replace characters. - Better Alembic export
Blender 2.81 now exports mesh normals properly to the Alembic format, widely used to transfer geometry between software in VFX pipelines. It also now imports face-varying normals. - Updates to add-ons
The set of add-ons that ships with Blender has also been updated, including new options when importing glTF and FBX files, and a big speed boost to the Rigify auto-rigger.
System requirements
Blender 2.81 is available for Windows 7+, macOS 10.12+ and Linux. You can find full details of the hardware requirements on the Blender website.


12 Comments
Love it however blender 2.81 takes a long time to open now and stalls on the file browser and sometimes the prefs window....
That sounds like a bug, maybe look for a bug report in the bug tracker or consider reporting it yourself.
Looks like Christmas came early this year, so exciting!
Just one thing that I've noticed - I've just quickly tested moving parent object without affecting child objects and it works great, BUT it still does not work with Shift + S -> Selection to Cursor. It moves all the hierarchy the old way, looks like a papercut.
It's disappointingly bug and glitch ridden on crucial things, sadly enough :( My prefs that I slaved over to create from scratch when 2.8 came out, caused so many glitches. I've made 3 bug reports in the first half hour I installed and started using it >:-(
My view is that they sure have screwed up badly with this one and the sad thing is that we'll need to wait till 2.82 till everything's fixed.
You don't necessarily have to wait, if you try experimental builds that are updated quite frequently you may find that those are more stable.
It is indeed less than 4 months ago since the release of 2.80 and its quite obvious. This feels absurdly rushed and is unusable. Is it even tested? For now, I'm going back to 2.80, until 2.81 gets a severly bugfix.
Supercool!
For those who has GeForce GTX cards on Windows 7:
Latest driver is 441.20 while Optix needs 441.28 which is available only for Win10.
RL, 441.28 is not working with older Gcards... I have a geforce gtx 960, so Optix needs also some newer Hardware...it is not enough information about optix hardware requirements, but this is one of the best features in the new blender 2.81. you get up to 100% more power with the same hardware...even 10-20% is a lot...i hope, Optix will be available also for older Graphic-cards...
441.28 (and Optix) is available only for:
NVIDIA TITAN Series:
NVIDIA TITAN RTX, NVIDIA TITAN V, NVIDIA TITAN Xp, NVIDIA TITAN X (Pascal)
GeForce RTX 20 Series:
GeForce RTX 2080 Ti, GeForce RTX 2080 SUPER, GeForce RTX 2080, GeForce RTX 2070 SUPER, GeForce RTX 2070, GeForce RTX 2060 SUPER, GeForce RTX 2060
GeForce 16 Series:
GeForce GTX 1660 SUPER, GeForce GTX 1660 Ti, GeForce GTX 1660, GeForce GTX 1650
GeForce 10 Series:
GeForce GTX 1080 Ti, GeForce GTX 1080, GeForce GTX 1070 Ti, GeForce GTX 1070, GeForce GTX 1060, GeForce GTX 1050 Ti, GeForce GTX 1050
No bugs or glitches here but it feels kind of slow/heavy. Cycles renders faster on 2.79 for some of my test scenes.
The new features though (especially the new outliner) are awesome. Thanks BF!
Yeah the obvious outliner usability and selecting several objects at once in viewport are essential to make Blender comfortable for me.
Any insights on changes to weight painting? I had just gotten 2.8 figured out - how to set it up so that I could pose a bone in pose mode, then click on the mesh to go to weight paint mode, and select a bone in weight paint mode as I adjust weights. And it's changed again in 2.81. So that I have to put the armature in object mode before selecting the mesh, which sure slows the process down. Is there another setting involved?
I do much appreciate the new layouts in 2.8n - the convenient top tool bar and the overlay button in particular.
All the features are wonderful but I think the worst thing about blender 2.8 and 2.8.1 is about Retopology workflow because all the tools and functions to work with are useless with the viewport that does not support it properly.
If you do retopology in the new blender you will see that viewport functionality doesn't fit and you will get lost in your mesh as soon as get more faces. I can't do any retopology in blender with out getting blind. I think the X-Ray functionality for individual object is missing. they put it globally which is not useful. InFront option with Backfaceculling and random object color and Hidden wires does not work. I hope they do something about it in the next patch
you should write an article about it I think
thank you so much