Behind the Scenes: It came from below
My name is David Horbach, 3D generalist and VFX artist from Germany and creator of It came from below.
Although I have been in the commercial and movie business for over ten years now, most of the stuff I am working on is VFX related (3D set extensions and 2D compositing work), sometimes motion design or particle related projects. Character design is rather rare. I guess that’s the reason why my latest personal projects are quite character related.
My Blender roadtrip didn’t start long ago. I played around with version 2.79 but really jumped on the train after 2.8 was released. It’s so much easier to use for people like me, whose musclebrains are connected to another 3D app (Cinema 4D in my case).
Anyway, it felt good and shortly after the release of Blender 2.8 I stumbled upon the Blender52 campaign on Twitter. It’s an awesome way to stay motivated for the year with a fresh prompt for every week. I highly recommend it!
The Idea Behind It
Blender52’s topic of week 3 was “It came from below”. It seemed like a great opportunity for character design!
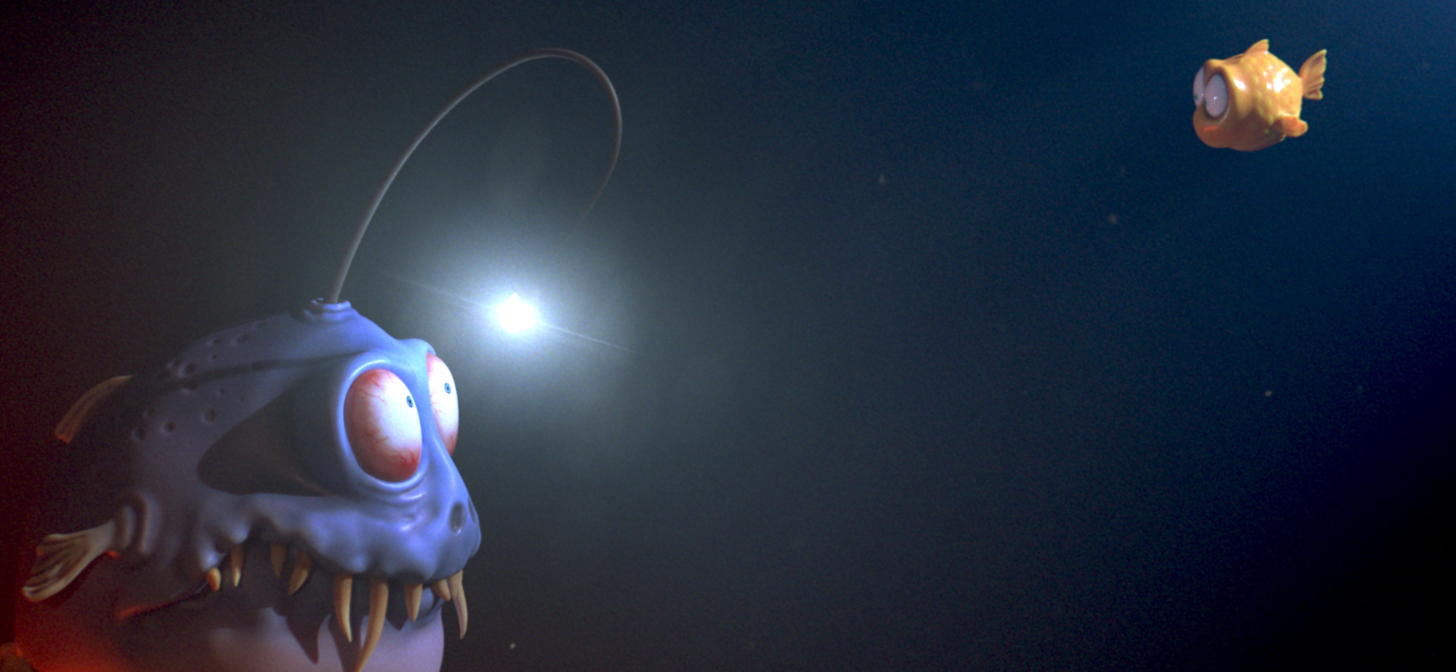
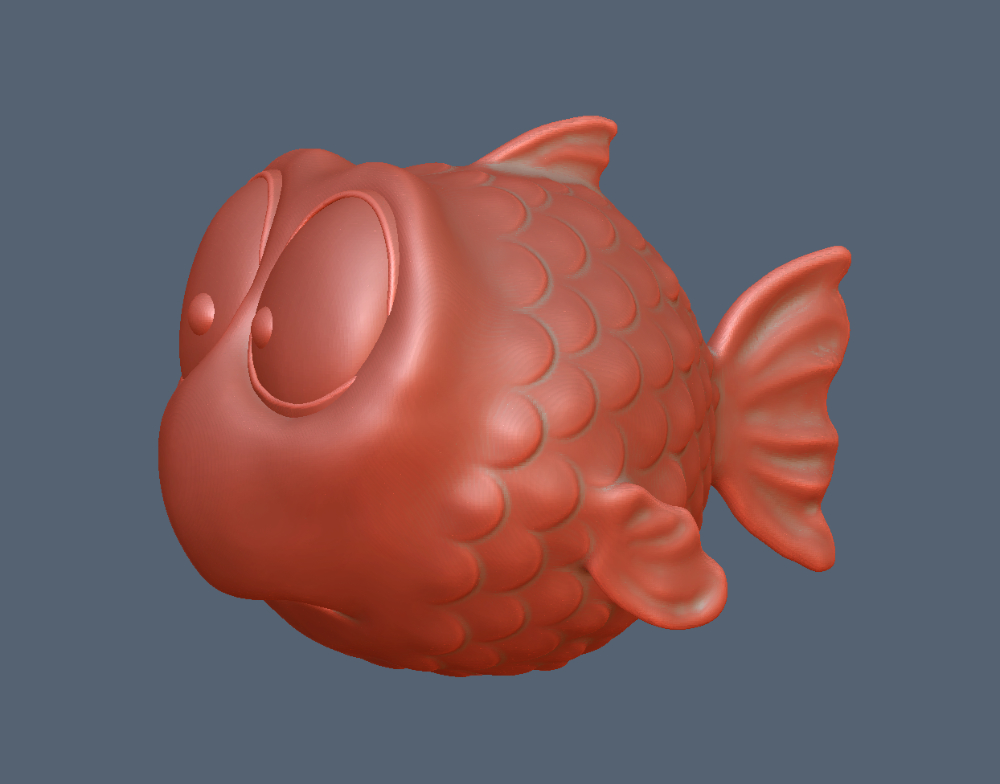
Of course everybody’s first ideas were things like big monsters lurking deep down in the sea or supersized moles digging themselves up to the surface. To be honest, I like fishies so I took the first one.
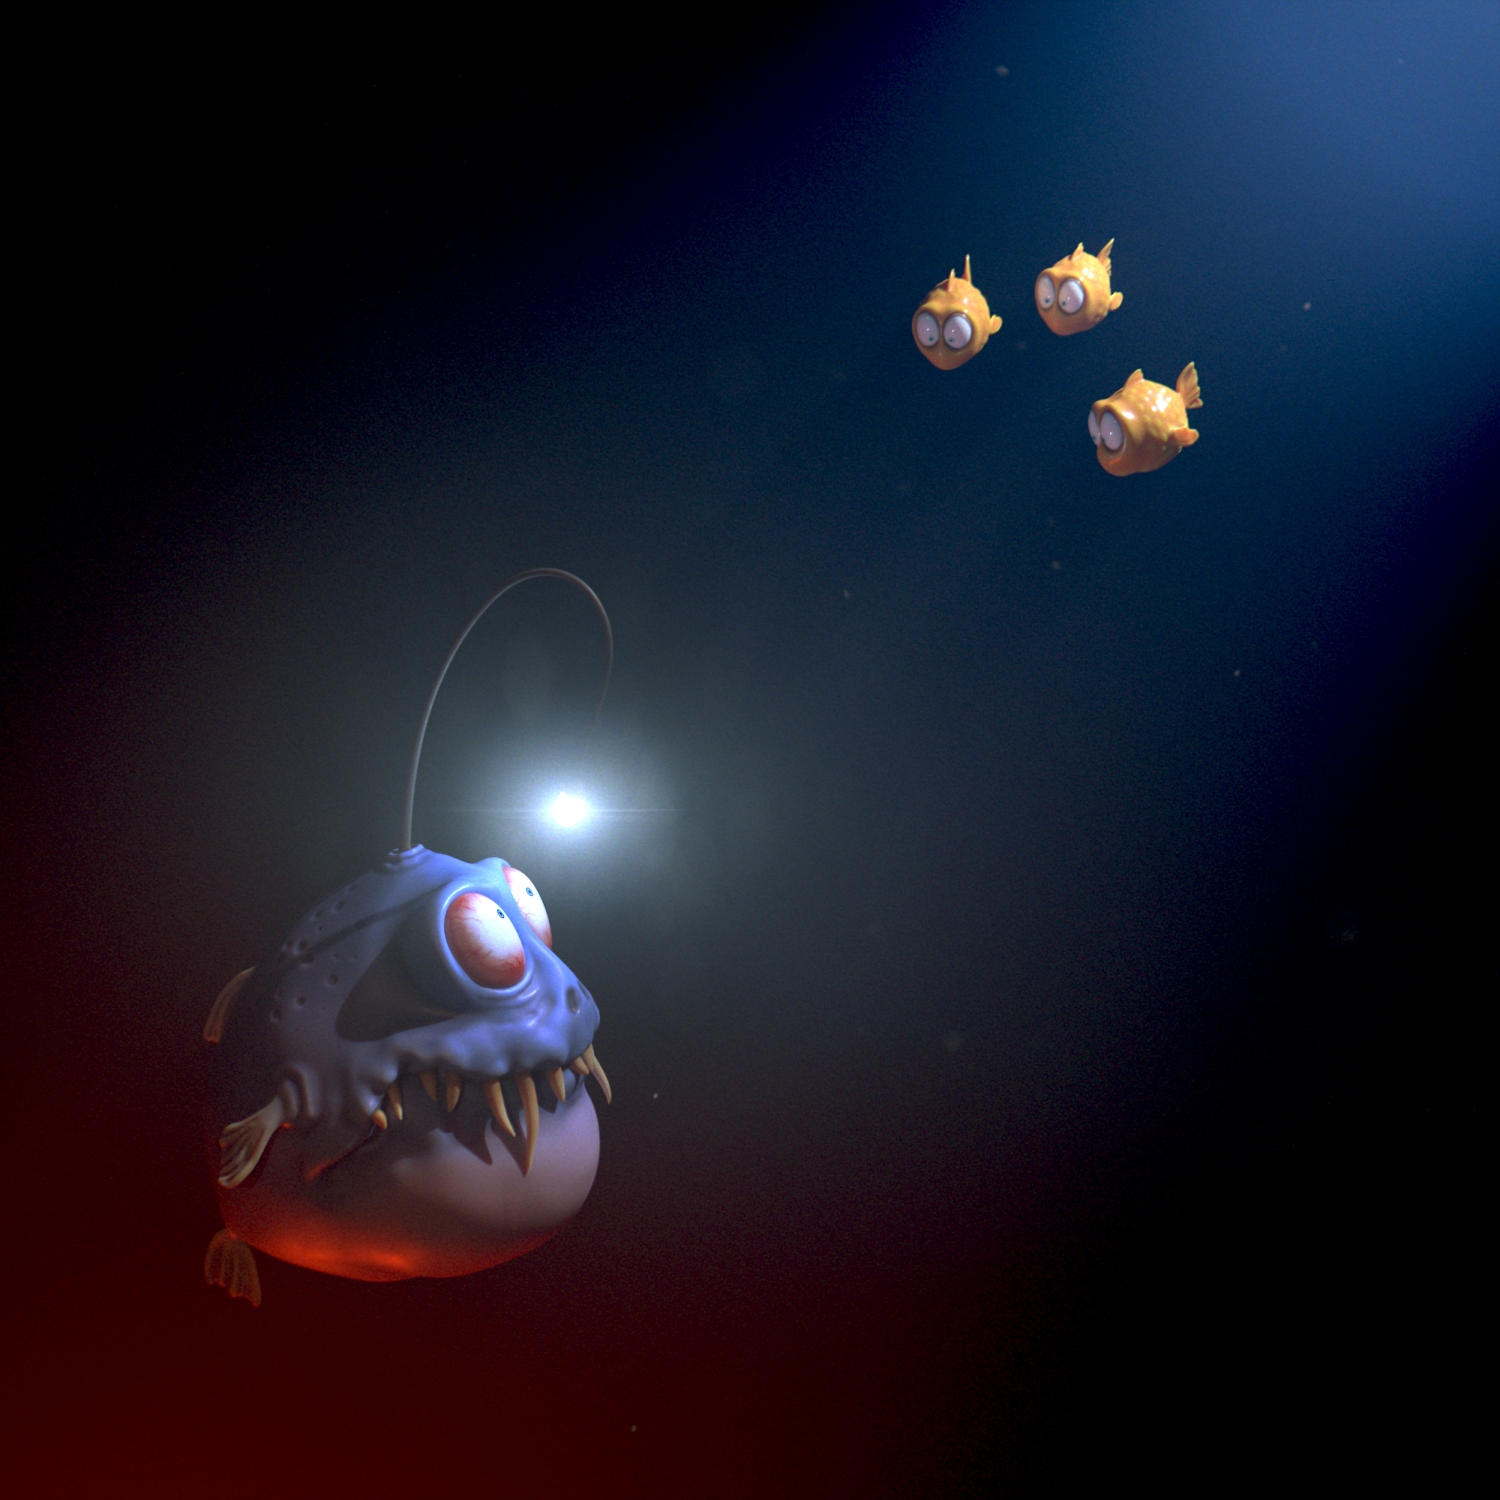
The scene I was looking for was something with contrast, two worlds getting in touch with each other. On the one side there is this deep sea predator with his shiny bait emerging from deep below. On the other side we have this fearless cute little fishies curiously looking at that monstrous thing coming from nowhere, well knowing that this thing has been hypnotized by its own bait for a long time now…
Workflow
To visualize the idea of this story I started to sketch out the scene. Nothing fancy, but it really helped to prove that the scene would work and gave me a rough reference for modeling.

The next step was blocking out the shapes in Blender. I didn’t care about edgeflow or proper geometry as I was only heading for a good basemesh for sculpting. Straight box modeling (the box has to be used!) without any special techniques.
After this: sculpting time in 3D-Coat!
Although I am aware of the great sculpting features in Blender (sadly I’ve never touched them), I really love painting and retopologizing in 3D-Coat.
For sculpting I was a little bit conservative regarding the brushes I used. Most of the time I just use the move-tool for squashing and stretching or grab the extrude-tool for finer details. The voxel approach of 3D-Coat is doing a great job here with delivering endless masses of clay!
For the scales I tried different things to speed up the process but (of course) ended up stamping every scale by hand with a brush I created. Well, I have to say that hunting the shortcuts took me longer than actually doing the thing by hand…. I should have known.
The big guy took me a little bit longer, even without scales. Again most of the work was done with the move- and extrude-tool, in addition to the smooth-tool for smoothing out minor imperfections.
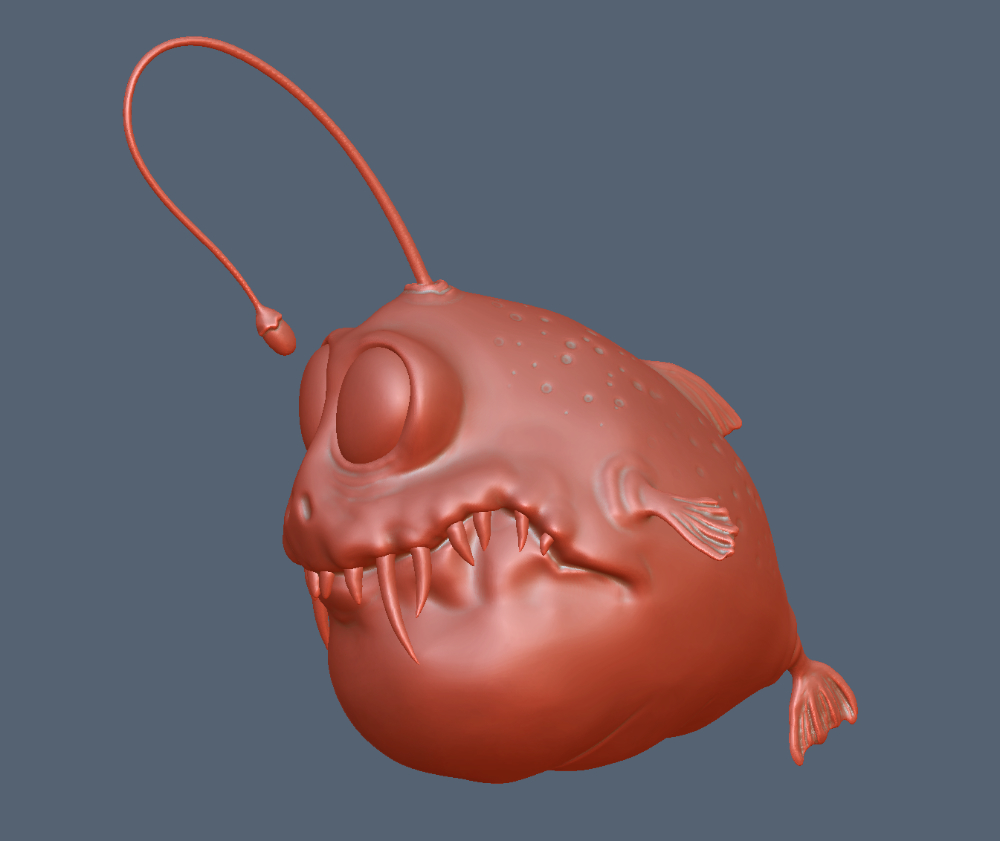
For the teeth I’ve chosen the spike-tool. It lets you click on a surface and draw spikes from that point. It’s a very fast and easy way to create shapes like this!
Before the fun painting could start, the characters had to be retopologized. The retopo-room of 3D-Coat offers you a lot of automatic choices for this, the so called Autopo command. As I had no plans for animating the characters, I had no ambitions to spend a very long time on this step.
The time I saved here was spent later during the UV unwrapping. Again no surprises here, but I spent some time placing some vital cuts in the UV map.
The Paint Job
I really like this stage as it pushes your model to a whole new level. Color can change the whole appearance of your character!

I was heading for a darker color-scheme for the big fish, as he comes from below and should be a threat to everyone smaller then himself.
On the other side we have the small and cuddly fishes. Giving them a bright yellow skin color should reflect their sunny state of mind.
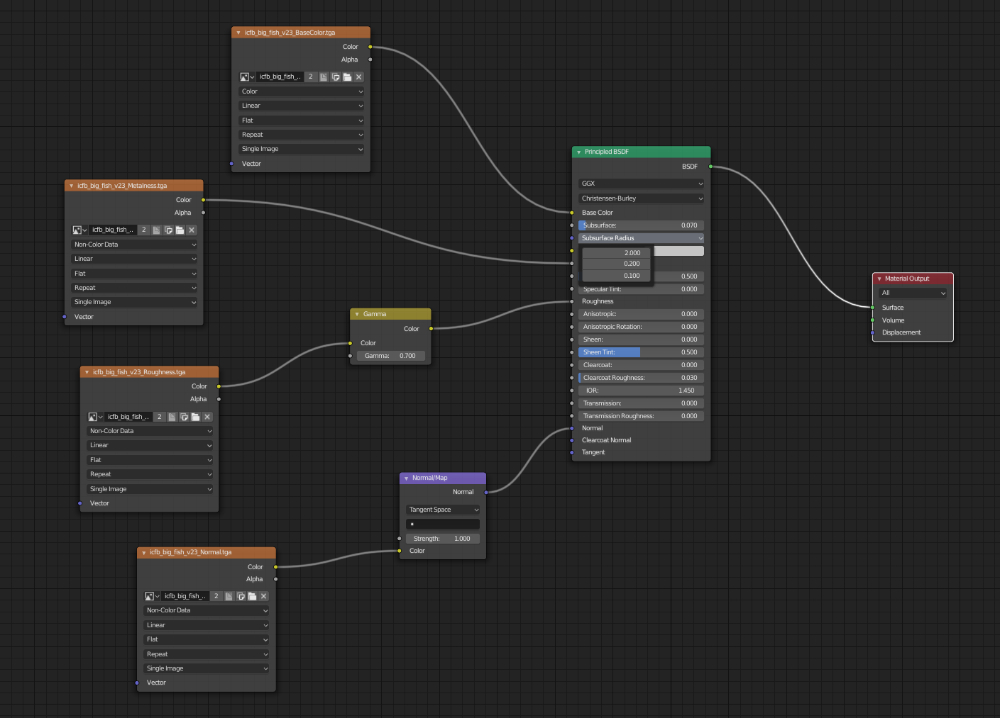
As 3D-Coat supports a full PBR workflow, I chose the metalness/roughness way. The Principled PBR shader of Blender works flawlessly with these maps and is just fun to use!
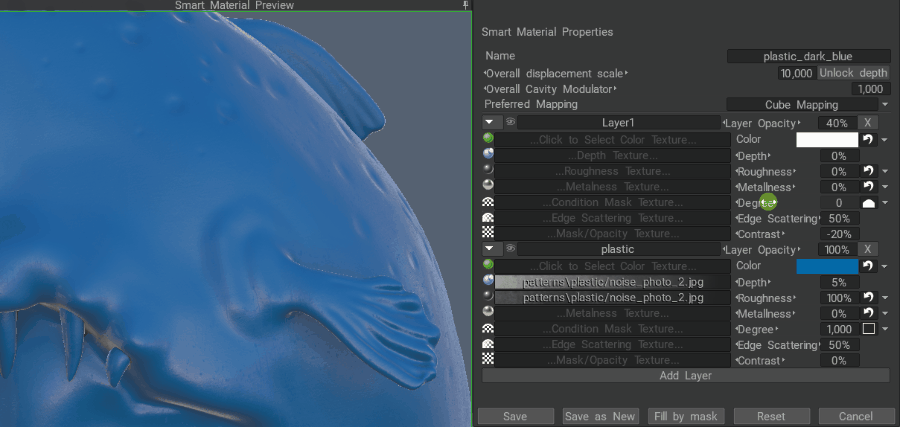
As a base layer for both skin types I chose a tweaked plastic smart material. Smart materials give you control over different layer blends based on the curvature map of your model. With this it’s quite easy to paint different color shades on different parts of your model.
After exporting the retopo-models and creating texture maps I was finally back in Blender for…
The Final Step
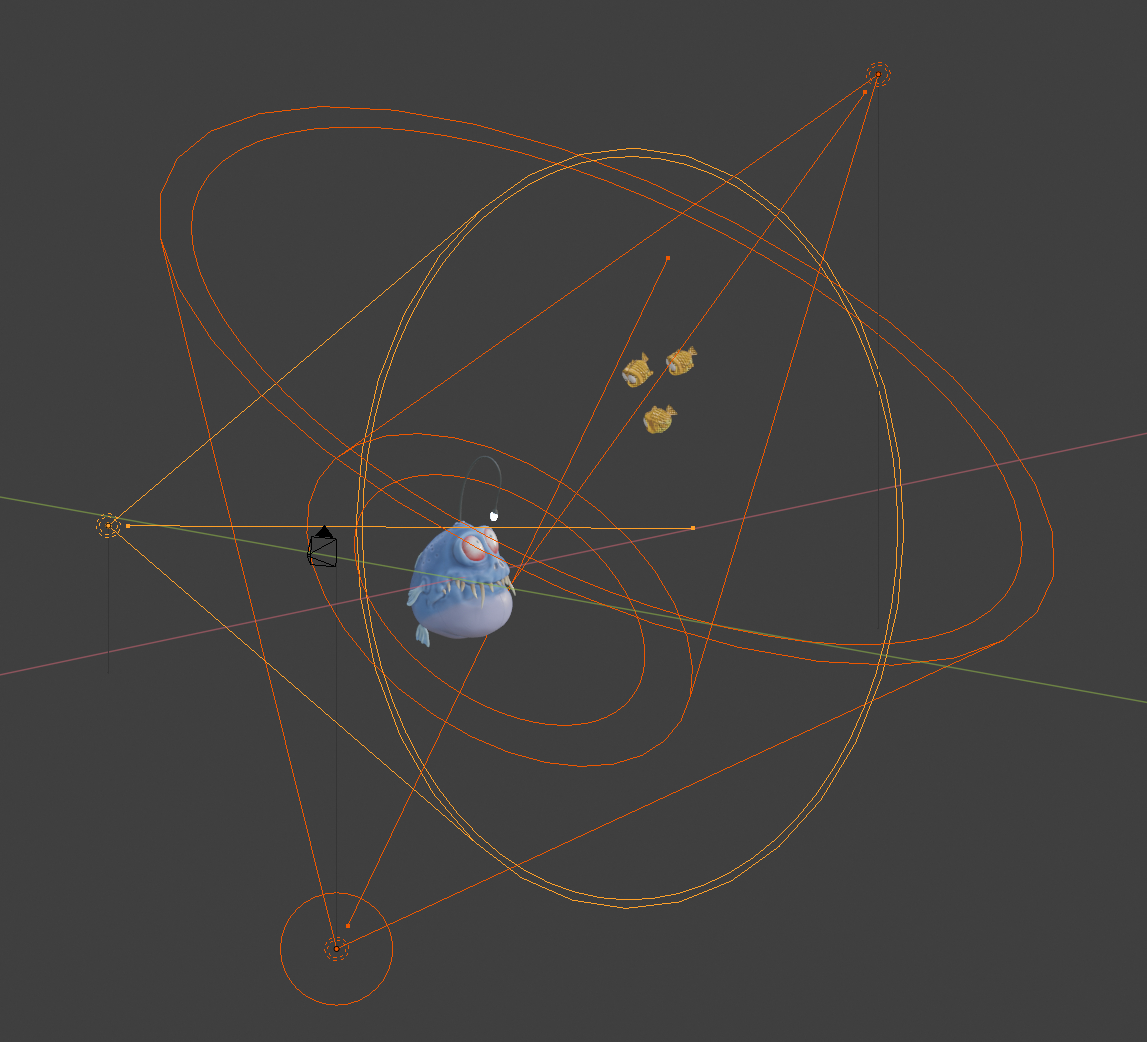
Now it was time to put fishies together!
As I knew that the final format would be primarily for Twitter and other social media, I chose a square format. At the bottom left the big fish is heading to the top right, the corner filled with small fishes.
To emphasize the contrary actors I placed a menacing reddish light under the big guy and the bright sunlight on top of the small ones.
Adding volumetric lighting helped with two things: it gives the impression that this is an underwater scene and helps to draw a visual line between the two factions.
To sum it up: only three lights were used, two keylights (red and yellowish) and a fill light from the front. The glowing bait is an emission shader on the geometry.
For the shading I used the Principled PBR shader. With the right textures it’s so easy to use and rewarding at the same time! Crunching the gamma on the roughness channel gave me a more appealing, less shiny look.
In addition I always love to add some light subsurface scattering for characters, so I spiced them up a little bit with this ingredient.
Final Touch-Ups
After rendering it was time for some post production in Affinity Photo.
First I denoised the rendering as I had used not the slowest render settings. After this, the clean rendering needed some imperfections and real life elements. For this I blended a picture with particles on top of the lighter parts of the image, giving the impression of little floating things in the water.
A lens flare on top of the bait helped to create some smudginess on the lens. Speaking of lenses, I added some chromatic aberration on the outer parts of the image. To achieve this effect I split up the RGB channels into separate layers and scaled them up a bit differently from each other.
Finally adding some grain for the last percent of realism and voilà… picture finished.
About the Author
 David Horbach, 3D Generalist & VFX Artist with lots of passion for little creatures


This was a great article, thanks for sharing your process
You’re welcome! Thanks!
Very nice, did anyone notice that the angle fish looks a bit like ahmed the dead terrorist from jeff dunhamm, the puppeteer?
Ha ha, yes you are right!! XD