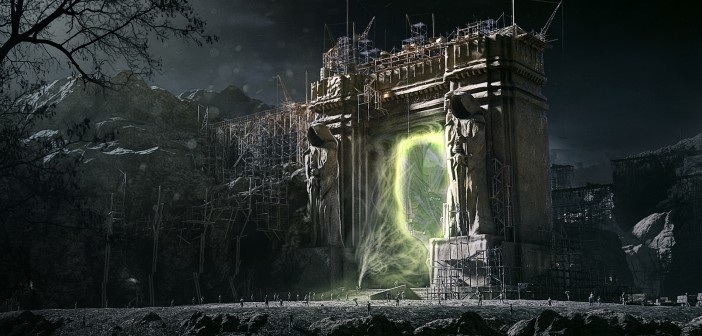
In the Behind the Scenes series, I'm inviting artists to talk about the creation of one of their works. Guilherme Henrique's 'Opening the Dark Portal' is a truly epic scene. Today, Guilherme talks about his inspiration and about how this image was created.
Hi! I am Guilherme Henrique (aka Sepultura on BA), an Environment Artist from Brazil. Let’s take a look into the process of bringing the Dark Portal to life!
As a big fan of fantasy worlds, I’ve always loved films like The Lord of the Rings, and one day I saw a new game called World of Warcraft in a game magazine, after that day, my life has never been the same. I lost friends and school classes, but got some pretty fancy high level epic armors as a prize.
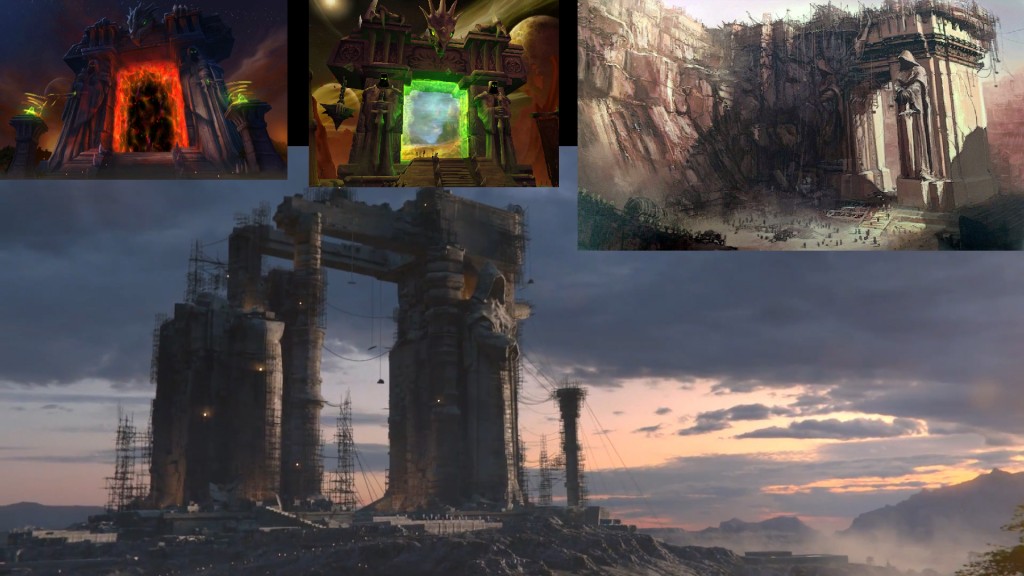
The Dark Portal is the most iconic monument of Warcraft, a huge portal that is the gateway between the main lands, and if you google that, you’ll notice that there’s a hundred of variations of its design. I chose to mix some of them that I really liked, since I had a very tight deadline to finish it.
The first step was to gather some references for a good starting point, I took some screen shots from in-game footage, also some other from cinematic and some concept arts:
My main goal was to achieve a cinematic look, and since I really liked the idea of depicting the monument in construction, I just started to find some references about construction sites and ancient rock carving/old egypcian construction techniques.
In the need to finish everything in time, I had to break everything in pieces which could be manageable to do in my schedule, so my task list started as something like this:
- Modeling & texturing the statues
- Building the Portal
- Creating assets to populate the scene
- Adding details to the Portal
- Sculpt the terrain
- Light everything
- Find the best camera setup
- Final touches
- Post production
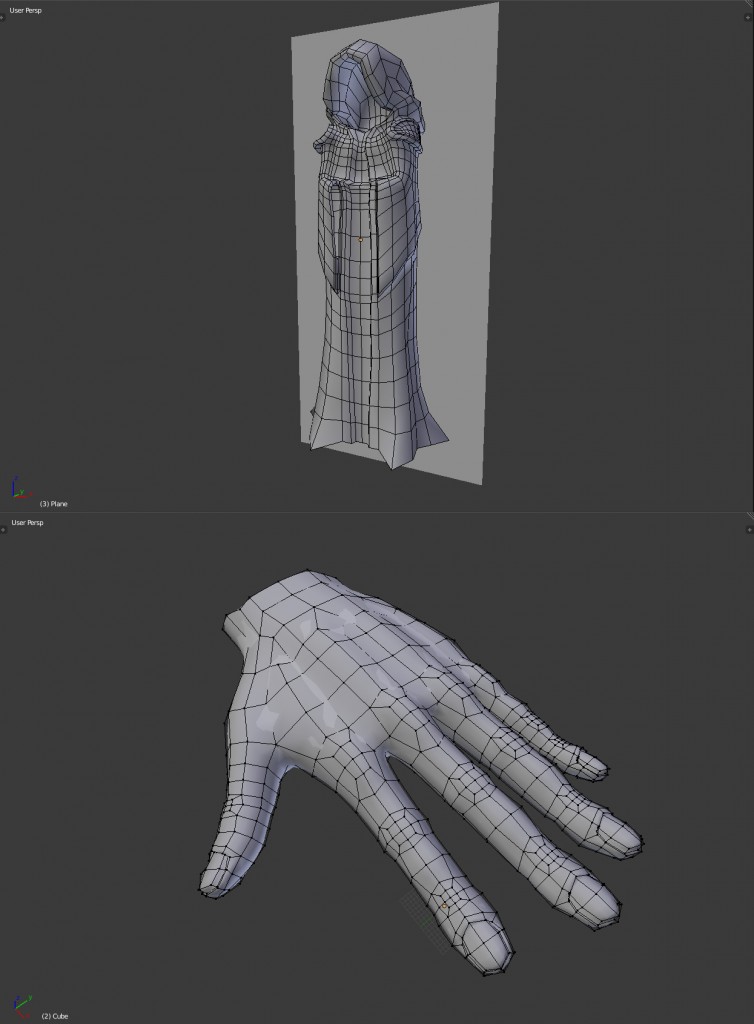
1 - Modeling the statues
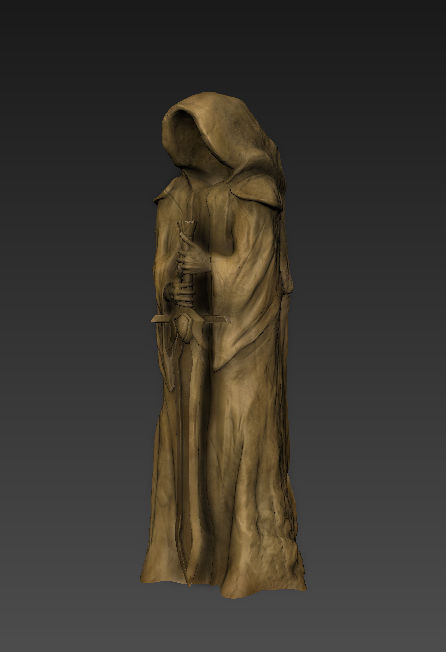
Looking at the different references I had, I decided to do something based on the game model for the statues’ look, since it was the easier to visualize, and had a good amount of images over the internet.
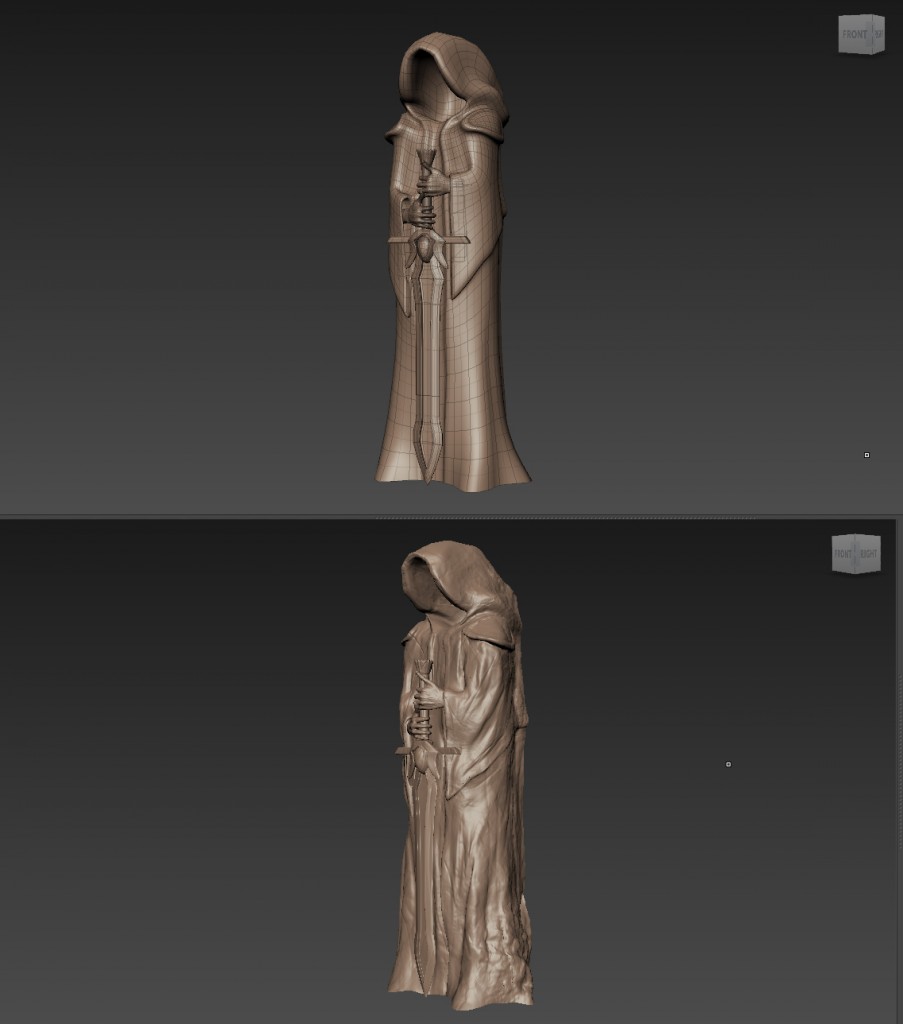
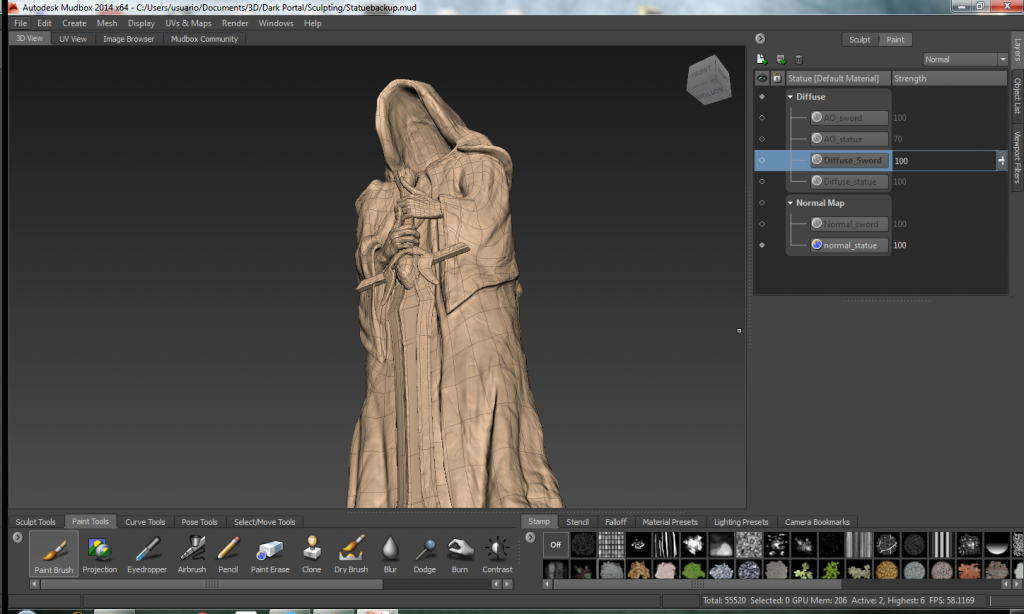
When done with base mesh modeling, I sent the finished model to be sculpted on Mudbox:
After that I also painted the textures straight in Mudbox, one thing that helps a lot in that stage is to bake out some maps like Ambient Occlusion, Cavity and so on to aid in the texturing process, you can add a good amount of detail in a short amount of time.
Since I don't have dual teslas up for grabs in my workstation, I had to save as much as I could regarding poly count, so I baked out some normal maps to use a “low poly” version of that model into the scene:
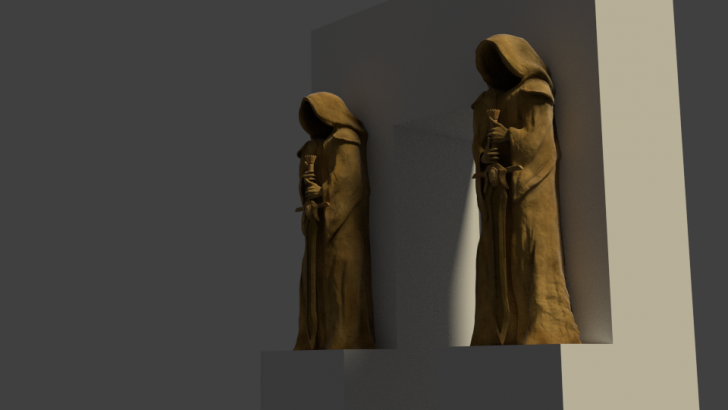
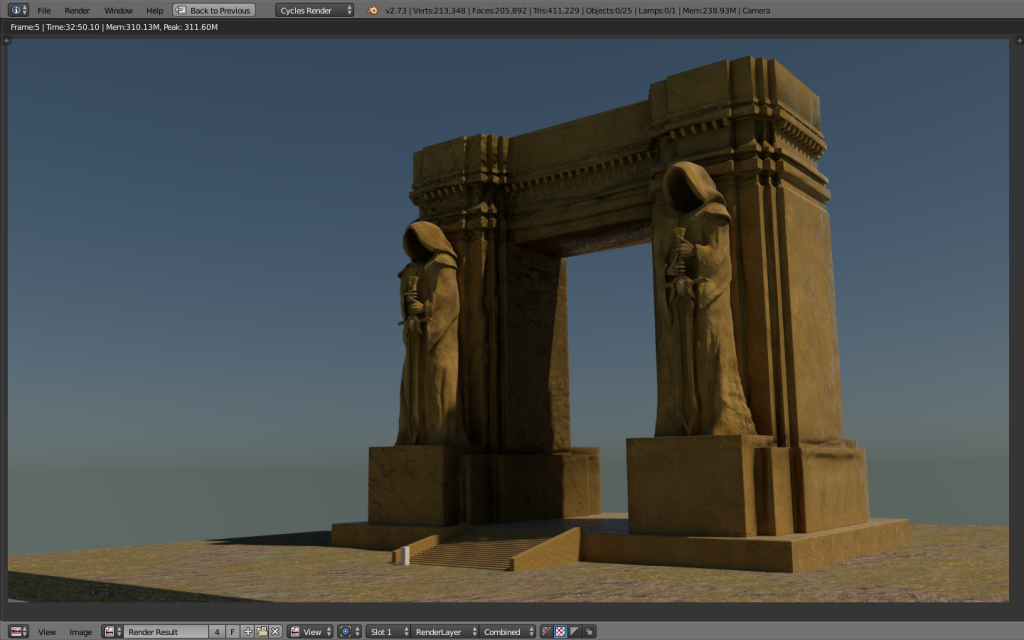
Following the resource saving guidelines, I decided to make the second statue as a mirrored instanced version of the first one, this way the model is only stored once into memory.
In my first blocking test, things started to look like this:
Now I just needed to build a scene around it :D
2 - Building the Portal
Since my workflow had already been defined by the statue, doing the portal was much faster and straight forward:
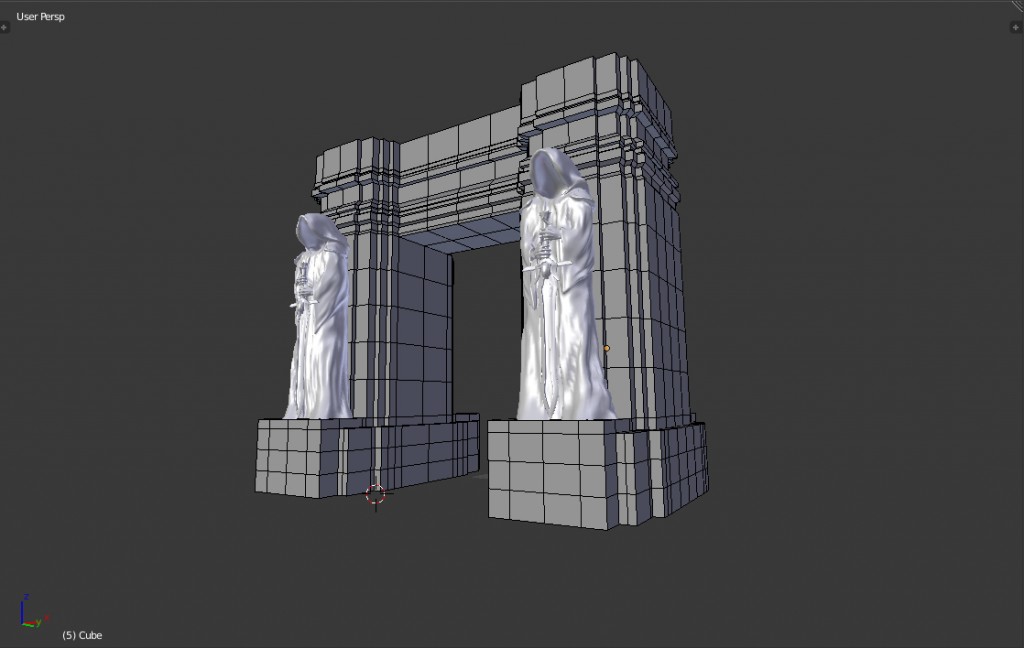
First thing I needed was to make a block base mesh with even faces to sculpt some detail on it:
On mudbox I only did some bump details using rock stamps and took the normal map back to Blender to create a shader:
I’ve used cubes as a human scale reference in order to maintain consistency among assets. Some details were added using arrays too.
But that was only the base where I still was going to build the scene on top of it, I decided to keep maintain the portal very raw, so the structures could fill the blank spots without a high amount of visual noise.
3 - Creating assets to populate the Scene
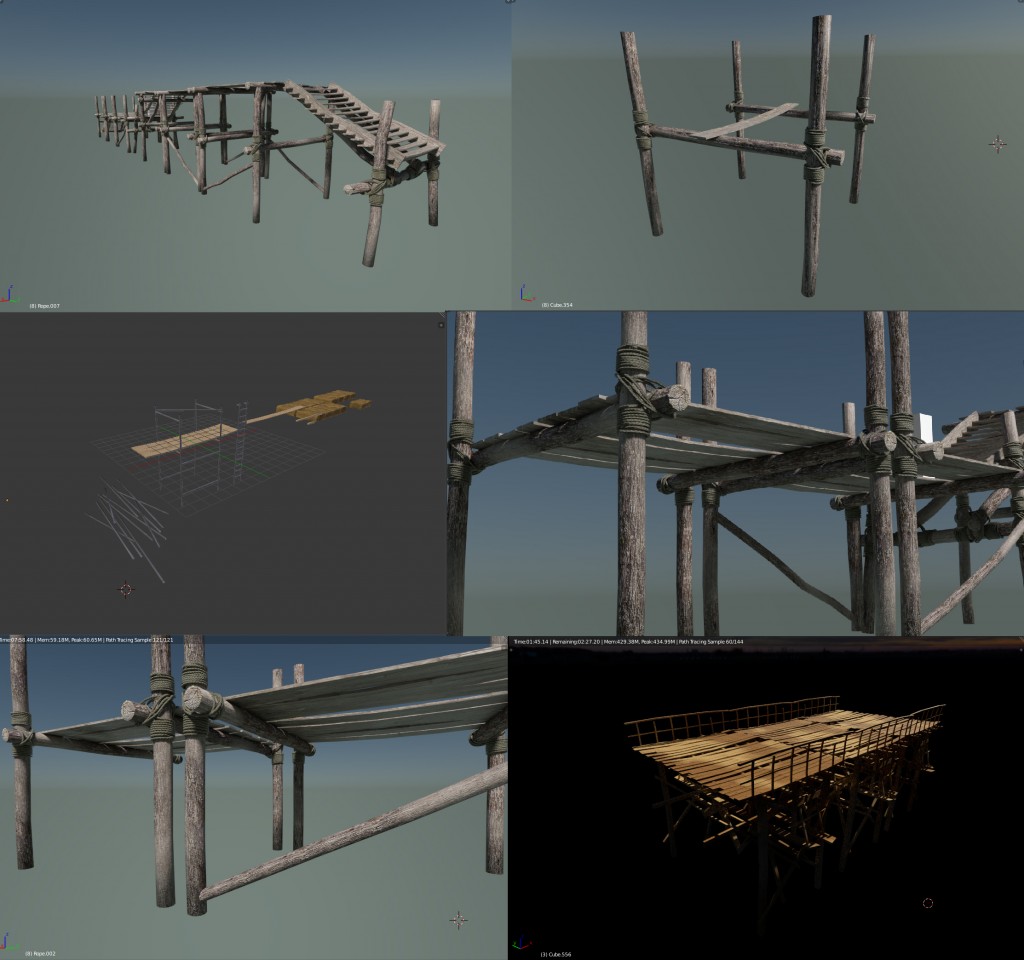
In order to add some chaos to the overall scene, I decided to add a bunch of structures, like the ones found in a construction site, but computer memory consumption was a certain issue. To solve that, I decided to make an asset library containing the major props to build all the structures. The best way I found to do that was to build modular assets that could be instanced a million times without draining all the resources from my PC.
These wood pieces in particular have the same textures, moreover they are all the same instanced meshes. After having a previous idea on how the things would have to look, I figured that for believability I would need textures with not so obvious repeating features, so I created a shader that uses a random Y coordinate for the base bark texture for each new object ID, on top of that, they change the contrast randomly for each object too, giving a kinda damaged feel. To get rid of the obvious tilling, I blended a different wood texture using a procedural noise, and set that noise to use the displacement channel to bump the first texture, making something like a damaged bark.
4 - Adding details to the Portal
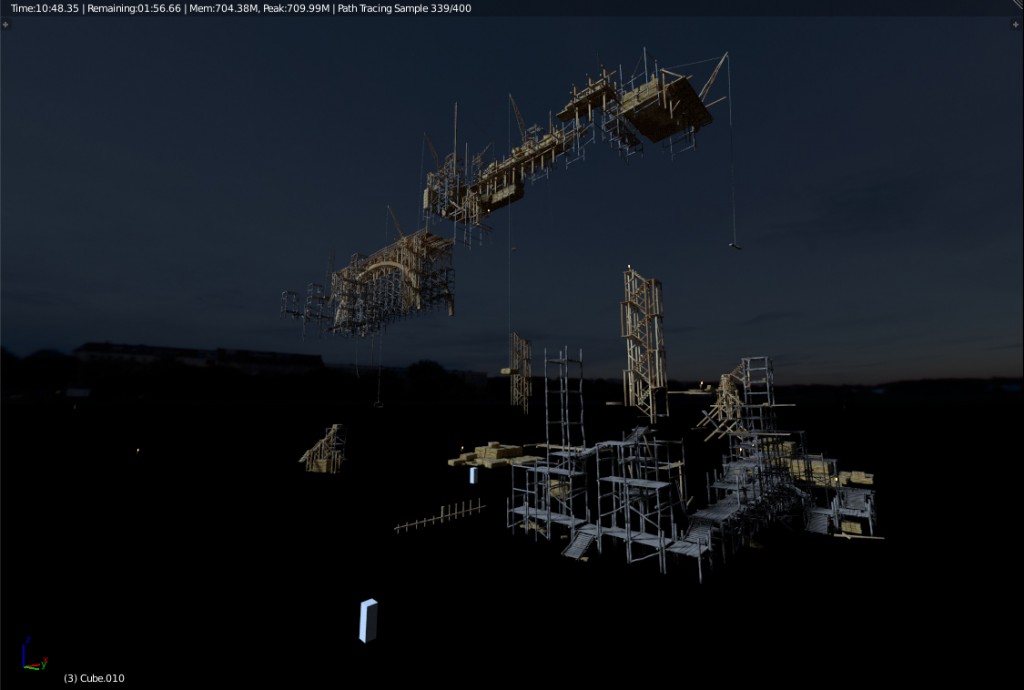
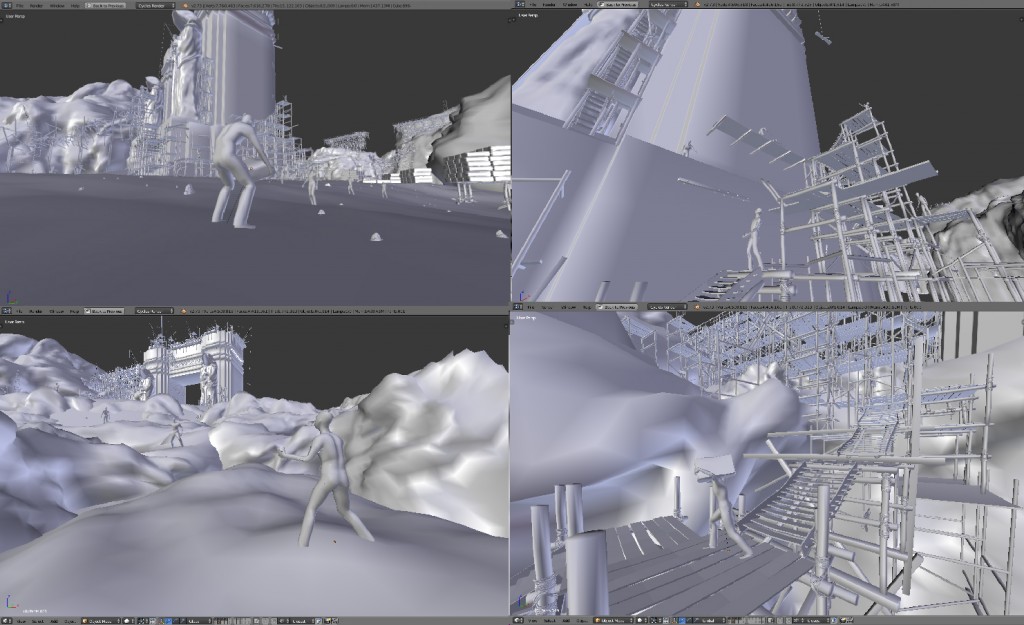
After spending a good time placing stuff here and there, things finally started to look interesting:
Always using instanced models, the beauty of modularity is that you can combine the pieces as if they were lego blocks, thereby we can build really complex looking structures with minimum effort and memory consumption.
5 - Sculpting the Terrain
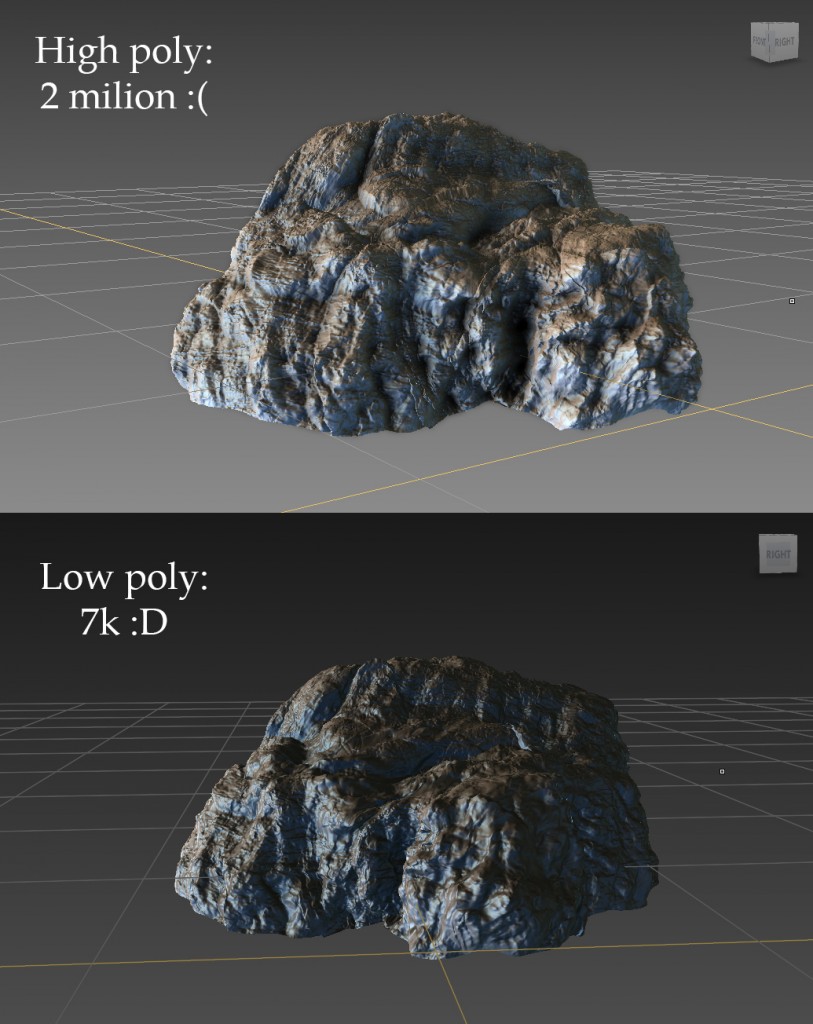
The terrain probably was one of the easier and funnier things to do, just some random shapes waiting to be sculped:
As even my mobile phone has more memory than my desktop, I decided to use that single rock to actually build the entire island, using instances, of course. Just by rotating, mirroring and doing all else that could create the illusion of a unique cliff.
6 - Light Everything
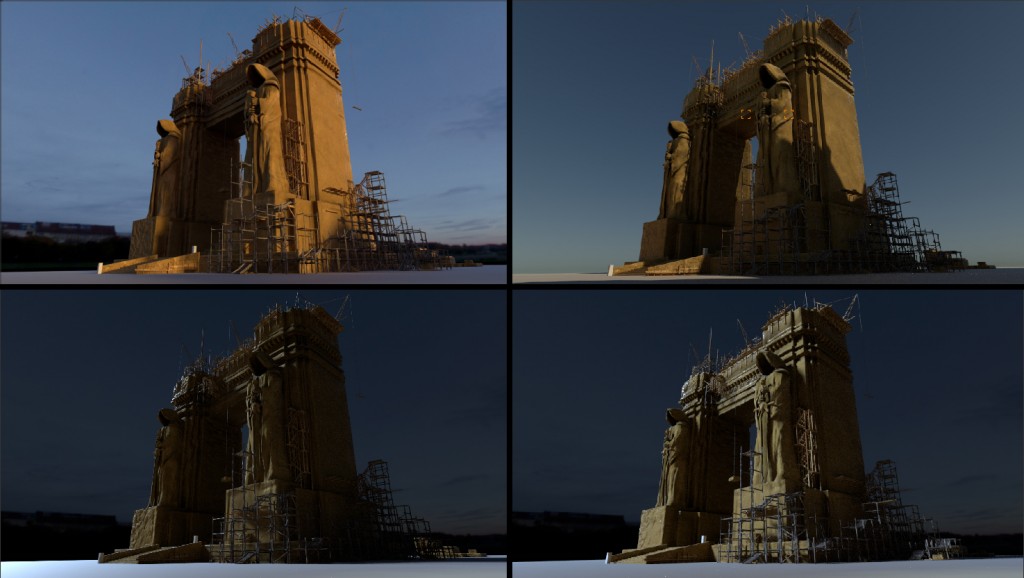
Choosing the right light setting, for me it’s always the hardest part of a work. The right light can take your work to the next level, and the wrong one can just throw all the hard work you put into your models into trash.
After almost 2 days only rendering different light conditions I started to highlight my personal preferences:
The lighting setup was really simple indeed, just a Sunlight with a small light size for crisper shadows, and a HDR background with low intensity to bump up the contrast in lit areas.
7 - Find the best camera setup
If I told you that lighting setup was the hardest thing to choose, I lied. Finding the best camera angle, with the best focal lenght, could take forever if you dont have enough discipline to take an angle and stay with it.
I started searching a bit about photography theory to discover the best way to force a good perspective in order to make things look huge. At the end, I used a tight focal lenght, in order to have some apparent perspective distortion to reinforce the overall scale.
8 - Final Touches
With the deadline coming closer, I had to make hard decisions about general aesthetics. Certain things couldn’t have been done, other things I would need to think about ways to optimize them for the remaining time.
One of these things was the workers. Since the start I had the idea to put a crowd to support the monument scale, and I really could not give up from that idea, so I ended with a idea that was similar to the asset lib. I made some really sketchy default man and put a very basic rig into it, just to pose it. Then I made a small pose lib, which I could scatter instances of each of them on the ground.
So finished up with some very funny poses:
After that, I randomized a bit the saturation of each men clothes with a shader, and hoped that they wouldn’t look awful in the final render.
9 - Post Processing:
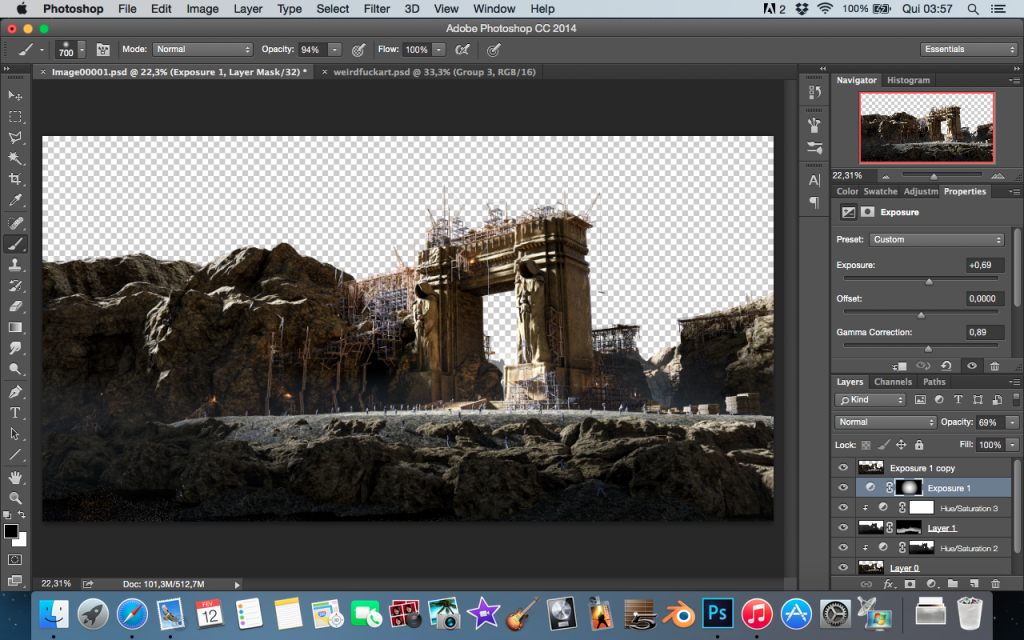
Finally, here’s my favorite part! Compositing! The step where you fix all the mistakes you did before!
I have a special appreciation for compositing/post processing, for me, it’s in the compositing stage that an awesome render differs from a regular one, you can easily take a bad render and turn it into a badass image just by doing some wizardry in Adobe Photoshop, and that’s amazing.
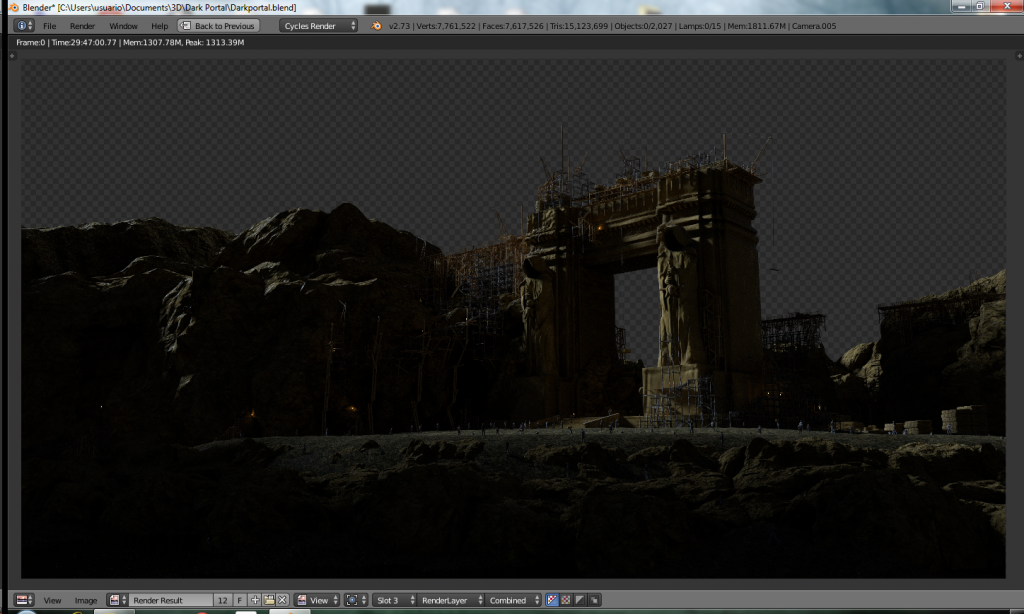
I usually start rendering some passes, in this case: the combined pass (in EXR 32 bits), Mist Pass (also in 32 bits), Ambient Occlusion and Emission. The Open EXR format is specially useful if you like to tweak your renders brutally, like I do.
The first thing I usually do is to adjust some level & exposure using Camera Raw Filter, in Photoshop.
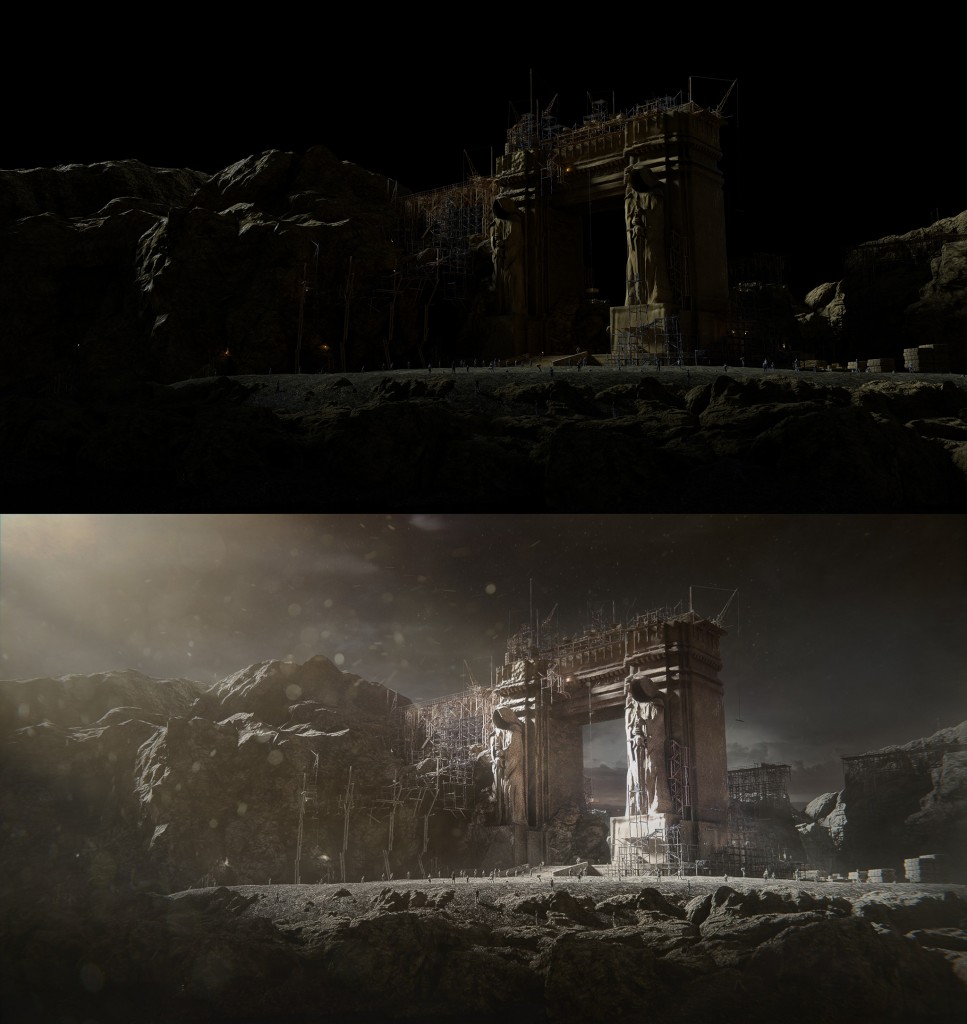
Here’s the raw render from Blender:
After some tweaks using Camera Raw in an EXR file and some grading:
Yeah, the difference is brutal.
Just the main passes composed together.
The mist pass was also rendered in 32 bits, this way it stores much more color information, this can be very handy when you want to adjust the fog density, using levels for example.
My main workflow when compositing is:
- Tweak the base colors
- Adjust mist intensity
- Mask out mist pass on the key areas (near the ground, usually)
- Adjust levels & color grading, and mask that stuff to where they look best
- Paint extra details such as highlights, extra fog, sky, dust, and other glitches that make images more realistic.
And here you can see the difference before & after post processing:
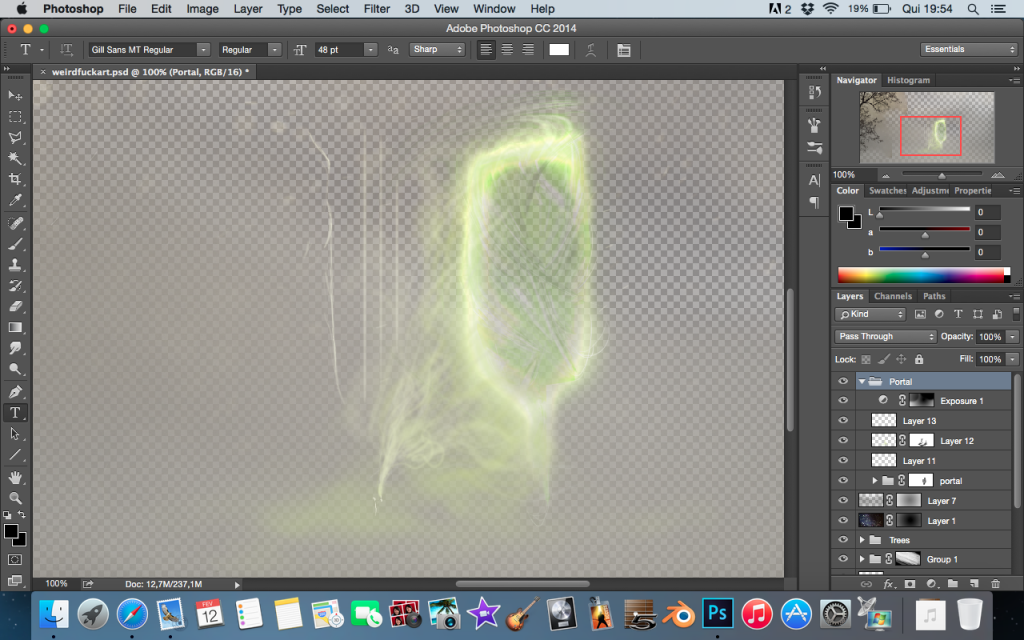
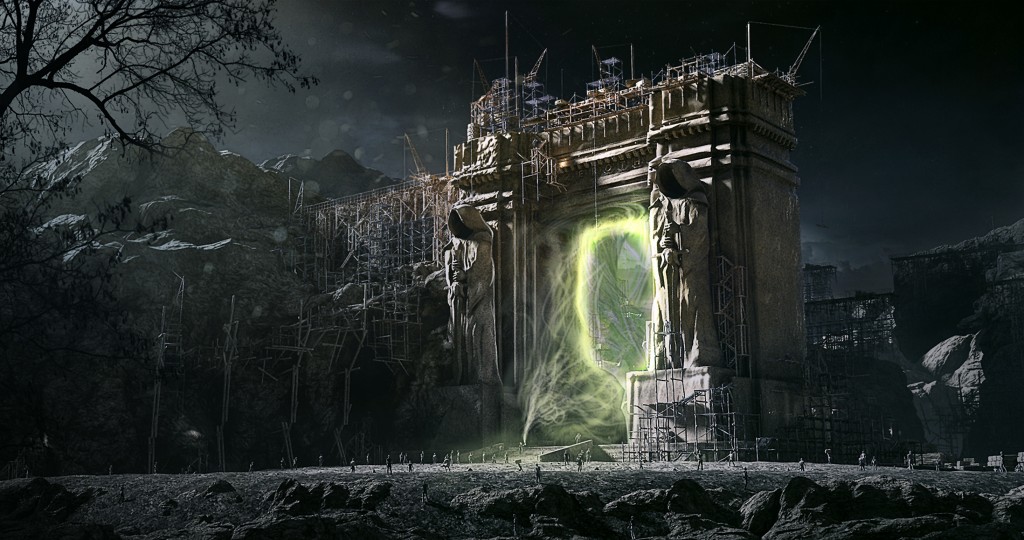
The second render has a different grading and also a green portal taking shape, to make the portal, I just painted some colors using the default hard brush with pressure on tablet, and tried to simulate the behavior of smoke:
And this is the final image:
TIPS:
- Instanced models take almost no space in memory, since they are referenced geometry, so you can theorically have an army of millions of soldiers. Since they are instanced, you can probably render them without problems, and with tons of free memory. Try it!
- When building modular asset blocks, try to have a consistent working unit to deal with them, think like lego blocks, they need to fit each other, in order to do that, you need to standardize your measures, a good idea is to use the grid as your boundaries, this way you can just snap different blocks, and they will always fit!
- Break tile repetition using procedural noises as a factor to blend two different textures, you can come up with very interesting textures. Also try to use the “Random” output from the “Object Info” node, that output can assign a random value for each new object ID you have, the possibilities are endless!
- Don't be afraid to change your render dramatically in post production. Remember: The most important thing as an artist, is to make art. At the end, people just want to see a beautiful piece of image that can inspire them, don’t limit yourself! Post processing is not cheating. Cheating is making bad art.
- And finally, find new ways to optimize your scene! Dont stop doing stuff just because of your hardware limitations. Always force yourself to find new ways to get things done, but never, never give up.
- And if you have interest to learn a bit more about the stages of the process, I’m preparing some in-depth information about the whole process for the CG Masters’ website, coming out soon, don’t forget to check it out!
I’m glad to share my work process here, thank you Bart and people from Blendernation!
Any questions, just ask here, and I’ll try to do my best!
And Keep Extruding!



5 Comments
Trabalho fantástico!
Queria compartilhar teu trabalho na página que tenho no facebook. Se pudermos falar, seria legal!
https://www.facebook.com/summoningstone
Please comment in English, thanks!
Hey, thanks mate!
You're free to share it in your facebook page, of course! ;)
Anything, you can contact me (in Portuguese, if you wish) on: [email protected]
Cheers!
The color of the dark portal should be red, according to the lore of orcs and humans. The green portal reflects changes that didn't occur until much later.
Amazing work Bart!
I'm rolling my eyes at the comment Claude left lol