
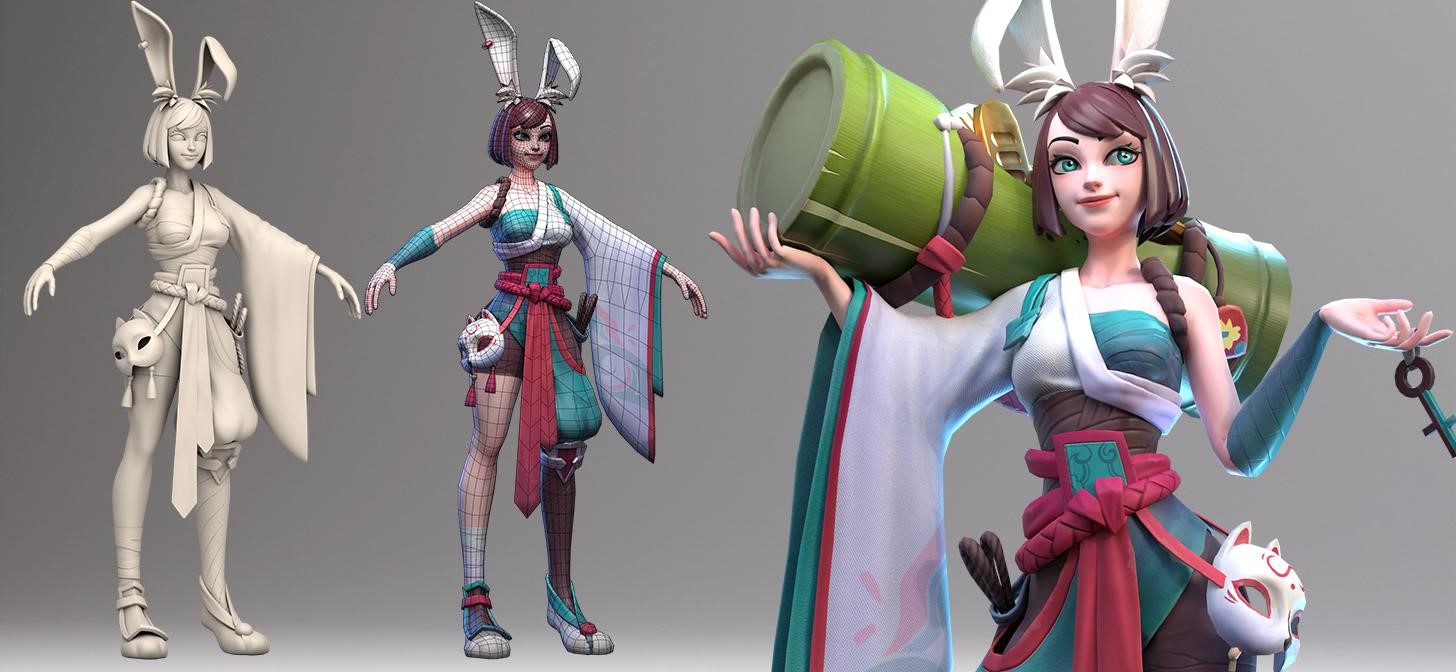
Behind the Scenes: Bunny Thief
INTRODUCTION
Hi, my name is Tùng, also known as InnerWind, and I’m a 3D character artist from Vietnam.
I discovered 3D characters about 5 years ago. I spent 2 years learning everything, from very basic concepts like vertex, edge, and face in Blender to anatomy knowledge to trying to become a 3D character artist. Then, I luckily got a job from a Korean company. I worked there for 3 years and learned a lot, but I quit 2 months ago.
Currently, I’m a freelancer and looking for a remote job.
INSPIRATION
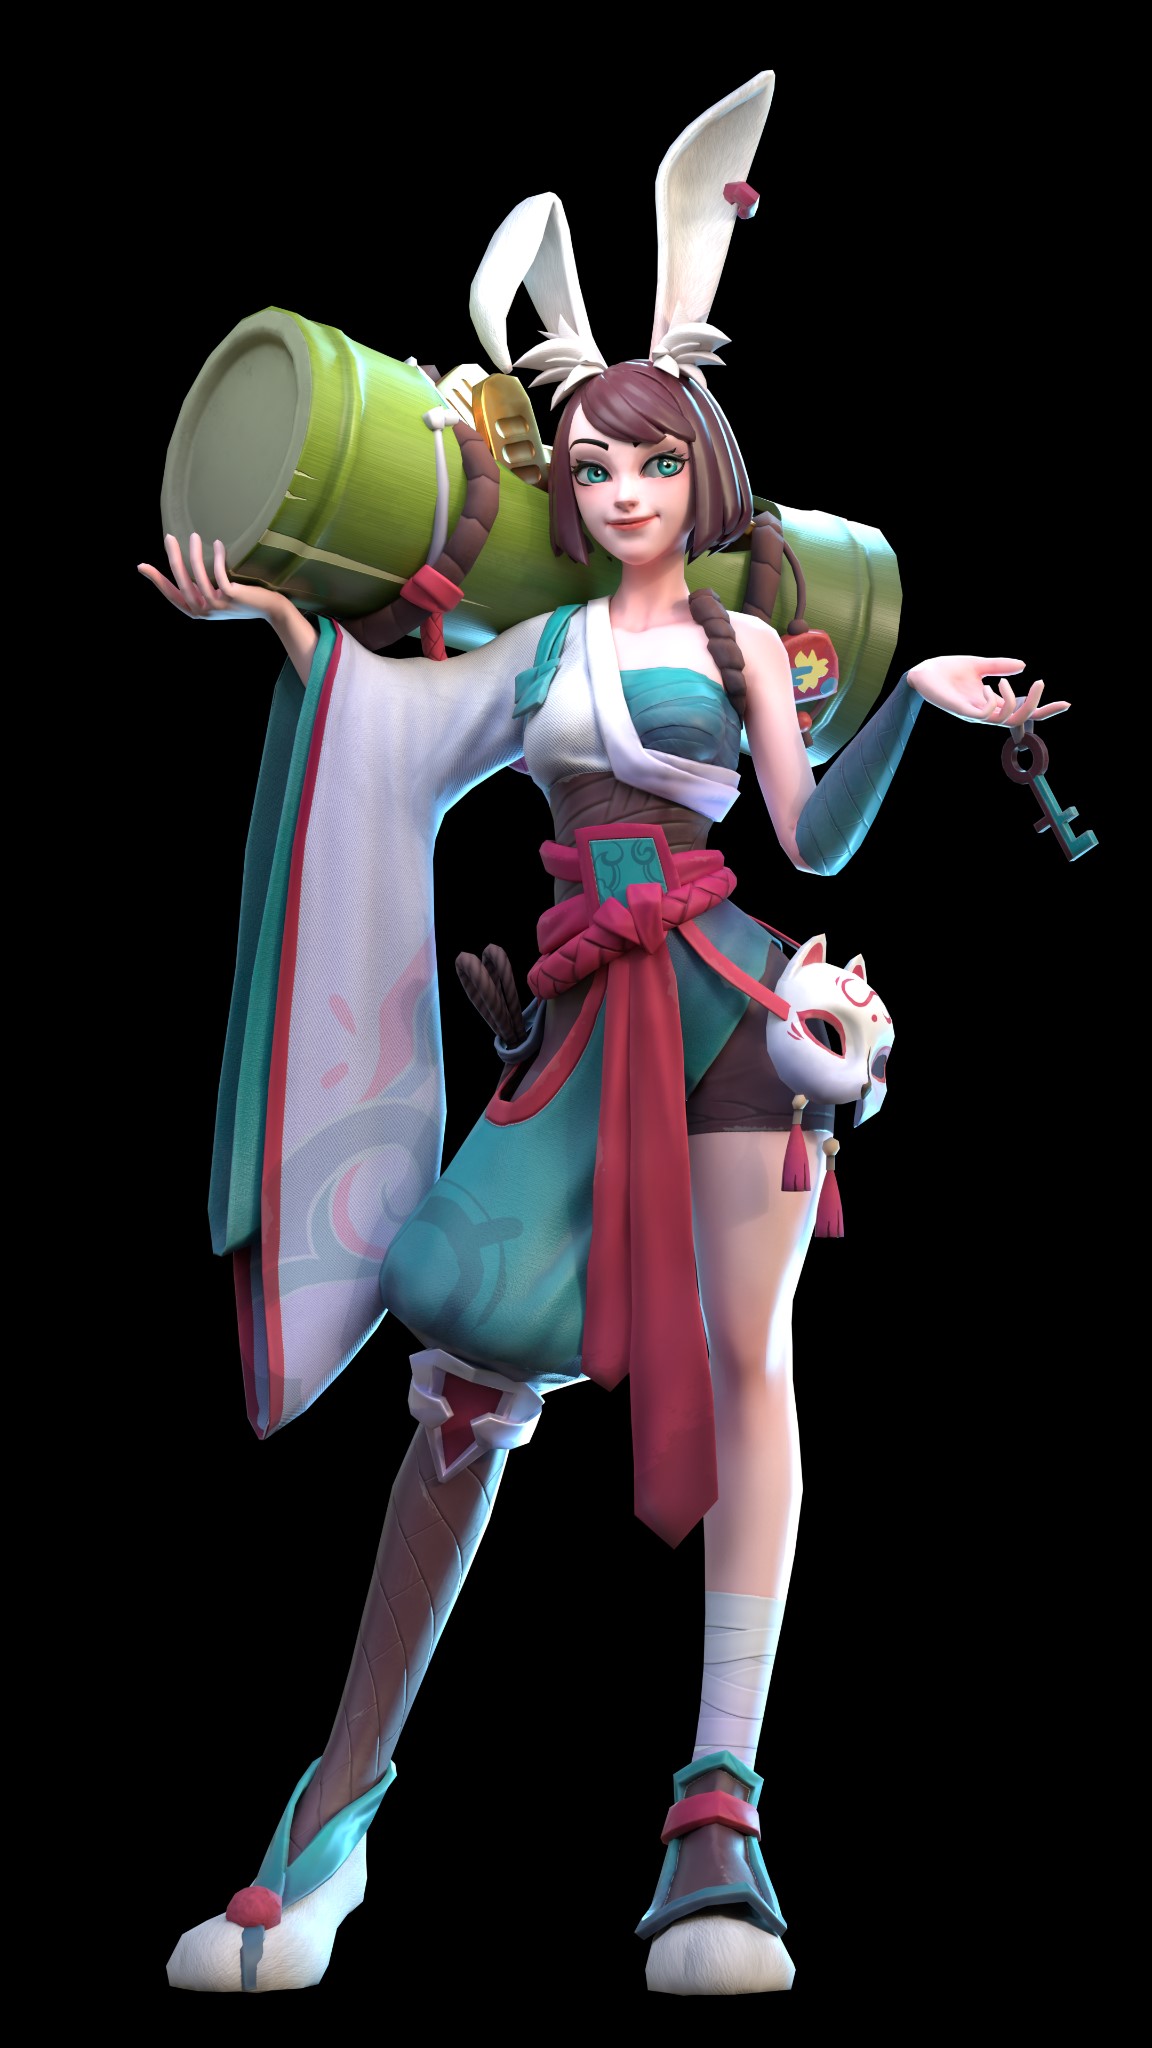
I really really love the style of characters in Overwatch. This project was helpful for me in learning how to create the vibe like Overwatch style on a game character. I found a really nice concept character from Loan Nguyen(also a Vietnamese artist) so I asked permission to use it for this project.

PROCESS
3D software
- Blender 3D: Sculpting, retopology, UV, posing, rendering.
- Substance Painter: Baking/texturing.
- Quad Remesher addon
Base Mesh
You guys can watch the real-time video step by step on my channel.
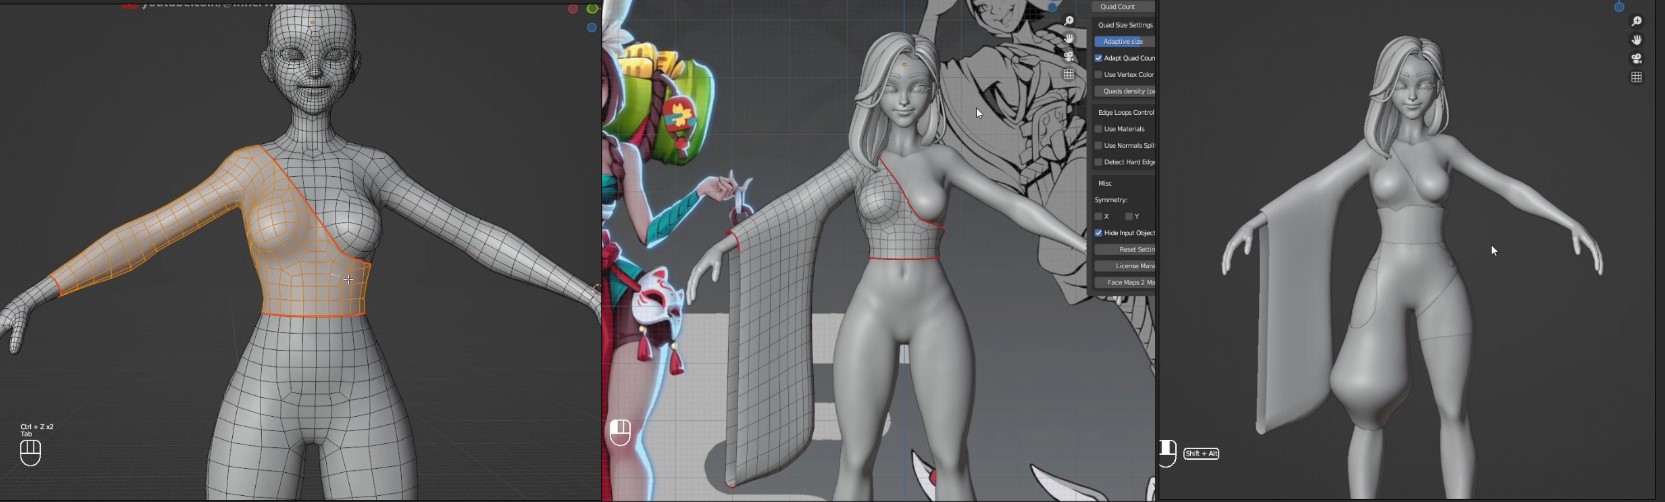
First of all, I create a base mesh which I can use for many different projects. I start with a sphere, block out, and then sculpt a raw high poly.

I retopologized after this step for the low poly model. Then I used the Shrink Wrap and Multires modifier on the low poly model to this Raw high poly model, and then we got the left (image below).
I applied the Shrink wrap modifier, and then refined it. We got the finished base mesh model (right).
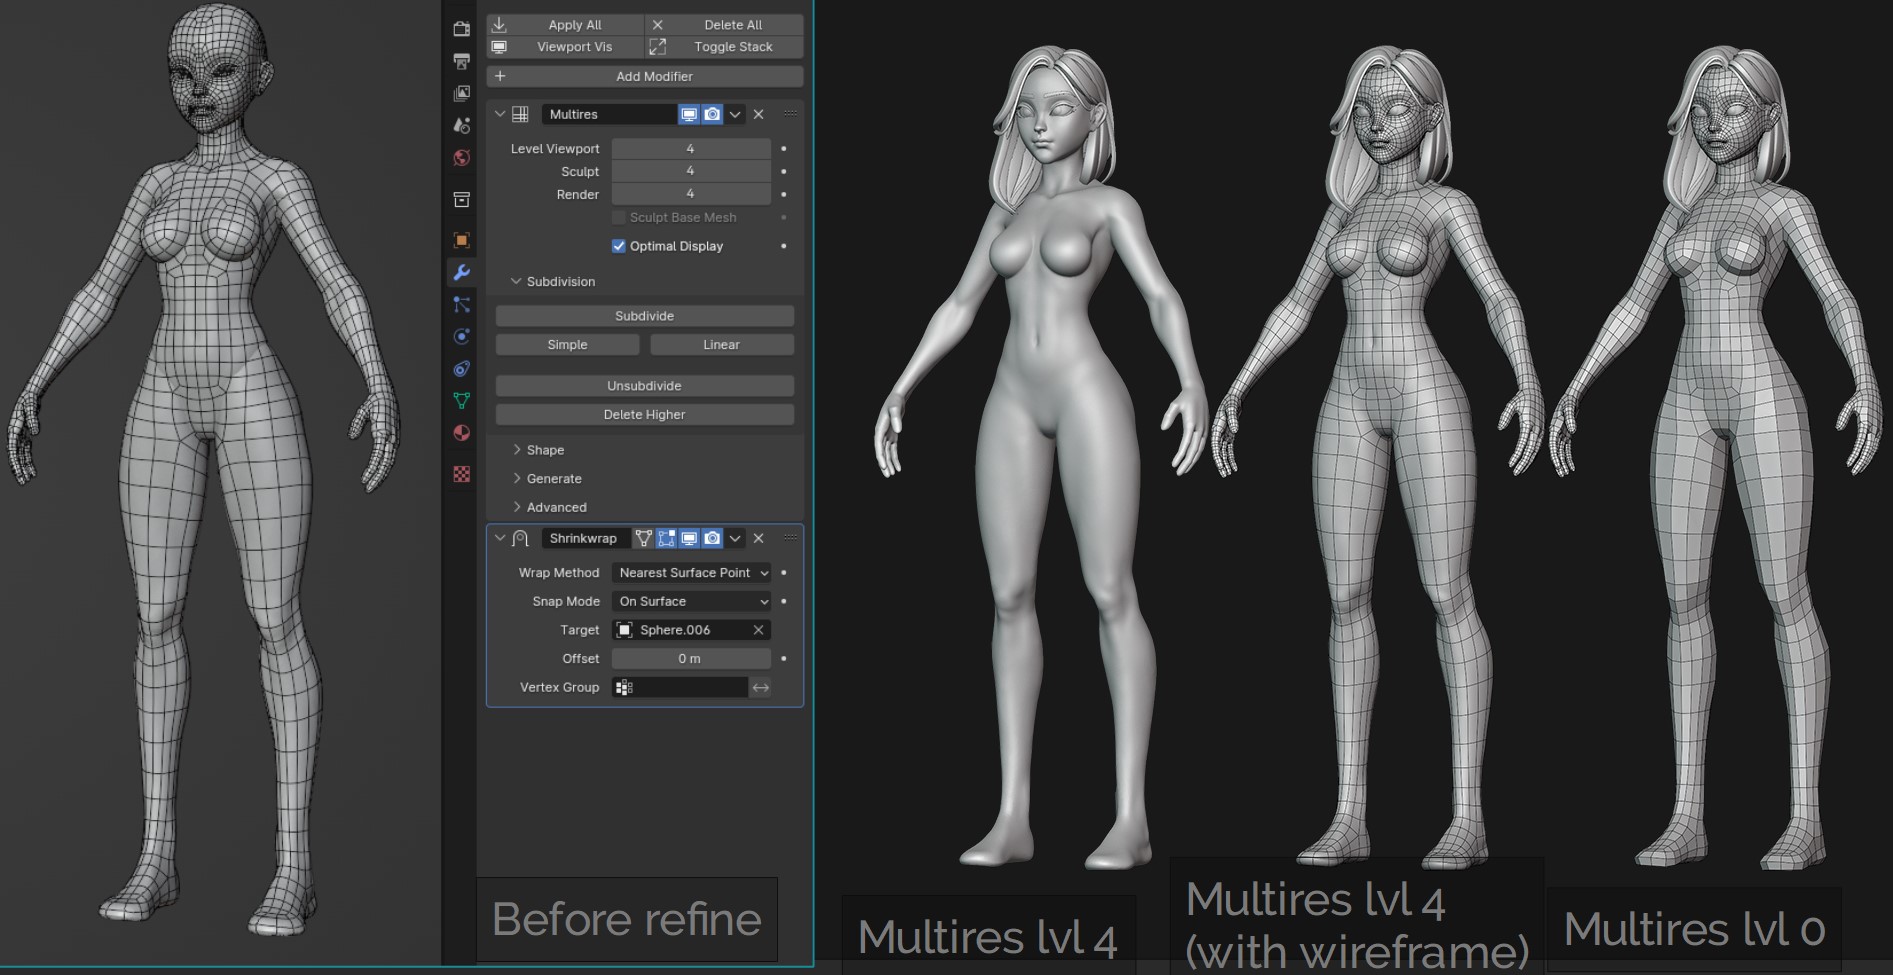
Now we’re ready for every female stylized character.
High-poly
You guys can watch this stage here:
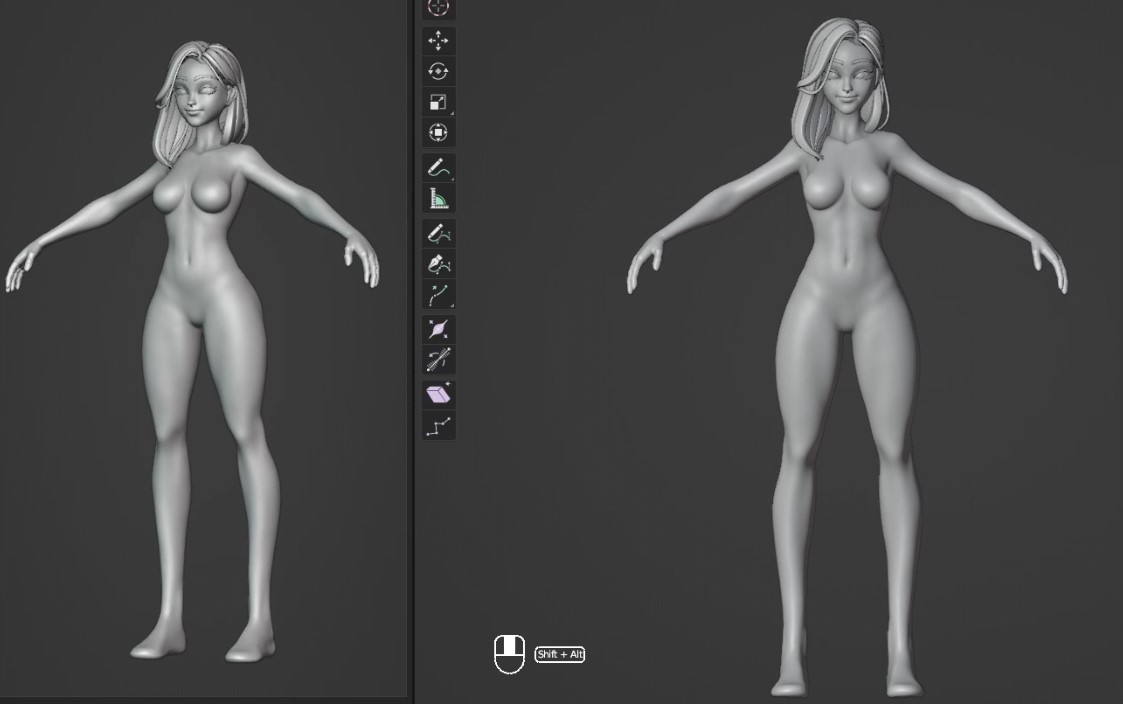
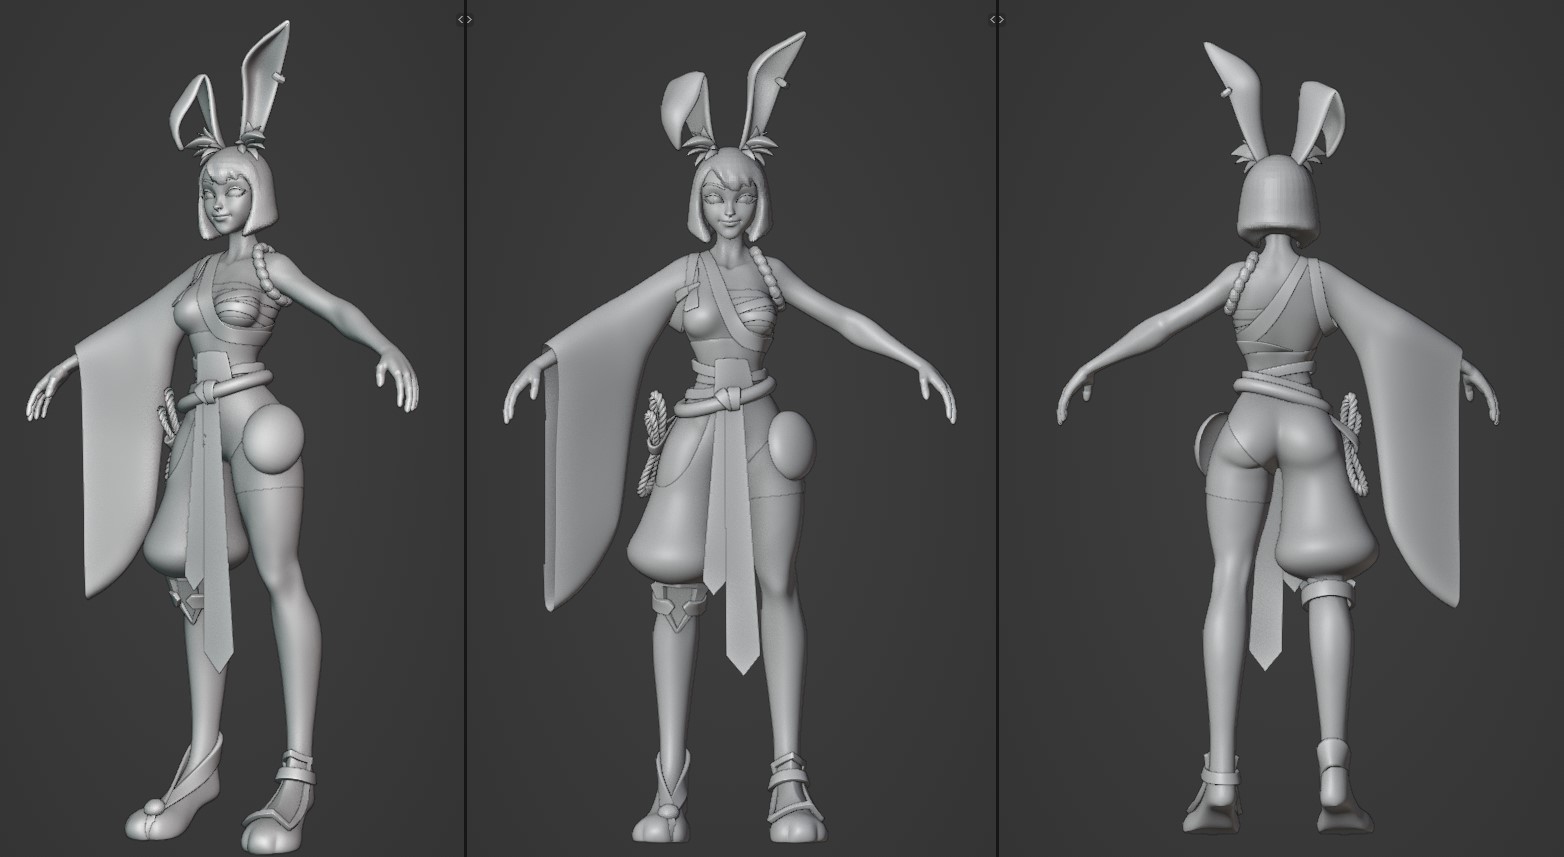
First of all, I adjusted the proportion of the Base mesh to look the same as the concept.
I used edit mode for this step. If I use sculpt mode, I would sculpt the Lvl 0 (Multires modifier) model. This way helps us easily to control the overall proportion.
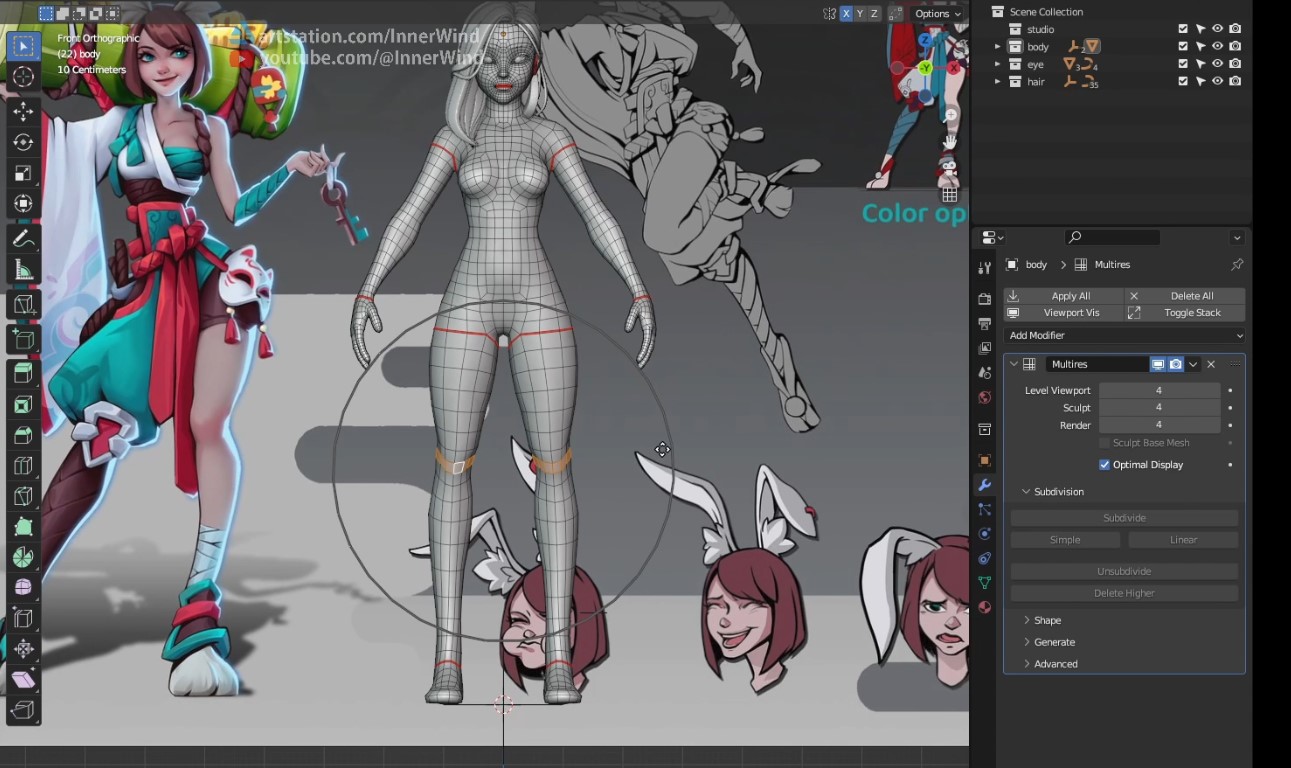
Then I adjusted the face; I tried to catch the vibe which the concept wanted to show, and here’s the result:
Block-out outfit
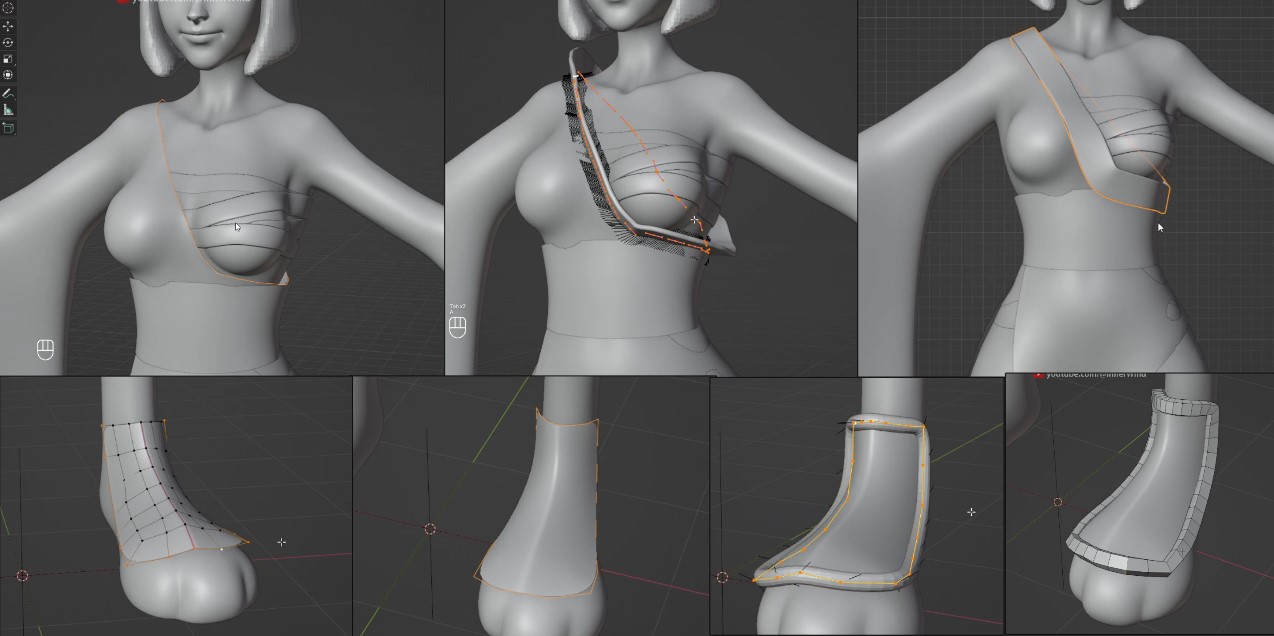
Most of the outfits’ blockouts were created separately from the base mesh with a knife tool, then marked it, seamed it to select easily, and then separate. Then, I edit it as I want.
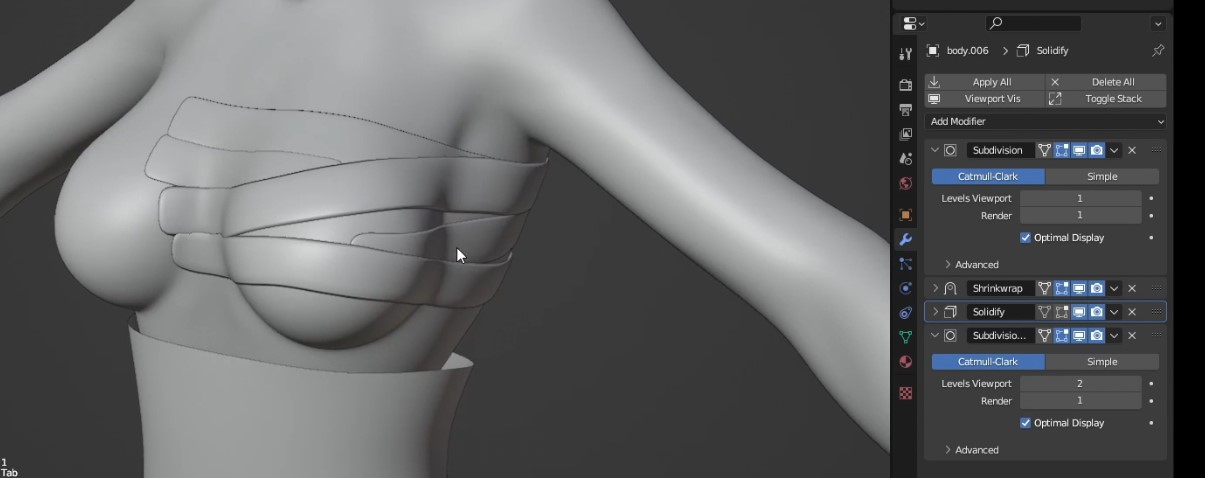
The bandage parts were created like retopology work (snap on body mesh) with these modifier layers: Subdiv-Shrinkwrap-Solidify-Subdiv.
I created some parts by converting the Edges into Curve, and then edited it as I want, like this:
I added more accessories for her, which were mostly created by Curve. I combined some Curve modifiers with the other modifiers if I needed, like this:
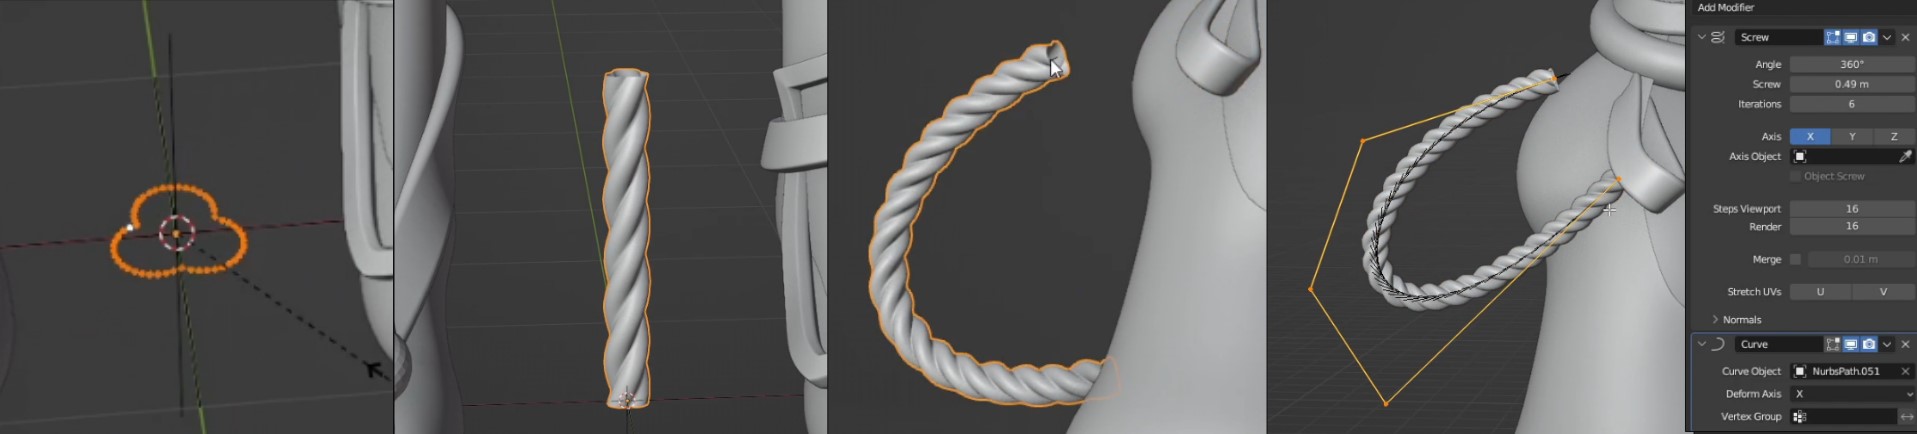
Now we have:
Detailing
Mostly, I added multires modifiers, and then I added more details by sculpting or displace map.

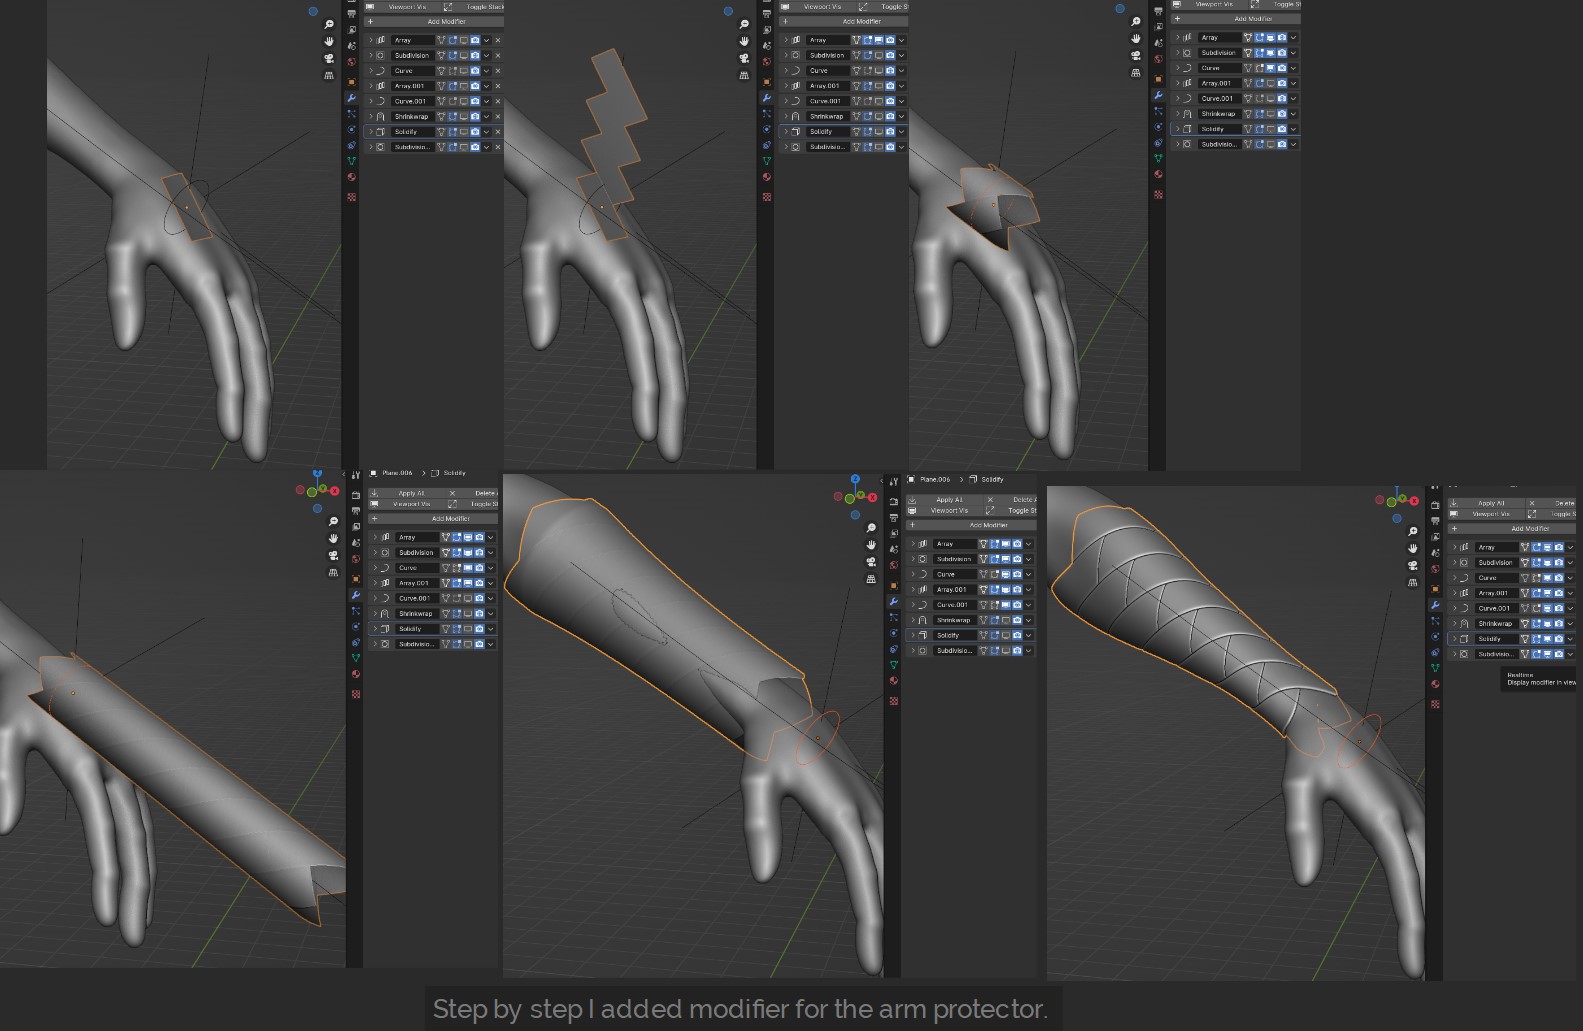
For the left arm and right leg protectors, here’s my way:
Add a rectangle, then add these modifiers like the image: array, subdivision, curve (circle), array, curve (along the arm), shrinkwrap (to the arm), solidify, and subdivision.
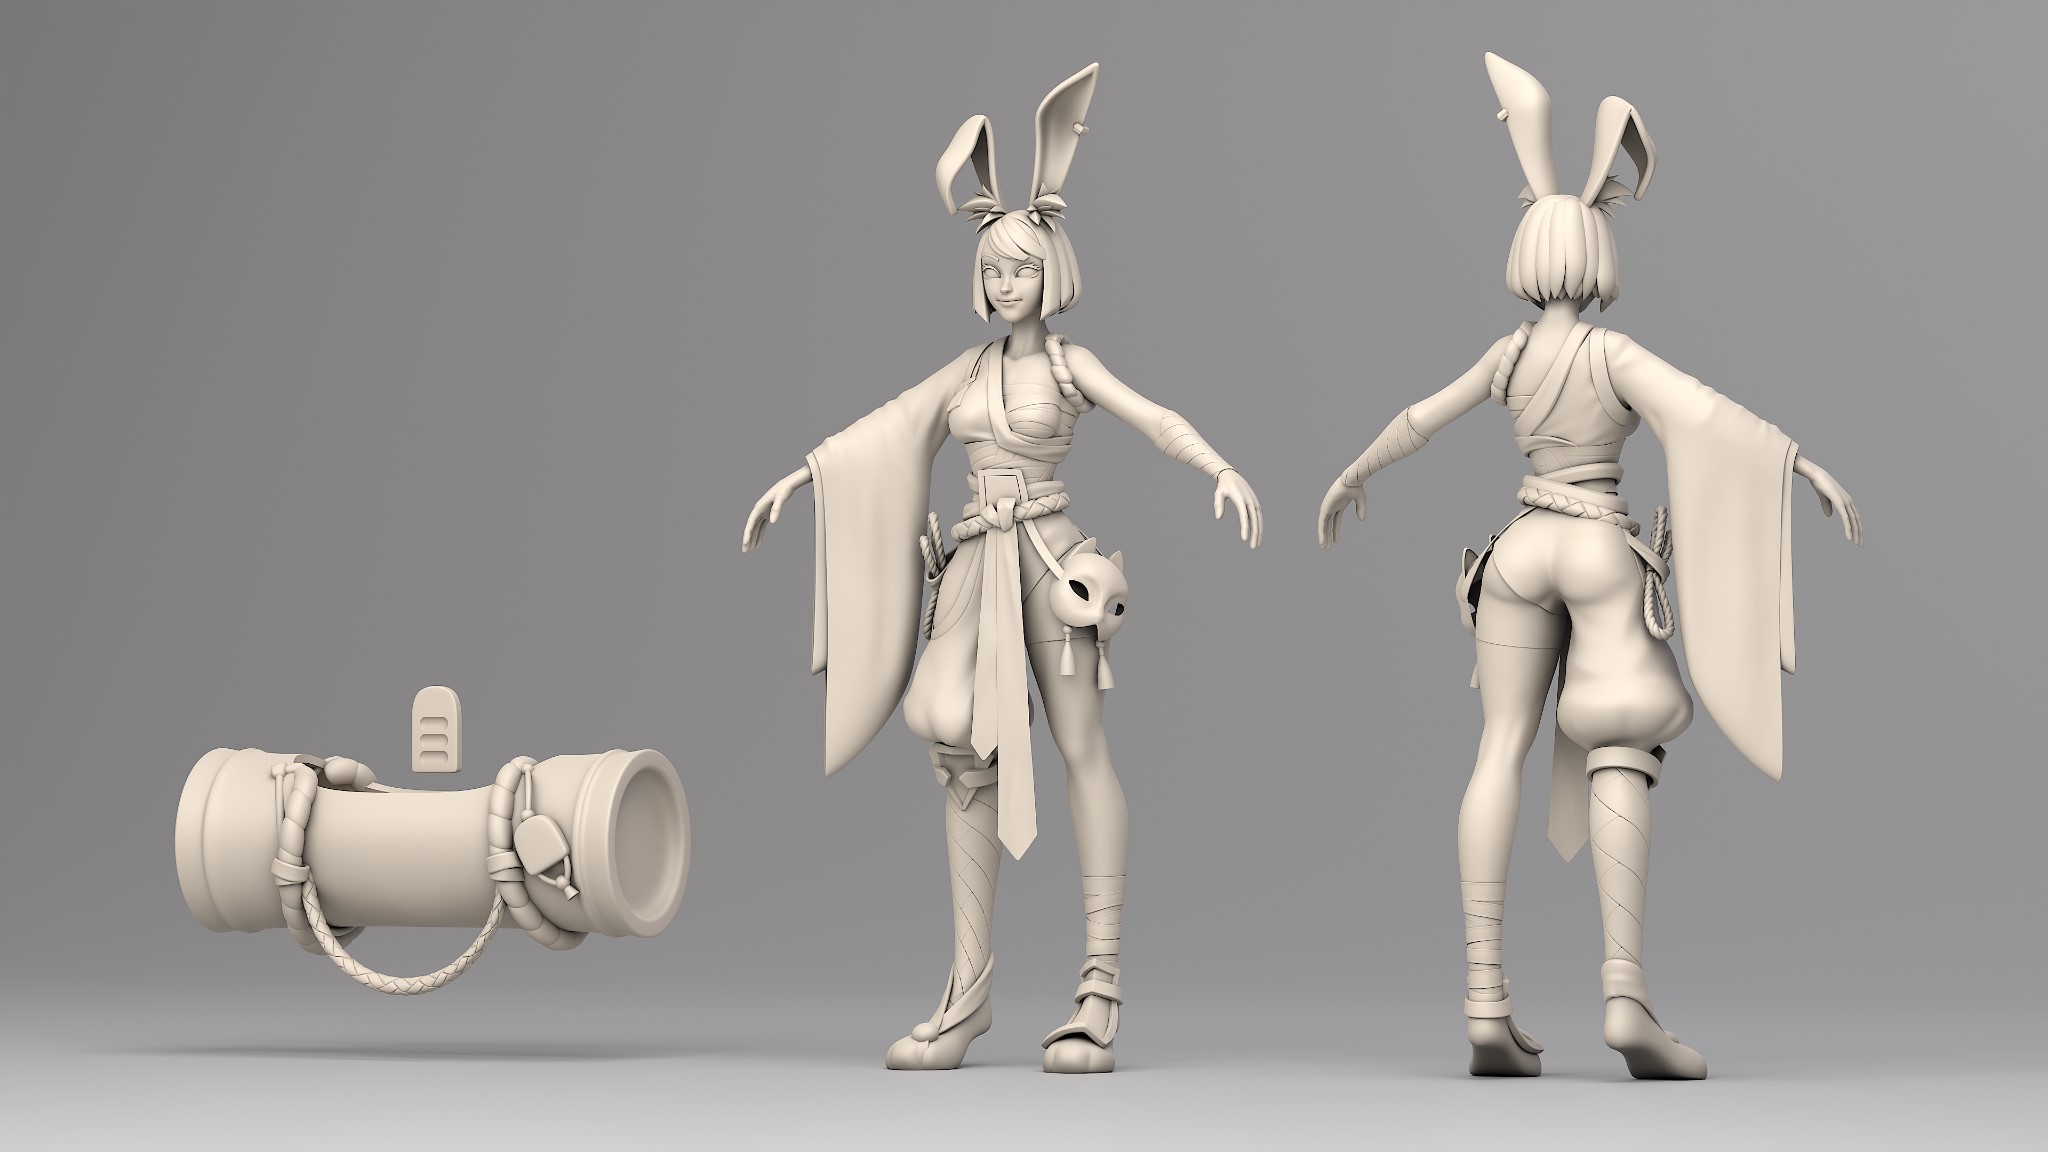
Accessories
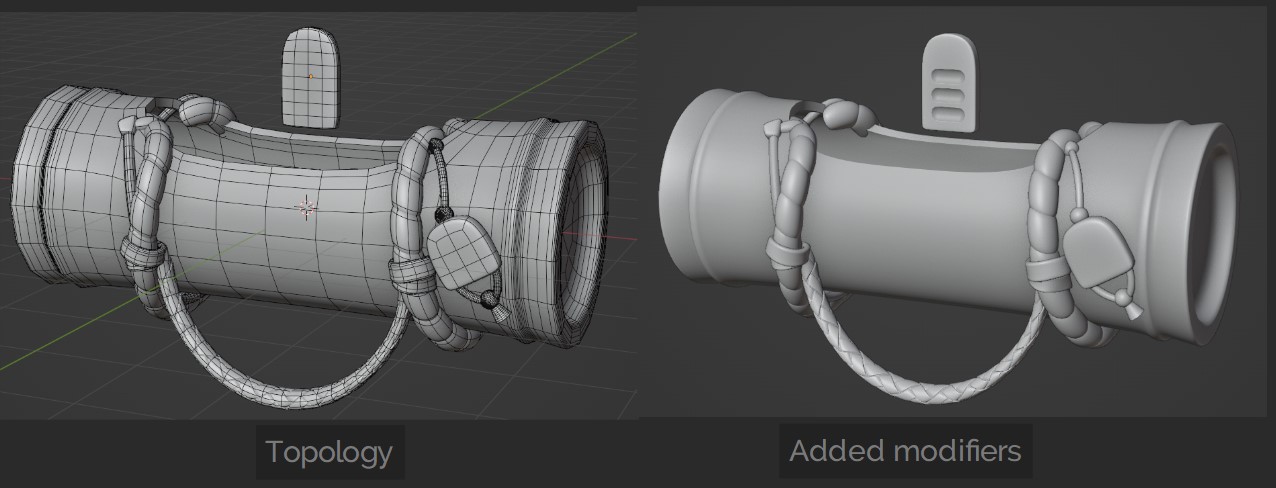
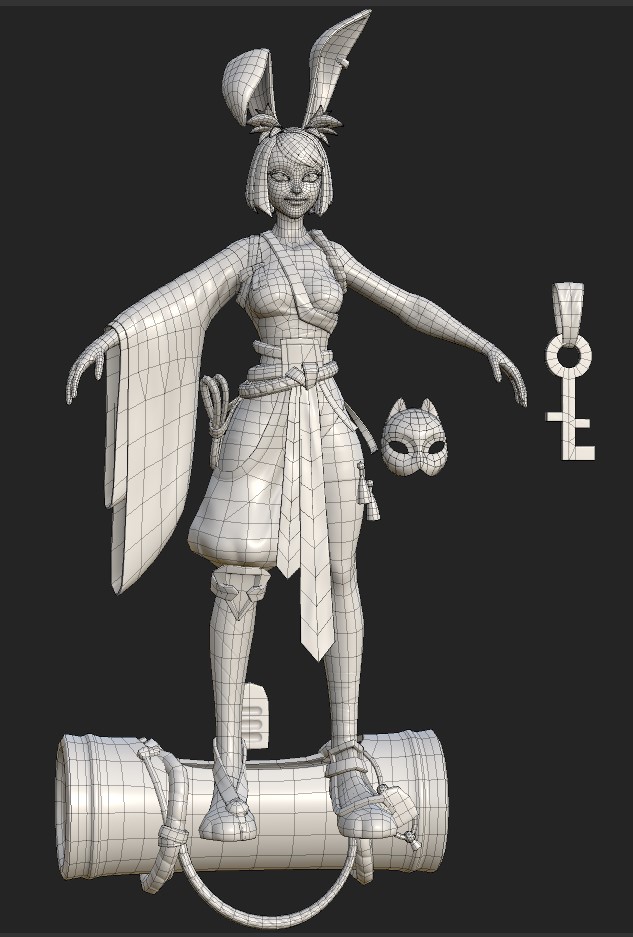
I tried to model accessories so that I could use the topology in the low poly stage.
Sculpt the cat mask:

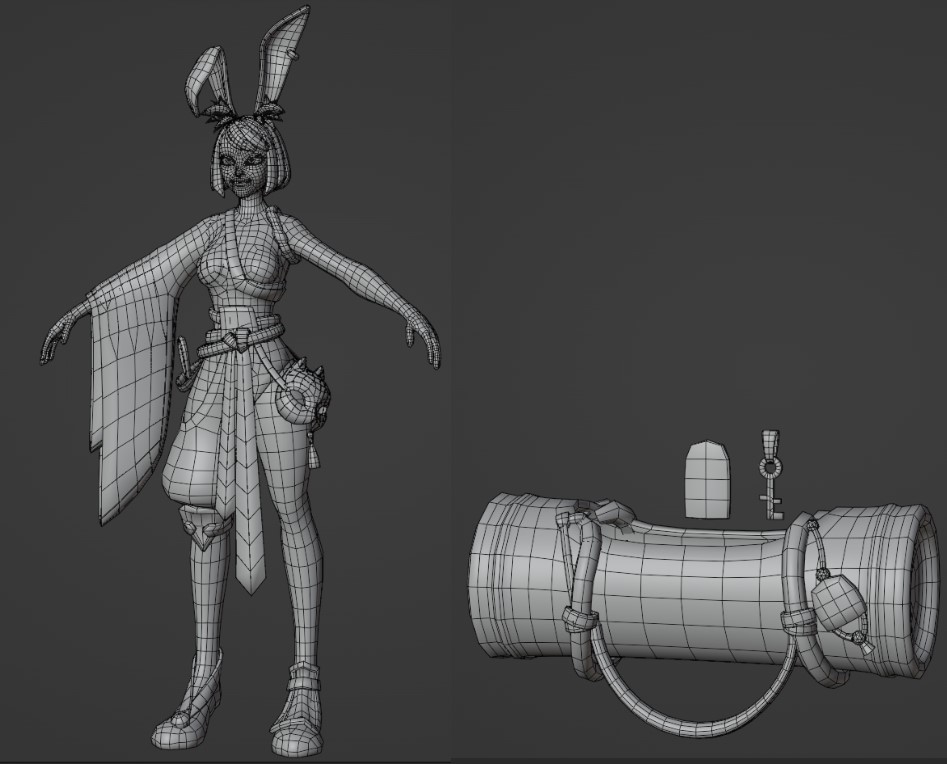
Retopology/Low-poly
You guys can watch this stage here (including the low poly, UV, and baking stage in this video):
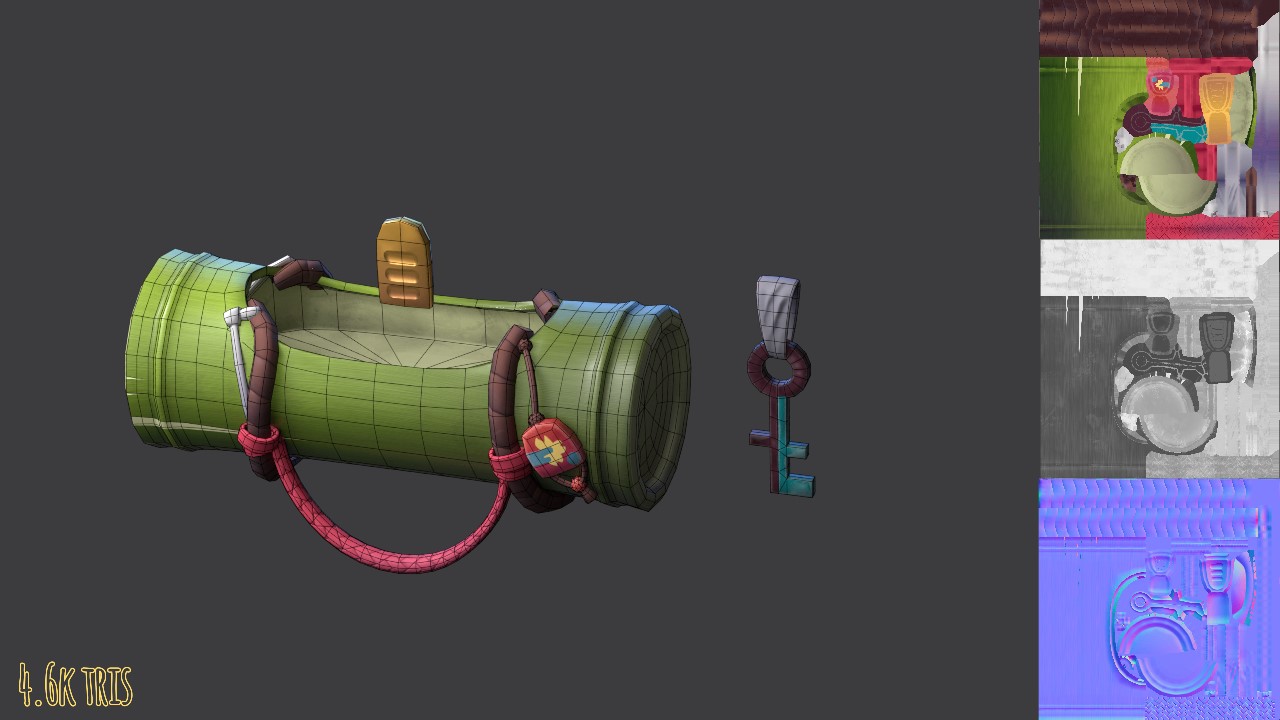
I reused as much of the topology of the base mesh as I can, plus anything cut from the base mesh. I then added more retopology. With some meshes, we can turn off modifiers from the high poly model for the low poly model (like the Bamboo accessories above).
UV
I prioritize scaling up a bit more for some parts that have a lot of detail, like the face, and rather scale down the part we rarely see, like the inside of the sleeve or the back side of the head. Some parts were symmetrical so we could use 1 UV for both sides, like the Bamboo (We need to move one side UV unit to the right to avoid baking error.)

Bake input map(Substance Painter)
I tried two ways to bake:
- Move all the meshes out separately for the character.
- Rename low poly and high poly models with the corresponding names for the Bamboo accessories.
The second way is much better.
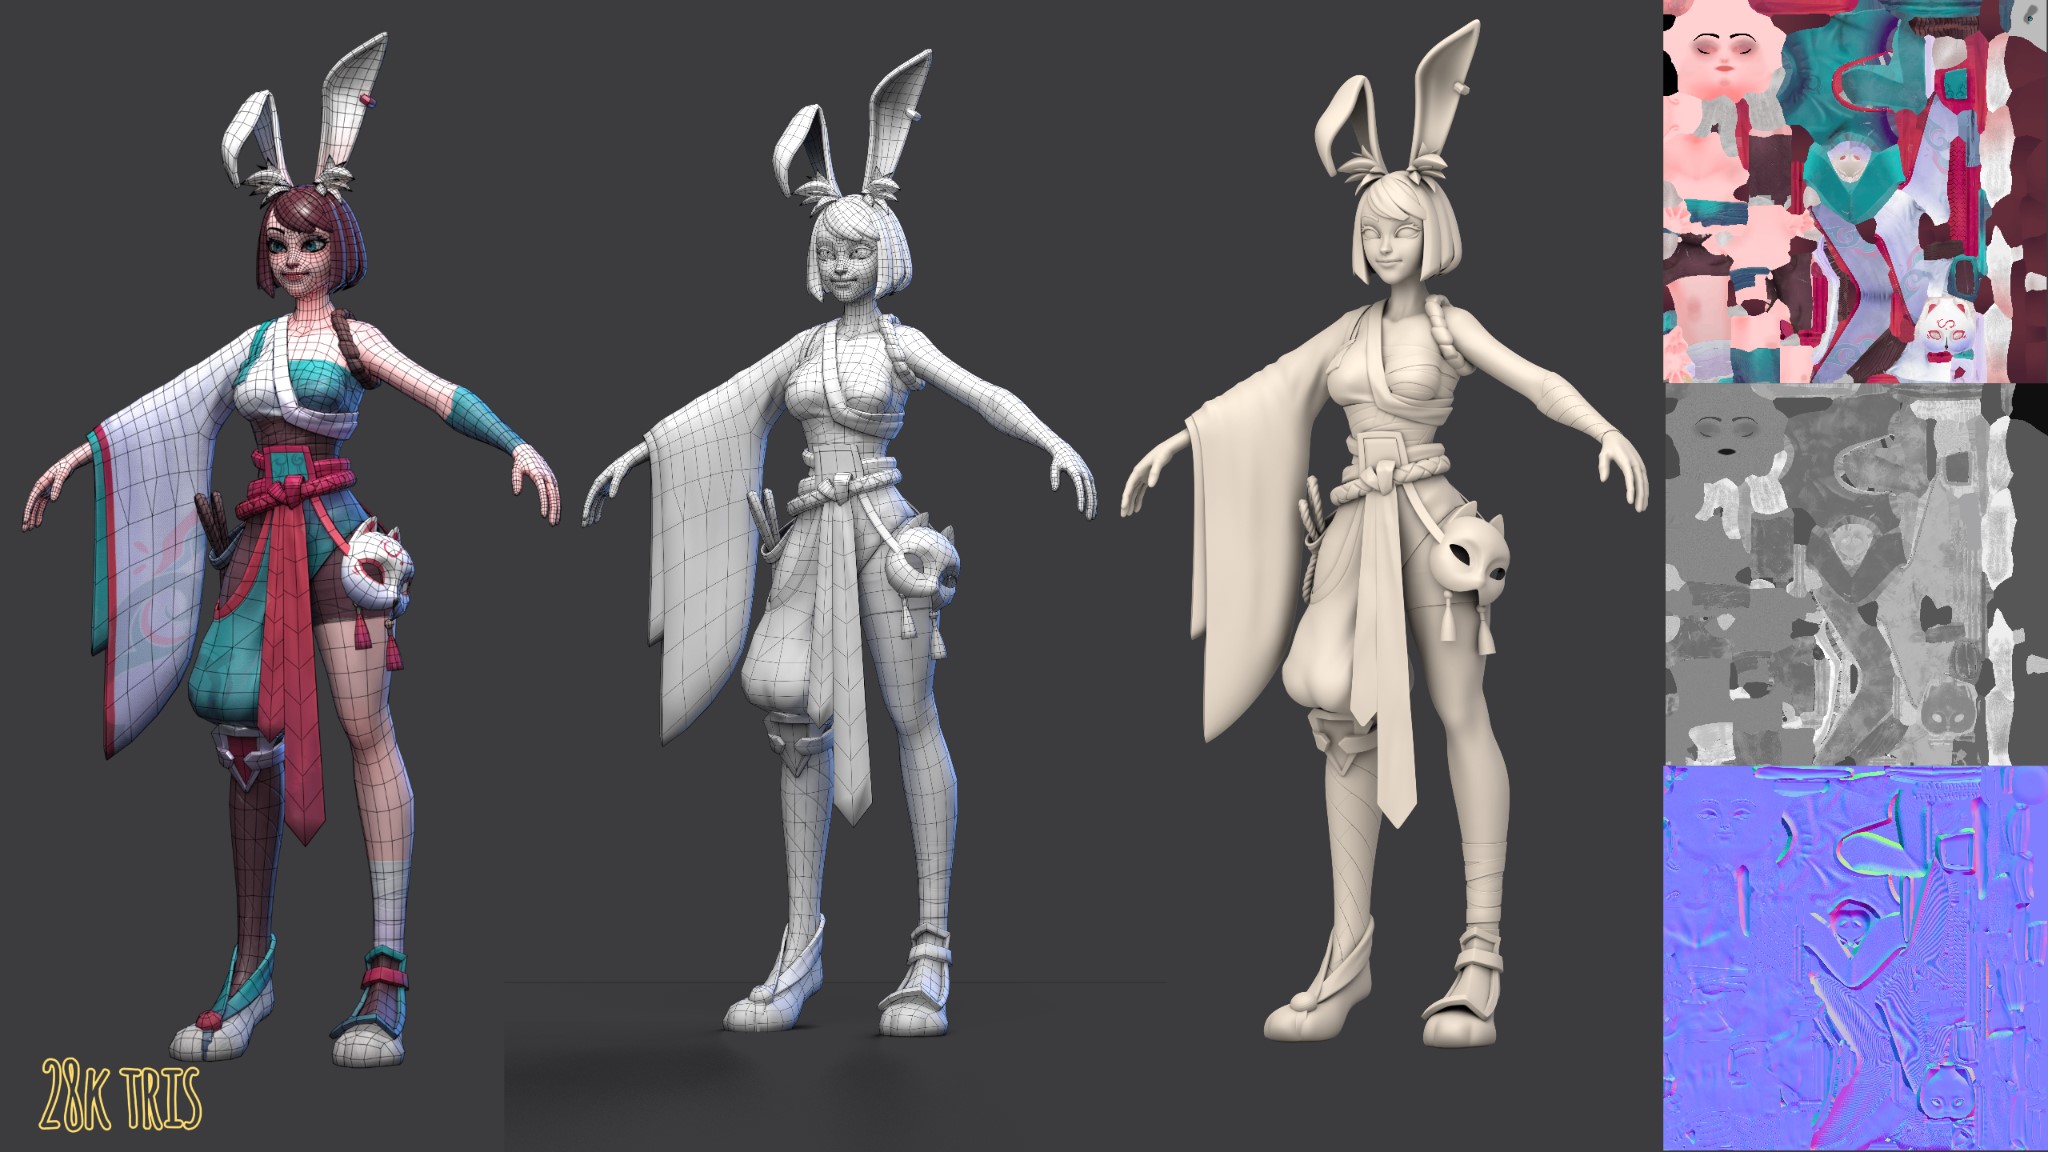
Texturing(Substance painter)
You can watch this stage here:
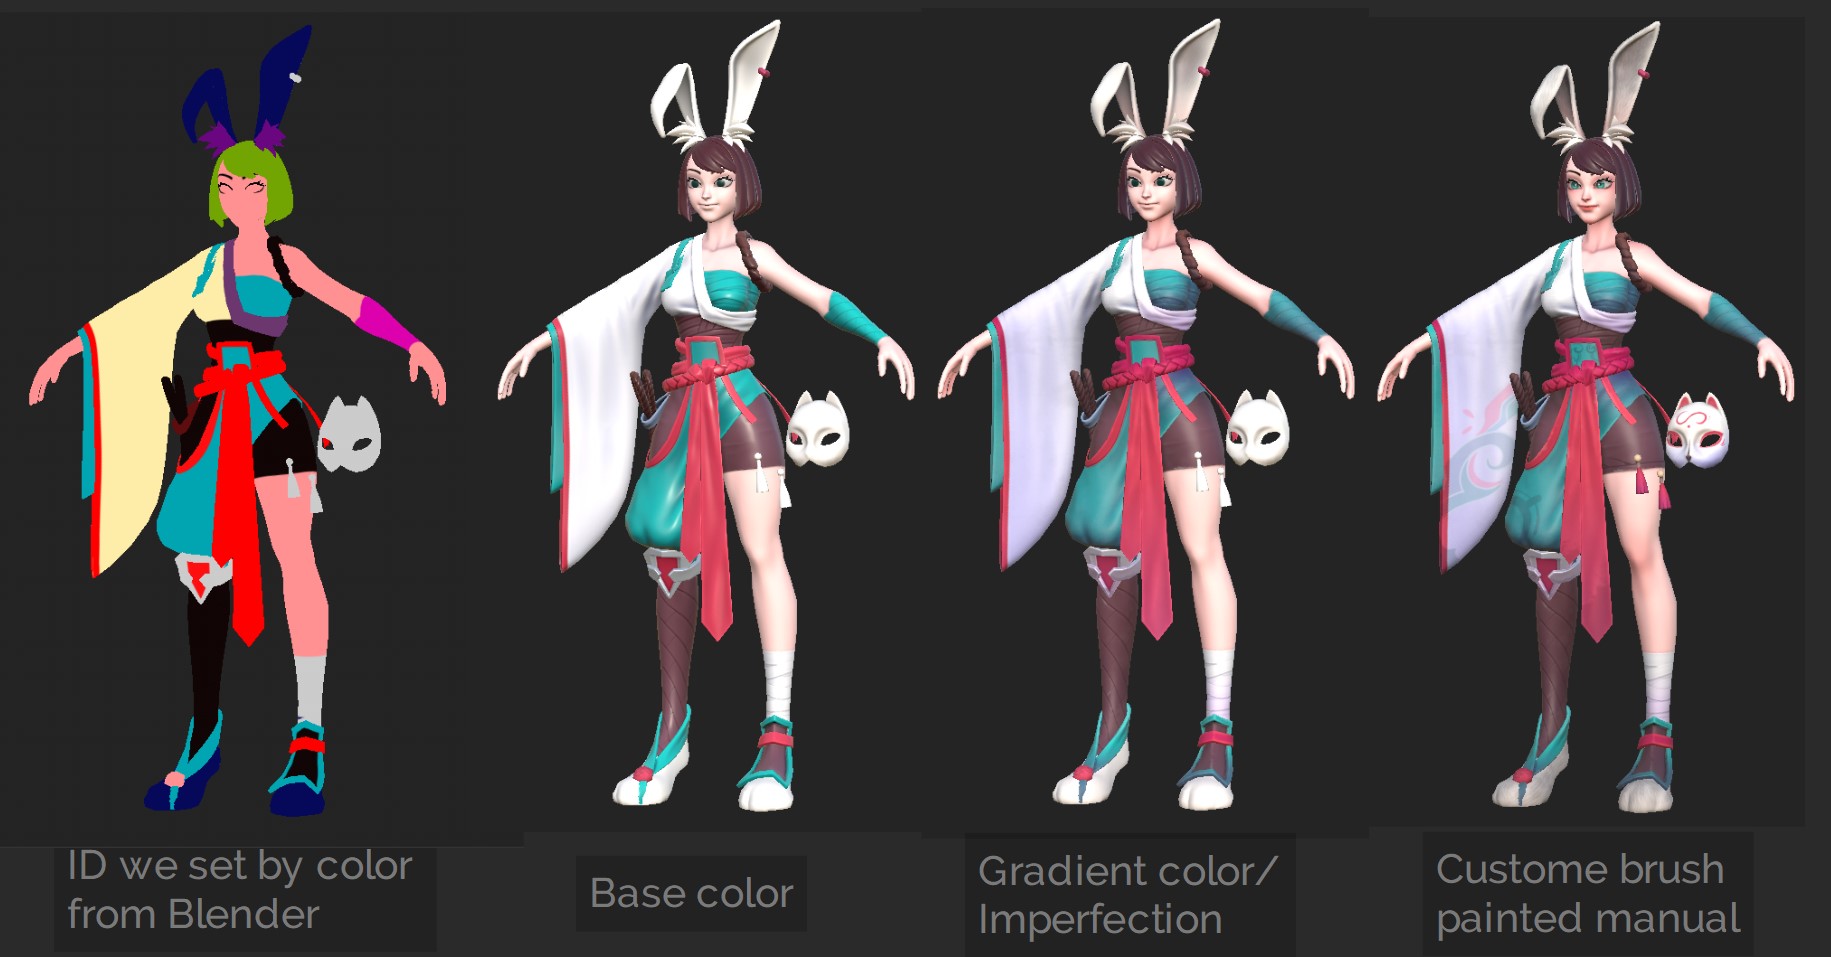
Basically, I added these layers:
- Base color: I had marked the ID color of each material in Blender before, so now I just needed to add each material for each ID color.
- Gradient: I added a gradient color for each part which is the unique characteristic of this stylized style.
- Imperfection: I added some grunge or dirt layer for each part.
Custom brushes included some additional imperfection brushes and some decorative stuff following the concept. Also, I added the make up layer for the face and the fur brush for the ears and feet.
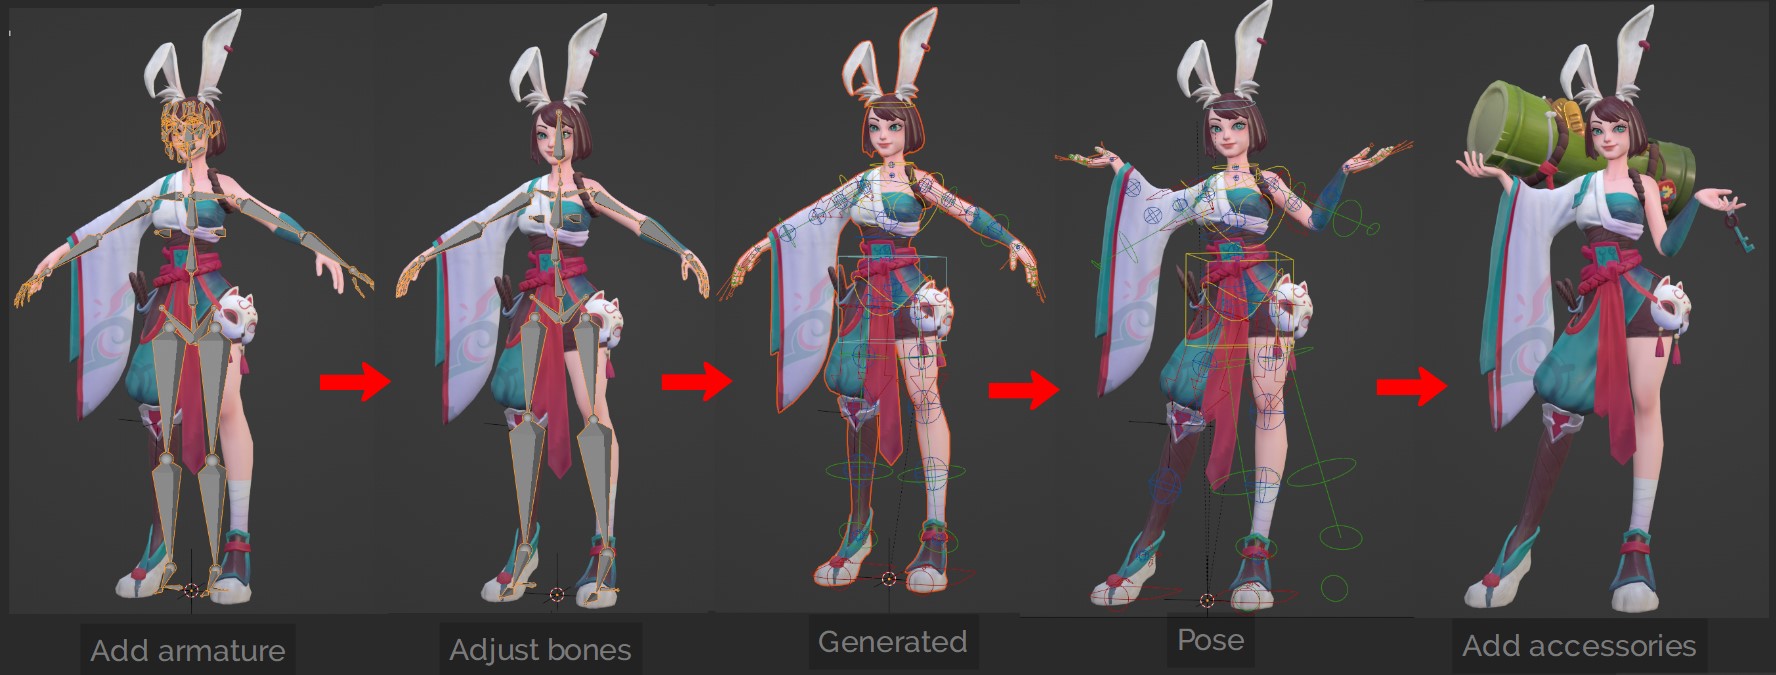
Posing
You can watch the posing and lighting stage here:
I added a human (meta-rig) armature, then adjusted it to fit the character, and generated it at last.
Before I posed, I had to fix some weight paint errors. The sleeve is so hard to rig, so I sculpted it separately. Then, I put the accessories in manually.
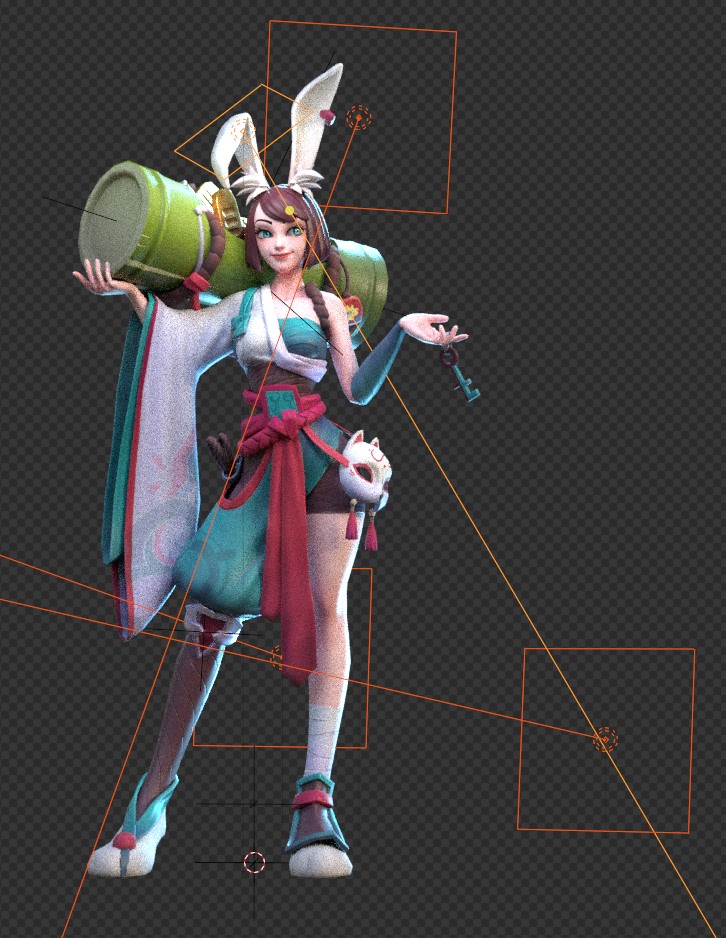
Lighting
I simply added the default HDRI light in Blender—Forest.exr as the overall light (we can find this .exr file in Blender’s folder).
I added a key light for her face, and 3 back lights for rim light. That’s it! It’s simple but efficient, right?
That’s it! You can always watch the full process on my YouTube channel.
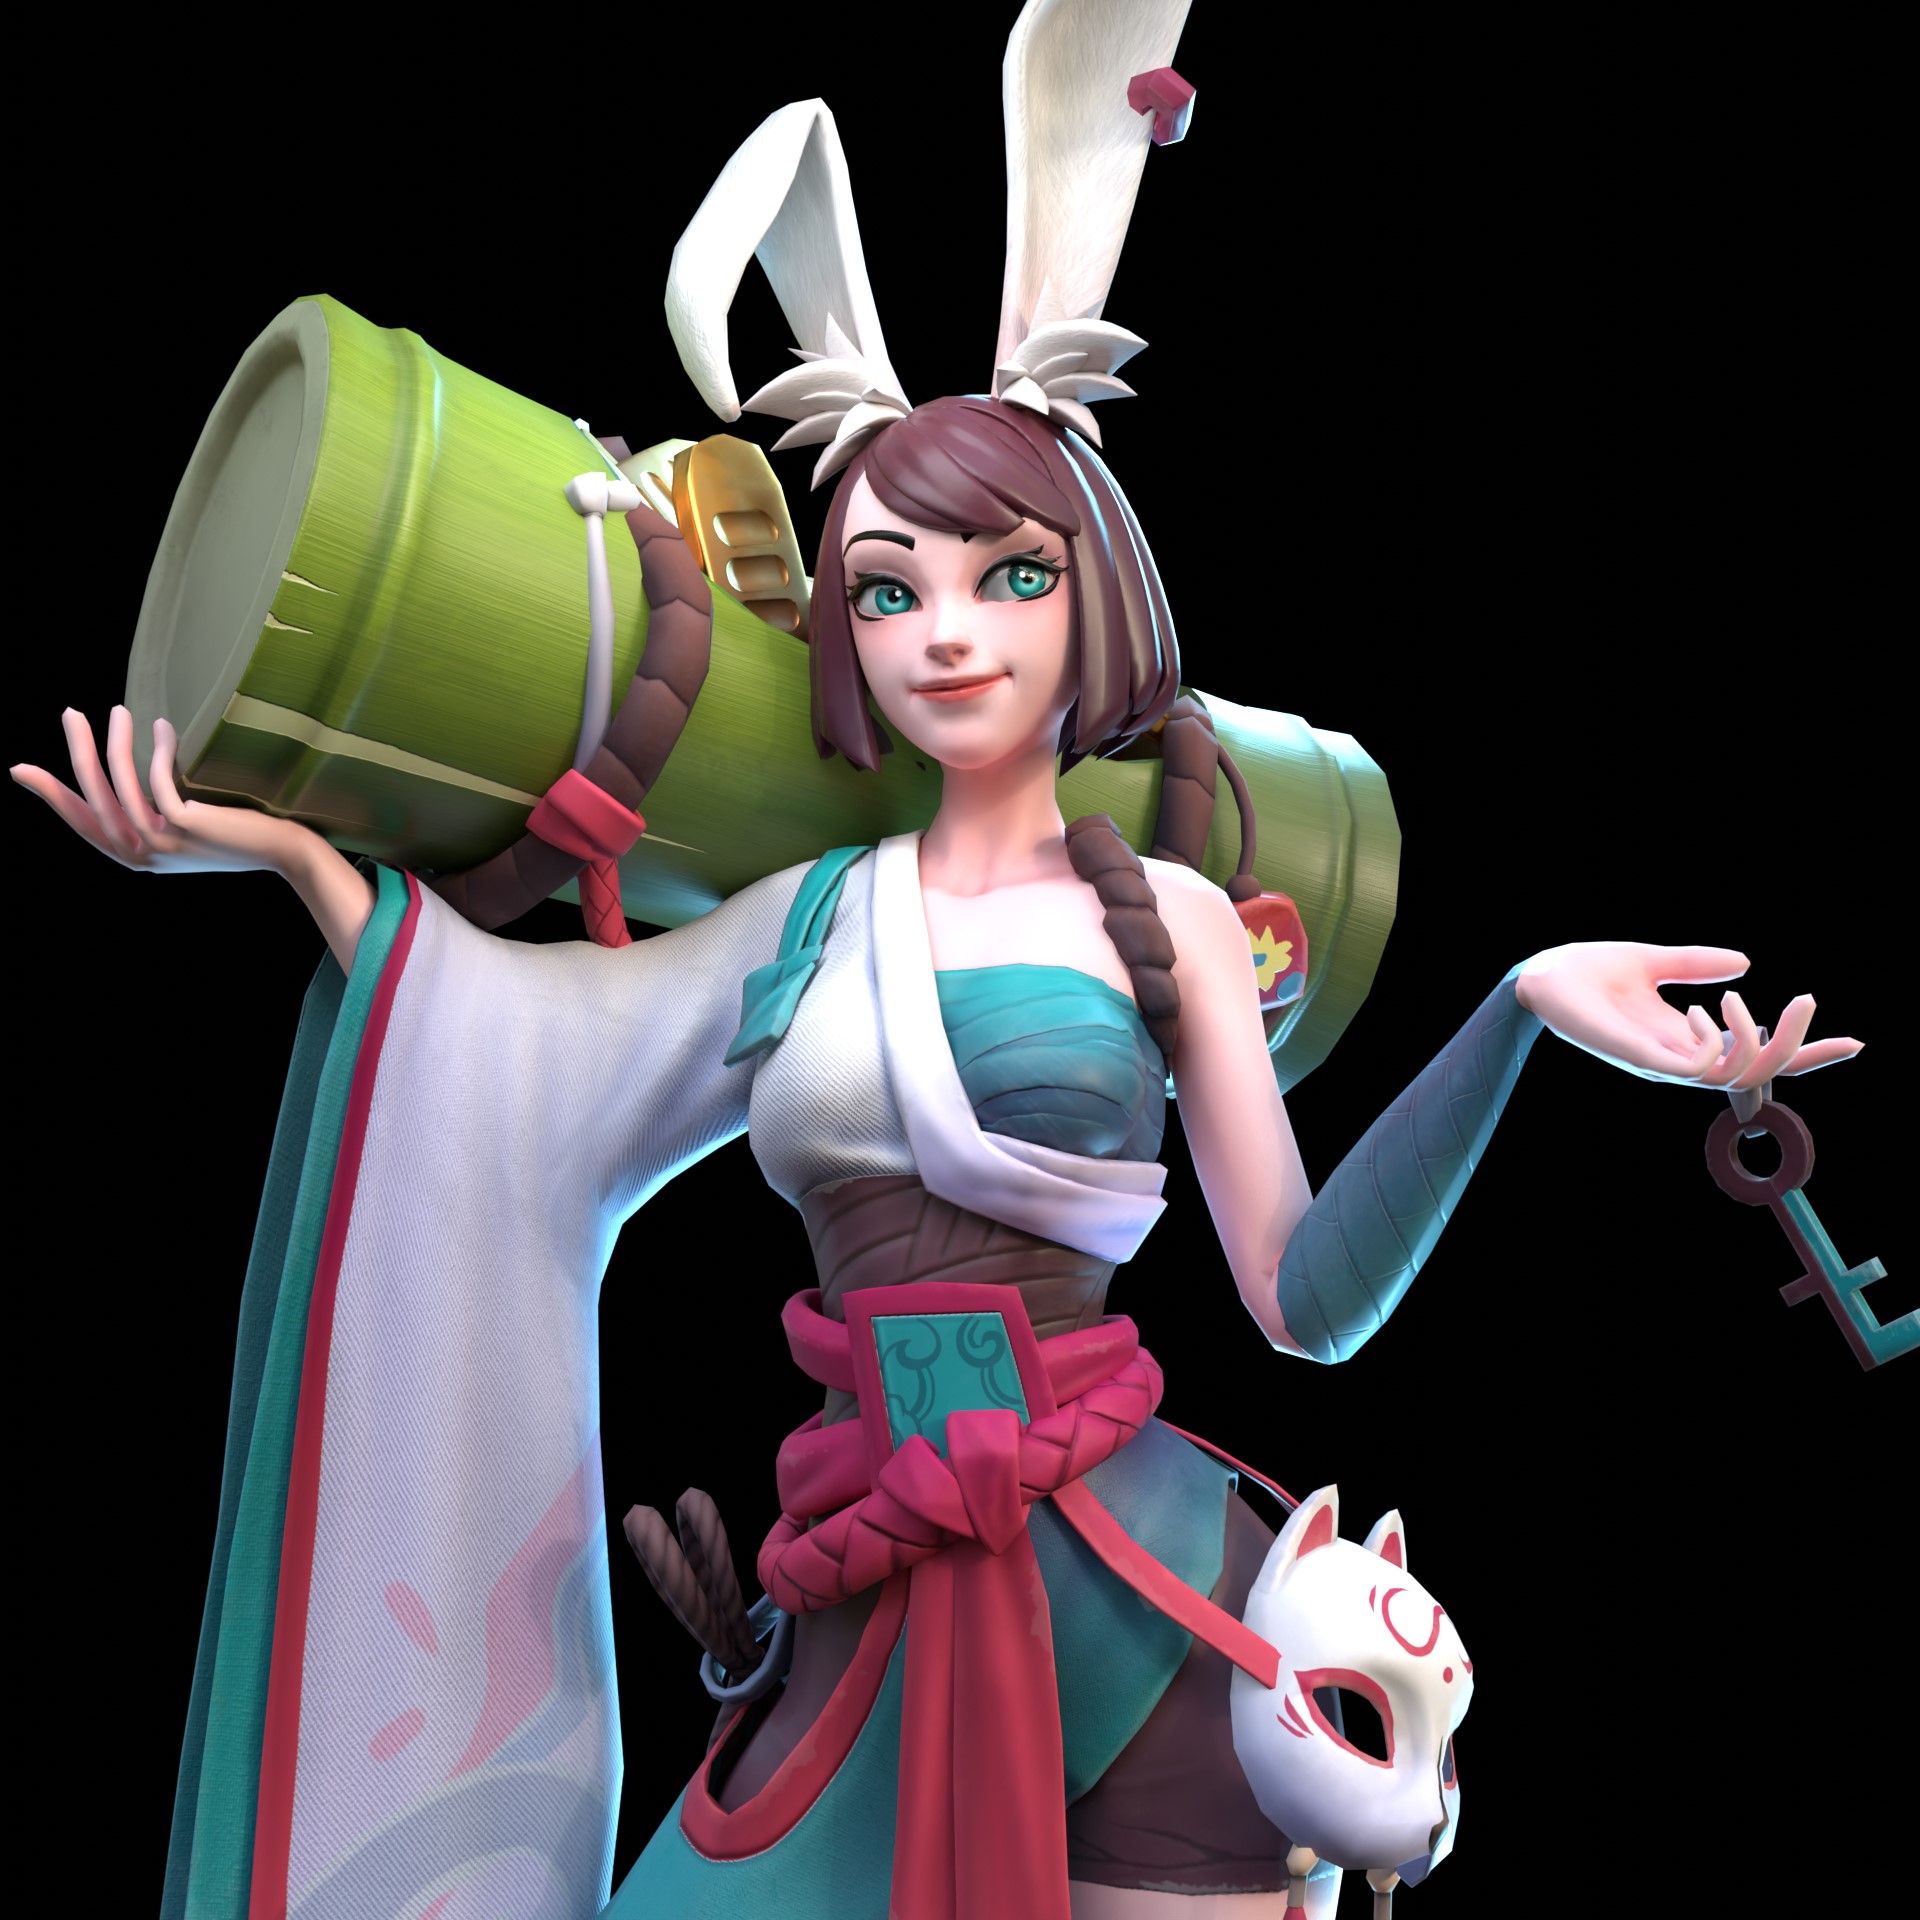
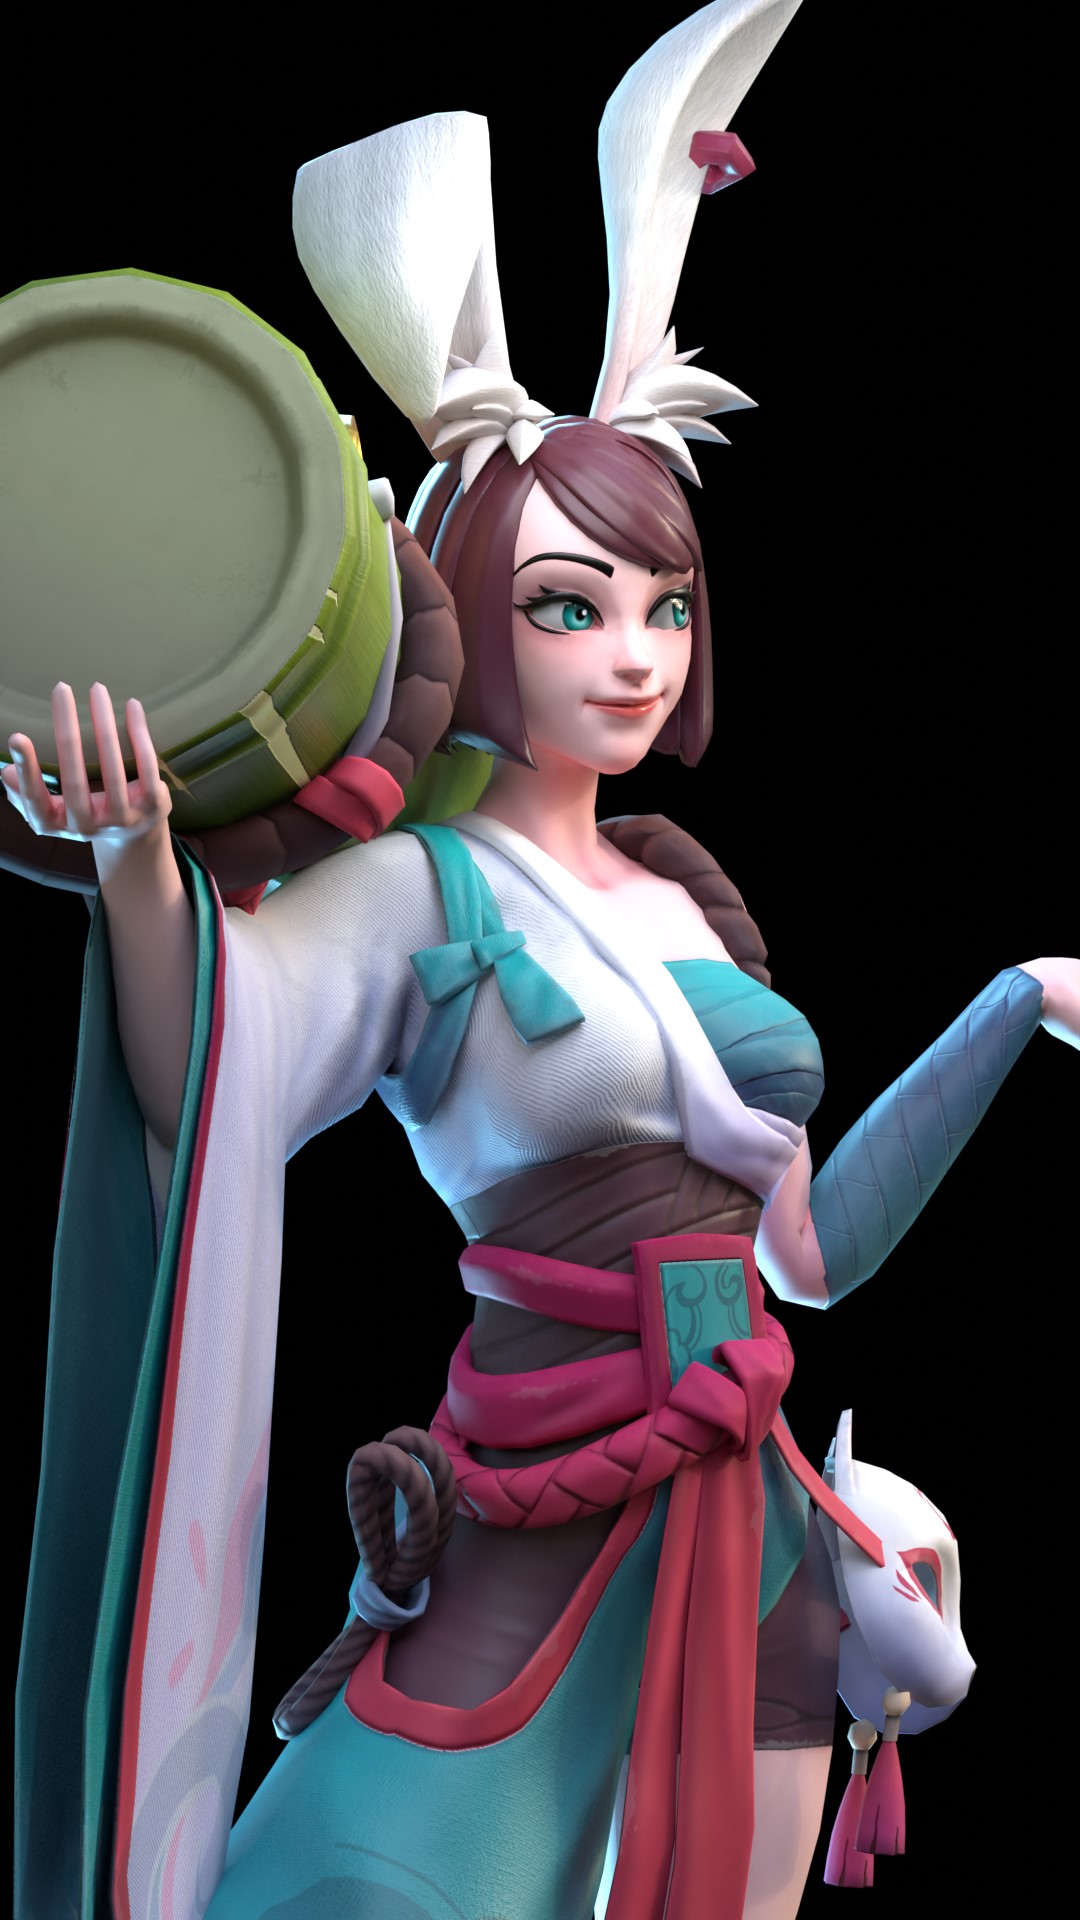
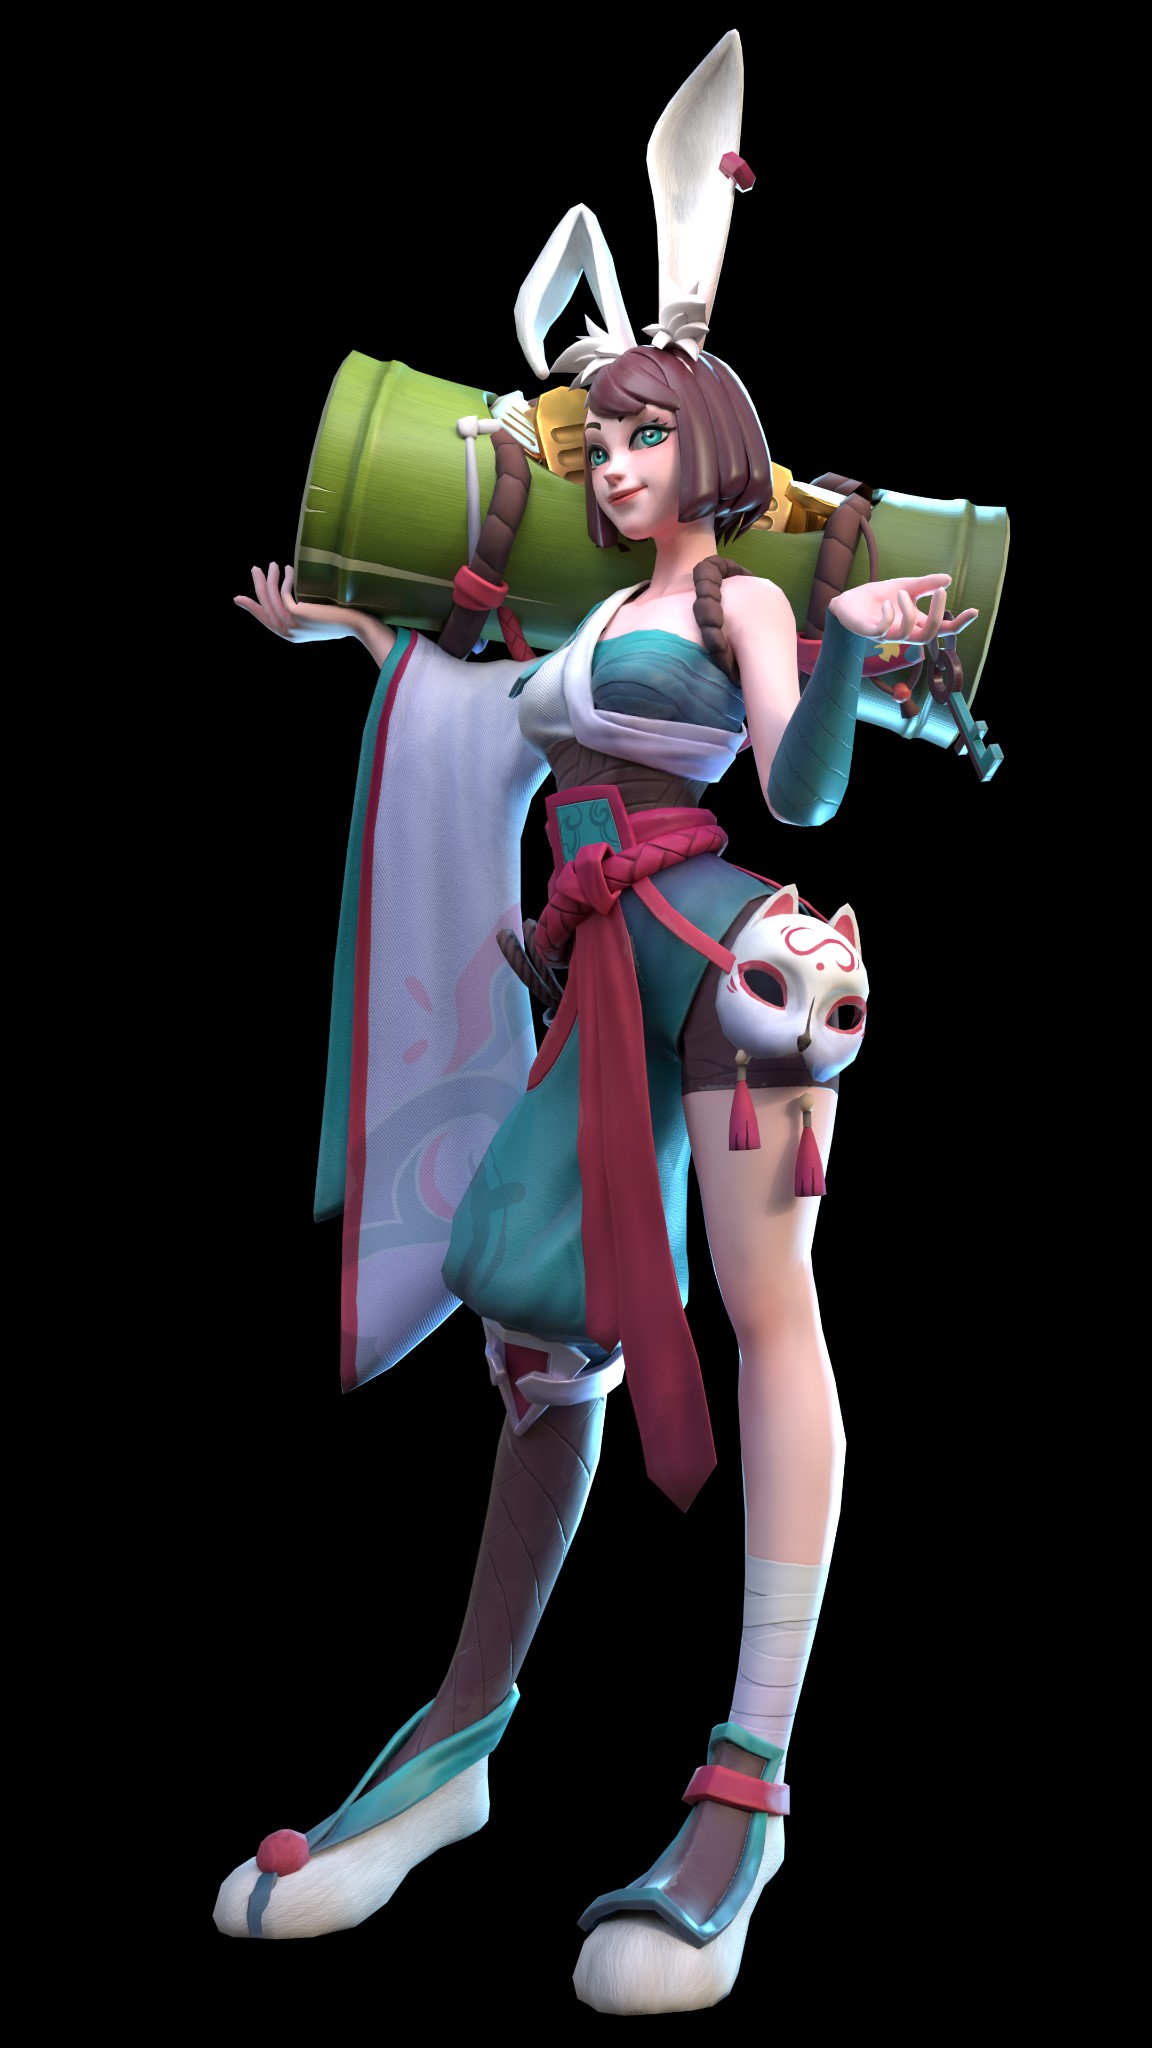
RENDER: Bunny Thief
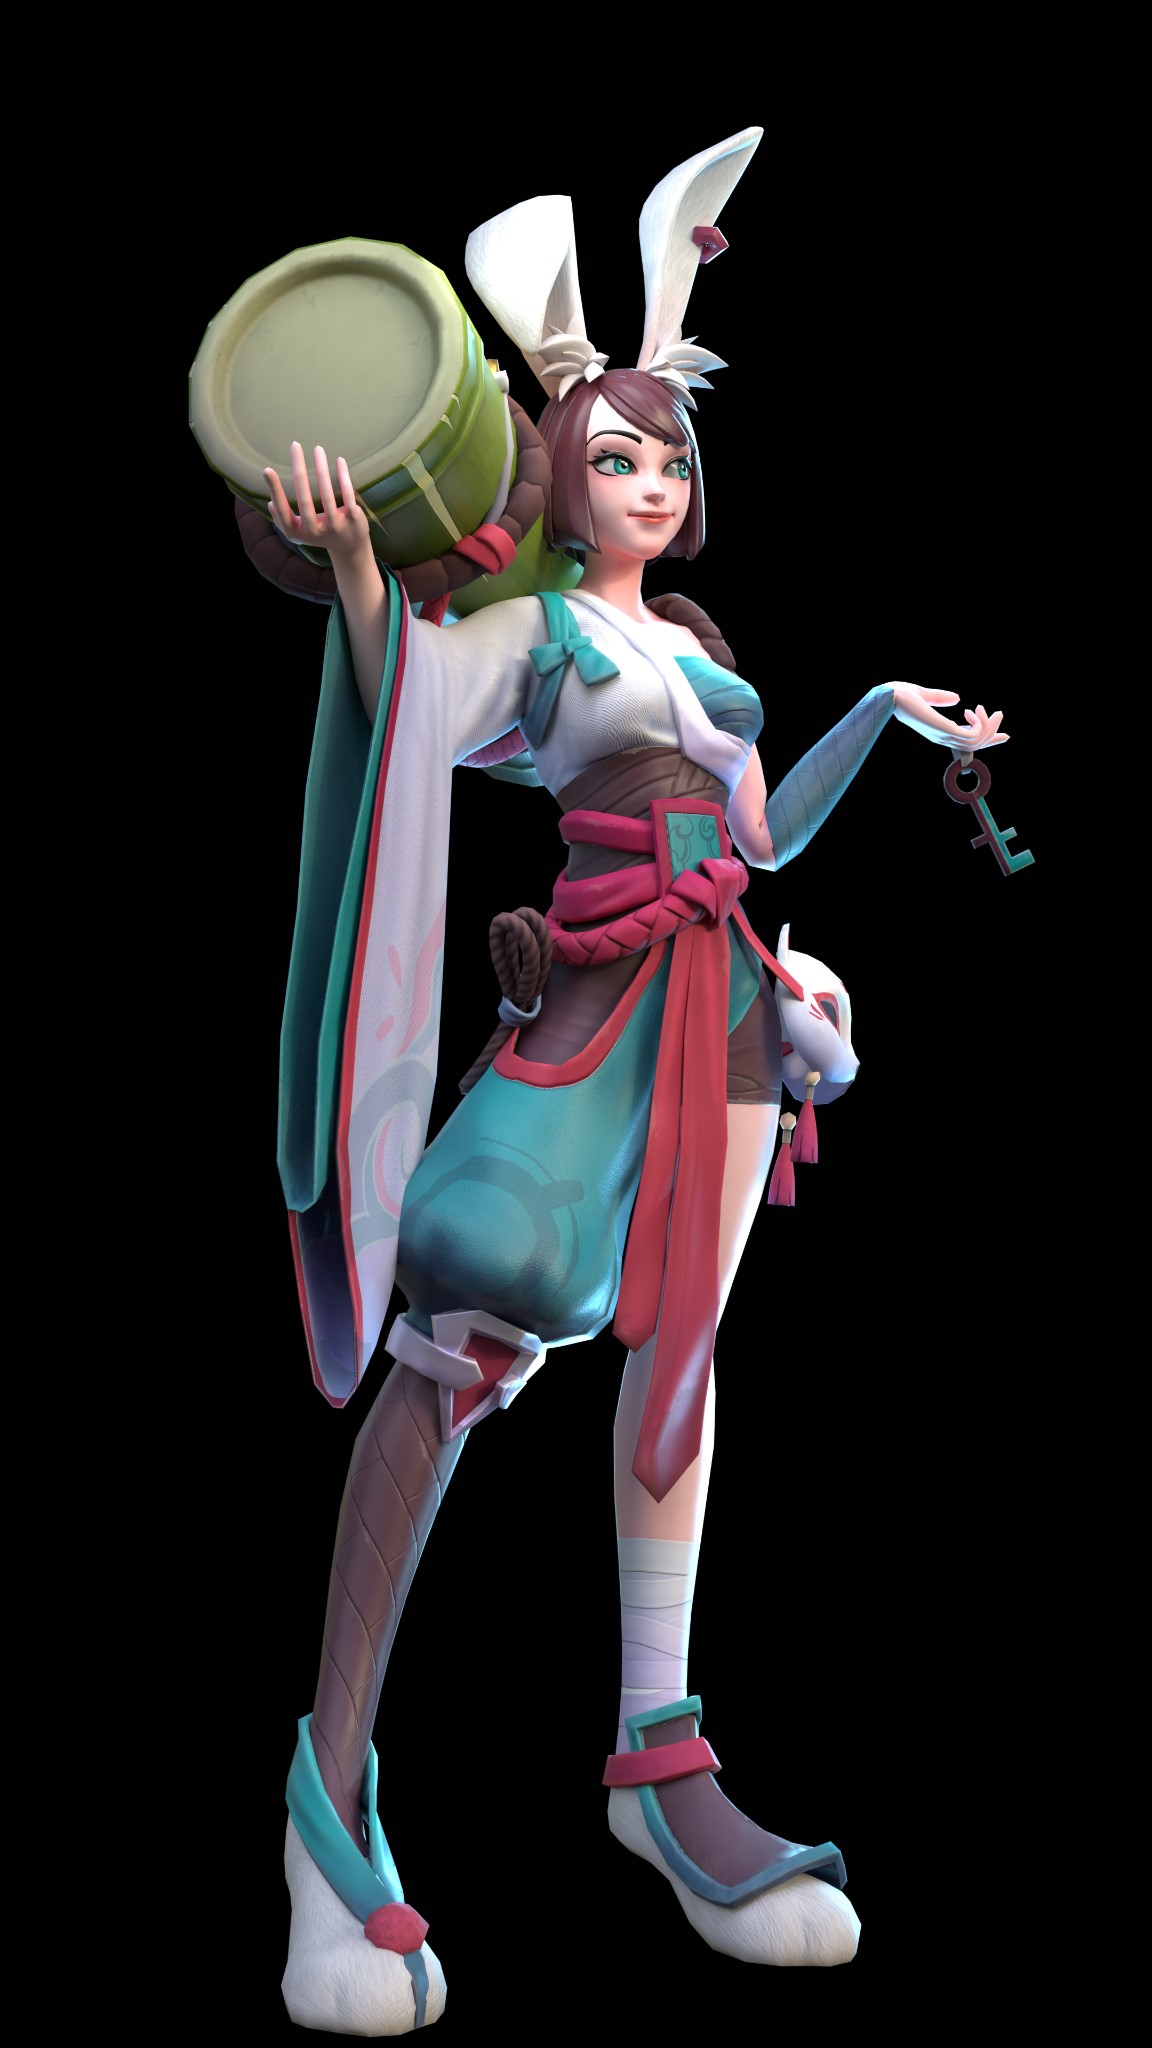
Thank you for reading my article, and I hope you enjoyed it! Feel free to ask questions on my social media. Have a great day!
About the Artist
Tùng aka Inner Wind is a 3D artist from Vietnam. He’s currently working as a freelancer, with his philosophy, “Follow the wind inside.”


Great