
Behind the Scenes: John Wick

INTRODUCTION
Hello, my name is Dani Tufeld and I am from Israel. After a career of 15 years as a chef, I decided that I want to change direction in my life, so I enrolled in a college for game development and design, as games were always a big part of my life.
During my studies, Covid broke out and the restaurant I was working at closed so I found myself without a job—I had to reinvent myself. I was lucky enough to find my first job in the gaming industry, and this is where I have been working since then.
From the first moment I was introduced to 3D during my studies about 4 years ago, I fell in love immediately with the craft in general and in Blender specifically. Now, I work on Blender almost on a daily basis as part of my job or in my free time, exploring, practicing and crafting my skills.
INSPIRATION
I love exploring the web in search of great art and artists that inspire me. I came across the amazing art of Patrick Brown, who is a Marvel comic artist and does a lot of fan-art of his favorite games and movies, and I found a lot of similarity in his taste to mine.
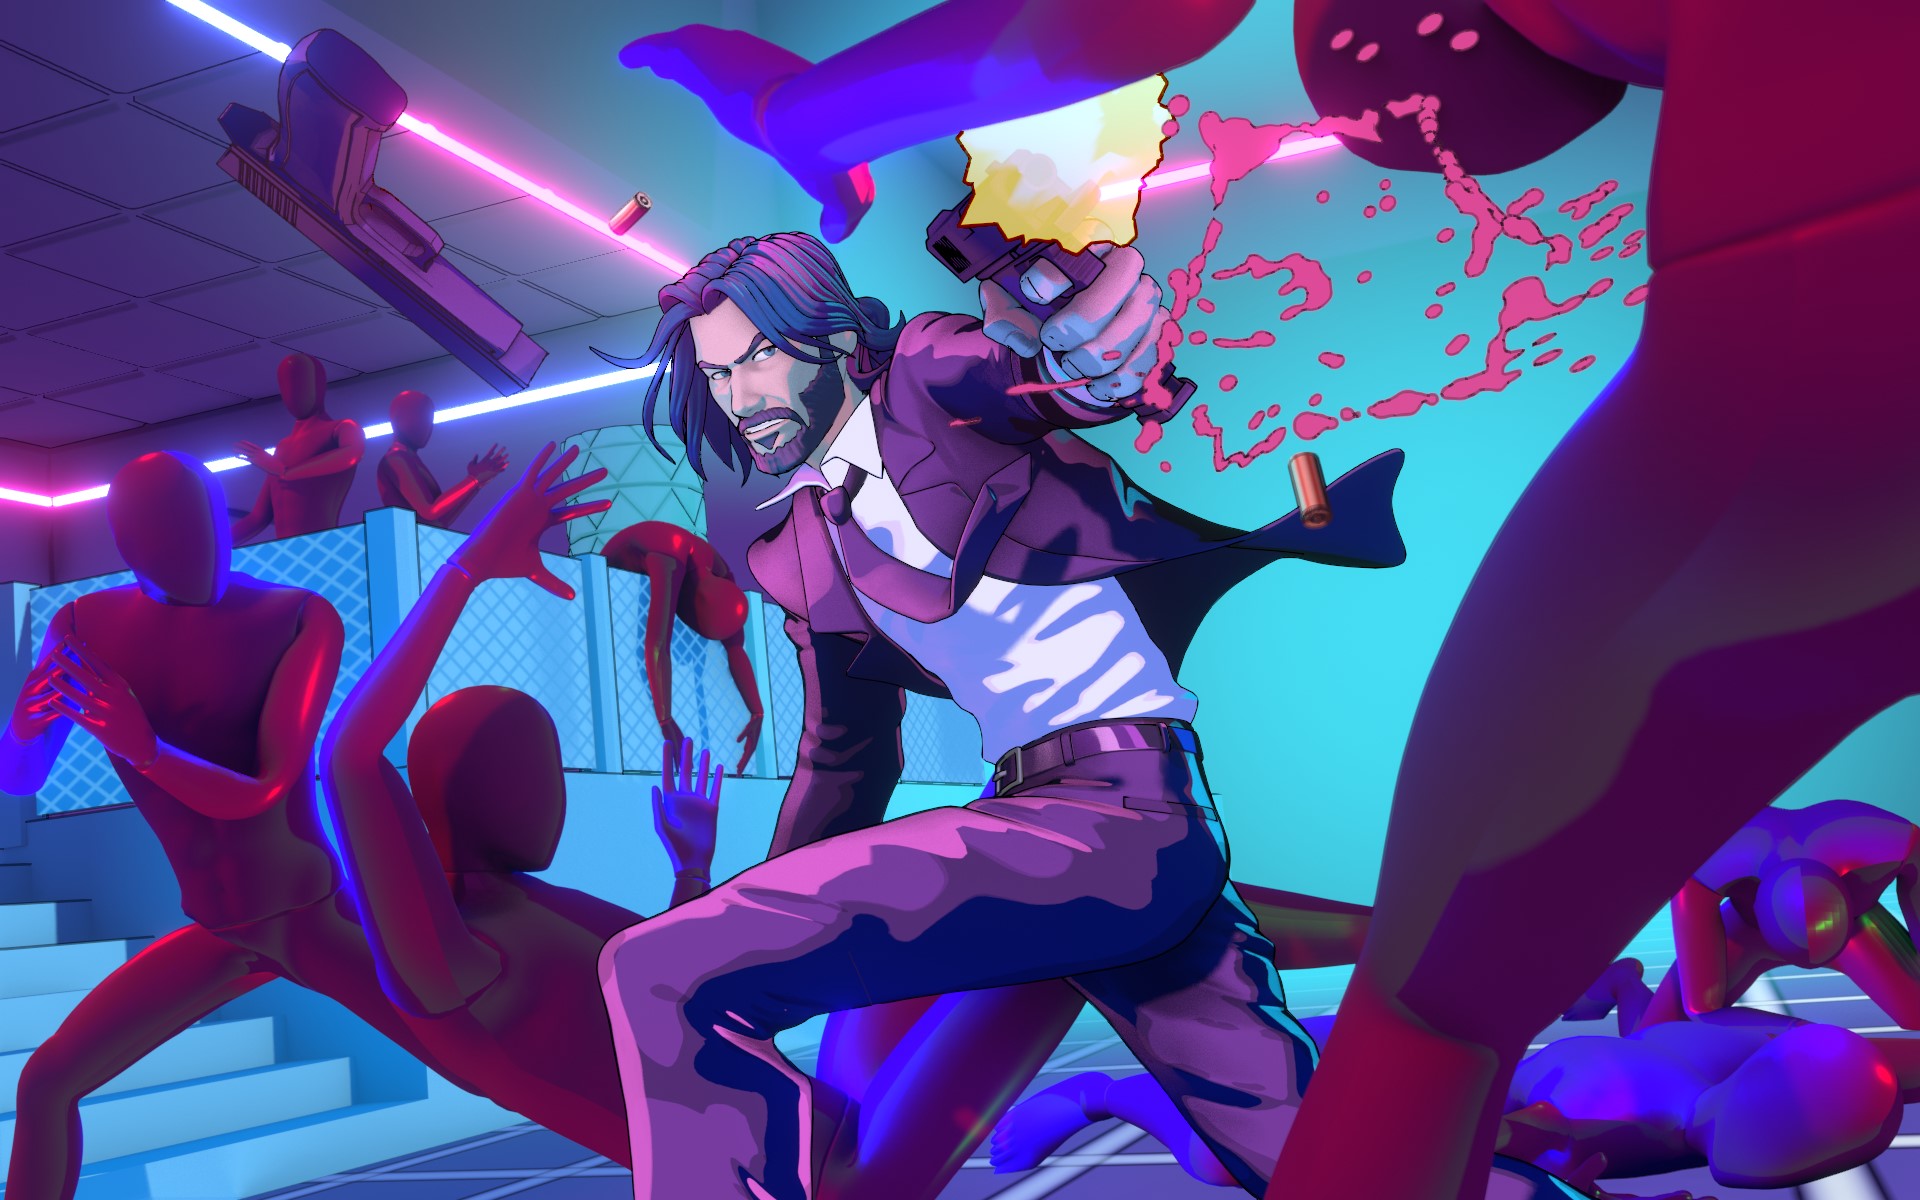
The John Wick club scene immediately caught my attention for its unique dynamic pose and bright neon colors that brilliantly capture the moment and tell a detailed story in one shot.
I decided that I have to recreate it myself in Blender.
PROCESS
The processes were:
- Modeled and sculpted in Blender.
- Rendered with Eevee.
- All textures are procedural shaders, inspired by Lightning Boy Studio’s shaders. Grease pencil was used to add outlines.
- Final touch-ups and tweaks were done in Adobe Illustrator, including adding glare to the spotlights and incorporating gunfire using blending modes.
Block-Out
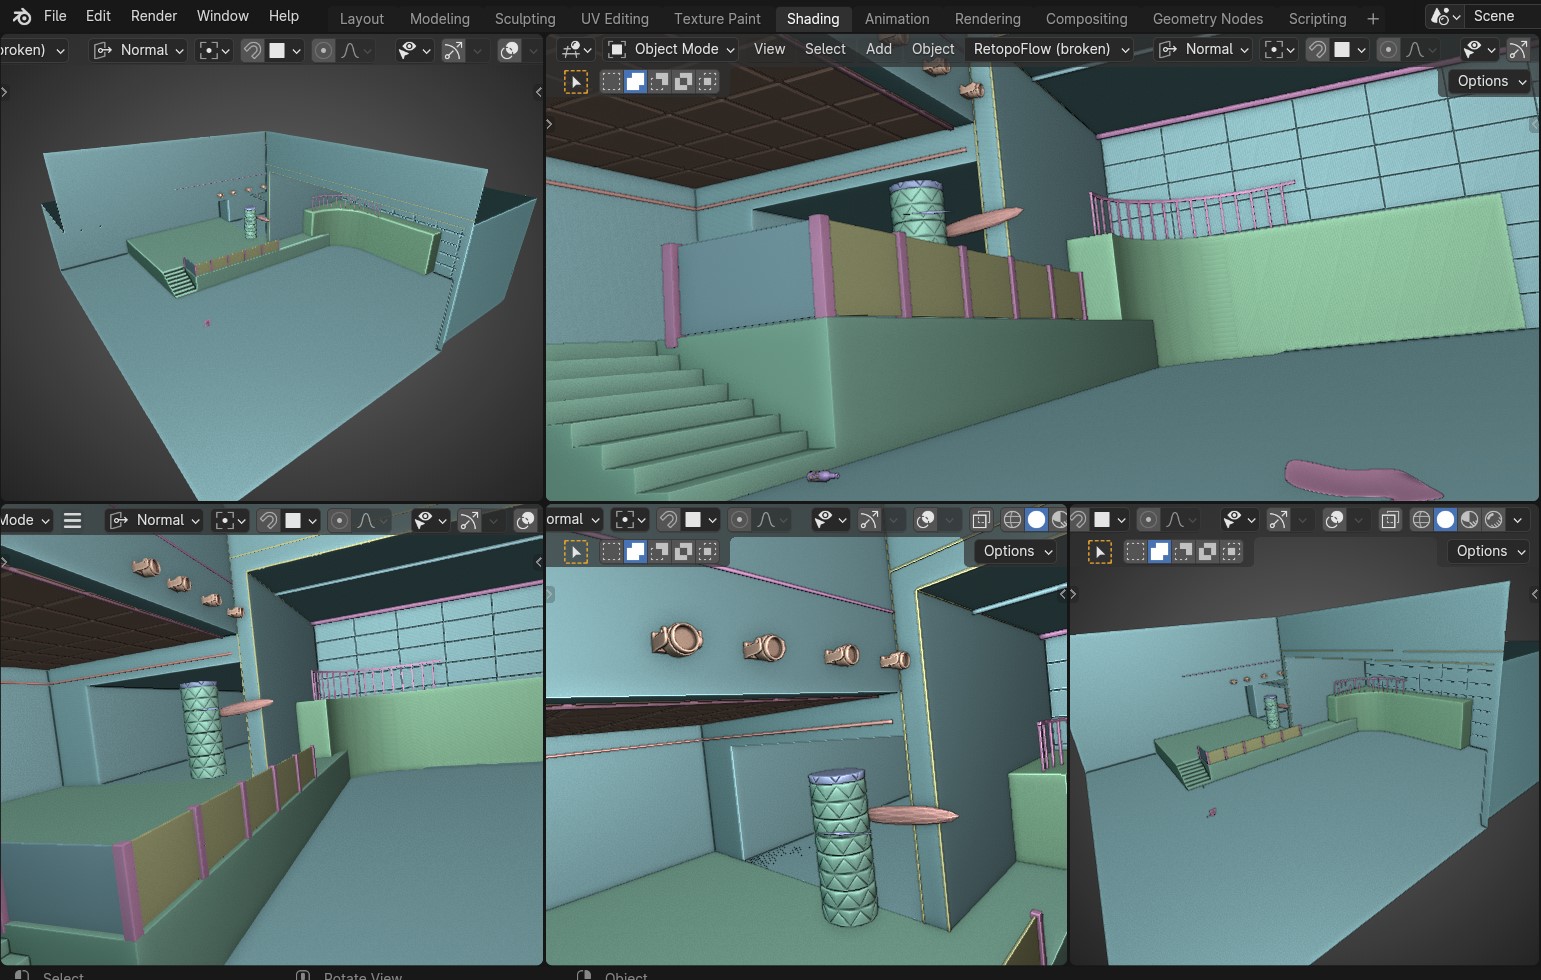
First, I established the blocking of the club, working with simple primitive shapes, and adjusting the camera angle and focal length to work with perspective in the scene according to the original reference.
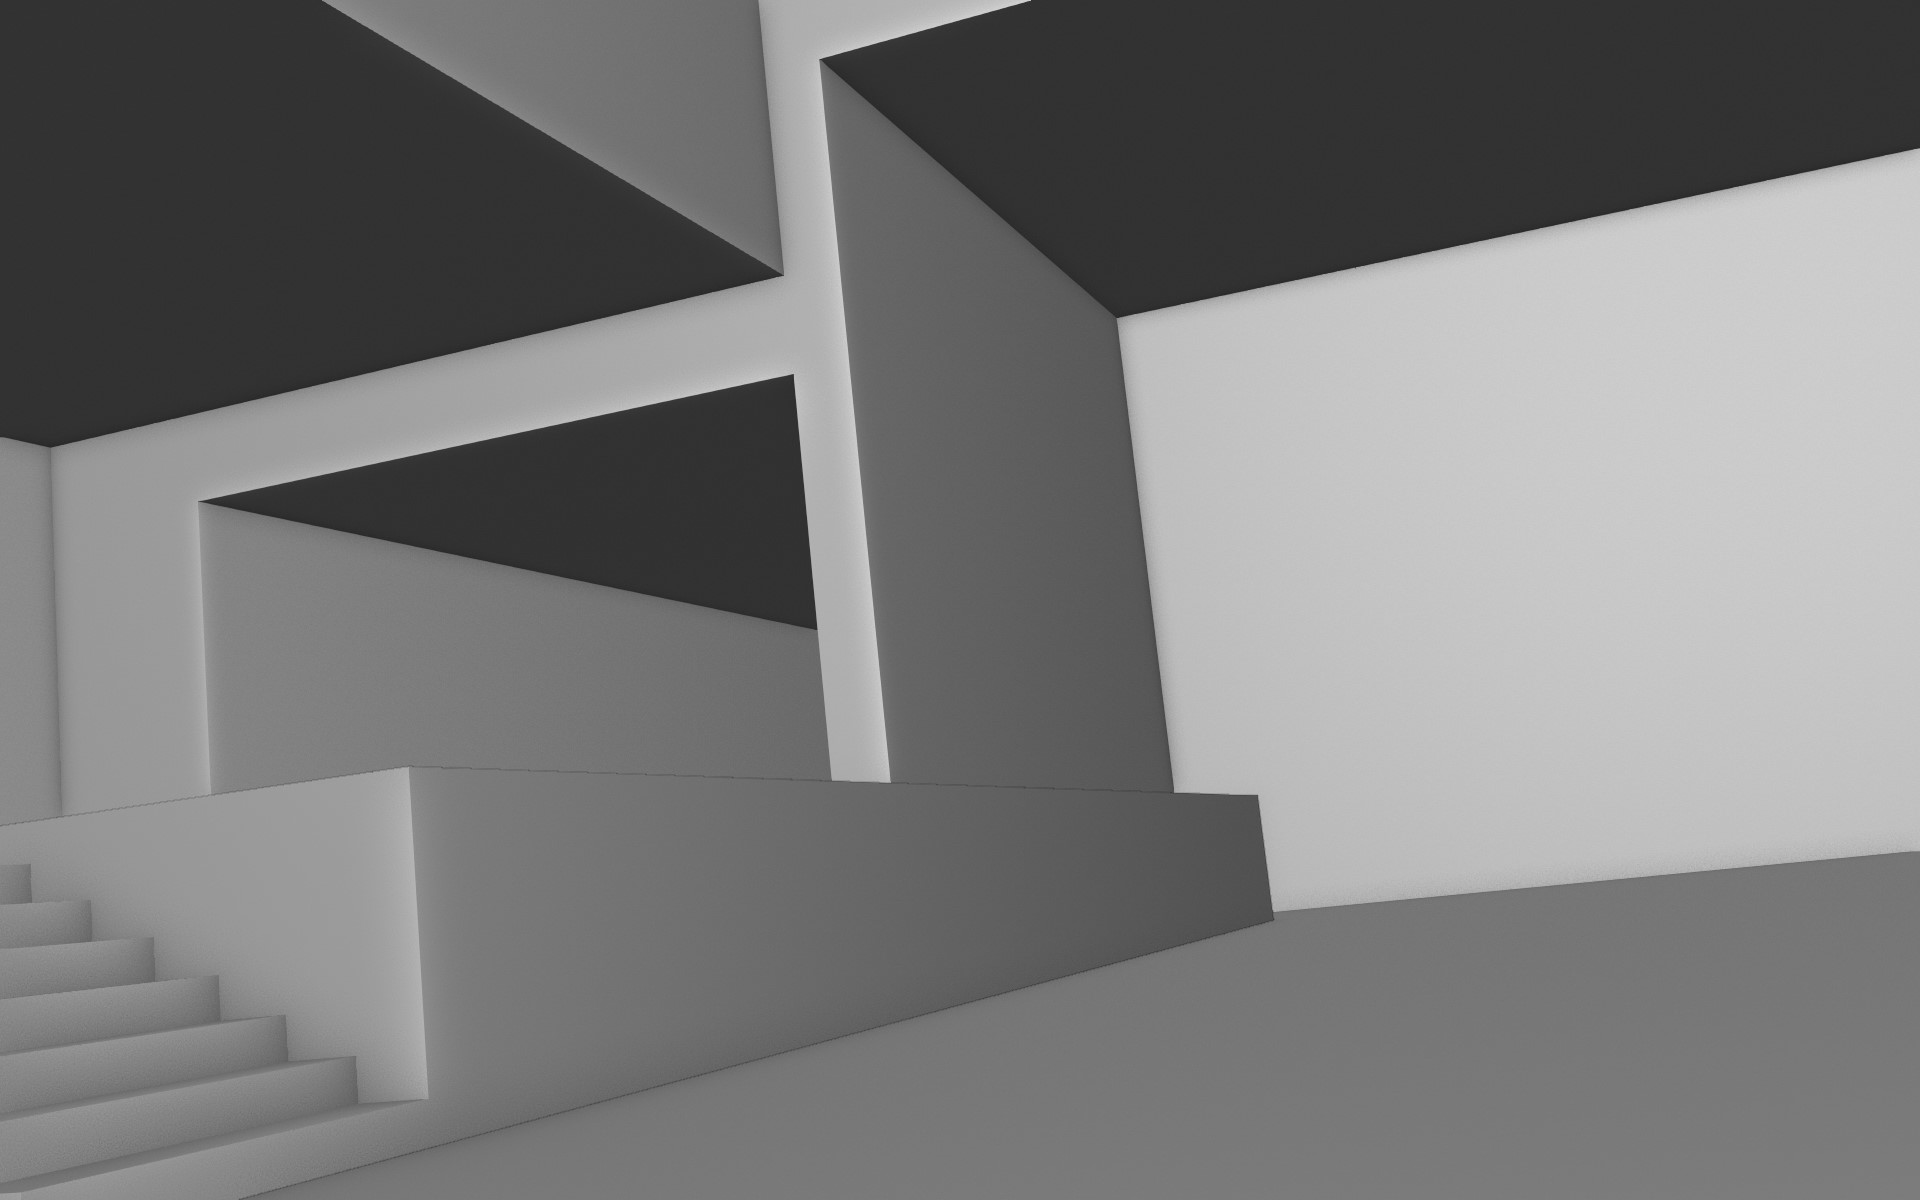
Then, I imported a simple rigged mesh from Mixamo and placed it around the scene roughly in their final pose, while adjusting the camera to work with all the different elements.
Modeling
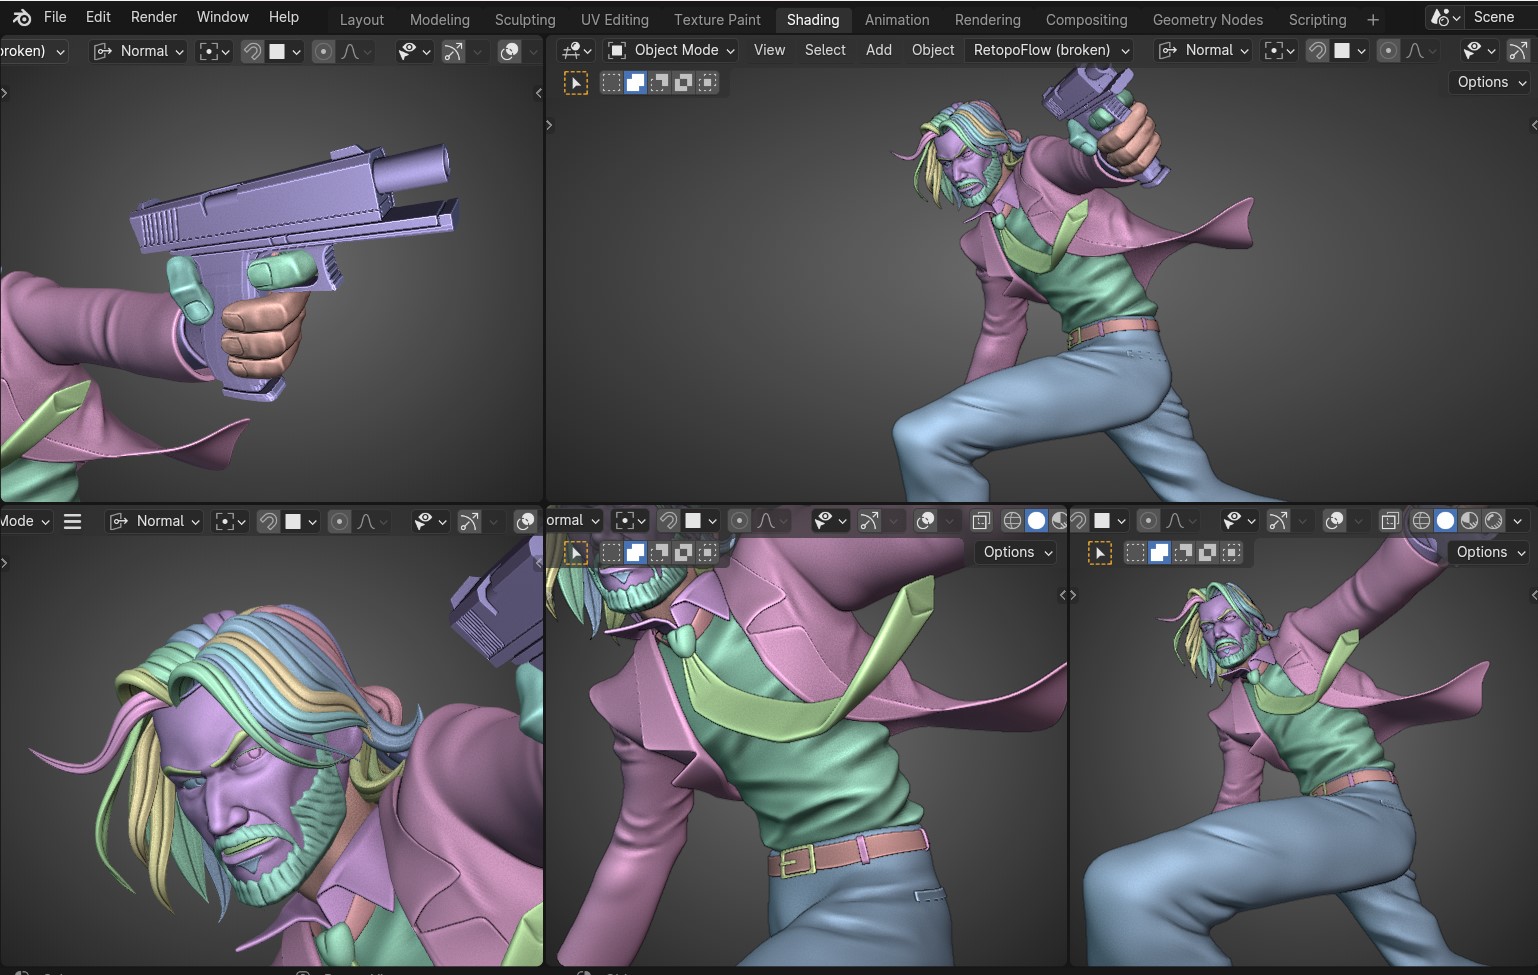
Next, I started modeling and sculpting, focusing on the main piece (John) and testing the shader to understand how to achieve the desired look.
Shading
To establish the shader, I added 3 main lights in the scene: a key light, fill light, and rim light. On every one of them, I gave pure colors of Red, Green and Blue (RGB).
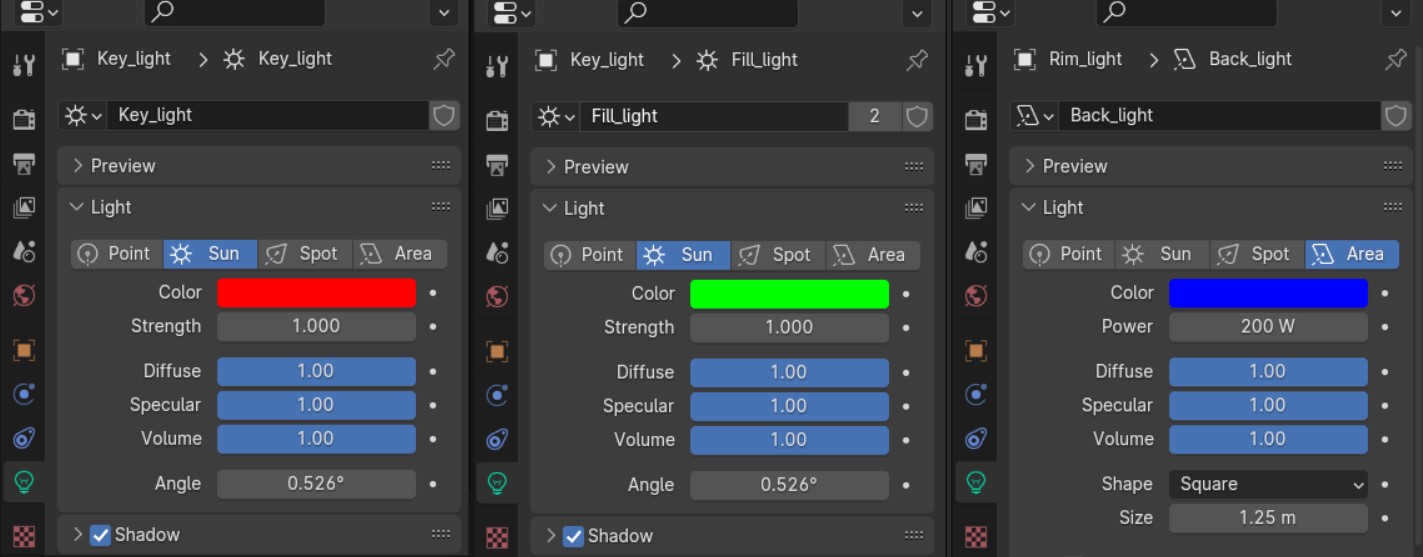
As you can notice, the dummies are shaded with red and blue colors, and that is because they have basic material and react to the colors of the lights in the scene.
This setup is important because it helped me achieve more control of the shader.
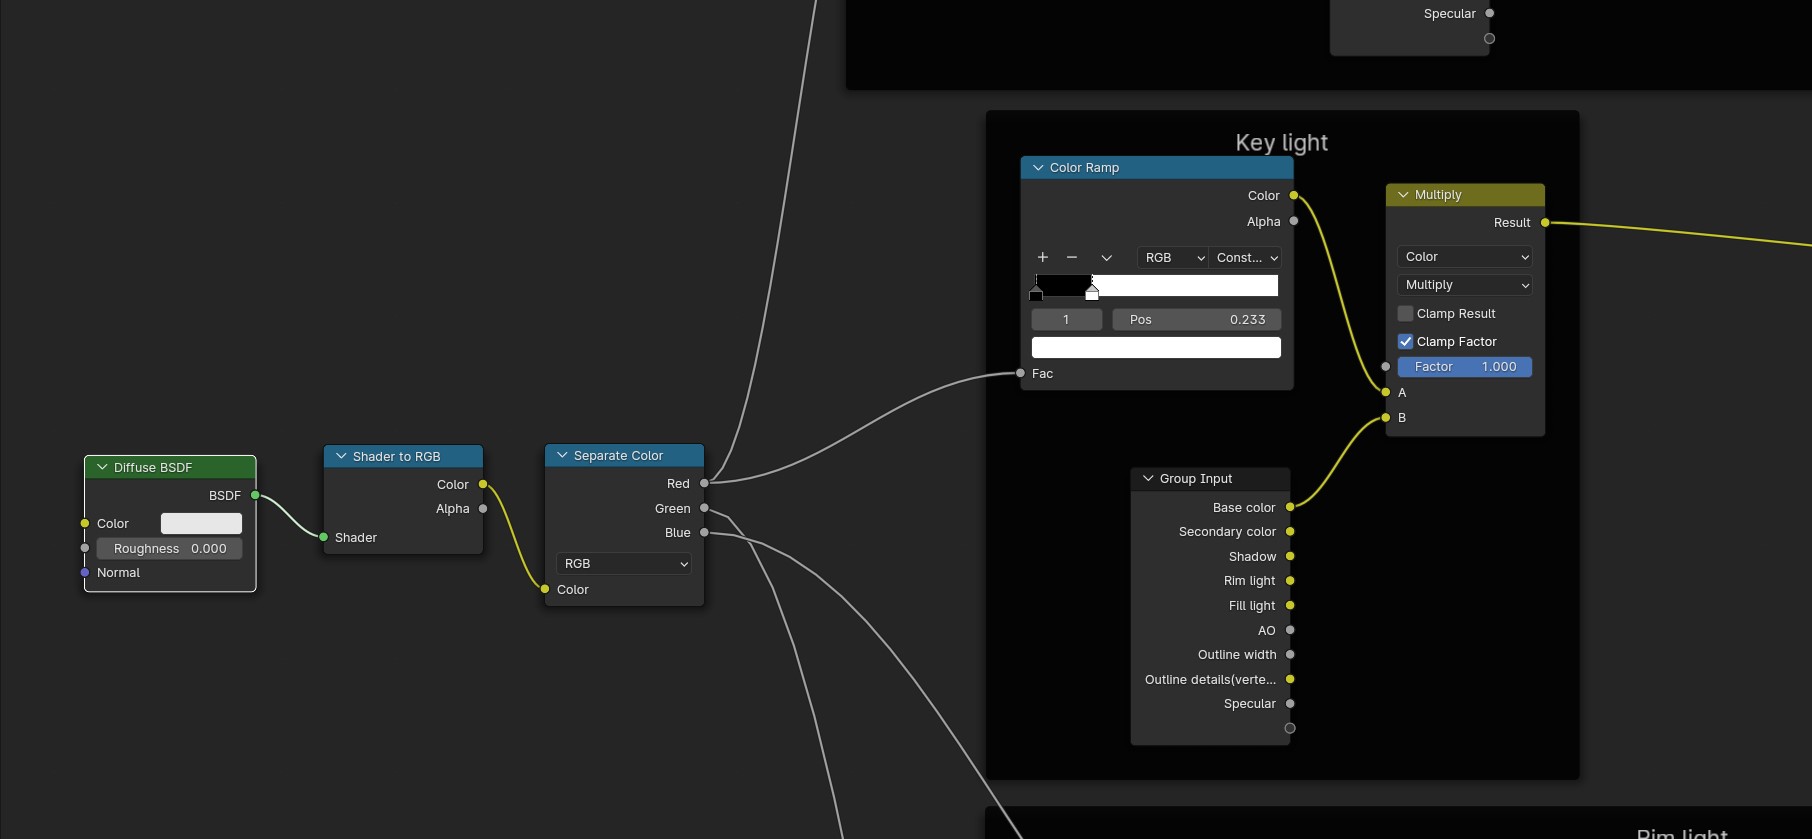
Using basic shader to RGB and separating the RGB, I can then manipulate each area individually using the different light in the scene.
For example, I needed more pink colors on John’s pants, so I just added blue spot lights.
To get a faster control of the shader, I made it into a group and exposed some parameters:
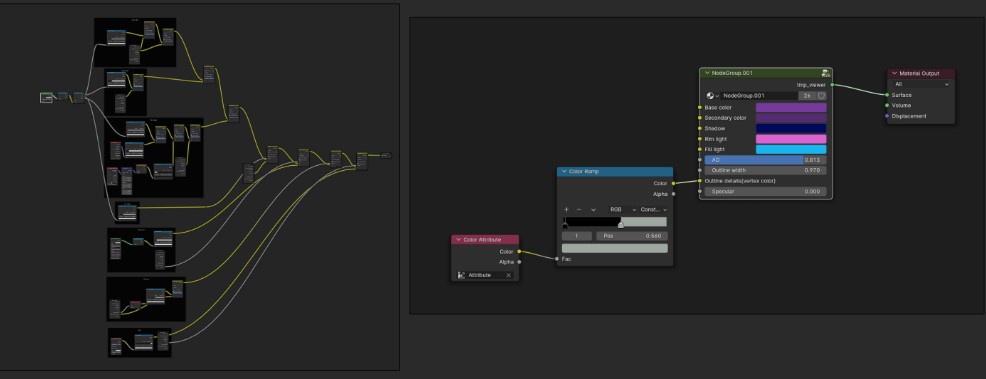
Using ambient occlusion and dirty vertex colors paint, I could extract more details for the shader from the sculpted geometry.
Shader examples:

Details
After I was happy with the general look, I just modeled and sculpted the rest of the details in the scene piece by piece.
Modeling the environment:
Modeling and sculpting John:
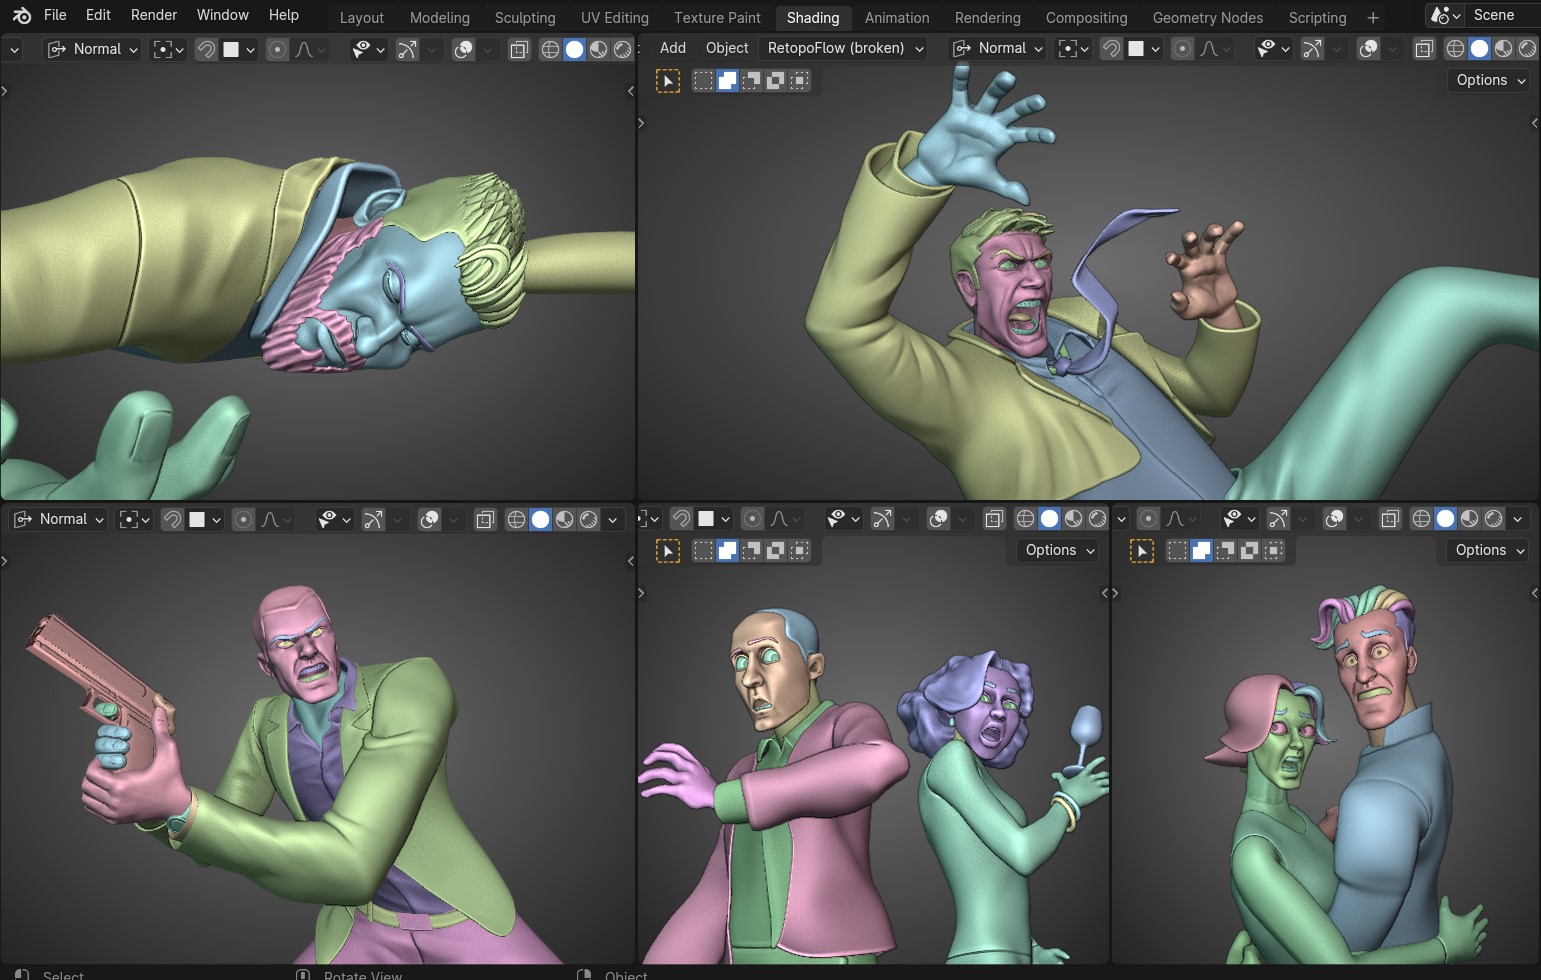
Modeling and sculpting the thugs and background people:
Grease Pencil
With Grease Pencil, I mostly used the line art modifier on different collections to achieve distinct thickness and colors on various elements in the scene. I filled the gaps with some manual drawing, such as the blood spots on John’s shirt and face.
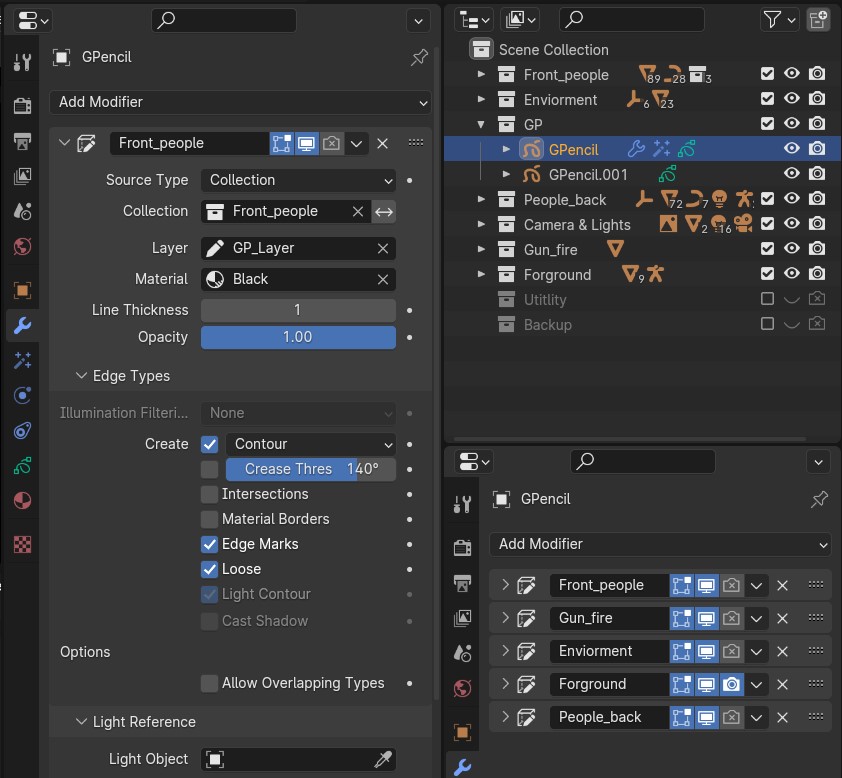
Grease Pencil layer rendered:
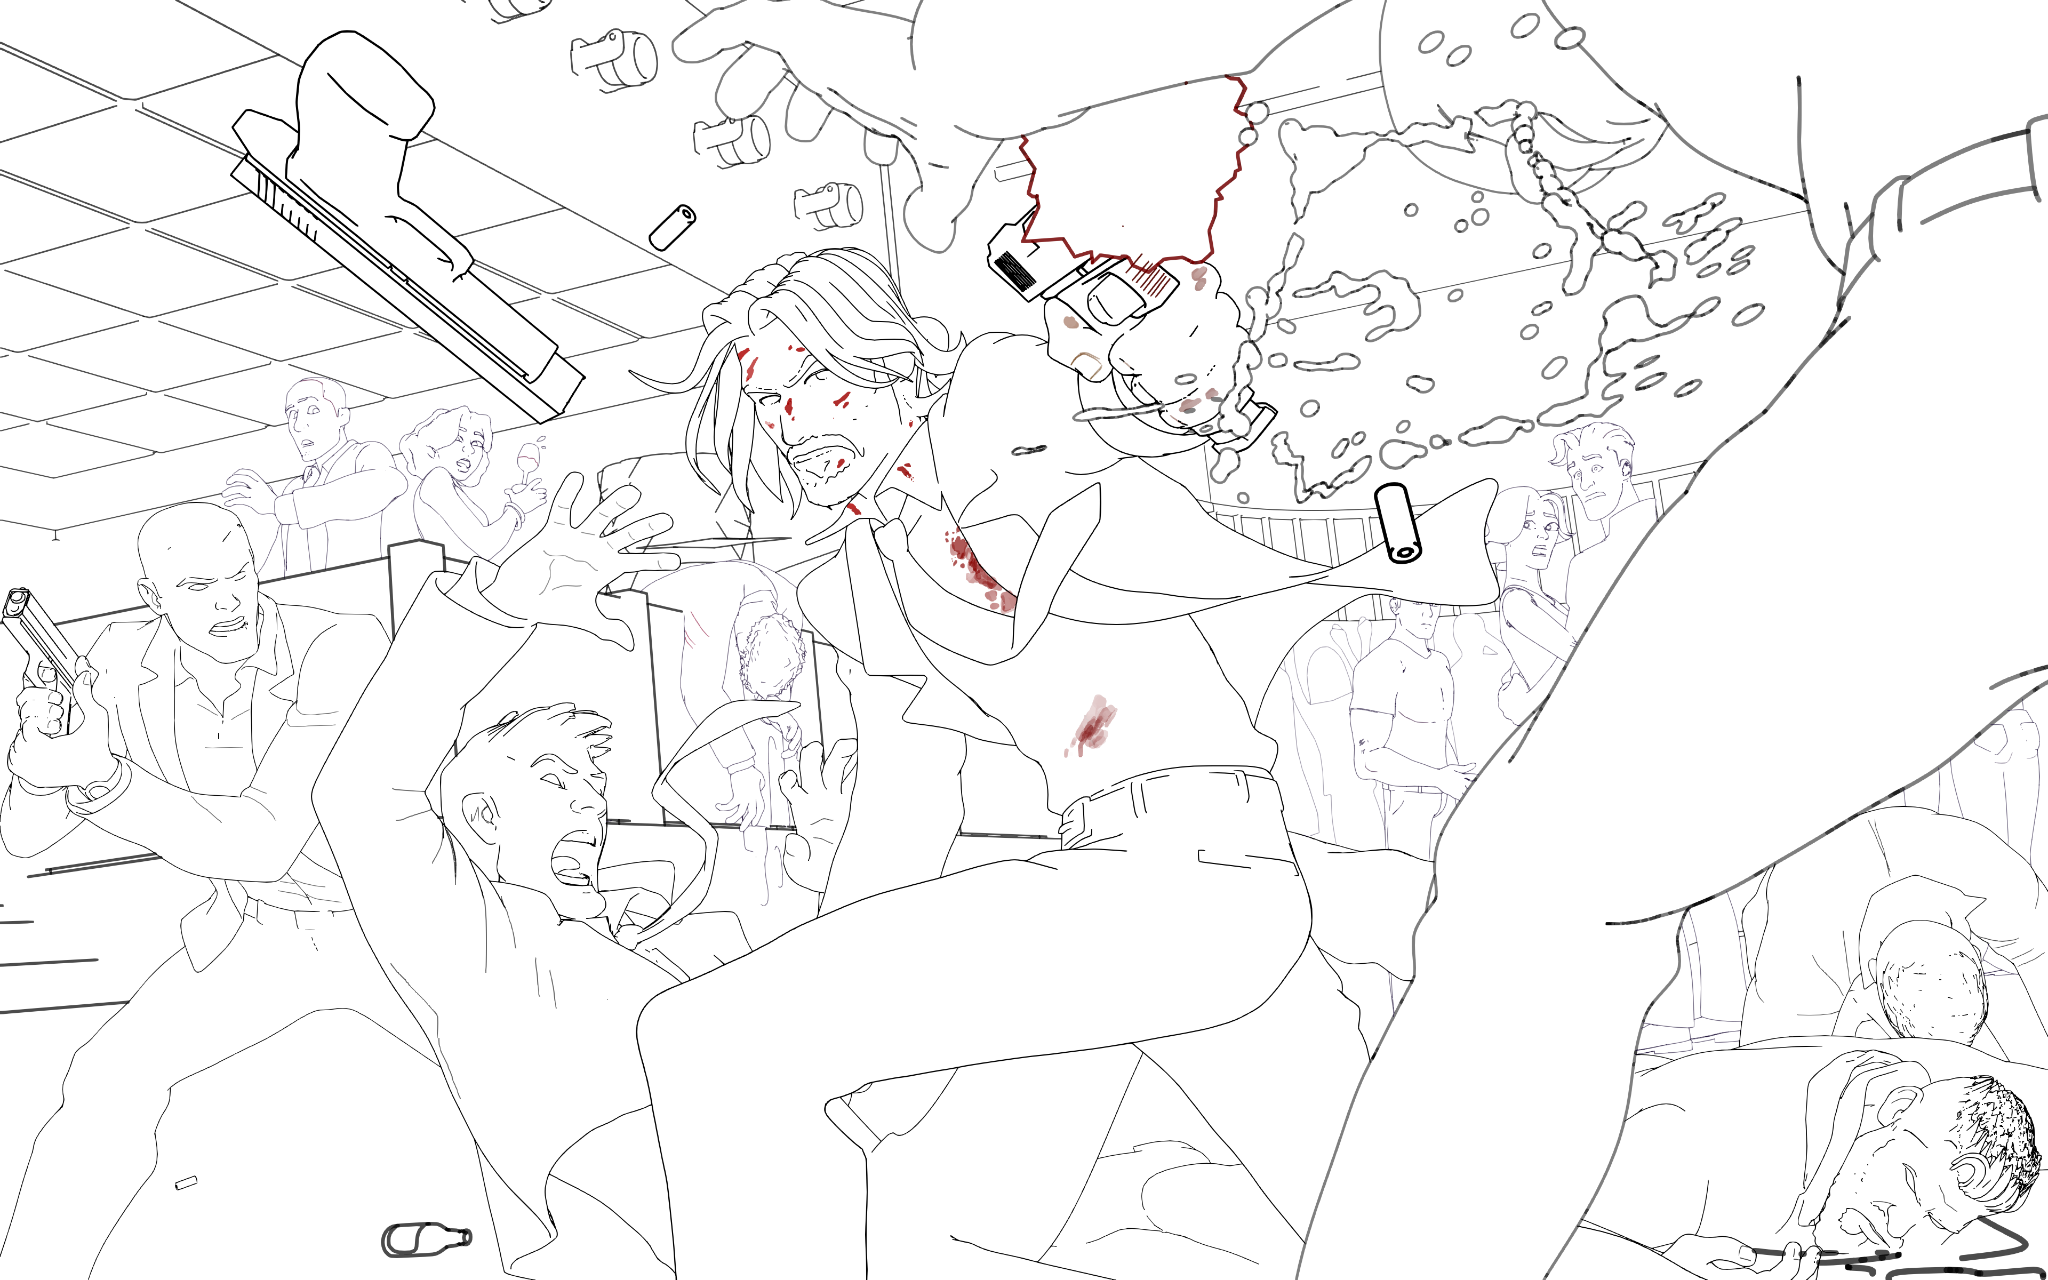
A short capture of the stages in process:
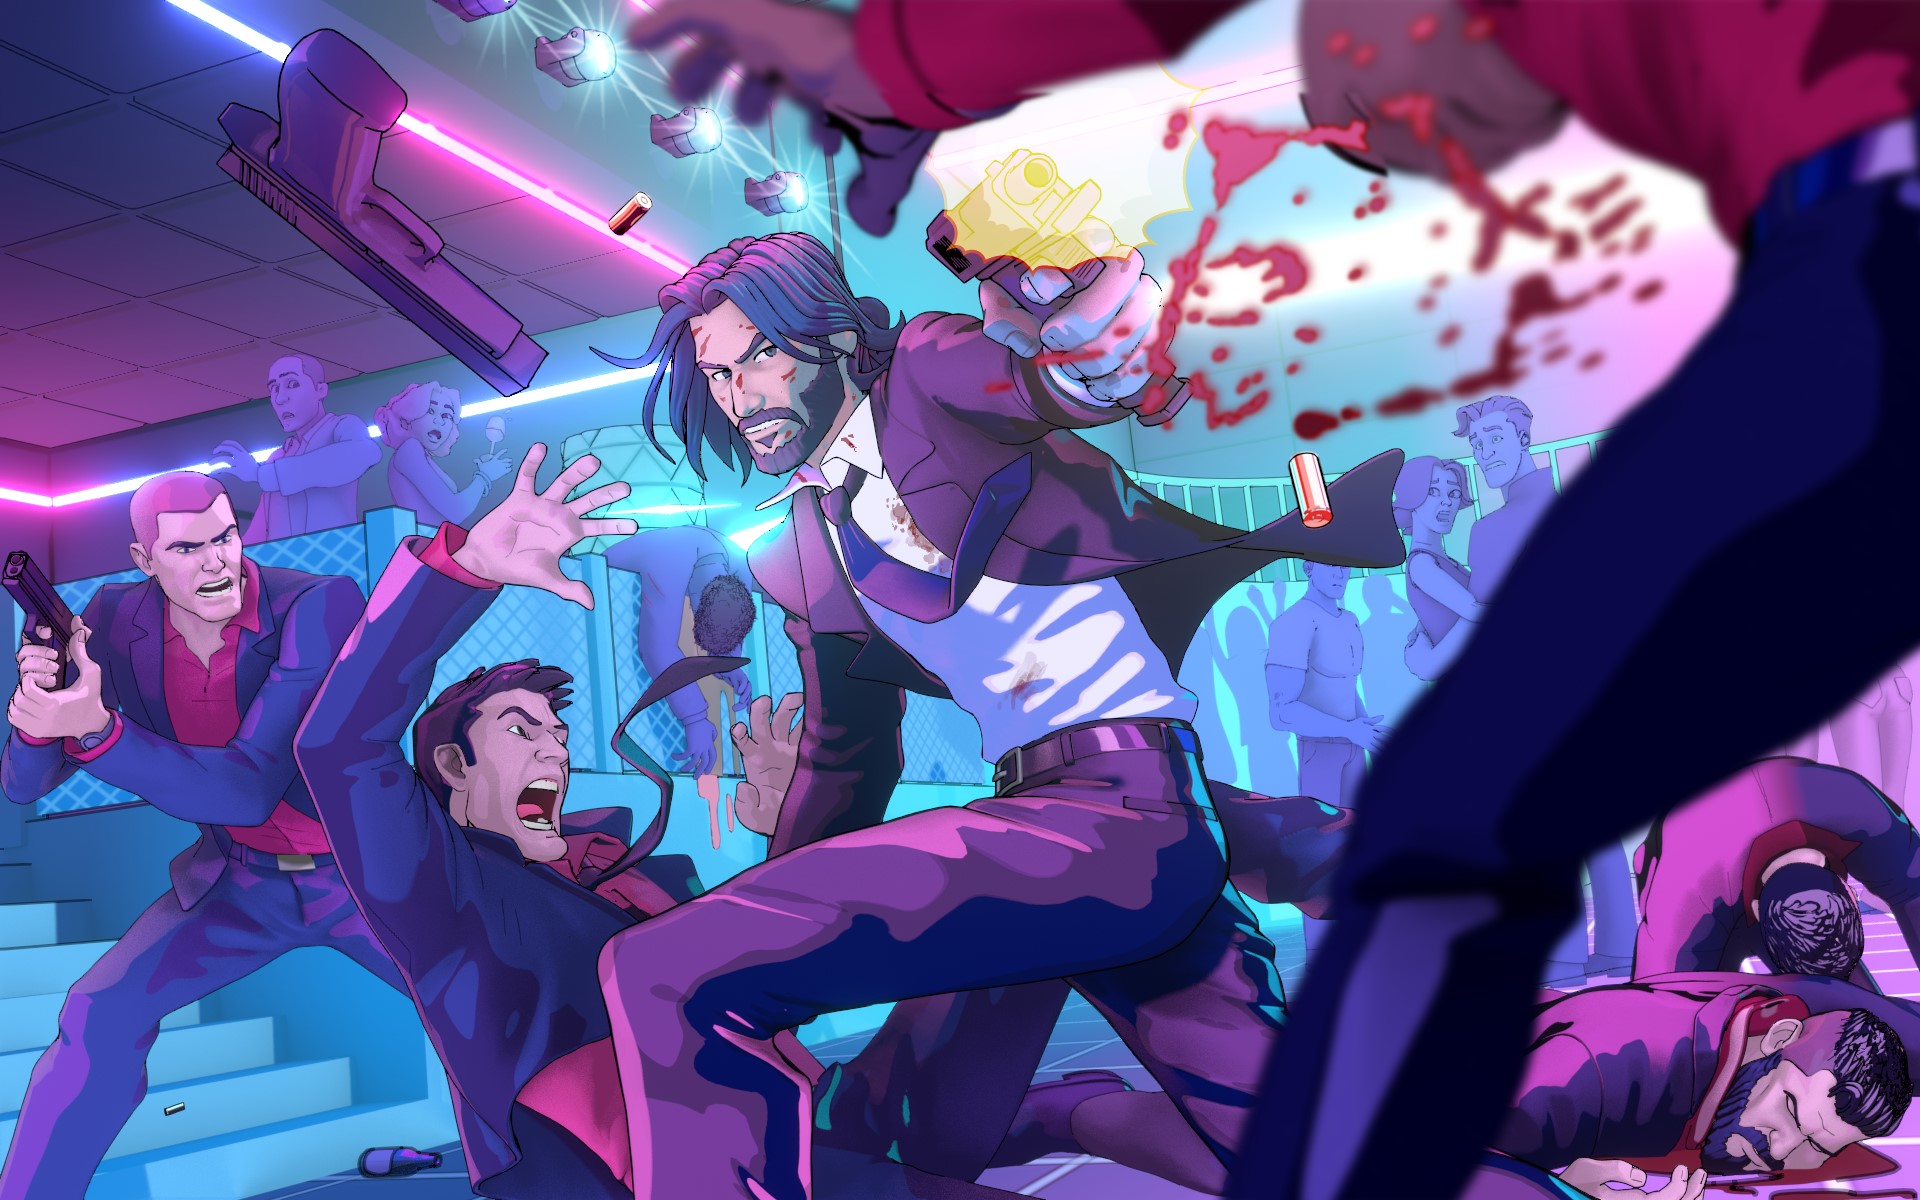
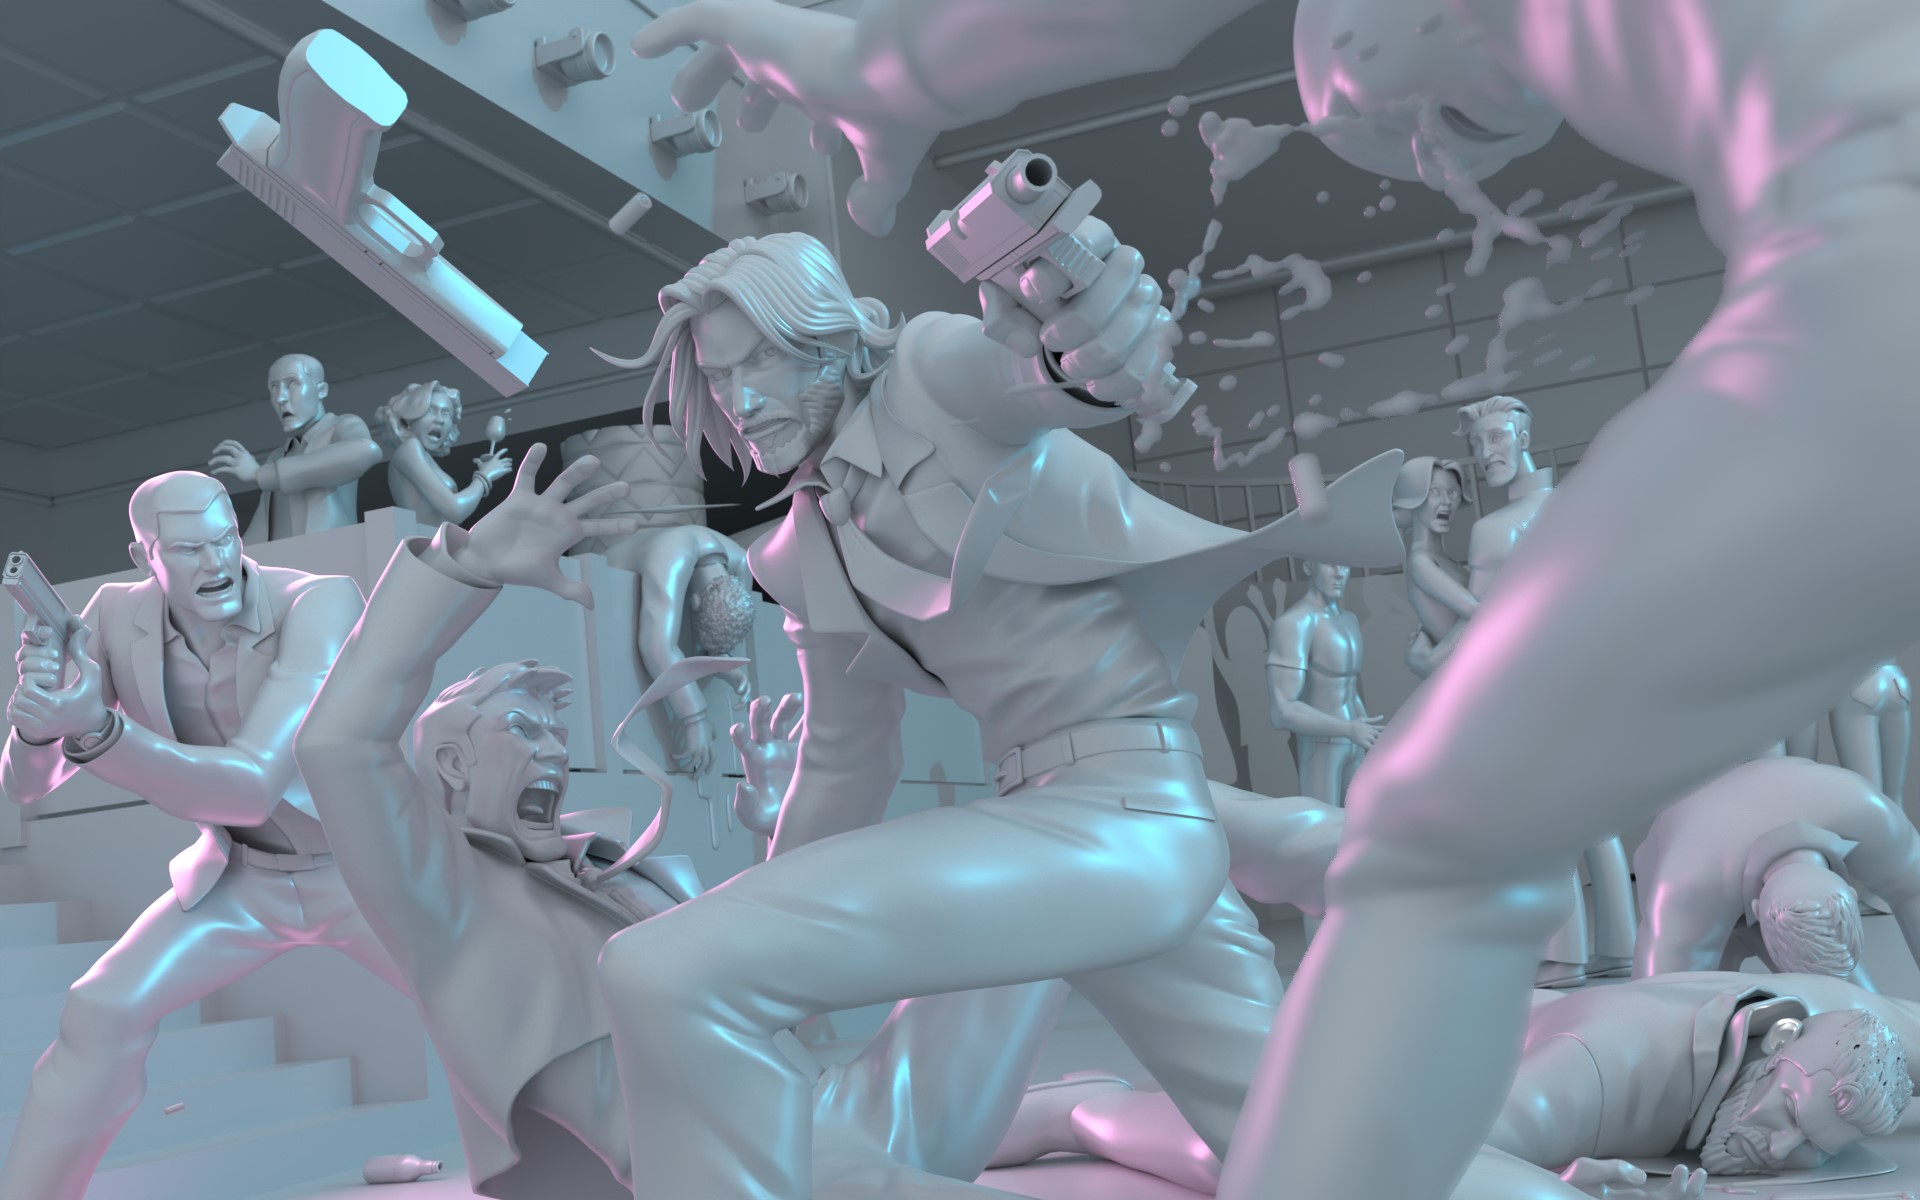
And that was it! Below is the final render and the clay render.
RENDER: John Wick
Thank you for reading our article. If you have any questions, please don’t hesitate to reach out to us through our social media channels.
Have a nice one!
About the Artist
Dani Tufeld is a 3D artist and game designer from Israel. He is currently working as a studio manager at Monstera Games.


