
Behind the Scenes: Realistic Spark Mandrill
INTRODUCTION
Hi, I’m Niko and I’m a freelance 3D artist from Germany.
Since the early 90s, I have been interested in the creative field, filmmaking, and visual effects. But back then, it was very difficult to afford 3D software, let alone find documentation or videos to teach you how to use it. Even though that’s when Blender started, It would take me until 2020 when I found out about Blender’s existence.
Until then, my career still went into the creative direction but I became a 2D graphic designer. I learned all about using Photoshop and Illustrator for classical design but also branched out into moving pictures with After Effects and Premiere Pro, and I started dabbling around in Cinema 4D, my first 3D effects.
In that time, I worked as a fulltime Art Director and also for the last 6 years as a freelance Designer. But it was 2020 that gave me that free time to educate myself about the 3D scene and that’s when I started using Blender. It immediately hooked me, and quickly the passion for 3D was rekindled and since then, I use it almost daily, either for private or client projects.
Now, for most of my client jobs, I use Blender and I am almost complete with my transition from a 2D graphic designer to a 3D artist. Currently, I am working on more episodes for my animated short film series “MAVERICKS.”
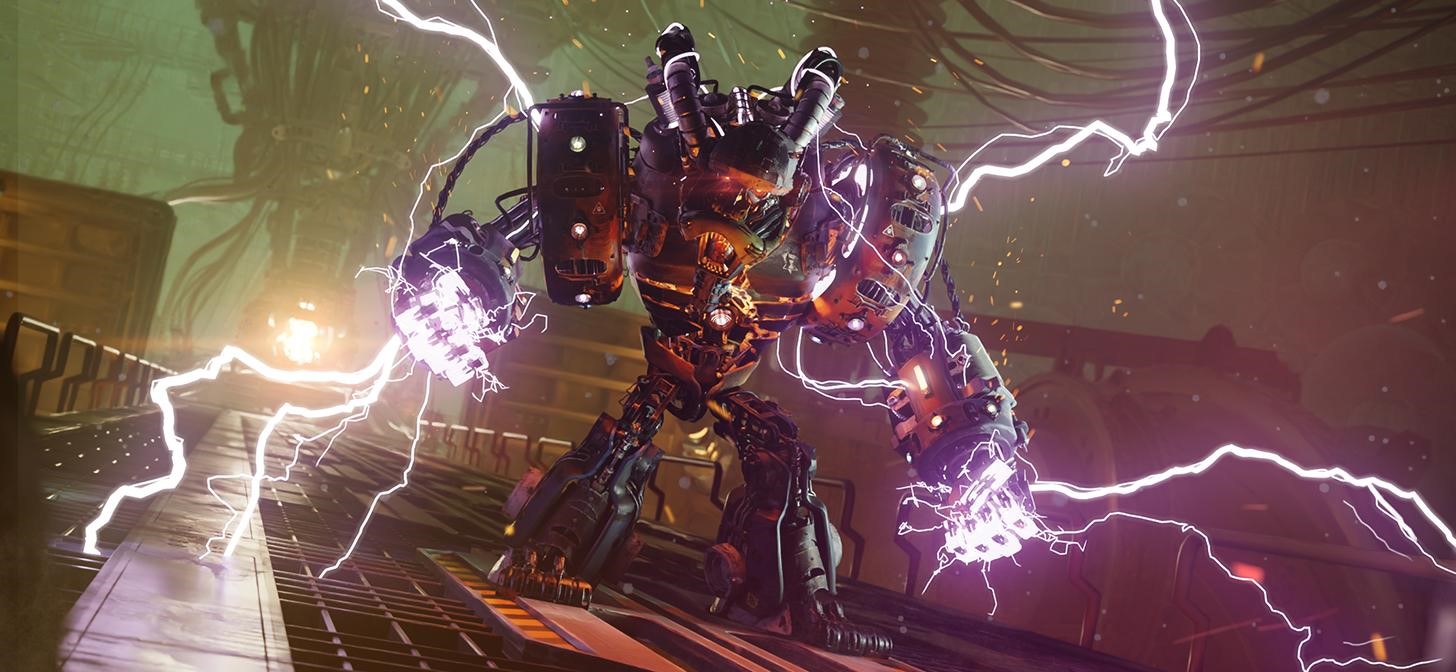
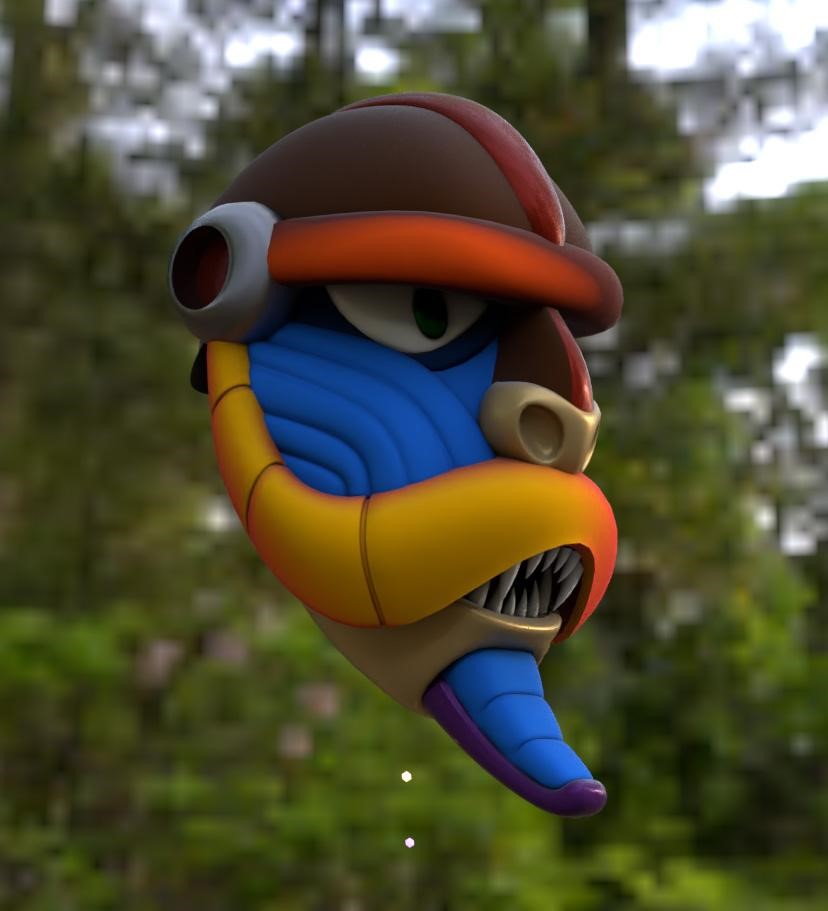
This character is one of the protagonists of that series and is the main character of episode 4 (see his short film at the end of this article). This is where my true passion lies—the filmmaking process and using it to tell unique and interesting stories.
INSPIRATION
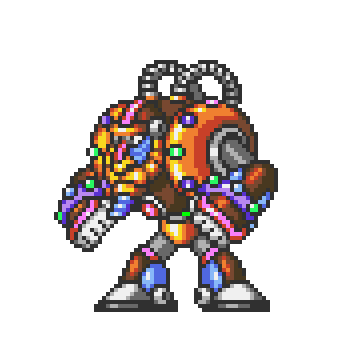
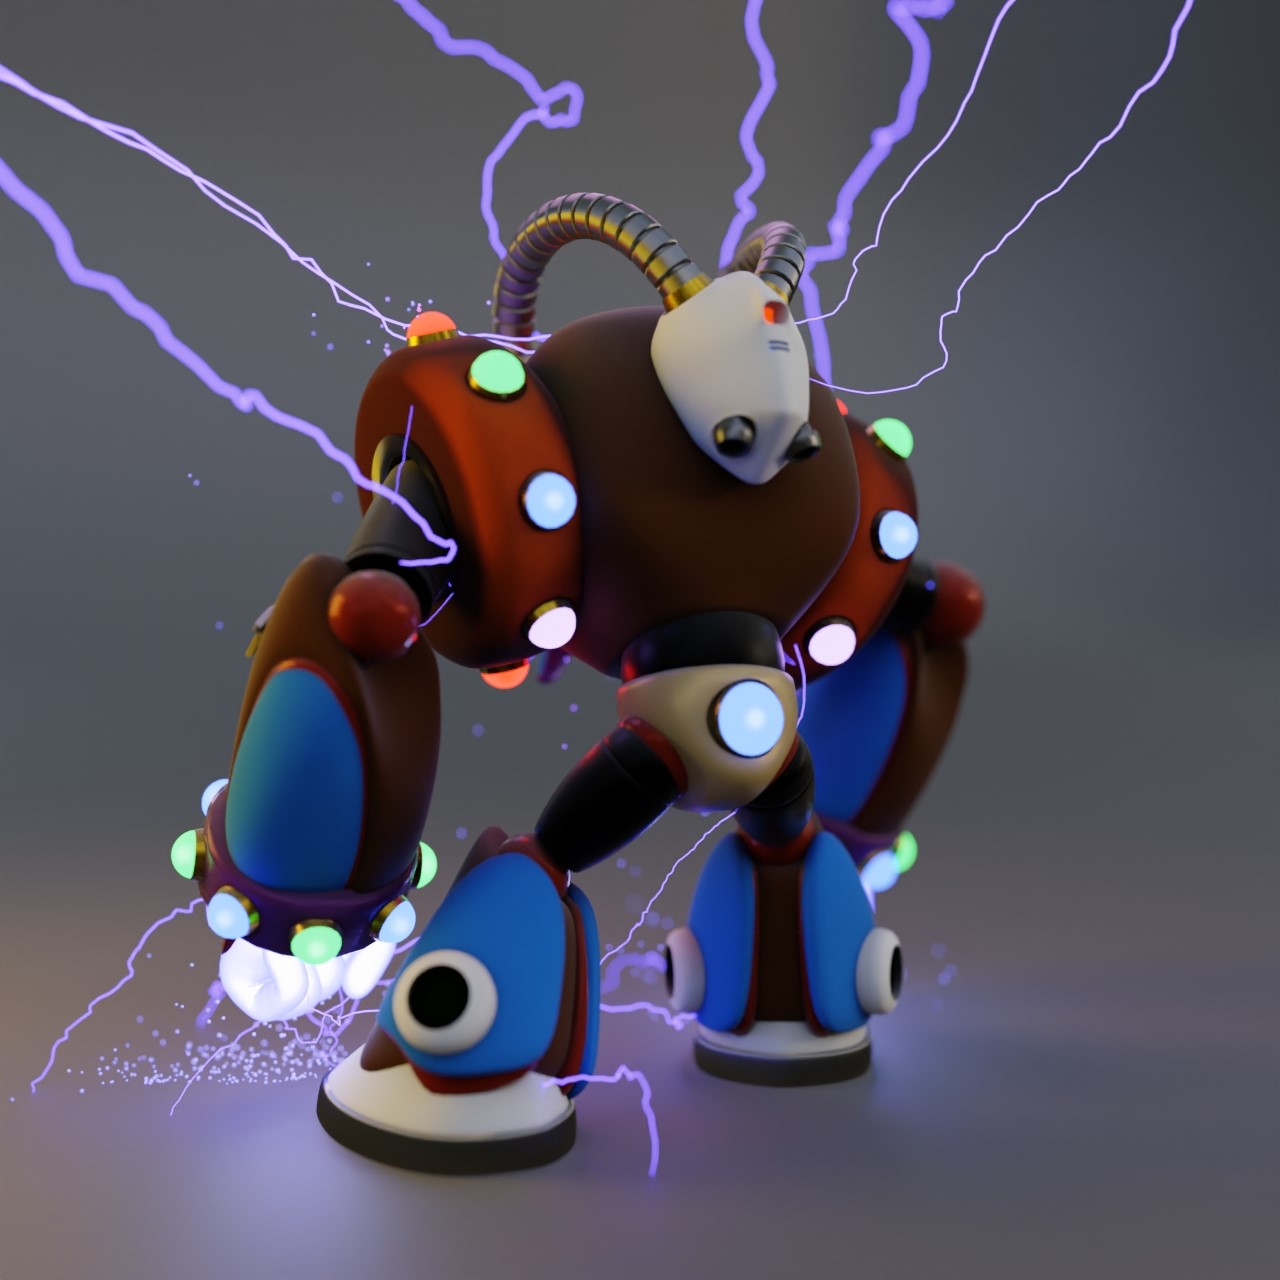
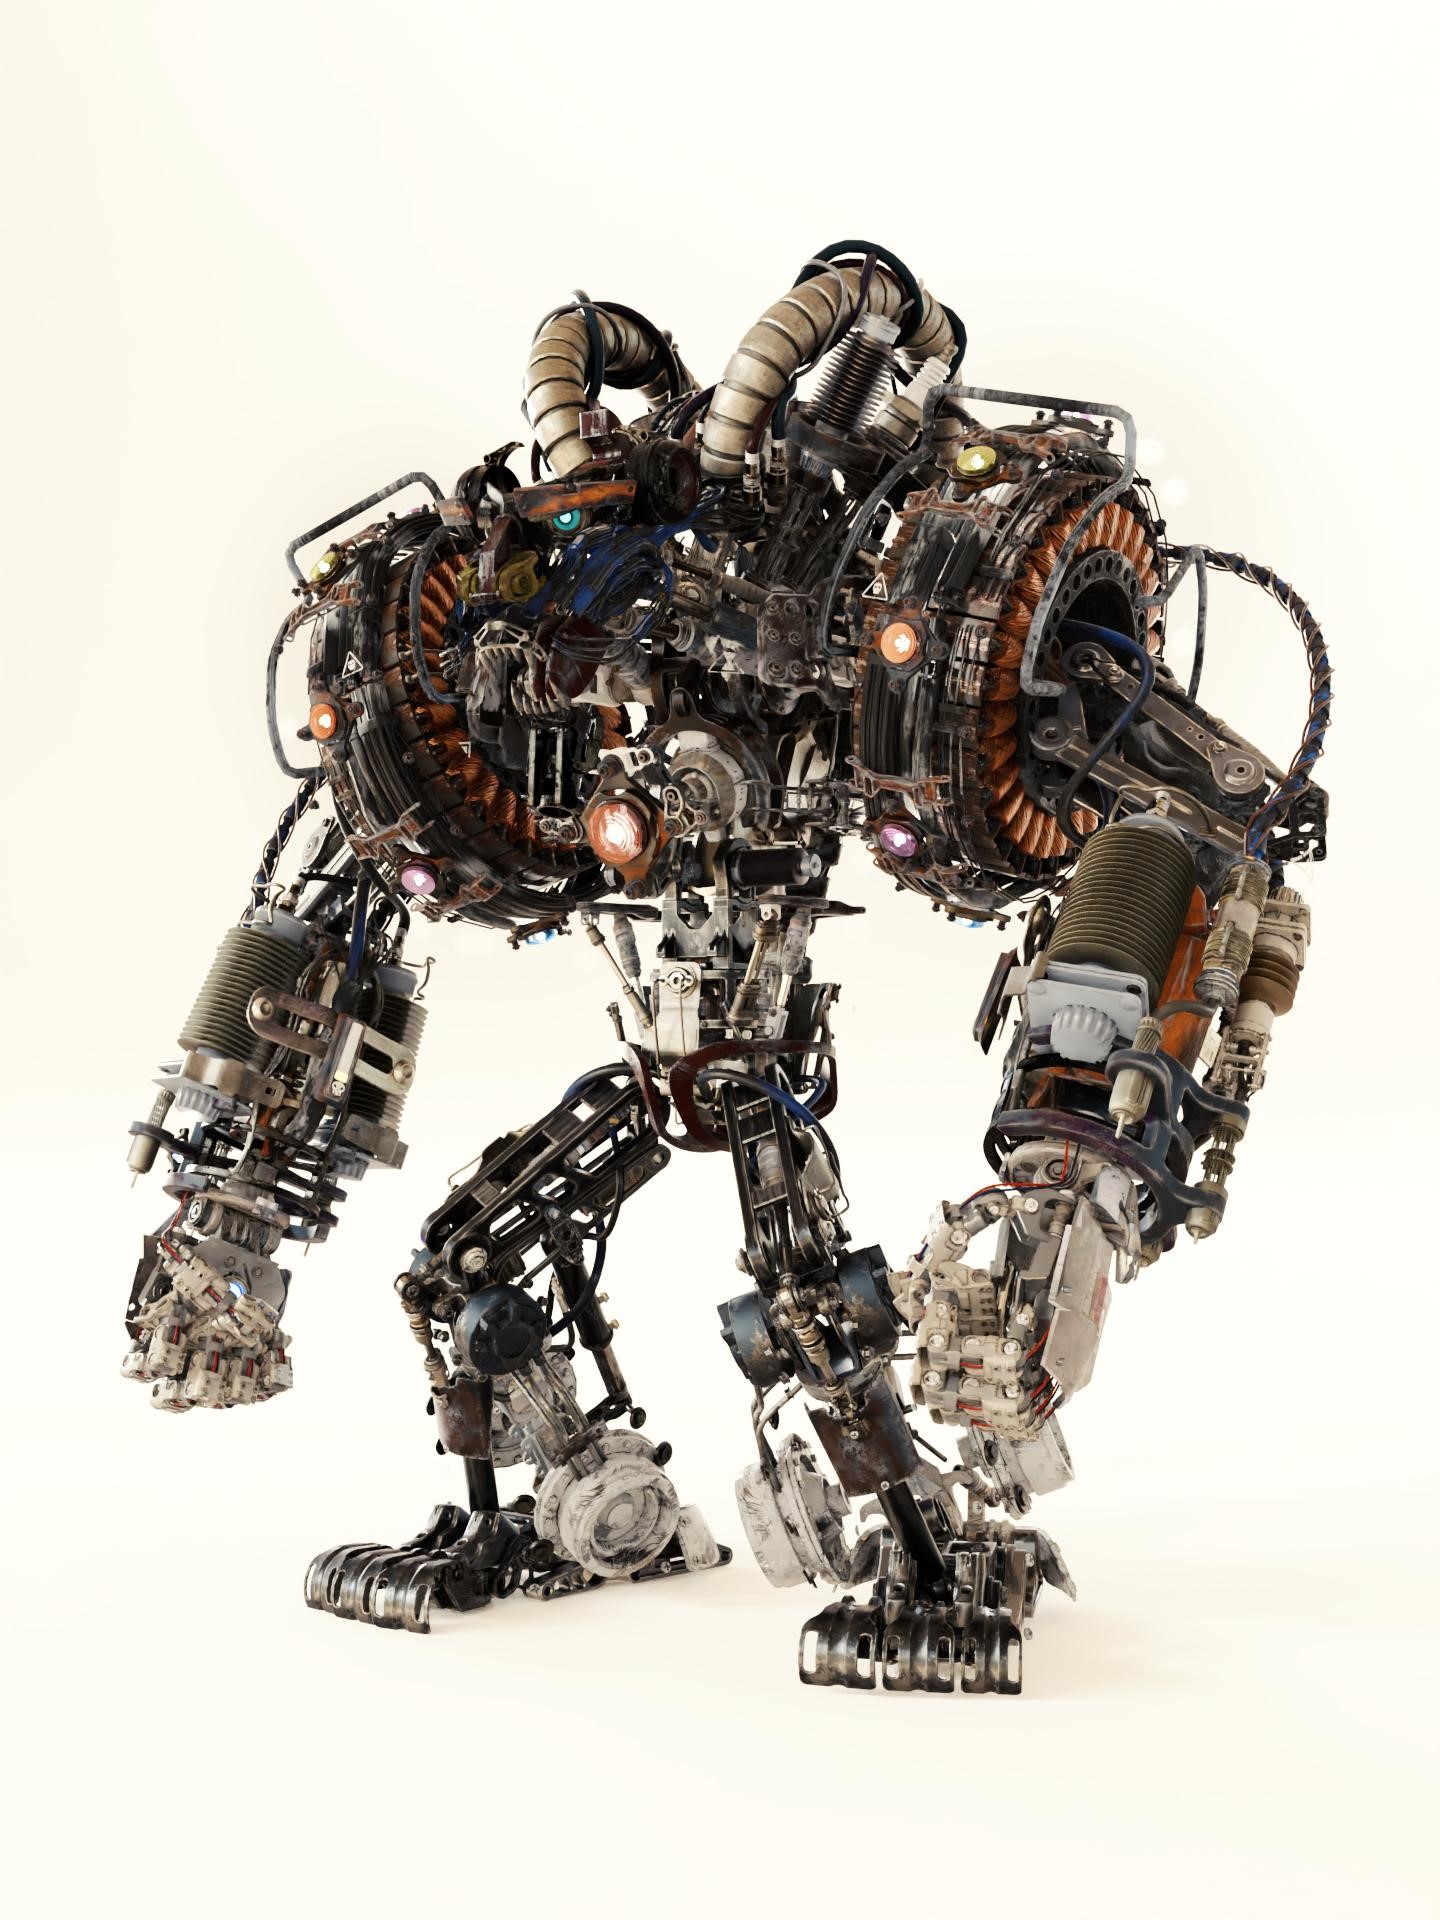
My inspiration for this character comes from the 90s video game “Mega Man X.” One of the stage boss characters is called “Spark Mandrill” and is an animal inspired Robot with electric abilities. He has an ape-like stature, and is very strong and powerful.

So far, there are no realistic interpretations of this character; only his original pixelated sprites, some original artwork and 2D fan art. So I made it my mission to bring this character into the 21st century in full 3D glory and dedicate a whole short film to him.
For the look, I was mostly inspired by the works of Ian Hubert and his rough, dirty, and imperfect worlds. Everything has a tangible feel to it and it all seems very grounded and not too sleek—an interesting mix of a digital and analogue world.
PROCESS
References
I began with collecting various references for the character like original and fan artwork to have an idea of what the character looks like from all sides.
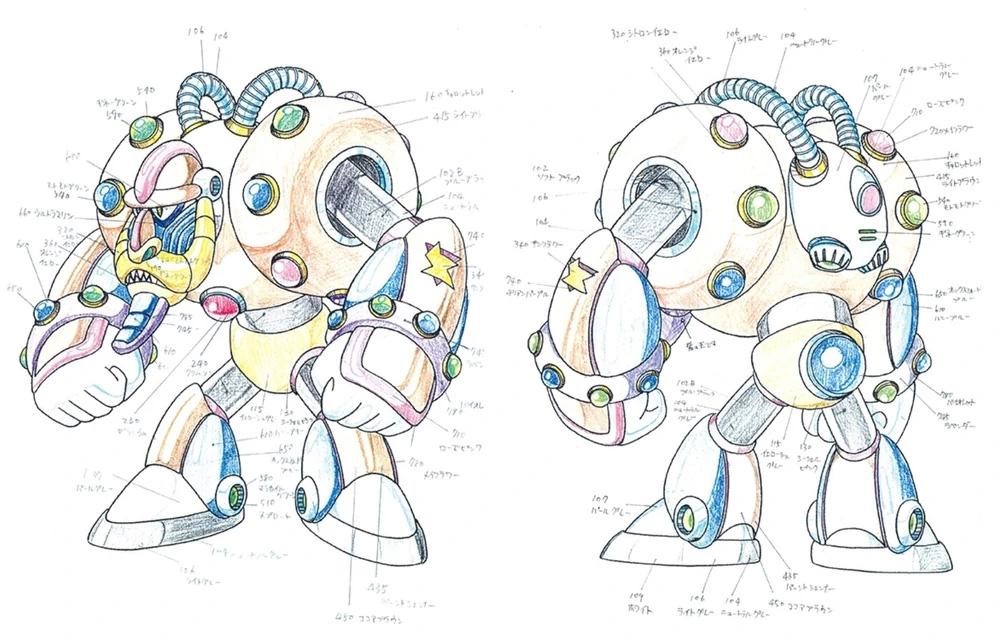

After that, I started blocking out the character just with simple shapes to get a feeling for his size, his proportions, and his main features.
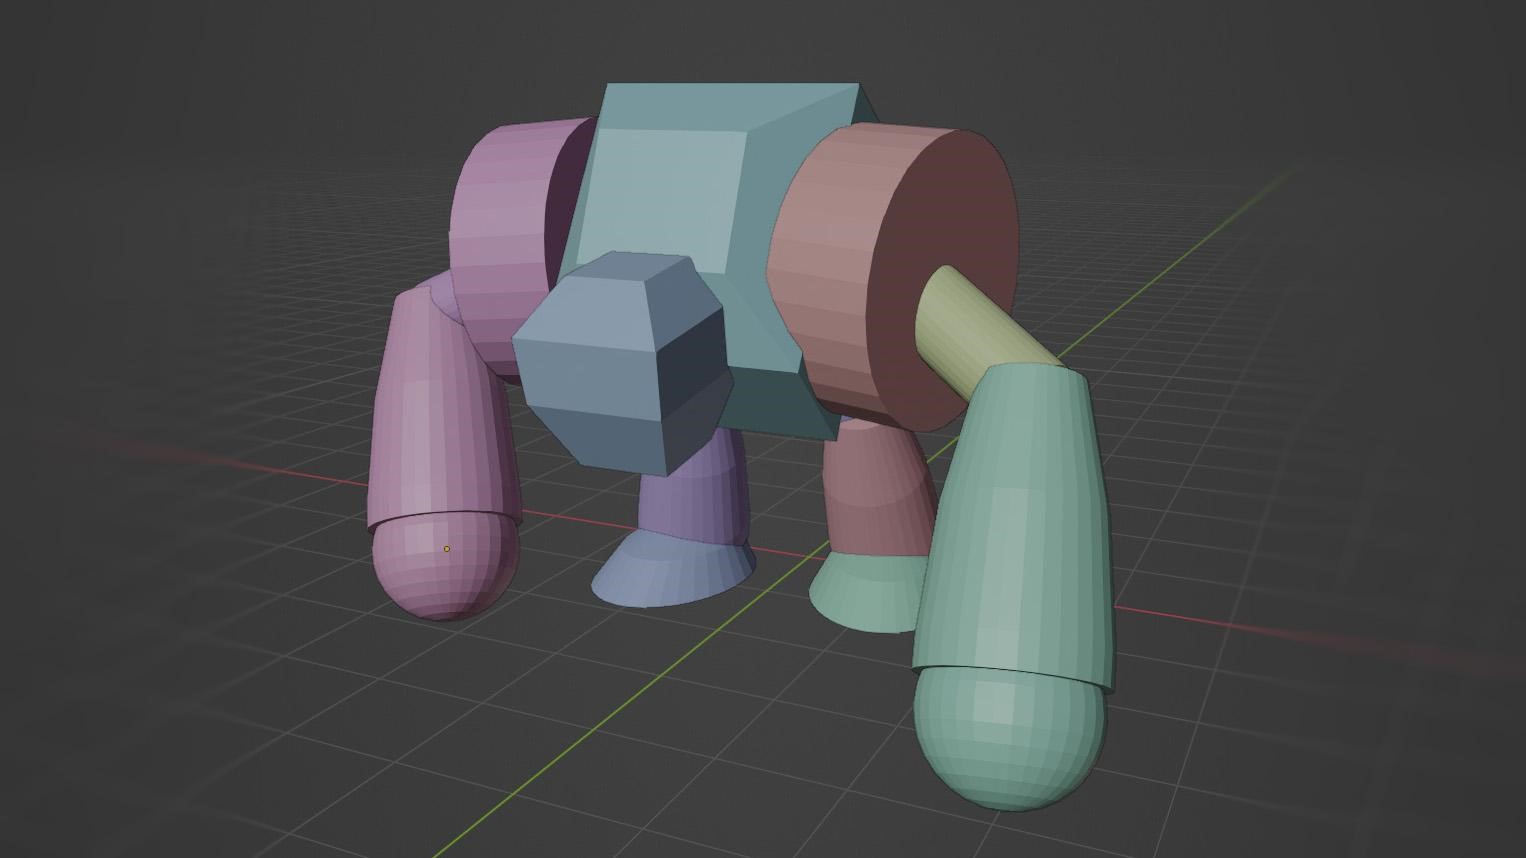
Then I recreated that character in Blender in his original design first.

That way, I was able to create a great template for my redesign process.
Before that, I created a short animation for that original character to not waste that cool model :)
Realistic Re-design
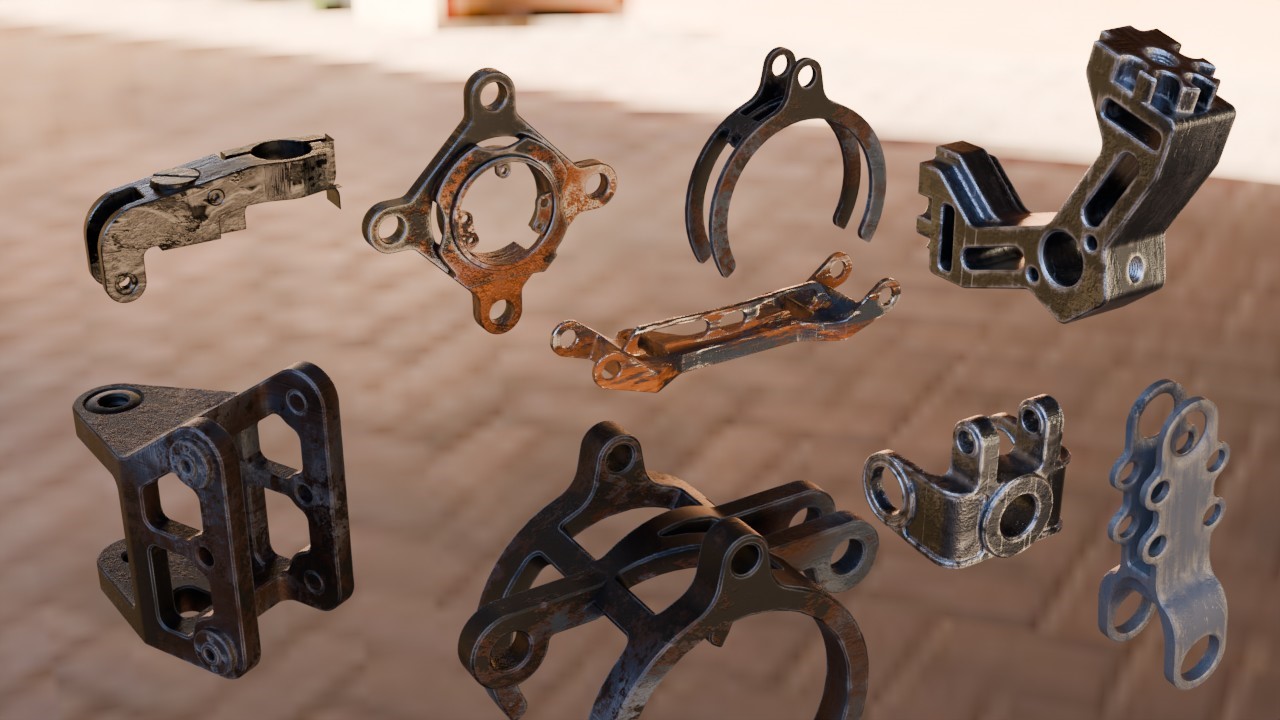
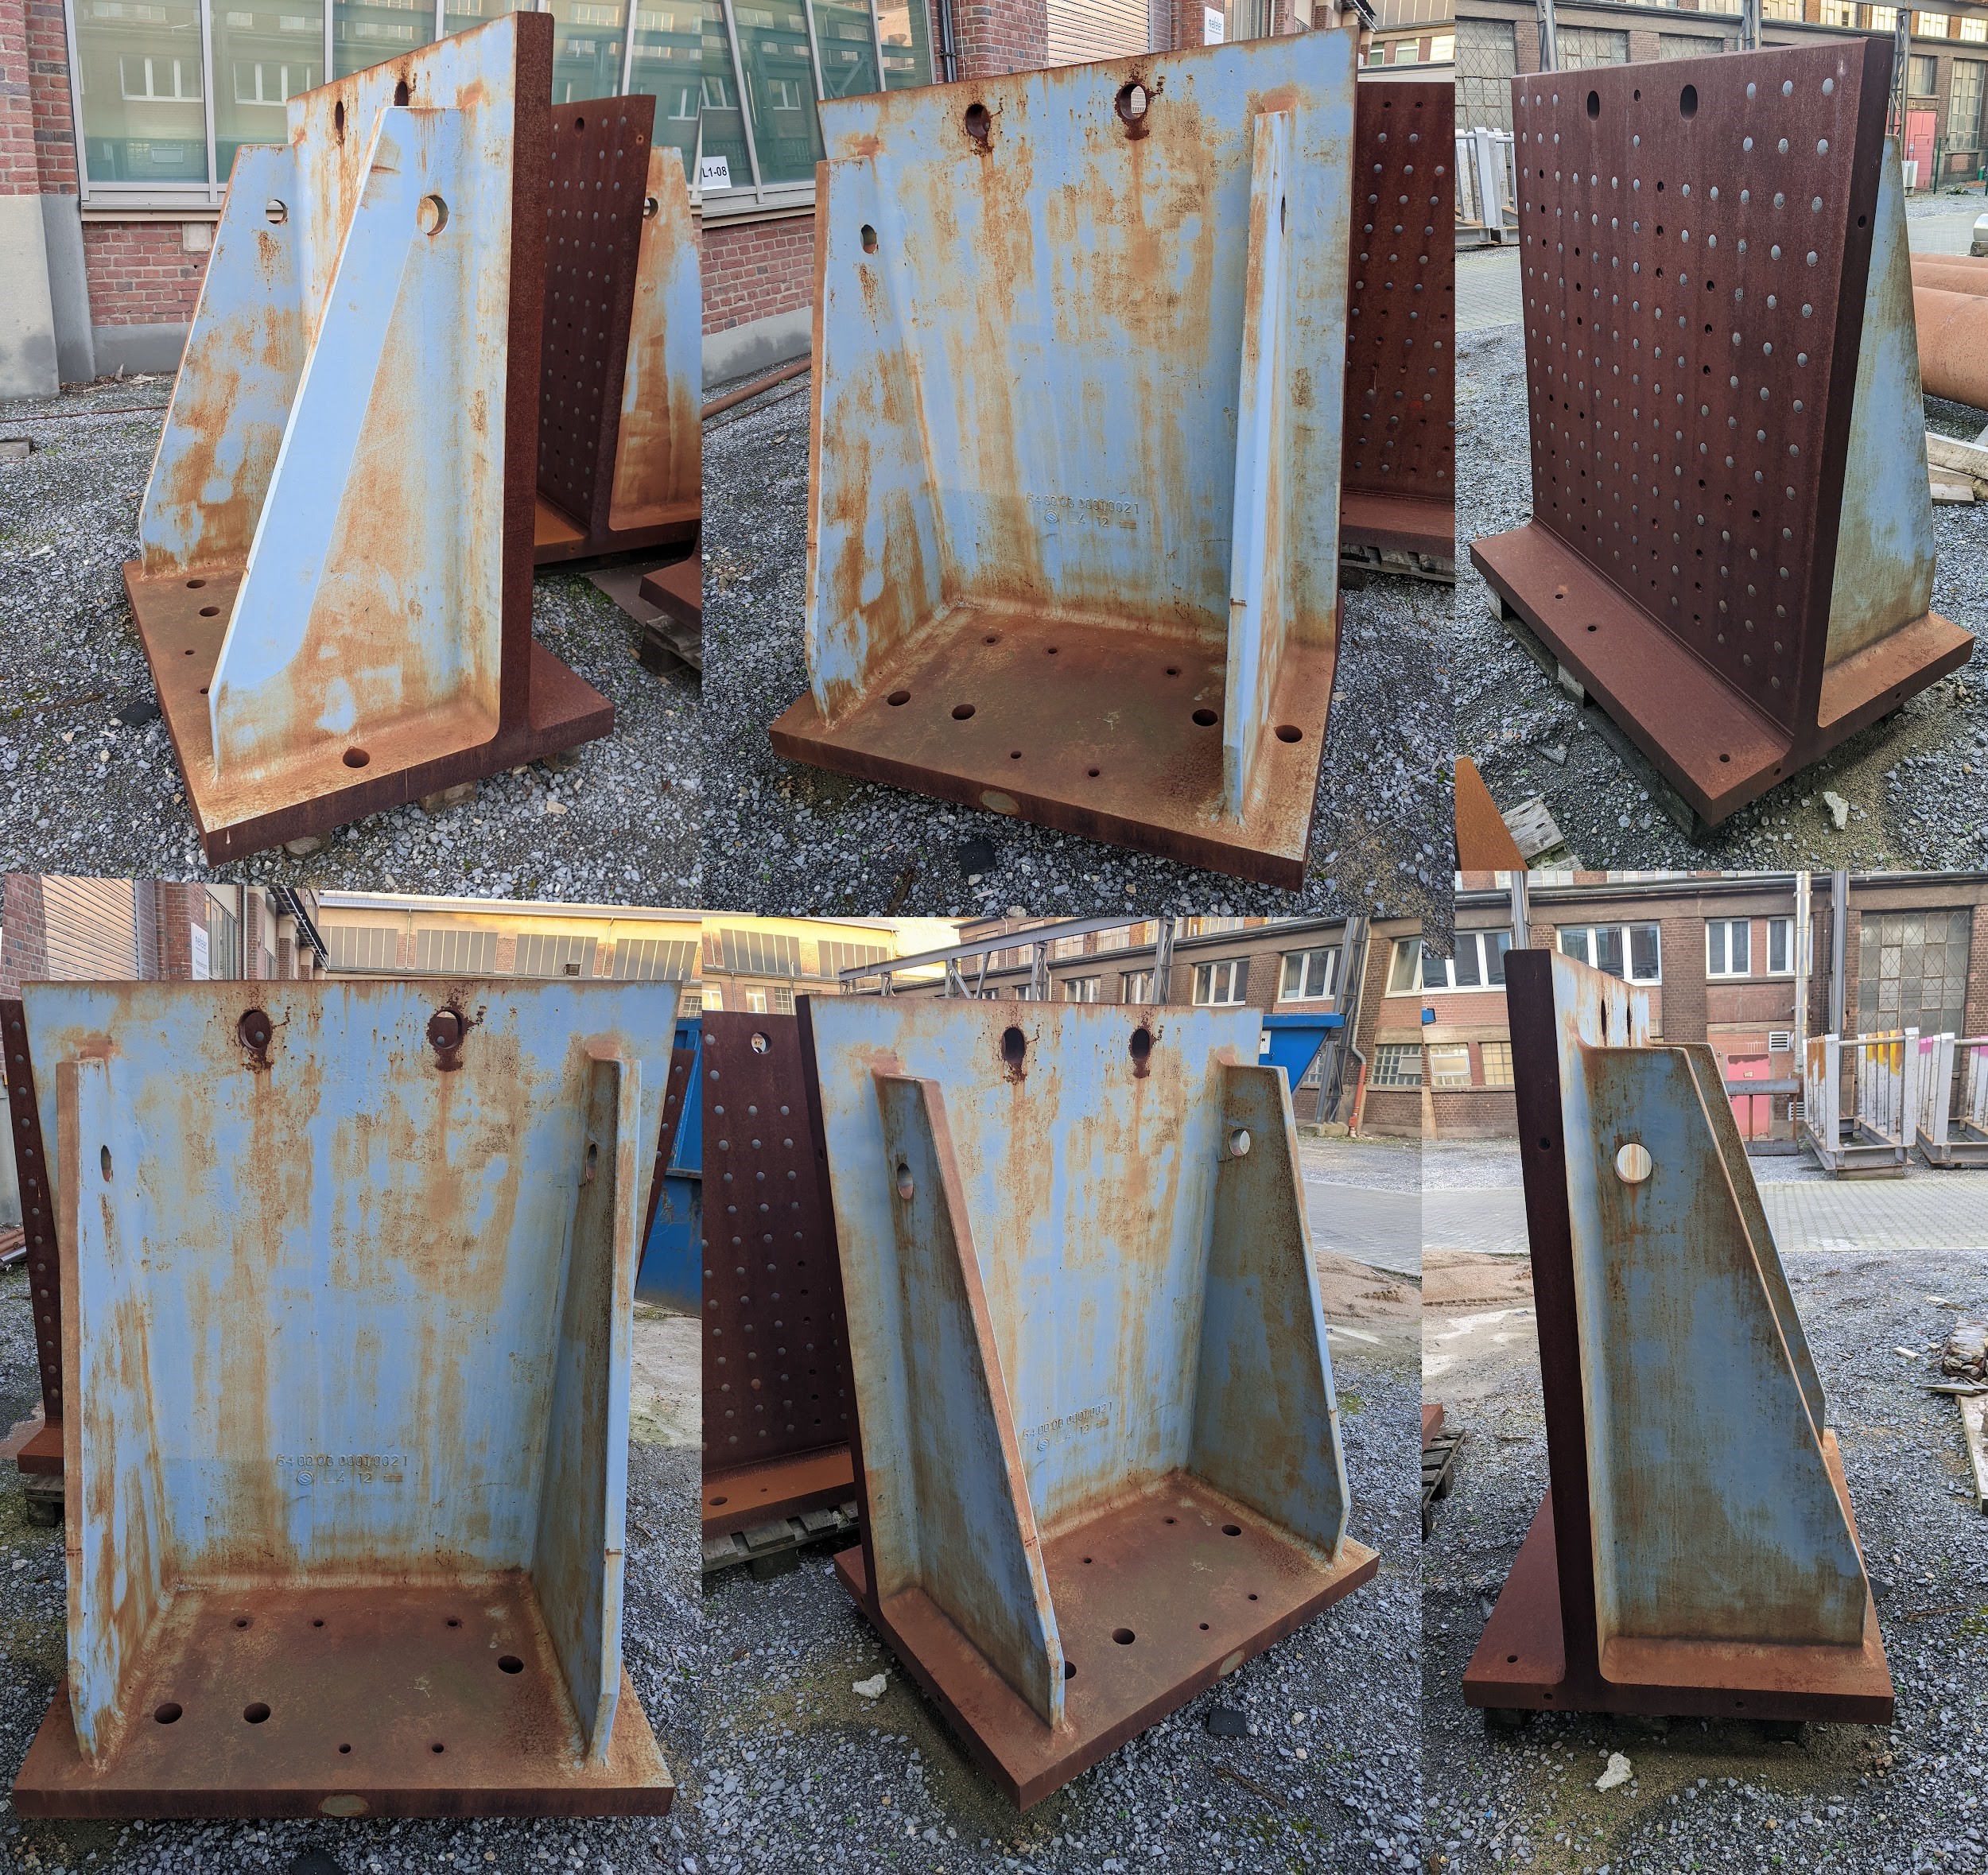
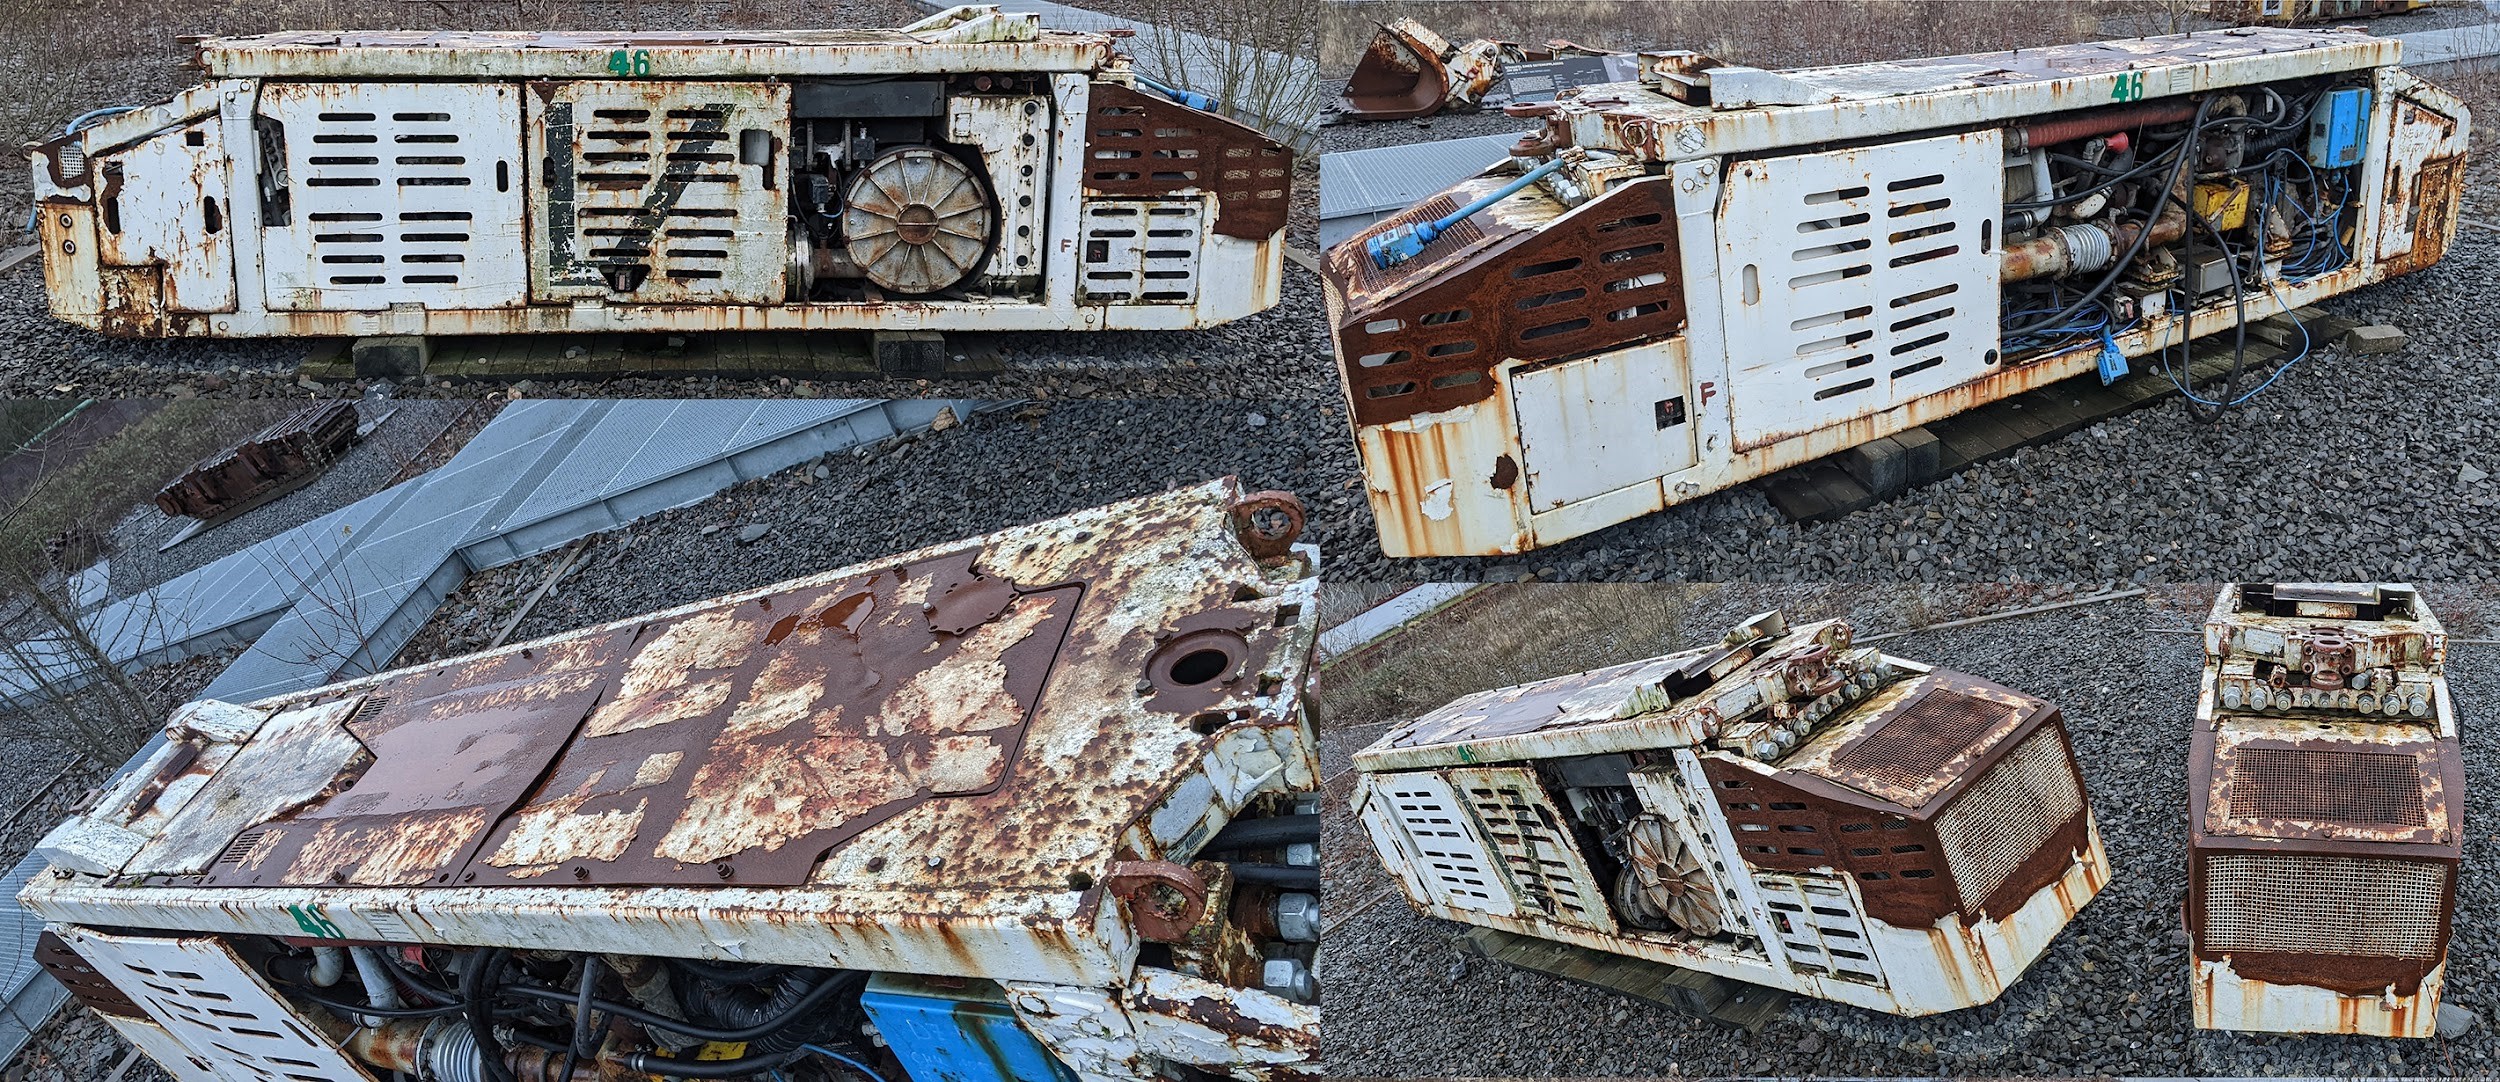
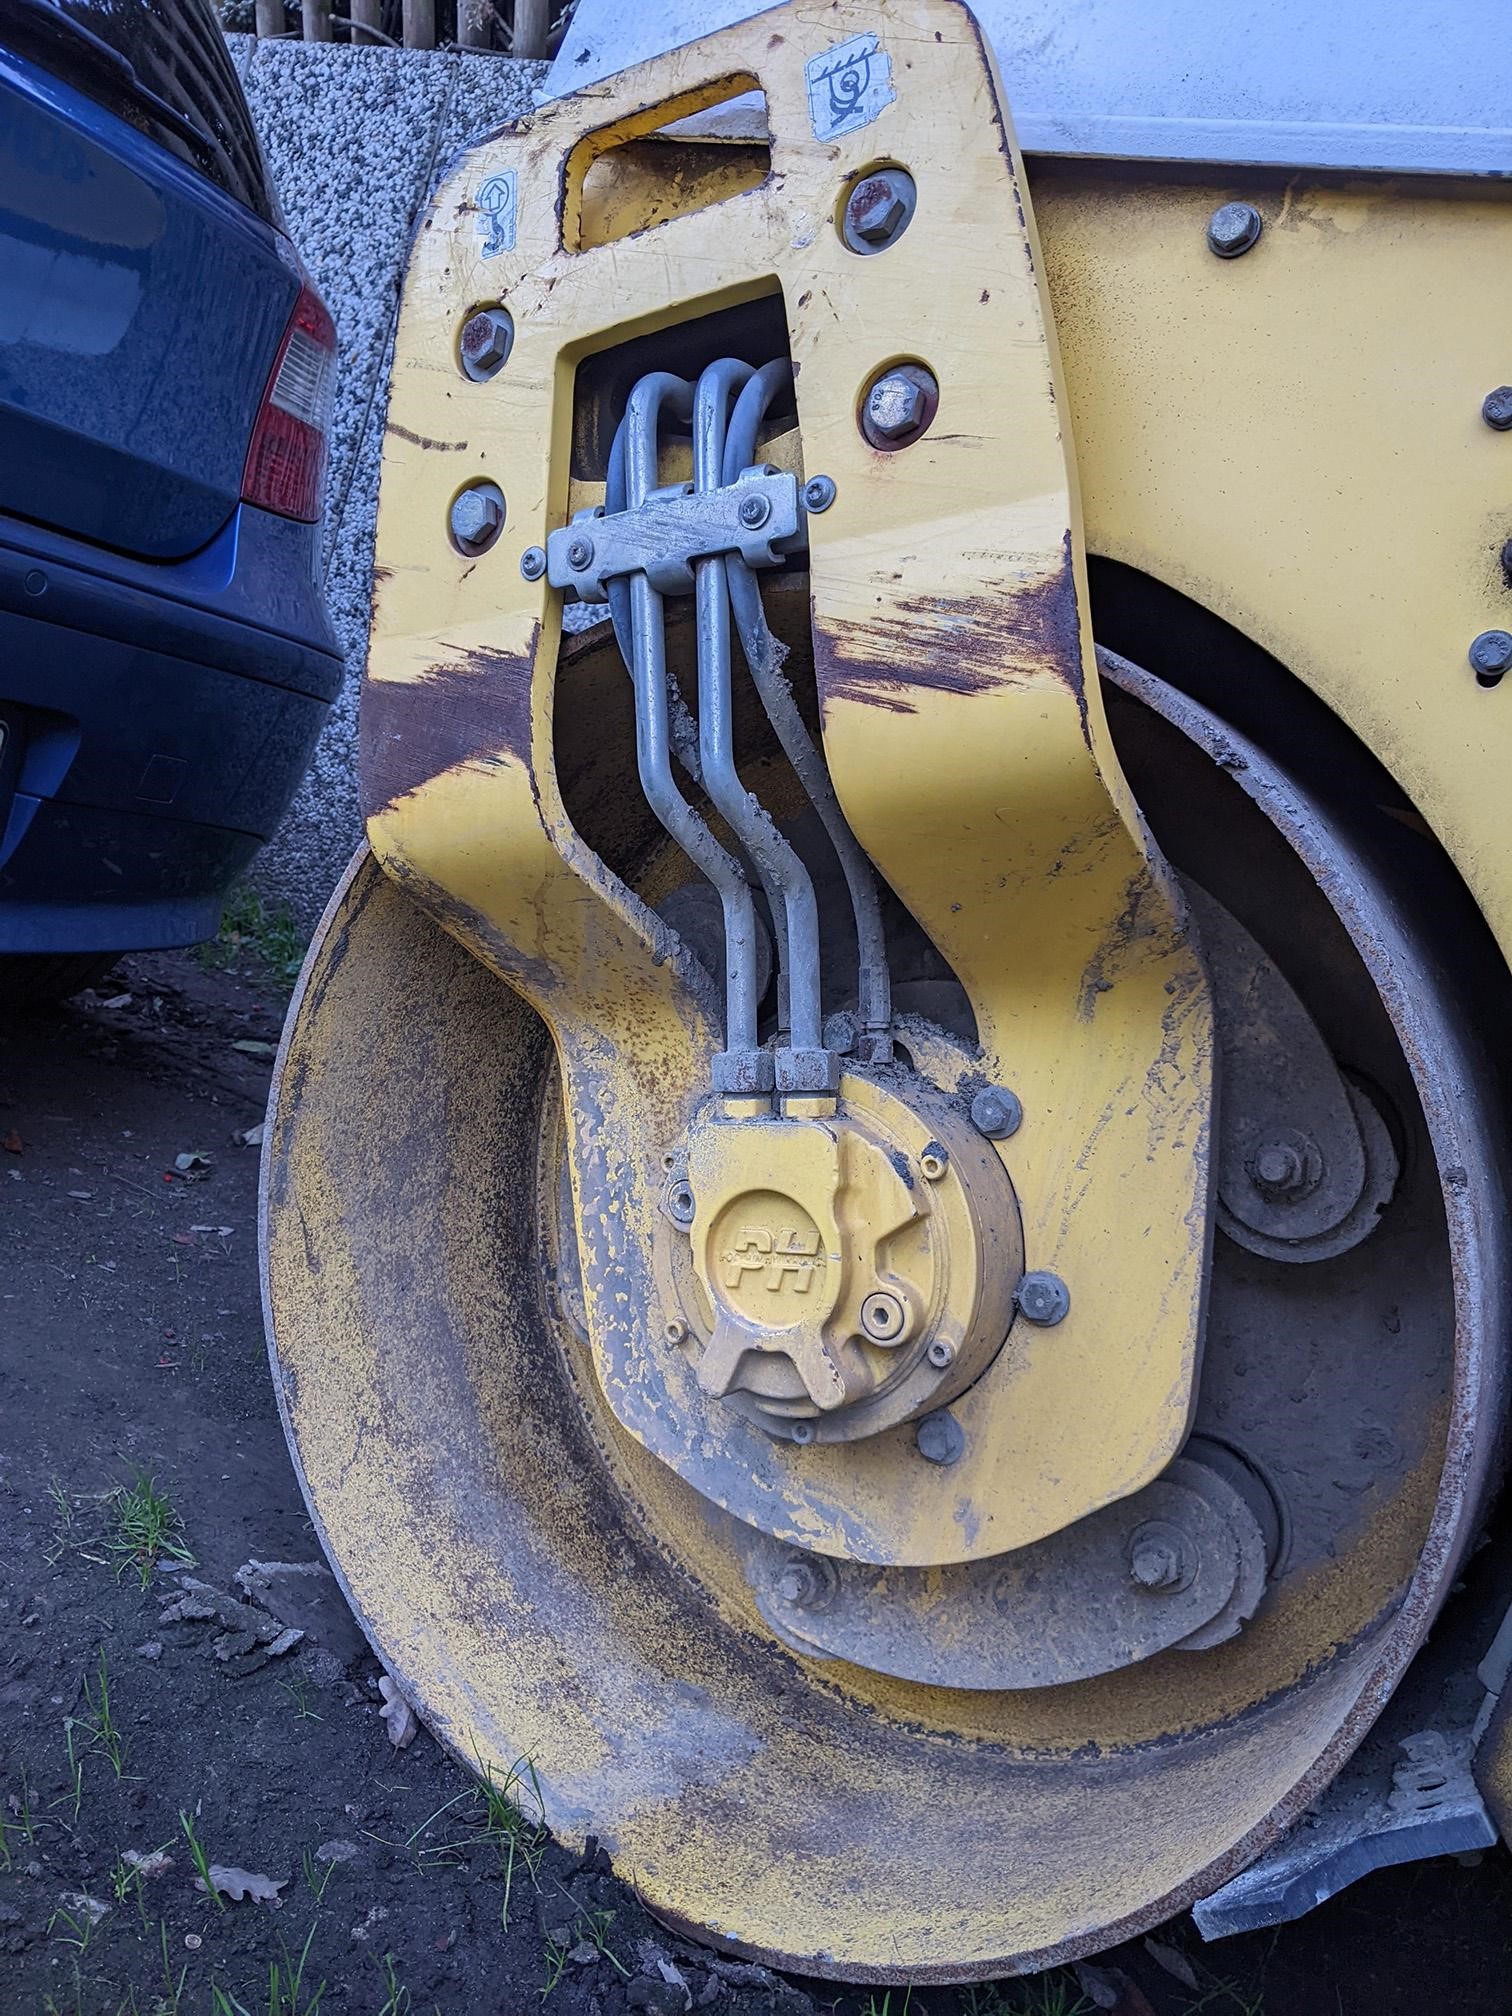
My redesign process also started with collecting references for robots, mechanical parts, and especially electric devices.
Since he is a creature with emphasis on electricity, I wanted to incorporate many parts and shapes from the real world that the viewer would recognize and connect with electricity.
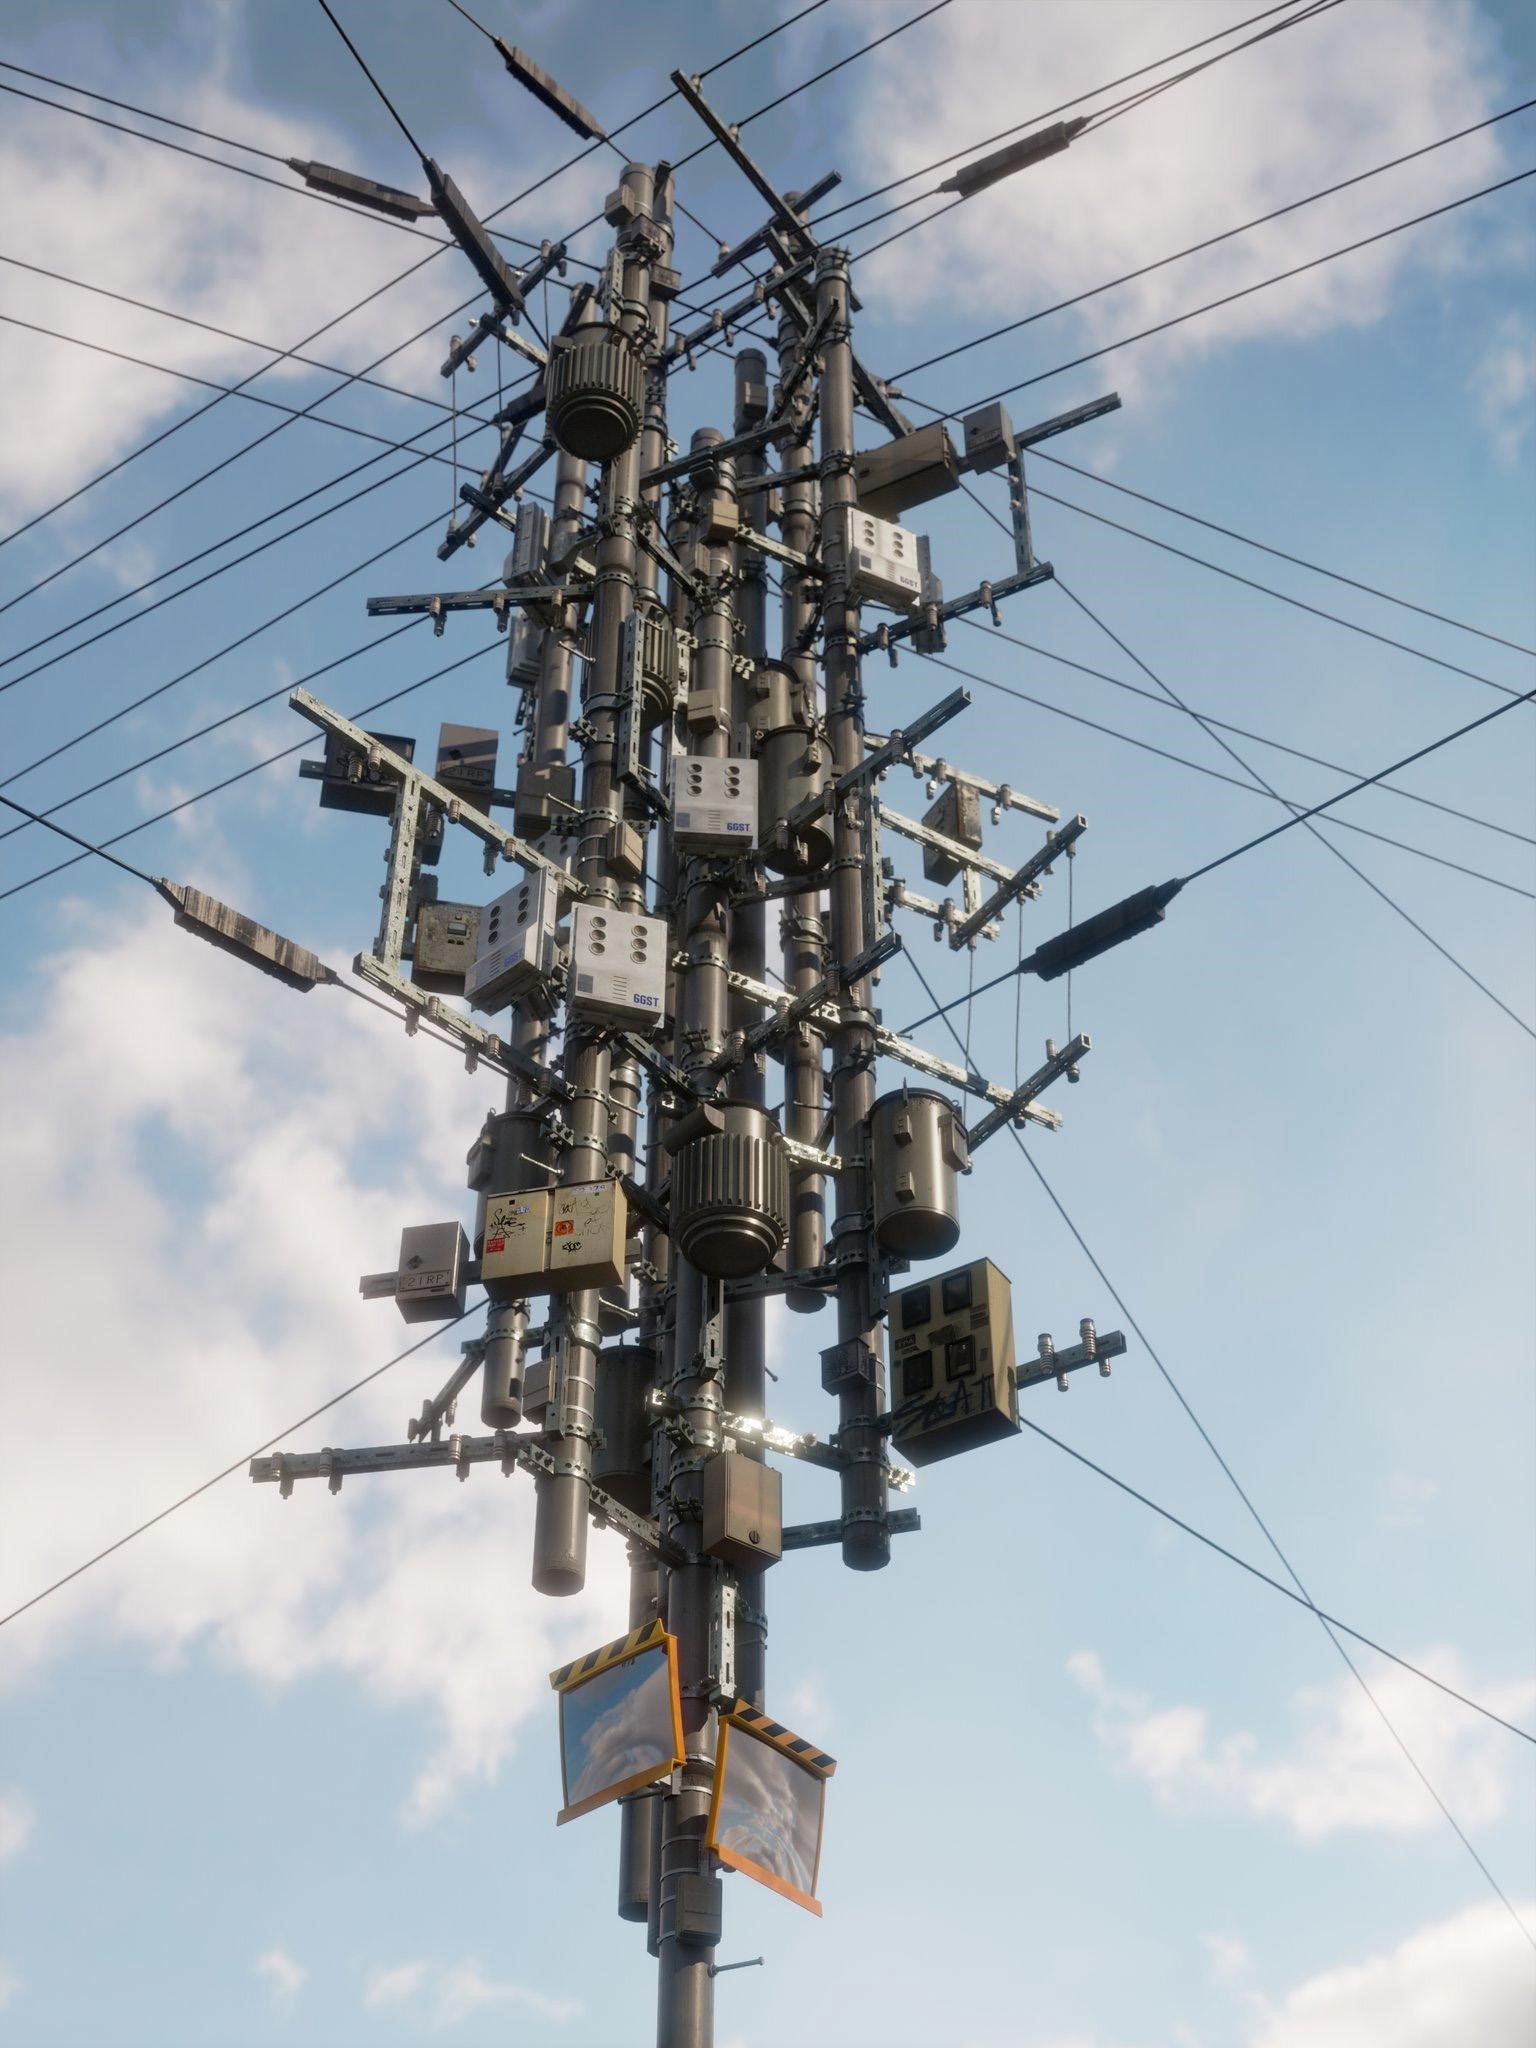

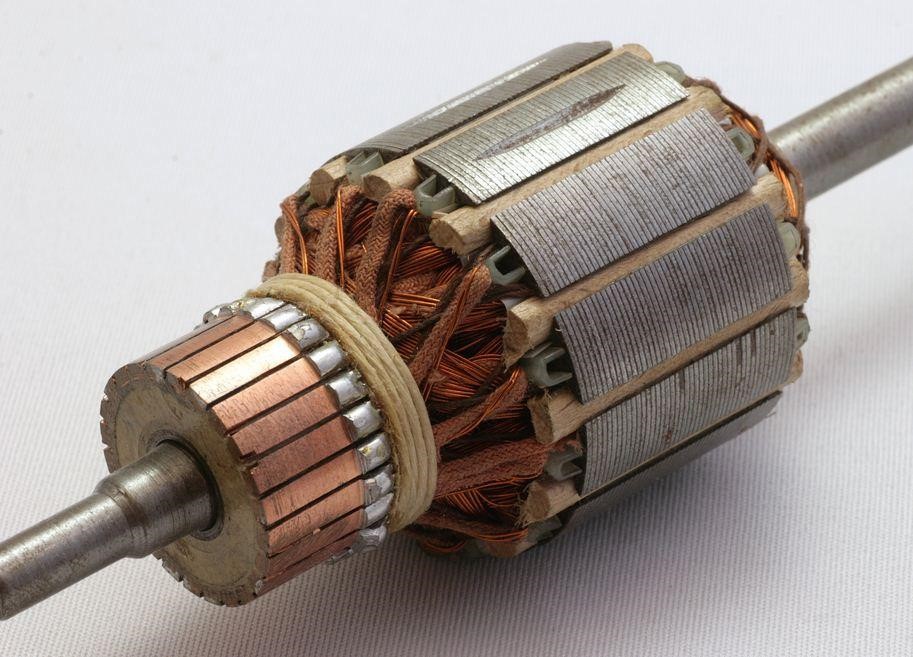
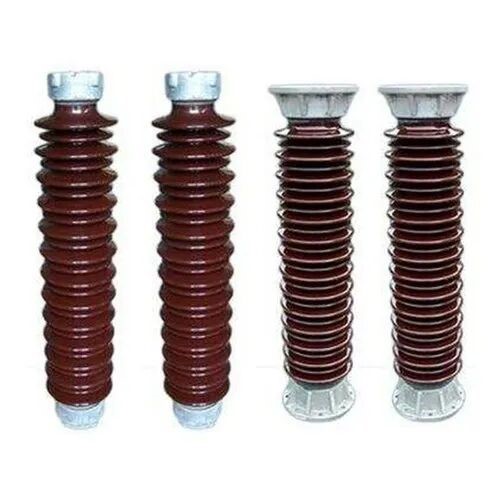
I also collected many images of other robots, especially interesting shapes and robotic details. Here are some examples:
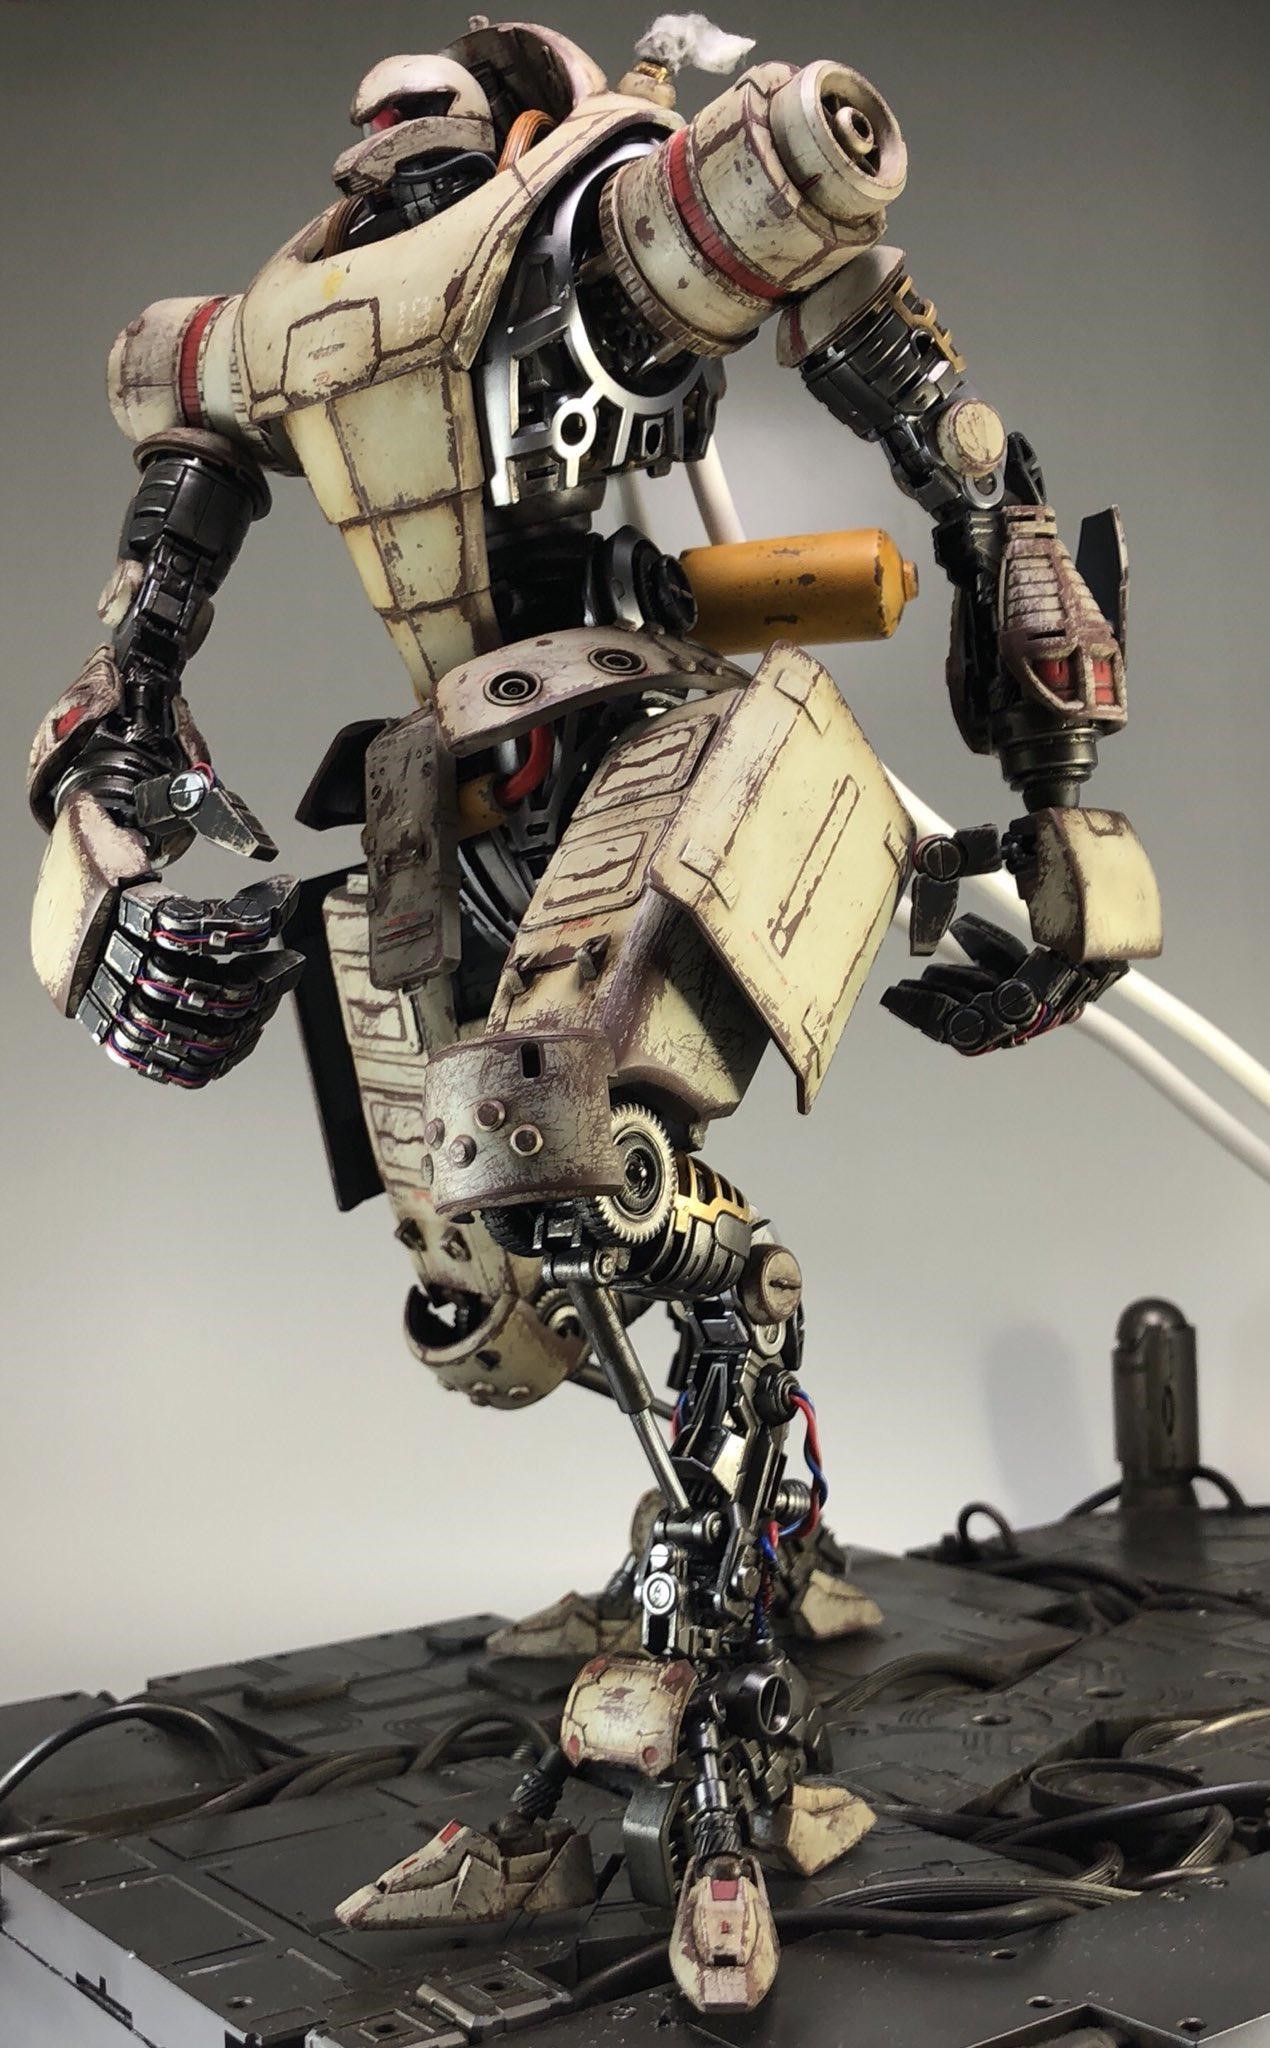
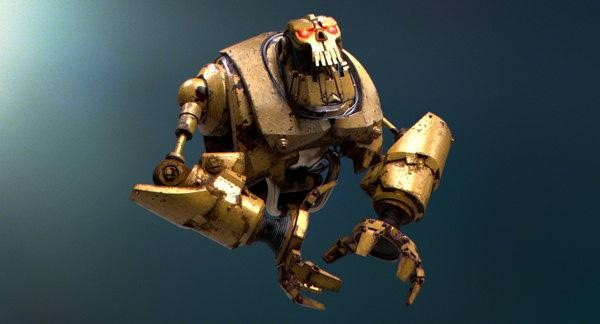
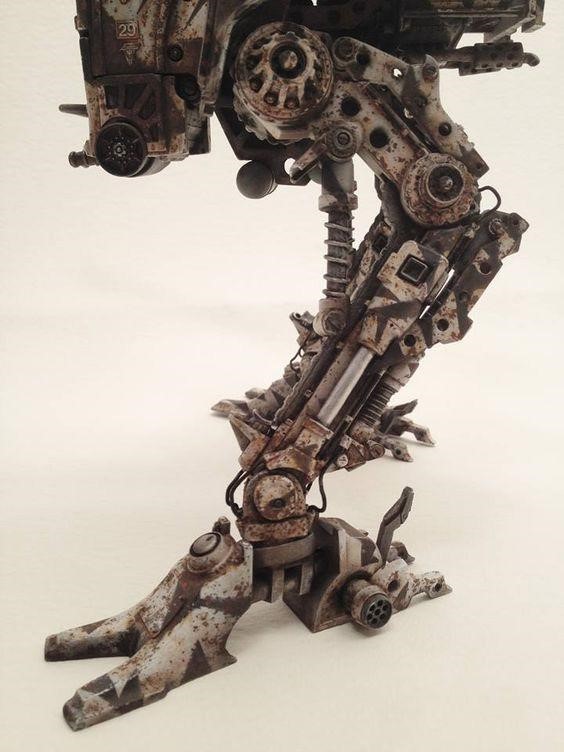
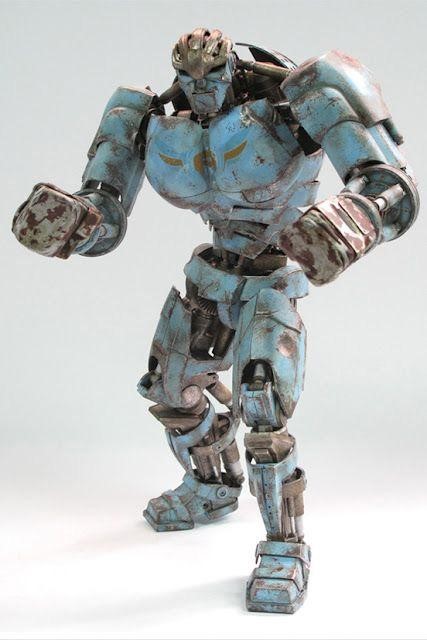
Overall, I like to aim for a certain aesthetic that is not too sci-fi and not too modern. I often see sci-fi design that is very different from our world and I feel that creates a certain disconnection to that world. I rather like to create an interesting mix between modern tech and the current, or even old and analogue tech that feels real and recognizable.
Texturing
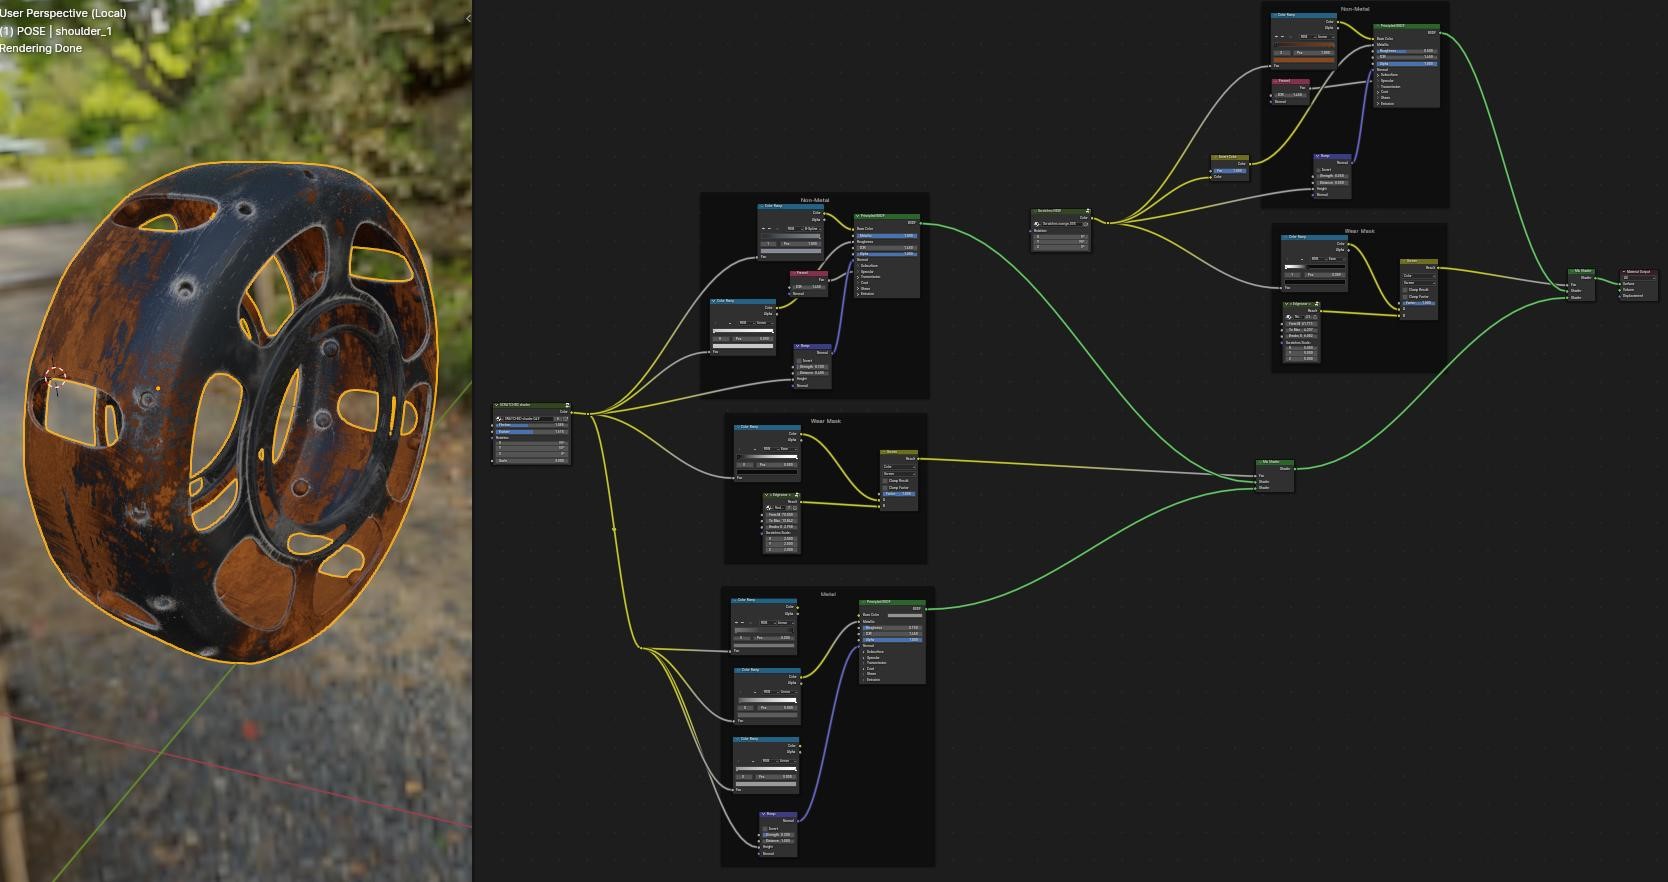
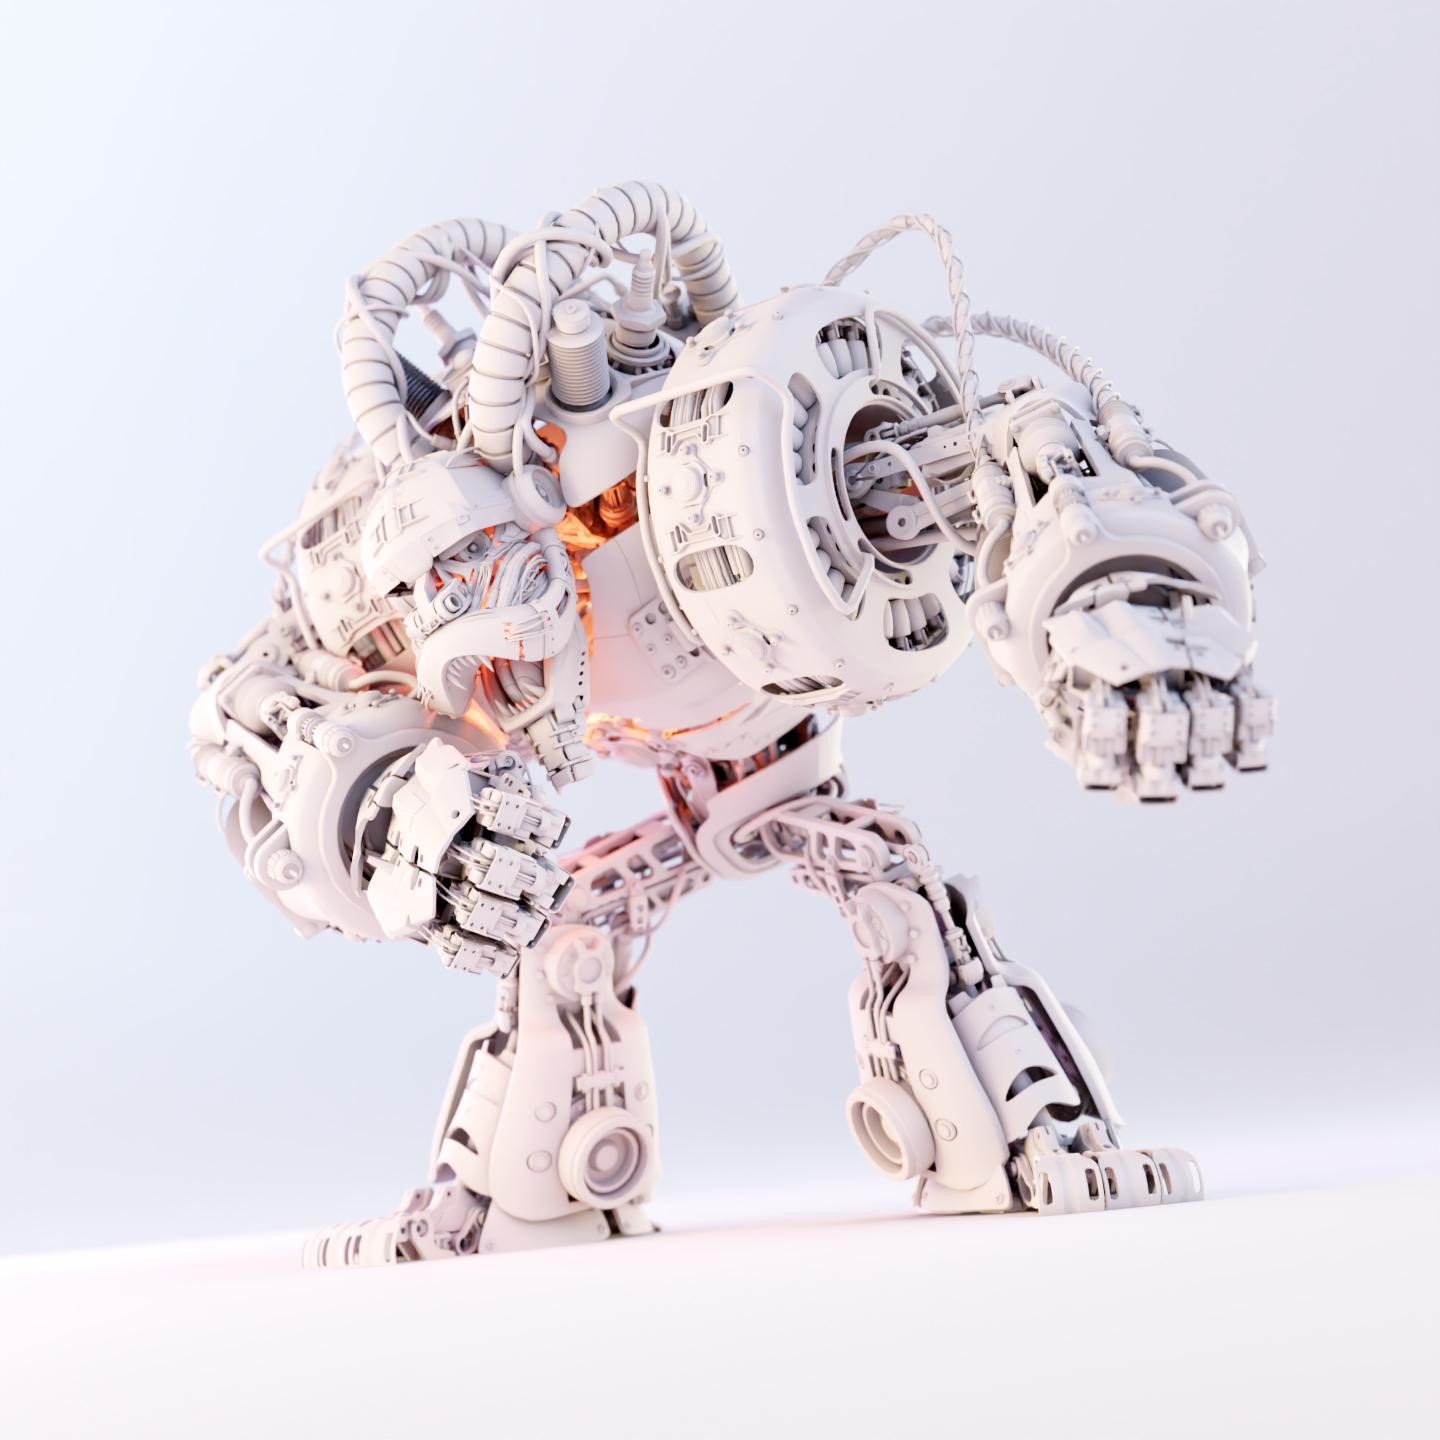
I mostly like to use procedural shaders, since they are universally applicable and they often work within the first try as seen here:
In some special cases, I use photo textures which I either shoot myself while roaming around my hometown or off some texture websites. Construction sites are a great place to find good mechanical references.

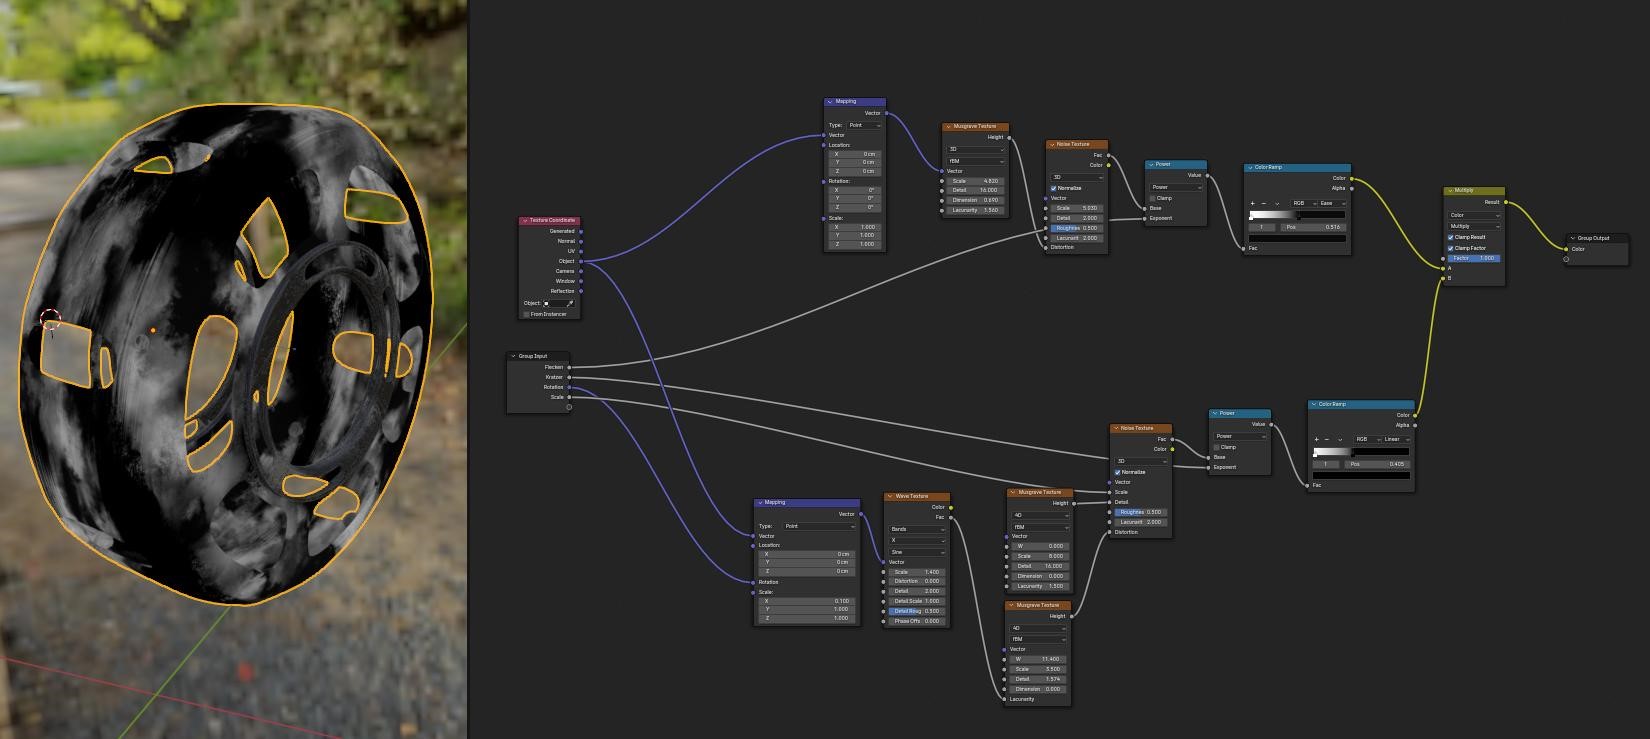
The procedural textures are a combination of different node setups that I learned over the years. Final node setup:
To give some variety to the metal, I used this tutorial by Royal Skies Procedural Scratches to create a base material with some scratches.
Then I created an edge wear mask to create… well… edge wear. This one from Kaizen tutorials helps you create an easy edge mask which works instantly on almost every shape: How to create professional materials.
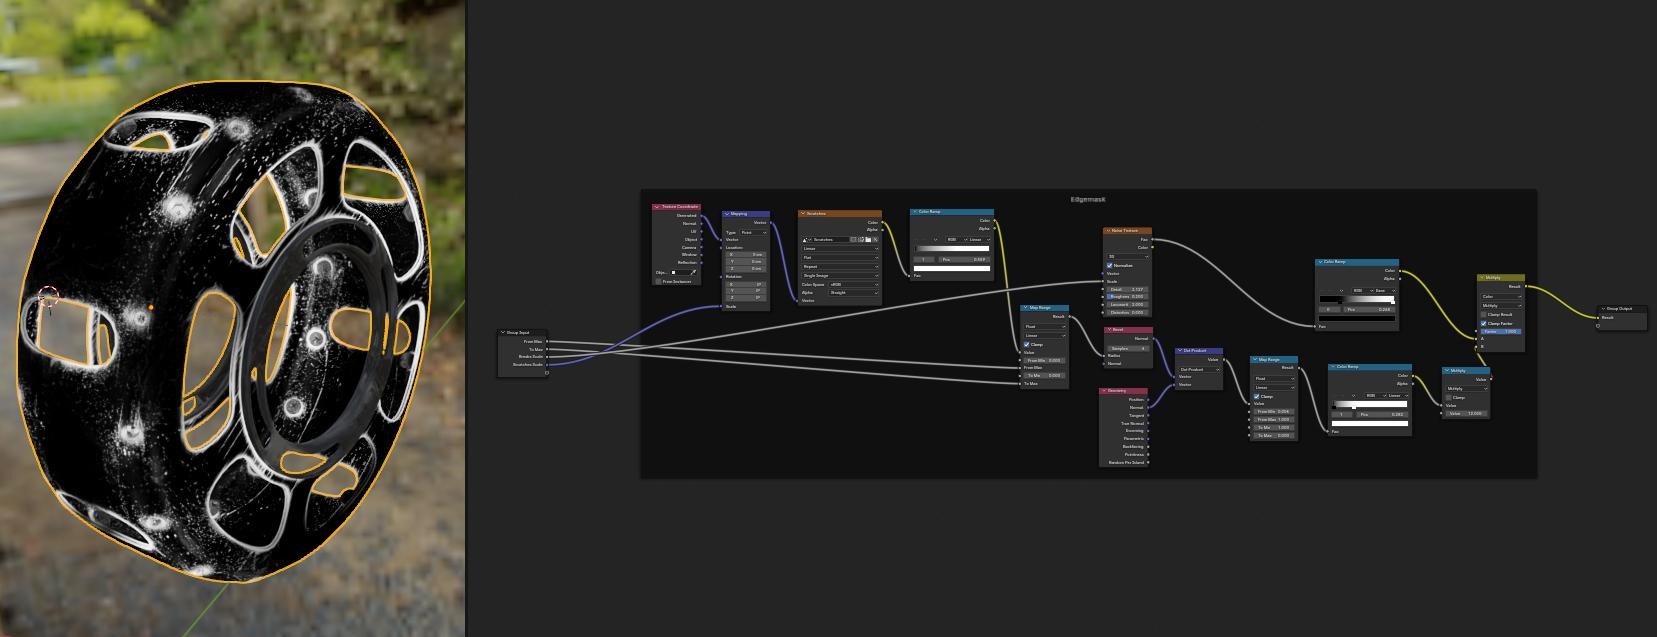
These masks combined are the factor for the two main metal shaders. One is rather matte and dirty which was exposed more to the environment, and the other one is brighter and more shiny for some fresh scratches.
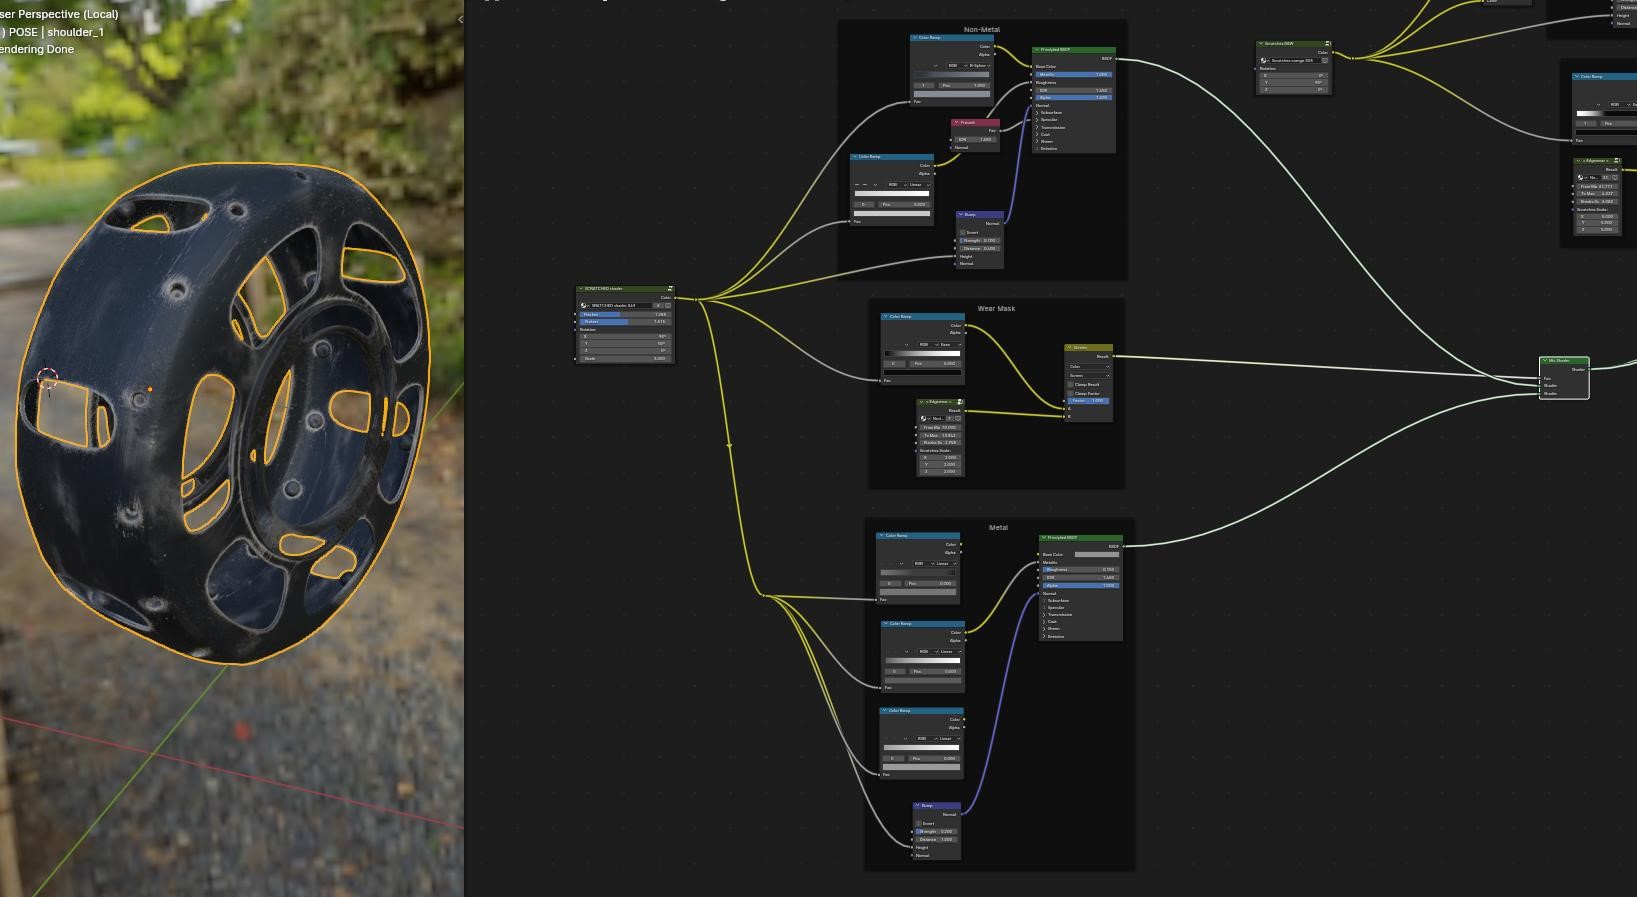
After that, it is again combined with a similar setup but this time, it’s for the paint layer.
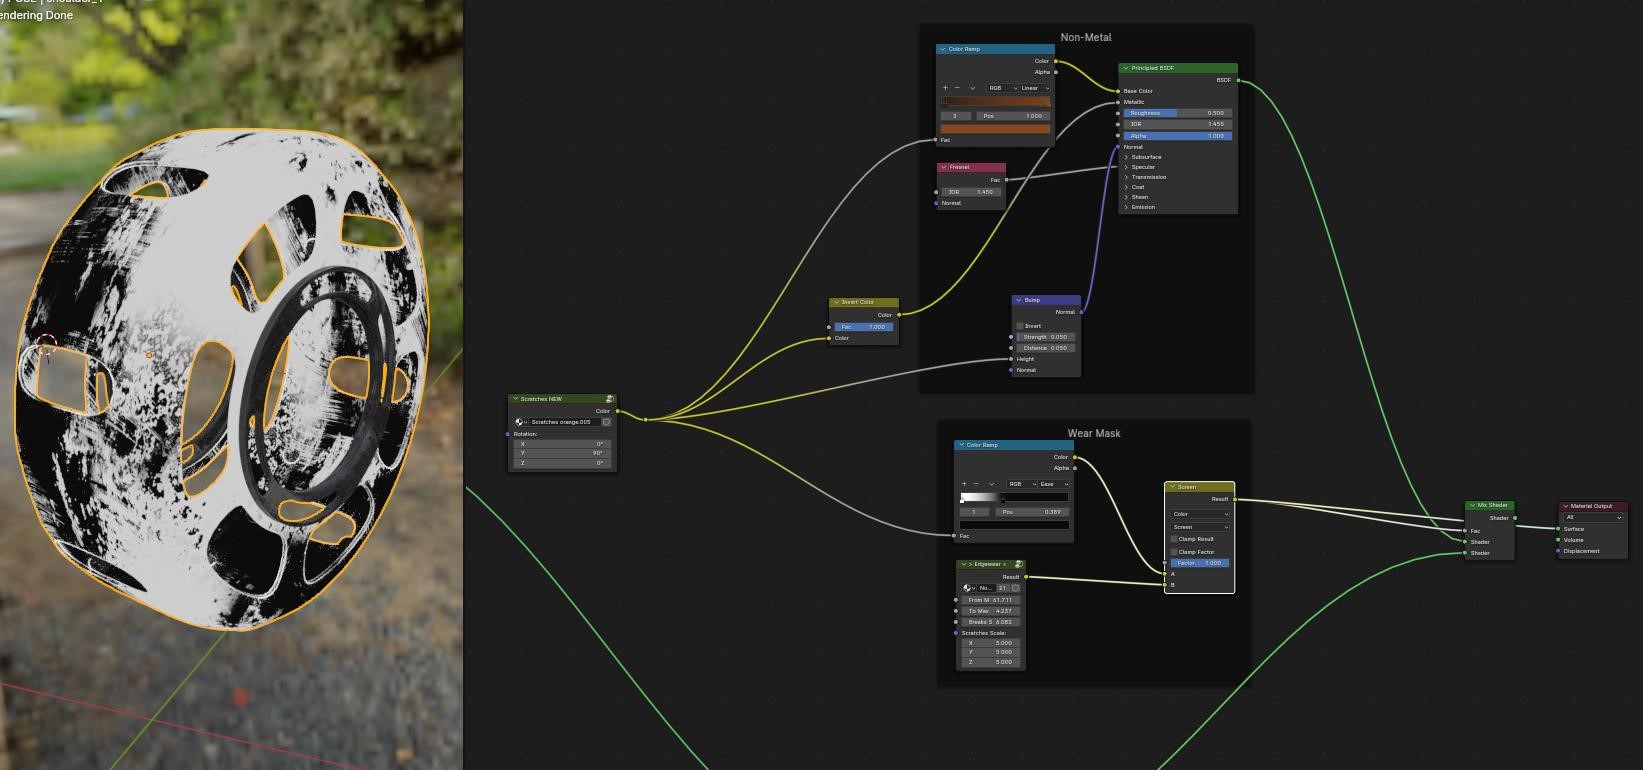
Final look:
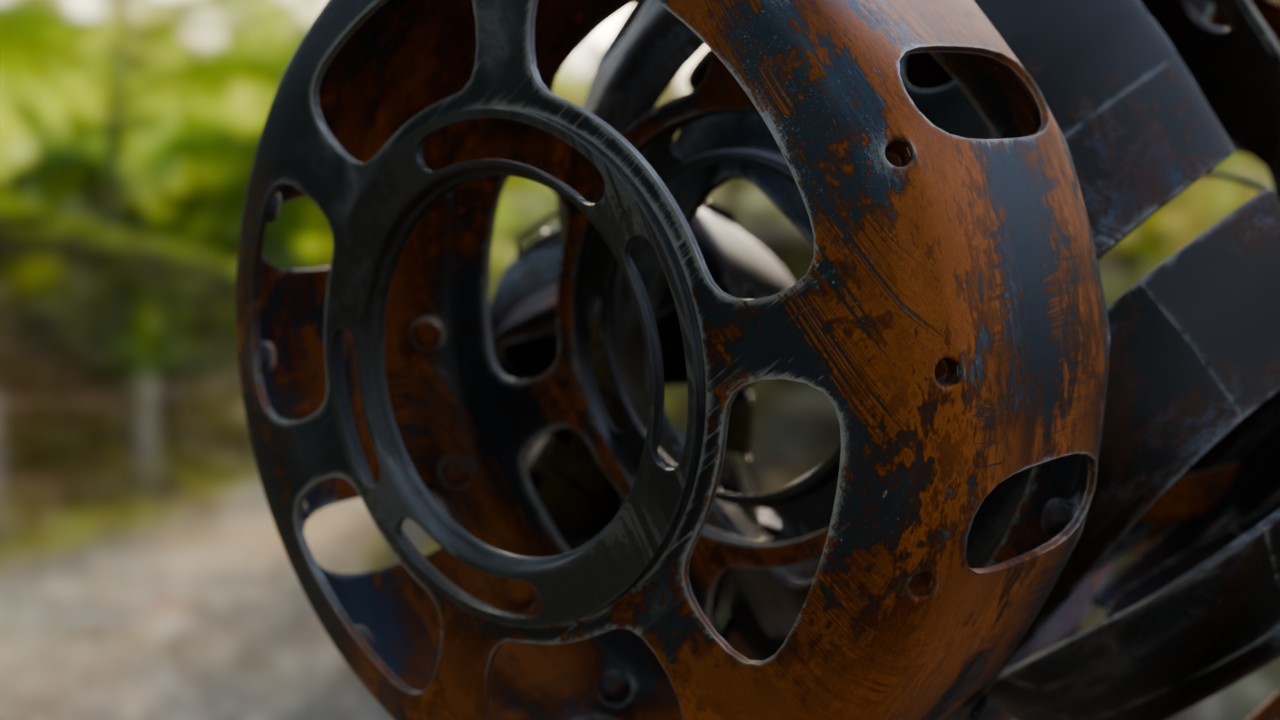
Variations of this shader are used on about 80% of all parts of the character. And since all of them use the Generate Coordinate system, there is no UV unwrapping ;)
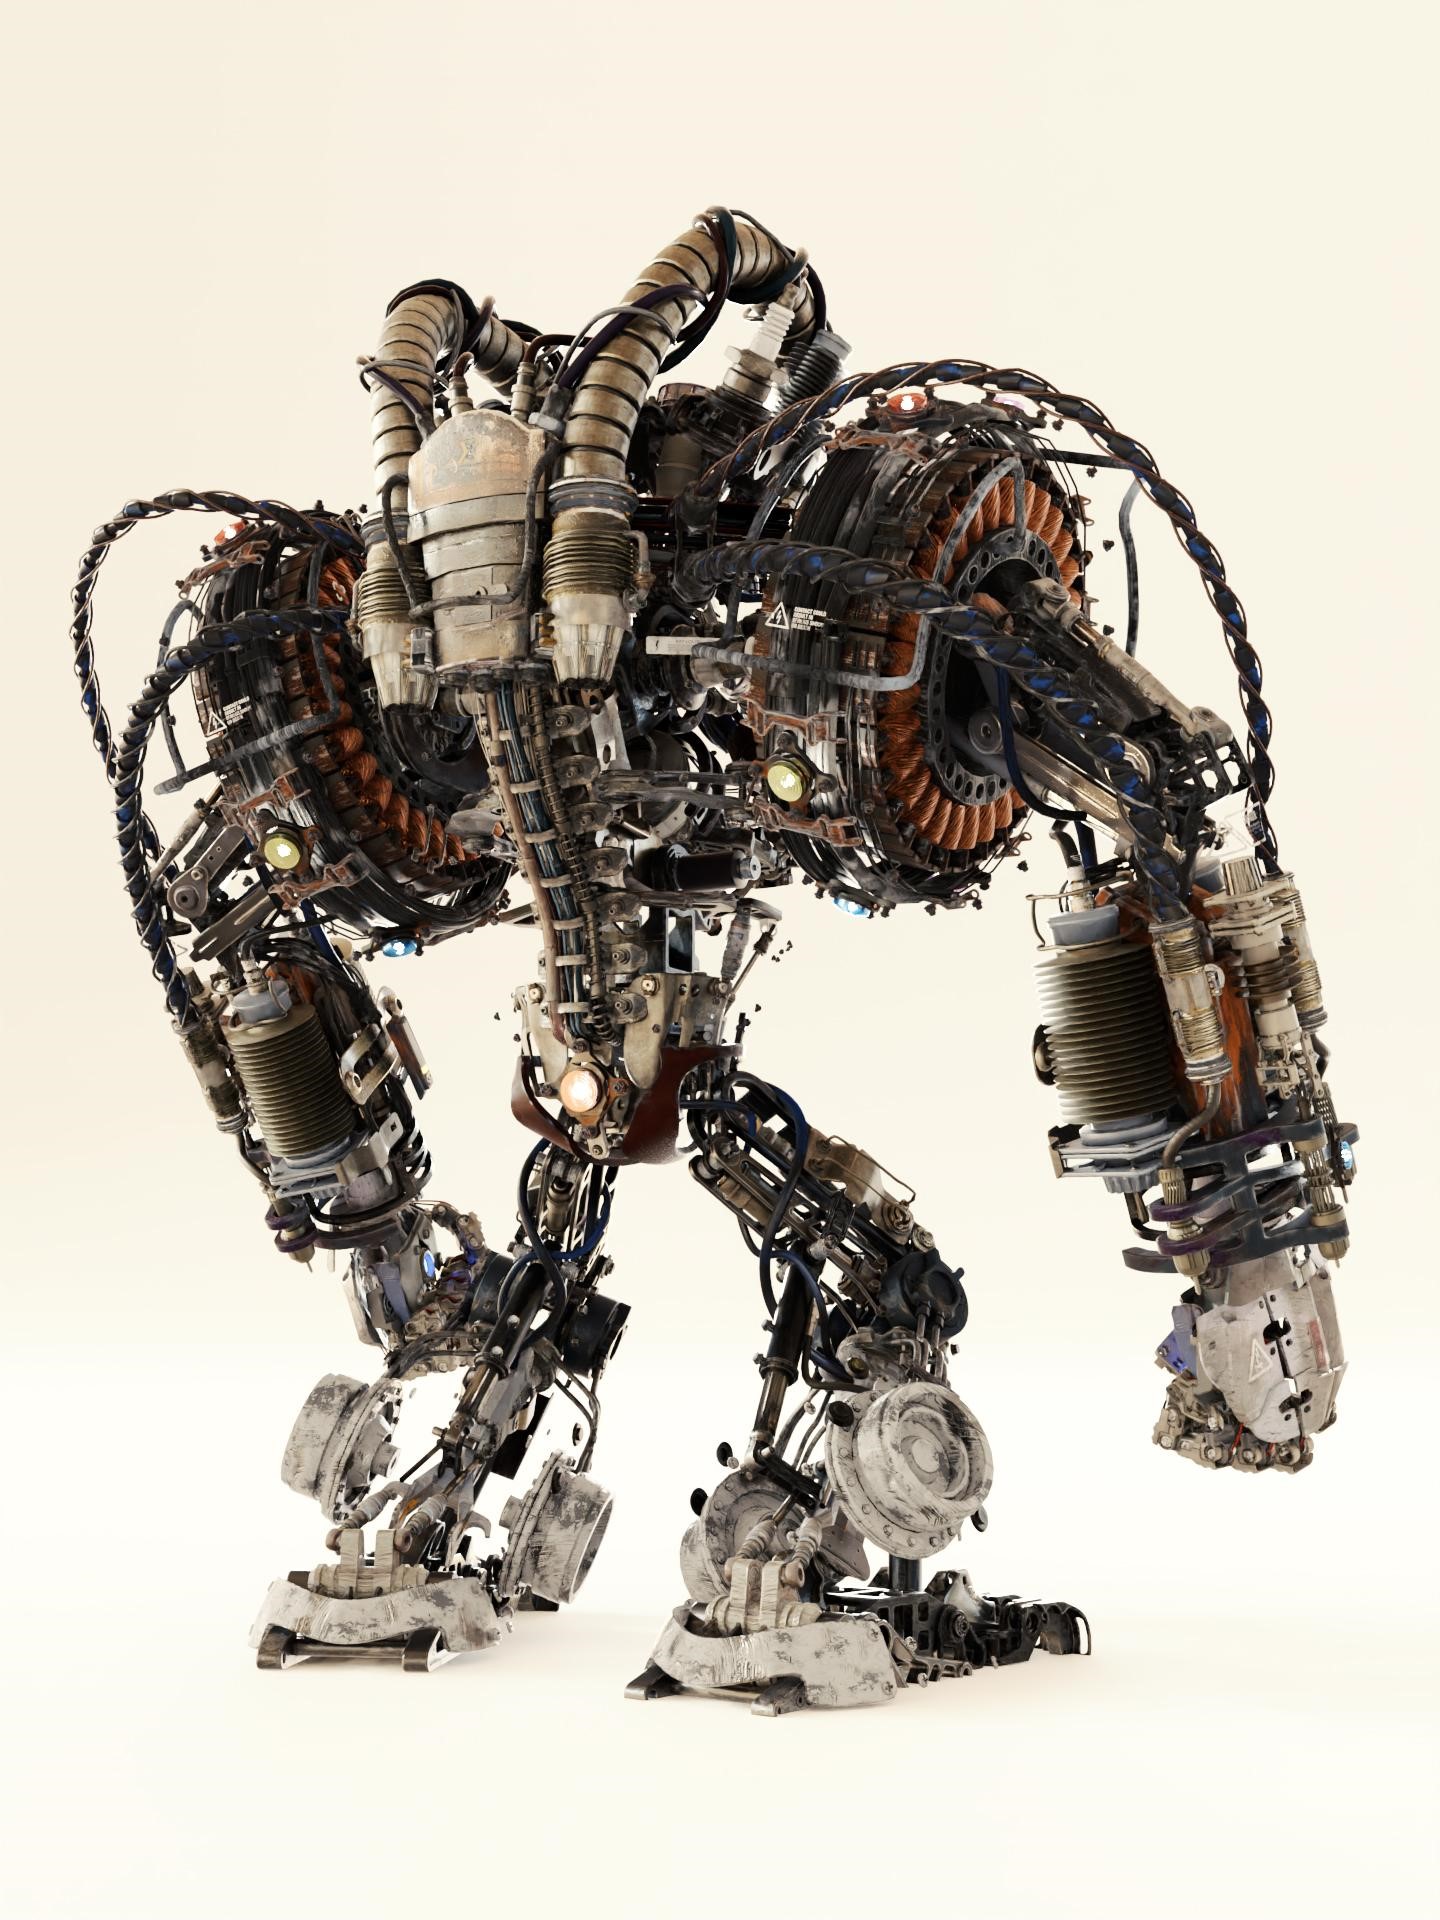
Head
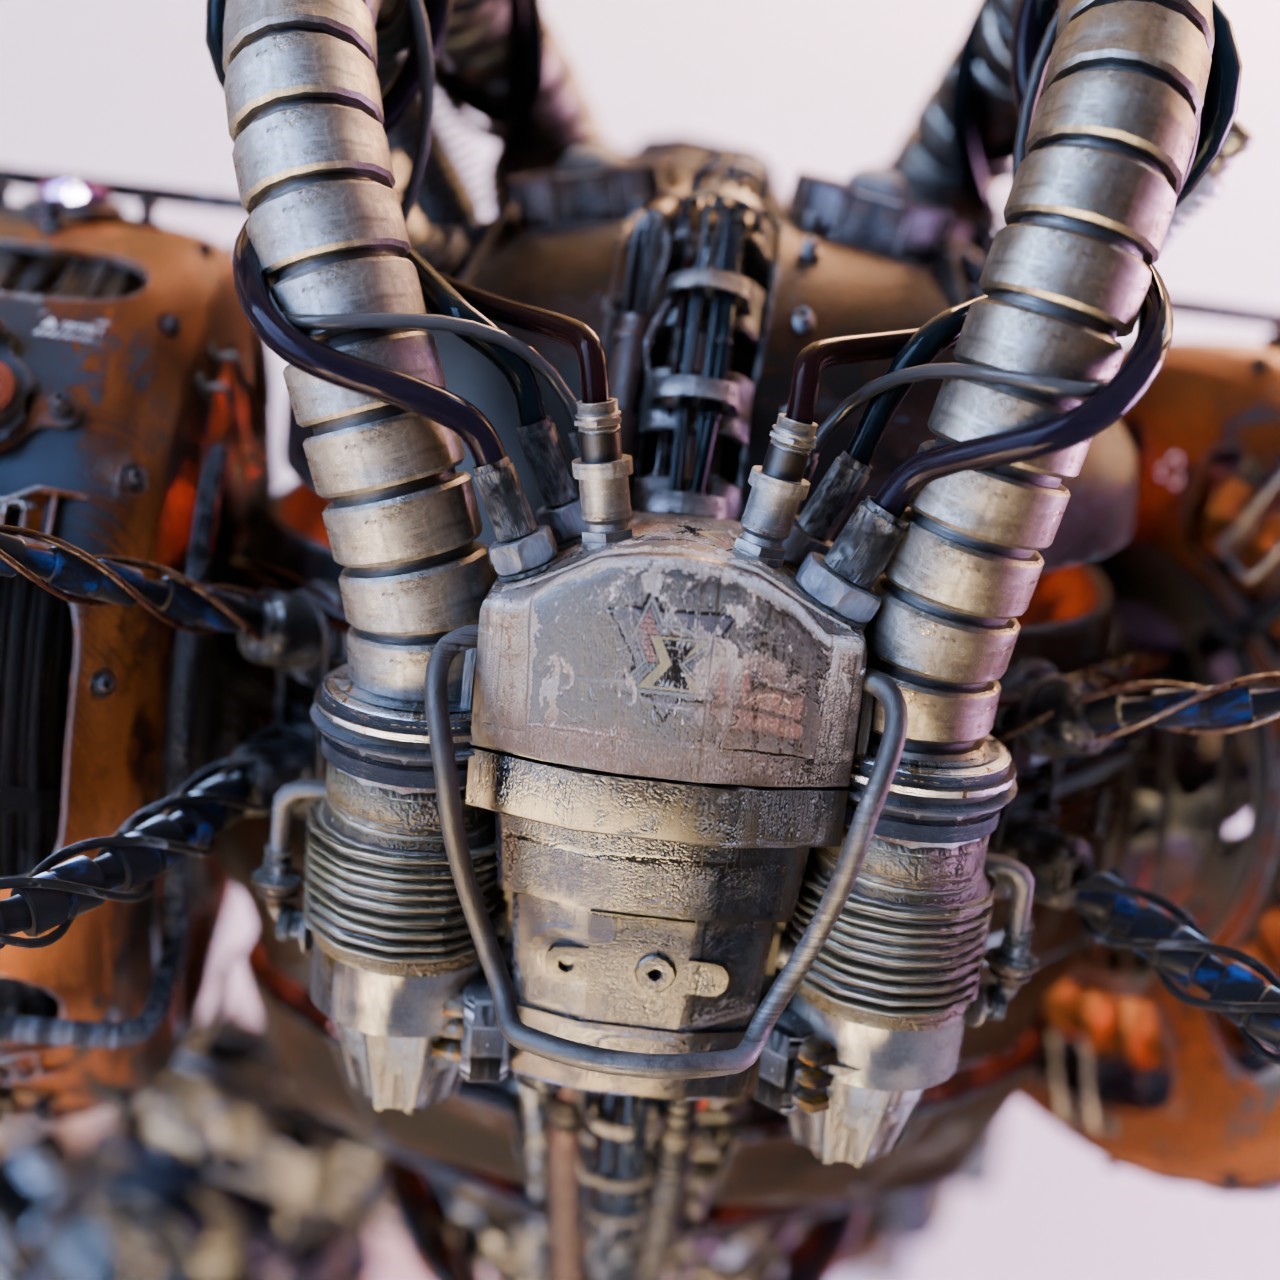
I started with the head as it is the most important feature. His personality should remain recognizable so I wanted to focus on that. The shapes mostly stayed the same but I put realistic textures on them. Then I extended that with adding bolts, cables, and some parts where multiple pieces would come together and create a welding point or some form of connection like in the real world.
Here, I already started using a mix of modeling original parts, and also used kitbashing as a way of adding complexity to the model.

For that, I use a mix of my own created assets from past projects and other purchased assets from other creators like Ian Hubert. His Patreon is a goldmine for knowledge and assets: Ian Hubert’s Patreon. William Landgren also has a great library of mechanical parts on his Patreon. And a huge amount of parts I got were from Oleg Ushenok and his Kitbash Set 405.
Torso
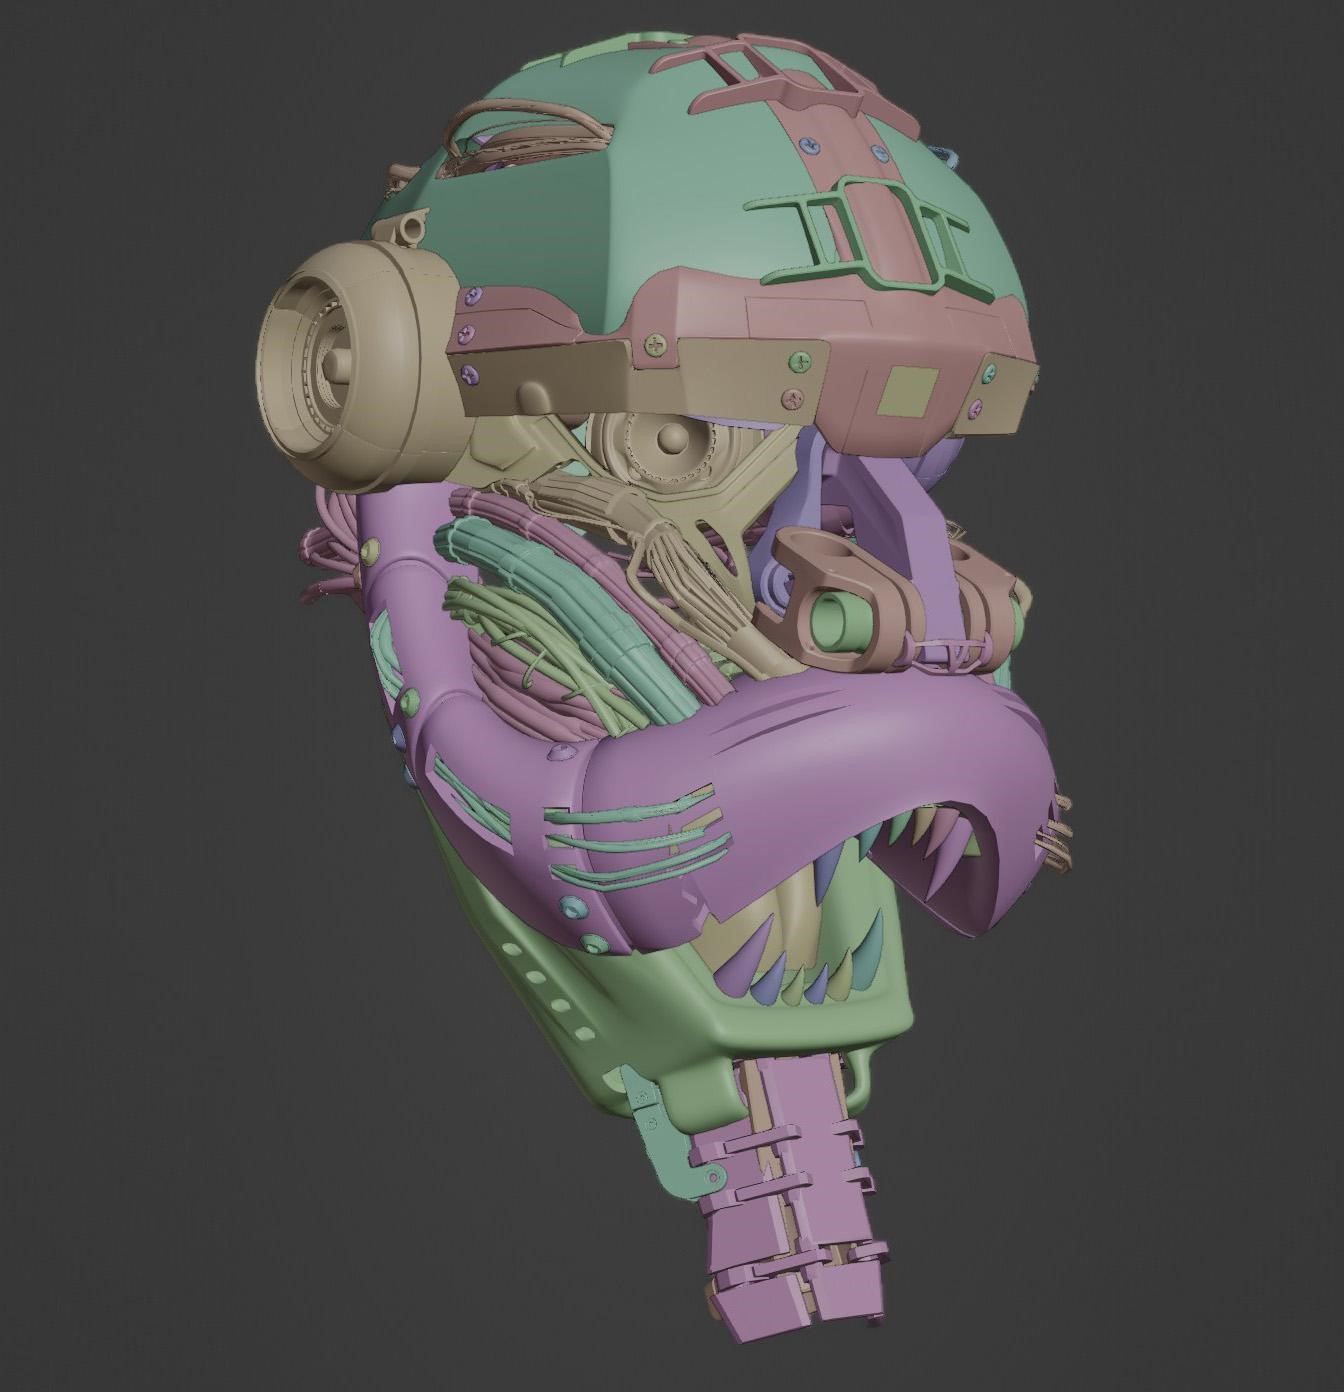
Then, I went on to create his torso. Since in the template, this is basically just a big round shape, I was a bit more liberal with my creativity. Since he was about to be animated, this one piece of torso would be too rigid and too limiting for animation. That’s why I separated it into four pieces which can move independently. That also gave me a chance to give him kind of a rib cage which makes his design a bit more visceral and menacing.
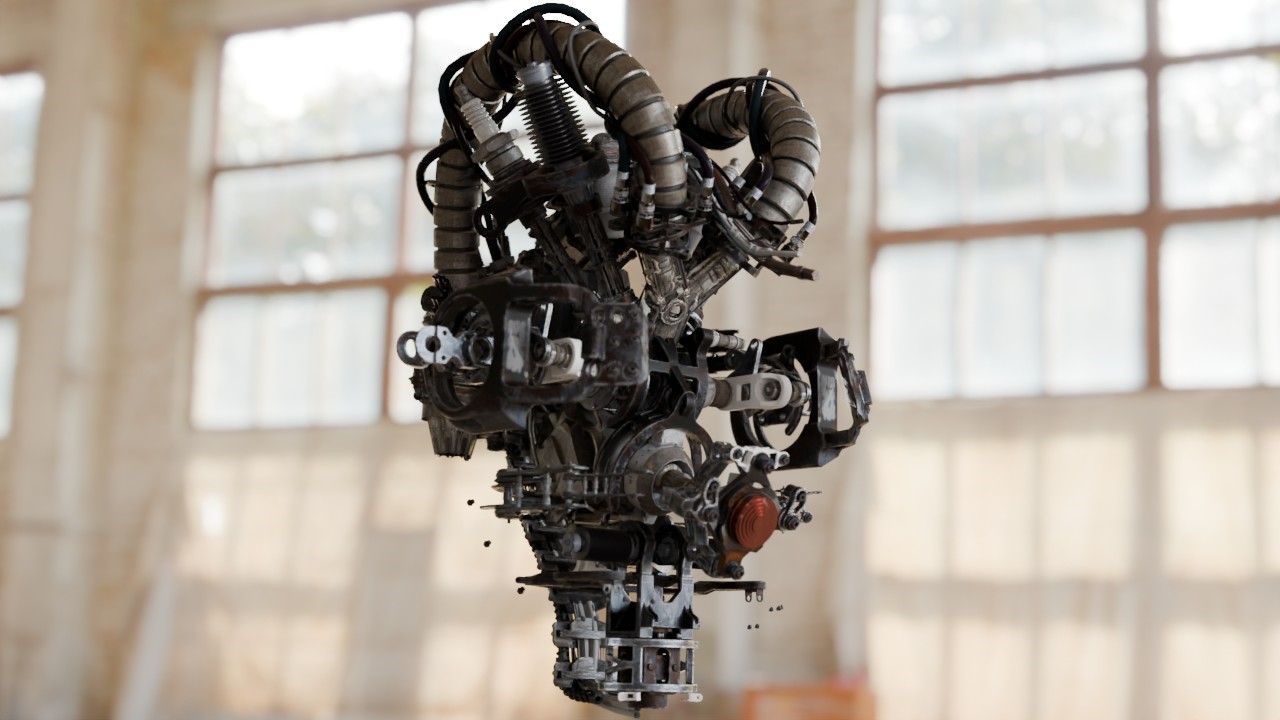
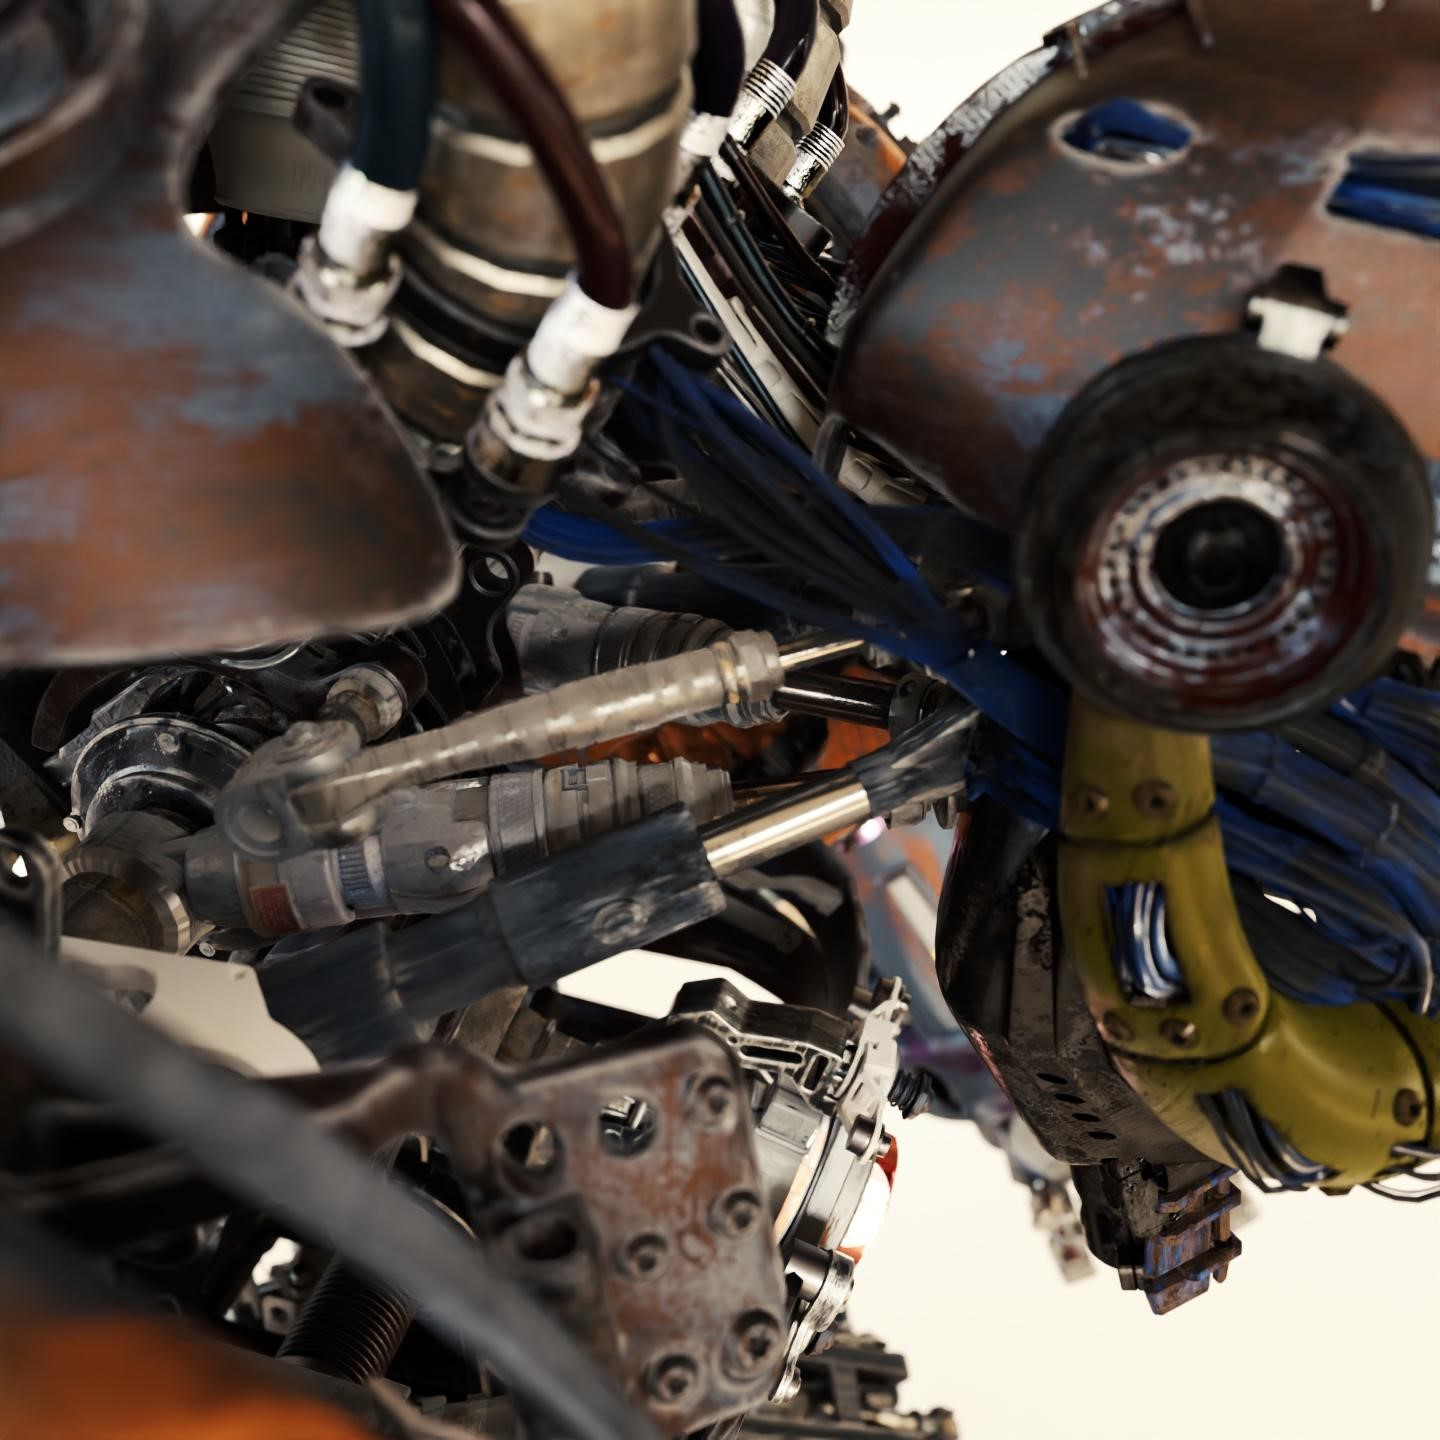
Since his design is a bit more open and filled with gaps and holes, it was important to me to make an inner skeleton for him. In the end, this is how most real world robots are built. The final look and design of a character is basically just the outside shell but the motors and gears are the parts that drive the machine.
So I used many of the parts I had available and combined them in a way that seems plausible and would make sense to the average viewer. I created a main spine, some sturdy parts that connect and carry the heavy arms, and some supporting structures. If you look very closely, it probably doesn’t make sense but that wasn’t my goal.
Not to be realistic, but to feel realistic. I’m not an engineer so I wouldn’t know how he would operate anyway :D
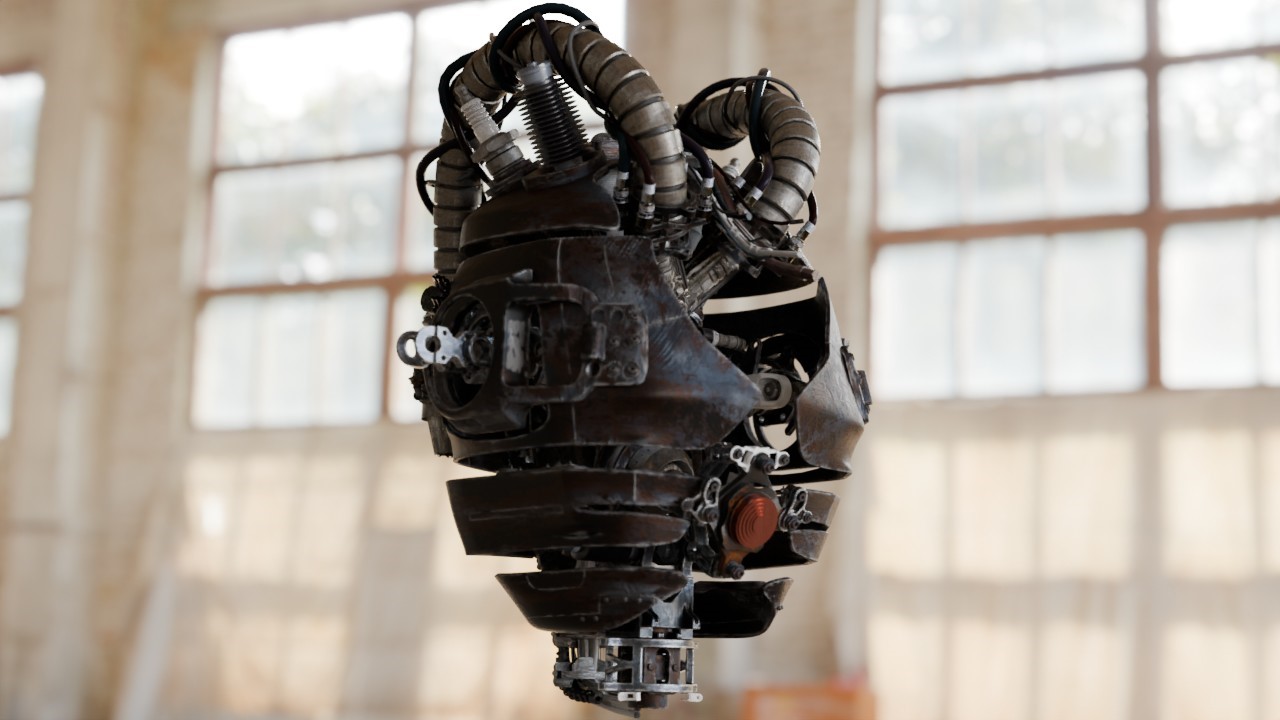
I topped off his back with some familiar elements from the real world like spark plugs and high voltage insulators.
Arms
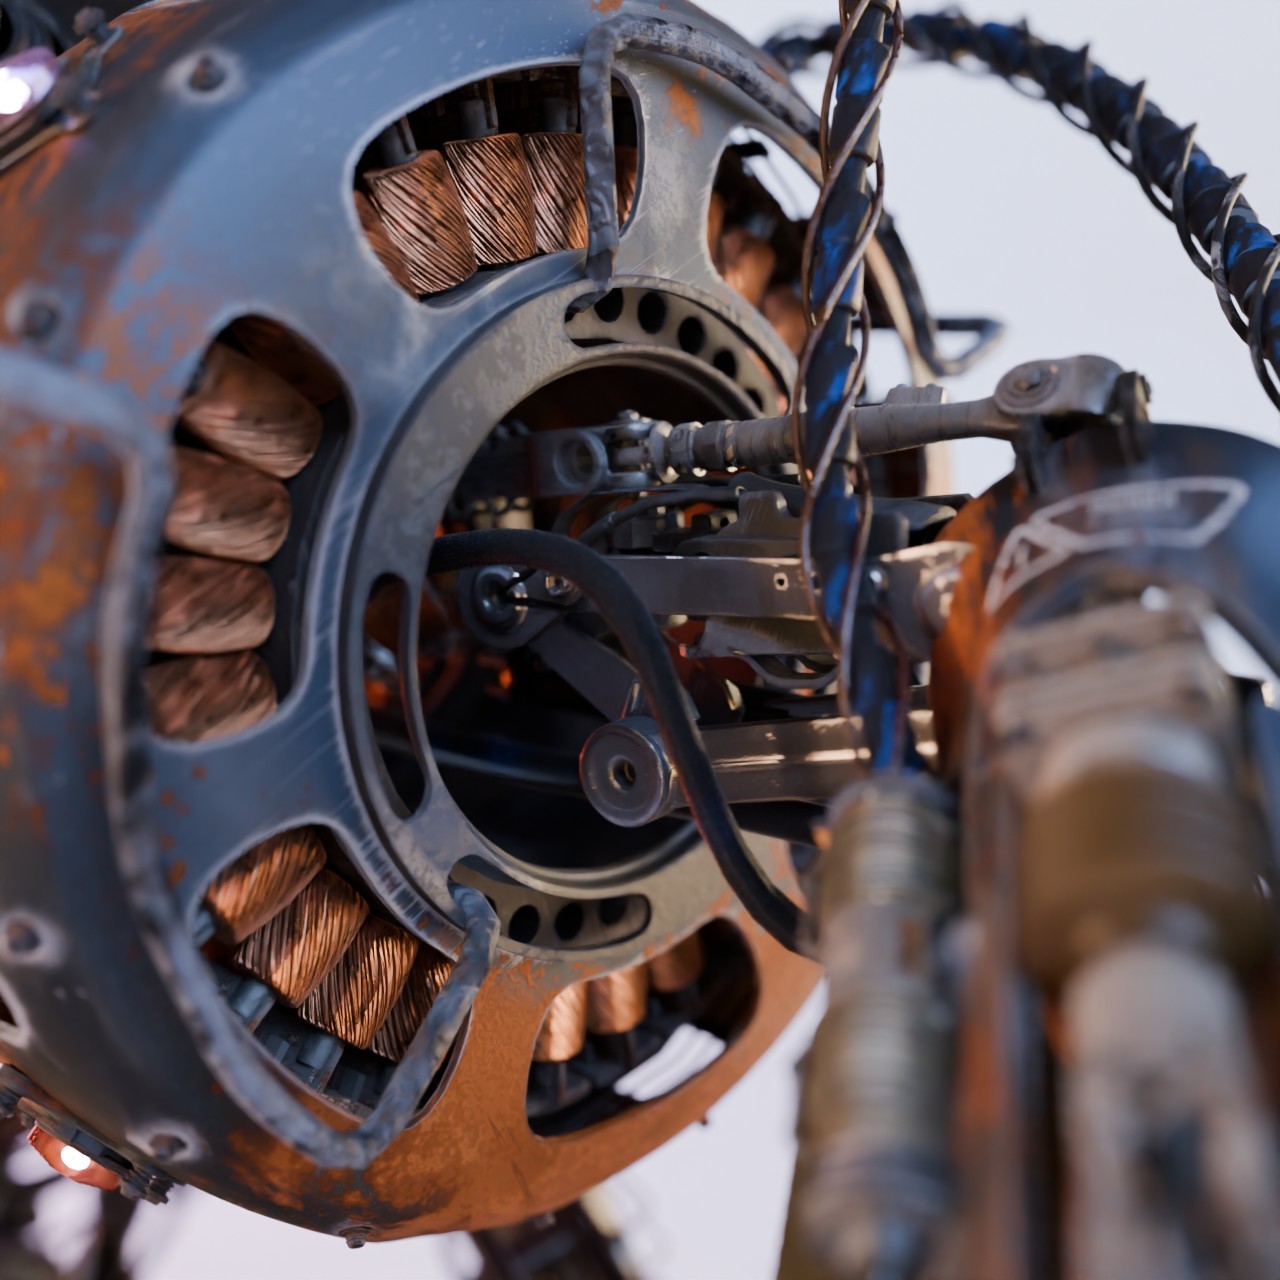
The arms were an important part since these stand out with the big shoulder parts. To bring these into a real world sense, I looked for similar shapes and found electrical coils. These were perfect since that way, I could explain how he generates his electrical powers. They also give him a big realistic touch.

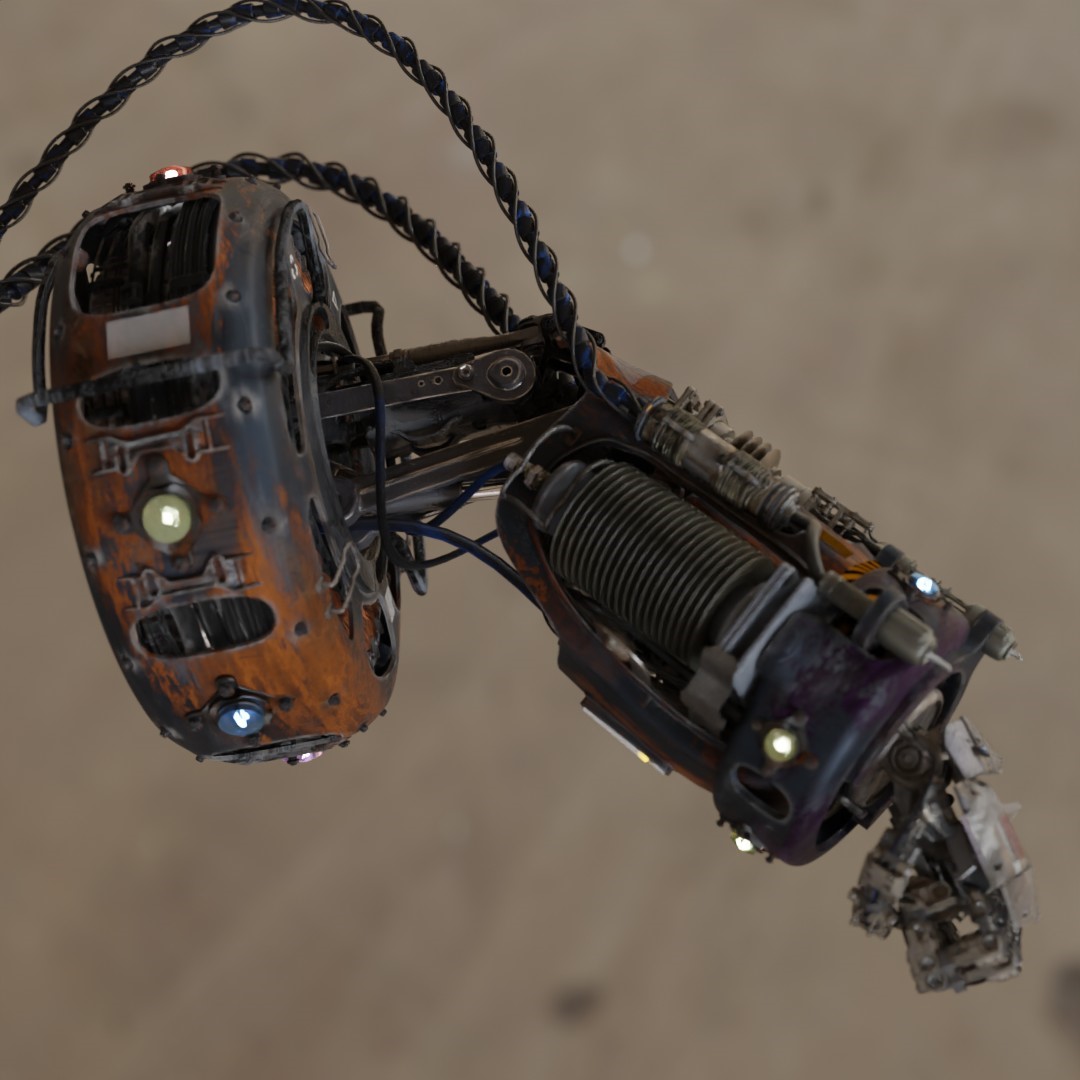
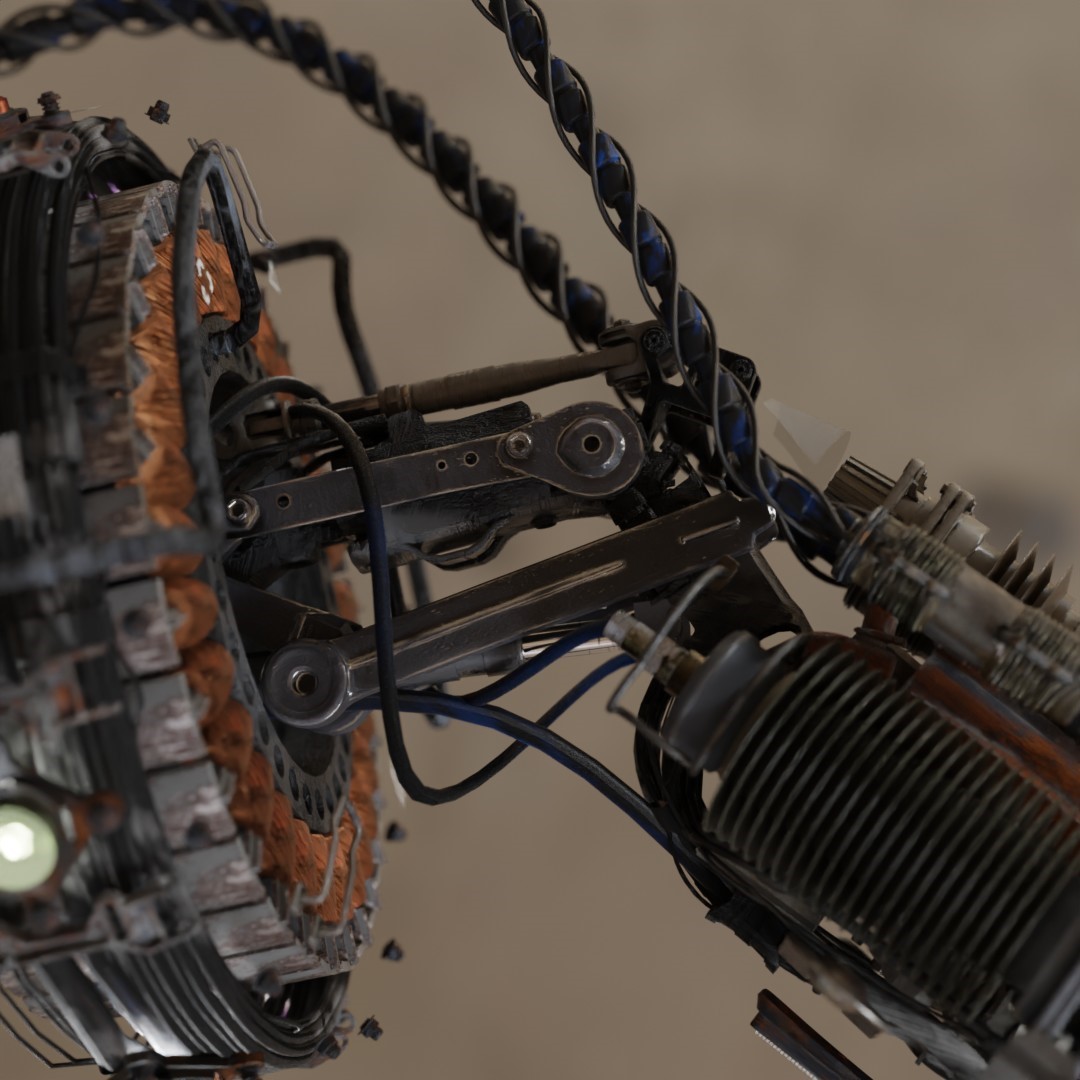
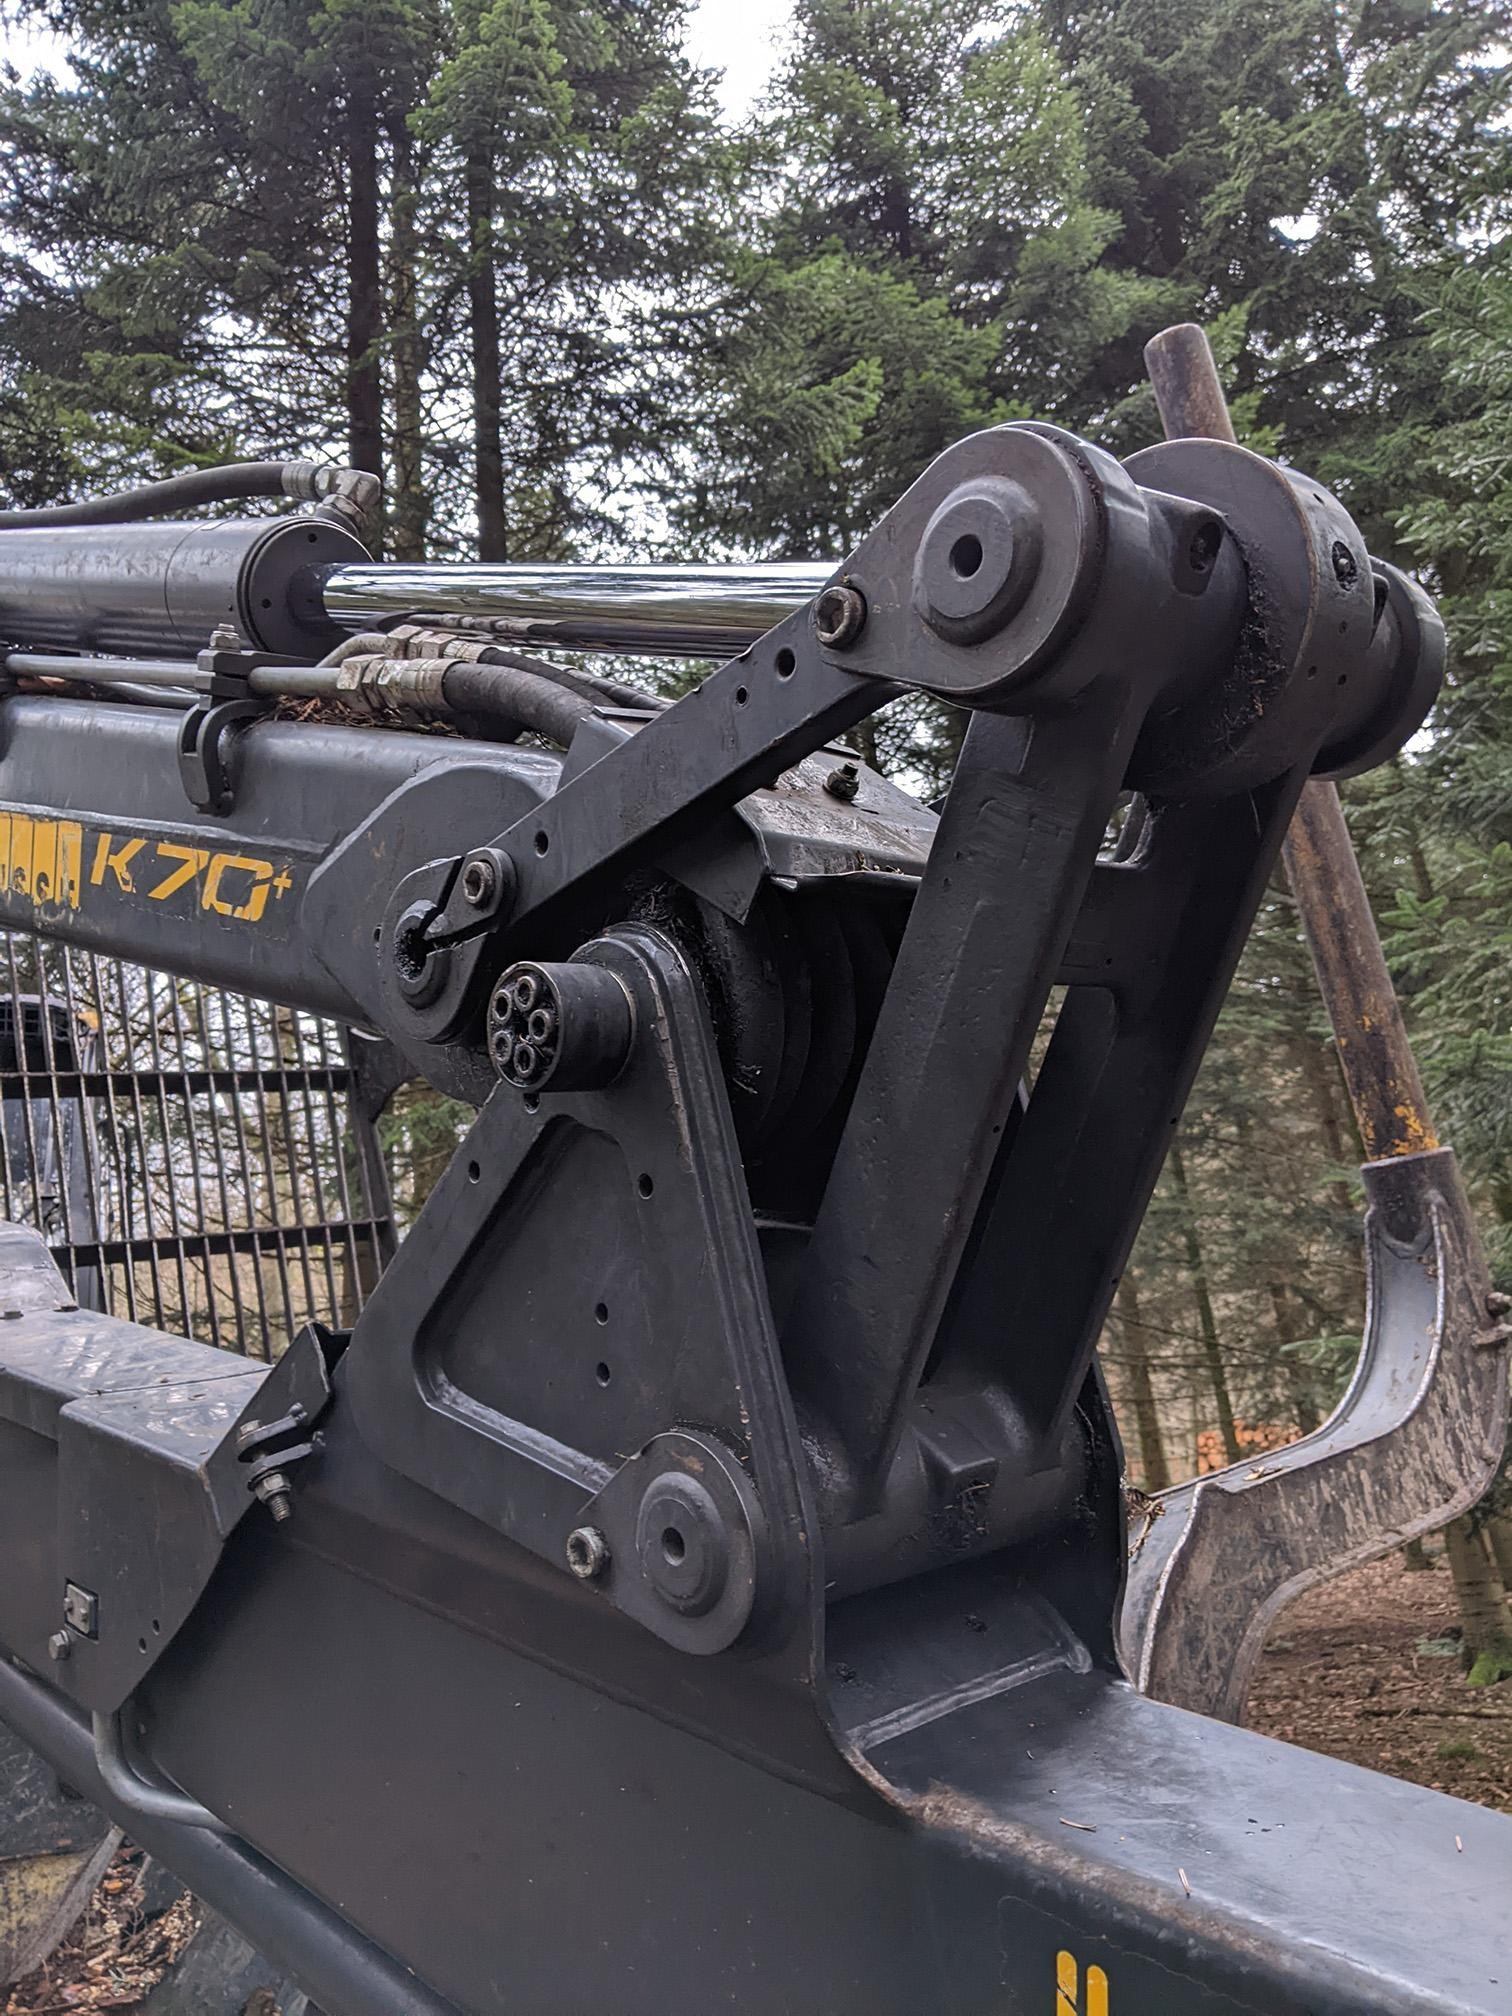
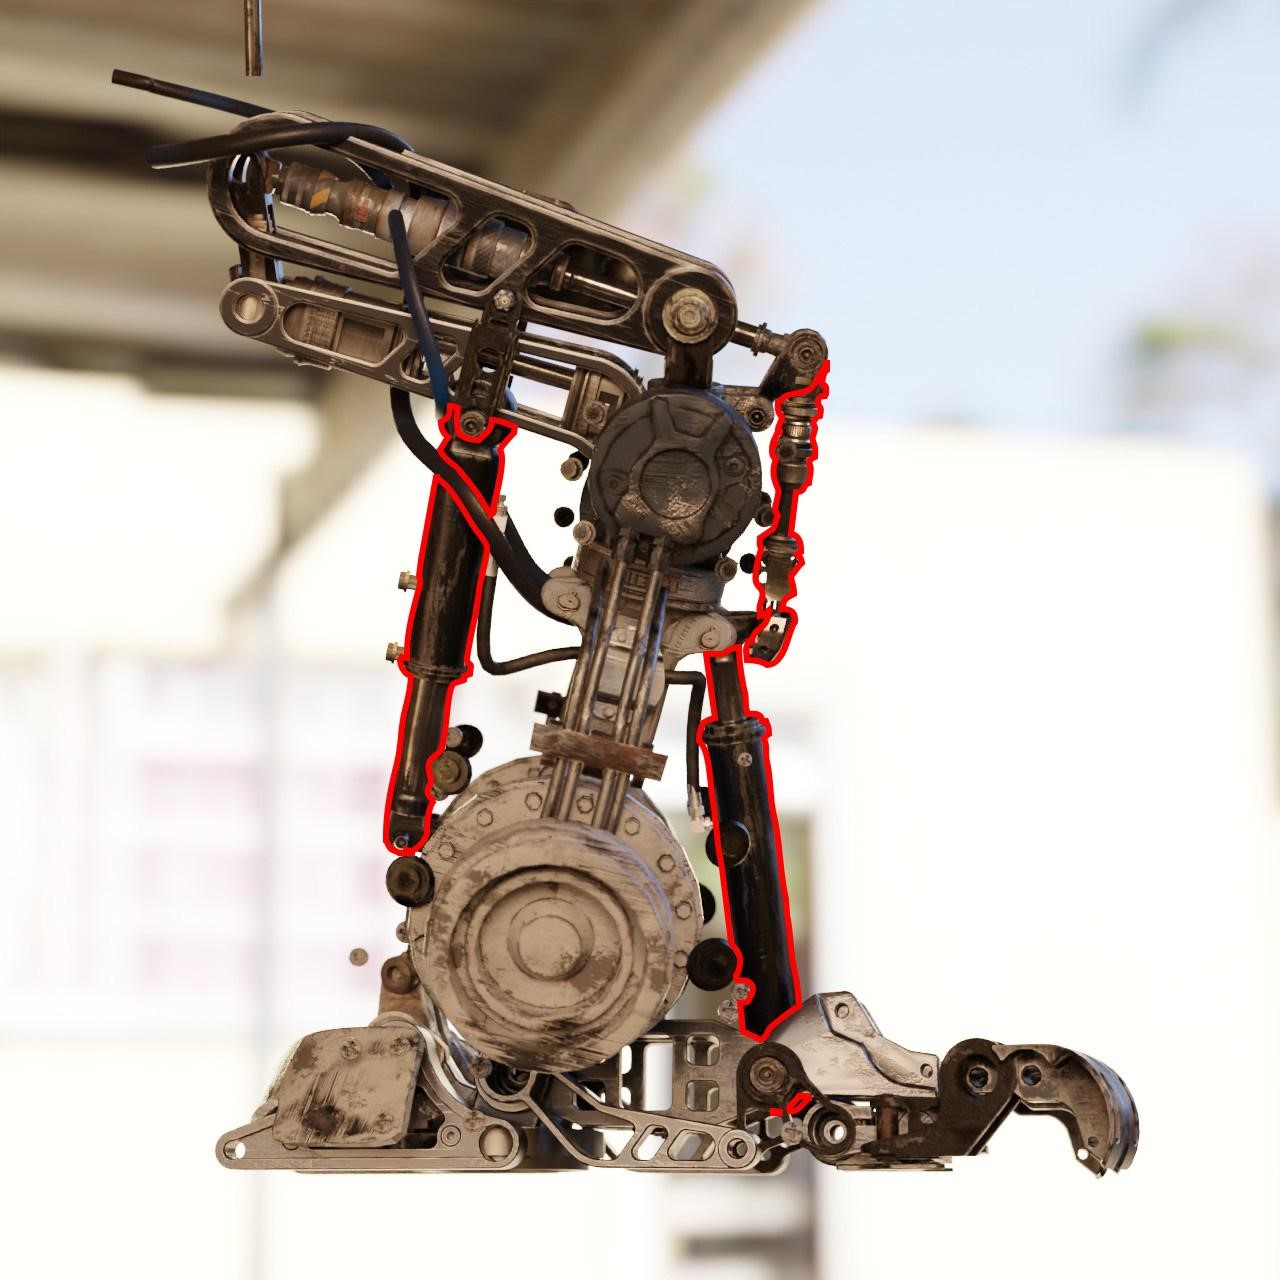
For the upper and lower arms, I like to use a mix of familiar design but also show off some mechanical rigging. So, I decided to leave the upper arms exposed and cover up the lower arms. The upper arms gave me the chance to create a more complex rigging system that adds to the mechanical realism which works within real world rules.
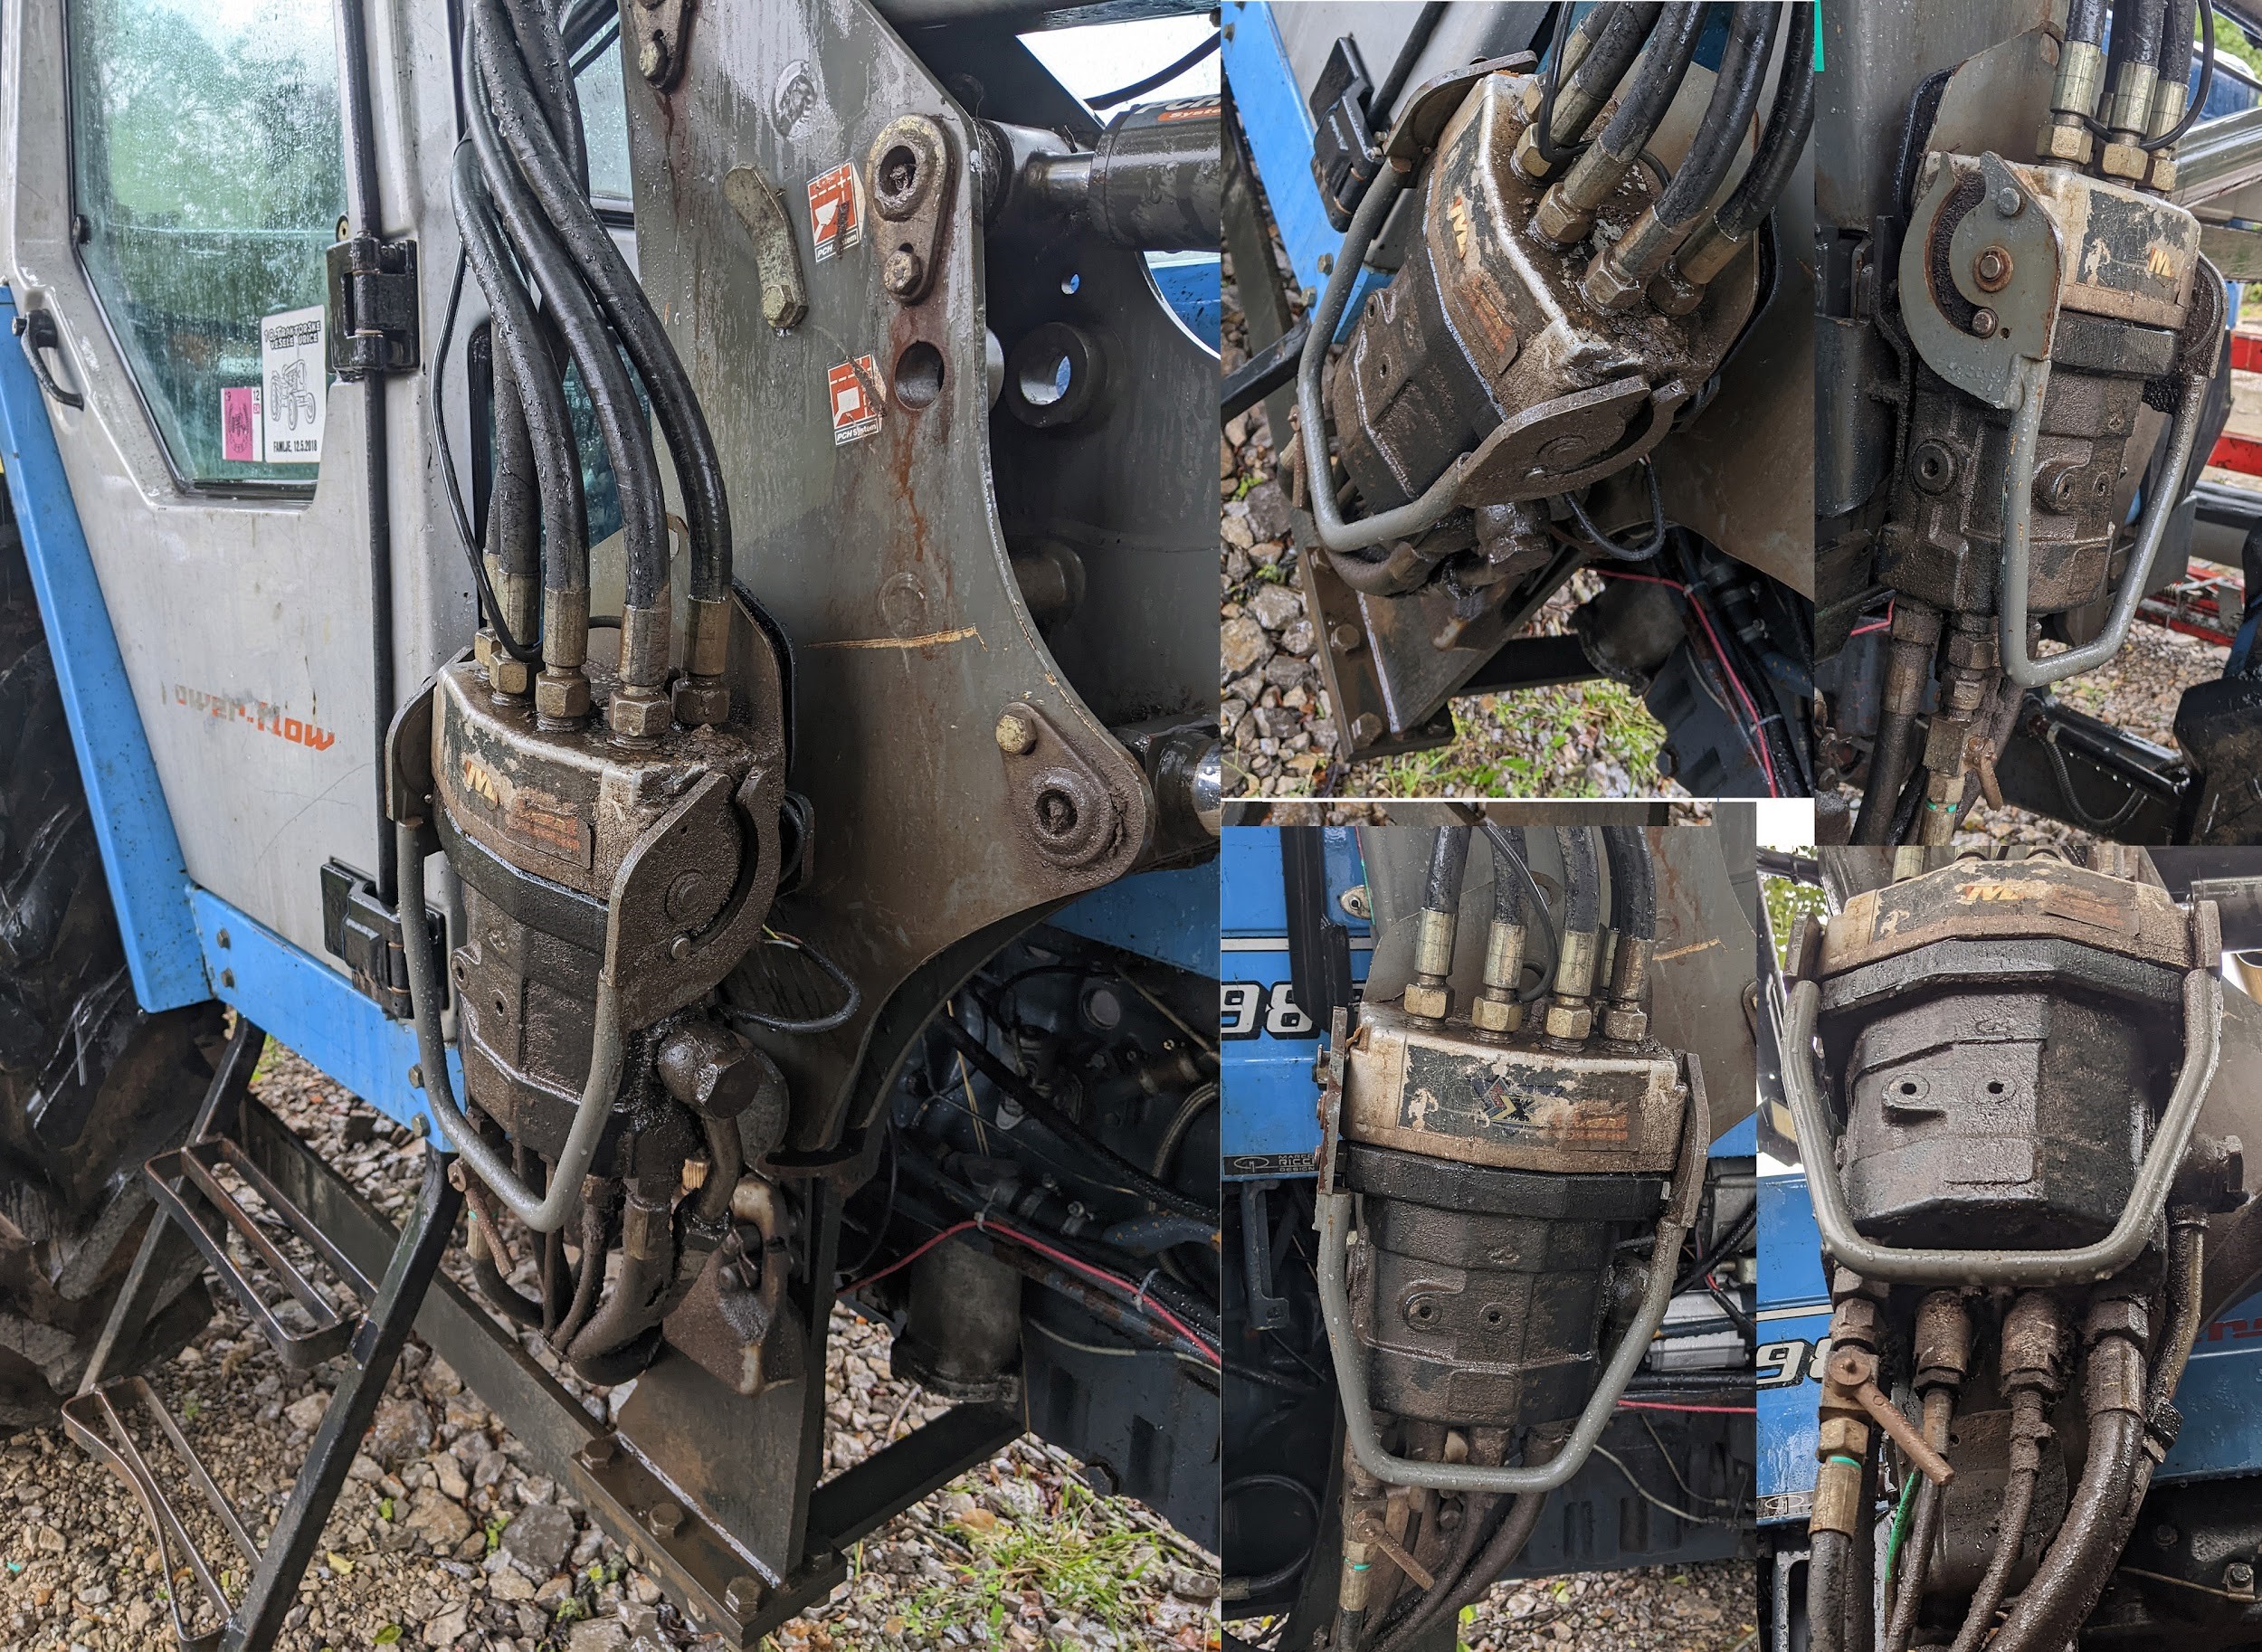
By the way, those parts are modeled after some excavator parts. I also used photos of that for the textures.
Legs
That same principle I also used for his legs. I made the upper legs mechanical with a visible rig, and masked the lower leg with parts that support the original design.
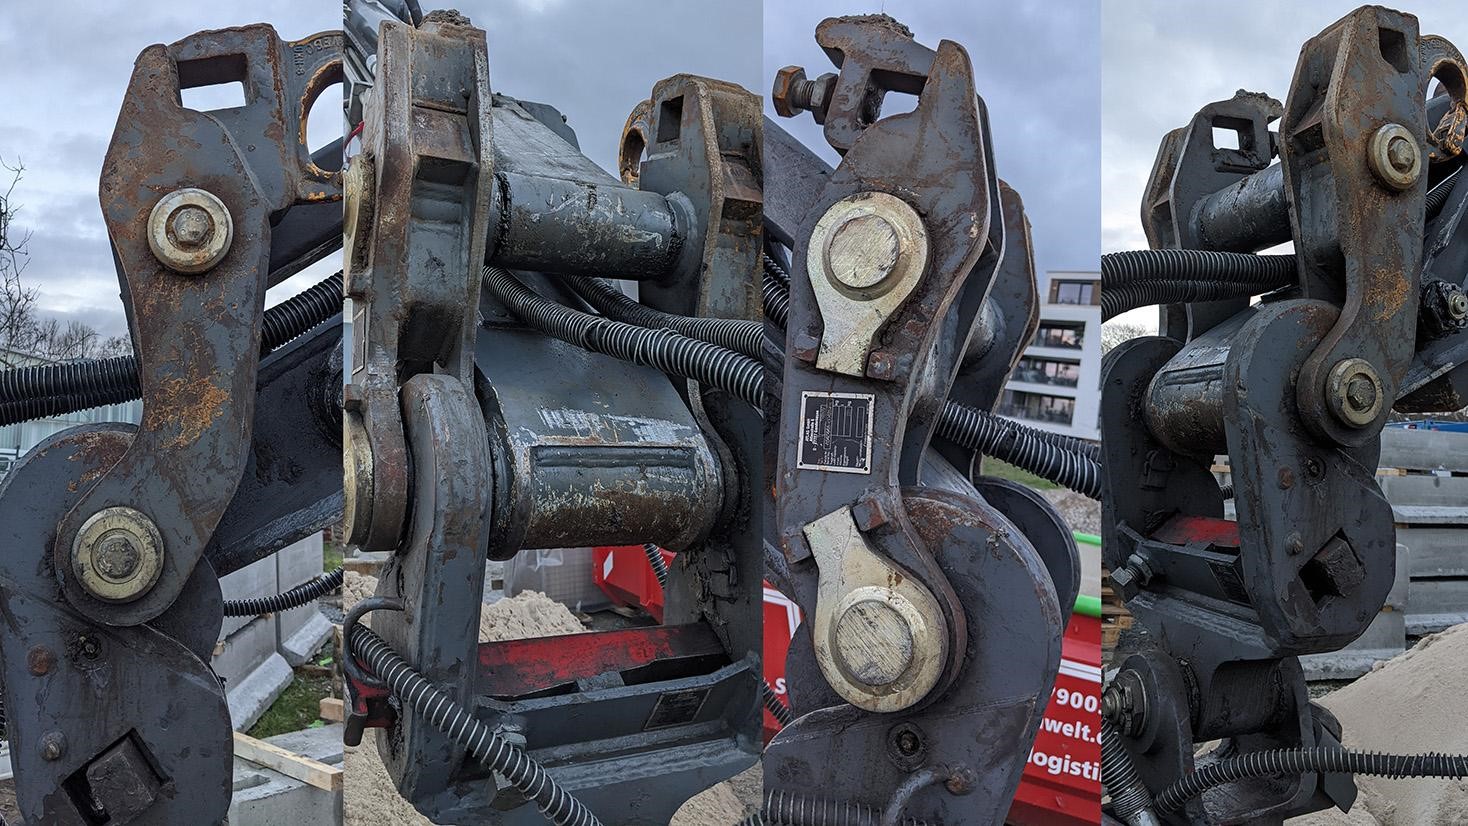
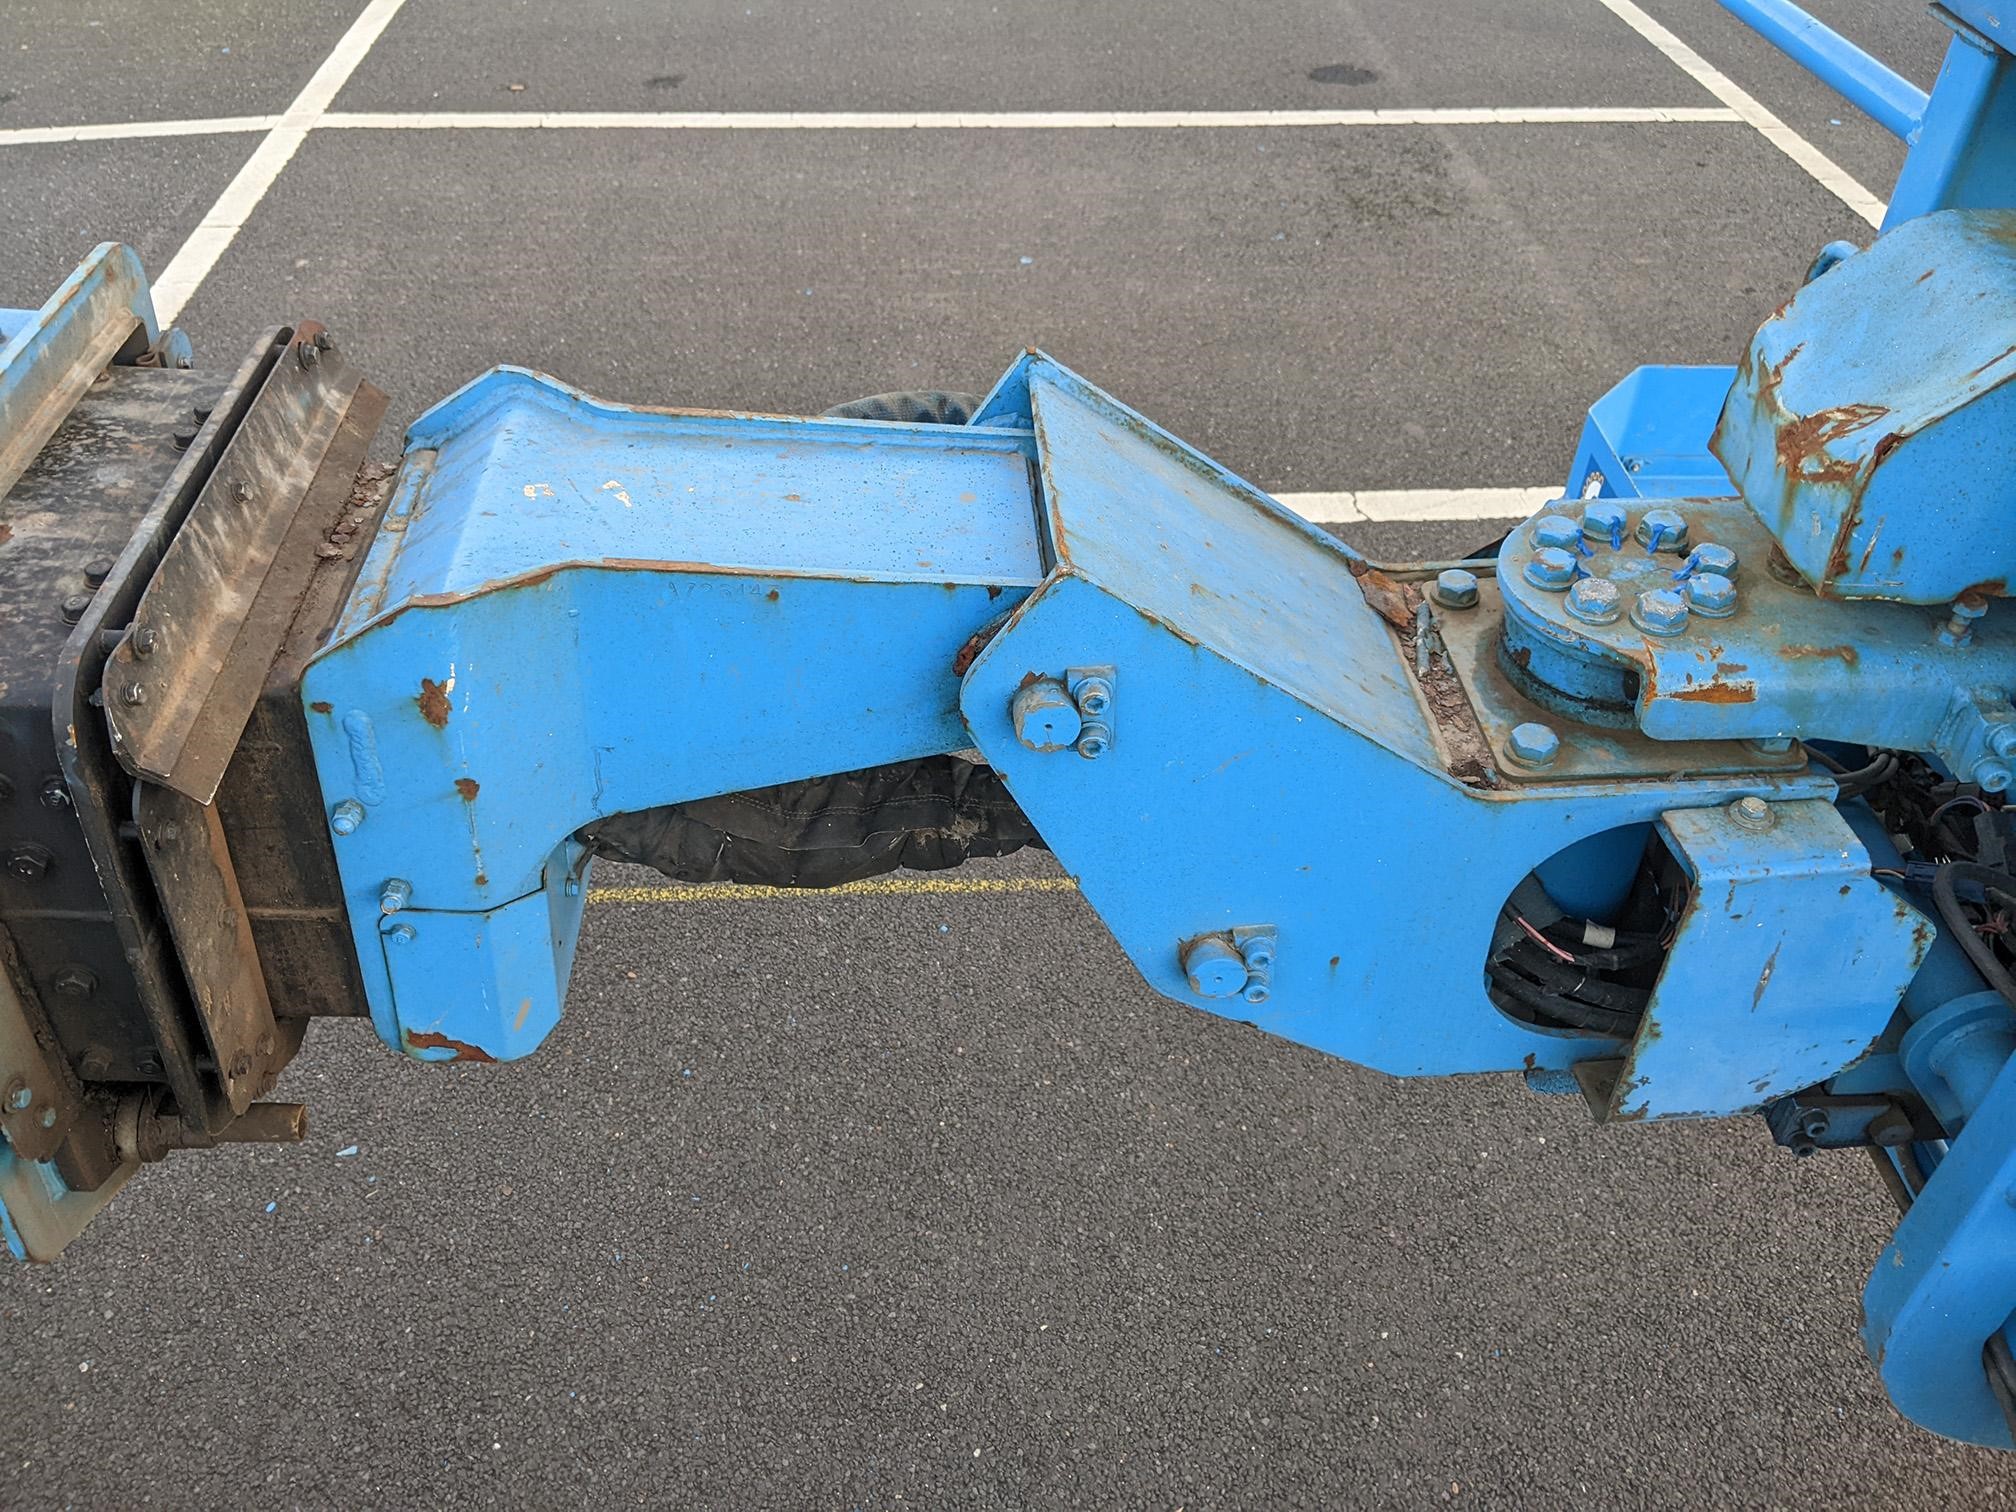
For the lower legs, I actually used parts of a steamroller. I used photos for the texture and as a reference for modeling.


The last modeling part were the cables which are mostly curves with a certain thickness. I attached the ends with the hook modifier to make the cables move along with the according part.
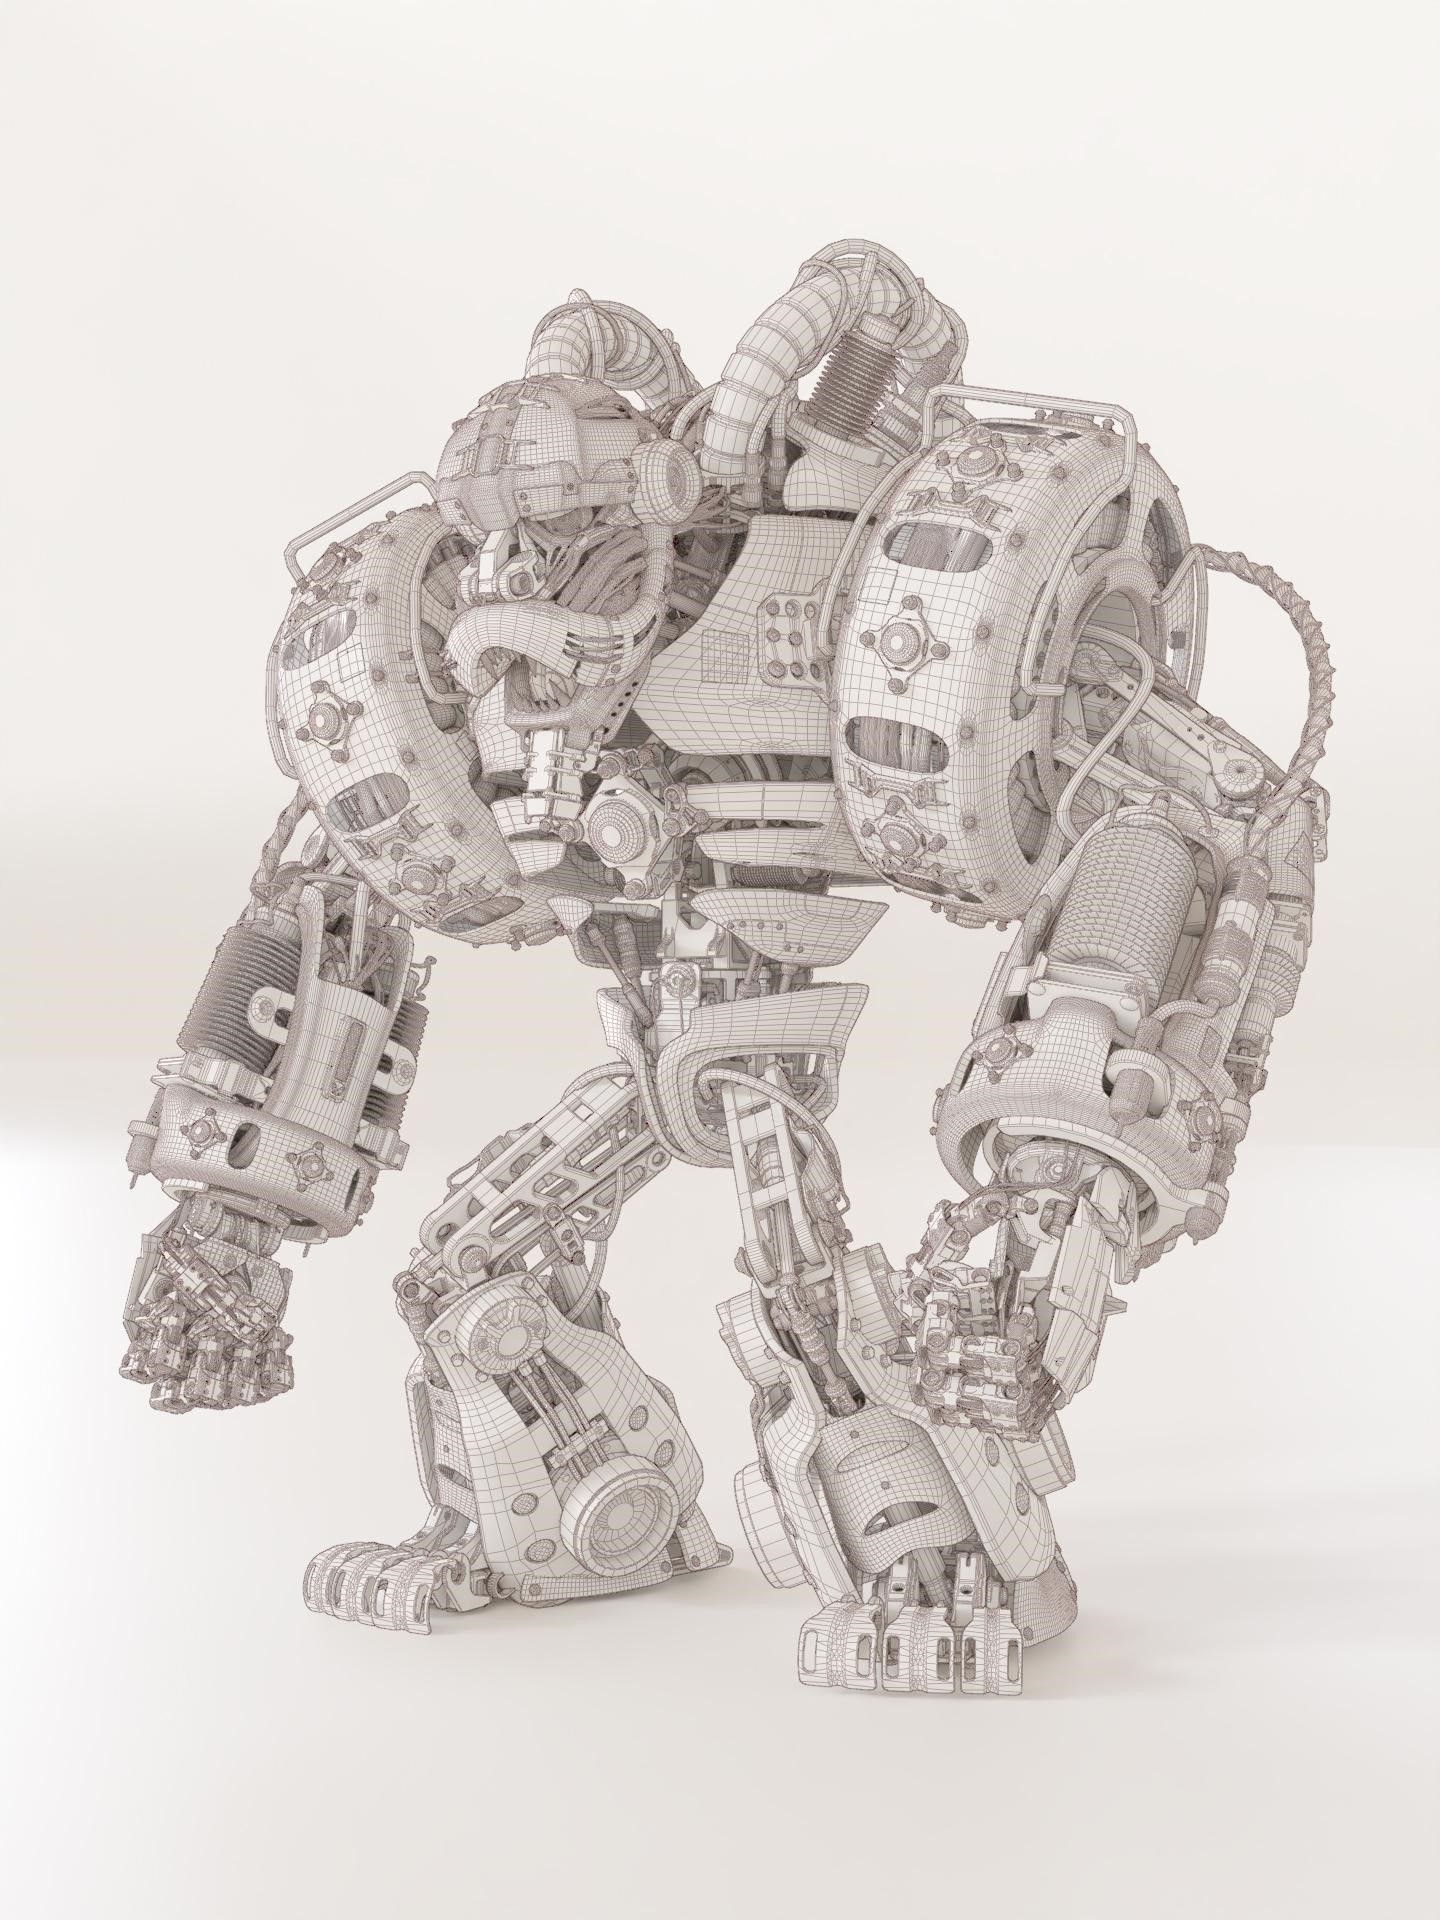
Rigging
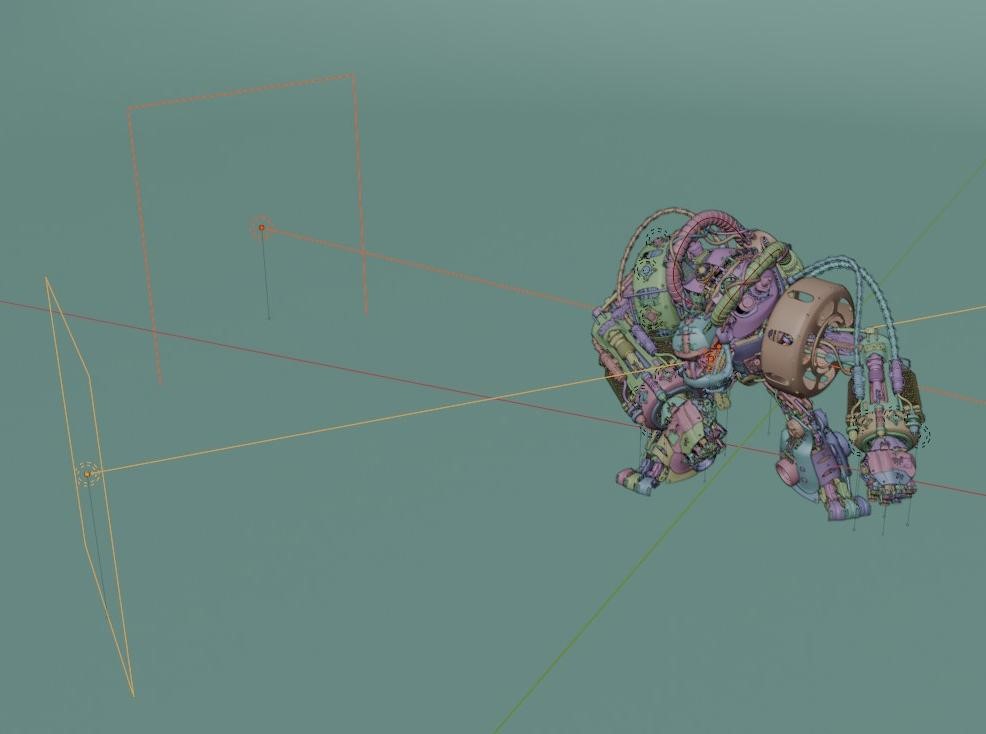
I created a brand new rig for that character because a premade human rig won’t fit his stature and pose. Also, the mechanical elements needed some special attention.
I parented all complex parts of an area to a “Master” object which was again parented to the according bone. For the upper part, I used the already existing objects for the legs. I tried to use additional empties but both techniques worked fine.
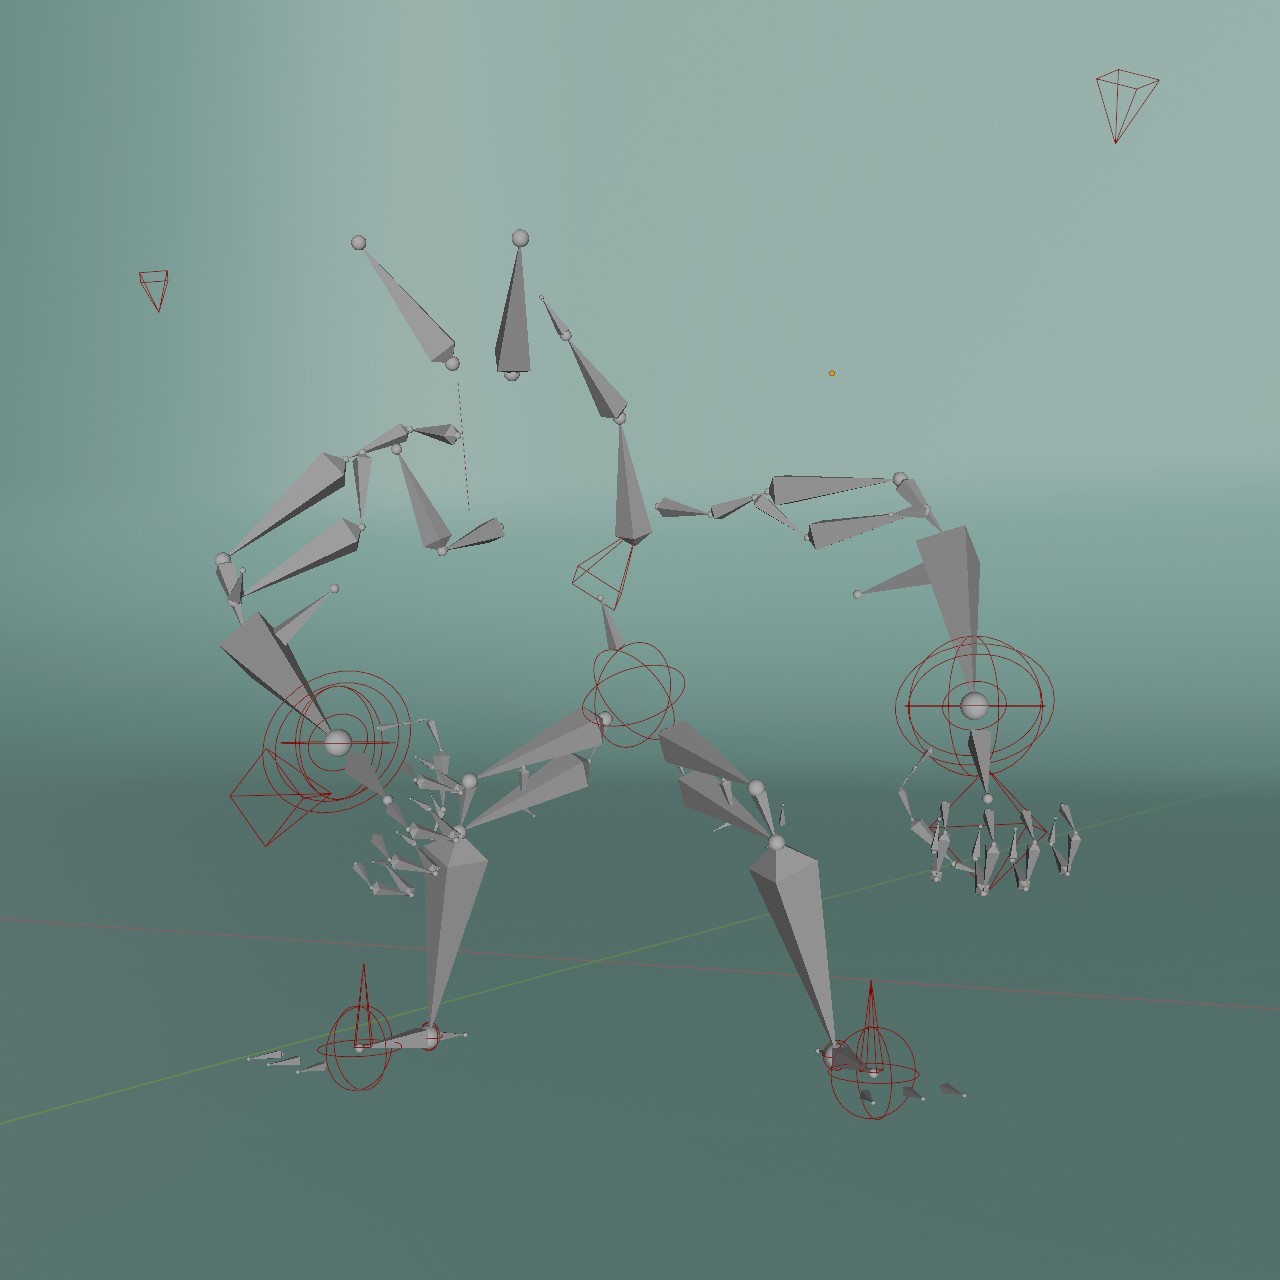

To make the complex arms and legs work properly, I used IK constraints which are not just for hands and feet. You can use those to create complex machines and movements. Alone from this short clip, you can see how easy this can be: Lazy IK rigging
I use pistons a lot but instead of using an armature for those, I went the lazy route and used “damped track” constraints on them. However, those are not aiming for the counterpart itself but for an empty that is attached to that counterpart. Otherwise, there would be a lot of glitches because of a kind of dependency loop.

The feet are rigged after this tutorial by Royal Skies: Foot IK rigging. This gives you great flexibility with positioning the feet without them moving around in a weird way.
Lighting
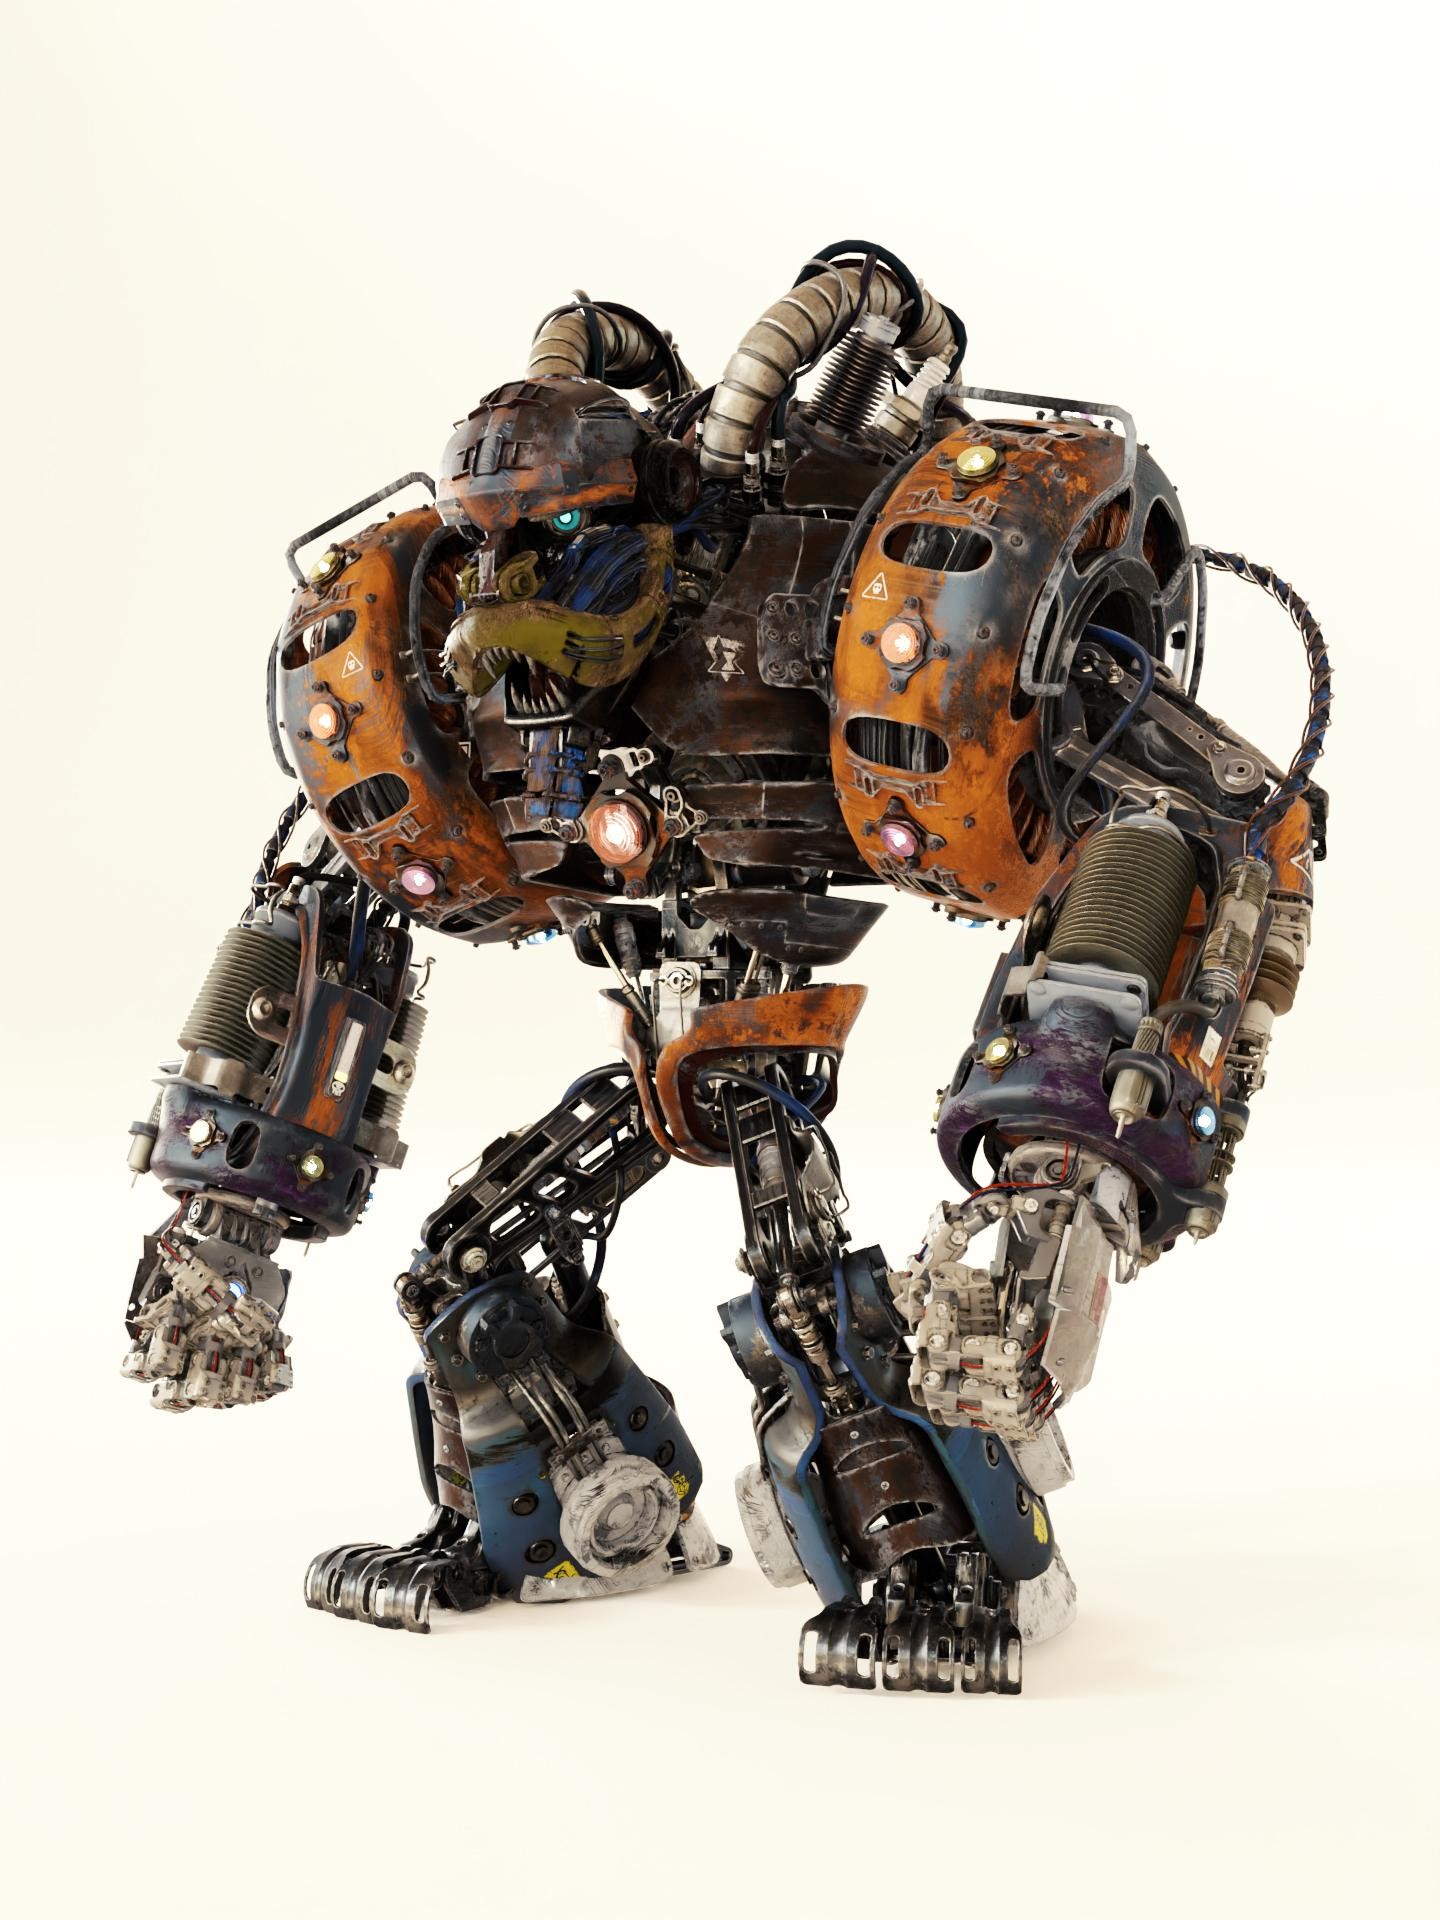
The lighting was a very simple setup with an HDRI as the main source which did the most work. To add a subtle rim light from the side, I placed a purple and an orange area light on the left hand side. (Purple is the color of his electricity and orange is his primary color).
I also have a short breakdown of making this character:
And that was it. Below are the renders and animations, hope you enjoy!!!
RENDER : Realistic Spark Mandrill
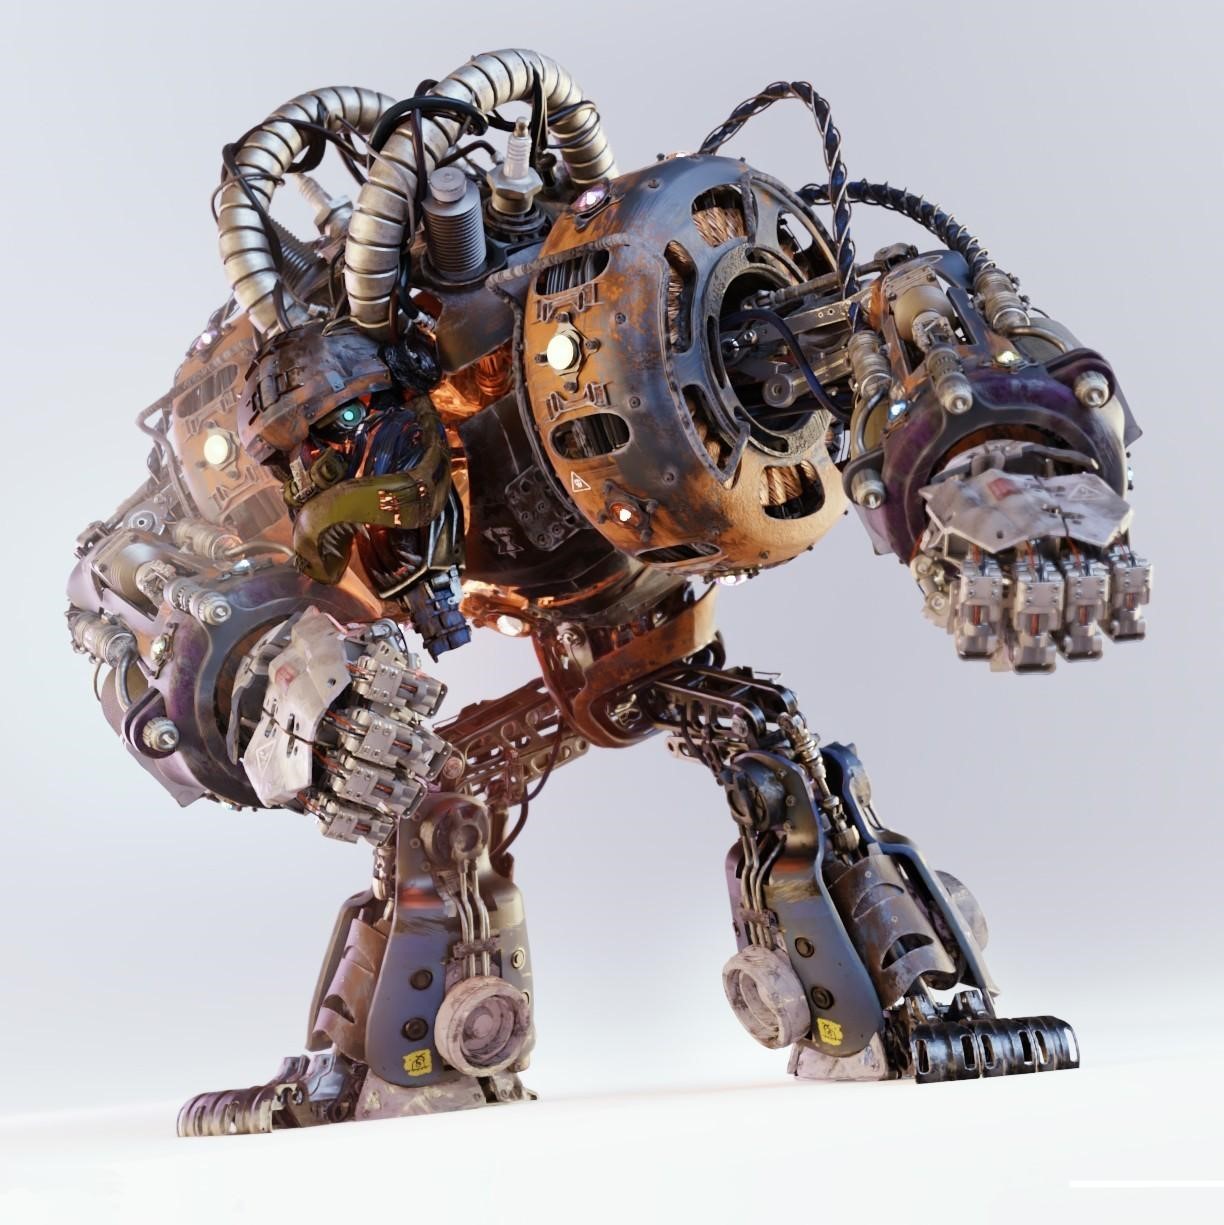
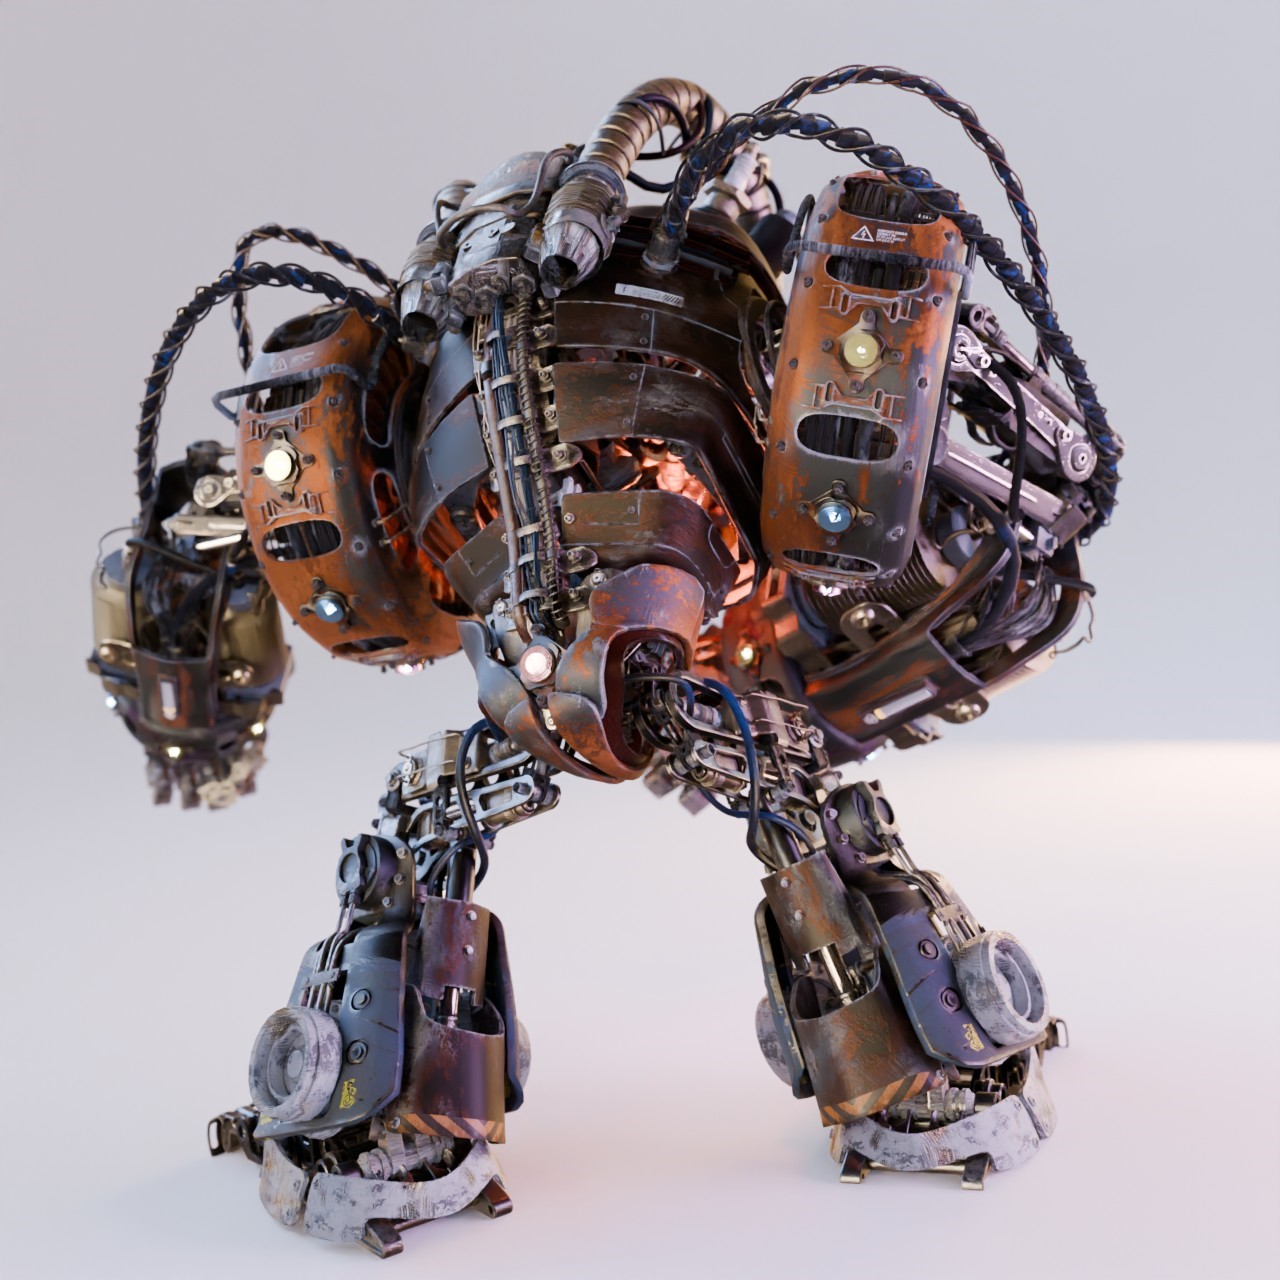
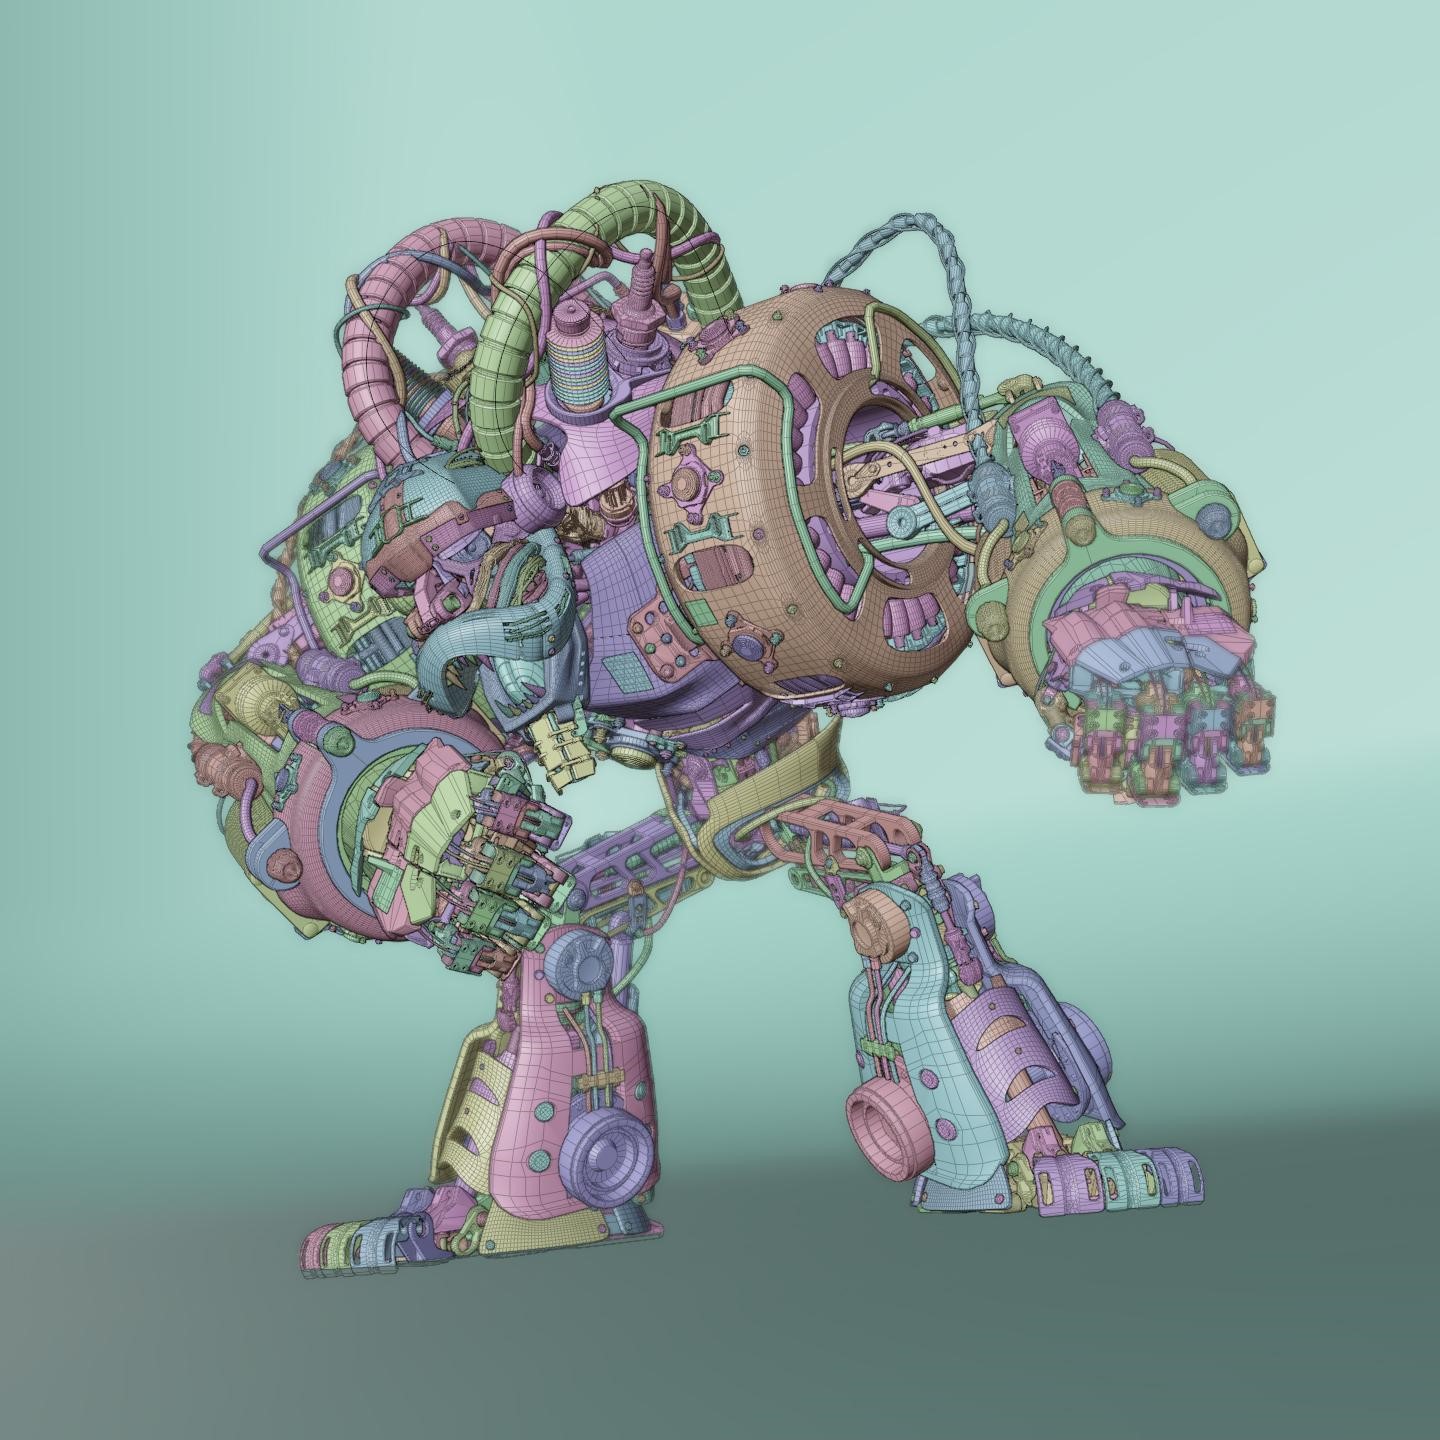


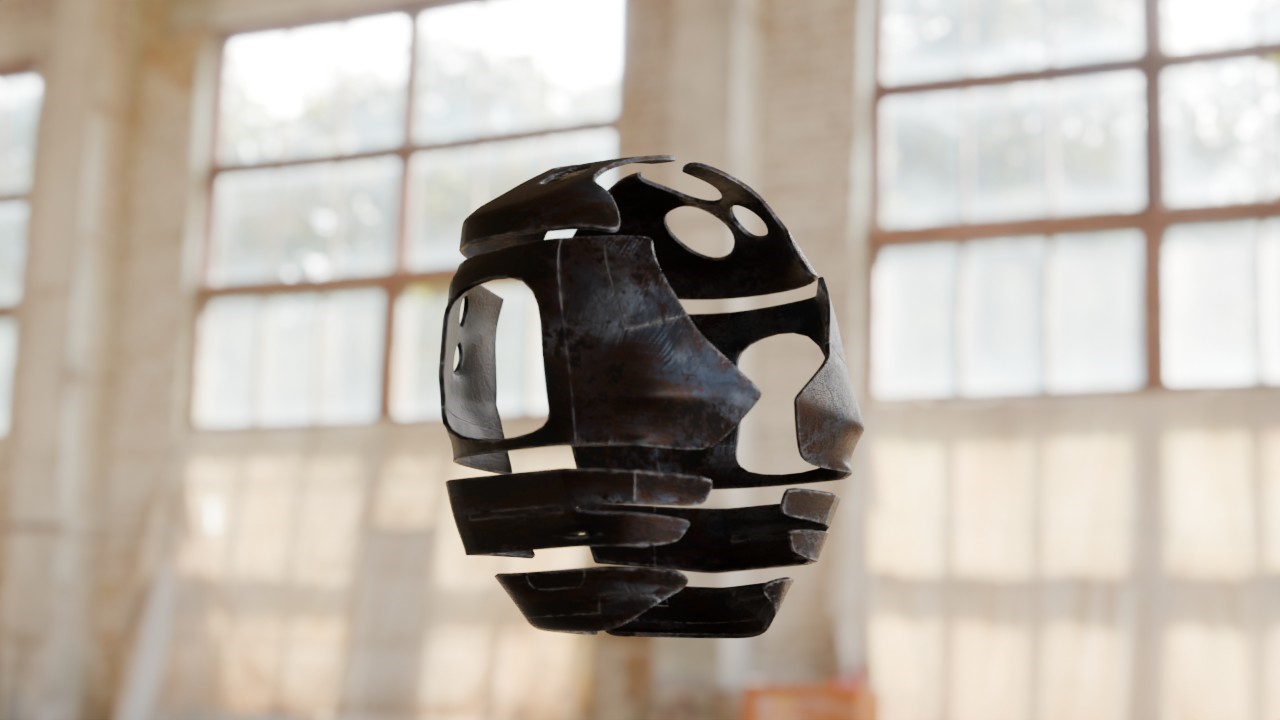
Here is a 360° turntable view of him, from the outside and inside. A literal breakdown if you will ;)
Here, you can see his final short film episode:
And for all curious, here is the making of the whole episode:
Thank you for reading this article. If you have any questions, please feel free to reach out to me through any of my social media accounts. Have a great day!
About the Artist
Niko is a freelance 3D artist from Germany with 20 years of experience in the design industry. His greatest passions are filmmaking, storytelling, and cool robots.


Great article and great breakdown! Awesome to see the real life examples of the metal parts you integrate into your model.