Behind the Scenes: Kitsune
INTRODUCTION
Hi everybody! My name is Florian, I’m a 37-year-old living in Paris. I work in a 3D animation studio in France called Cube Creative, which makes 3D cartoon animation series mainly aimed at children. It’s been a few years now since we switched to Blender for all the 3D manufacturing, focusing our entire pipeline on it.
For several years, I have taken up personal projects alongside work, which is very useful for understanding the new features of Blender and creating things that I like artistically.
INSPIRATION
For these personal projects, I regularly draw on concepts and drawings from artists that I like, and I have wanted for a while to make this fox with an Asian influence, based on a drawing by an artist I like, Yu QIuyang.
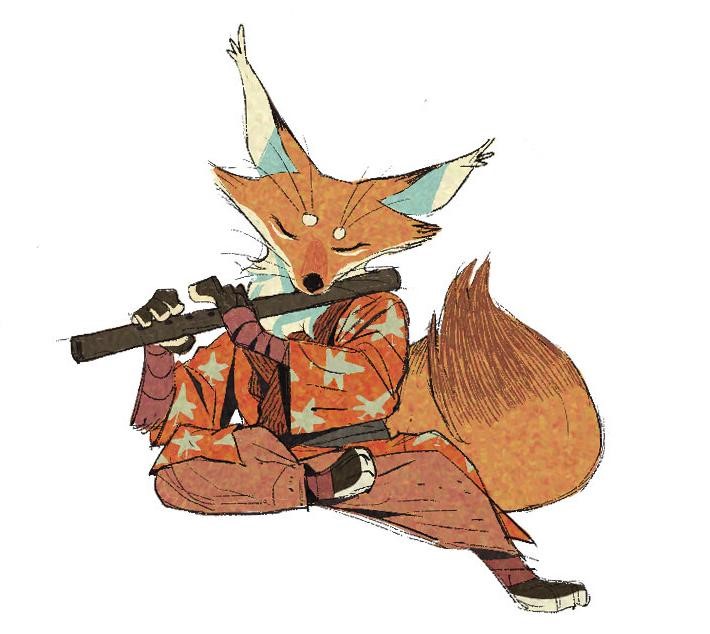
I like to go from cartoon style to realistic things, to really vary the pleasures and never be redundant, and to try new things. For this character, I wanted to return to an animal to continue exploring the creation of fur in particular.
PROCESS
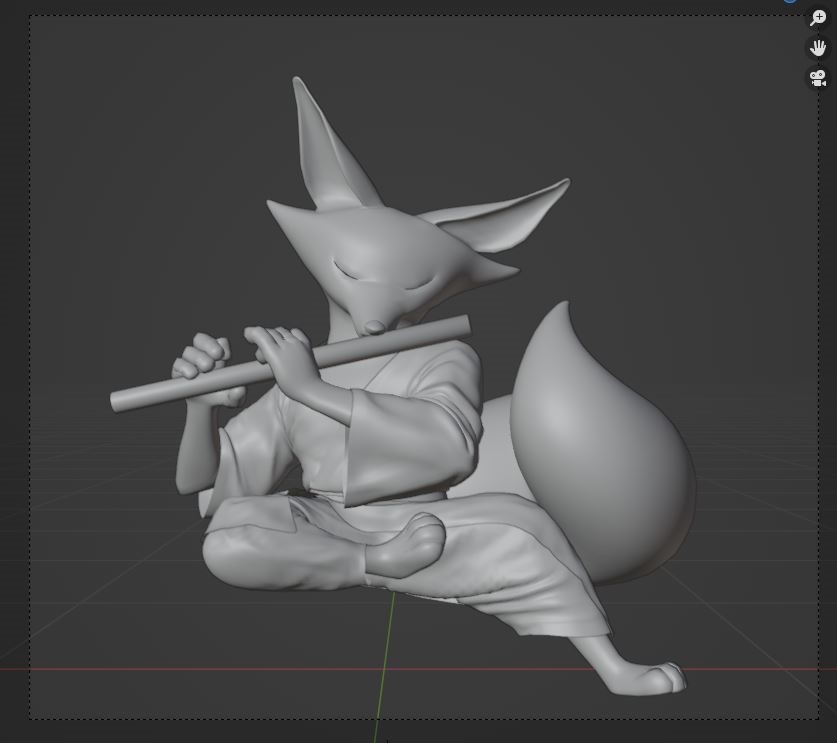
Block-out
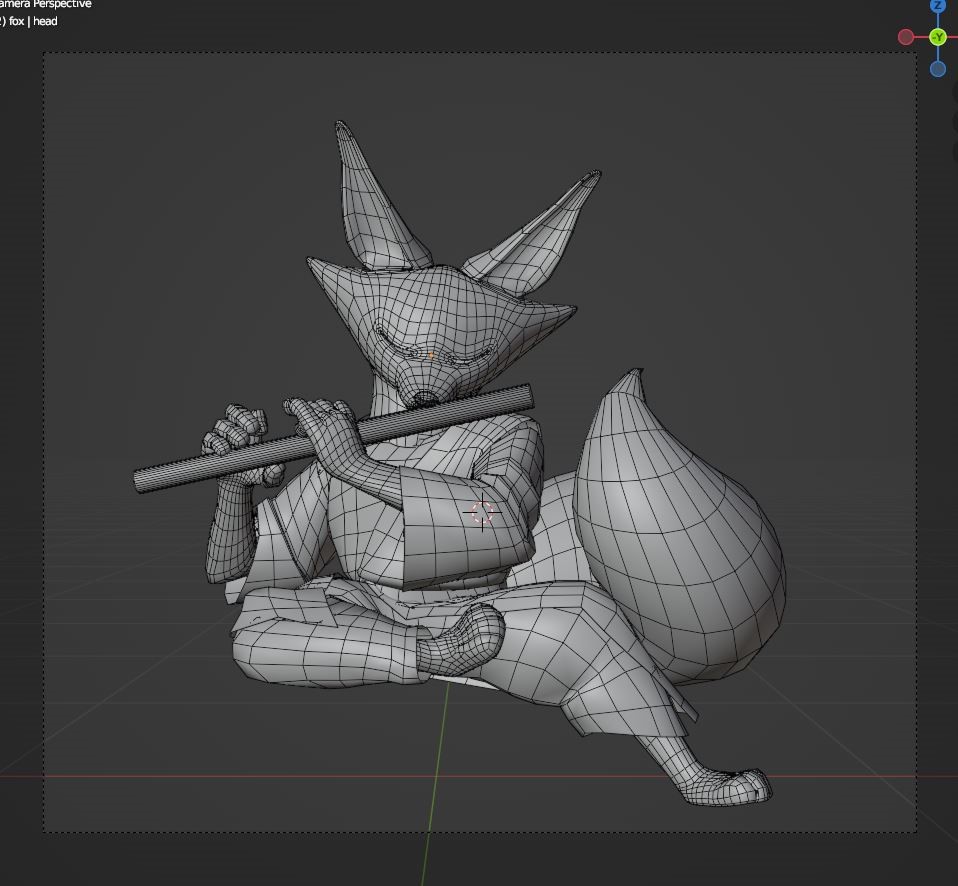
I started by laying a low def base on the character, with the illustration as a reference, the objective being to quickly put the main shapes and make sure that it works from all angles, while keeping a good dynamic in the pose. I like to work with simple shapes to quickly replace the arms and legs, while still making an outline of the head. It’s a really rough step but I can make a simple projection of my work.

Once that’s done, I start creating the basemesh of the cloth, with a first indication of the “main” folds. This allows you to have a logical topology around these folds to sculpting mesh easily with coherence. I am also finalizing the paws and the position of the fingers on the flute, while already checking via my final framing to keep a dynamic aspect in the placement of the fingers, so that we understand the way in which they are positioned and that the fox is in playing the flute.
Sculpting
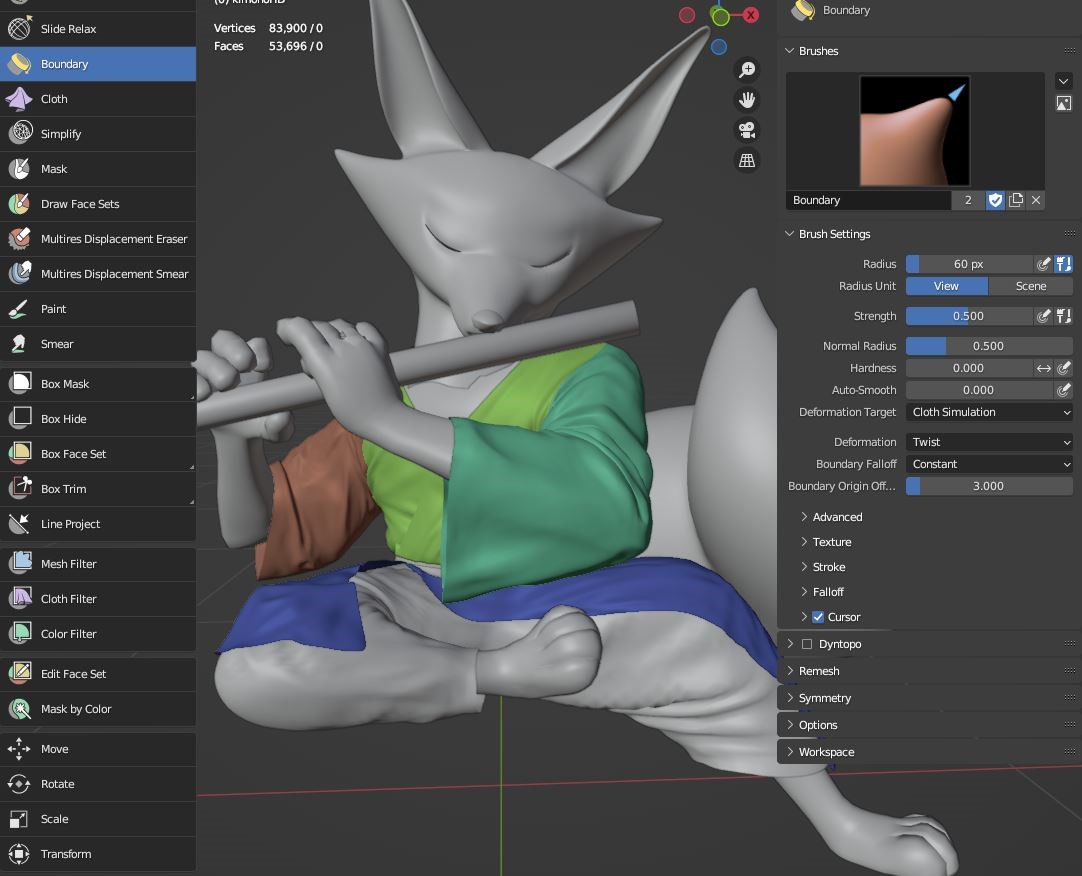
I then tackled the longest part: sculpting. I discovered the new sculpt brushes to create micro-simulations within the sculpt, alternating with classic brushes and “cloth” brushes by delimiting areas, either via masks or via face sets, to demarcate the main areas such as the arms.
I also used some classic brushes but using the “cloth simulation” deformation accessible via the Pose brush or the Boundary brush. I used this very carefully, with little touches, but it gave a little naturalness to the details.
Fur
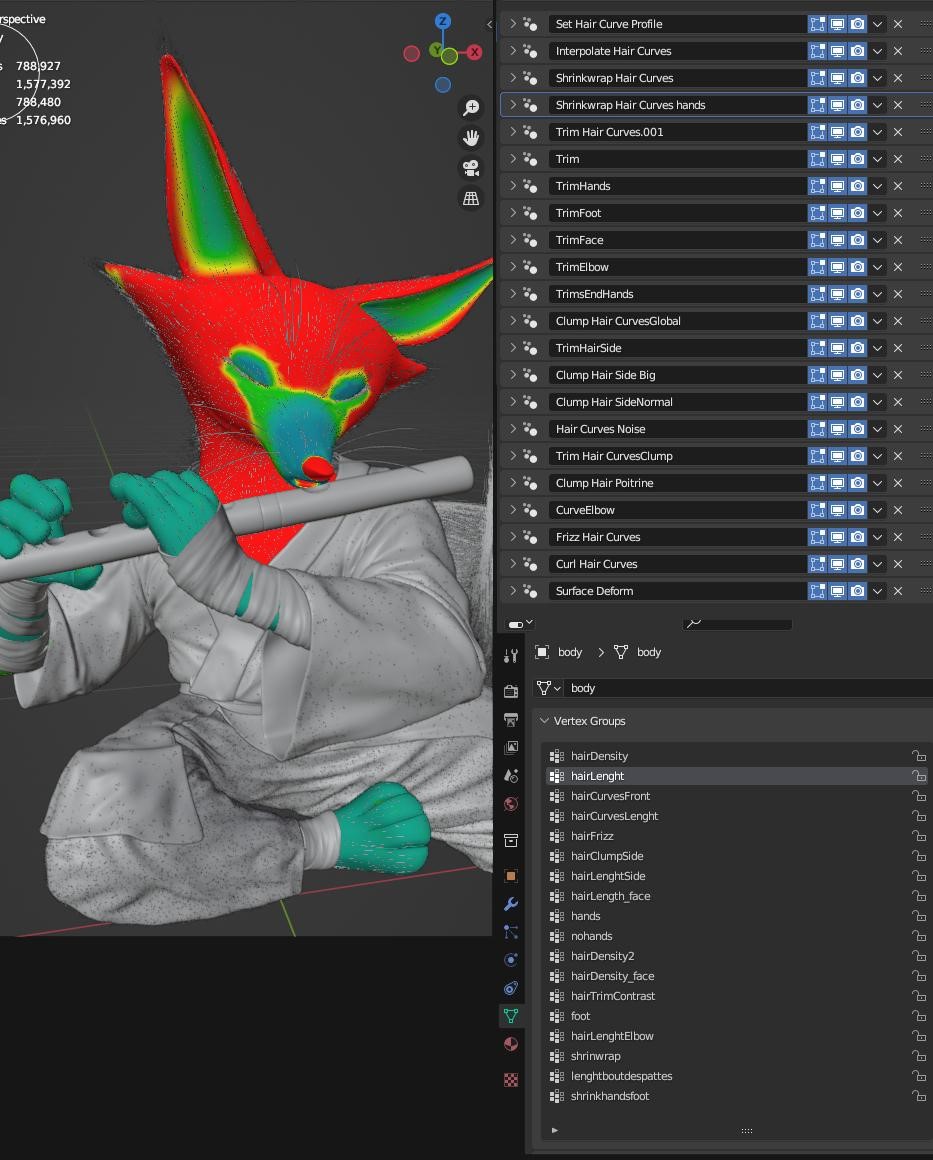
Once the clothing sculpt was finished, I tackled the second big piece: the character’s fur. I took the opportunity to discover the new fur system based on GeometryNodes.
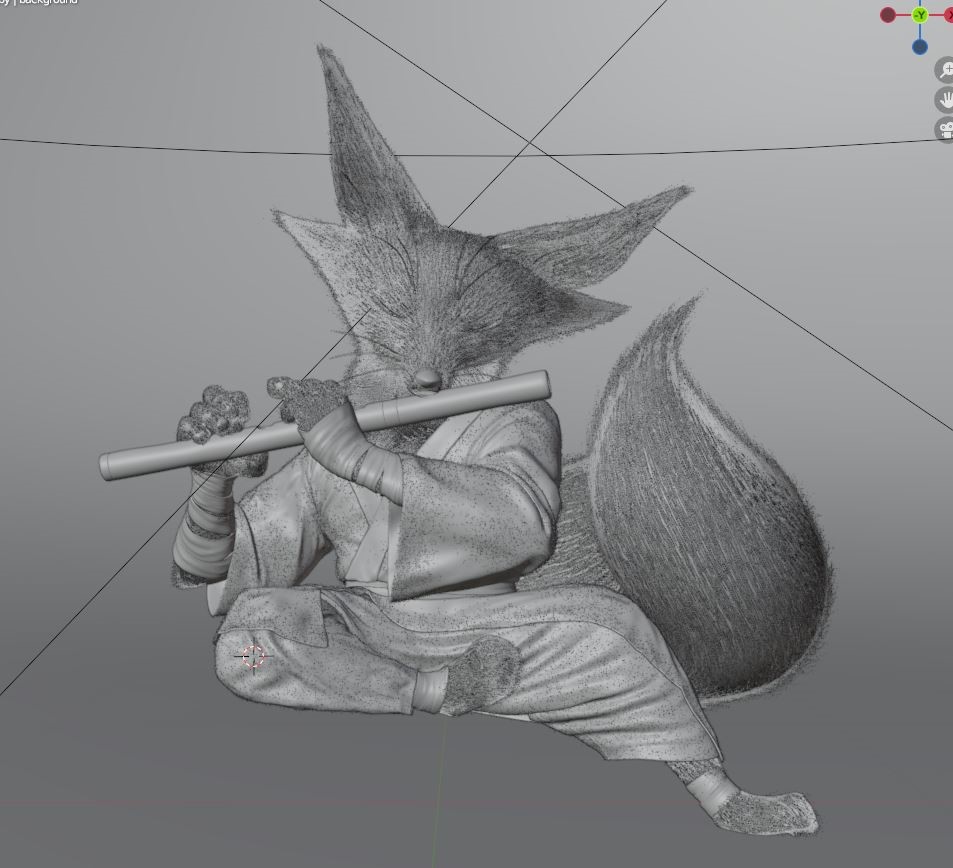
There are still small things that seem to lack precision, like the sculpt collision when combing the hair, but overall, the modifier system mixed with the freedom of Geometry Nodes where you can enter in detail allows many more possibilities.
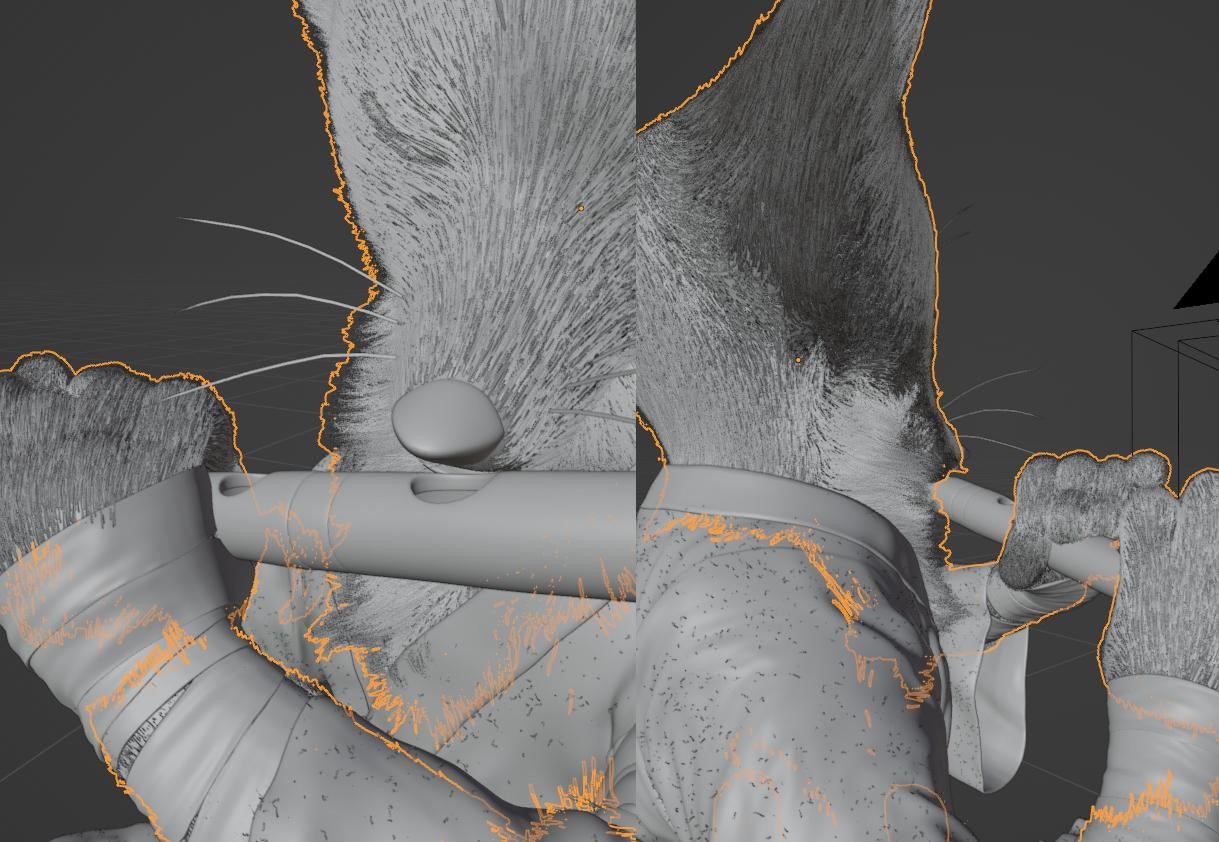
I stayed on a basic hair system, but I then detailed areas using vertex groups mixed with several modifiers to refine what I wanted, like the bushier fox chest or even the hairs on the fingers are finer. It took me quite a while to get the look I liked and matched the dynamics of the design, especially the fine points of his face without it looking fake.
Texturing
For texturing and surfacing, I first used Substance Painter to create the textures of the clothes. I wanted a fairly marked clothing material, as if the scale of the material was not completely realistic, but which would remain so in the look. I looked for interesting patterns Substance shaders to create the base, then I found a leaf reference that I modified a little in Photoshop to make it an element that I projected directly into Substance, both in color but also in Normal.
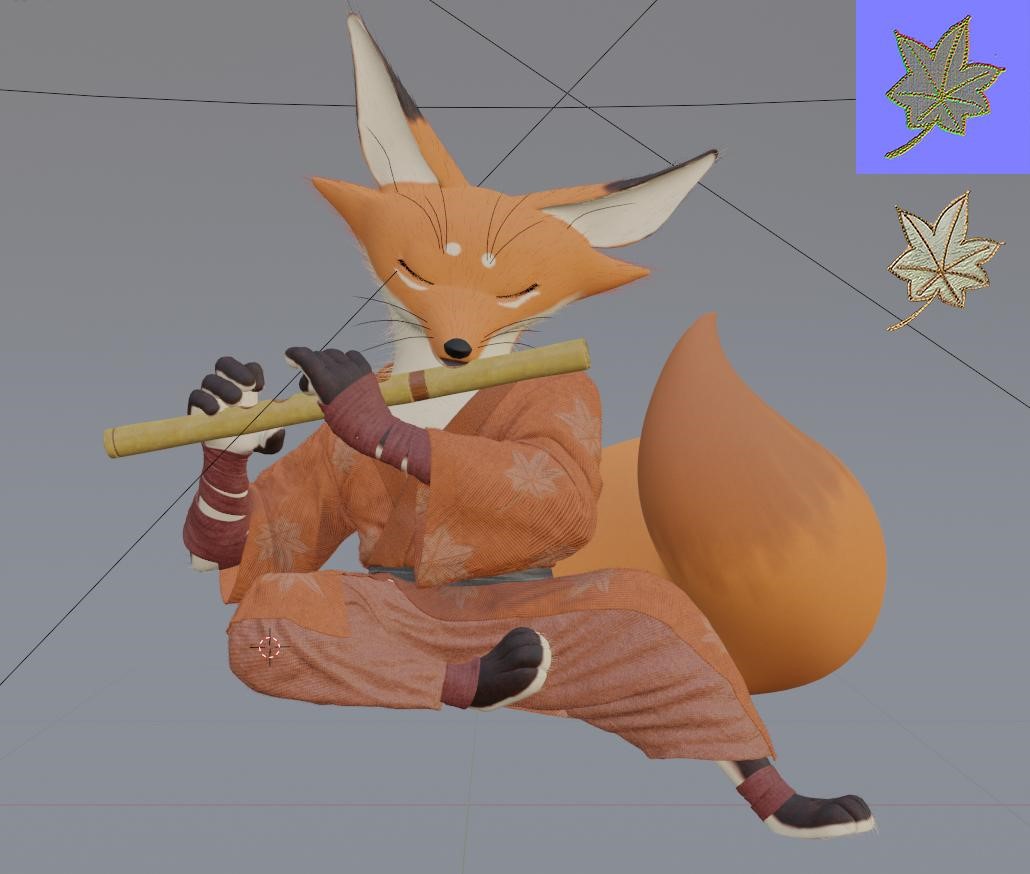
In Blender, once the shader was adjusted, I also added a few small furs to add detail and break up the uniform color. For the Fur color, it is a simple color texture which is then managed by the Fur shader in Blender.
Environment
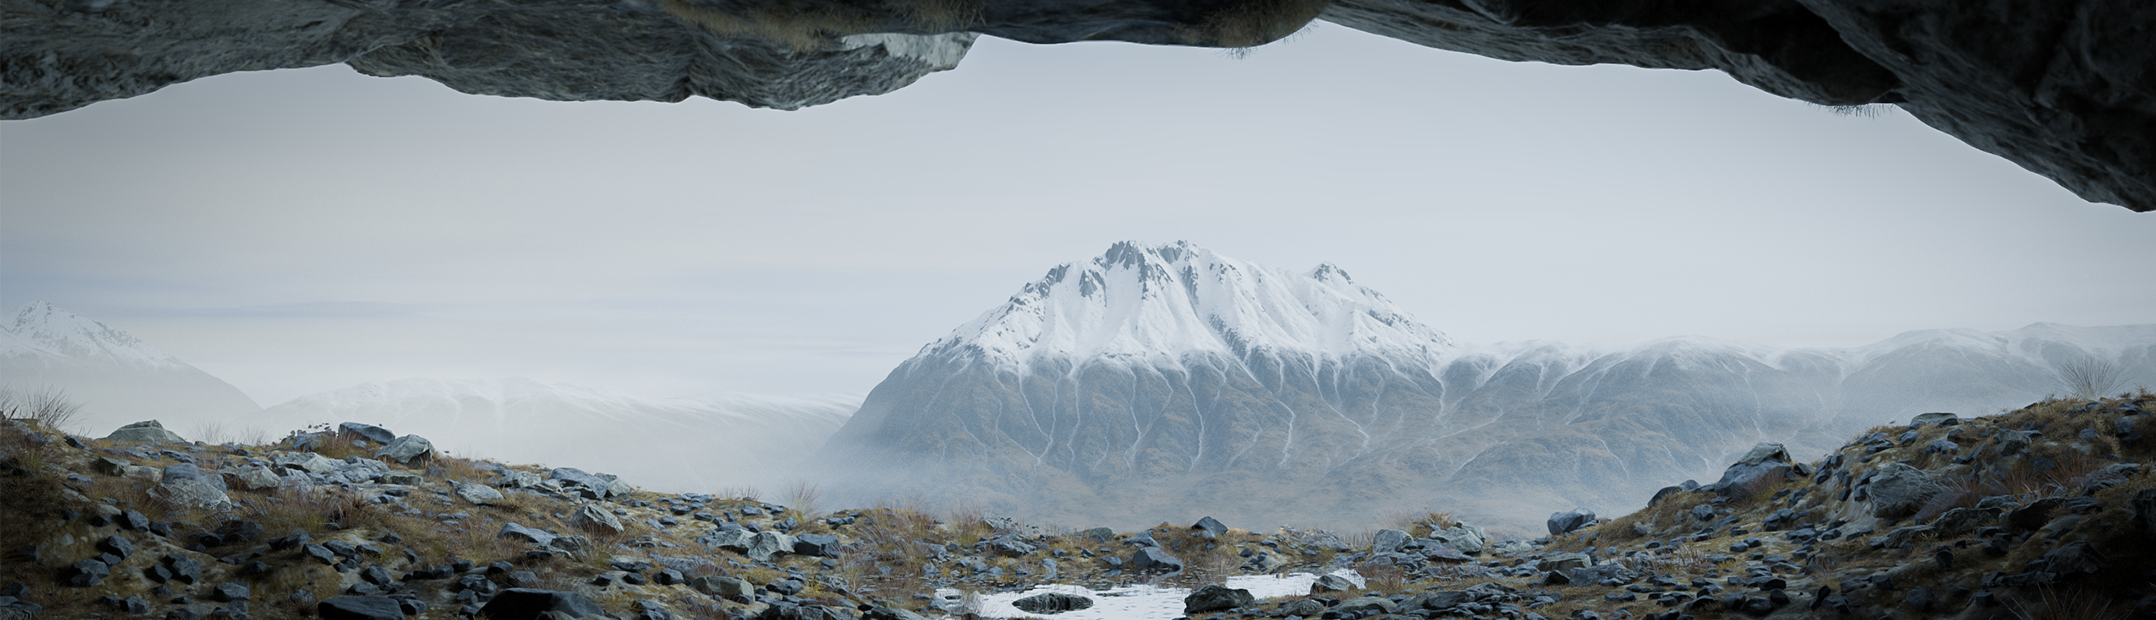
For the rest of the setting, I already knew that I wanted to integrate the character at the top of a hill, under shadow tree, to have a zen and peaceful appearance. But I prefer to focus on the character, so I collected assets purchased from several places, whether it was the rocks via Artstation or grass packs that I had collected via an addon “The Plant Library” in BlenderMarket.
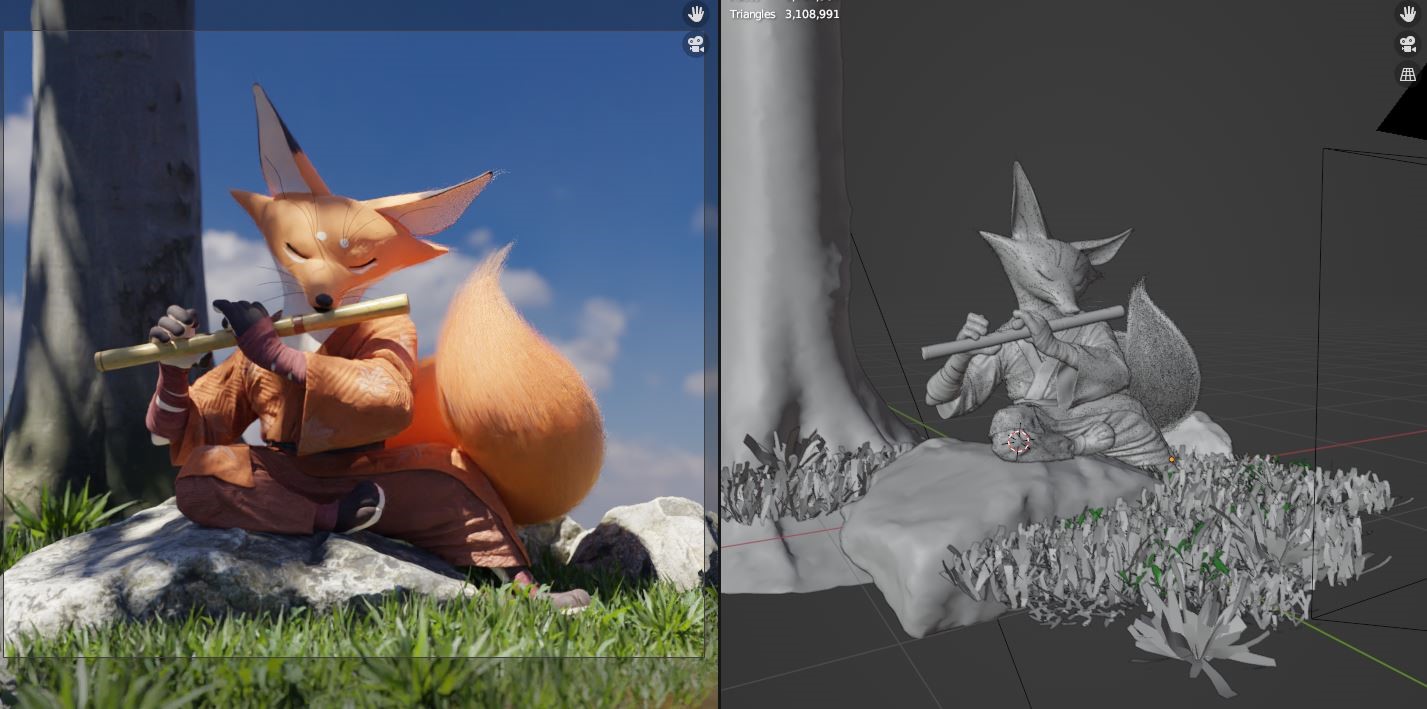
I placed the elements to have a nice composition, and I started to adjust the lighting by creating packs of invisible leaves to have small shadows as if the sun was passing through the foliage. The preview in Blender is useful for easily adjusting the orientation of the light, while adjusting the number of fur so that it is not impossible to render.

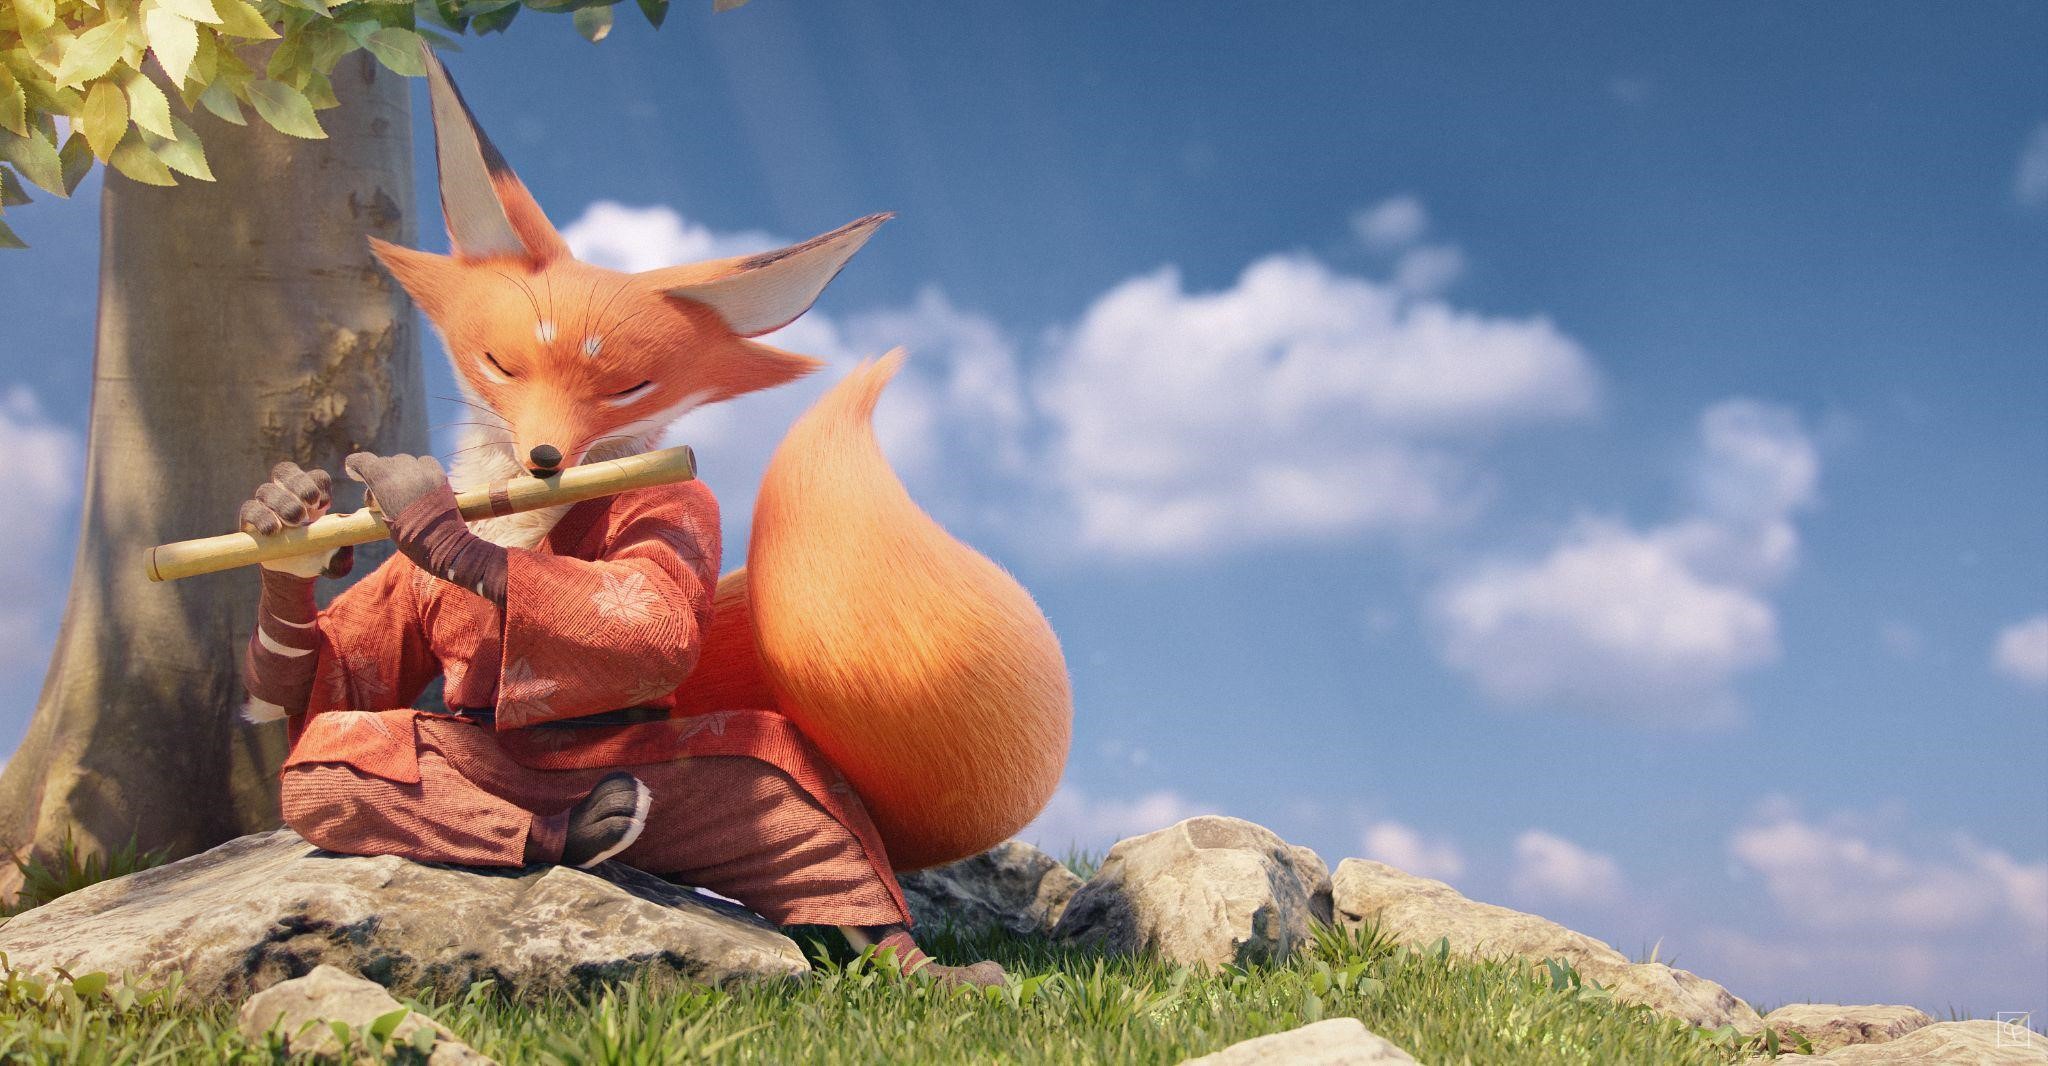
Once all the elements were ready, I launched the render to do a compositing pass via Photoshop with small post-production effects such as a halo of light to indicate the source or a slight chromatic aberration.


Thanks for reading to the end!
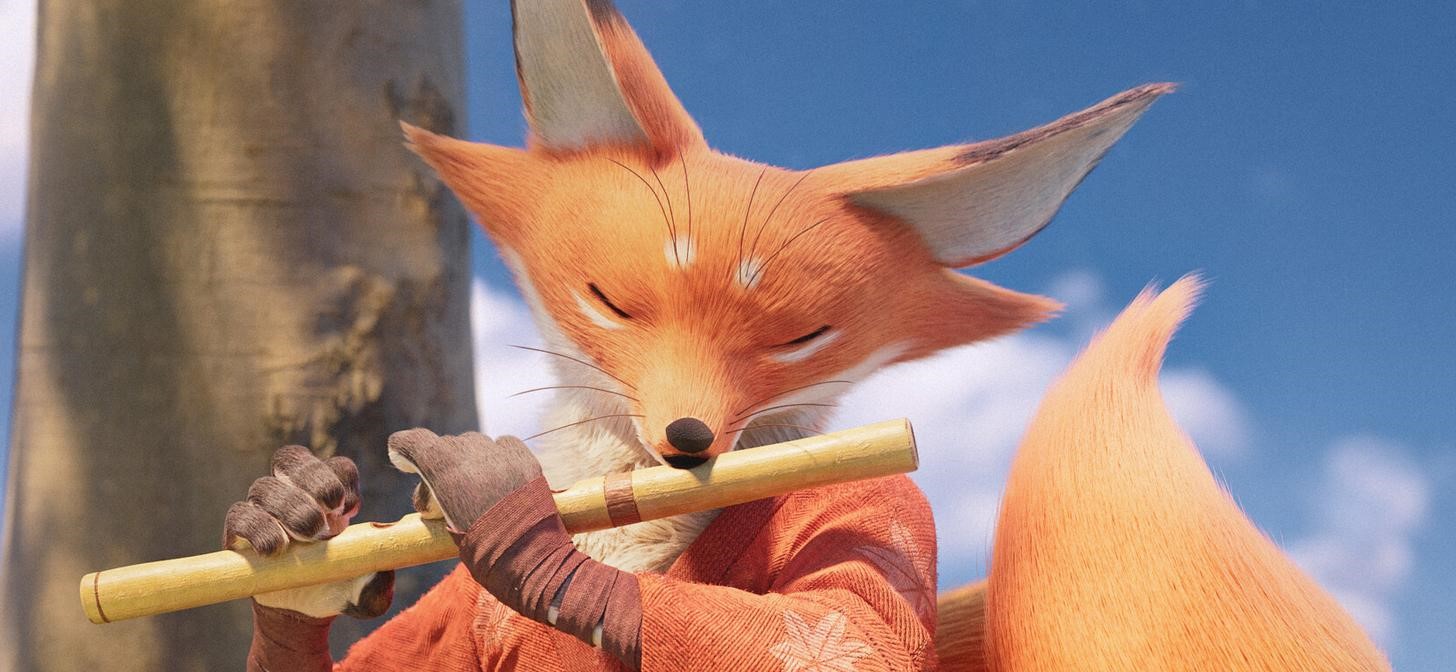
RENDER : Kitsune

Thank you for reading this article. If you have any questions, feel free to reach out on any of my social media accounts. Have a great day!
About the Artist
Florian Falcucci is a 3D Artist and CG Supervisor at Cube Creative, France. His previous article on Blendernation was The Scooby Gang.


Art of delicate beauty. The texture of the clothes and hair looked very natural. Congratulations