
Behind the Scenes: The Scooby Gang
INTRODUCTION
Hello! My name is Florian. I am 36 years old and I live in Paris. I am currently working at Cube Creative, a studio that mainly produces 3D series for television, mostly cartoons. While the company has gone through the use of several software packages, we have been using Blender for the past few years to produce our series
I gradually resumed creating personal projects after the confinement and I continue to do so from time to time when I feel like it, during my free time, to train myself in creating characters
INSPIRATION
Since I am not yet a character designer, I keep finding inspiration from artists that I really like, such as Brittany Myers. She works as a character designer in an animation studio, and did a sketch of a redesign of the entire Scooby-Doo crew, which I really liked.
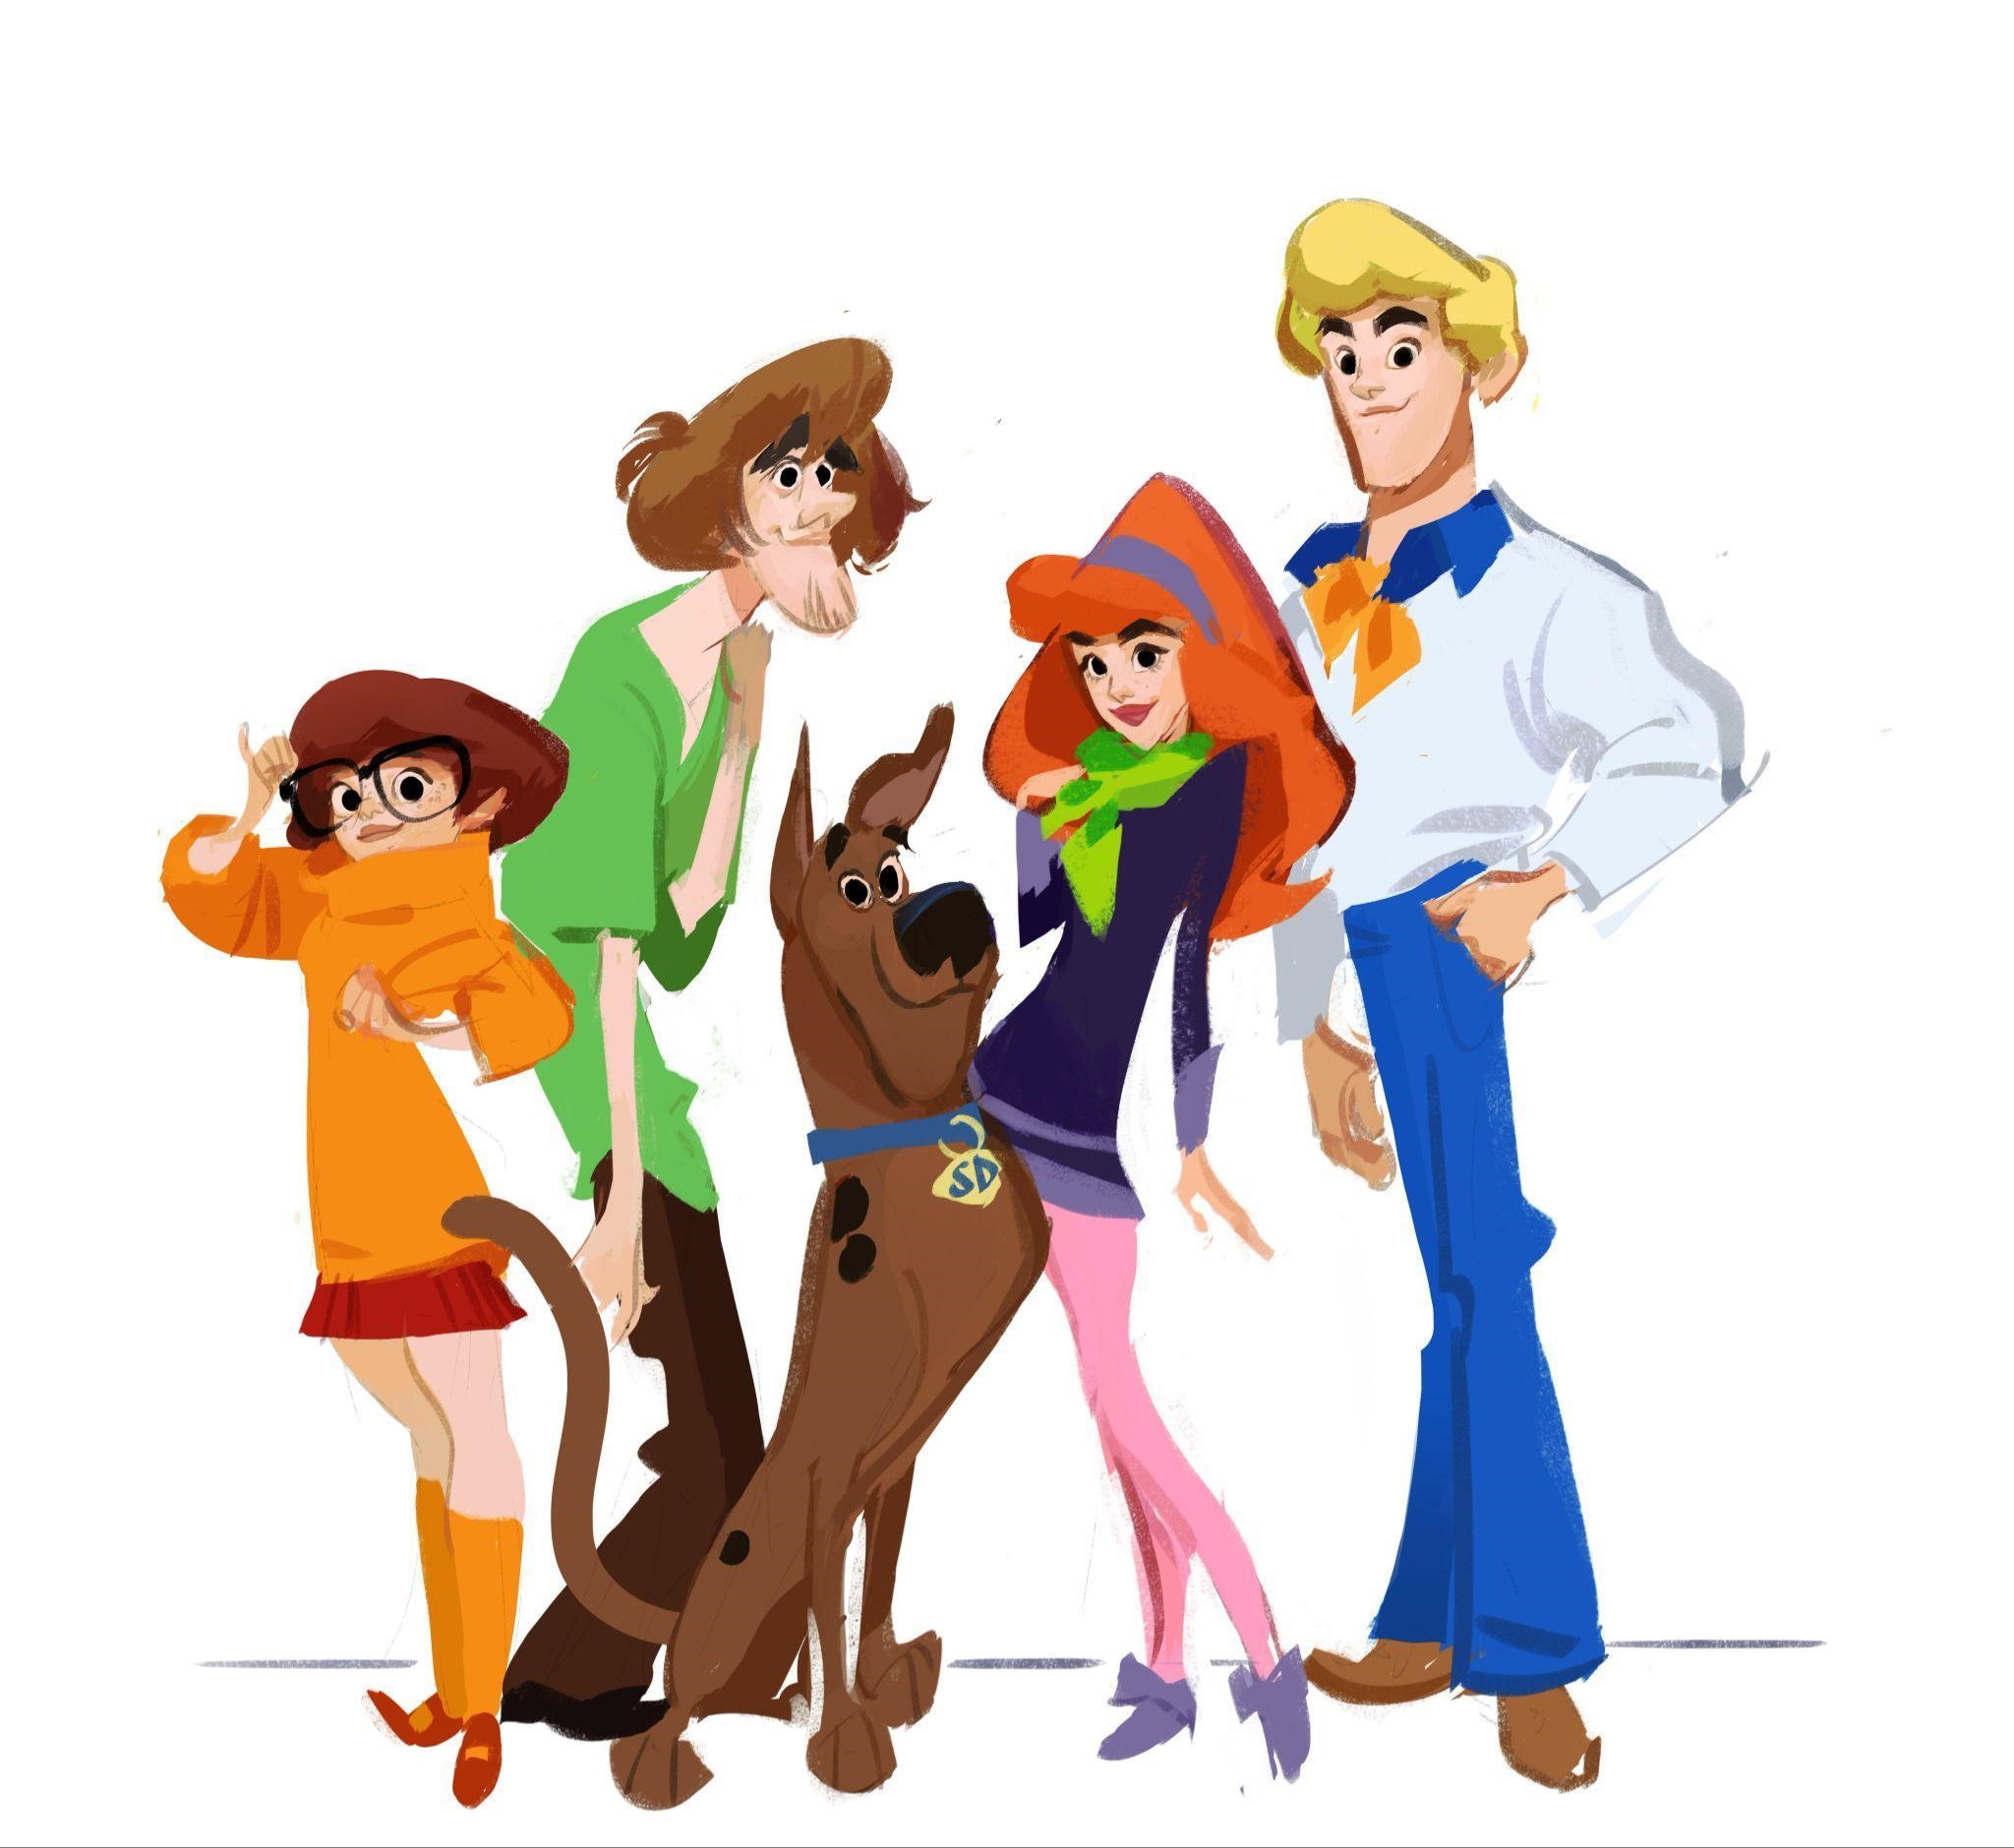
I loved the curvy style of the characters and the very dynamic lines. I wanted to find that aspect, trying to create the entire models of the characters, even though there were five to do this time! But it was a great challenge.
CREATION OF DIFFERENT CHARACTERS
I started with the character of Fred Jones, perfect to begin with. I preferred to start from simple polygonal models rather than from the sculpt: the idea was to make topology modeling by staying simple and with few polygons to keep the simplicity of the original features. So I juggled between the classic modeling and the sculpt mode to adjust the shapes of the characters so that it works in all the angles of view.
The complexity of the characters was that I only had a front drawing. So I had to improvise: I used a model I got from Artstation to quickly create a character posing close to my reference, and to make it consistent, which implied moving away from the drawing a bit so that it could stand up for example.
I also used a lot of references, original designs for example, to understand the important points to recognize the character, even cosplays and any other information to help me recreate the characteristics of the characters:

HAIR
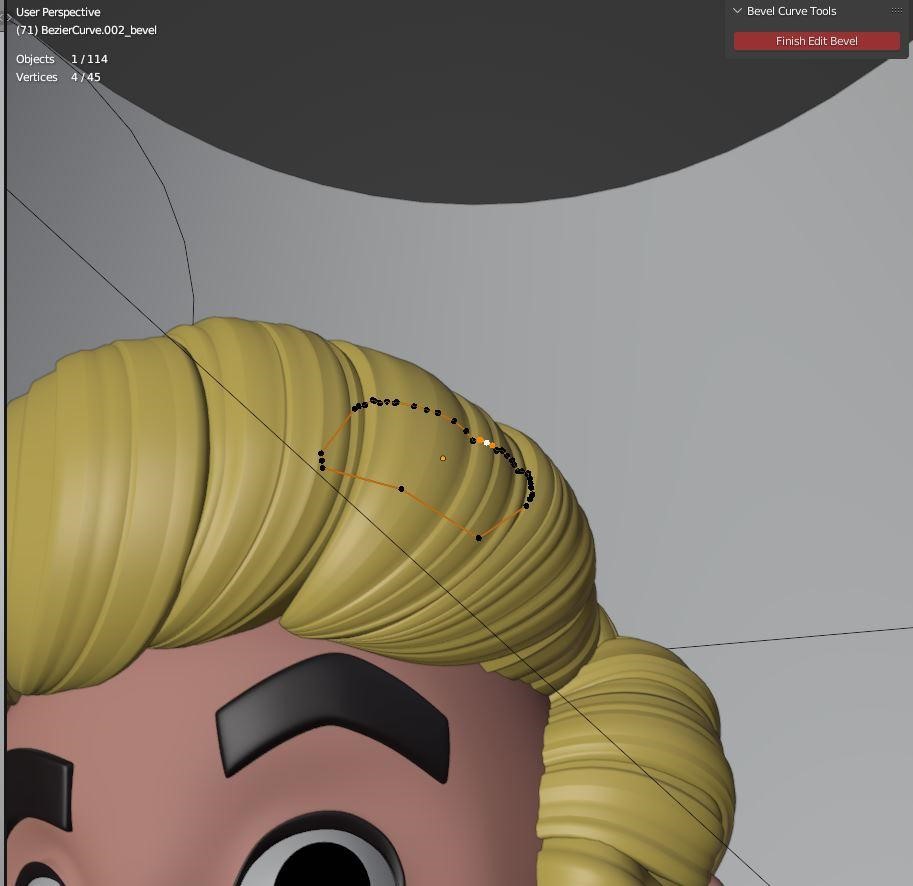
For the hair, I chose to keep the stylized effect by staying in the realm of modeling. I used a small and very efficient script on Github that allows me to create extruded curves while refining the bevels in any way I want. So, I started with a simple base to keep the volume and created the small meshes one by one – probably one of the most time-consuming parts of modeling.
Once I had a basic structure in place, I started to model the different parts of the character, such as the arms and torso. I used old character models as a starting point for the face, shoes, and hands, which saved me a lot of time. I also used symmetry to make the process easier and faster.
Once I had a rough version of the character, I could come back to it later with a fresh perspective. I would then refine the details, make adjustments to the shapes, and connect different parts of the model.
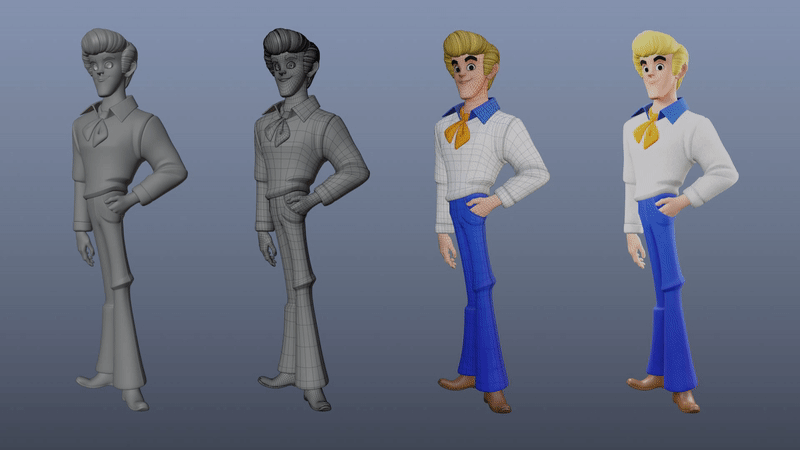
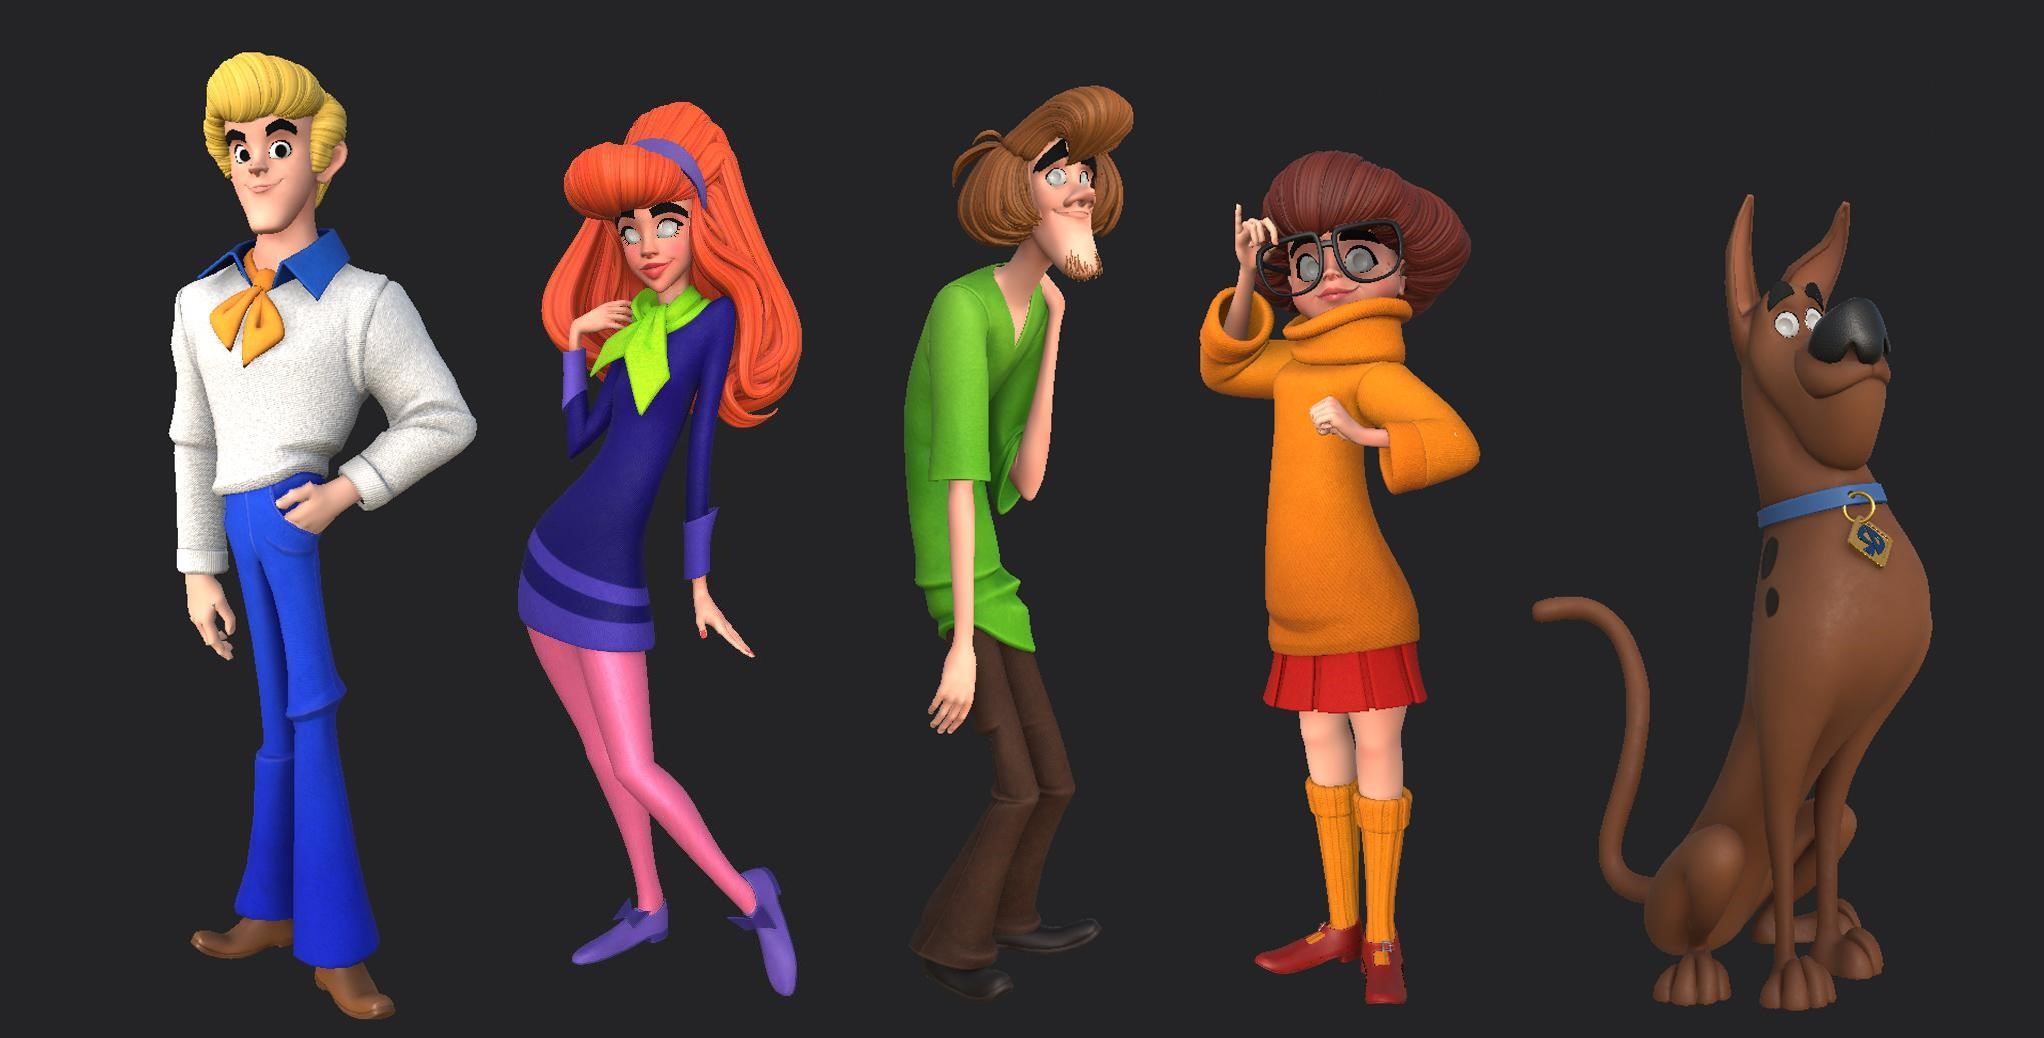
FRED JONES
The character Fred was the most modified. I found that after working on the other characters, I could see a lot of things I wanted to change in Fred.
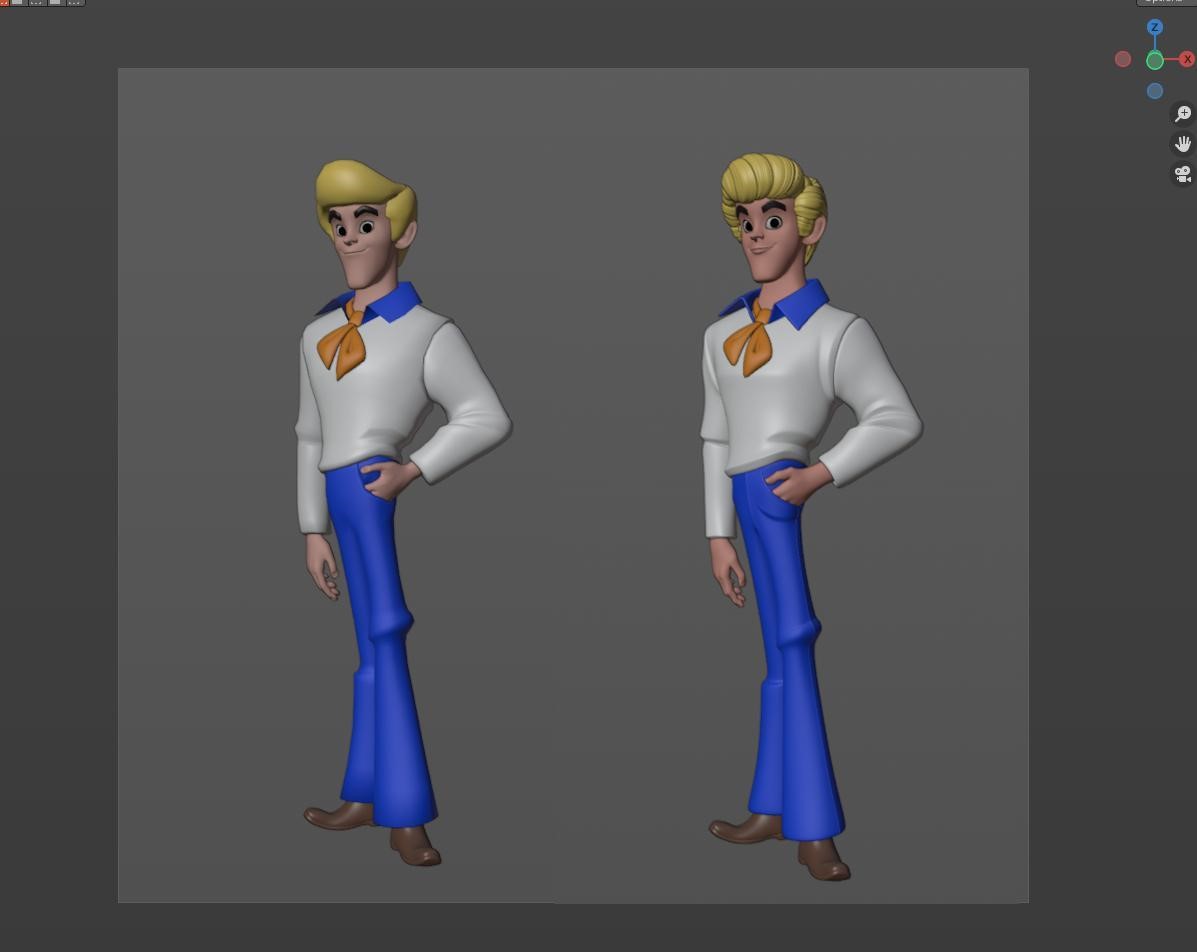
I found that after working on the other characters, I could see a lot of things I wanted to change in Fred.
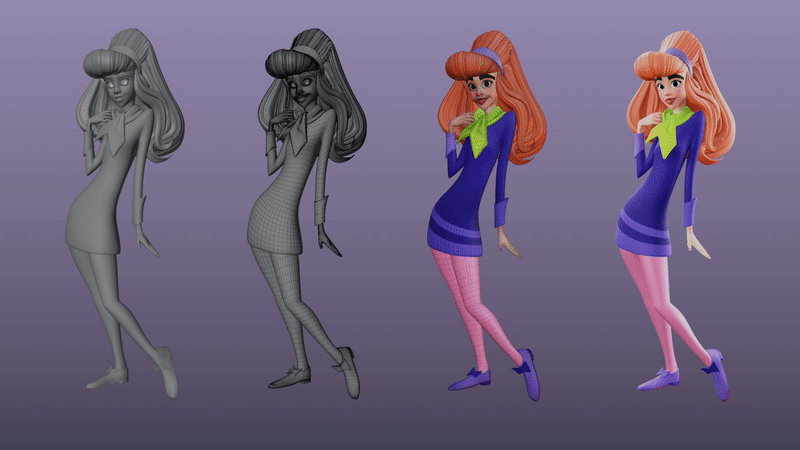
DAPHNE BLAKE
For Daphne, we had to make sure her curves were consistent from all angles, so that the redesign of the character would look good from every viewpoint.

The face was done relatively quickly, but the hair was the most time-consuming aspect of creating her character. We had to make sure that it looked good from all angles.
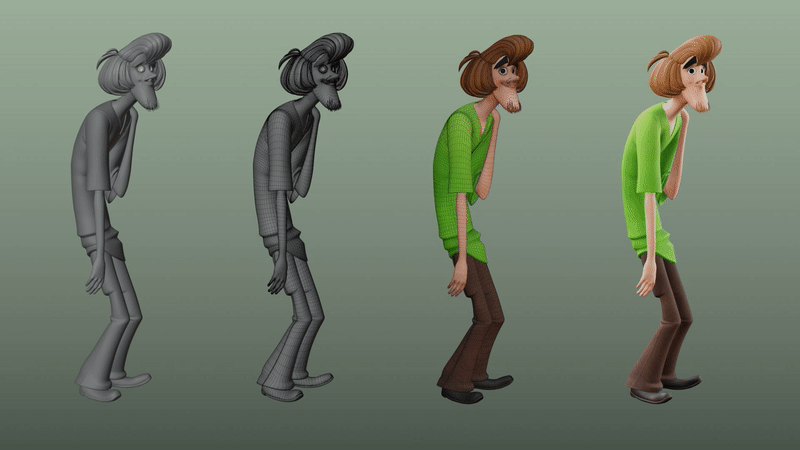
SHAGGY ROGERS
For Shaggy, the biggest challenge was to keep his kind and relaxed appearance while also adding detail to his features and finding his unique silhouette.
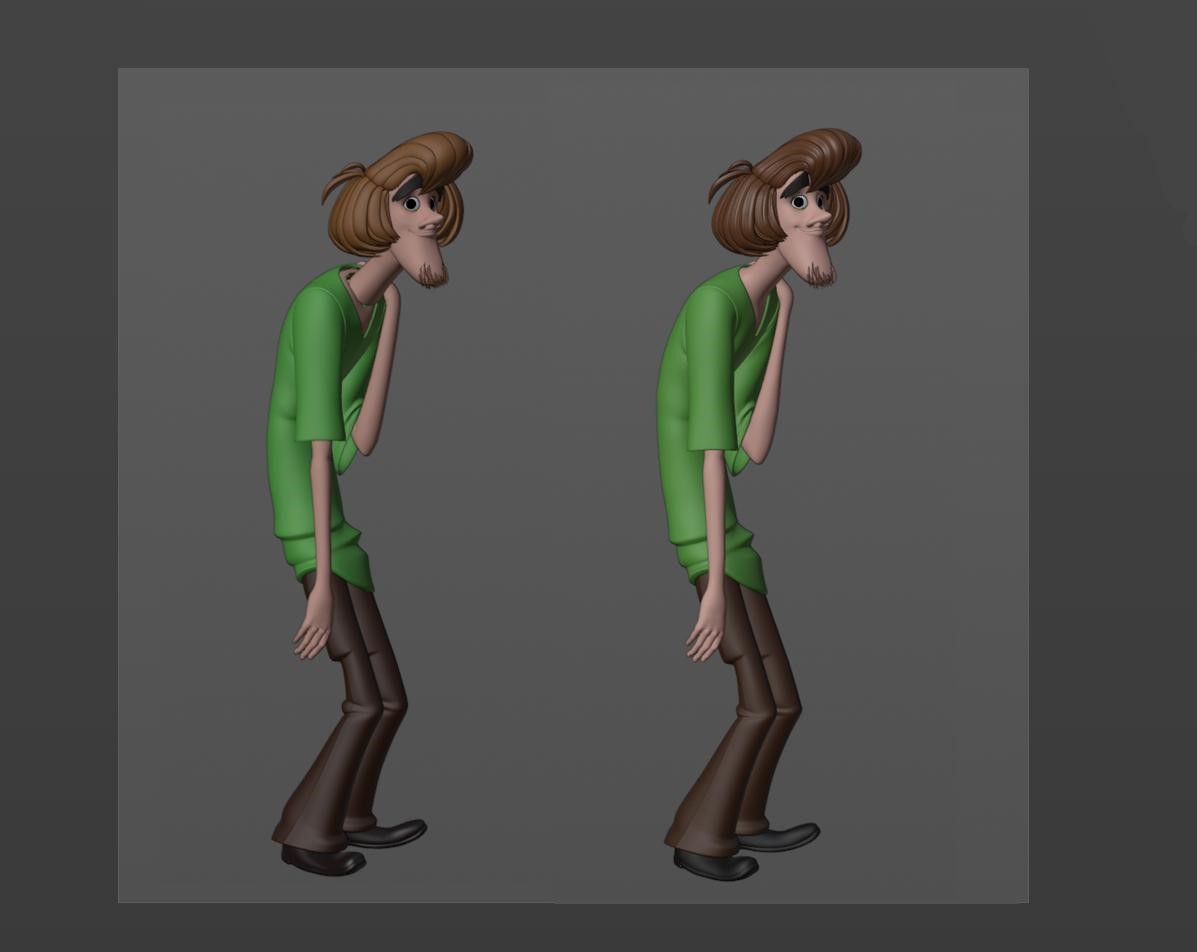
It was important to maintain his casual and sympathetic look.
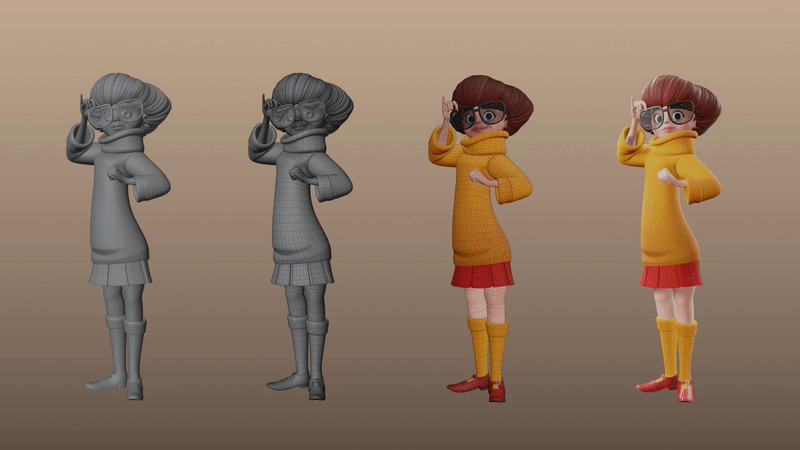
VELMA DINKLEY
Velma was the last human character that I worked on, and by that point, I had already practiced with the other three characters.
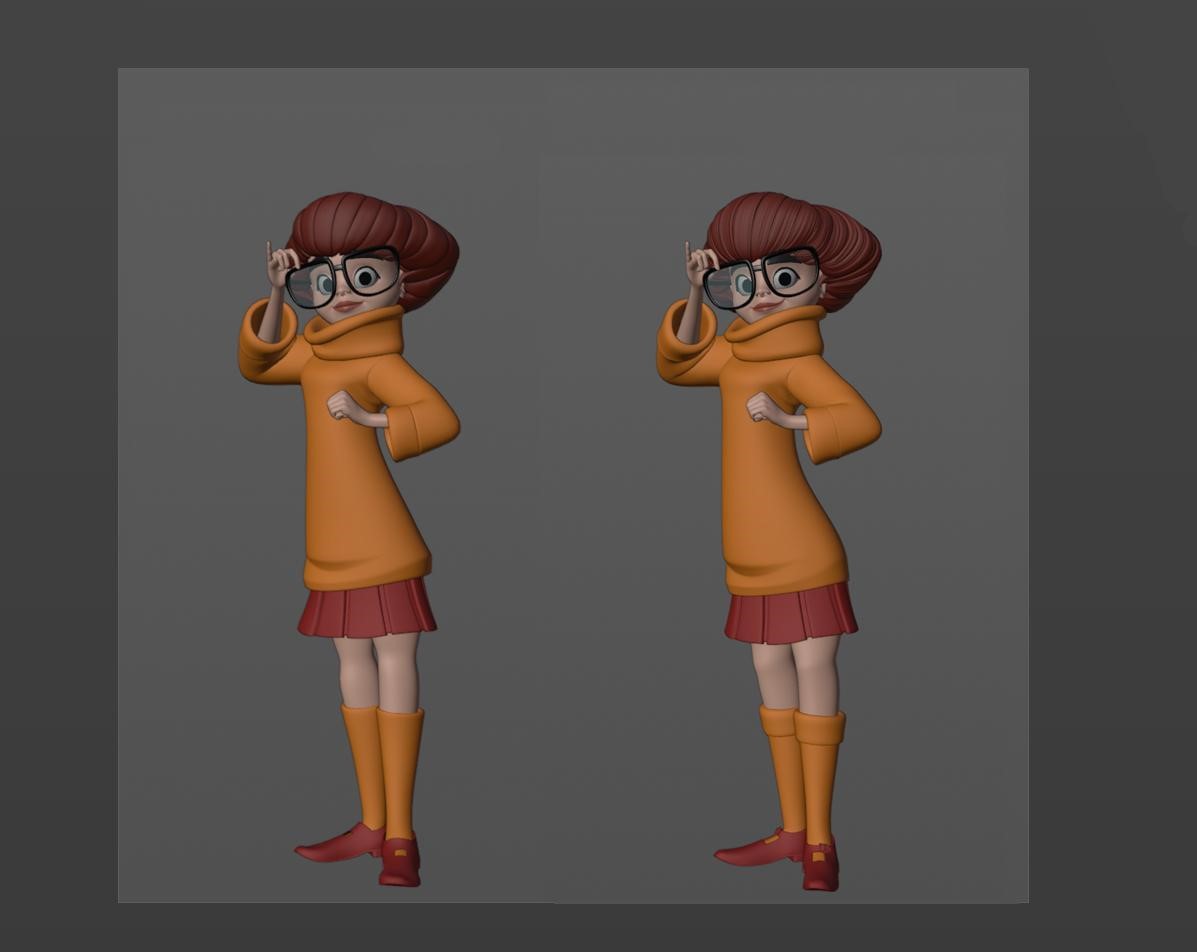
The most challenging part was to create a pose that I liked while still staying true to the character and her personality. This required a lot of sculpting to get the elements to align and create the right sense of movement.
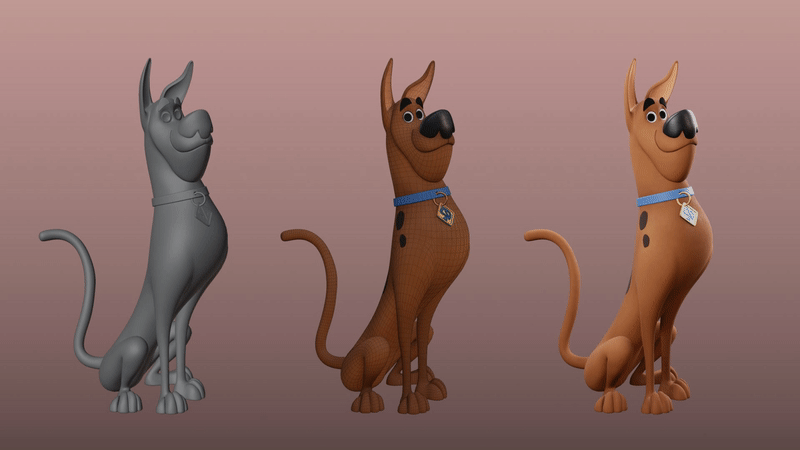
SCOOBERT “SCOOBY” DOO
Finally, for the last character, the famous Scooby-Doo, I couldn’t use much of my previous work as this character was very different from the others. I had to start from scratch. I used a lot of references of sitting dogs, and focused on creating a good topology. I made sure to maintain dynamic curves, so that the character would look good from all angles, while still keeping the expressive look of the original design.
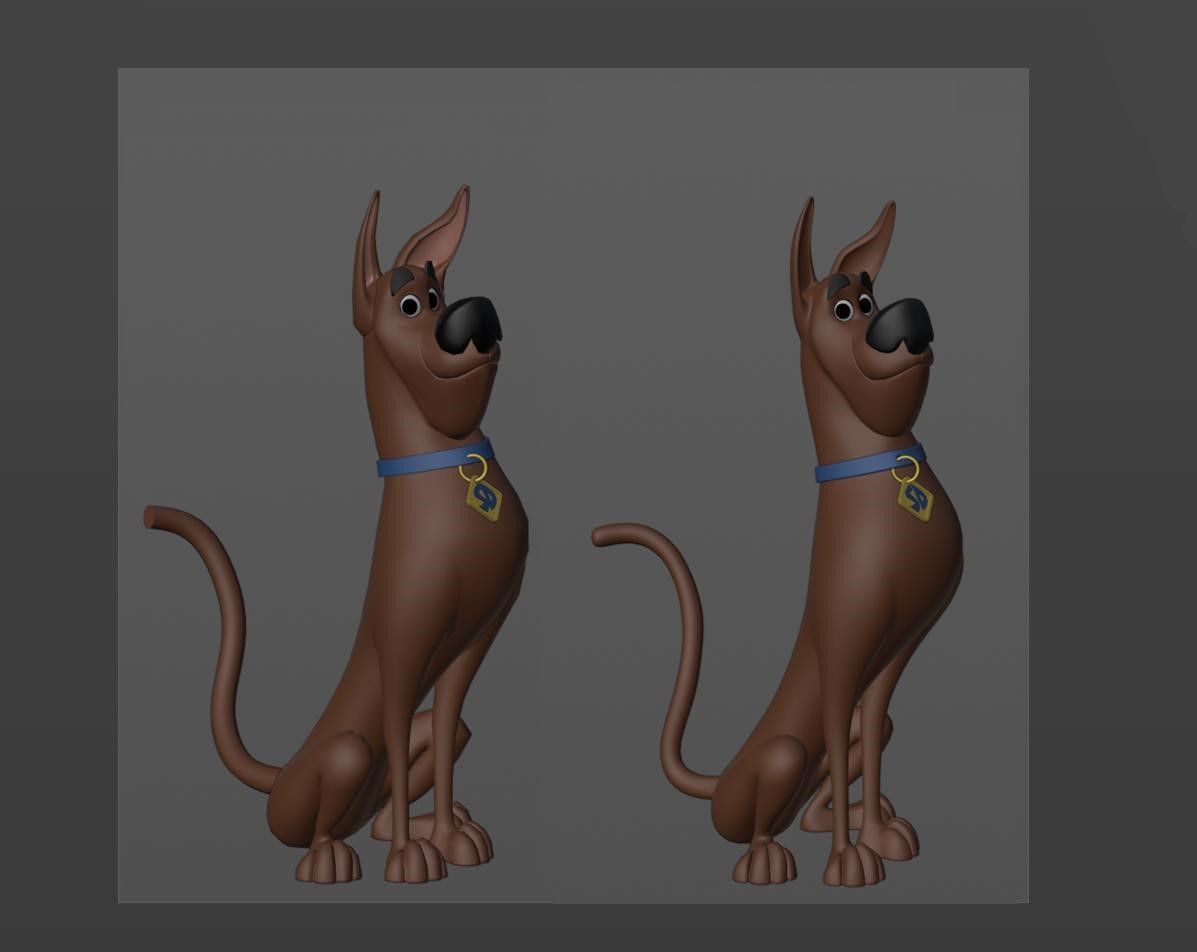
And that’s how I created the final Scooby-Doo character.
TEXTURING
For the textures and shading, I kept it simple by using Substance Painter. I wanted to keep the 2D look of the characters and not make them too realistic.
I used clean colors with some variations, light gradients and a bit of roughness to add depth. The eyes were created by selecting the face, using black and white, and making sure to keep the 2D look of the characters.
LIGHTING
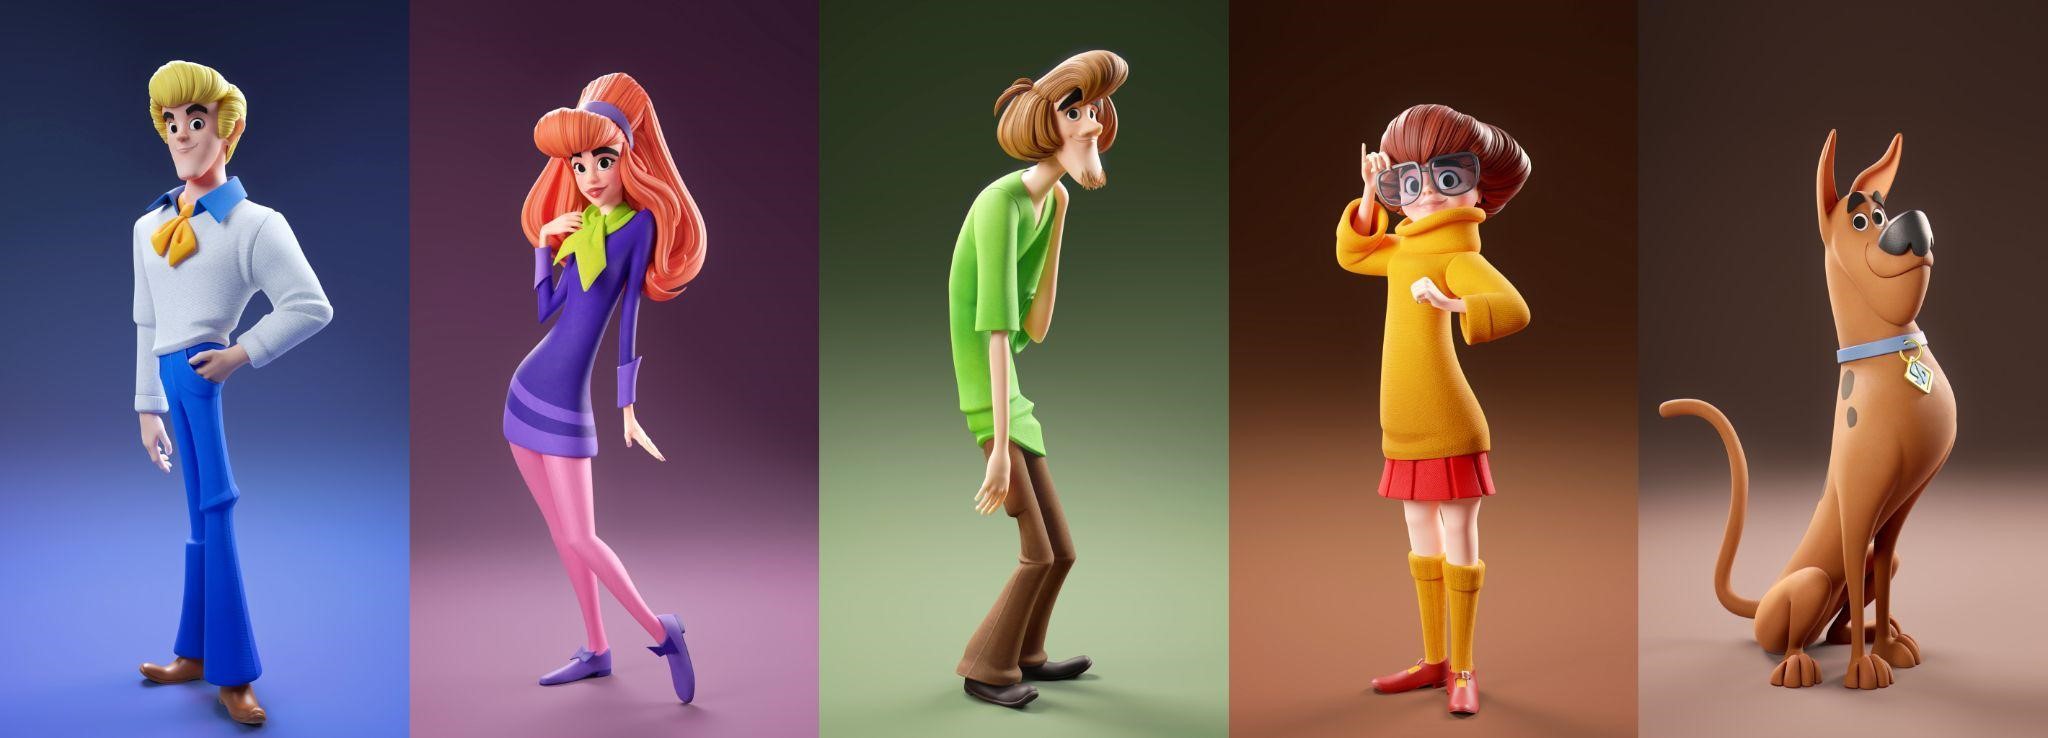
For the lighting, I first created separate scenes for each character, so that I could create individual images of them before creating the final image with the entire Gang.
The lighting wasn’t very complex: as the focus was on each character without any background, I used a basic three-point lighting setup.
- Main Light on one side or the other,
- Fill Light to lighten the shadows, a
- Rim Light to cut the character from the background
- Additional Back Light to add volume to the hair and accentuate the shape of the characters.

The background is a simple cyclorama with a different color for each character.
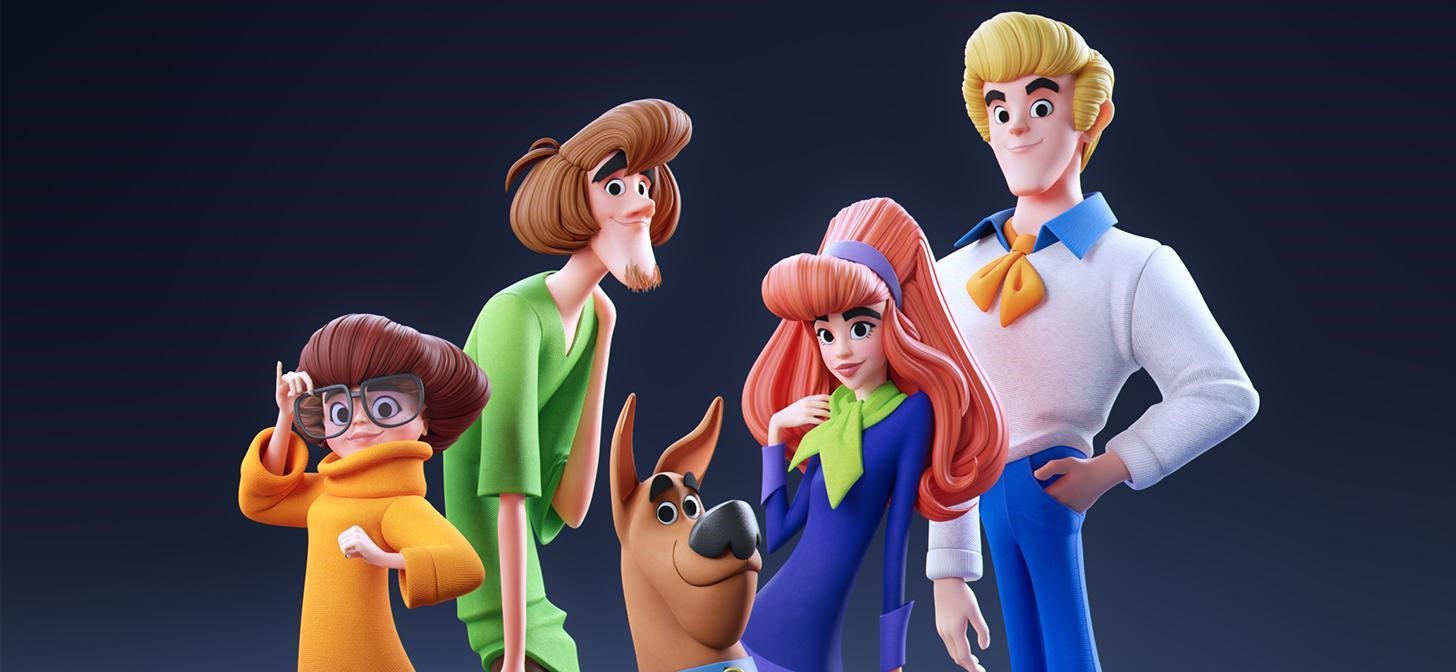
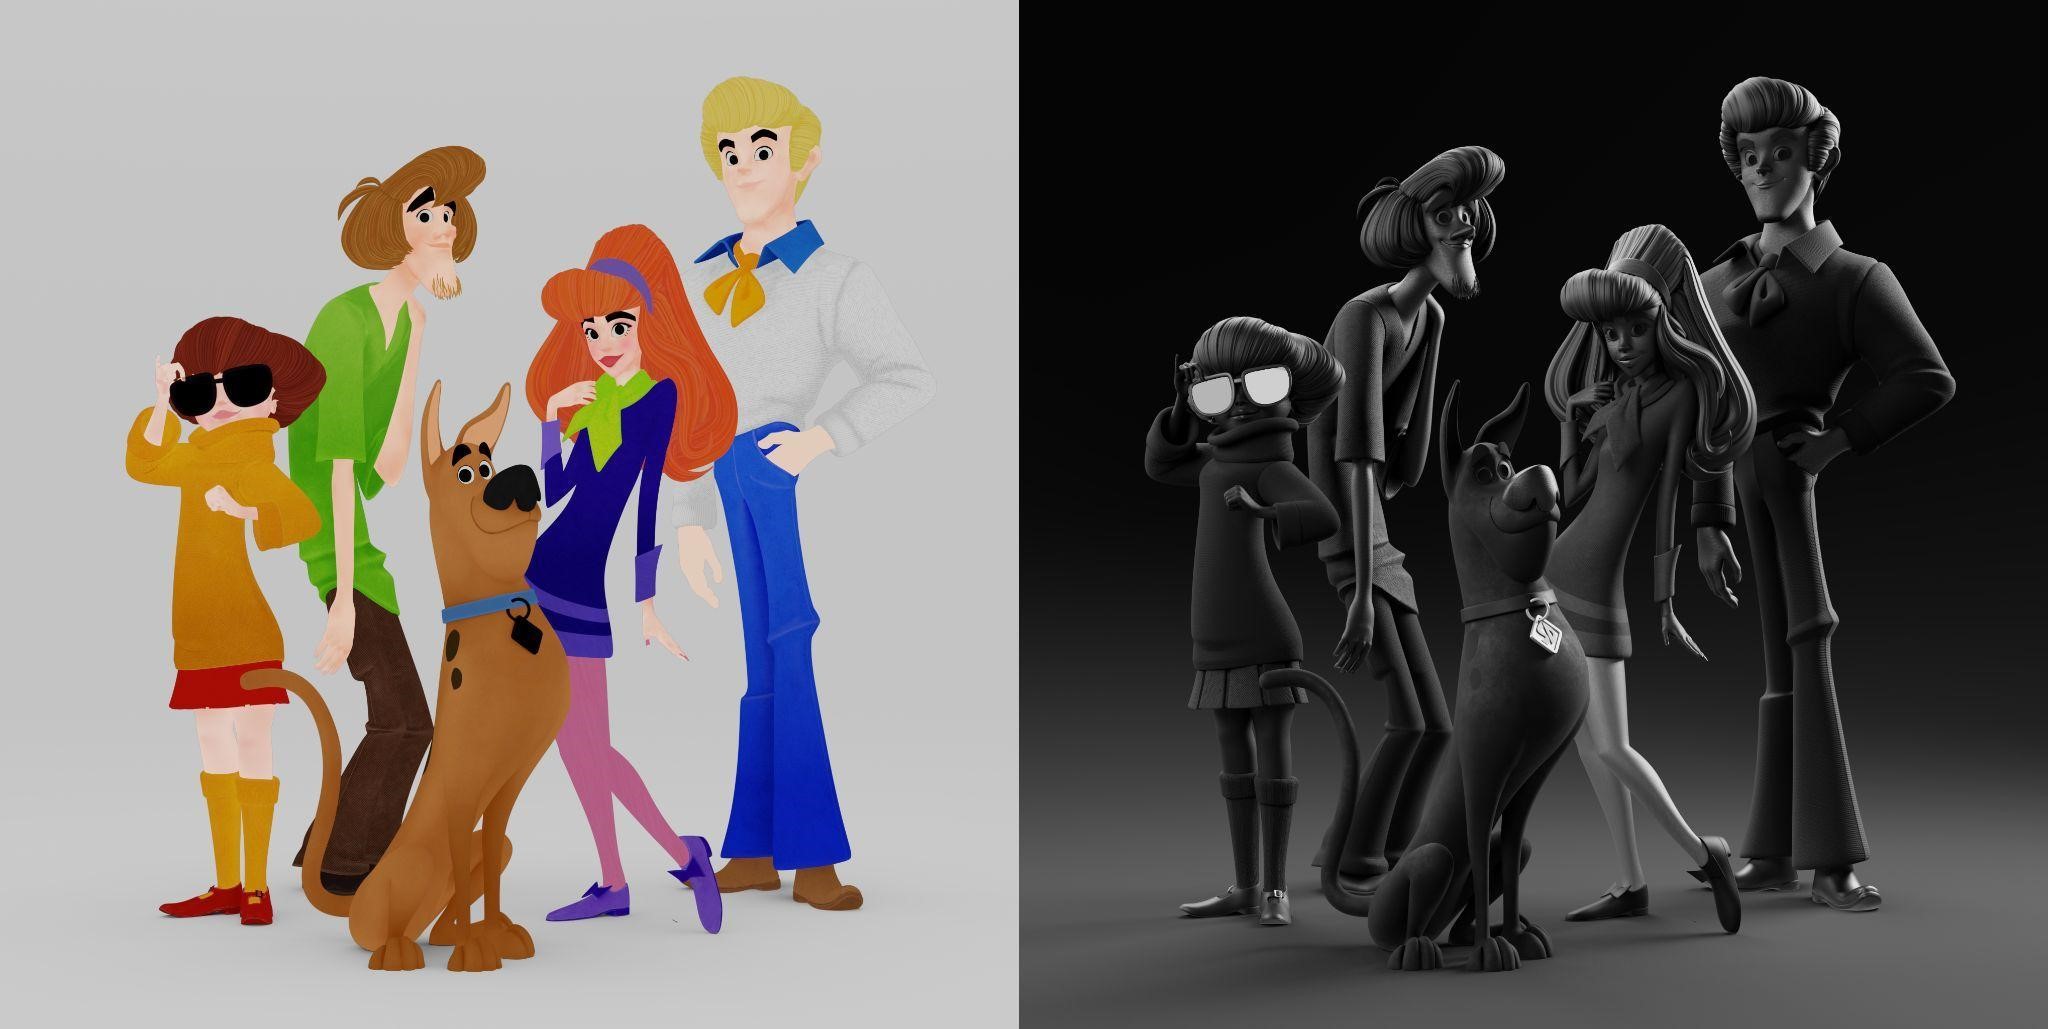
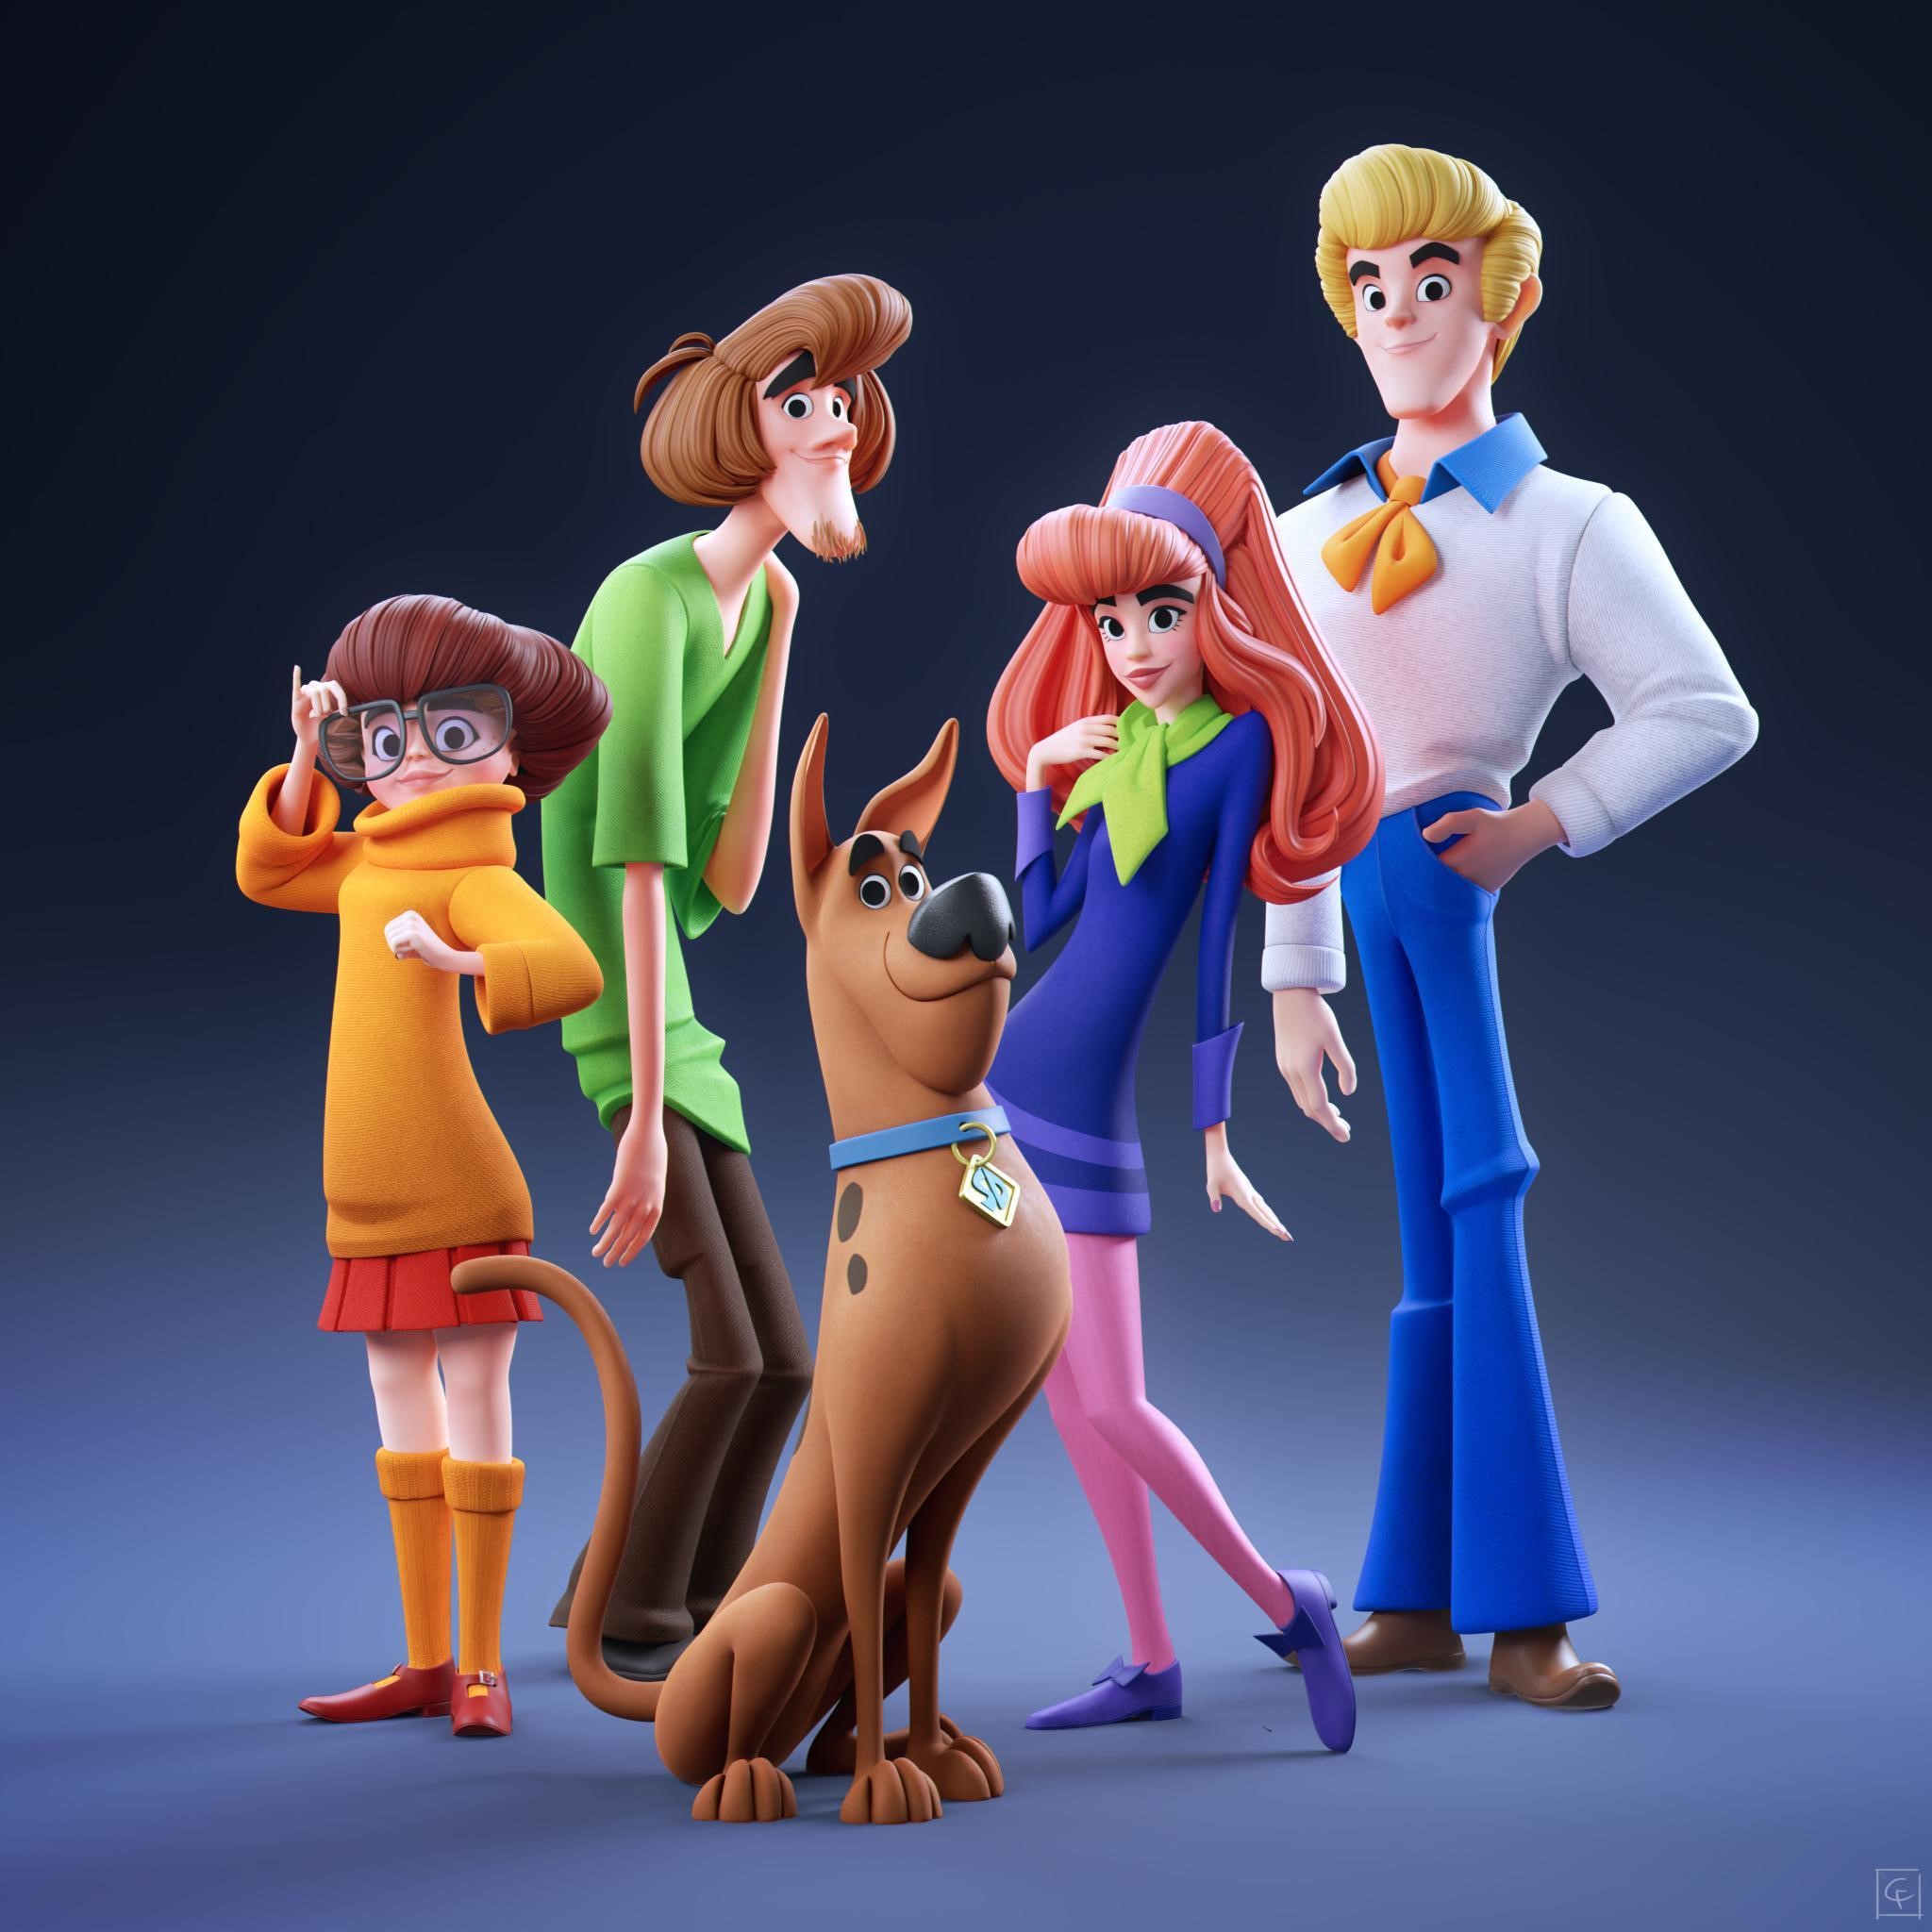
For the group photo, I chose a blue color which is different from the original cartoon. I also used a collection system to bring in each character from their own scene, so that I could make any necessary changes in each of their scenes.
For the group lighting, I also added an extra light to properly illuminate all the characters.

RENDERING
For the rendering and the passes that I output, there was nothing extraordinary. I separated the background (cyclorama) from the rest of the characters to have more flexibility during compositing.

I used Photoshop for compositing, and output the basic passes such as DiffuseColor, GlossDir, etc. The compositing process mostly involved adjusting the color balance and contrast, and homogenizing the colors. I also added some simple visual effects.

THE SCOOBY GANG
Thank you for reading all the way through. I hope it was interesting to you.
Thank you and have a good day!
About the Artist

Florian Falcucci, a 3D artist and a CG supervisor at Cube Creative, France.


