
Behind the Scenes: Elephant Bee
INTRODUCTION
Hello everyone, my name is Hernan Sandres. I’m from São Paulo, Brazil, and I have worked as a 3D artist for about 10 years, mainly with ArchViz.
Now, I consider myself a Blender enthusiast.
INSPIRATION
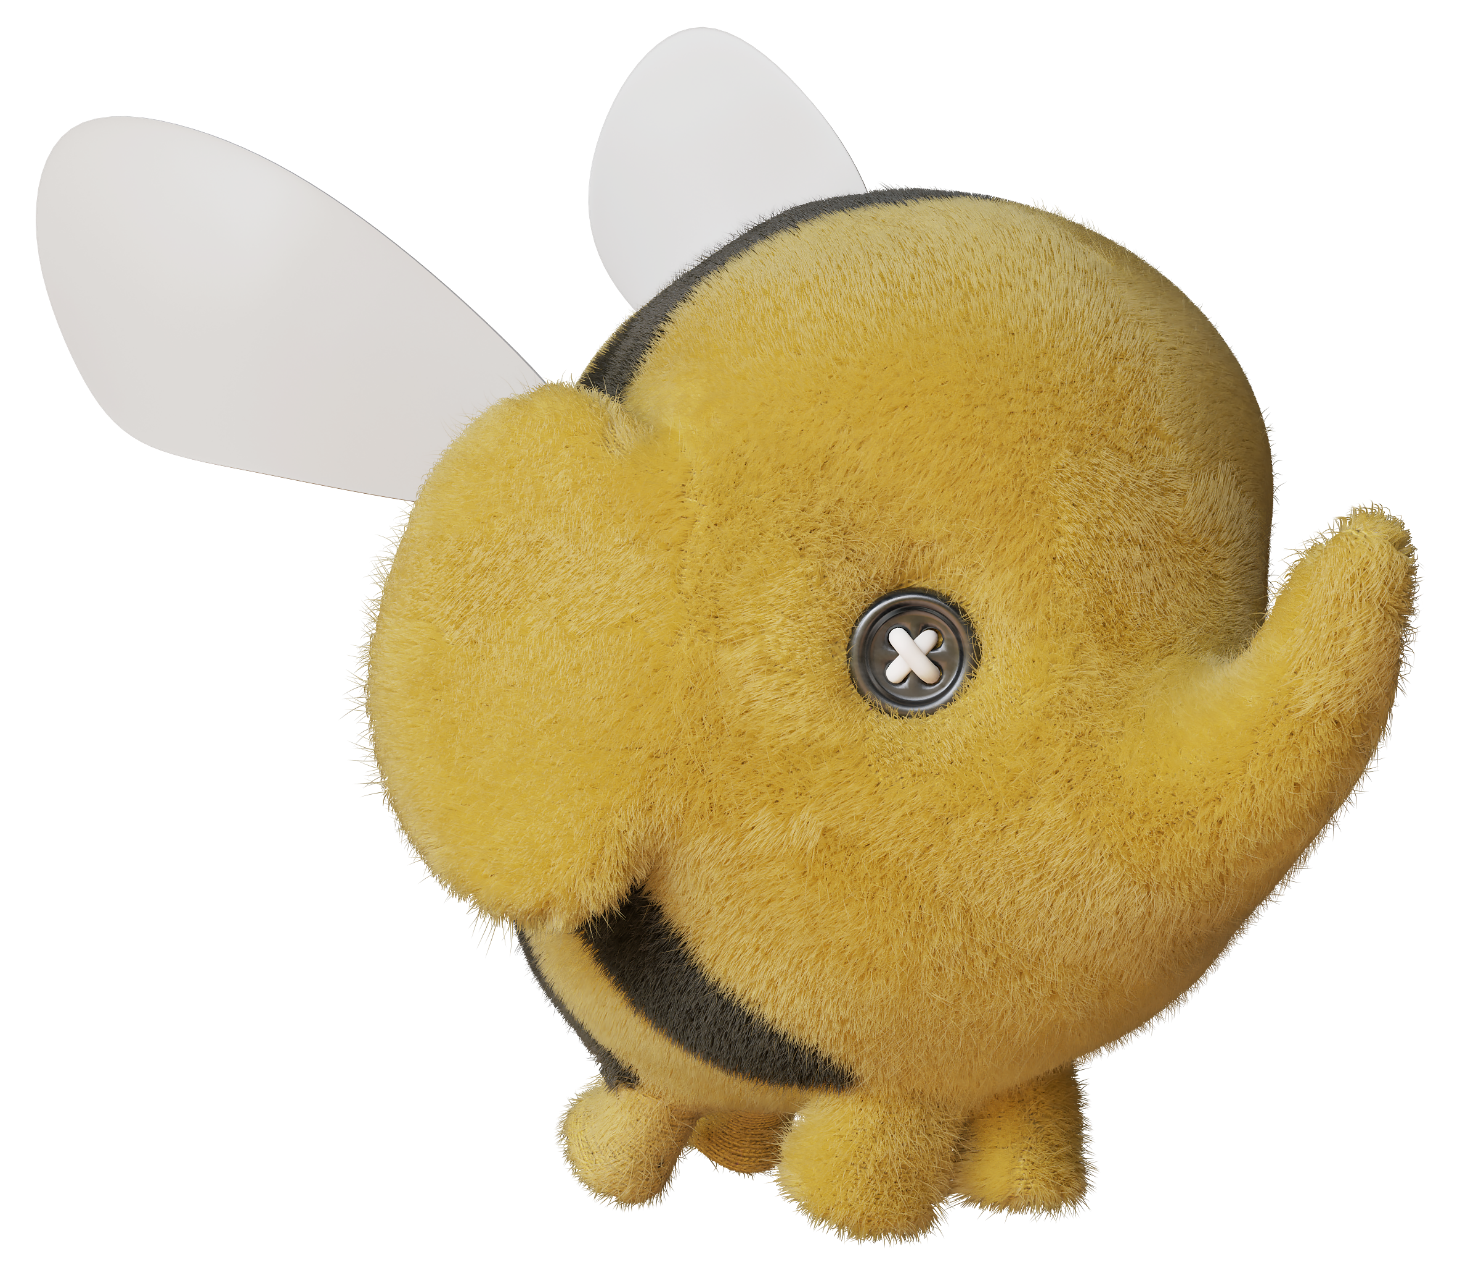
This project was a considerable challenge. The client wanted to convert a 2D logo into a 3D character.
The original logo is simple and cute. It is a symbol that arises from synthesizing the hybrid forms of the mammal with the insect, a fun result that adds up the wings, striped spots, and sting of the bee with the elephant’s trunk, ear, and body shape.
See the original logo below:

PROCESS
Modeling
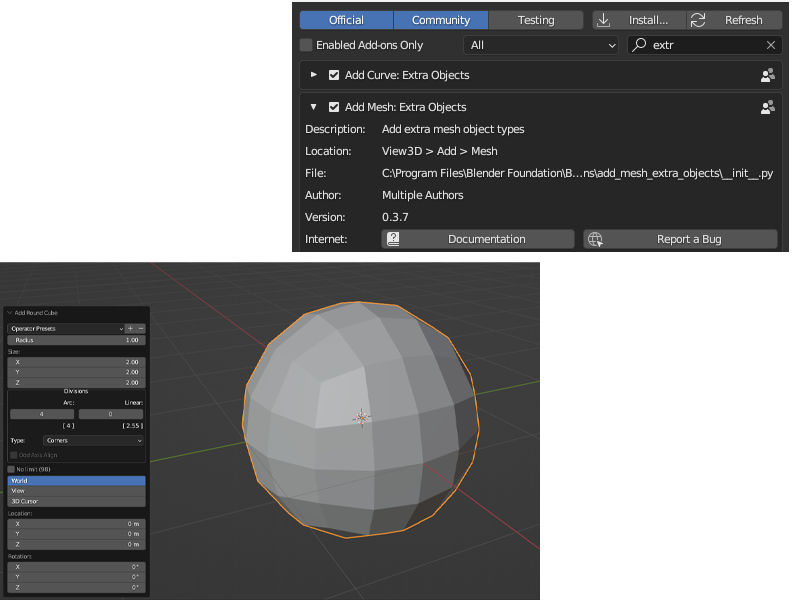
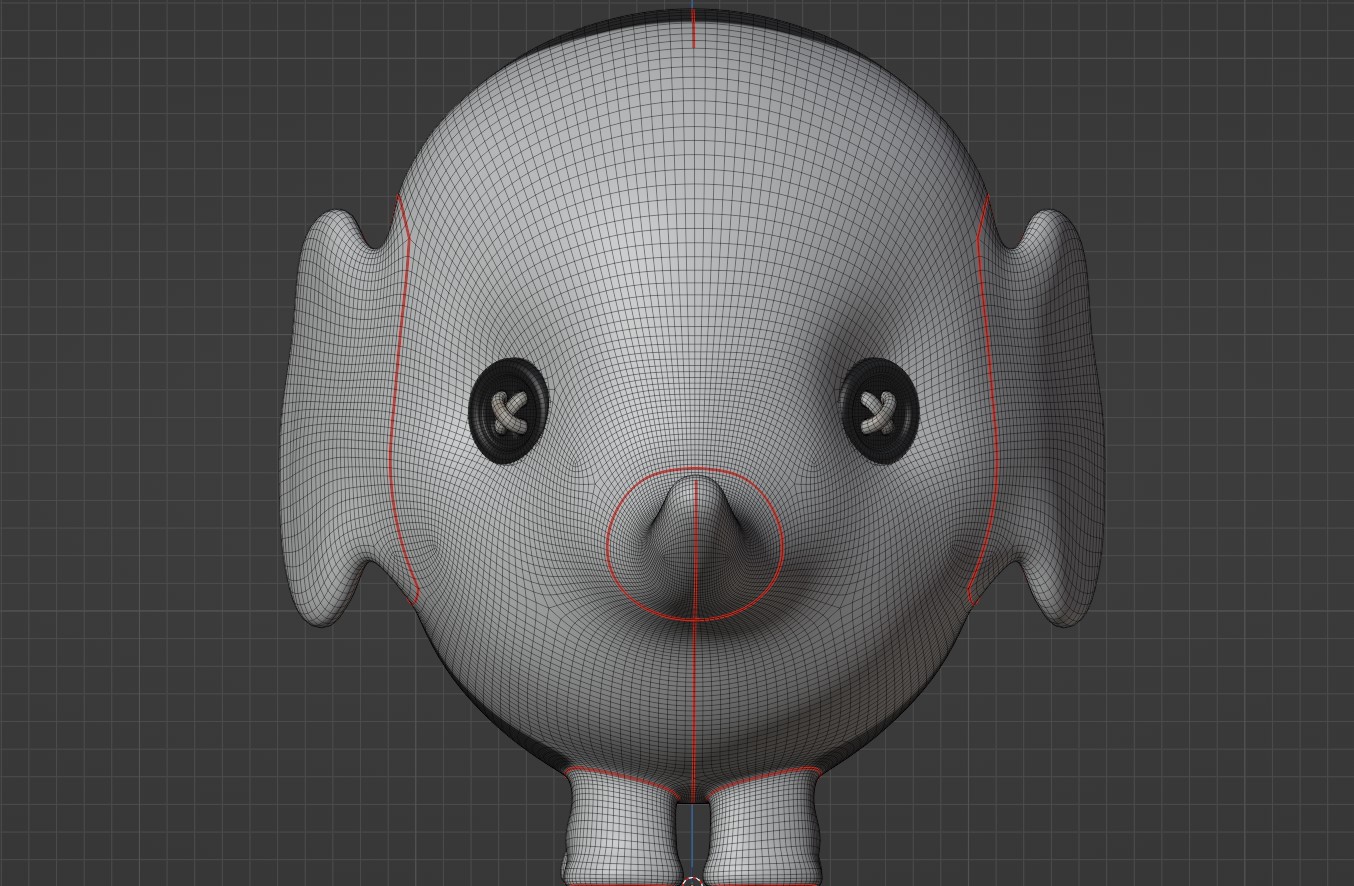
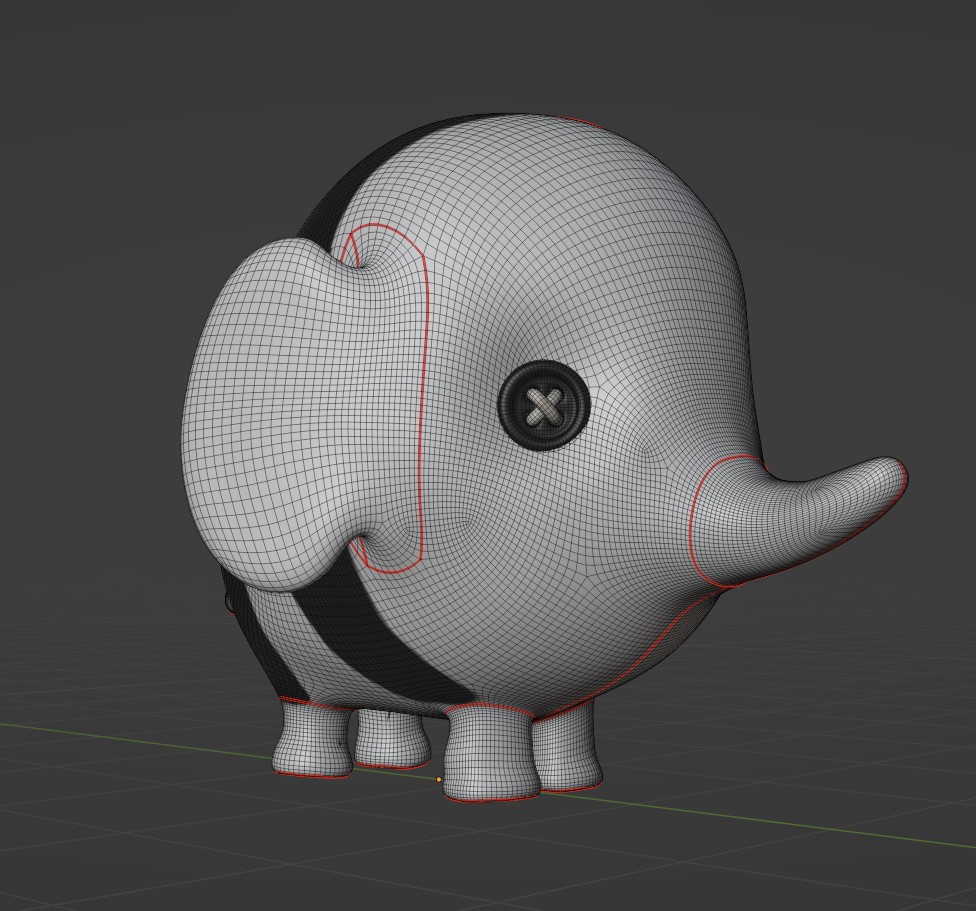
I started using “Extra Objects” (a native add-on of Blender), and “Round Cube.” I chose this one because you can have a sphere with all faces quads.
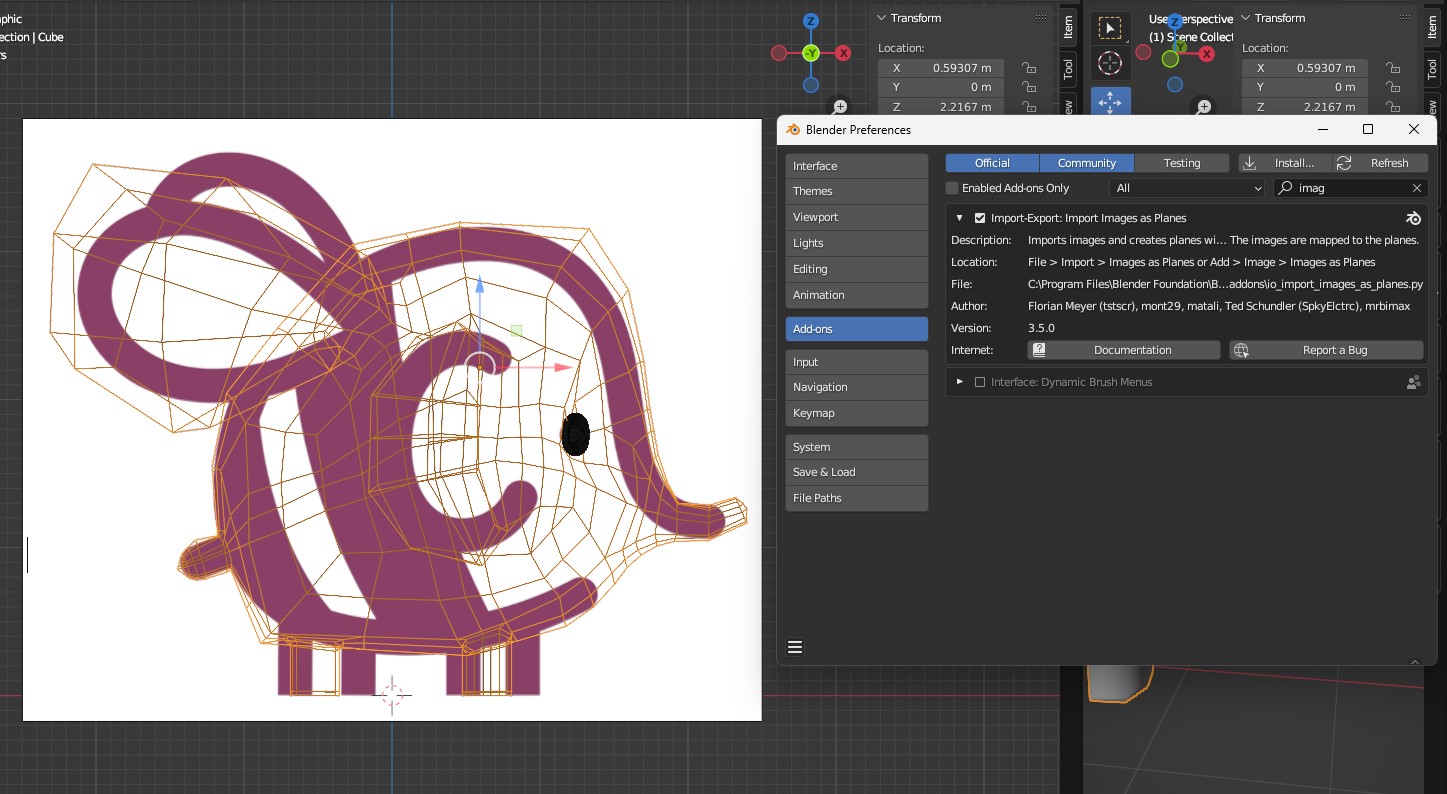
I placed the reference image behind (you can use another native add-on, “image as plane”) and started adjusting the mesh, adding necessary cuts and pushes. I deleted half of the elephant bee and added a “mirror” modifier.
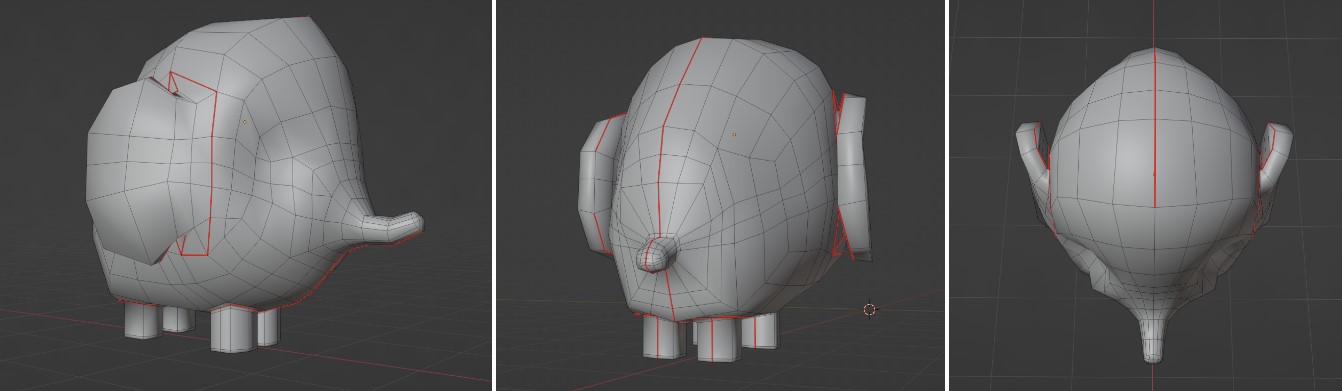
After that, I cut the edge for mapping, selecting the edges that I would like to cut, and then pressed “u” to “mark seam.”
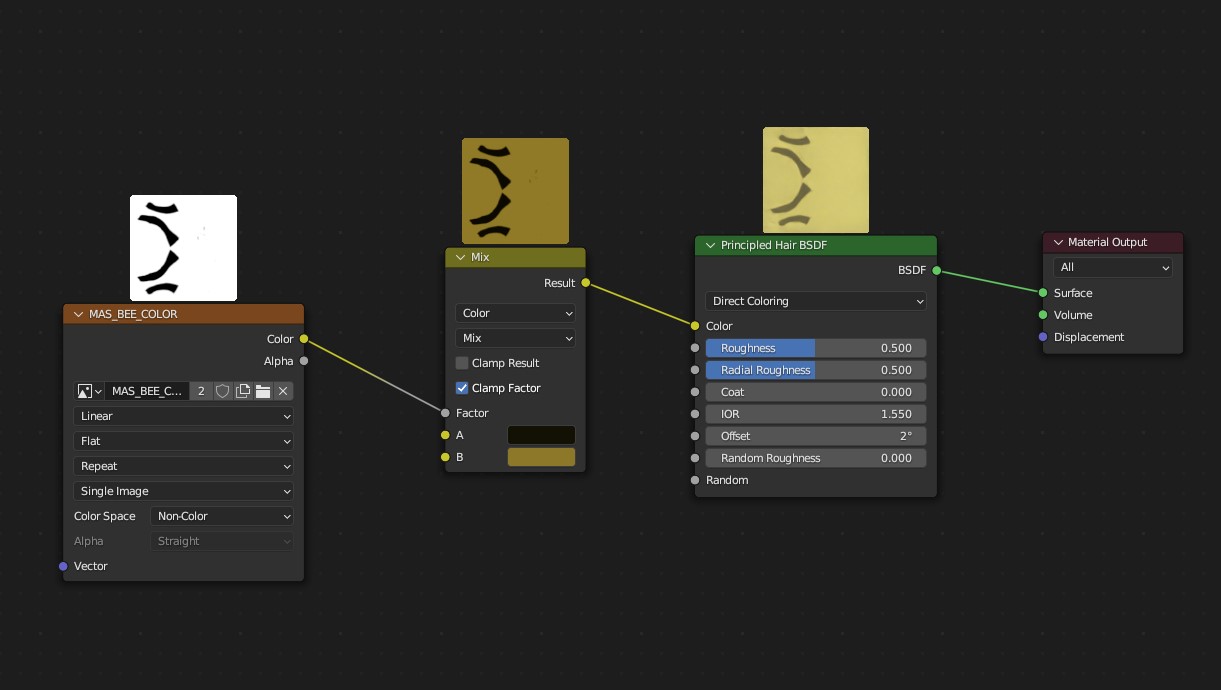
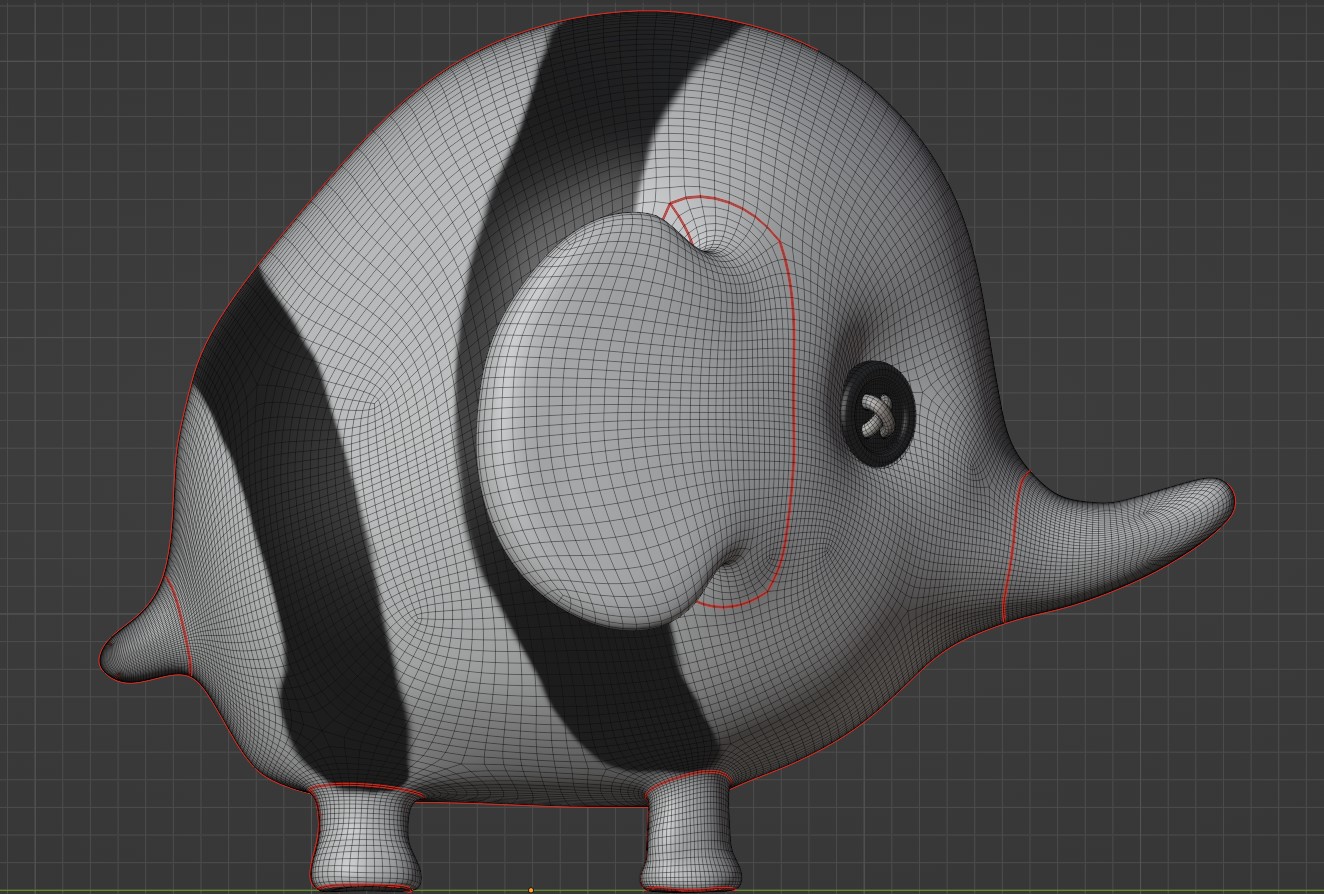
I opened the mesh and started to paint the different colors of the elephant bee. I just used black and white as a mask for the materials.
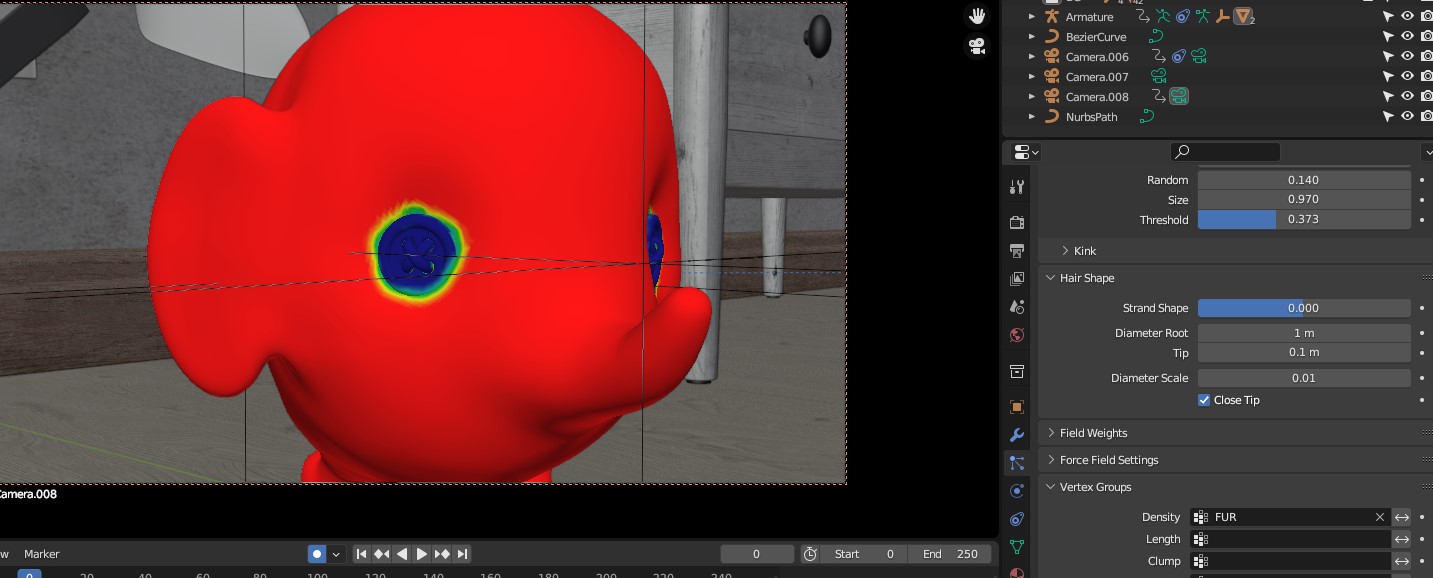
Hair
The material of the hair is really simple as you can see below:
For the hair particle, I used some parts of this tutorial:
An important thing that I learned from this video is to create three layers of particle hair with different properties.
To exclude the eyes, I painted a “Vertex Group” in a “Wight Paint” and set it on Density.
These are the first versions of the model:
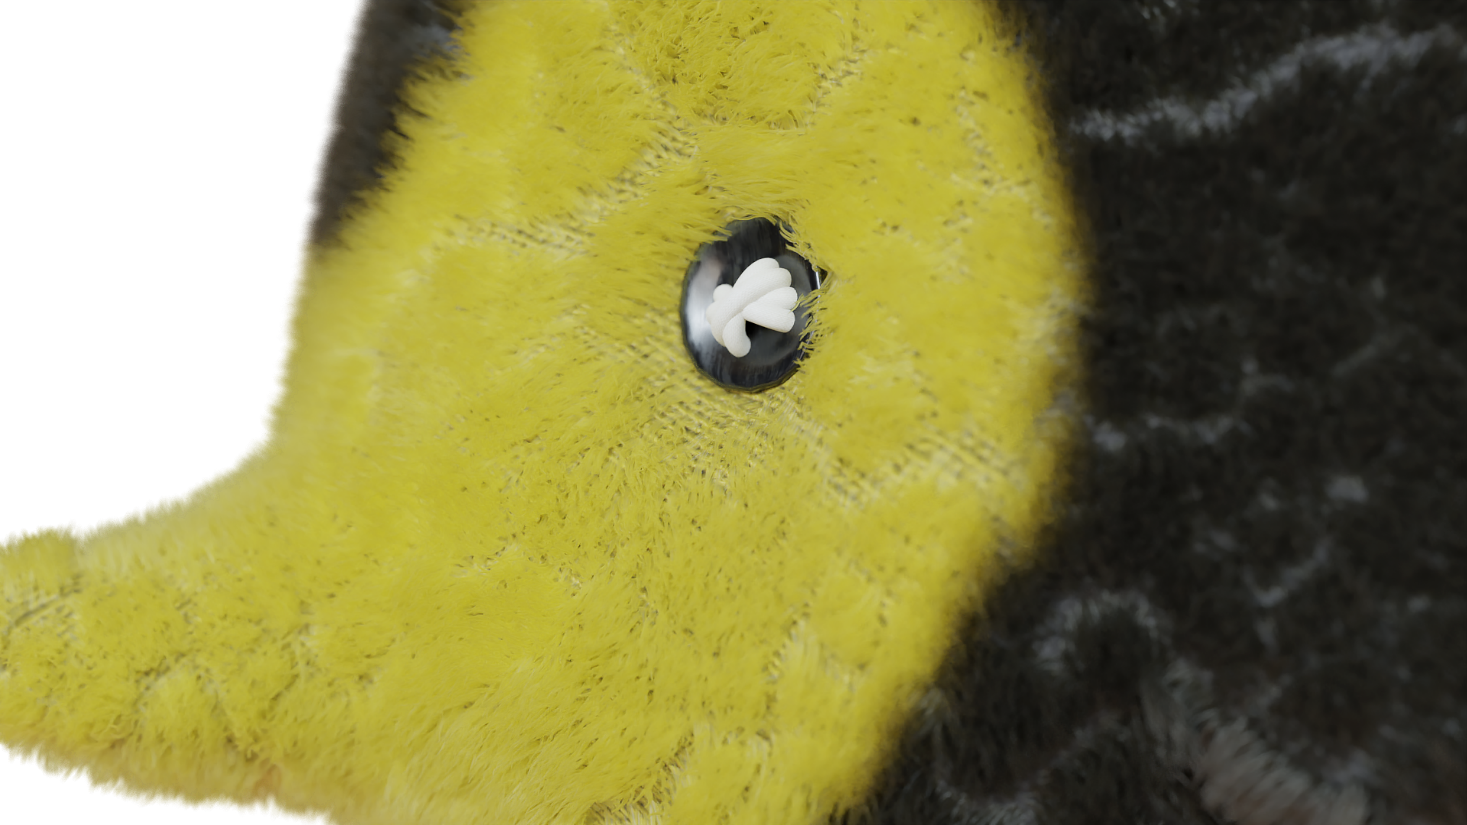
I rendered a video to check how the fur would behave when the elephant moves:
UV Unwrapping
Then, the final version was sculpted and unwrapped.
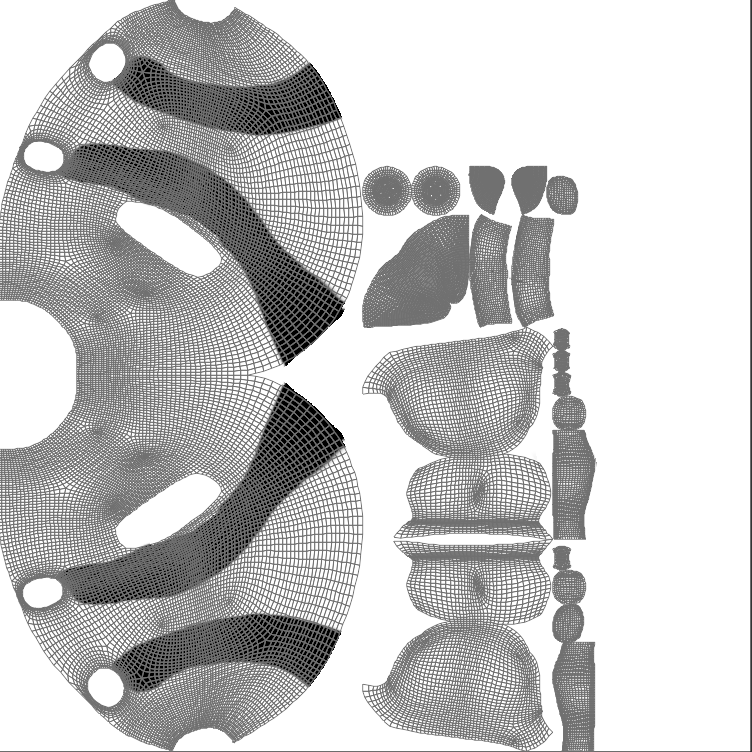
First, I used the “Multiresolution” modifier, but I couldn’t figure out how to unwrap appropriately, so I had to convert the mesh.

Rigging & Animation
I’ll not get into this too much for the rigging and animation because I really need to learn how to do it. I saw a lot of YouTube tutorials and tried to copy them, but I must confess I didn’t like the final result of the animation.
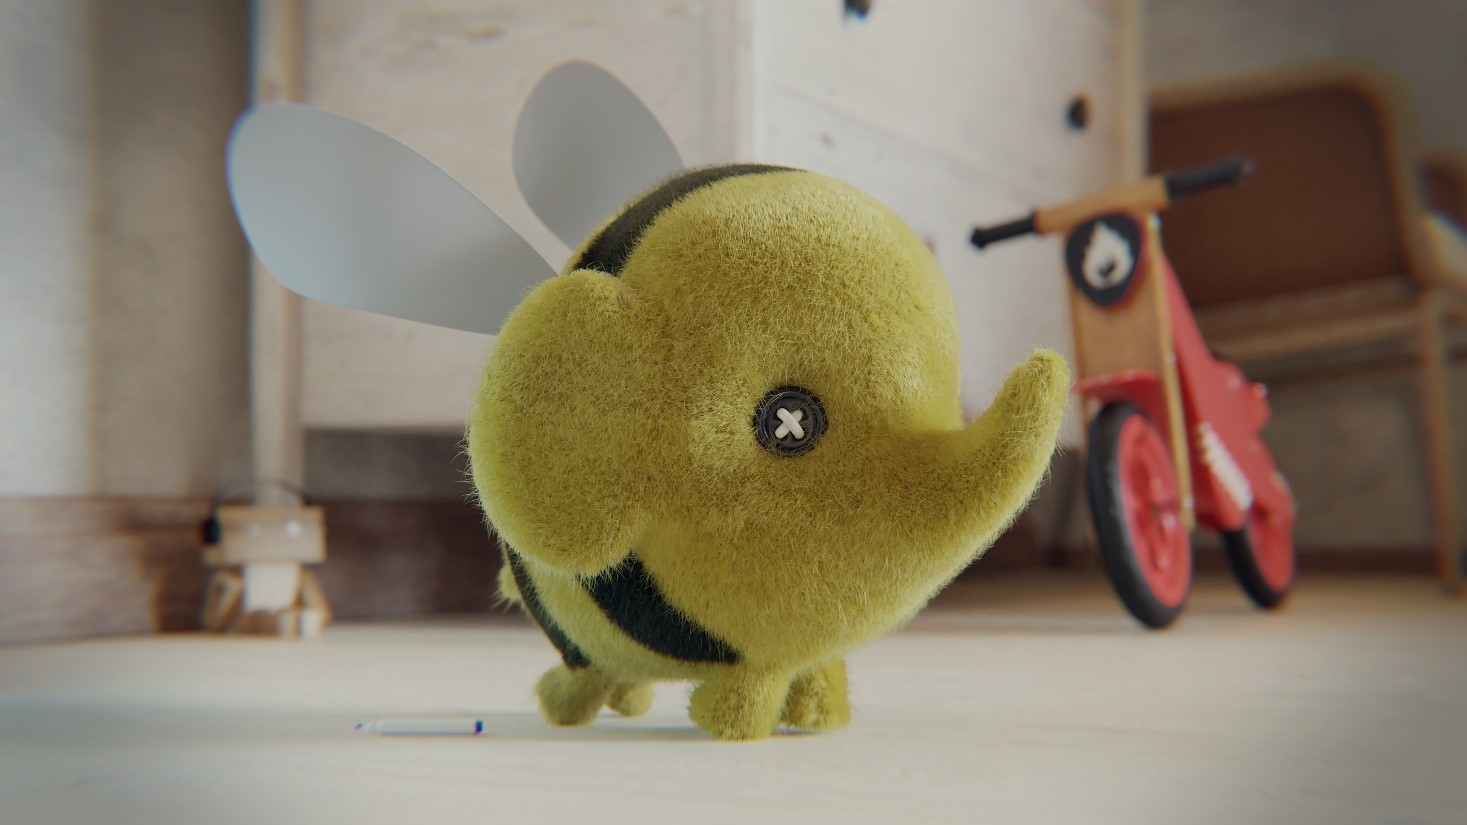
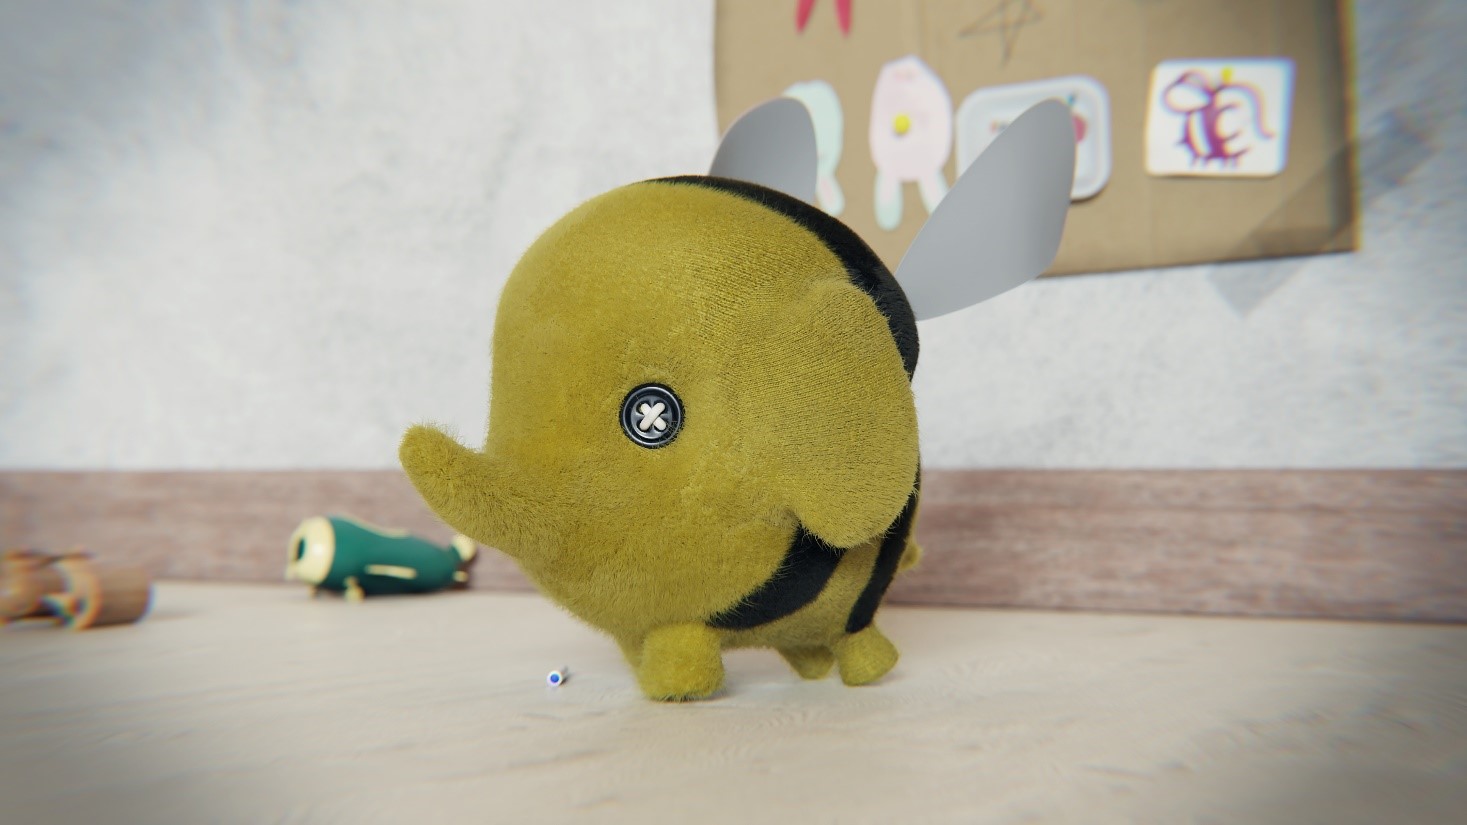
To compose this room, I used some free models from the BlenderKit add-on. Now, you can check out the final result below.
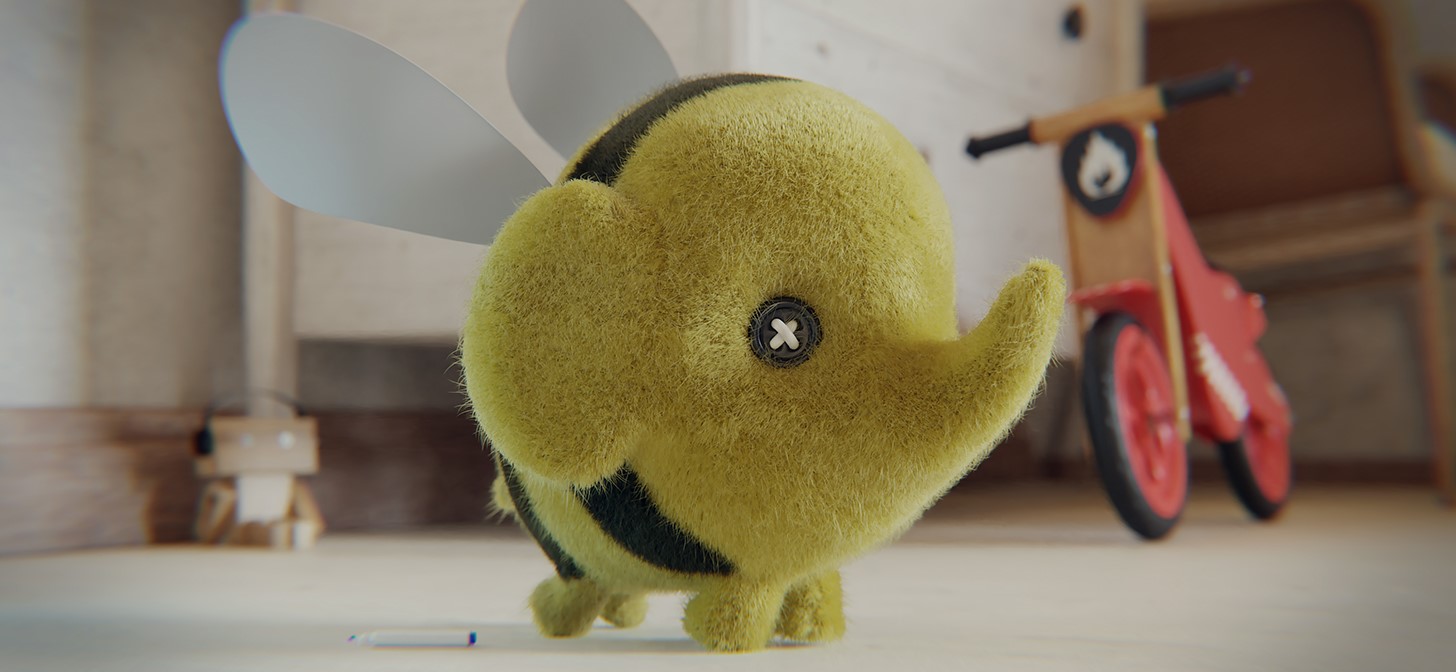
RENDER : Elephant Bee

That’s all, folks. If you have any doubt or want me to show something else, feel free to get in touch.
About the Artist
Hernan Sandres is a 3D artist from Brazil who is in love with the 3D world. His previous articles on BlenderNation include A Hobbit Hole and Japanese Kiss.


Thank you for opening my eyes to this remarkable elephant/bee. It’s simply mind-blowing.