
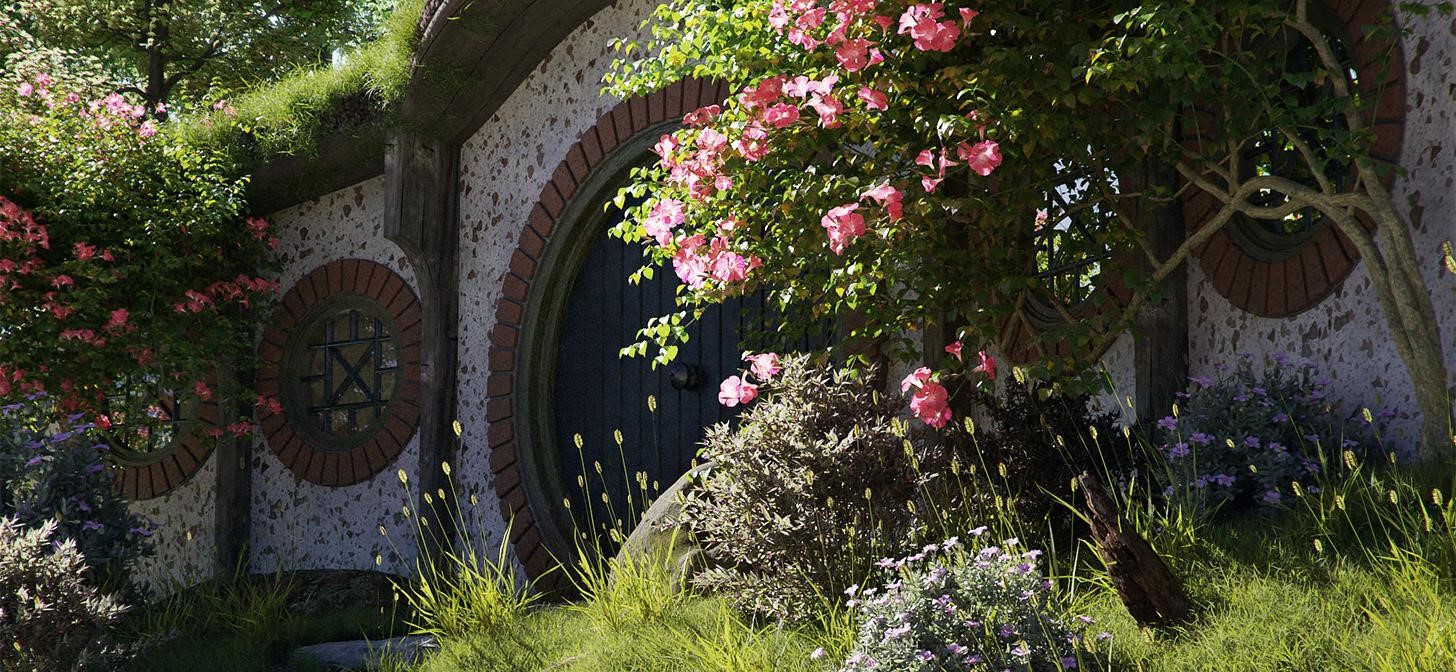
Behind the Scenes: A Hobbit Hole
INTRODUCTION
Hello guys! My name is Hernan Sandres. I’m from São Paulo, Brazil, and have worked as a 3D artist for about 10 years, mainly with ArchViz. I initially used 3DSMax and Corona Renderer. However, as everybody got excited about Blender, I decided to study this software.
To be honest, I’m a total Blender beginner. I started studying the software in June of this year, so I do not even have 1 month of Blender experience. But, I may confess, I’m loving the results.
I understand that my CG background helped me a lot to have some “fast progress,” even knowing that there is a LOT of stuff that I need to learn.
INSPIRATION
My friends, all Blender beginners and I decided to create weekly challenges to encourage our development.
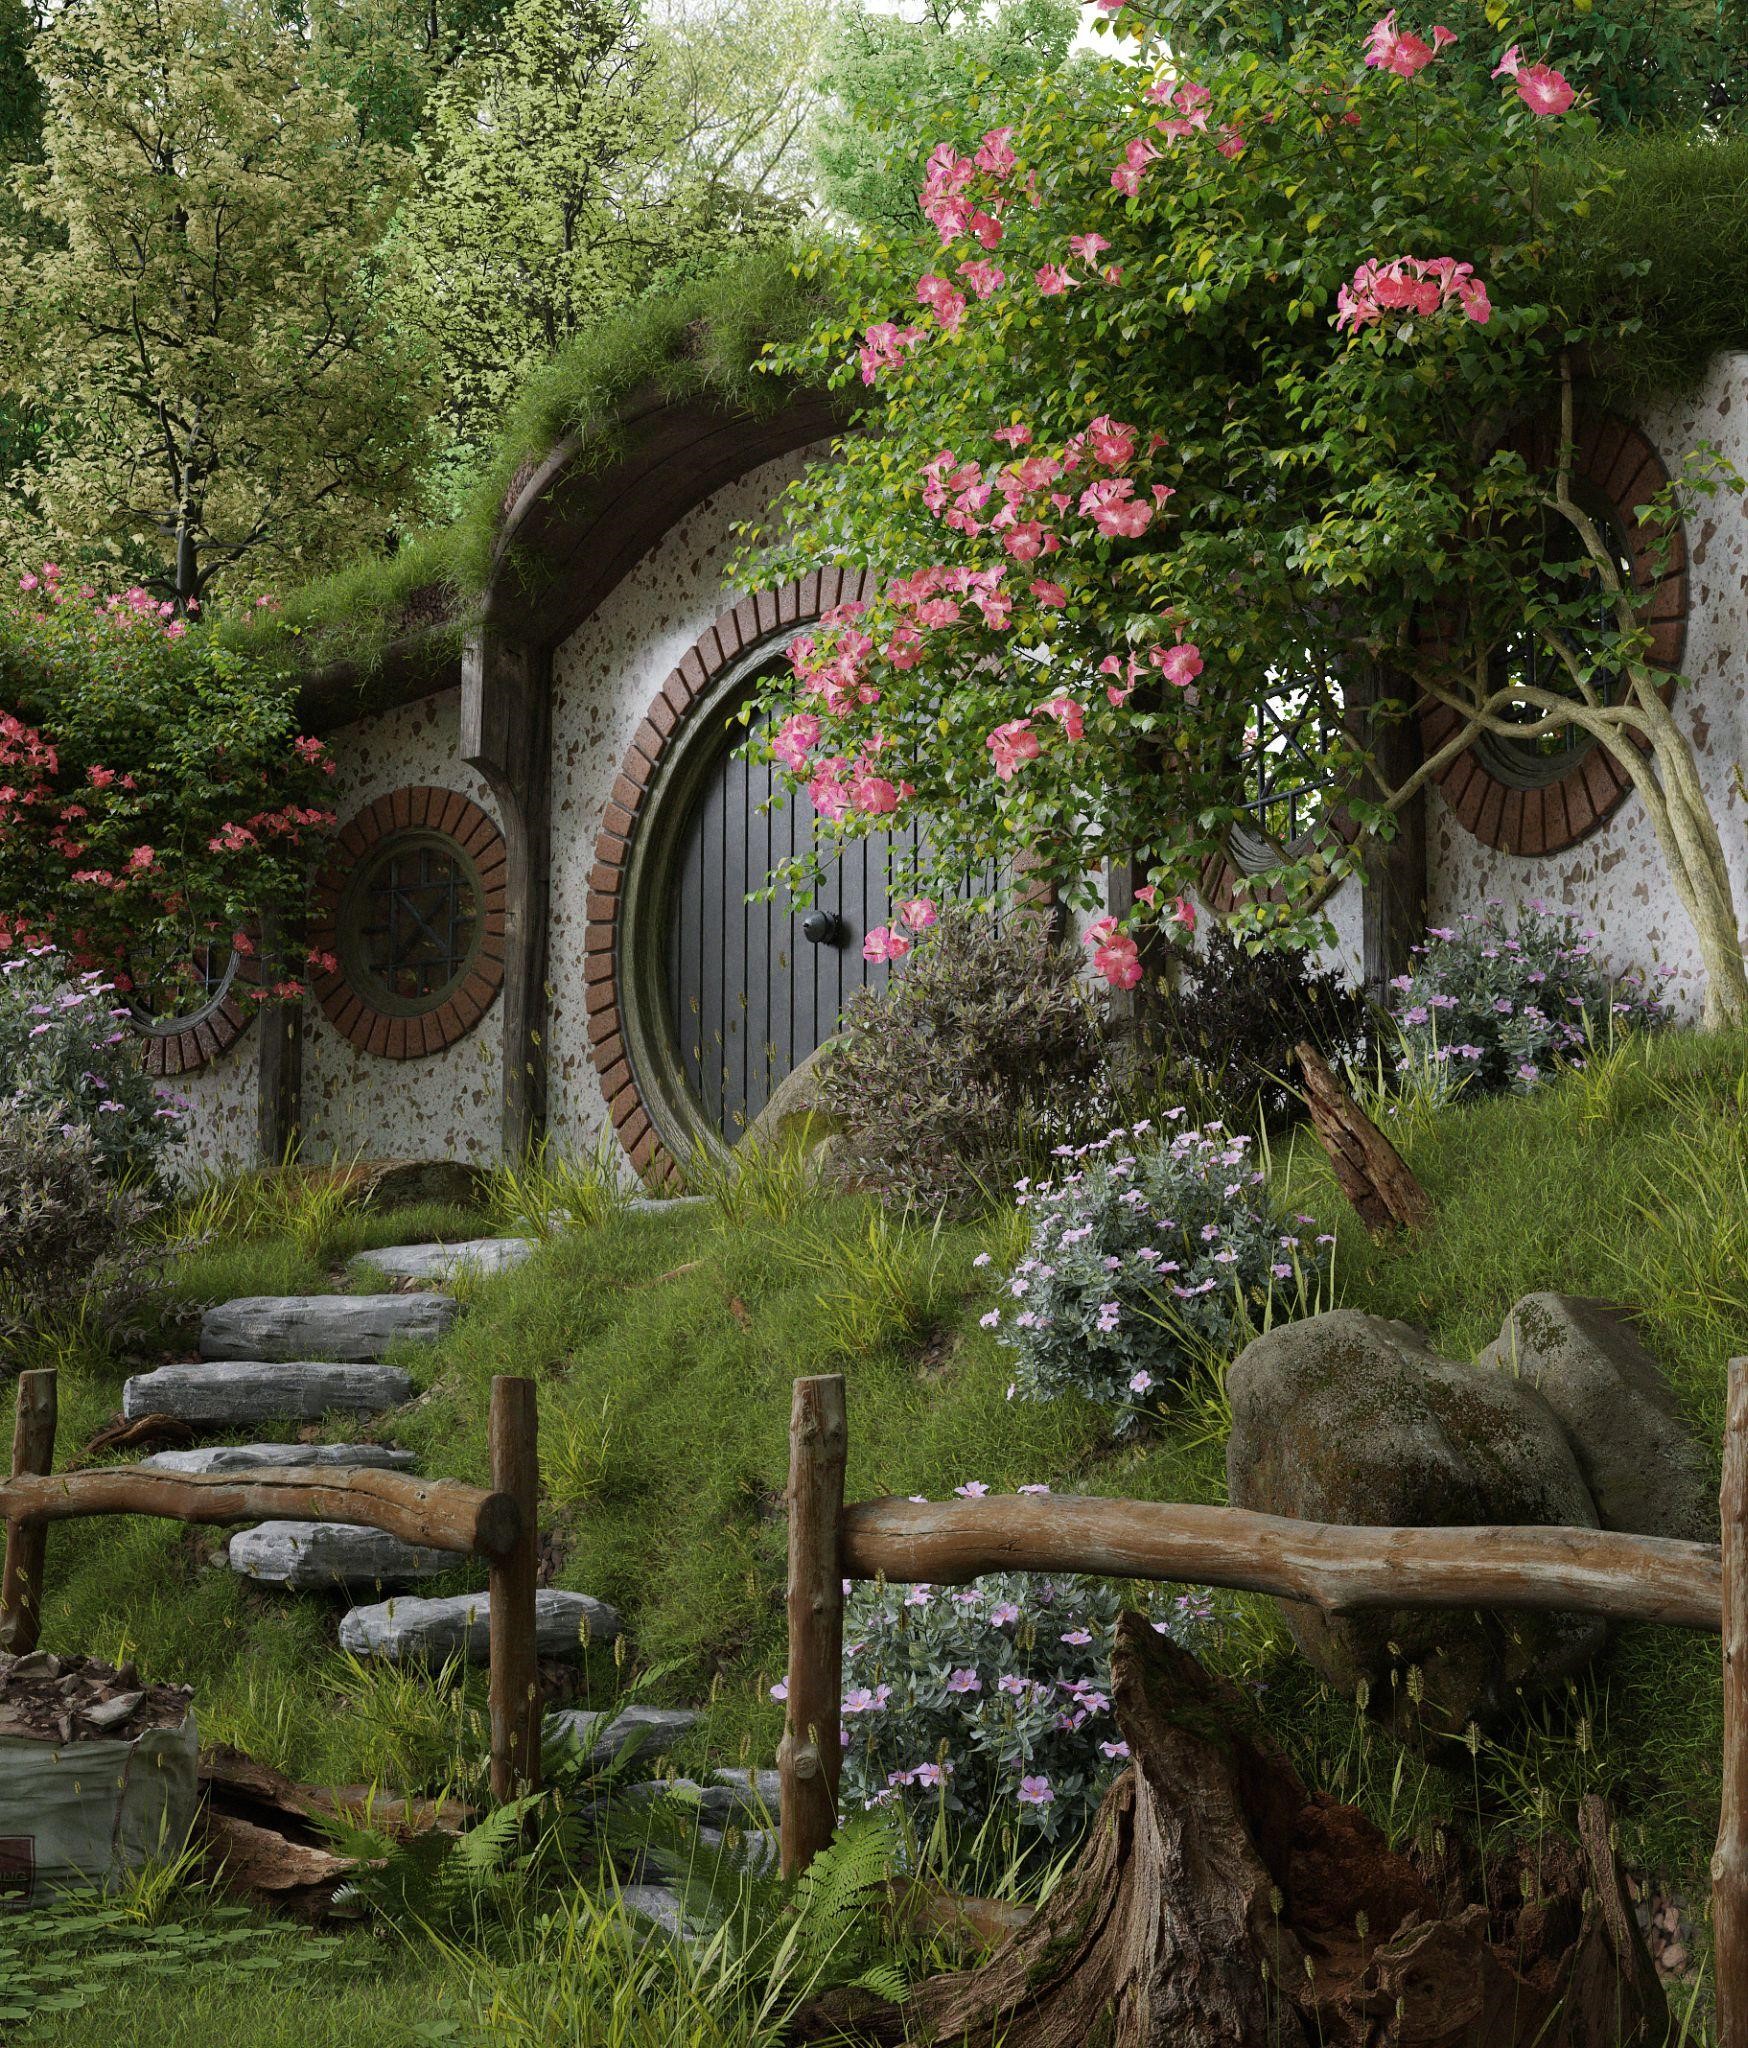
The theme of this week was THE HOBBIT HOUSE, and it was great. I could study a little about scatter, sculpting, composition, lighting and a lot of other things.
Although I started to use Blender less than a month ago, I can say I’m totally in love with it.
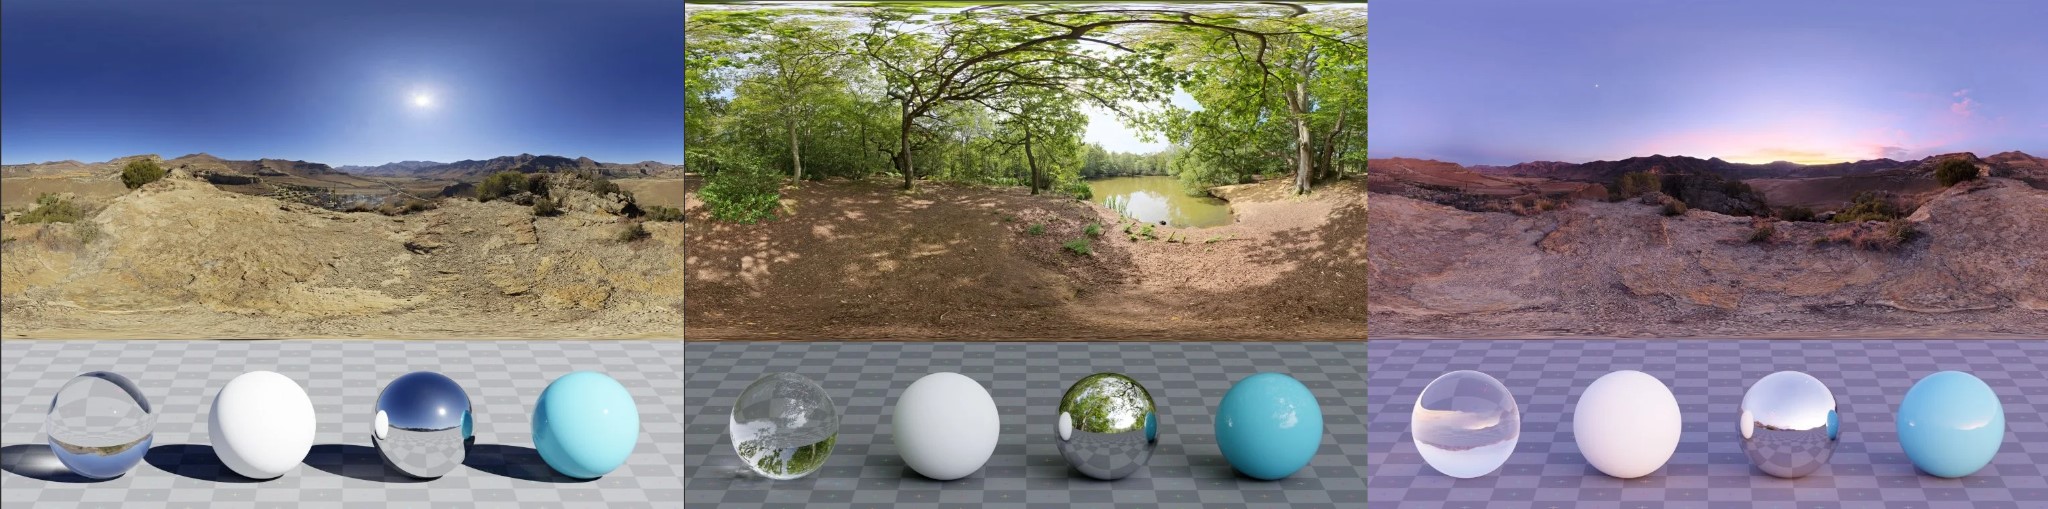
REFERENCES
Before I start any project, I always look for references. I don’t have trust in my terrible memory, so why not search for images, photos, videos and if possible, see in person what I want to model or create.
So, I created a reference panel on “PureRef”, which is the best software for that, and it’s free (if you can make some donation, do it.)

I tried to divide the references to collect: Background, Model, Light, Camera, Mood, etc.
BLOCKING
At this stage, the most important thing is to see if the image will have a good composition and what will appear or not, so as not to waste time modeling what will not be seen.

The time you will spend in this process will save you a lot in the future.
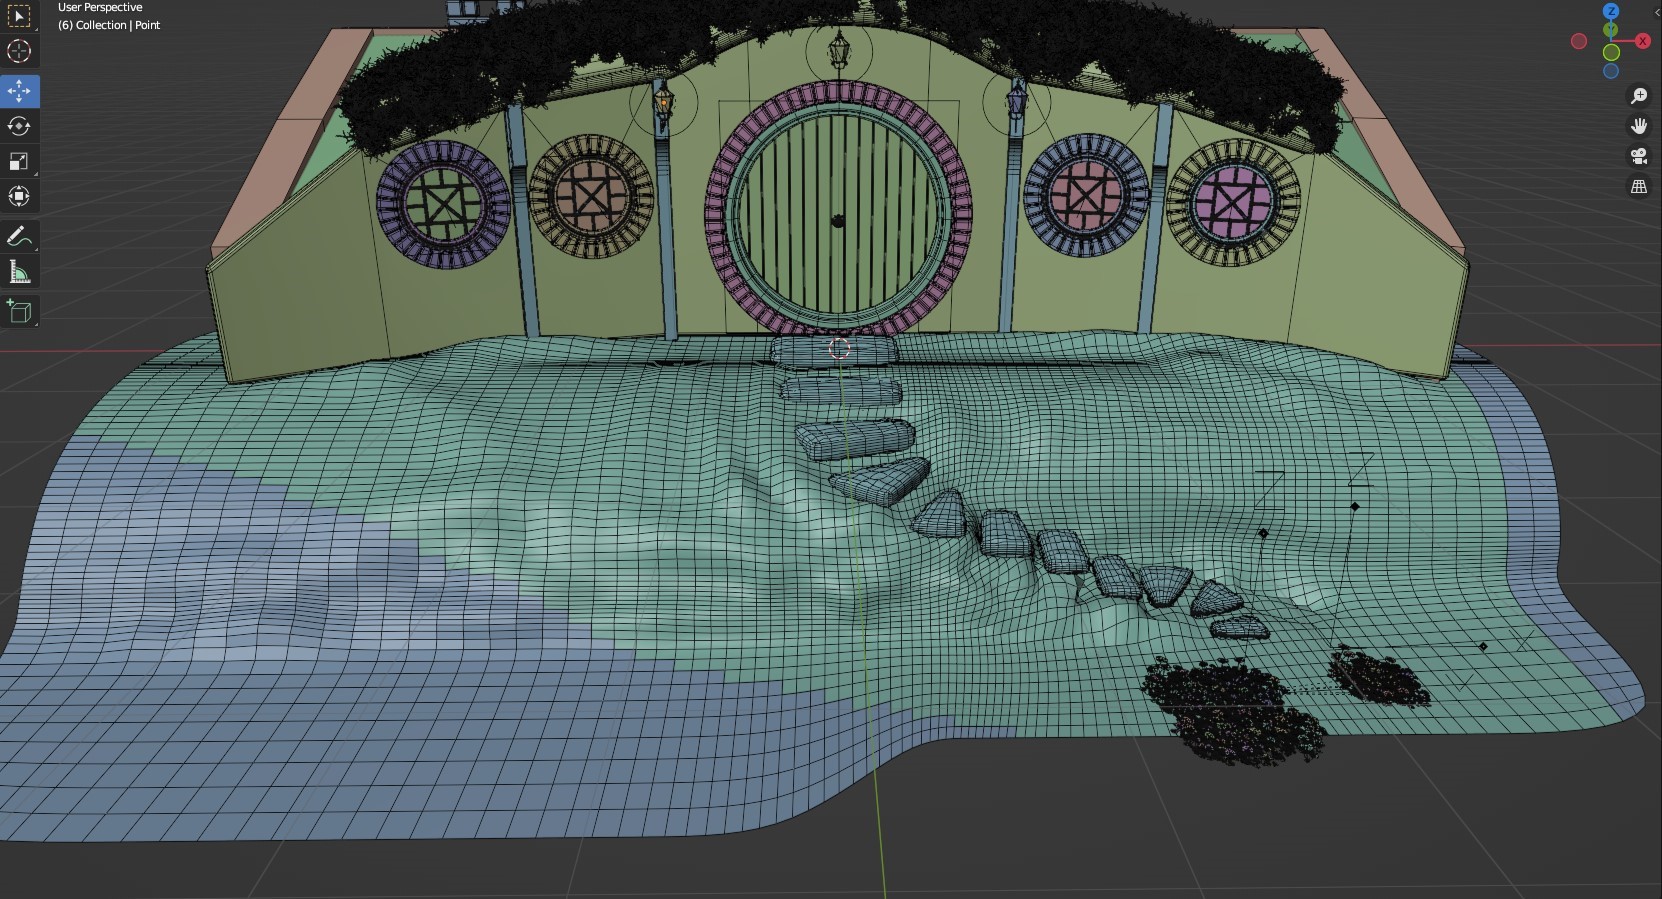
MODELING
Now is the time to model just what we will see.
I started the floor as a simple plane, subdivided it and modified it to make the slope up to the door.
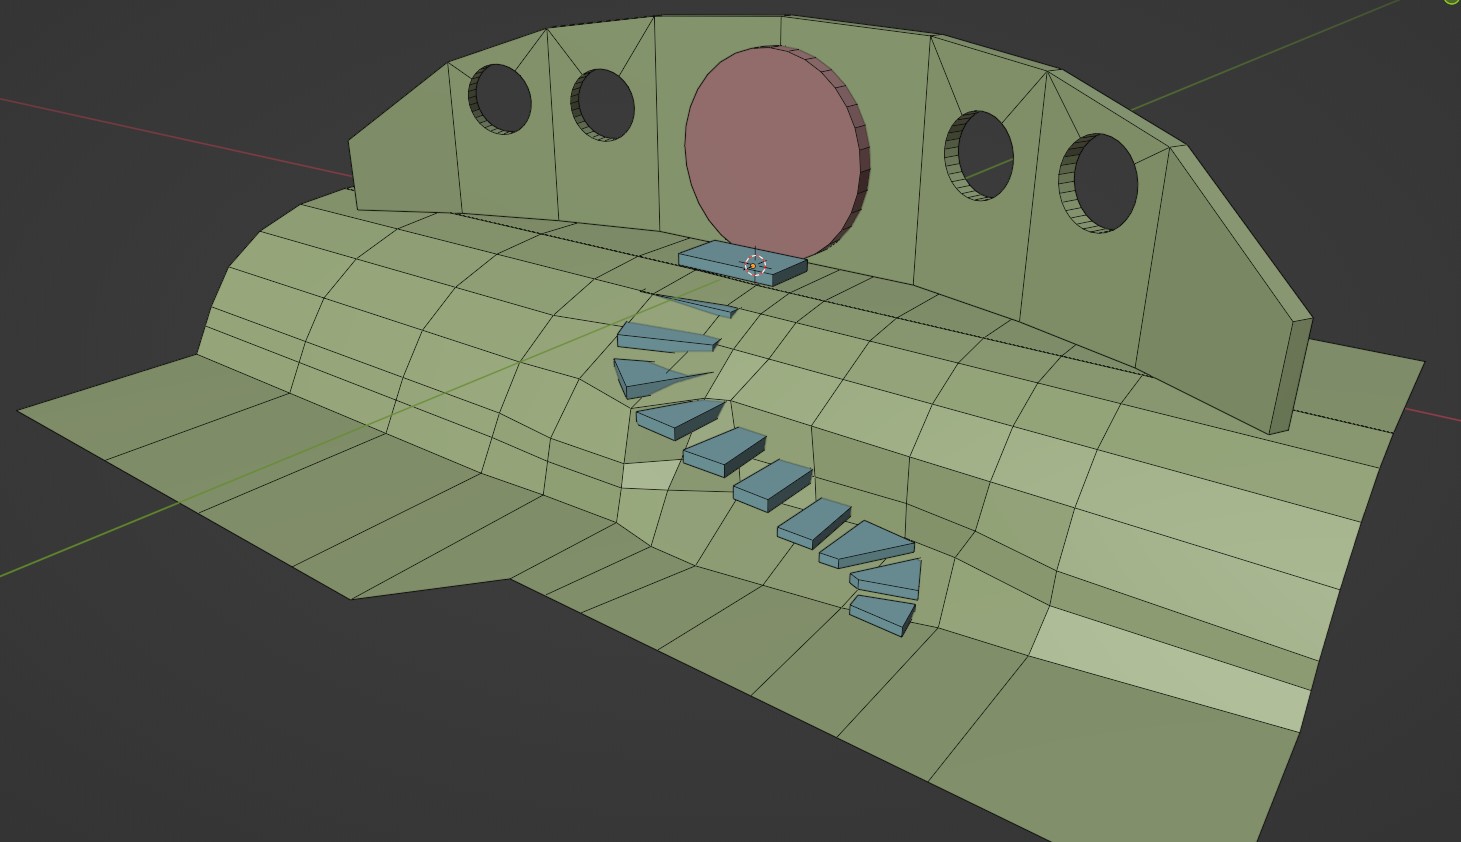
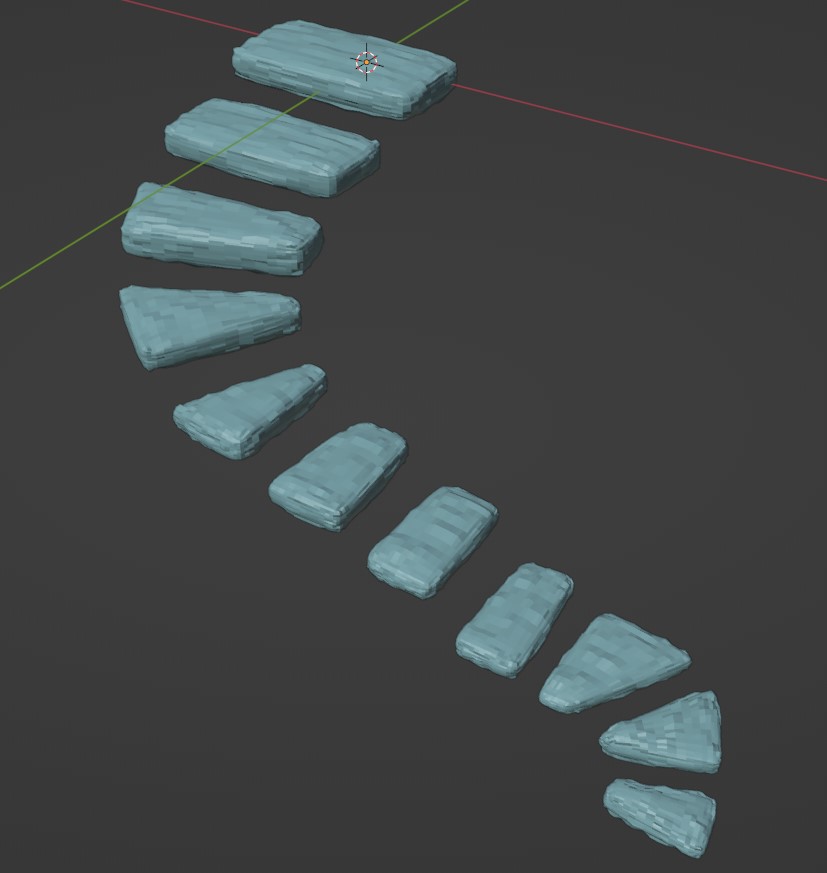
After that, I sculpted it to fit the steps, and then applied a Subdivision modifier.
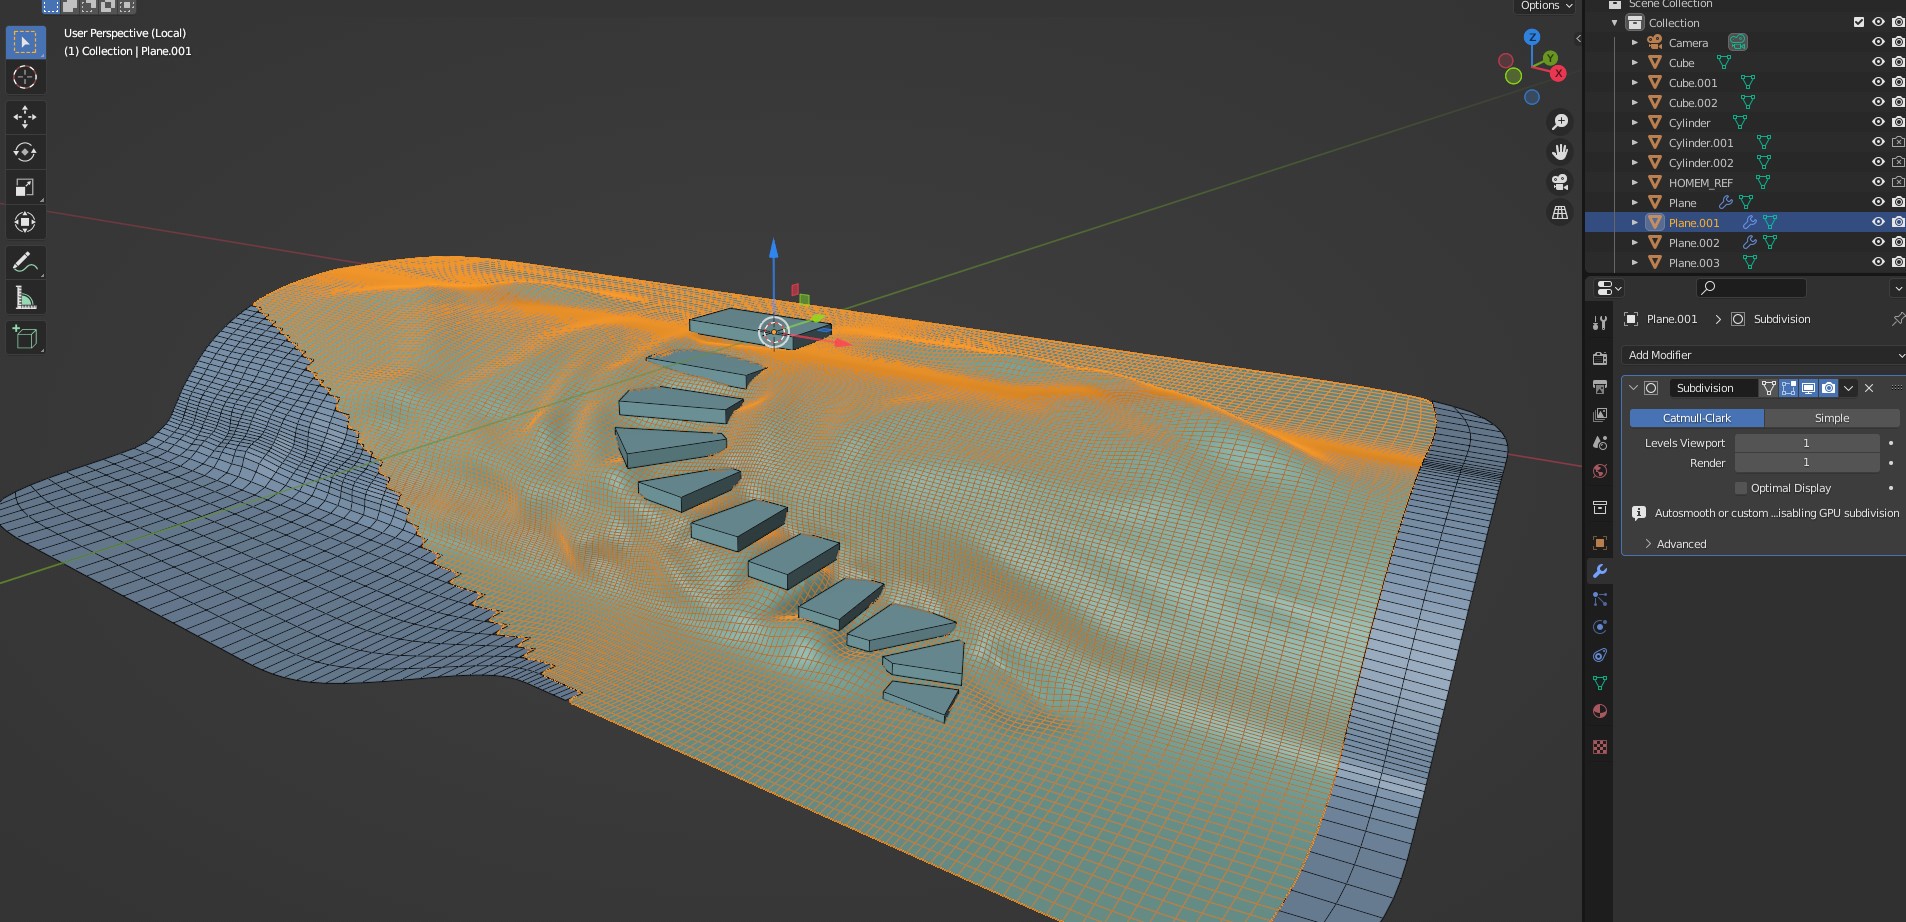
After I blocked the steps, I sculpted it and applied a stone material with displacement (I’ll tell more about it further).

The wall was extremely simple. I created a plane, modified it, applied a Mirror modifier, then Solidified, and used the “Bool Tool” addon to crop the windows by just pressing CTRL + SHIFT + “-”. After all that, I applied a Bevel modifier to chamfer the edges.
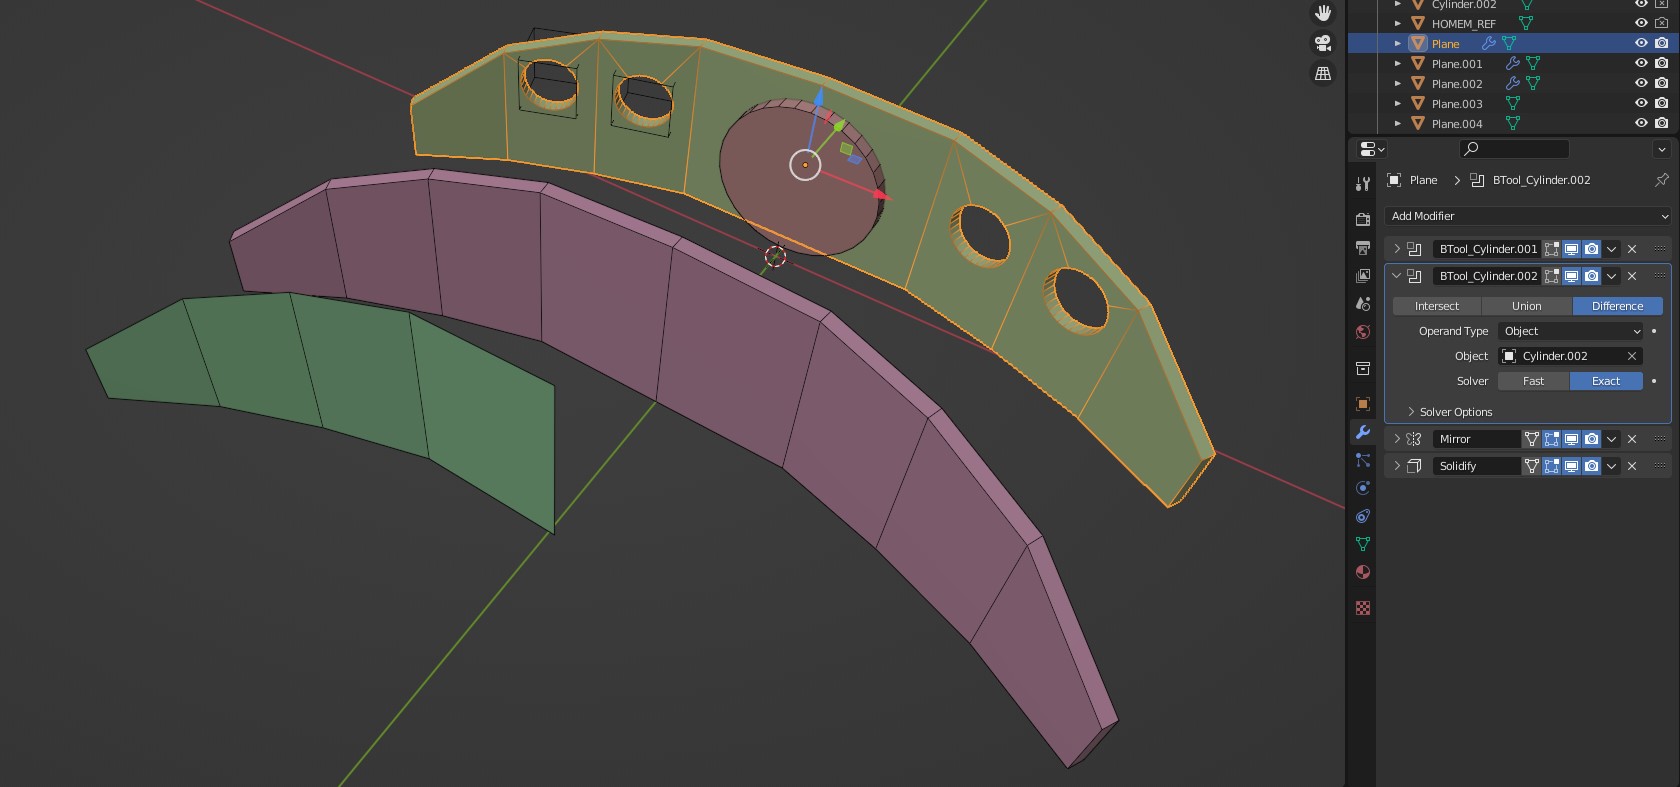
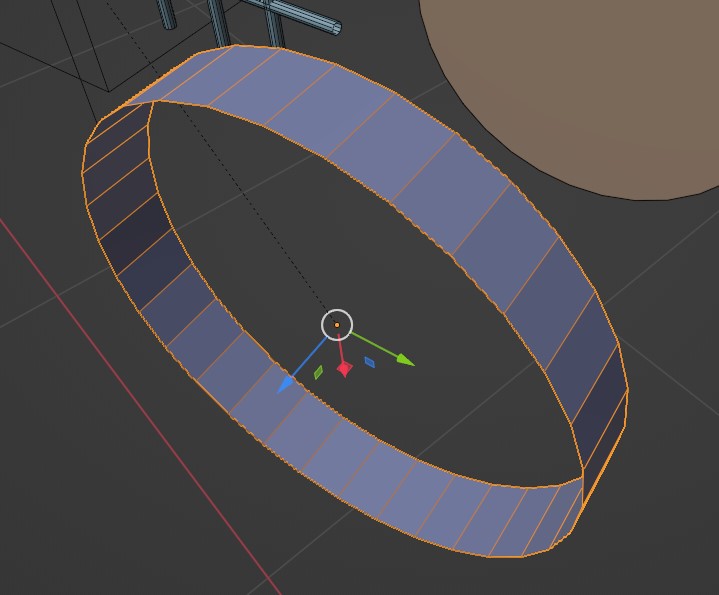
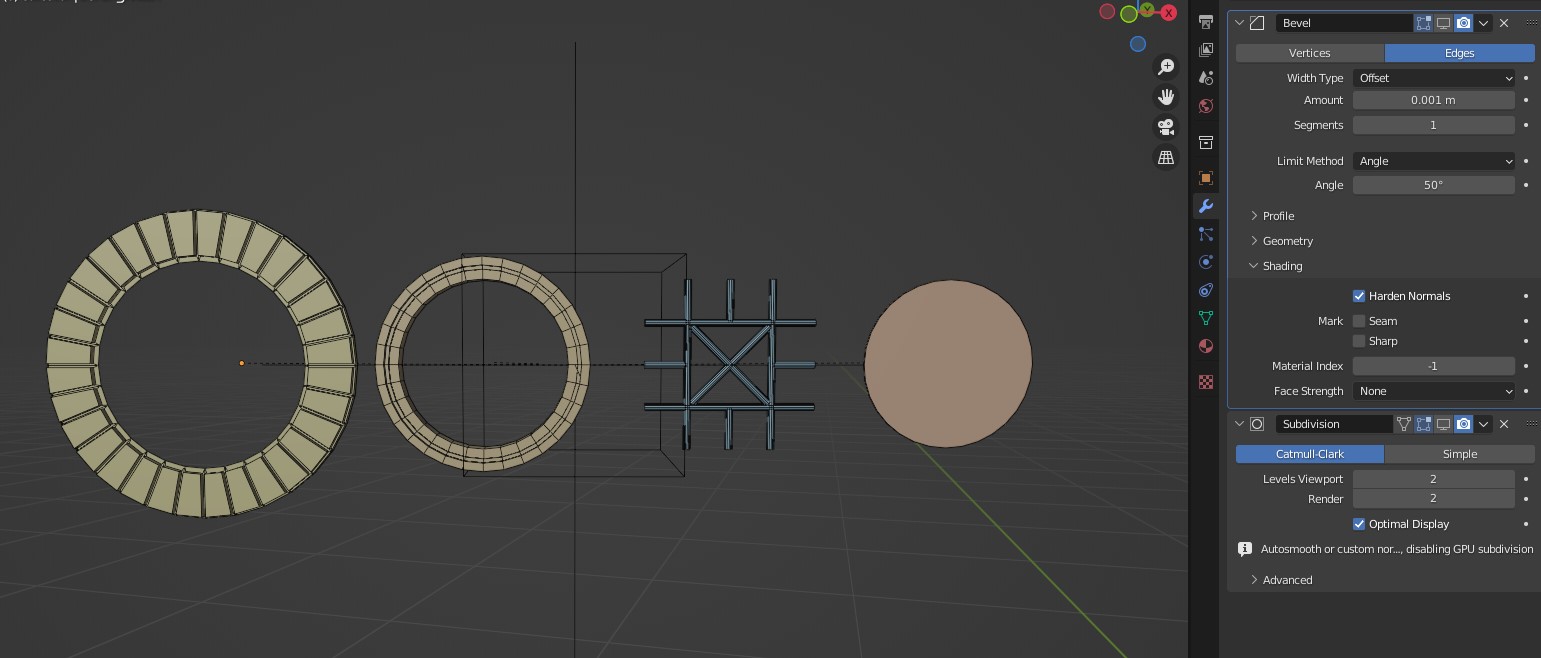
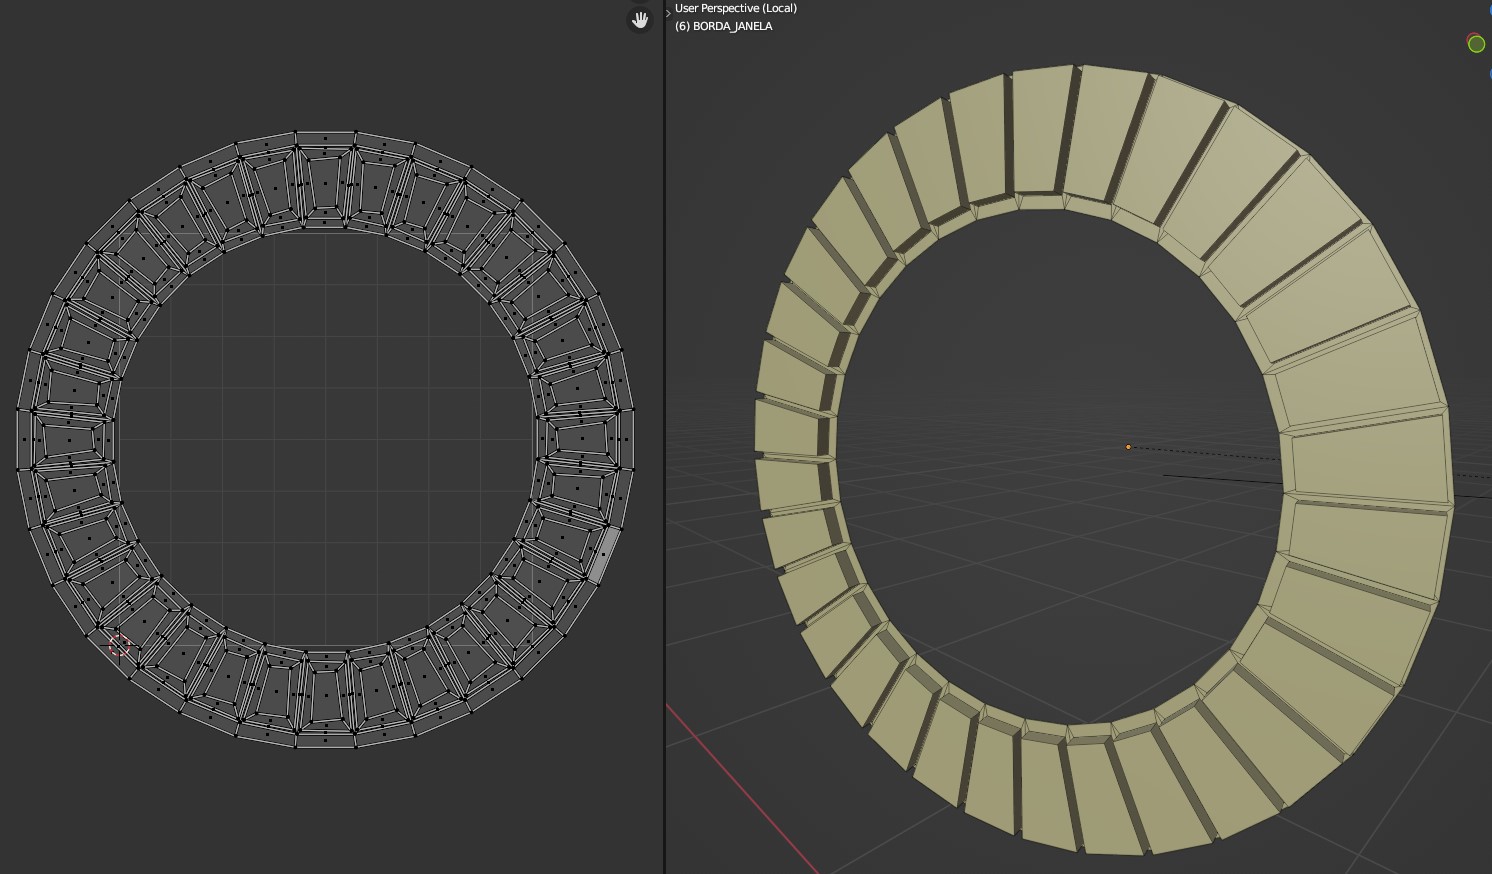
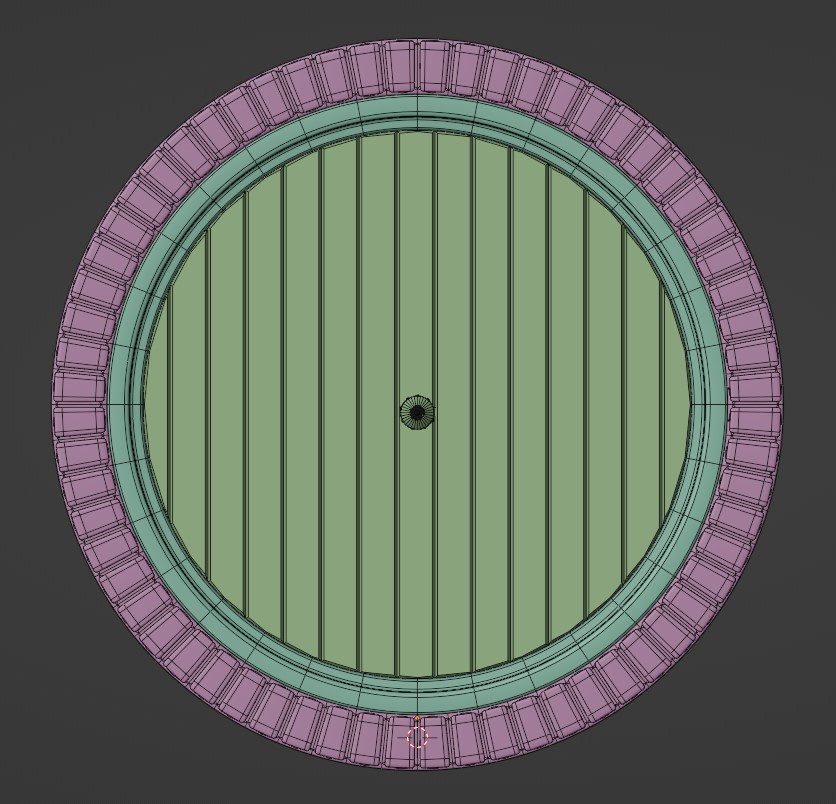
Now, it was time to model the windows. I used the cylinder that I made Boolean to create the windows (If you will use the same object, just remember to enable it to render and show in the viewport).
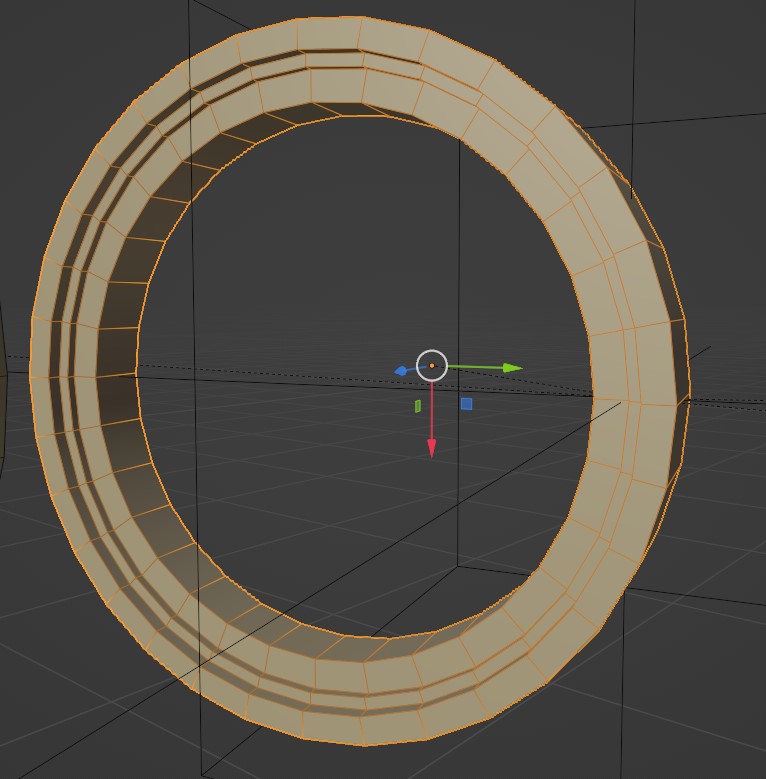
Using Extrude and Insert, I modeled and unwrapped the window. I always apply Bevel and Subdivision modifiers.
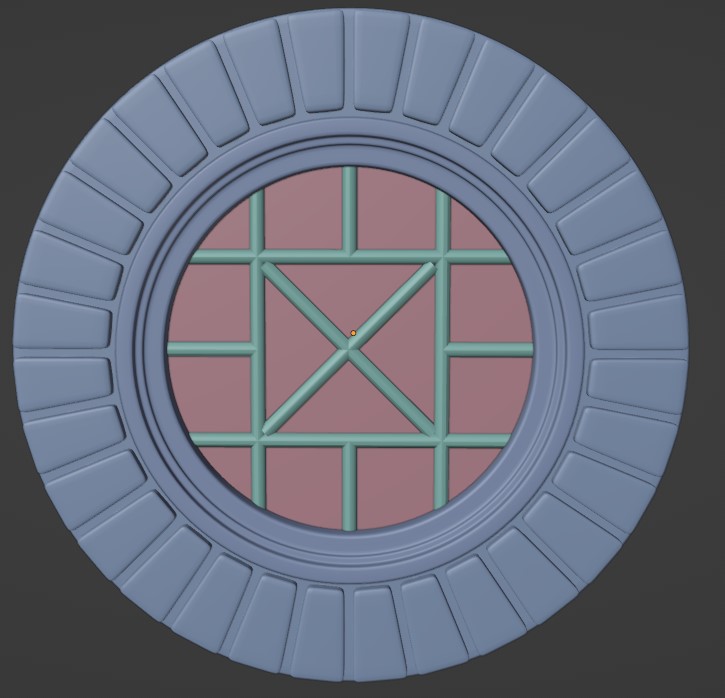
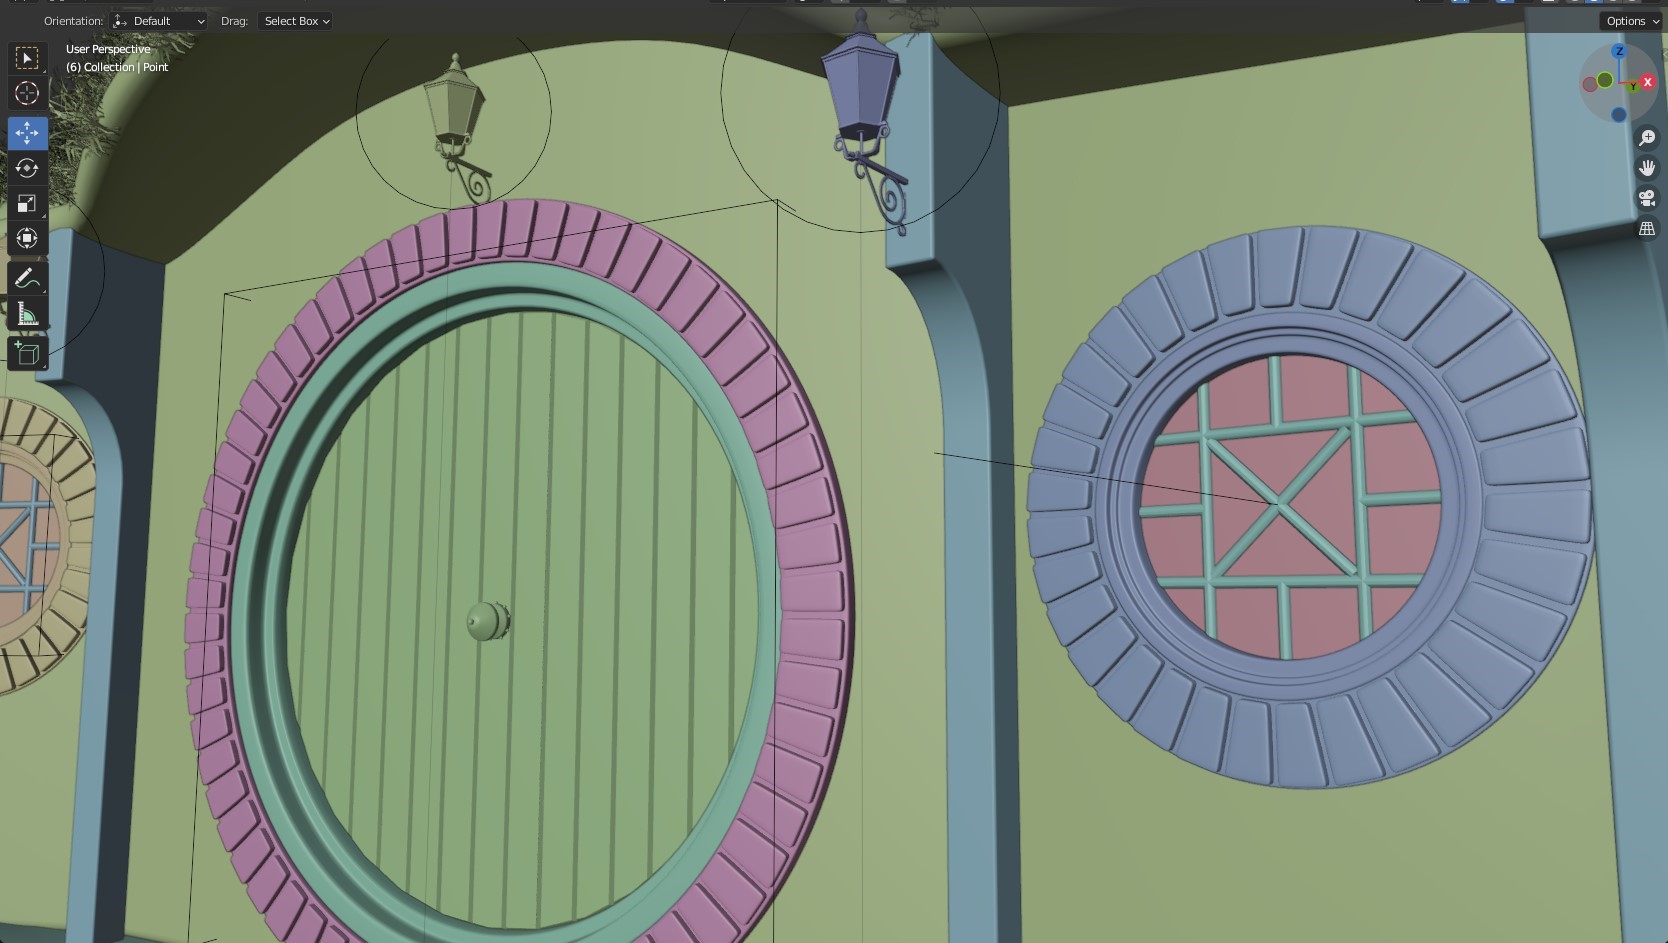
For the door, I repeated the same process. Later, I modeled the rest of the decorations on the house like lamps, wood carvings etc.
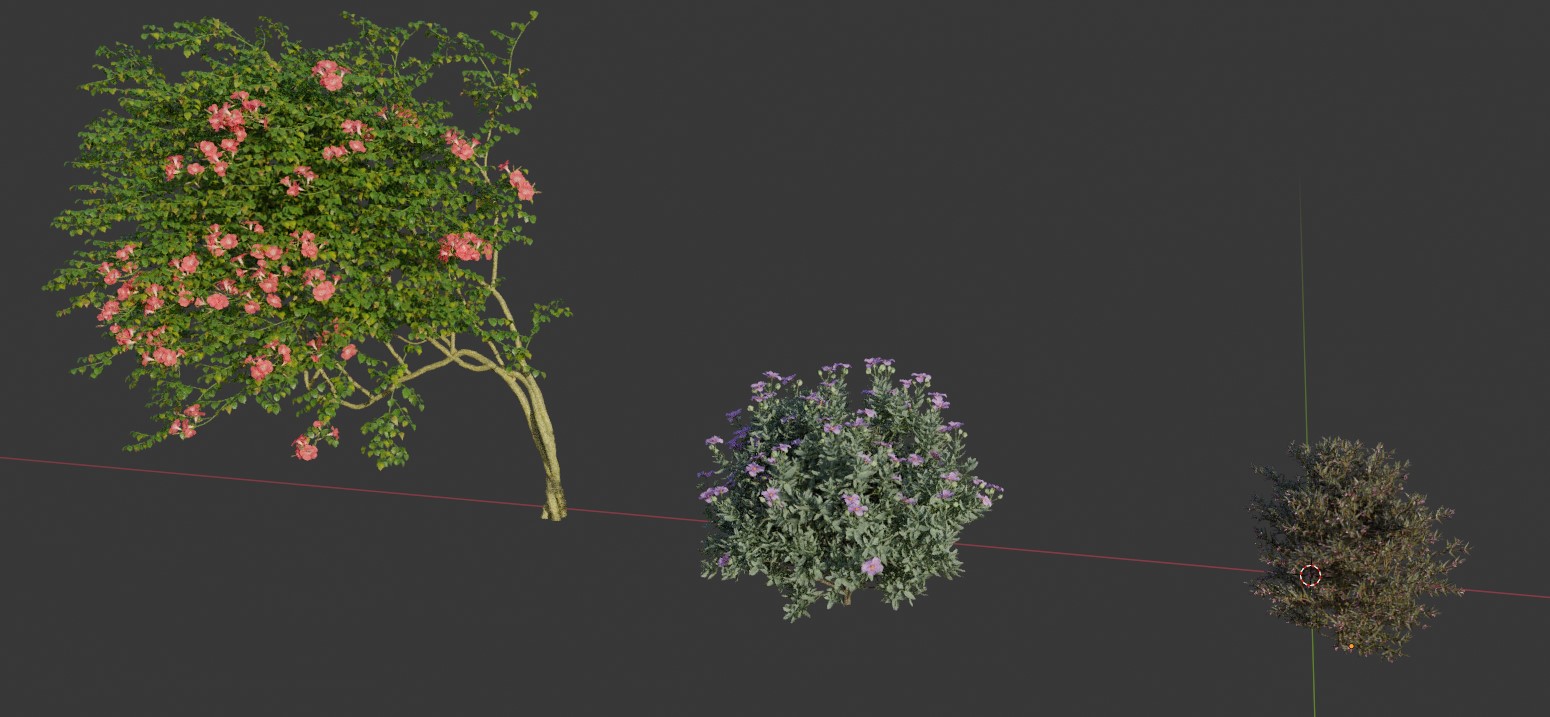
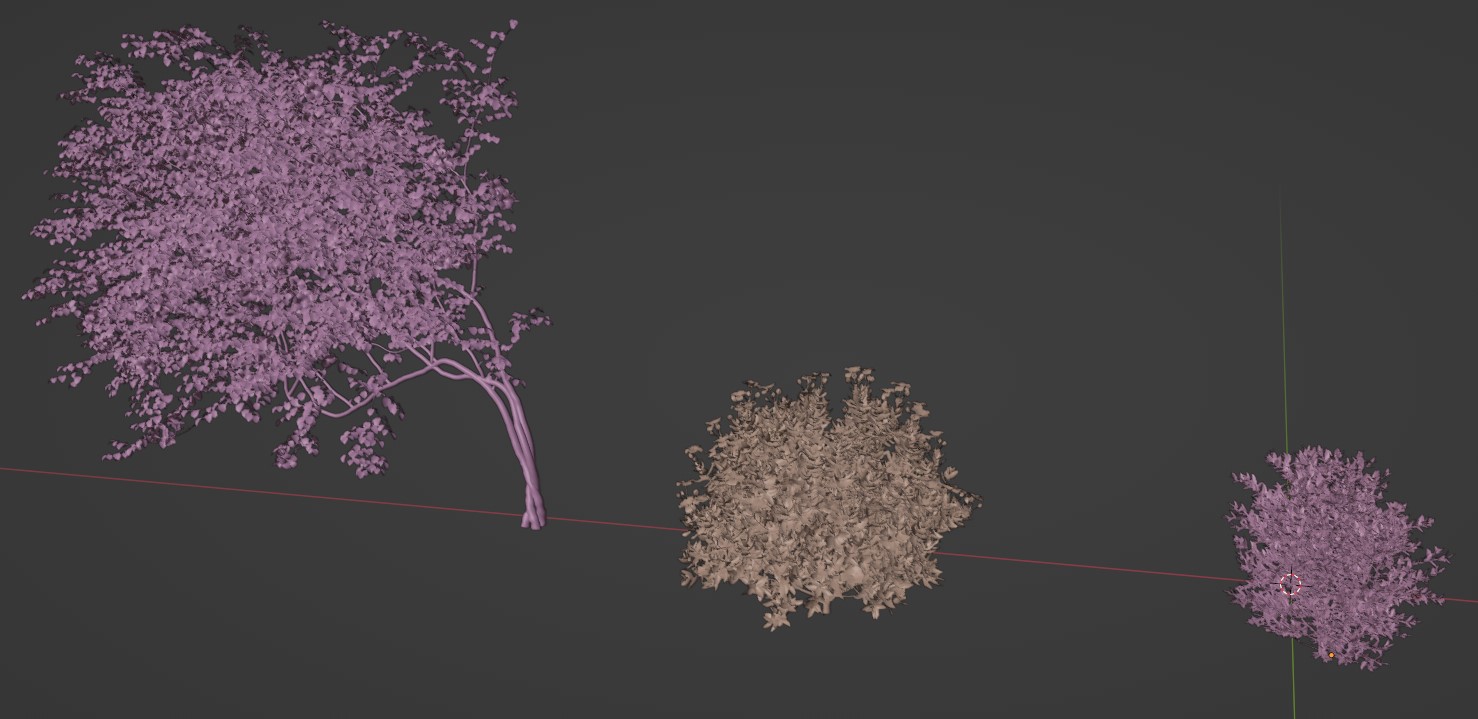
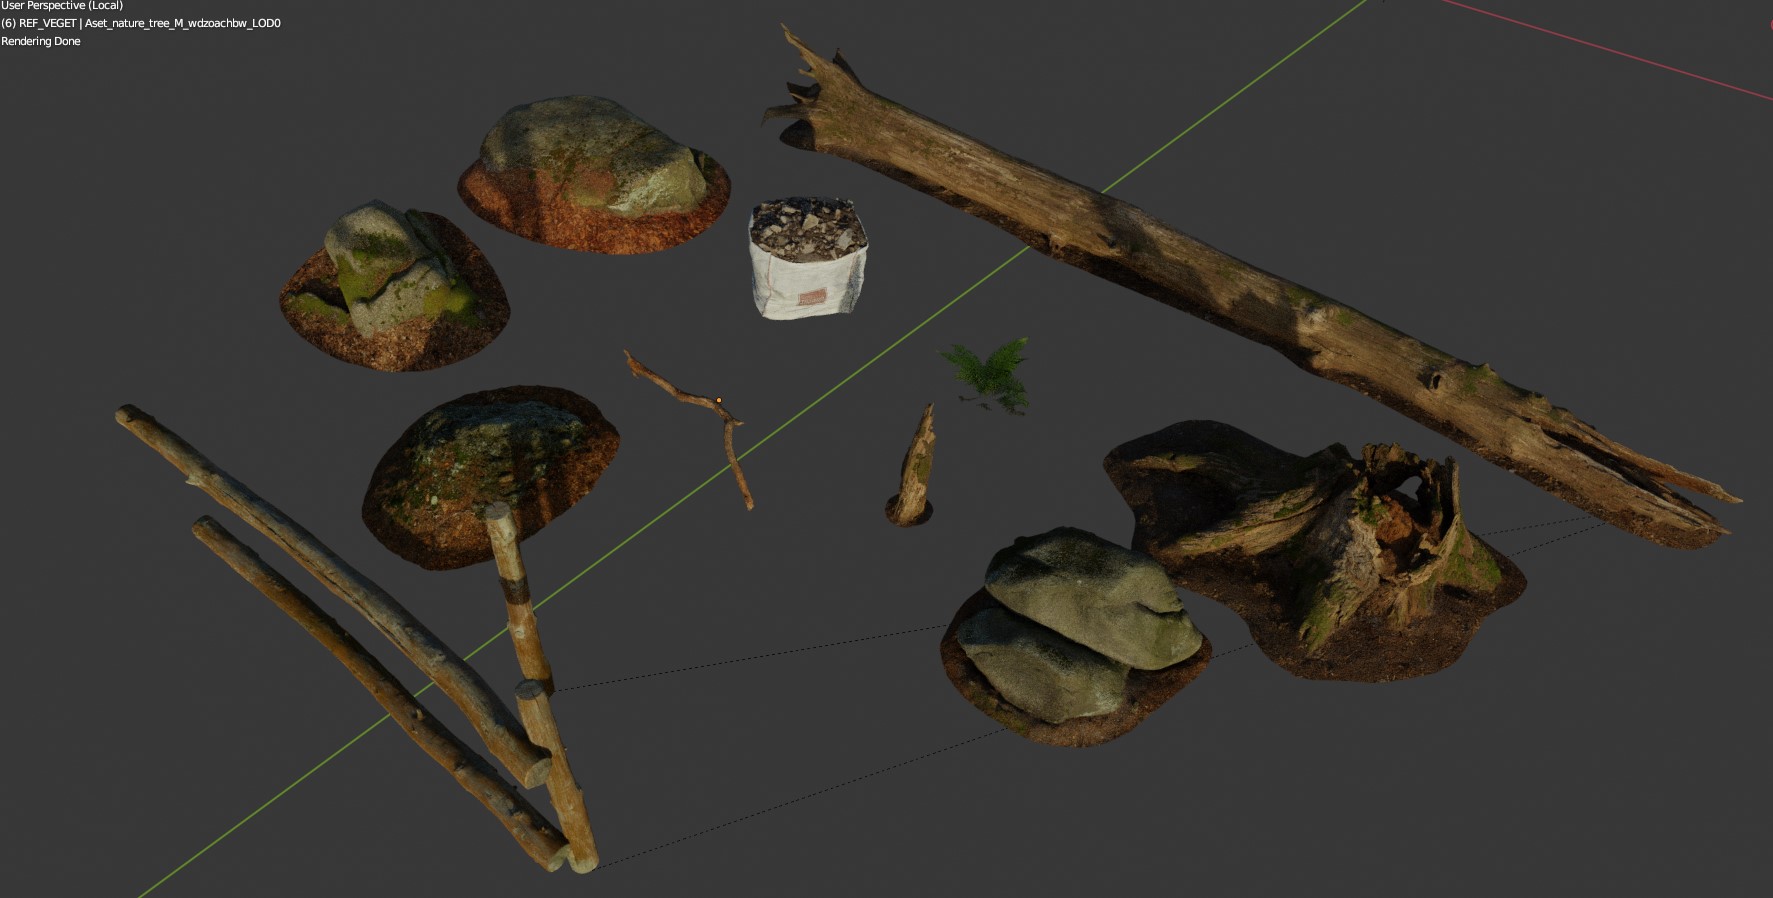
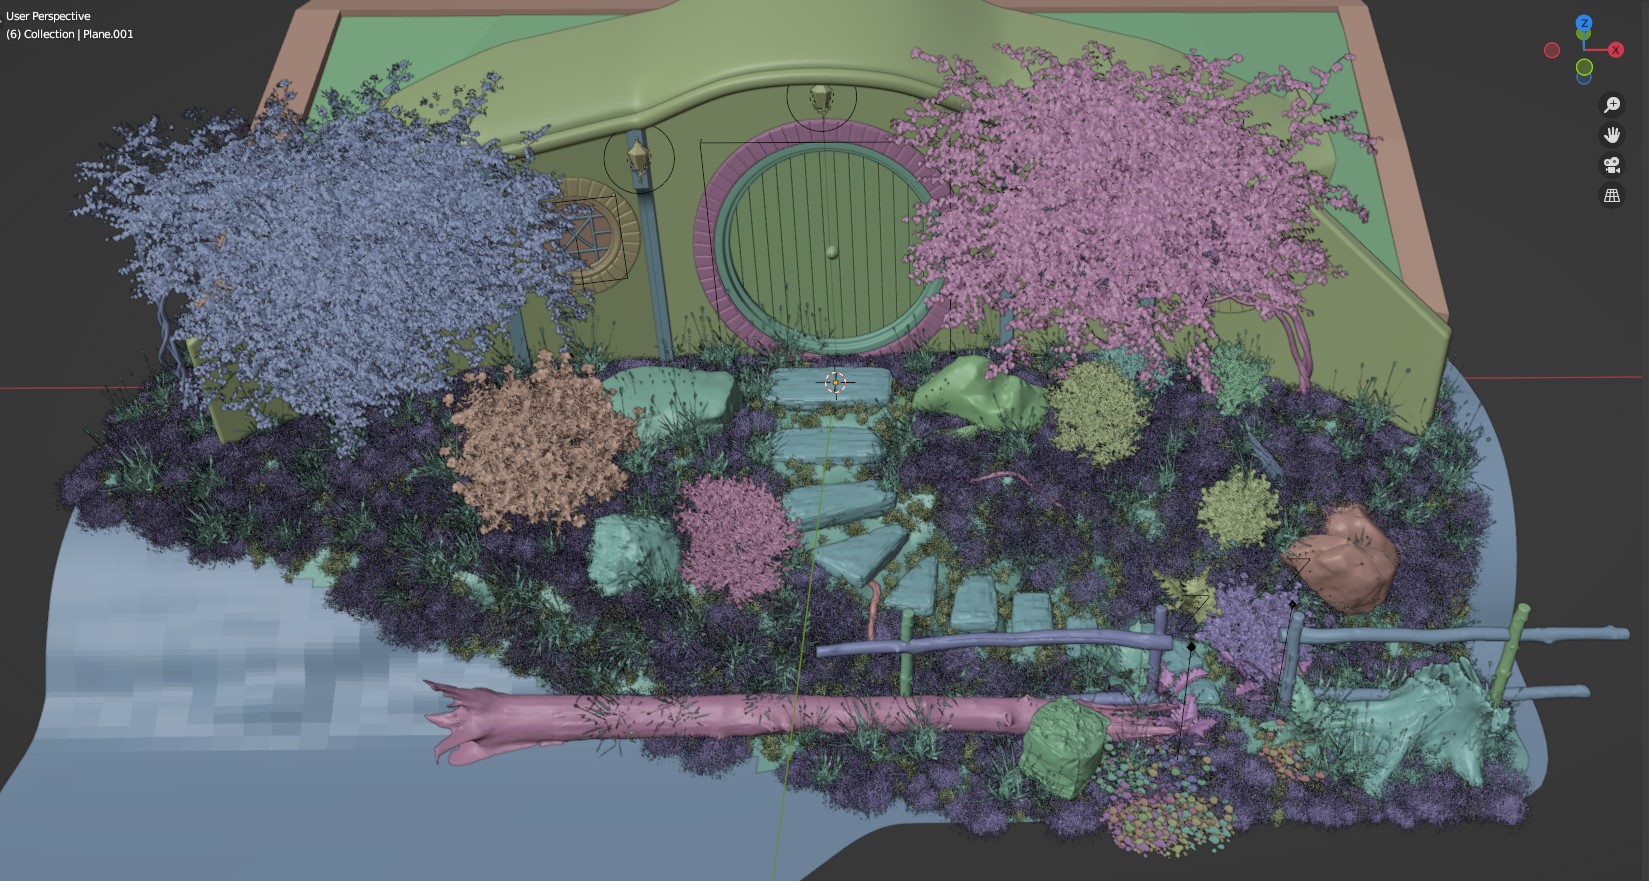
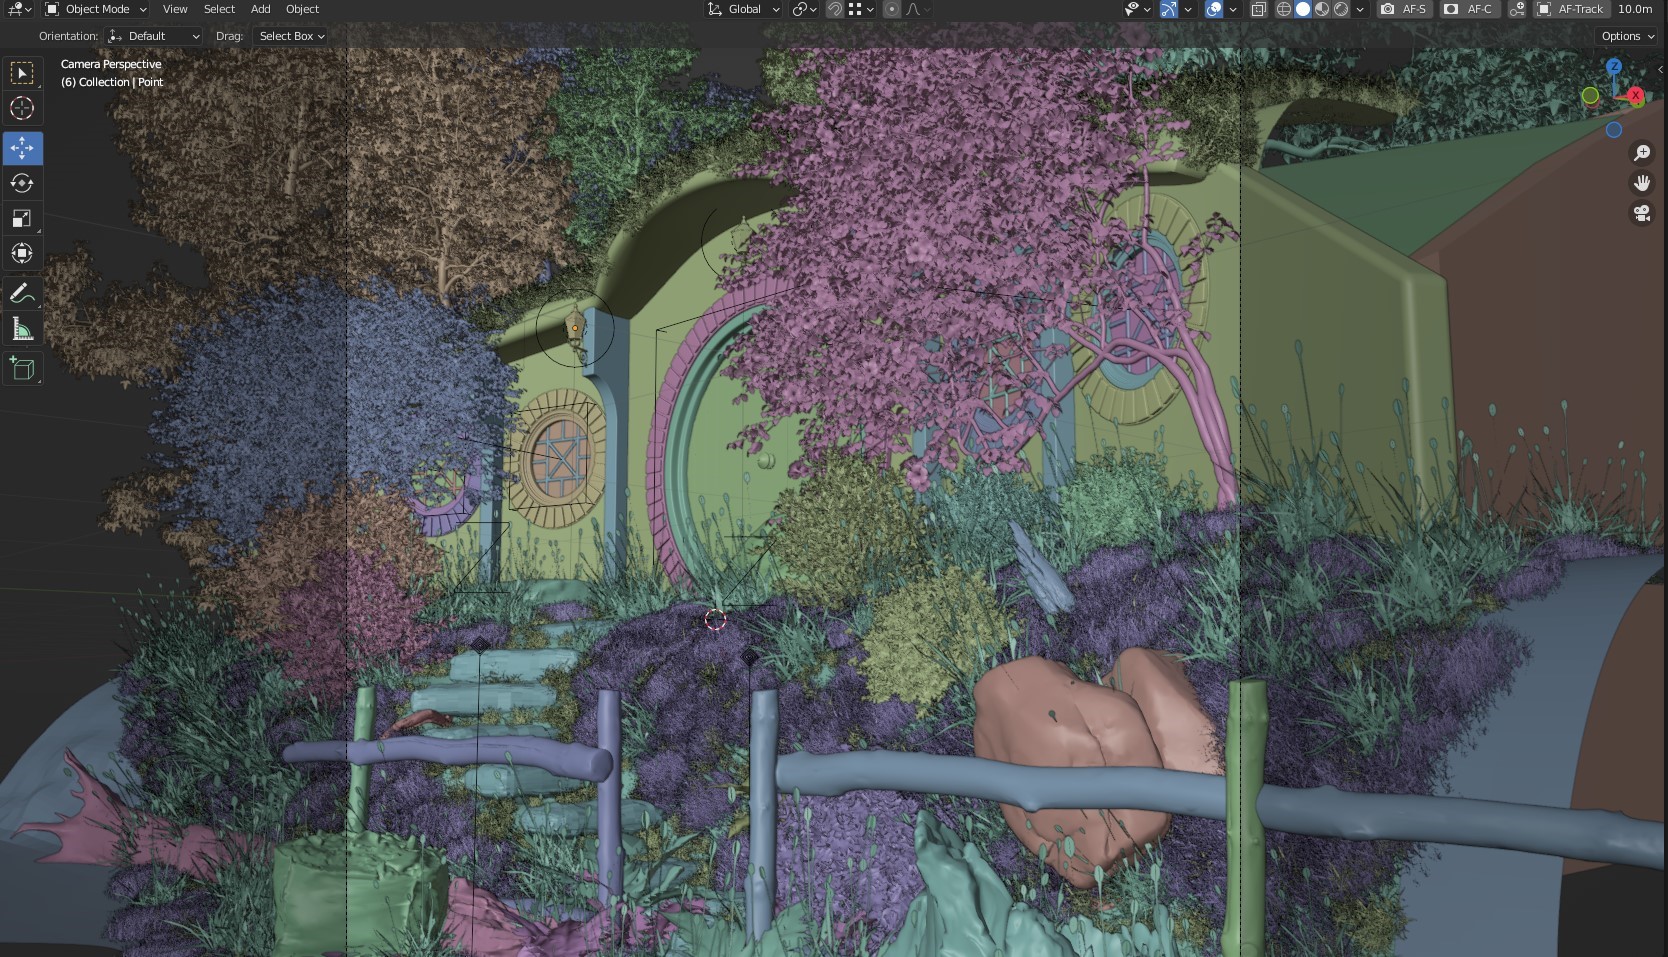
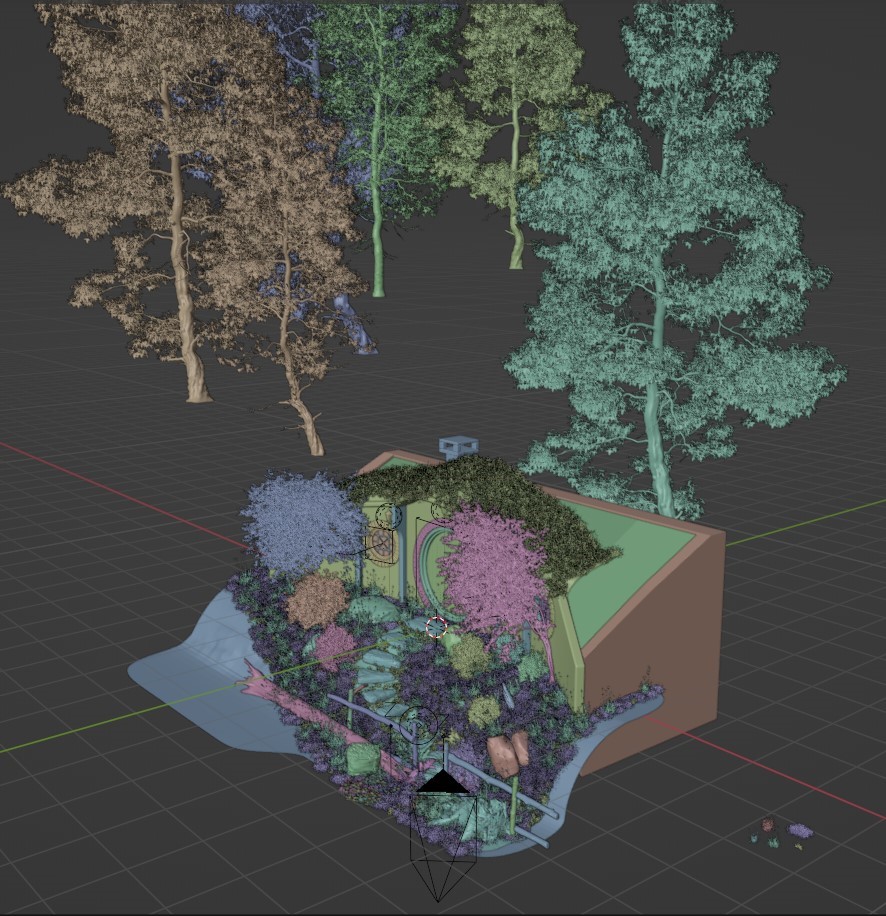
SCATTERING
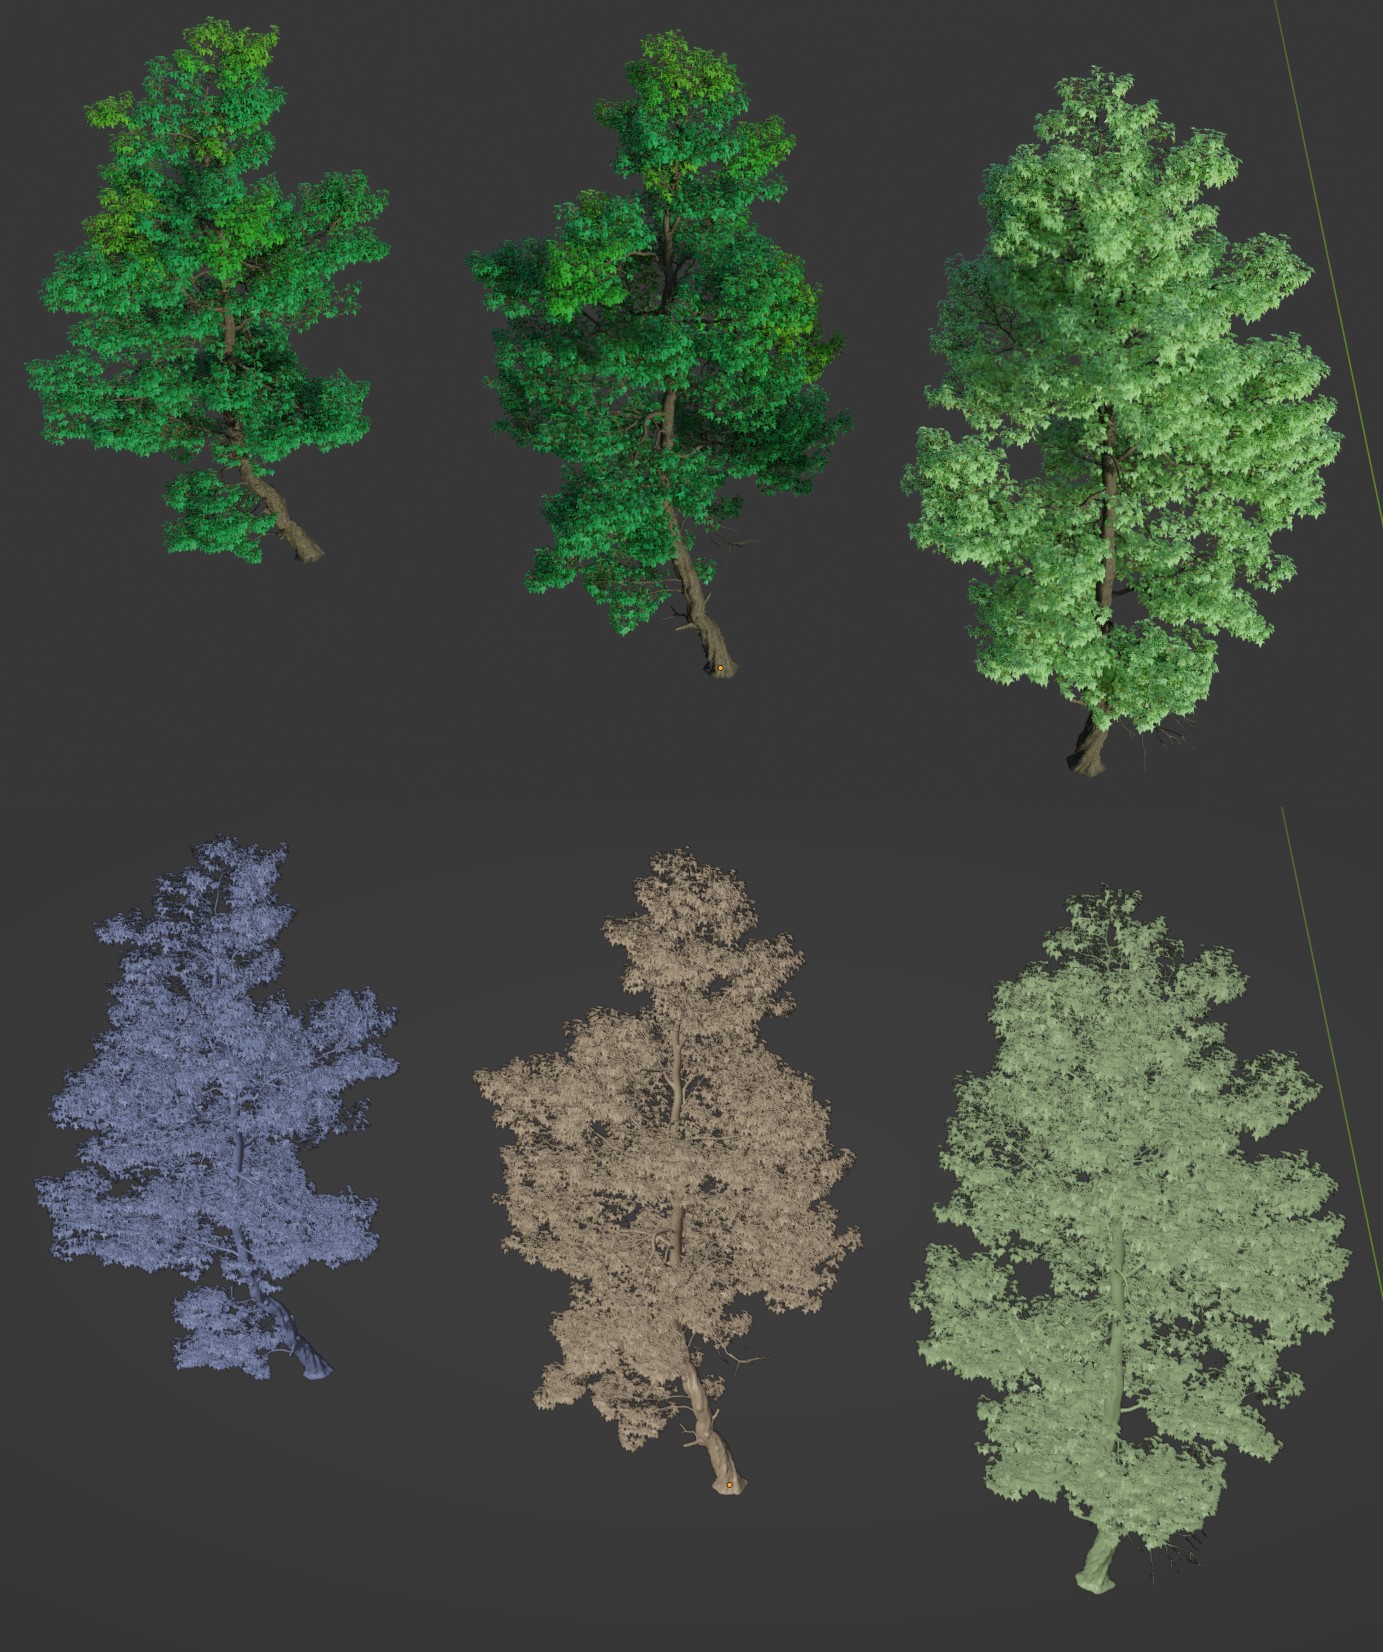
For the large objects and vegetation that I would spread around the scene, I used Bridge and MaxTree (free version for Blender).
I love using Bridge so much, because it’s free and there are a lot of excellent assets and materials that you can just drop in Blender, really easy, ready-to-use and of great quality.
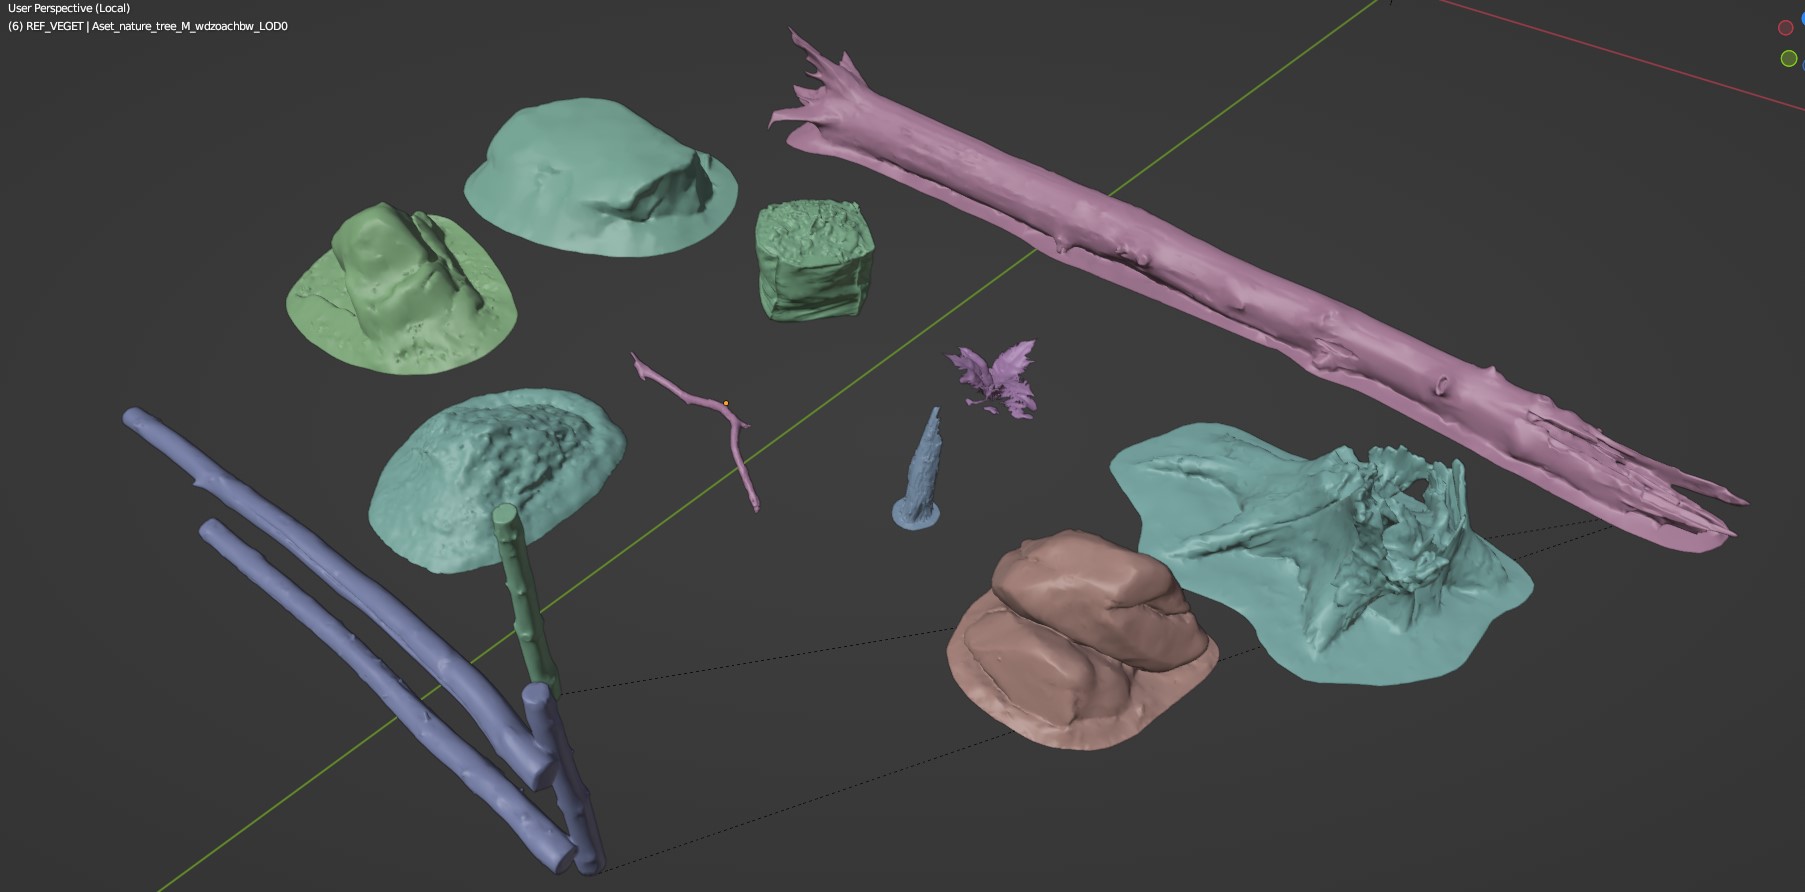
As the trees are yellow and orange, I changed the base color using the HUE Saturation shader.
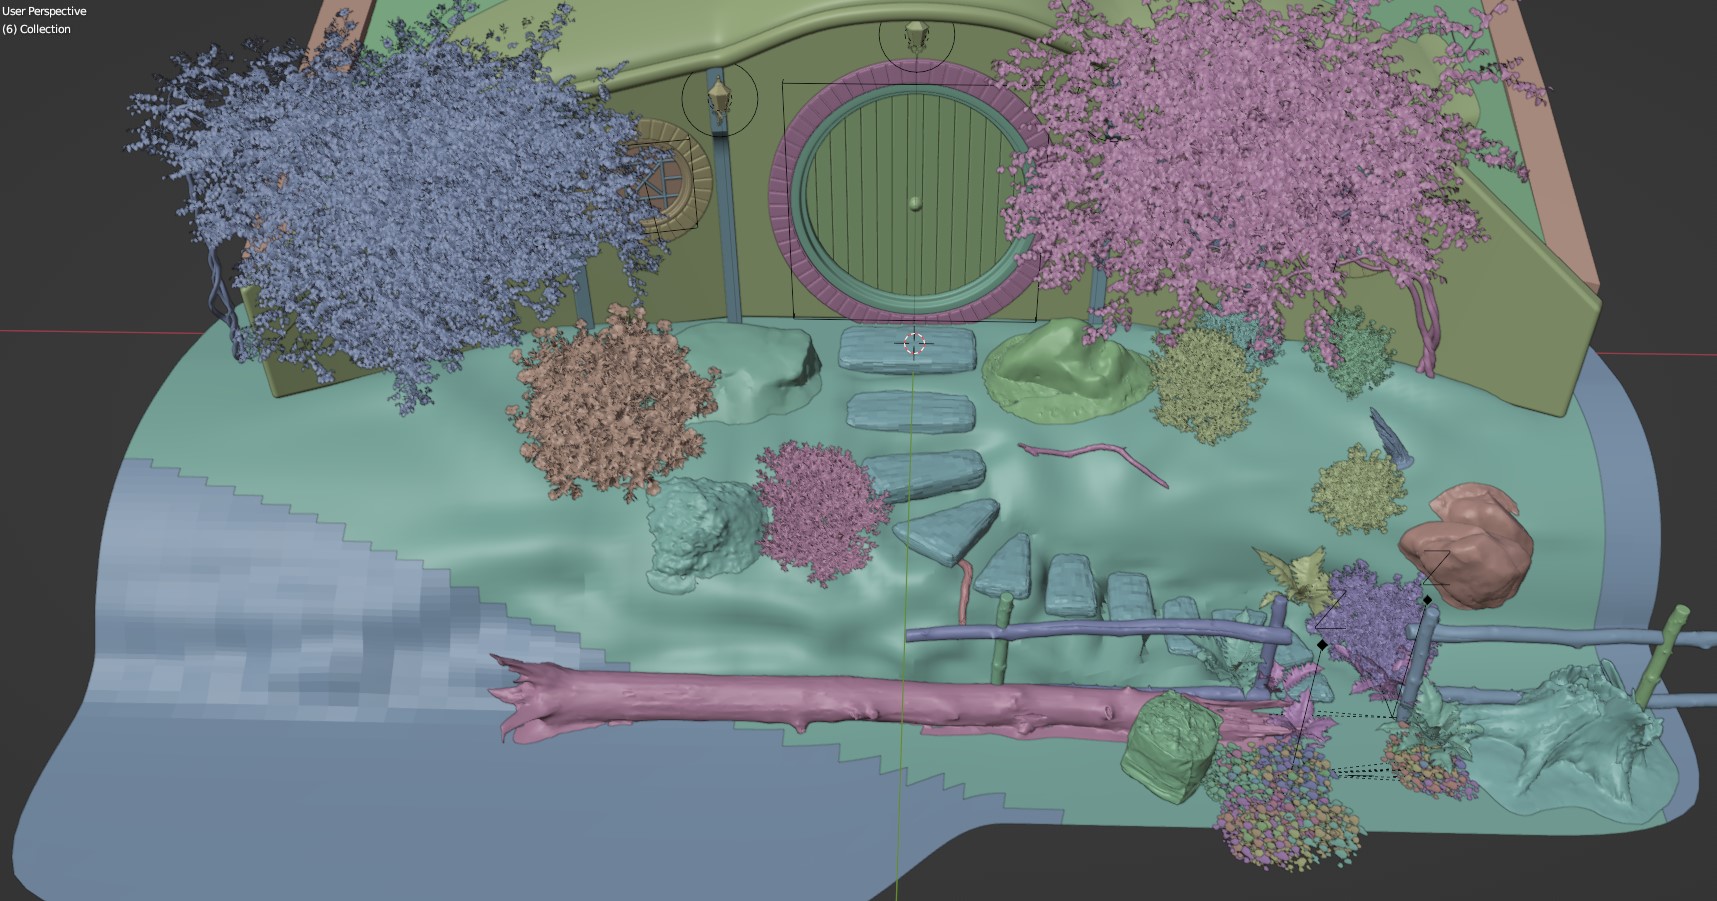
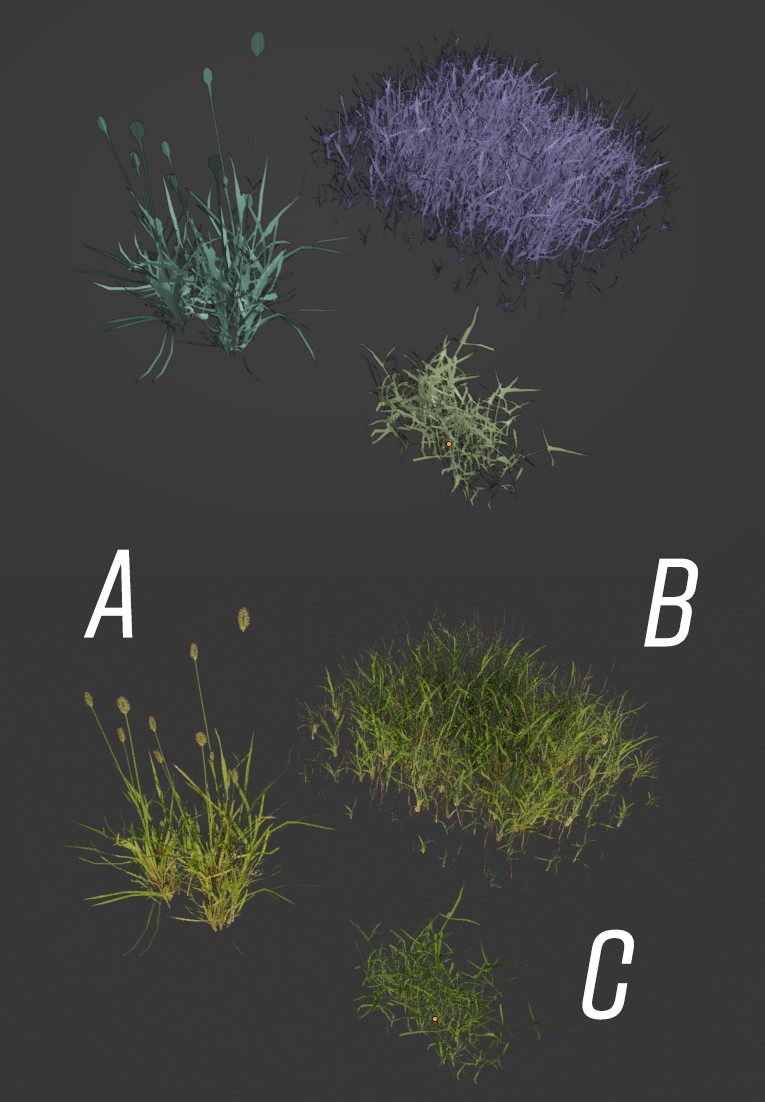
For the grass, I used MaxTree models and to scatter them, I used BagaPie add-on, which is also free.
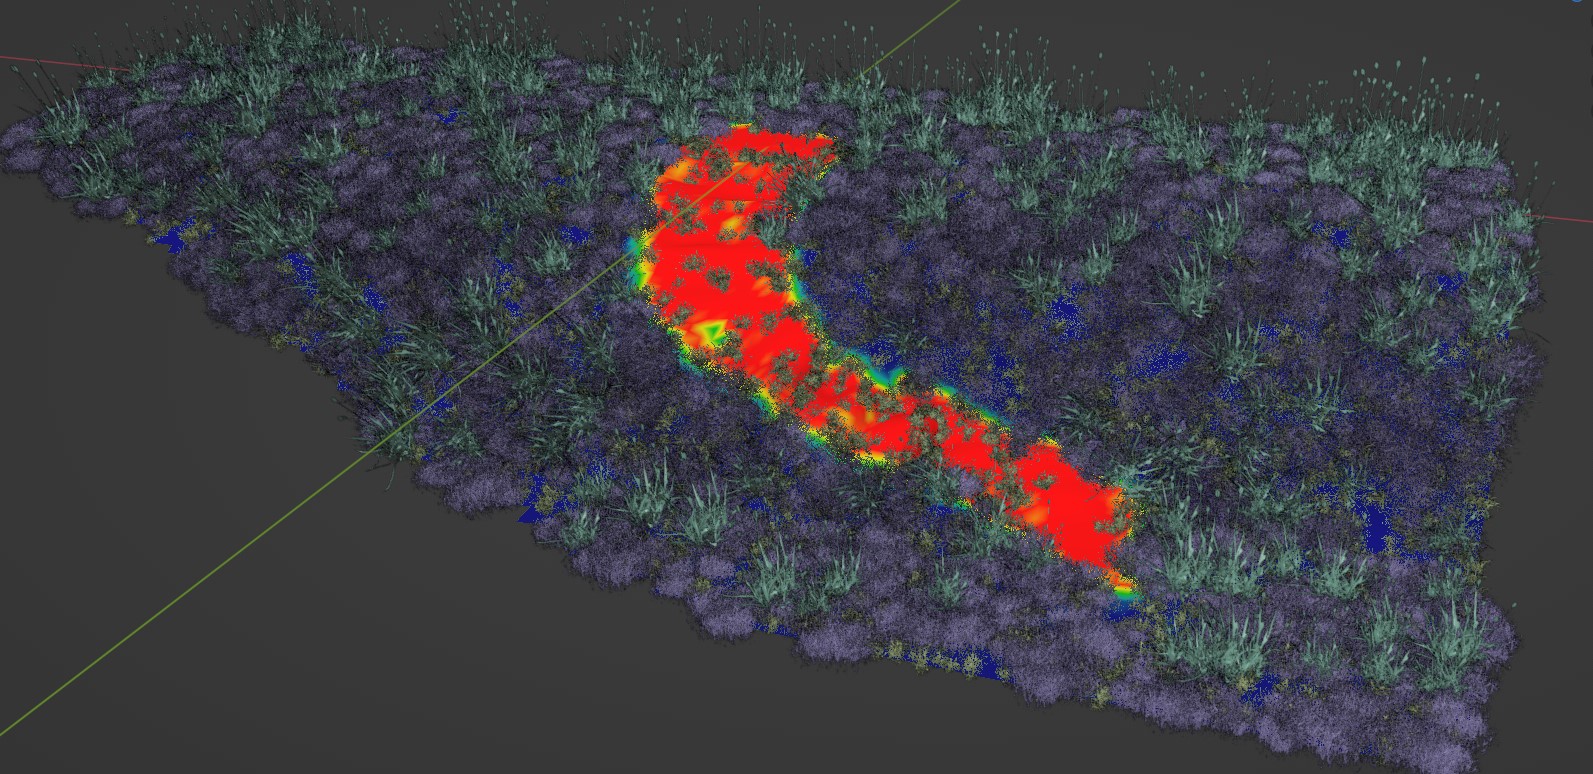

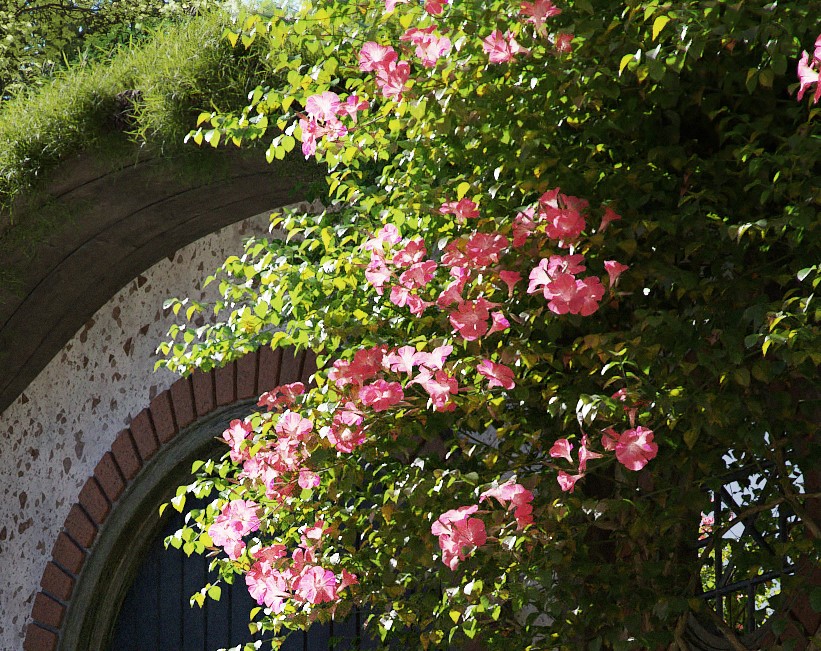
Here is how the scattered foliage looked like in the end.
MATERIAL
I confess, that I almost didn’t spend time on the material. For most of the assets that I used, I kept the material that comes with the model. For the assets that I modeled, I used the Extreme Pbr Nexus add-on, which was the only paid add-on I used.
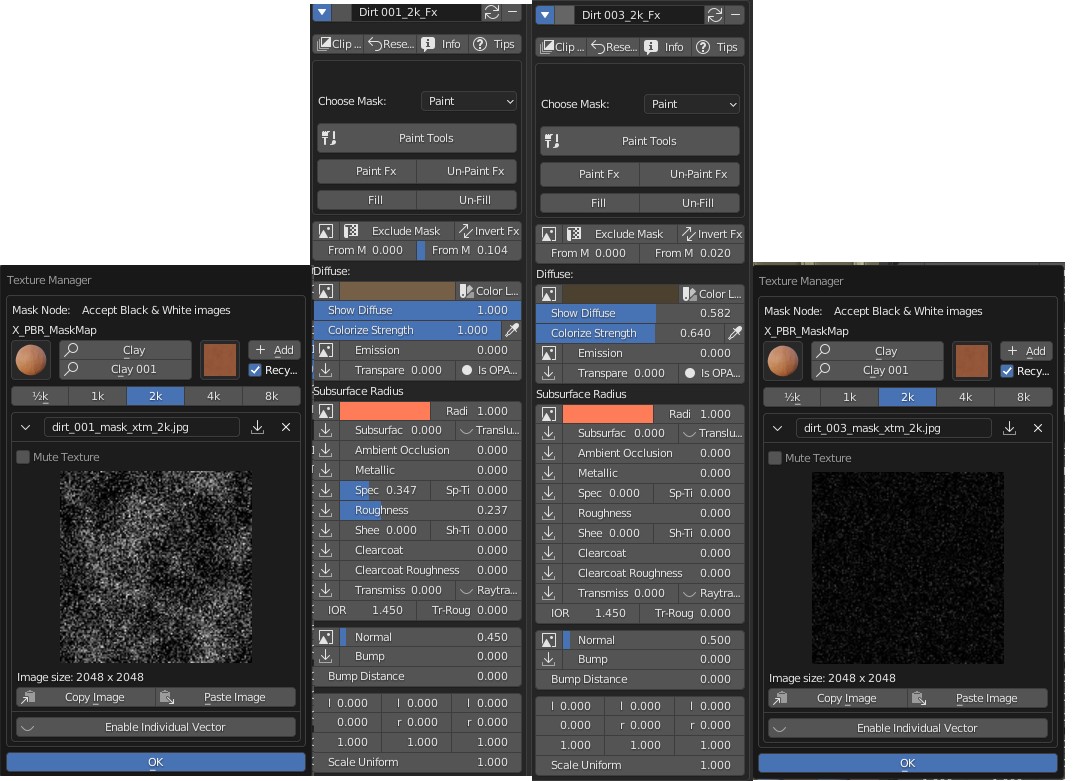
I modified the brick material from the windows a little bit. I added two FX layers, to make it dirtier.
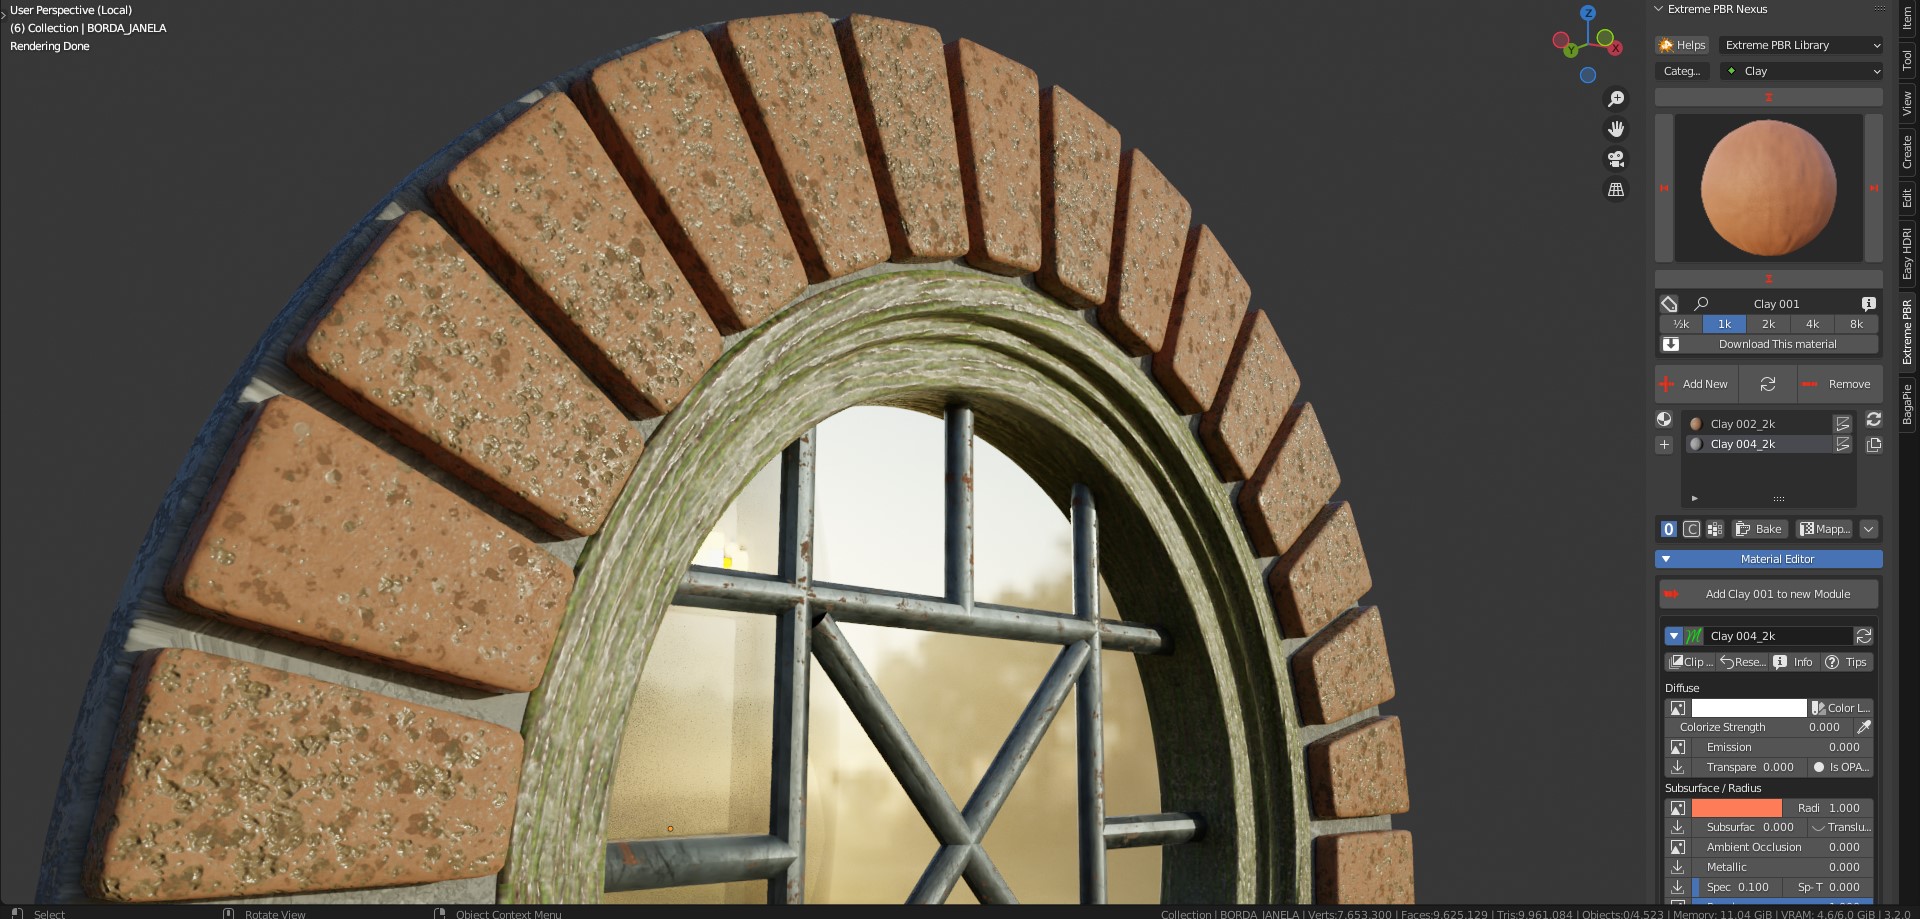
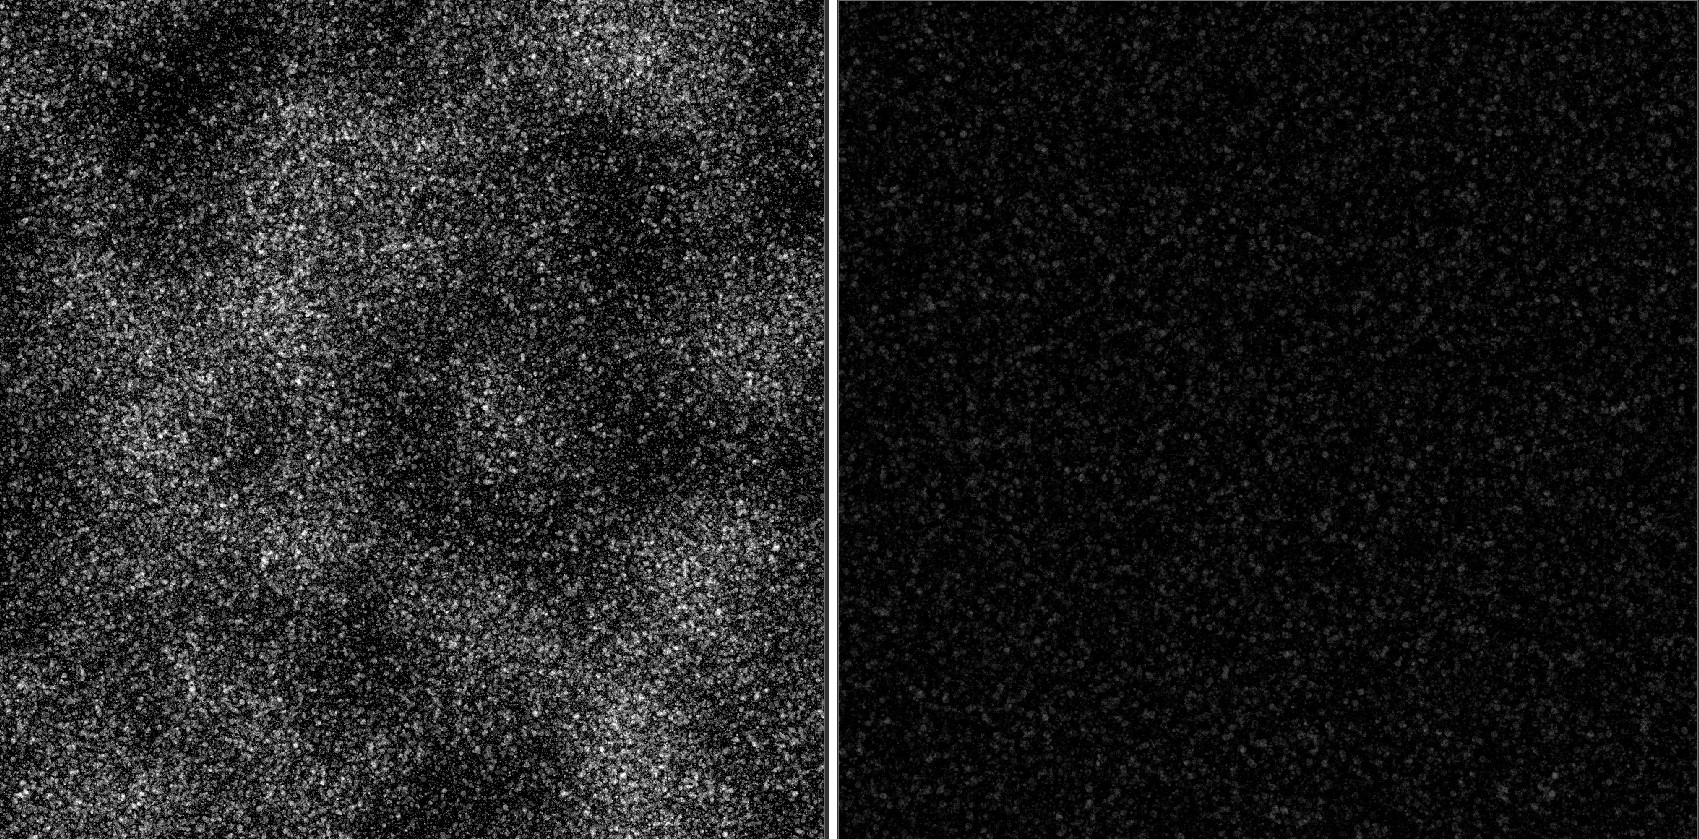
I added two FX layers, to make it dirtier.
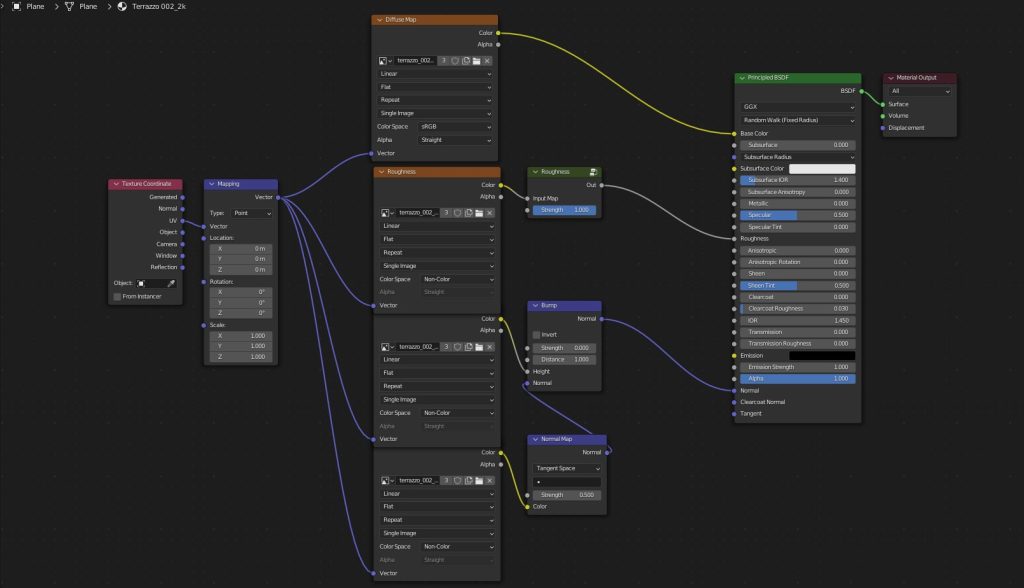
For the door and the wall, I used the standard material from the Extreme PBR (Terrazzo, Black Paint Wood and Metal Rusty).
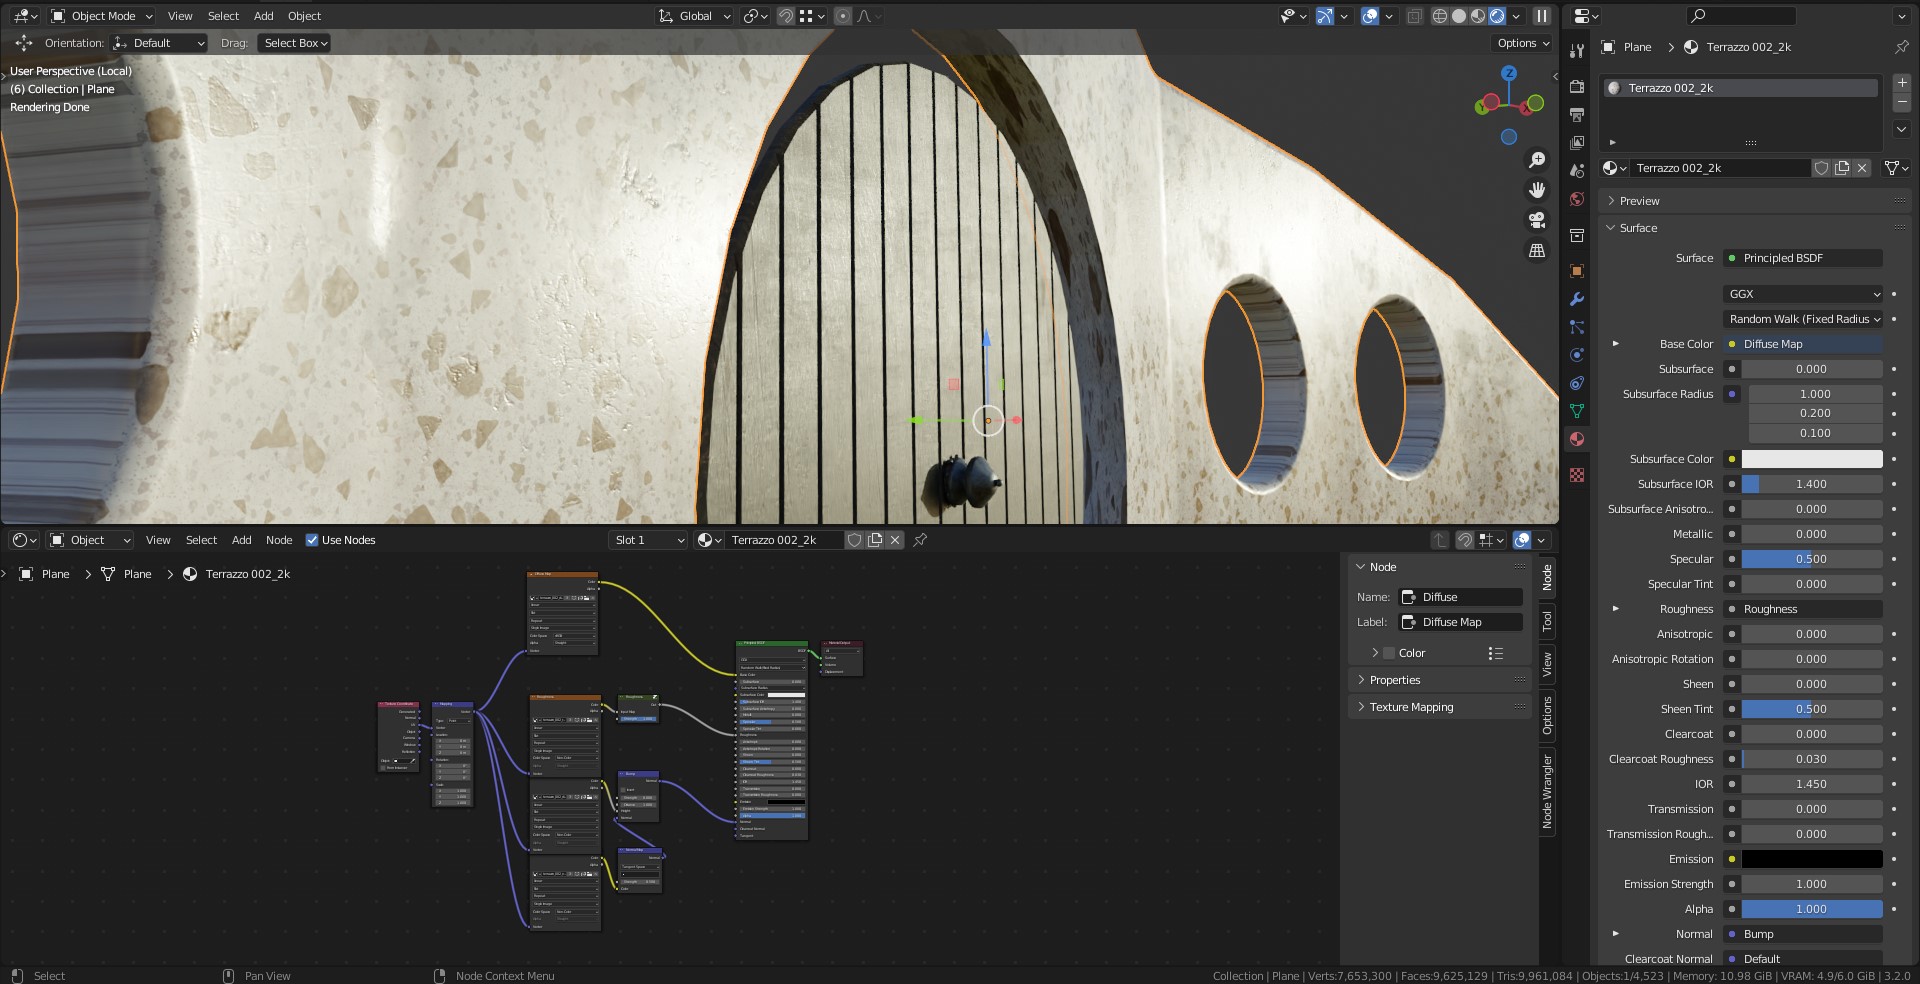
Here is the Shader set-up.
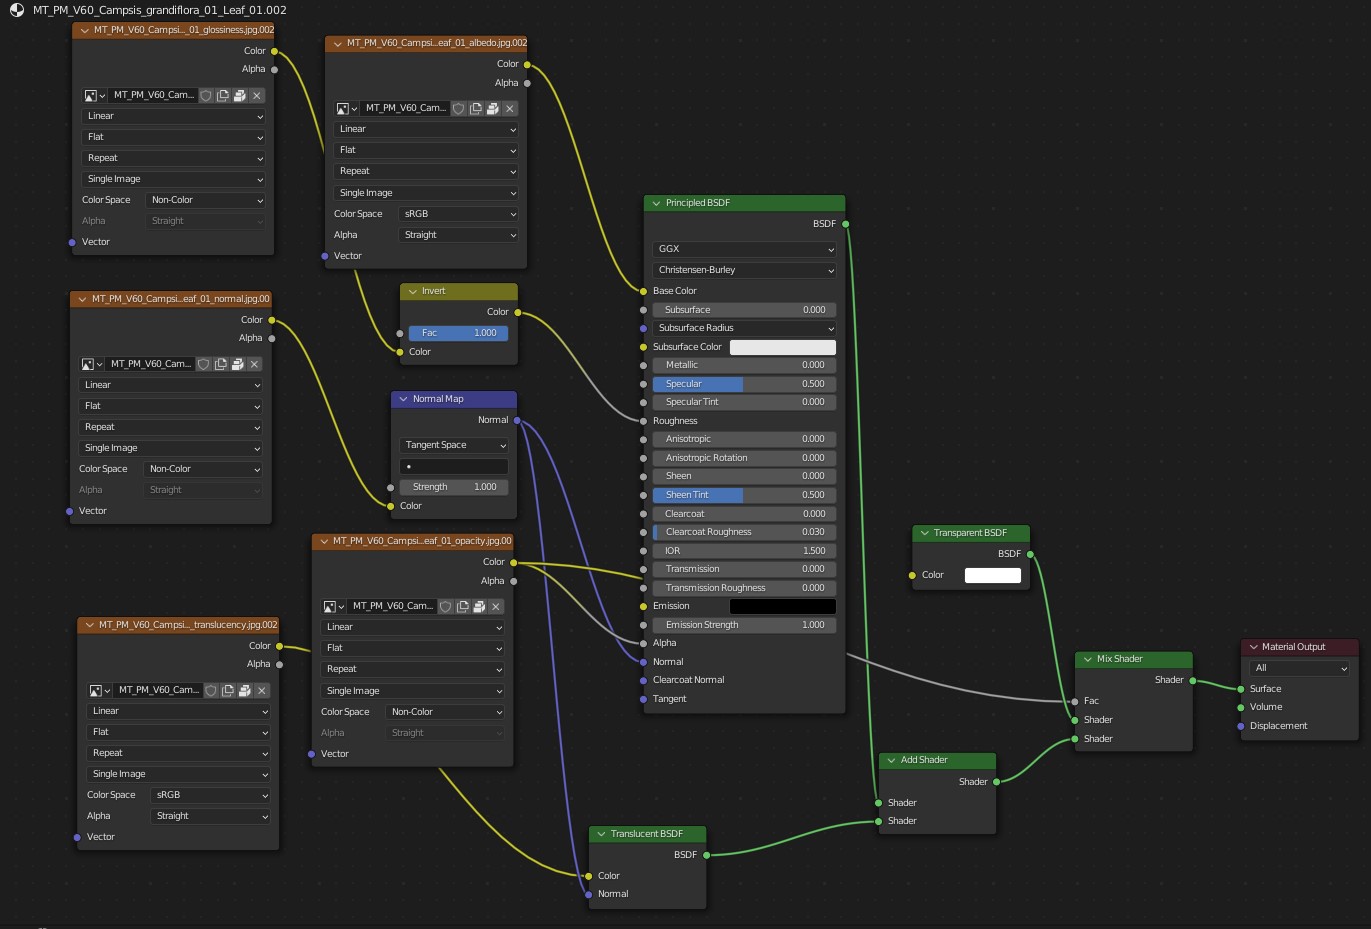
I didn’t configure a shader for the leaves, as I just used it from the model.
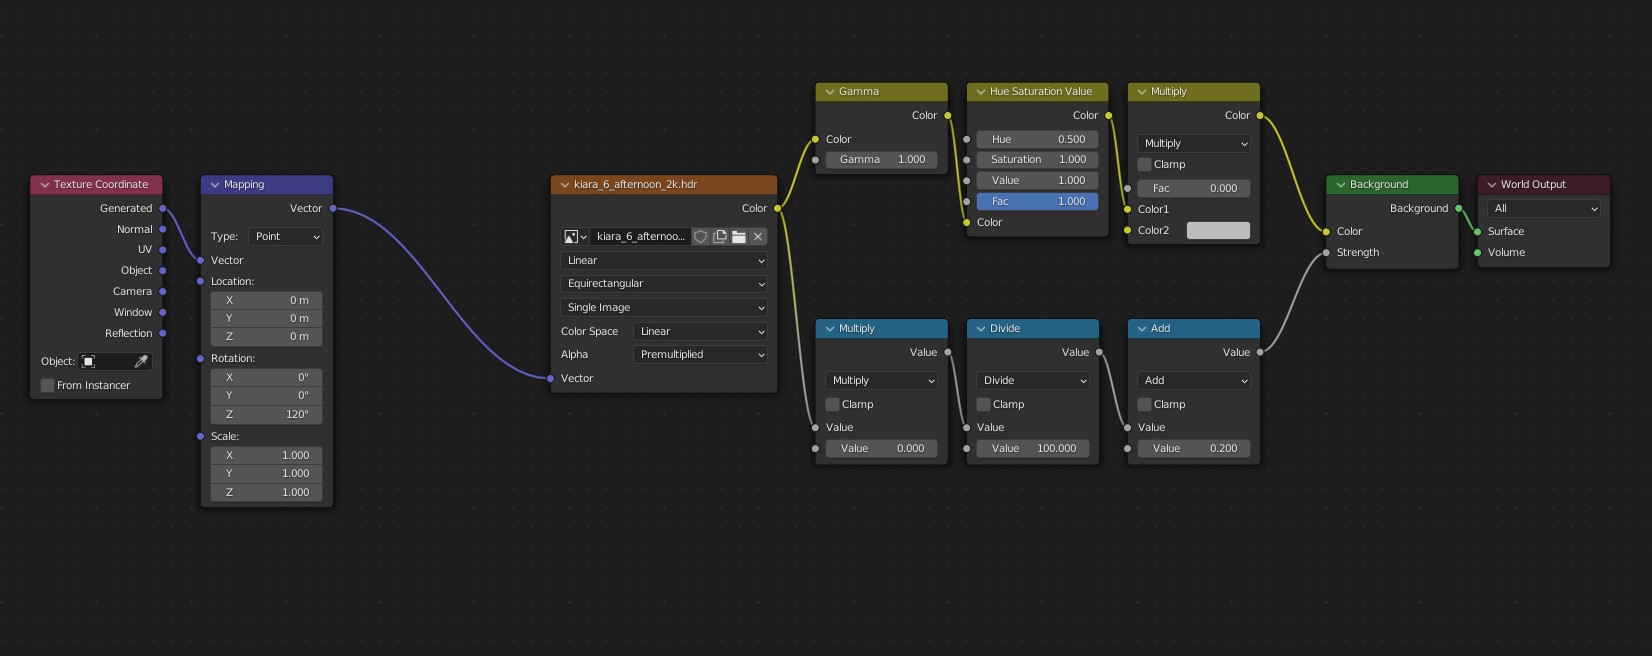
LIGHTING
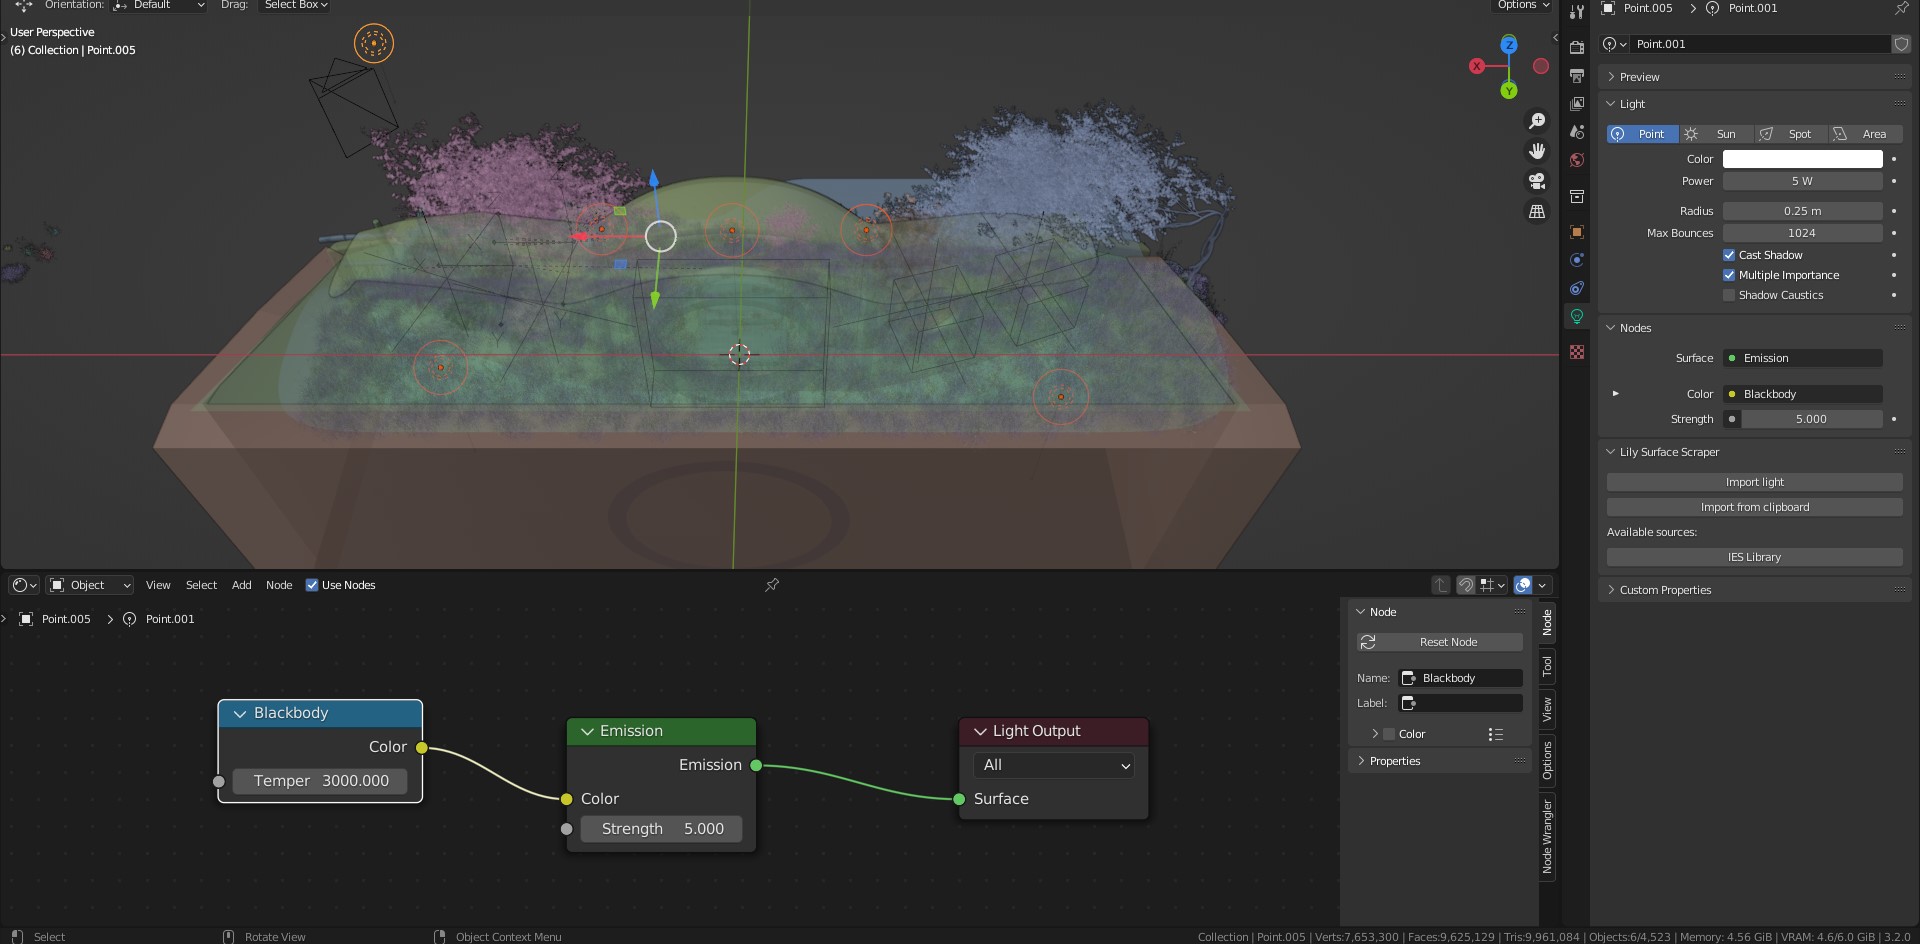
For the night scene, I only used a 6-point light with a Blackbody shader node on the color and an HDRI from PolyHaven.
For the Sun and Overcast scene, I just used an HDRI from HDRI Haven.
To set the HDRI, I used EasyHDRI, a free add-on. It allows us to use HDRI easily, with just one click. You can easily change the HDRI, rotate it, place it in the World and a lot of other stuff.

RENDER SETTINGS
I must confess that I still don’t understand most of the render parameters yet, so I Just copied from my friend’s file.
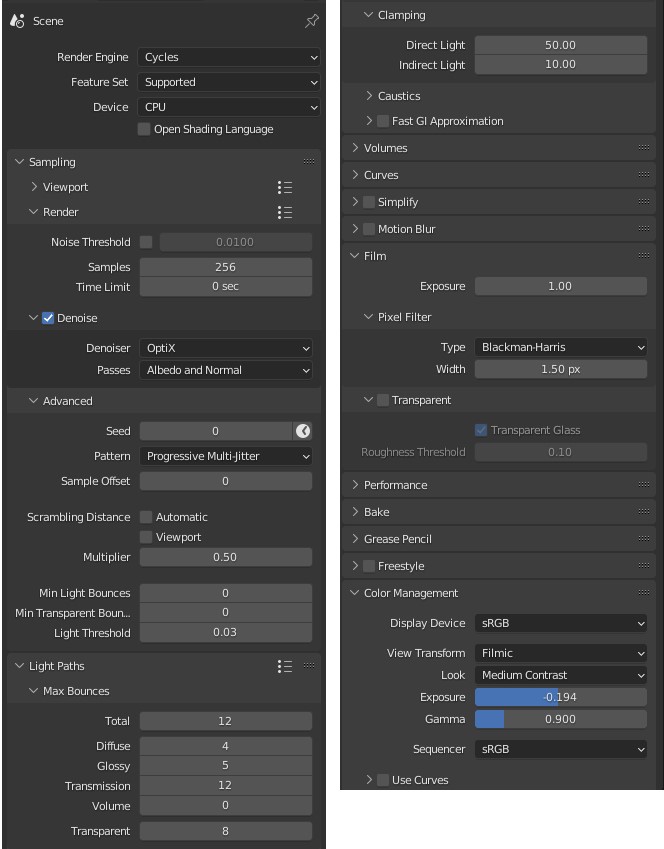
I started rendering using the GPU. It was taking 5 minutes, but when I was going to render for the second time, I got an out-of-video-memory error, so I switched to CPU, and it took 1 hour.
The render was consuming about 5.5 GB VRAM (on GPU) and 12 GB memory (CPU)
My computer settings:
- Laptop Predator Helios 300
- Intel(R) Core(TM) i7-9750H CPU @ 2.60GHz 2.59 GHz
- 32,0 GB
- RTX 2060 – 6GB
- 3 TB SSD
Enough talking now, let’s see how the images turned out. I hope you like it :)
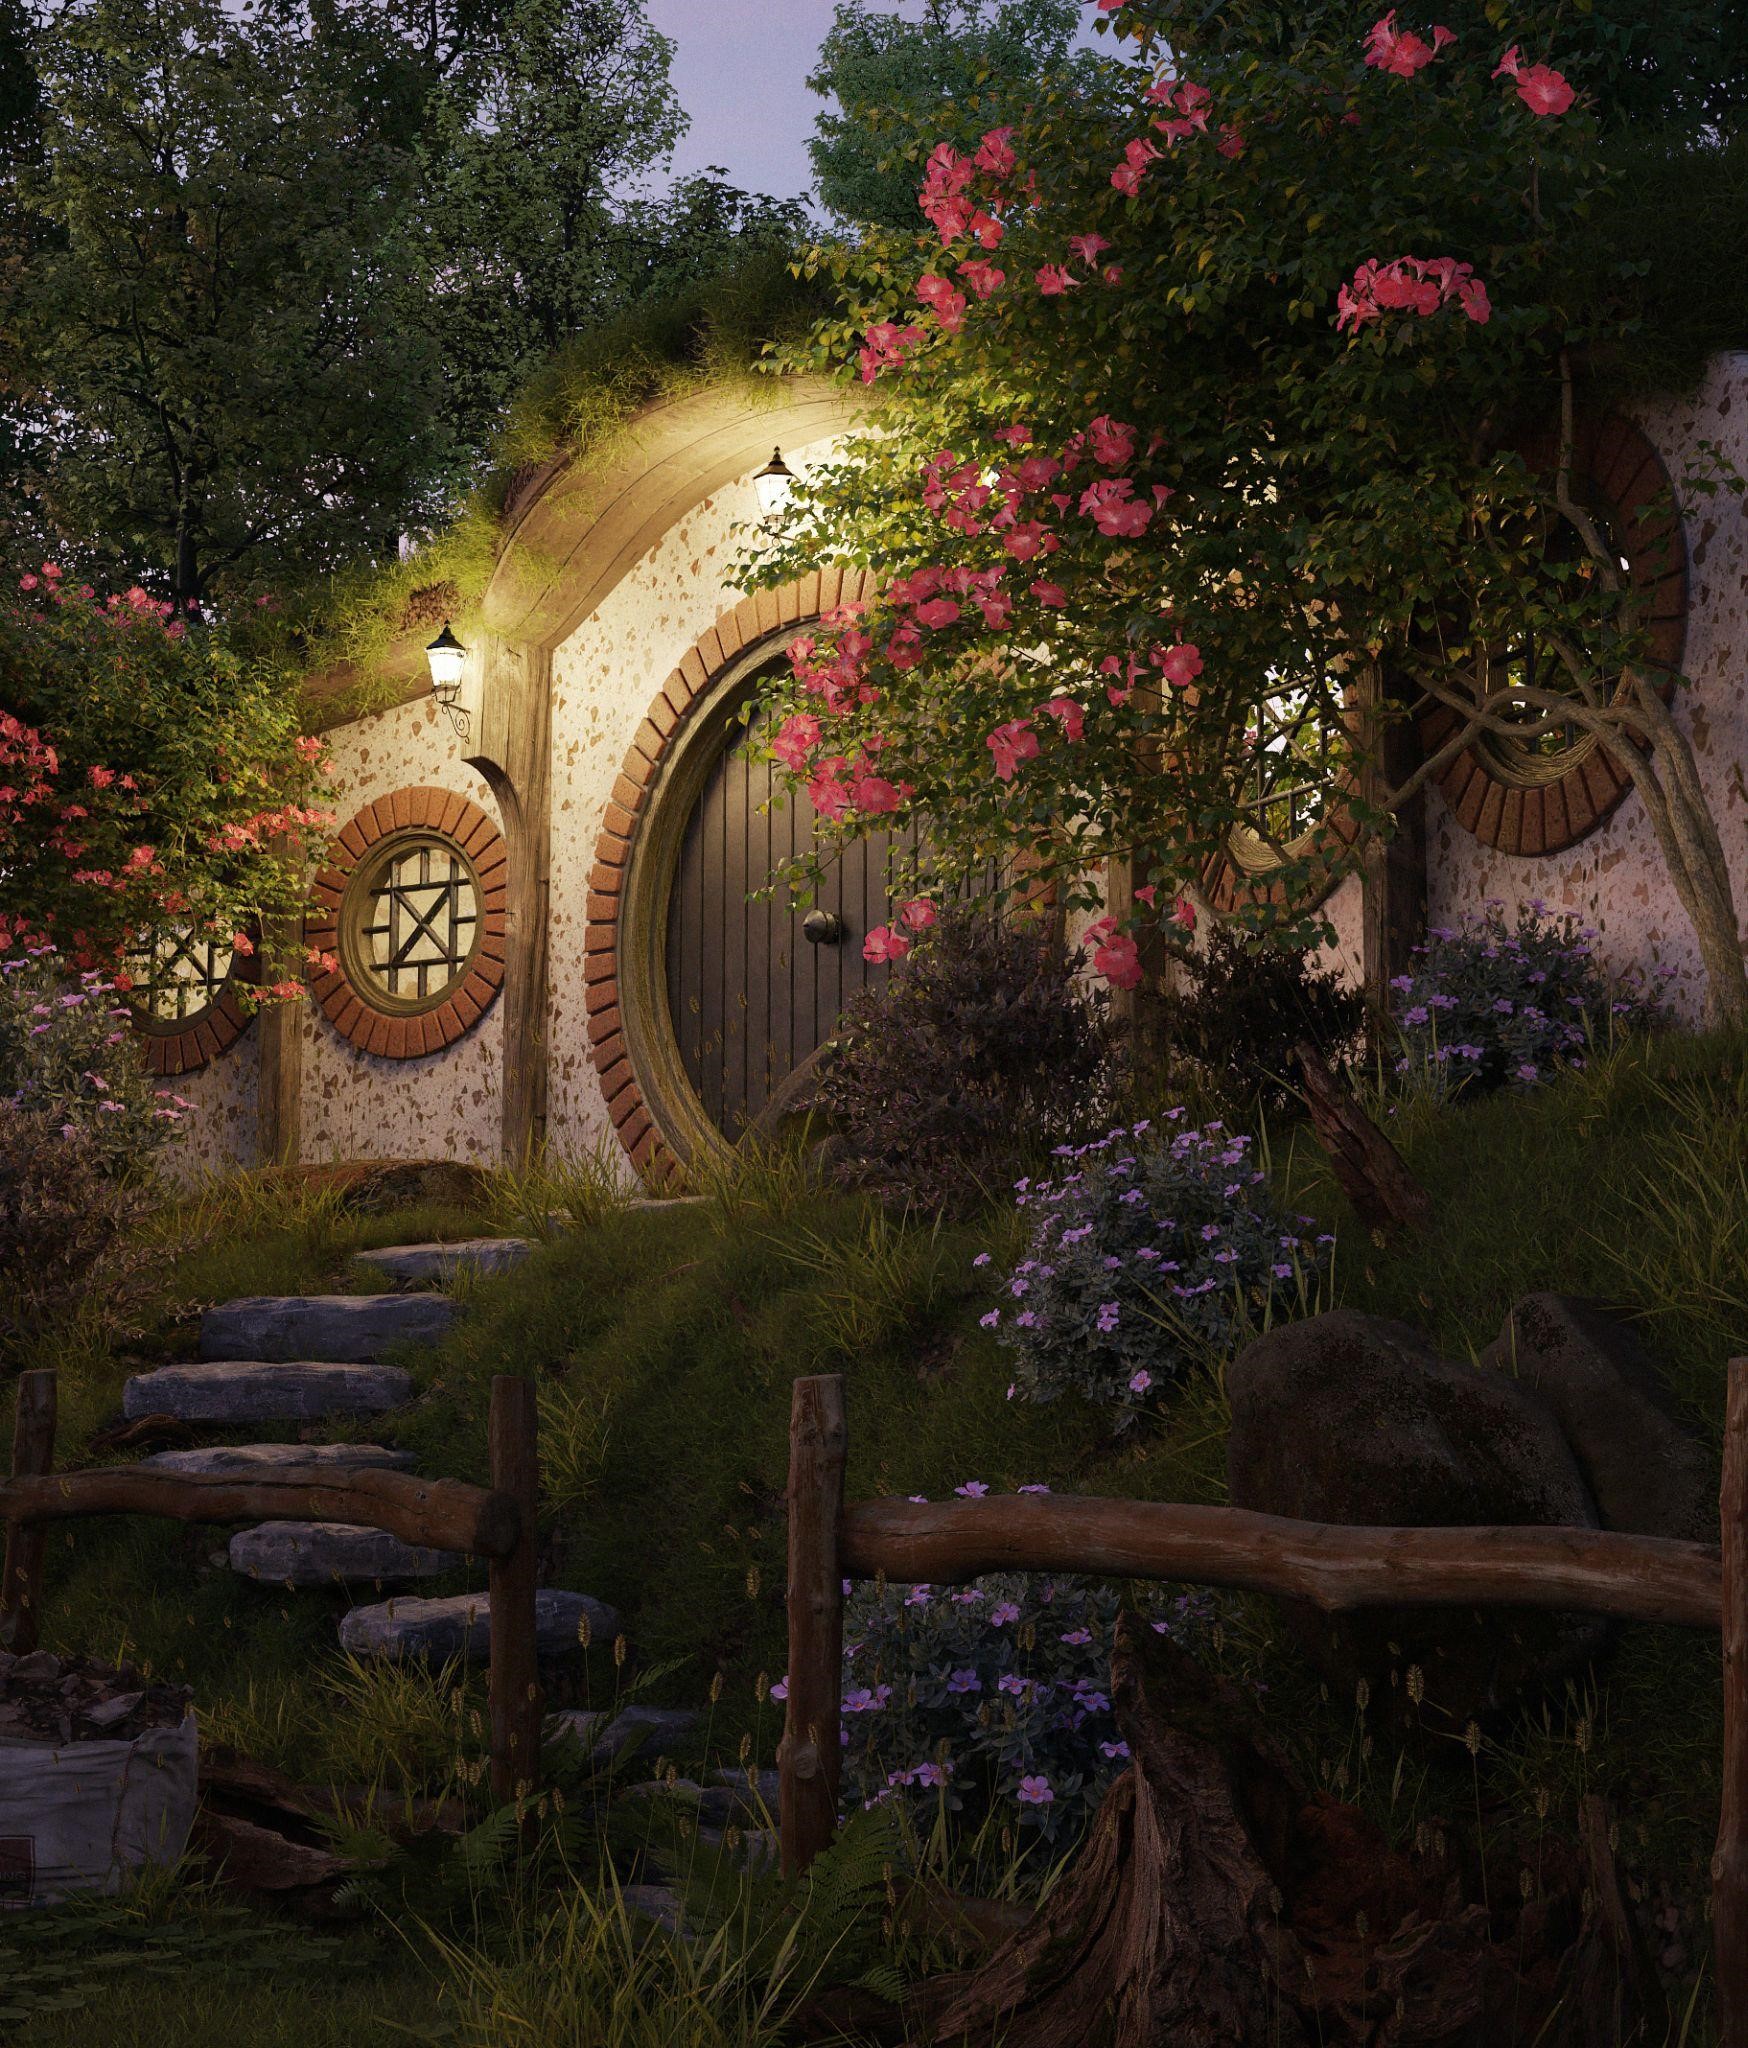
A HOBBIT HOLE

That’s all, folks. If you have any doubt or want me to show something else, feel free to get in touch.
About the Artist

Hernan Sandres, a 3D artist from Brazil and he is in love with the 3D world, again.


