
Behind the Scenes: Captain Archibald Haddock
INTRODUCTION
Hello, my name is Lucas Coelho and I’m a 3D artist based in Curitiba, Brazil. I started working 15 years ago as an assistant art director at an advertising agency and since then, I’ve worked with post-production, becoming a senior in the field and then decided to adventure myself in 3D. Today, I work as a freelancer and a full-time character artist. I’ve used many software, including Modo and Maya. But I find myself much more efficient using Blender as my main tool. Apart from that, I use ZBrush for sculpting.
INSPIRATION
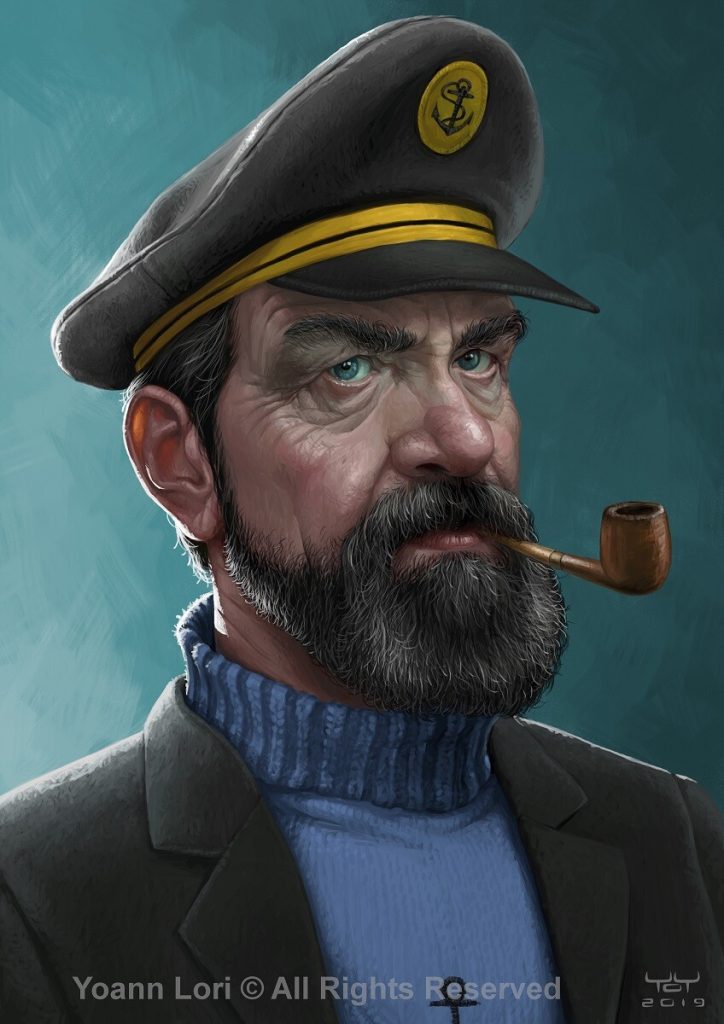
I really love the series “Adventures of Tintin” and recently started watching the animation again which brought me some fond memories. So I decided to make a character from the series. At first, I had no idea which character to do and after a quick search on Pinterest, I found the caricature of Captain Archibald Haddock by the amazing artist Yoann Lori and decided to give it my own interpretation.
PROCESS
I’d like to share some aspects of this project that can really help people get their work done in an organized way.
Modeling
First things first, scale is a really important matter in 3D, and that can vary between software. Because I used ZBrush in a part of the project (but everything I do in ZBrush can be done in Blender, it’s just personal preference) I use the GoB add-on by Jose Conseco to transfer meshes between Blender and ZBrush quickly while maintaining position and scale.
I started making a block shape to have the initial form of my object in the correct size.

This way, I guarantee that there will be no issues importing or exporting meshes between software. After that, the fun part began until I found myself in the need of retopoing the mesh and opening the UVs.

Here, I already did the retopo and opened the UVs. I used 4 UDIMs for the bust.

So that I could be more efficient, I set a camera on Blender from the beginning of the project and did not work more than what was needed. That way, I could use my time and the processing power of the computer better, because I only wanted to do one shot of him from one specific angle.
Clothes and Eyes
His clothes were just simple geometry, except for his sweater that I modeled in ZBrush and decimated. For his eyes, I used AutoEye that I bought a long time ago and still works perfectly to this day.
Texturing
The camera that I set was exported to Substance Painter so that I could texture the skin and his pipe.


I also exported the Displacement map from ZBrush to Blender, and used the displace modifier. This part was very important, because I could have used the displacement available on the shader but I would not have been able to see or apply its result to the mesh in the viewport. And I needed that, since I would apply hair and fur to his head later. The way the normals were facing helped the flow and origin of the hair strands. Hence, I used the bumps on his face as another “variation” factor for the hairs.

Hair and Fur
For the hair, it’s important to note that the more organized you work, the better. For all his facial hair, I separated the scalps which I could use with middle subdivision, and then applied displacement.
We’ll go through each section together; keep in mind that I haven’t used geometry nodes for this project yet, because I wanted to reach a final result, not learn a new tool.
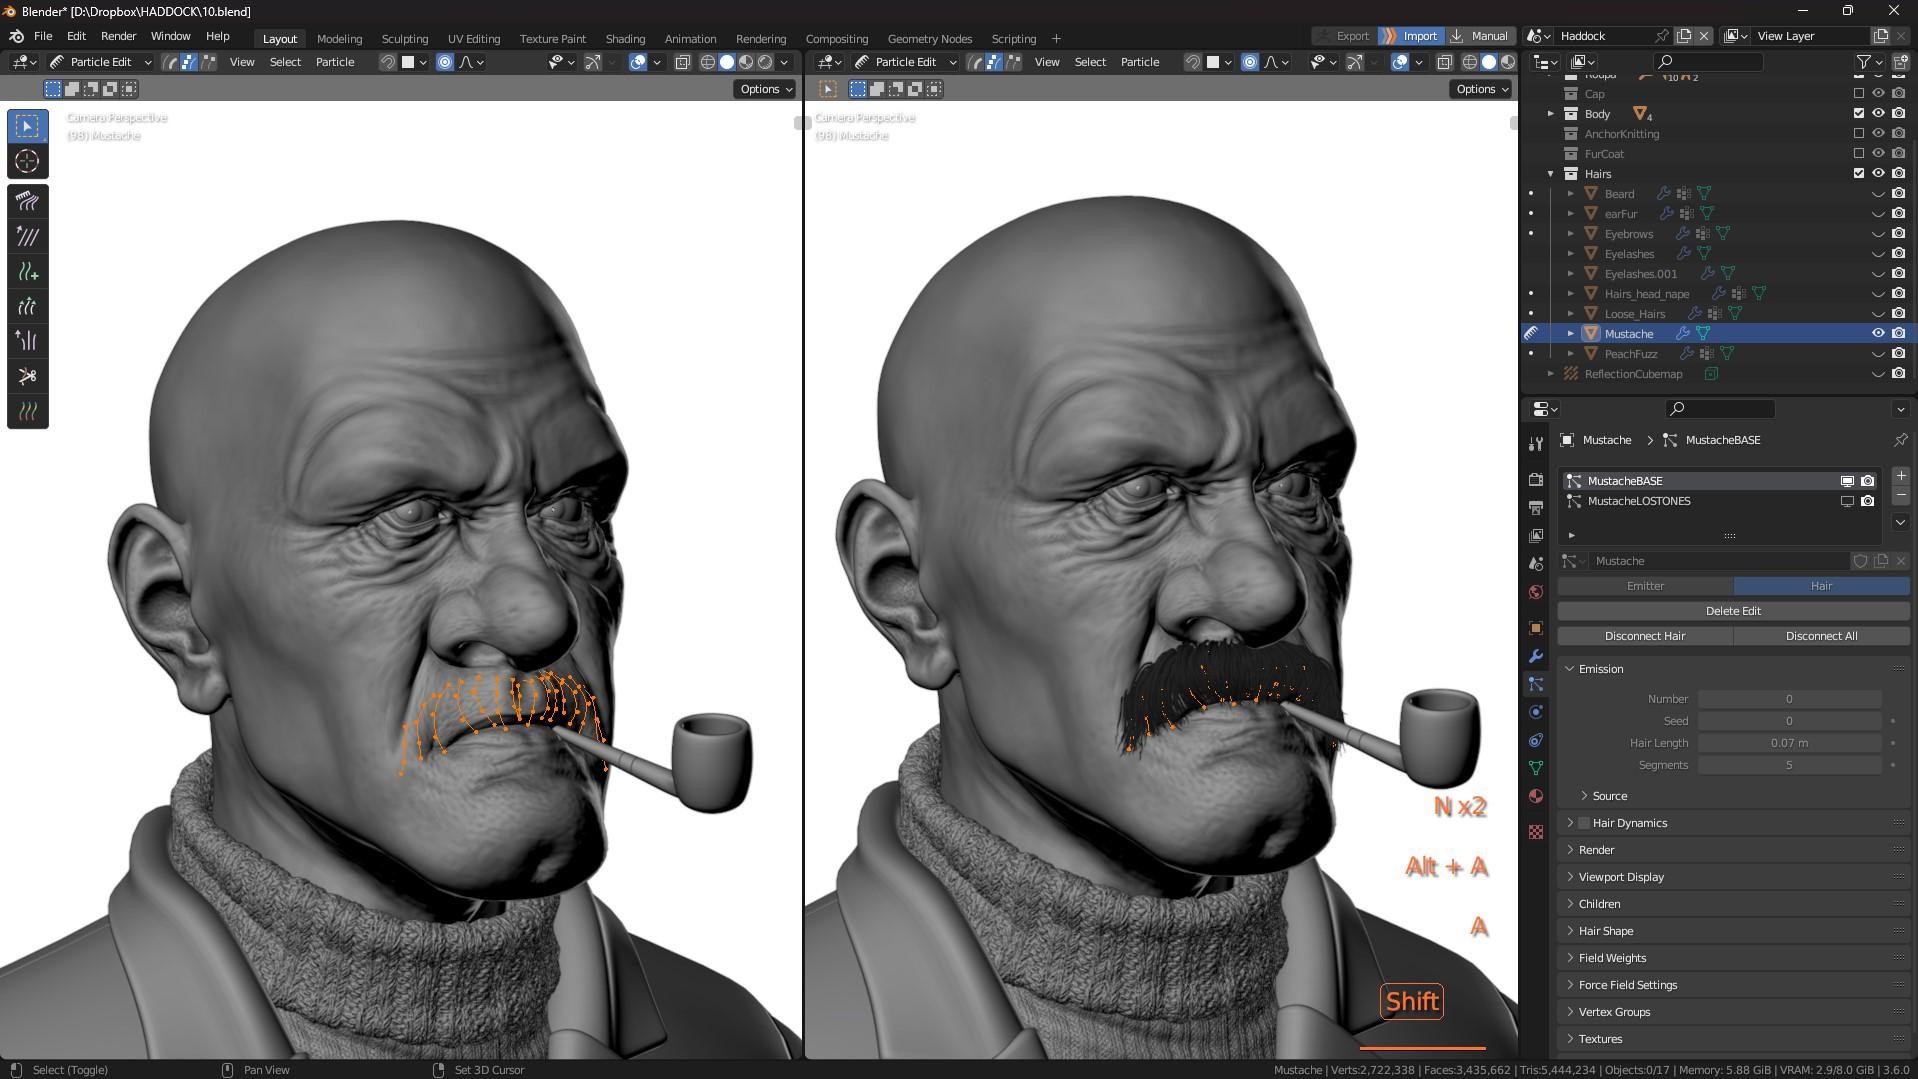
The best practice I found when doing hair is placing a guide, combing it to the desired shape, seeing the results in one single hair, and then moving to place another guide/children. I did the following: Placing guide > combing > Selecting all (A) > hiding (H) > placing guide… I do this for every guide in the project except the ones I place randomly.

Below you can see each step that I took.
Also, remember that you can reuse your particle systems. I reused my Loose Hairs particle system many times for different parts of the face as the hair would have the same size and behavior.


For the peach fuzz (those little hairs we have on our skin), I followed a guide for the direction of the hairs and combed them accordingly:

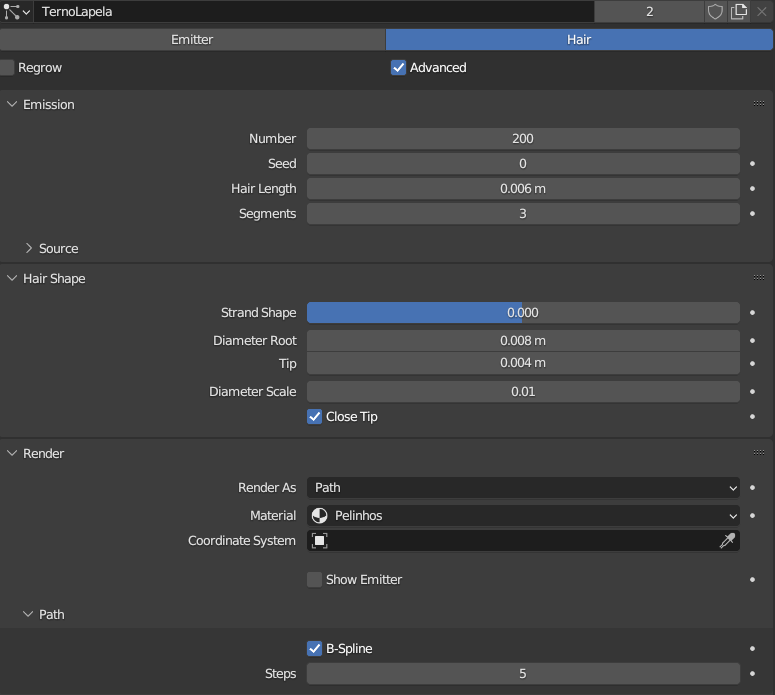
Below are the settings I used for the peach fuzz on the collar.
Please note that these settings are dependent of your model sized (applied).

Lighting
The lighting in the scene was very simple.
First, I set up an HDRI for the scene. It’s the same HDRi since the beginning of the process, so that I would always see the same result in the viewport. I preferred to keep the light consistent; therefore, I did not base my feedback and modifications to the model in the lighting. The HDRI I used was Carpentry Shop 02 from PolyHaven.

As for the lights, it’s pretty simple actually. I used three lights to create a Rim light, one light facing the studio, and another facing the model as a Key light.

With the HDRI turned off, the model looked like this.

Render settings
The render settings were pretty simple too. I had to use CPU for the final rendering because the GPU couldn’t handle the amount of geometry and textures. But to keep it simple, I tend to make the render large and use less samples. This way, I have more detail per bucket than if I render it with loads of samples in a smaller bucket. It’s better to downscale the render than to try to get insane details and clean renders from a small image.


That’s it guys! I hope you can all take something out of this process to use it on your own. I’m really excited for the next characters.
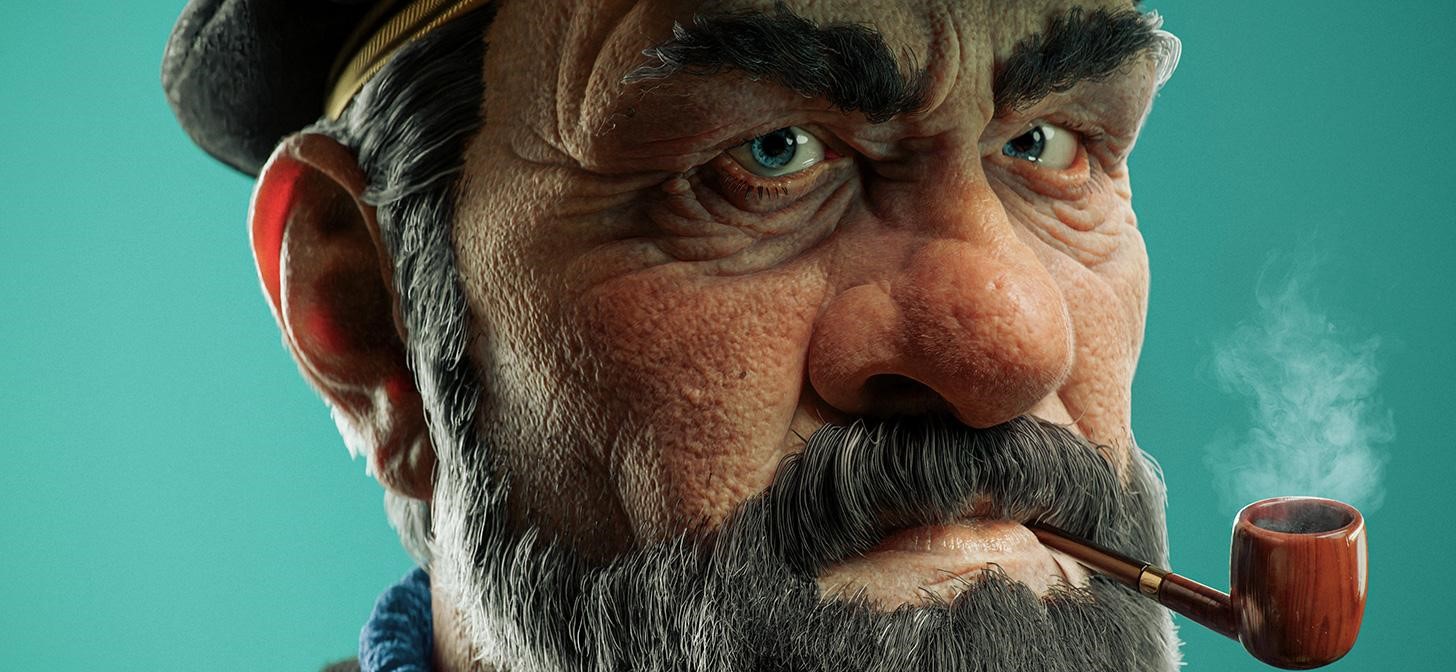
RENDER – Captain Archibald Haddock


Here is a breakdown of the project. Unfortunately, it’s in Brazilian Portuguese, but the closed captions on YouTube may help a bit. We used a lot of slang and regional terms, so it might be difficult to understand at times.
Thank you for all the support. Feel free to ask any questions, and if you like my work, follow me on social media. Have a good day!
About the Artist
Lucas Coelho is a 3D character artist from Brazil, currently working as a modeler for collectibles and games.


Thank you
Thanks a lot for using my work as an inspiration for your version. Mine wasn’t supposed to be a caricature like your mentionned, but rather a “realistic” interpretation of the character from the comics. But I guess I have an old habit of making portraits look like caricatures ! ^^
Anyway, you did an amazing work with it ! Congrats !