Behind the Scenes: Mission To Minerva
INTRODUCTION
Hello everyone, my name is LAMZA. I am a Game Artist from Hong Kong with over 10 years of experience working in related fields. I have been working as a freelancer in the game industry in Japan for about 4 years, providing services for clients including arcade games, console games, and mobile platform works.
INSPIRATION
I came across a space and interstellar competition called “Mission To Minerva” held by KITBASH 3D on the internet. As I am interested in this topic, I decided to participate and hope to improve my environment design skills.
REFERENCE
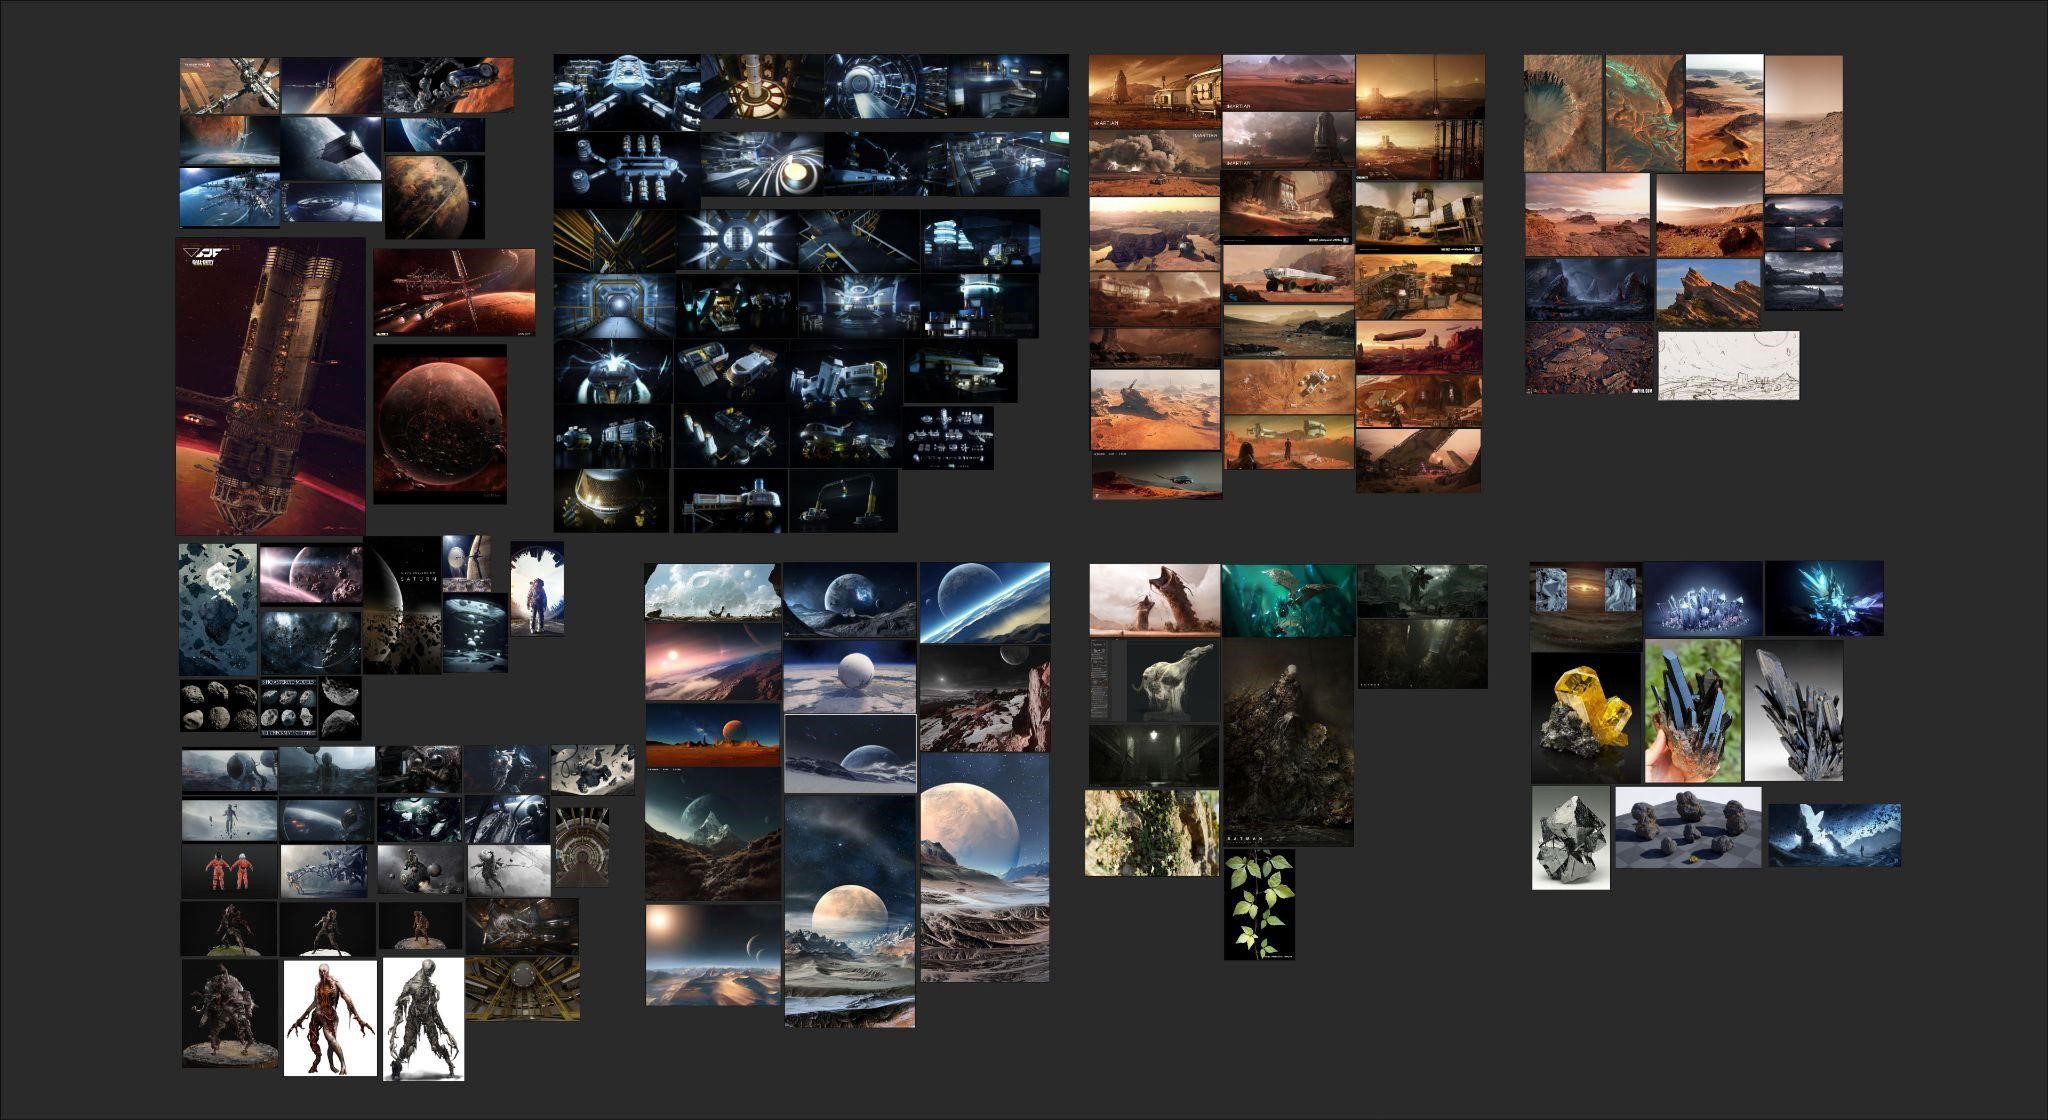
I primarily used the movie “The Martian” as a reference. In addition to this, I also needed to find references related to space such as planets, terrains, potholes, ores, spaceships, and monsters to gain inspiration and guidance for my creation.
SKETCH
When I have a theme in mind, I try to draw sketches and come up with stories. This is an important phase because it will affect the outcome of the artwork.
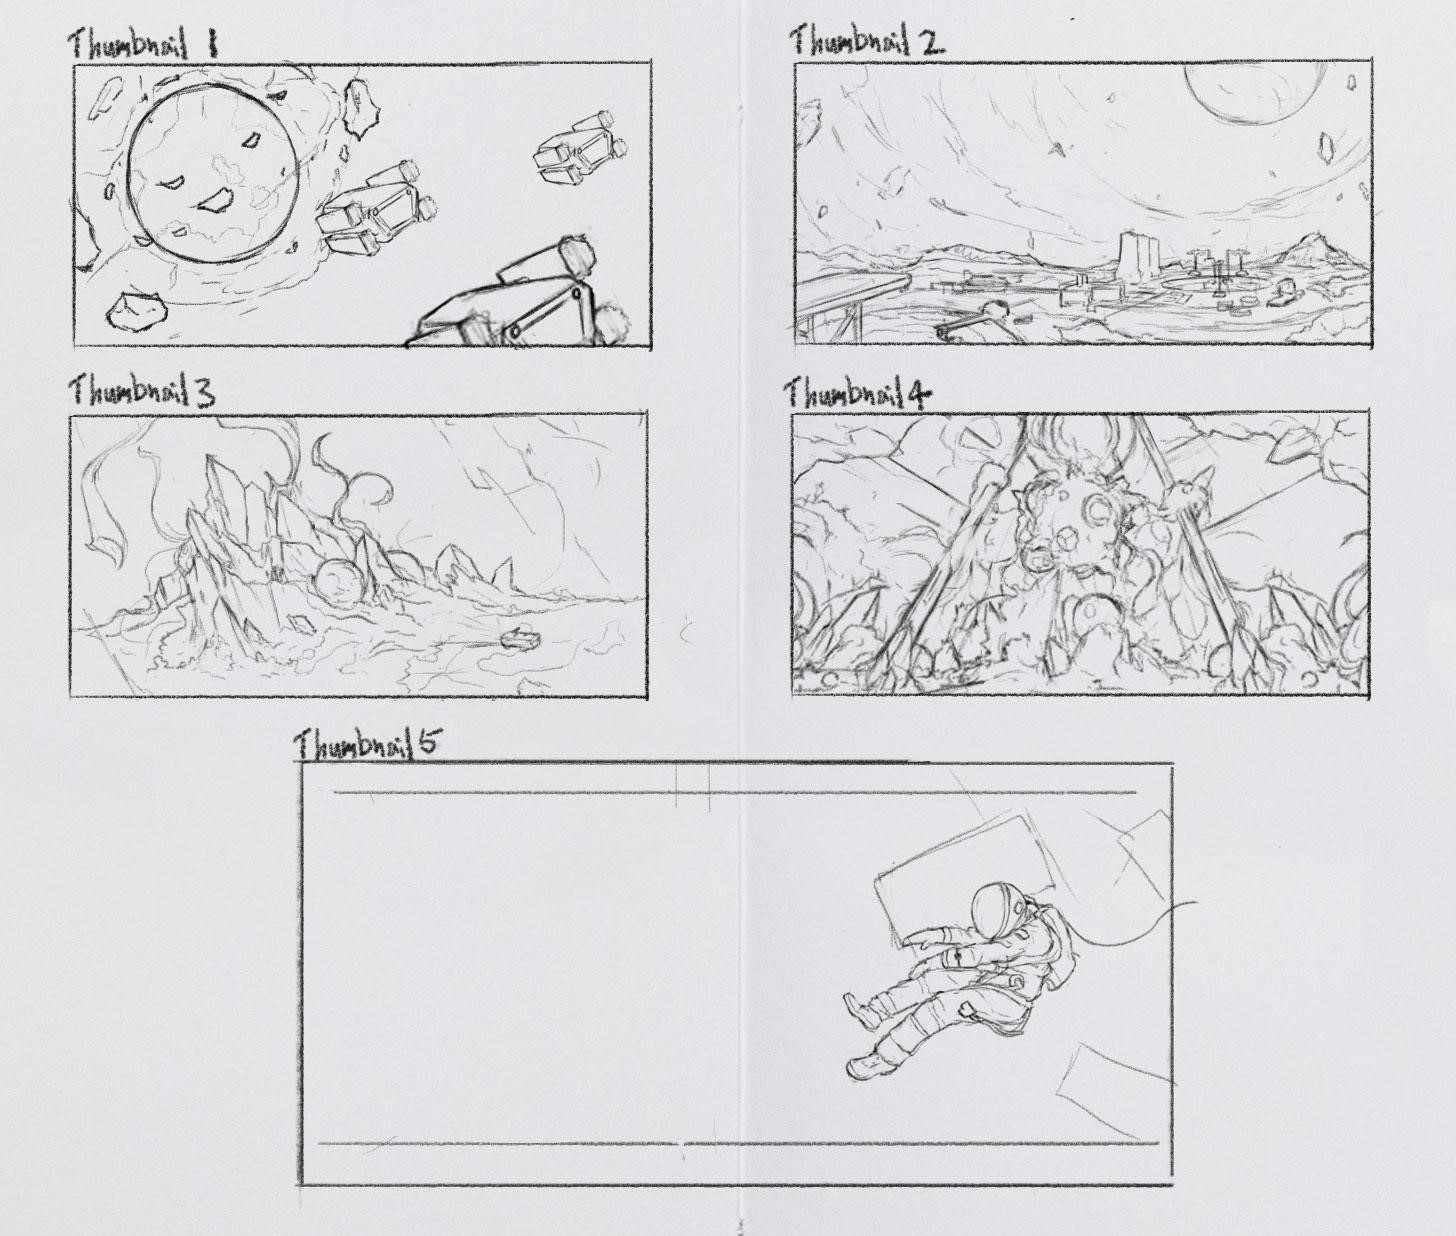
After considering all the options, I decided to use thumbnail 2 for production as it was closest to the theme of this competition.
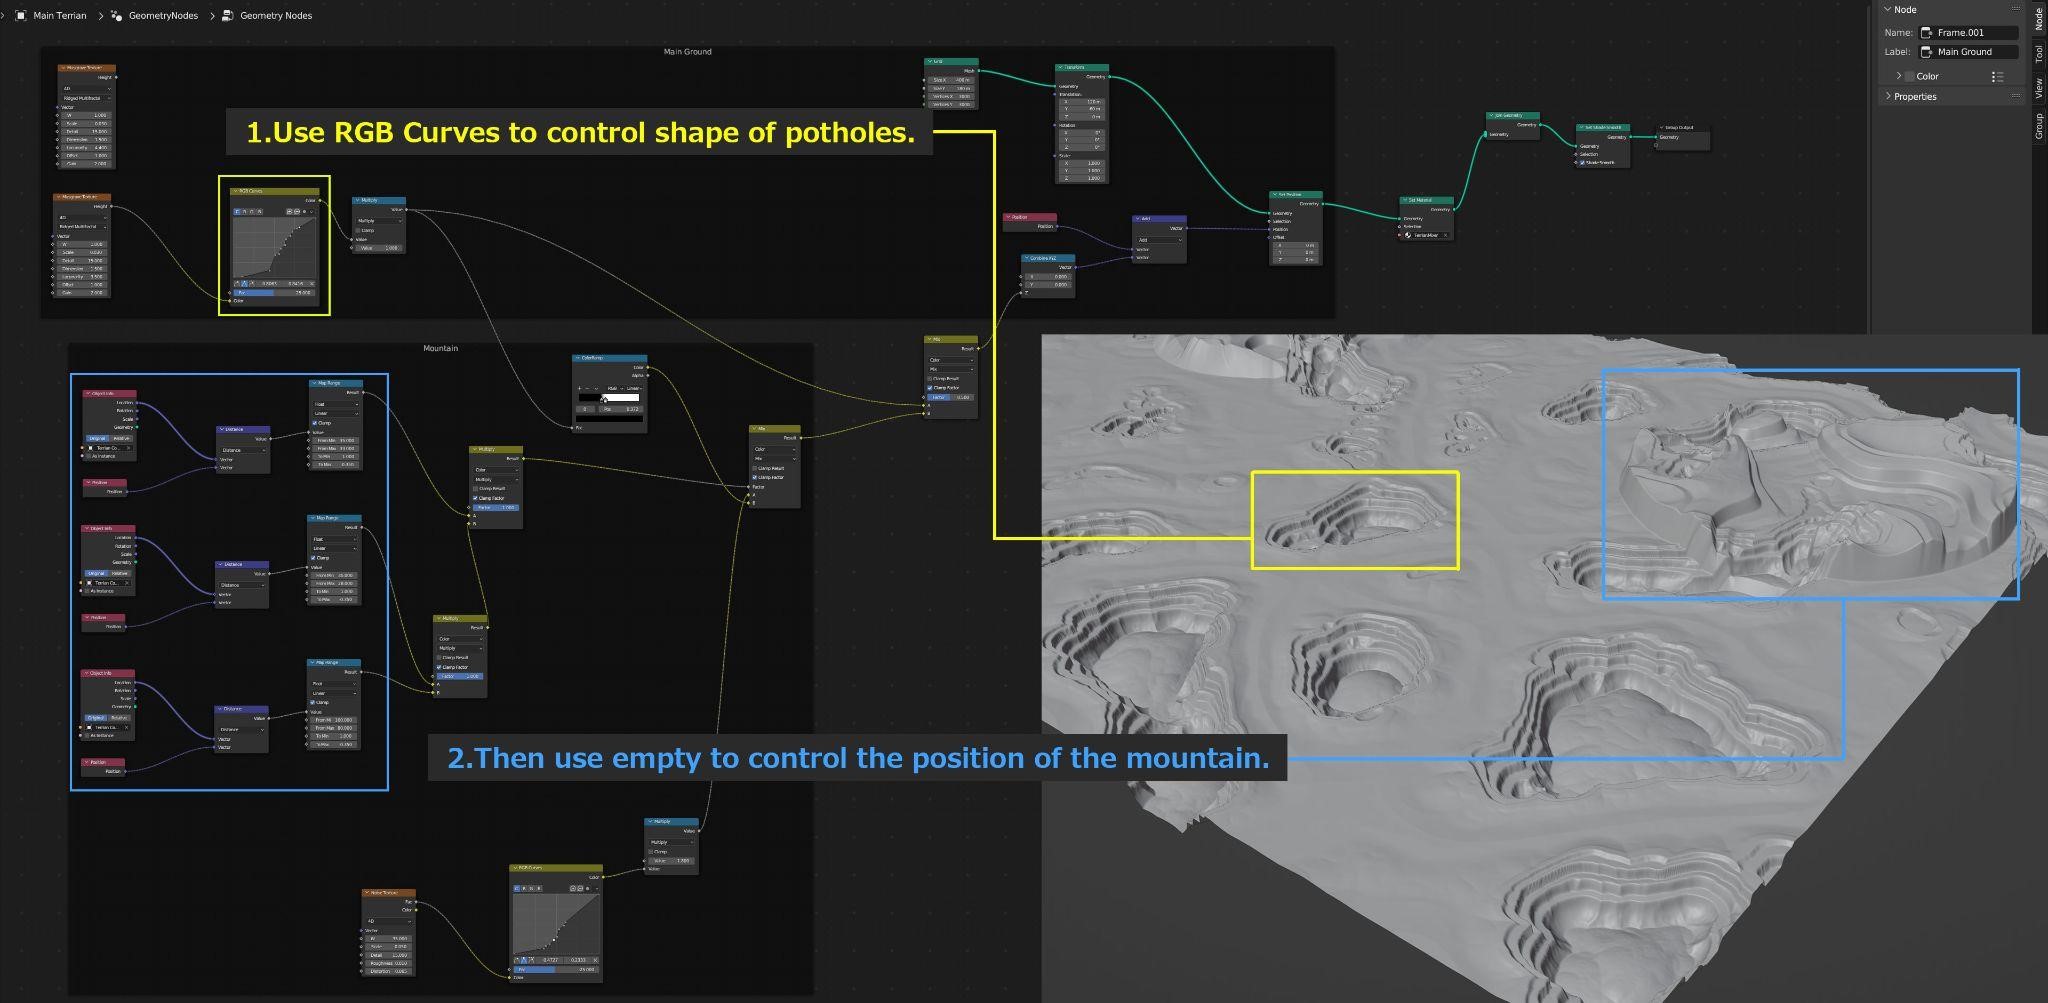
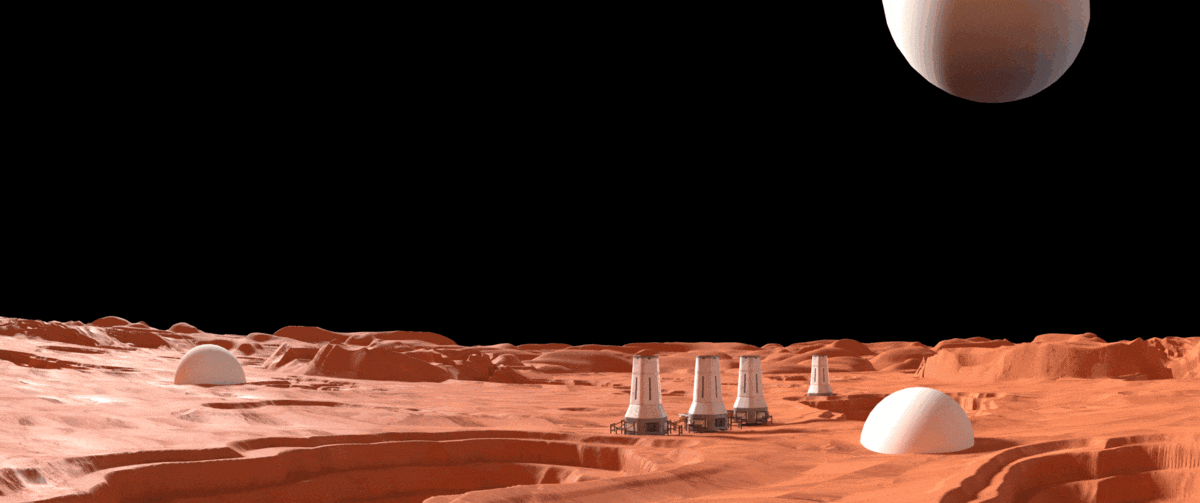
TERRAIN
The terrain is mainly generated using the Geometry Node, and the True Terrain 4.3 addon is used to make the material more convenient.
Since the scene is very large, I separated the terrain into two parts: the main terrain and the secondary terrain. The main terrain mesh close to the camera is high poly, while the secondary terrain is used for distant scenes and is low poly.

The Geometry Node is set up as shown in the figure, using an RGB Curve and an Empty object to control potholes and mountains.
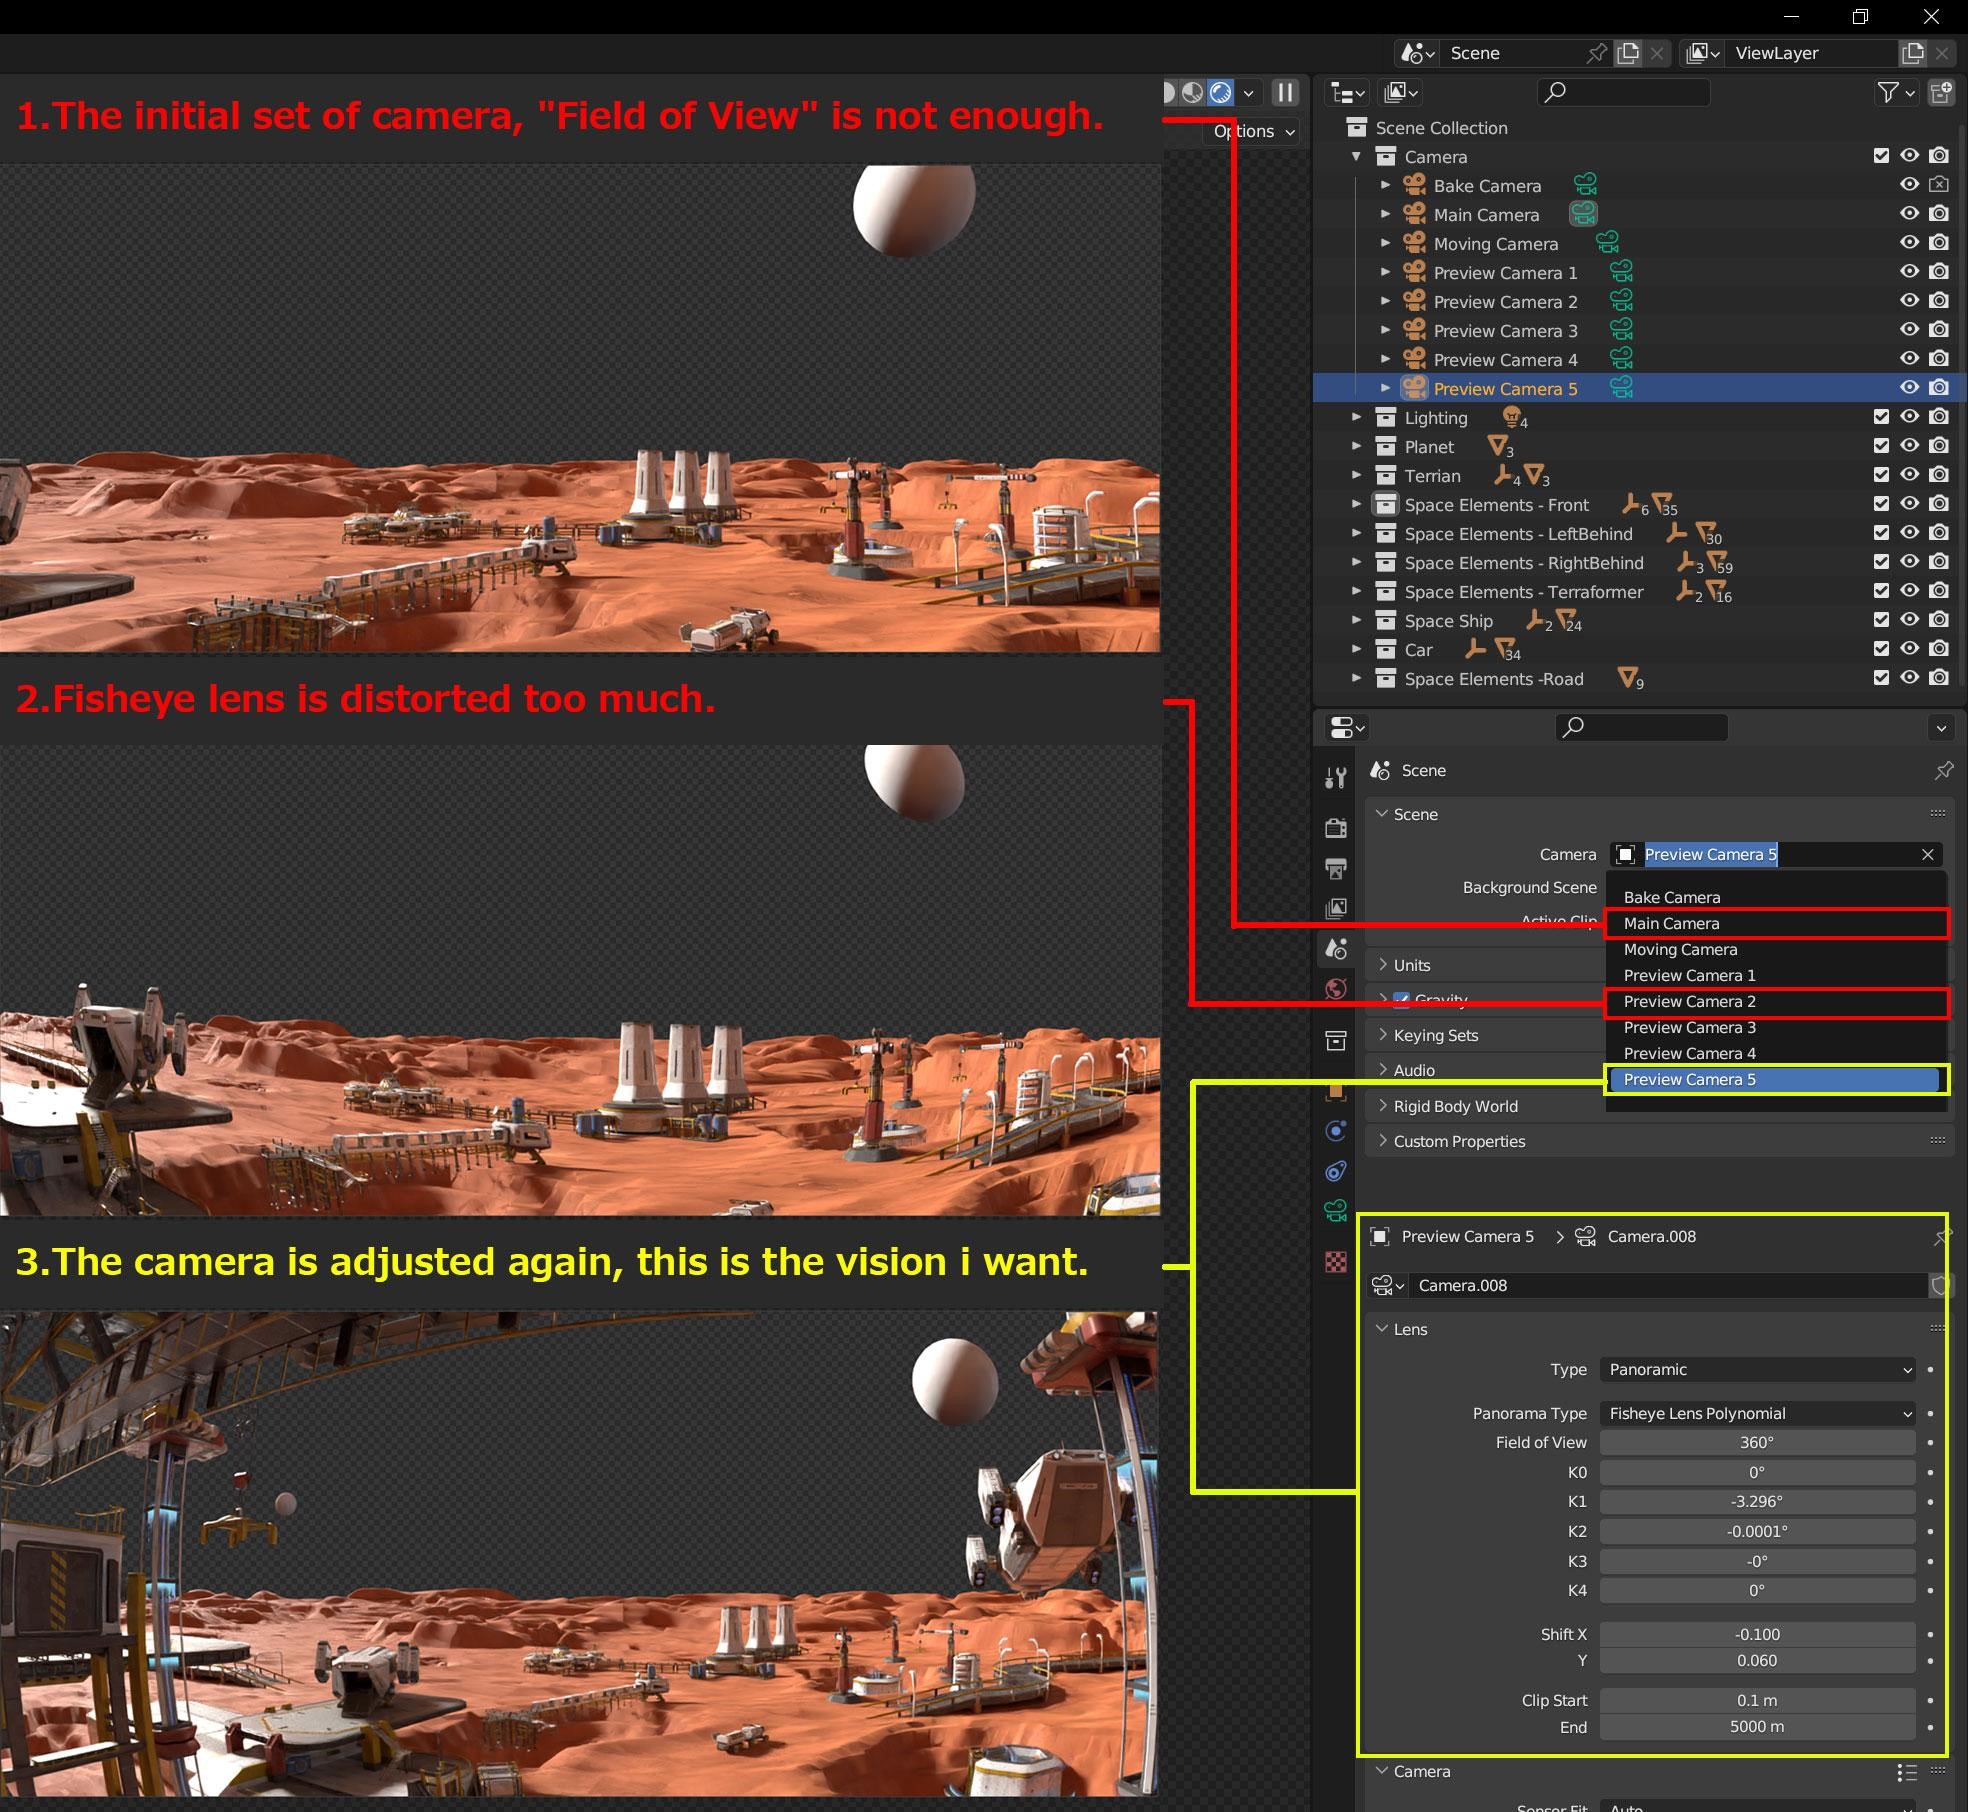
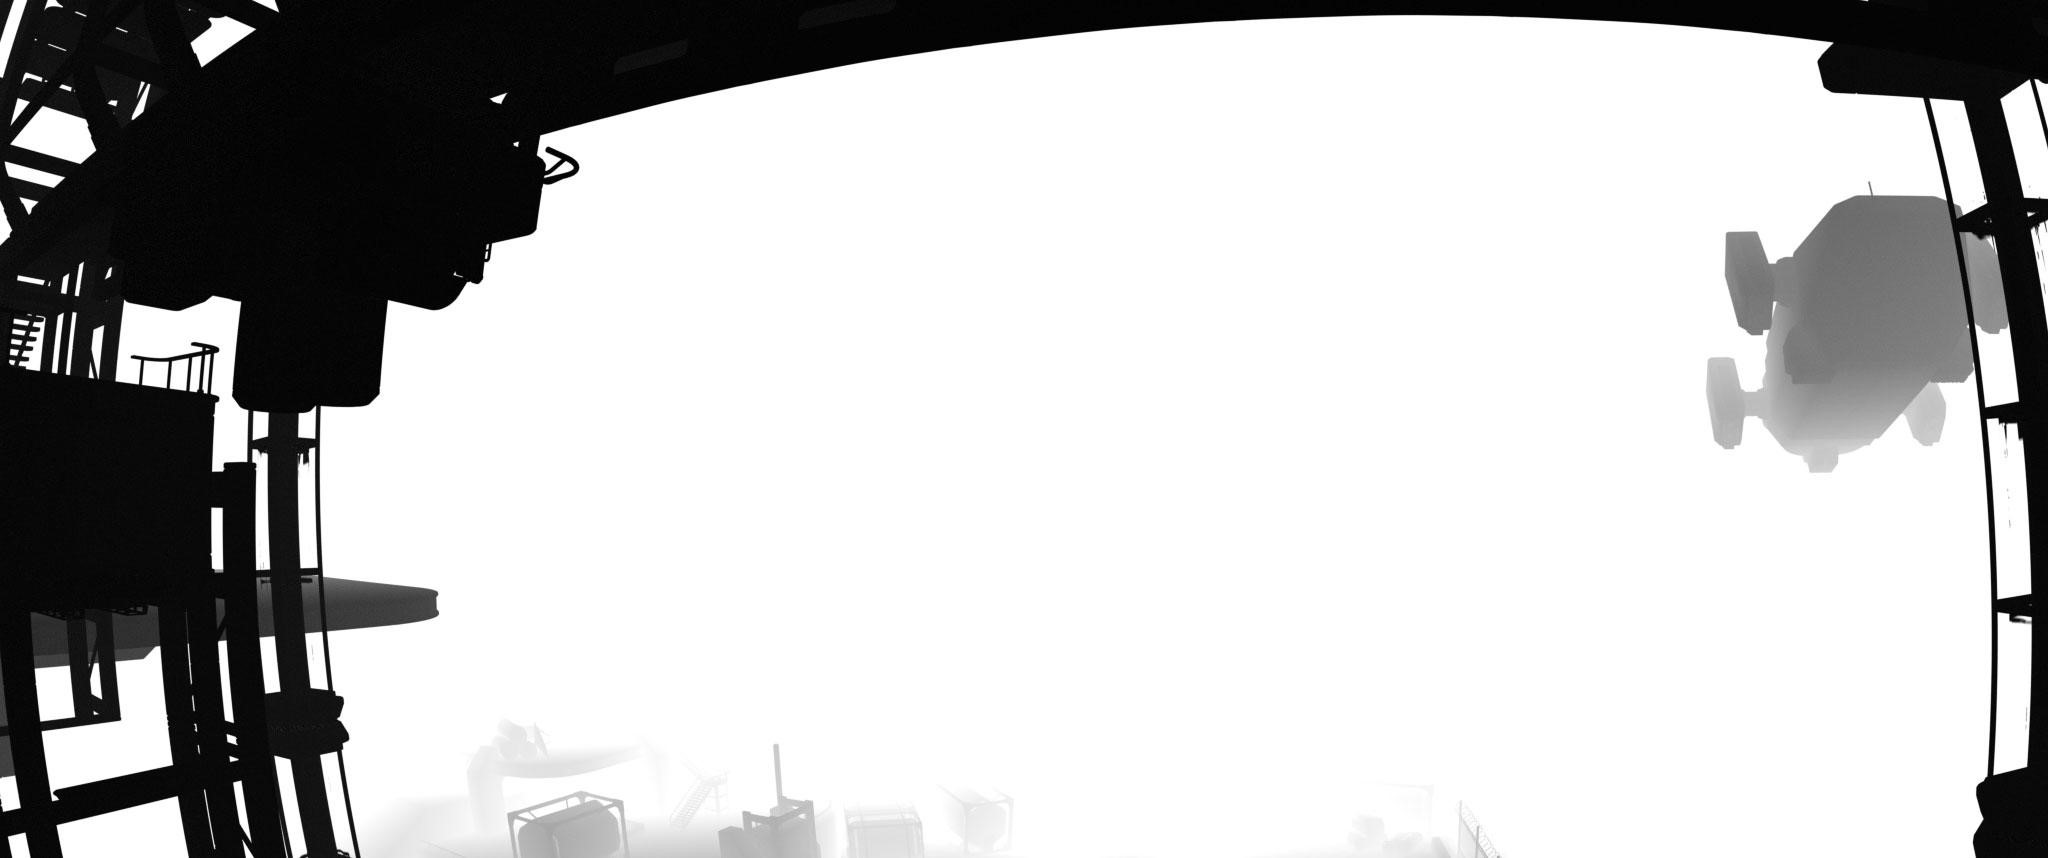
CAMERA SETUP
Once the terrain part is done, I try to make the camera look as close as possible to thumbnail 2 and set up different cameras to preview the best result.
I also used the Fisheye Lens Polynomial to achieve a curved visual effect that was similar to thumbnail 2.
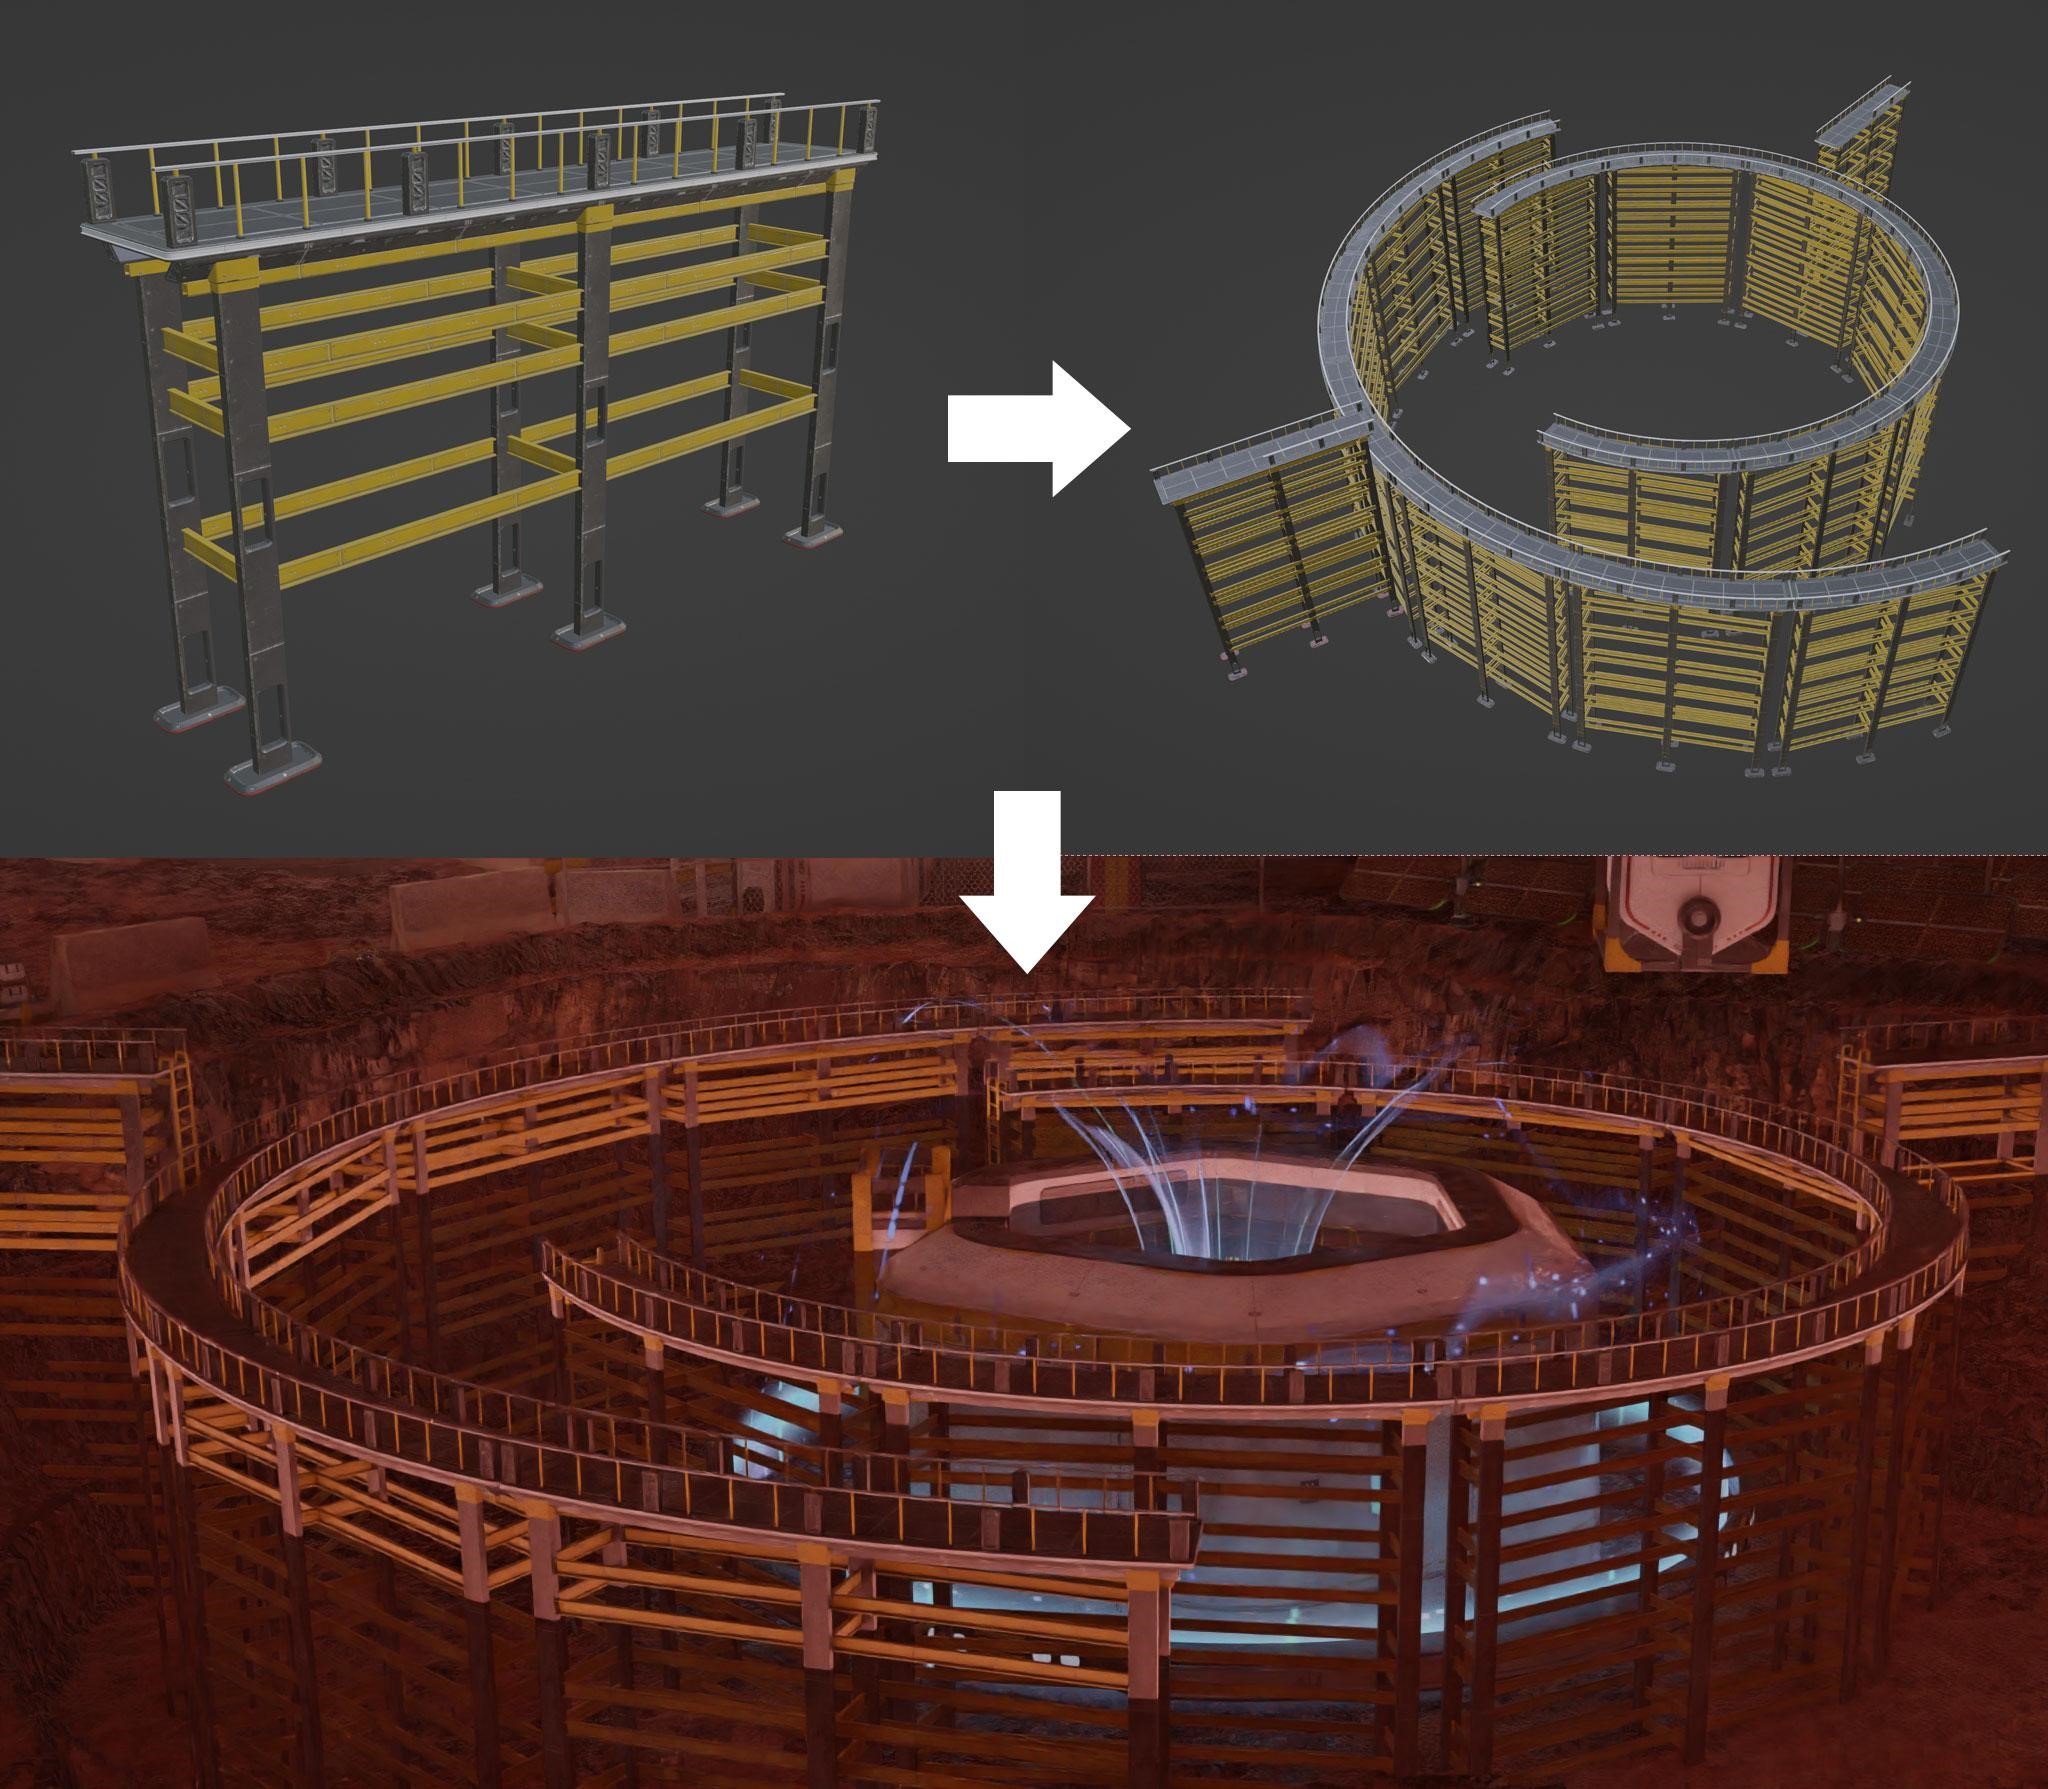
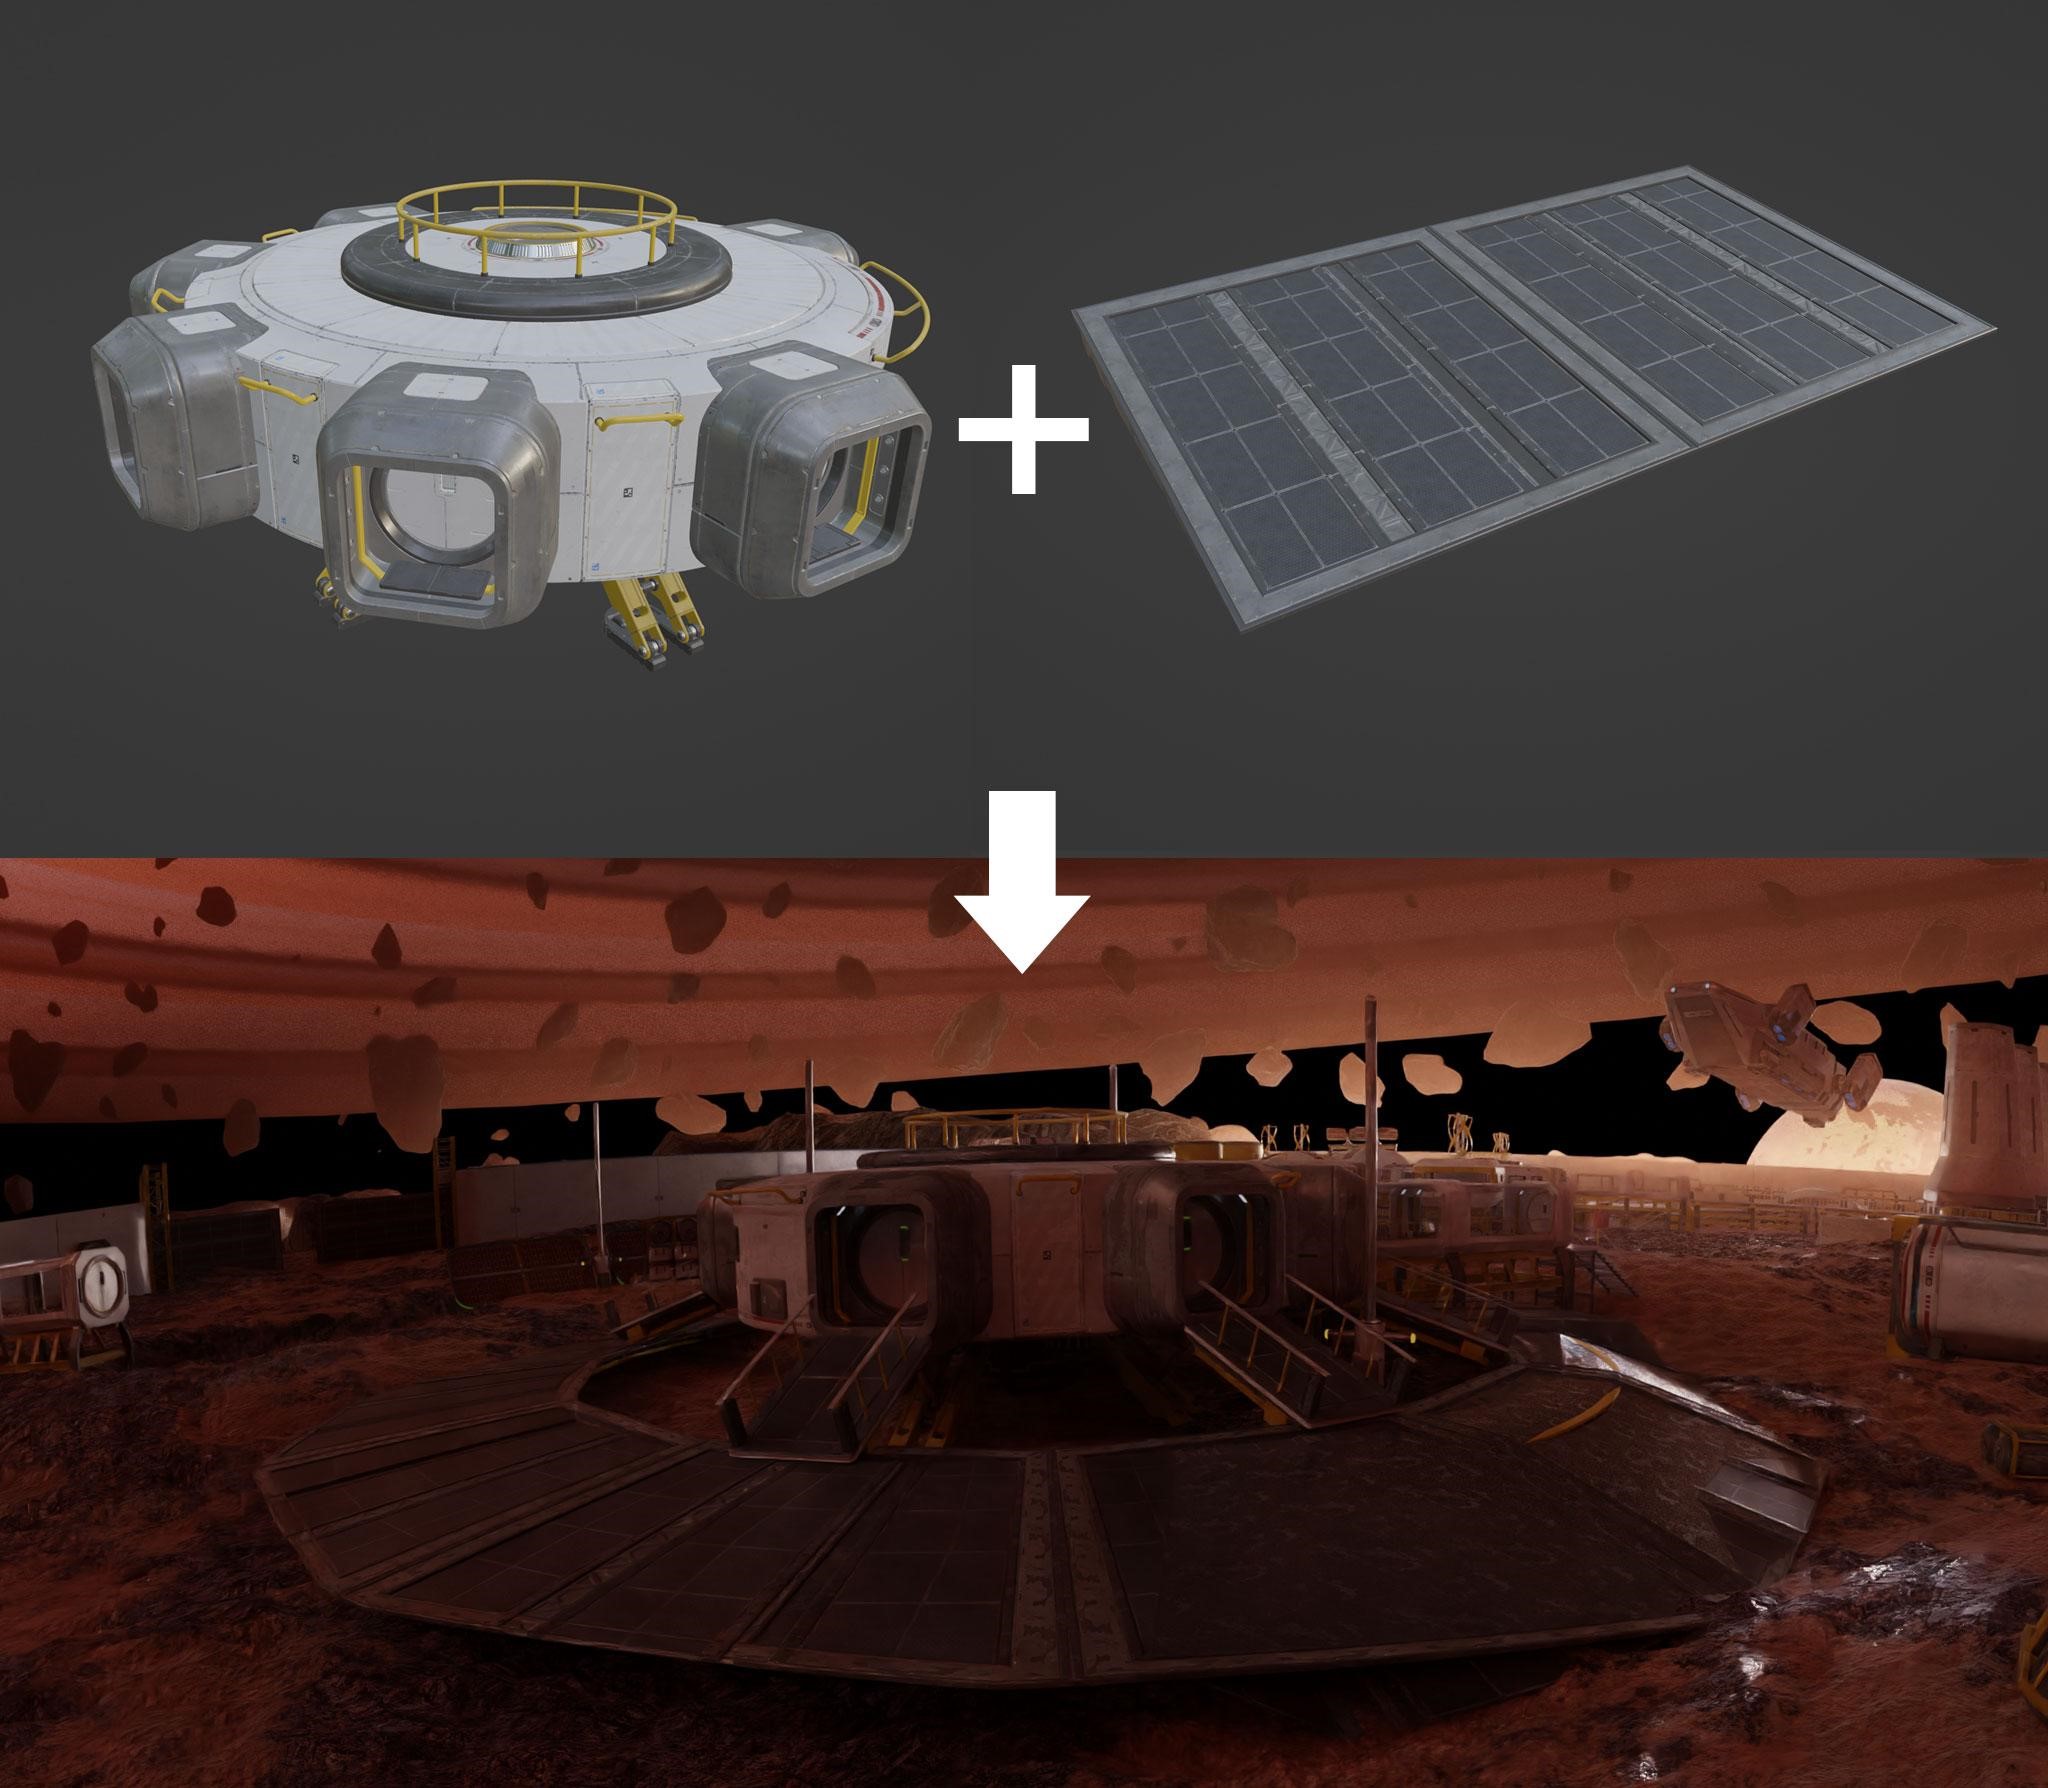
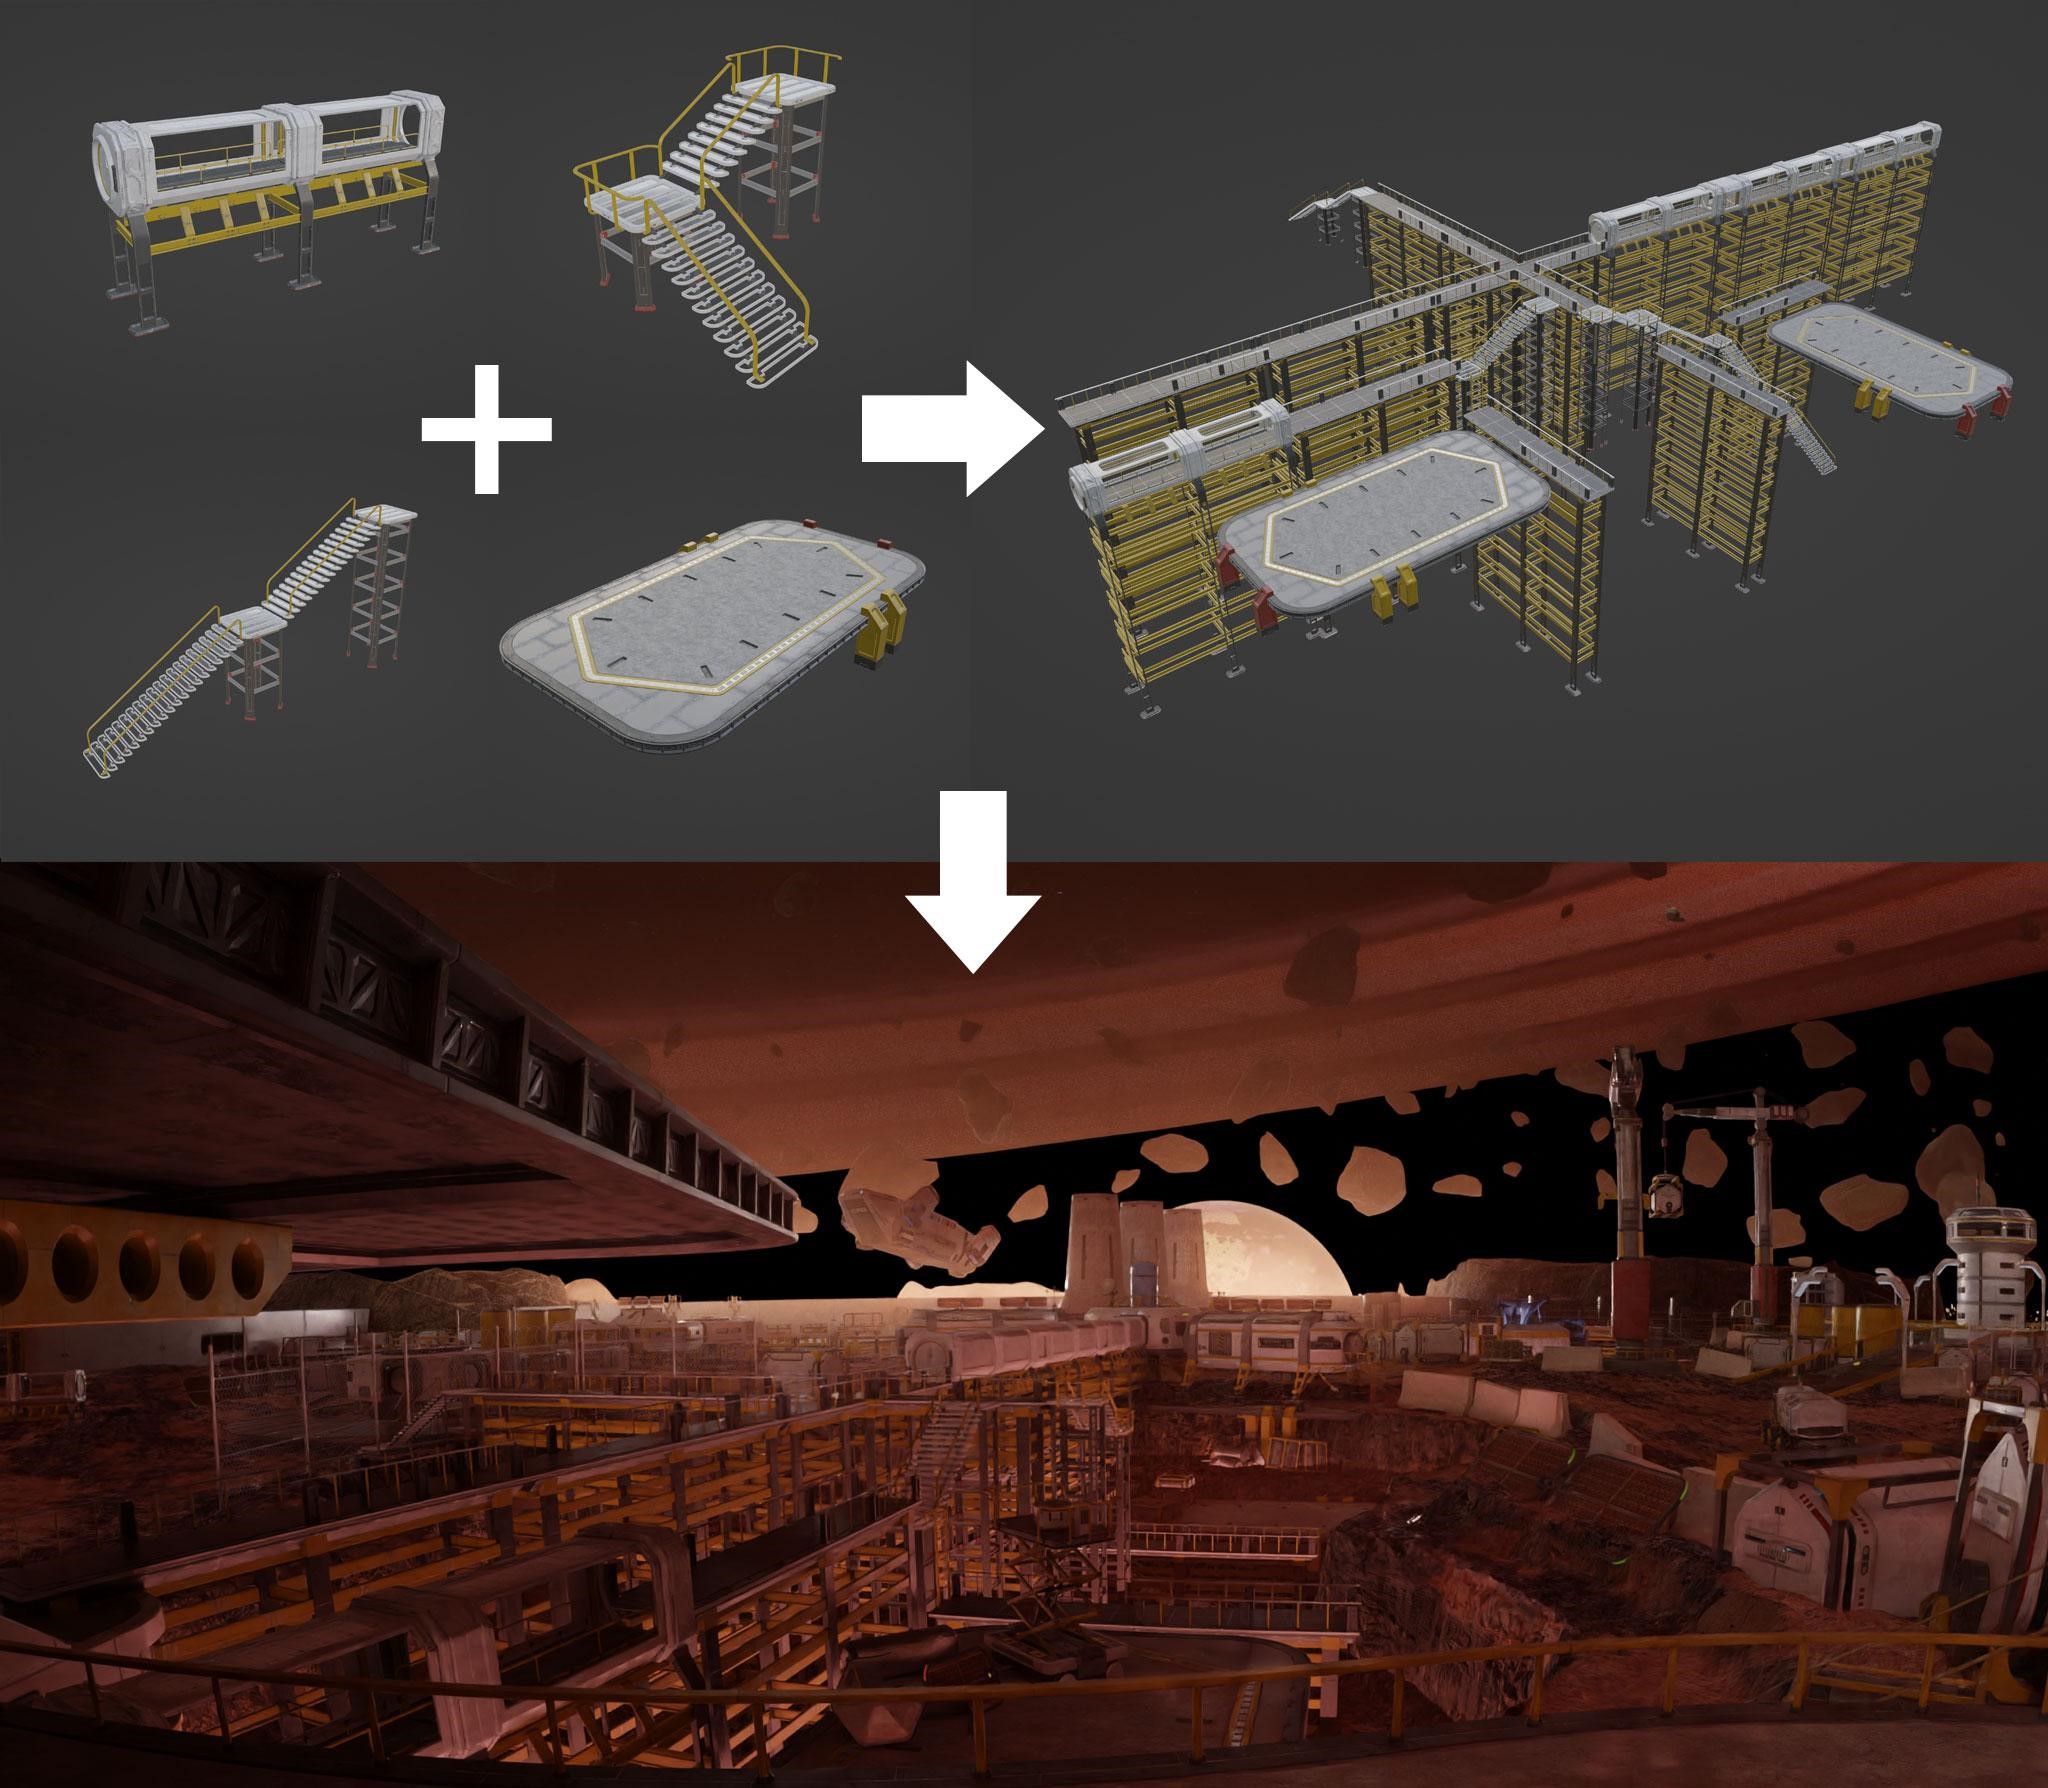
ASSEMBLY
Assembly is the most time-consuming phase and has a big impact on whether the artwork is attractive or not. During this process, I set some conditions and design tricks:
- The visual effect should be as close as possible to thumbnail 2.
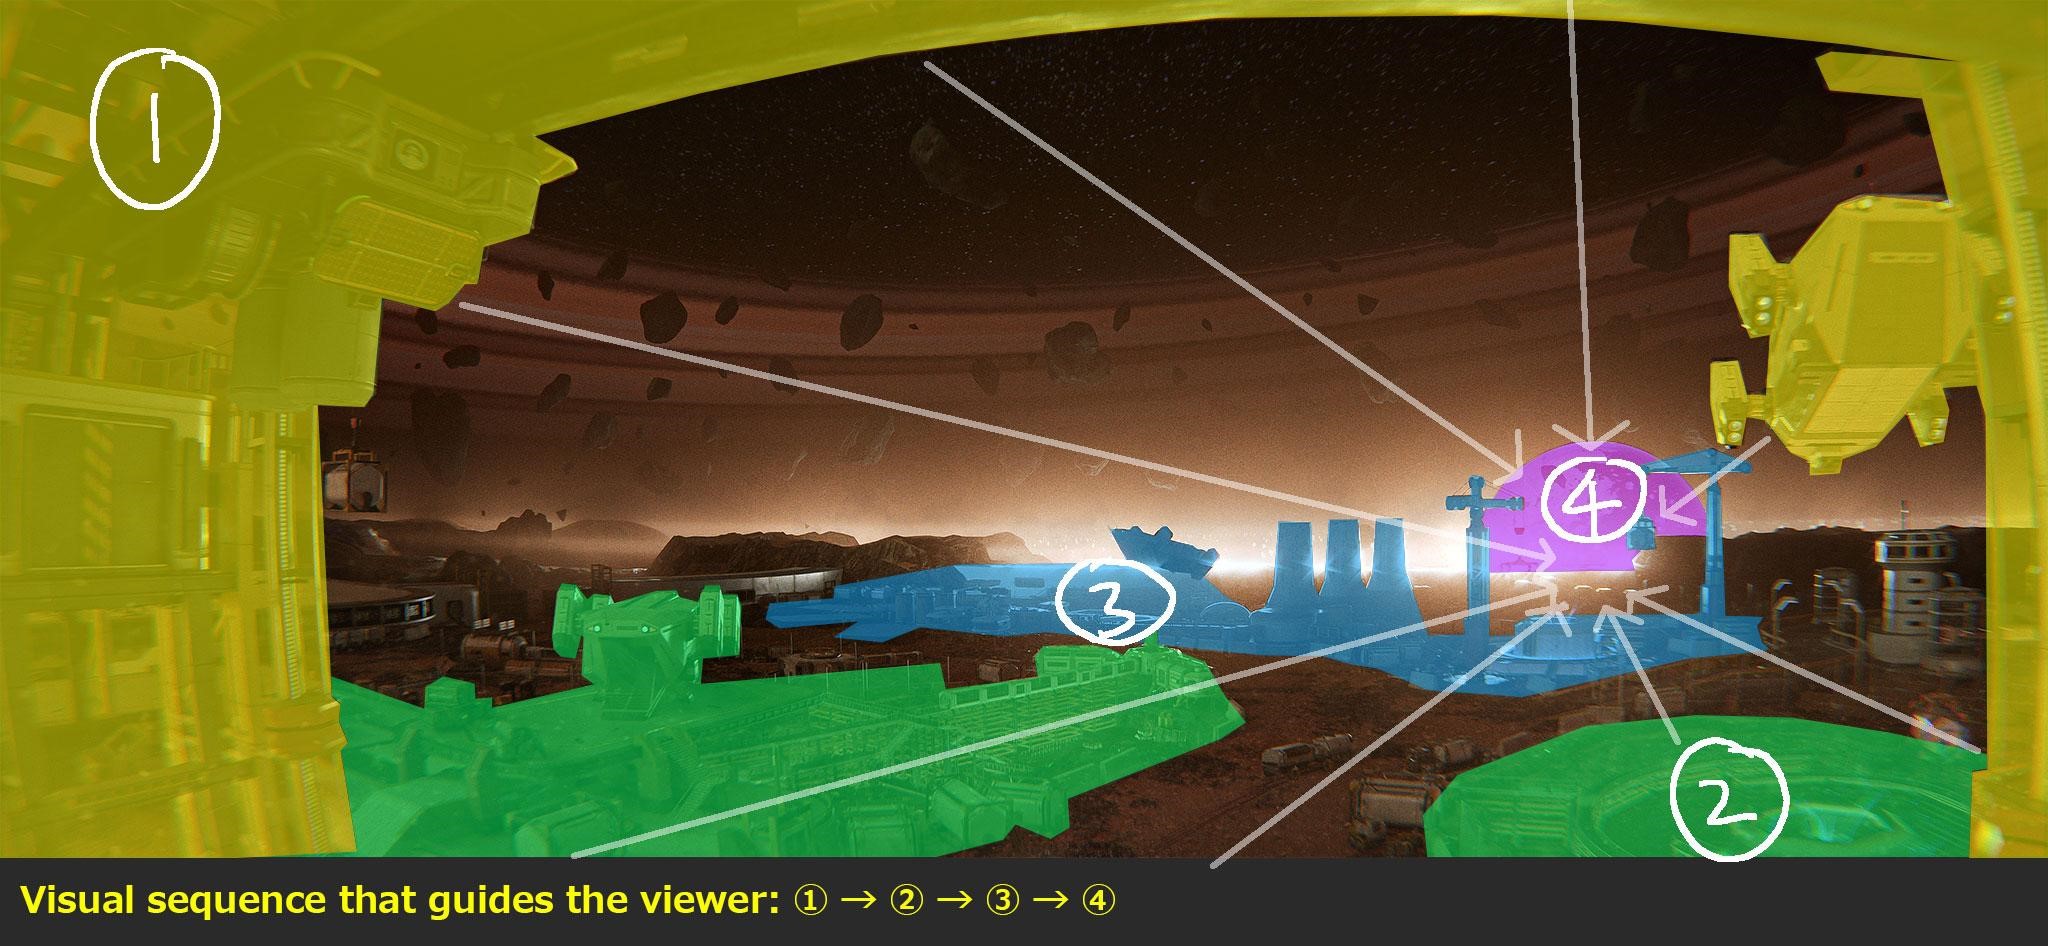
- Use perspective and the setting relationship of objects to attract the viewer’s attention.
- Use mathematical elements to guide the viewer’s vision.
- Coordinate with the camera vision to make the displayed objects more attractive.
- The displayed objects should stimulate the imagination and thinking of the viewers.
- The object placement must be natural and not feel out of place.
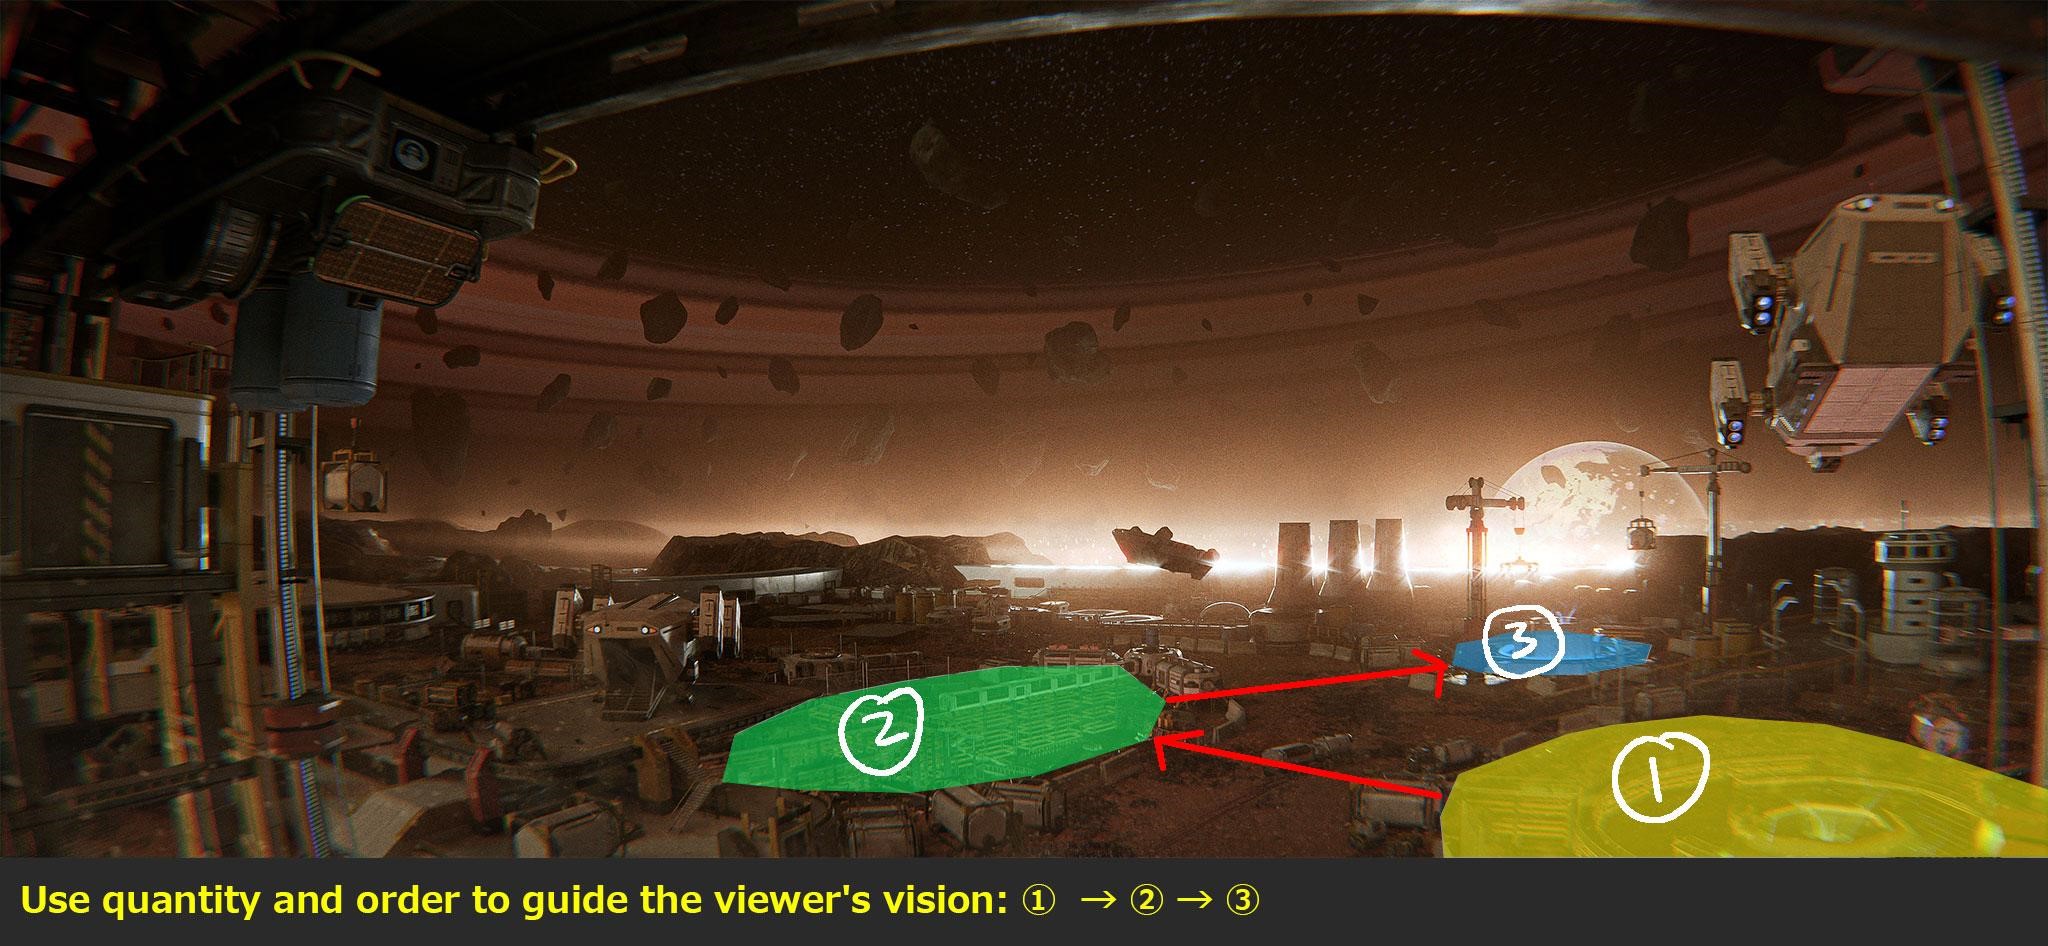
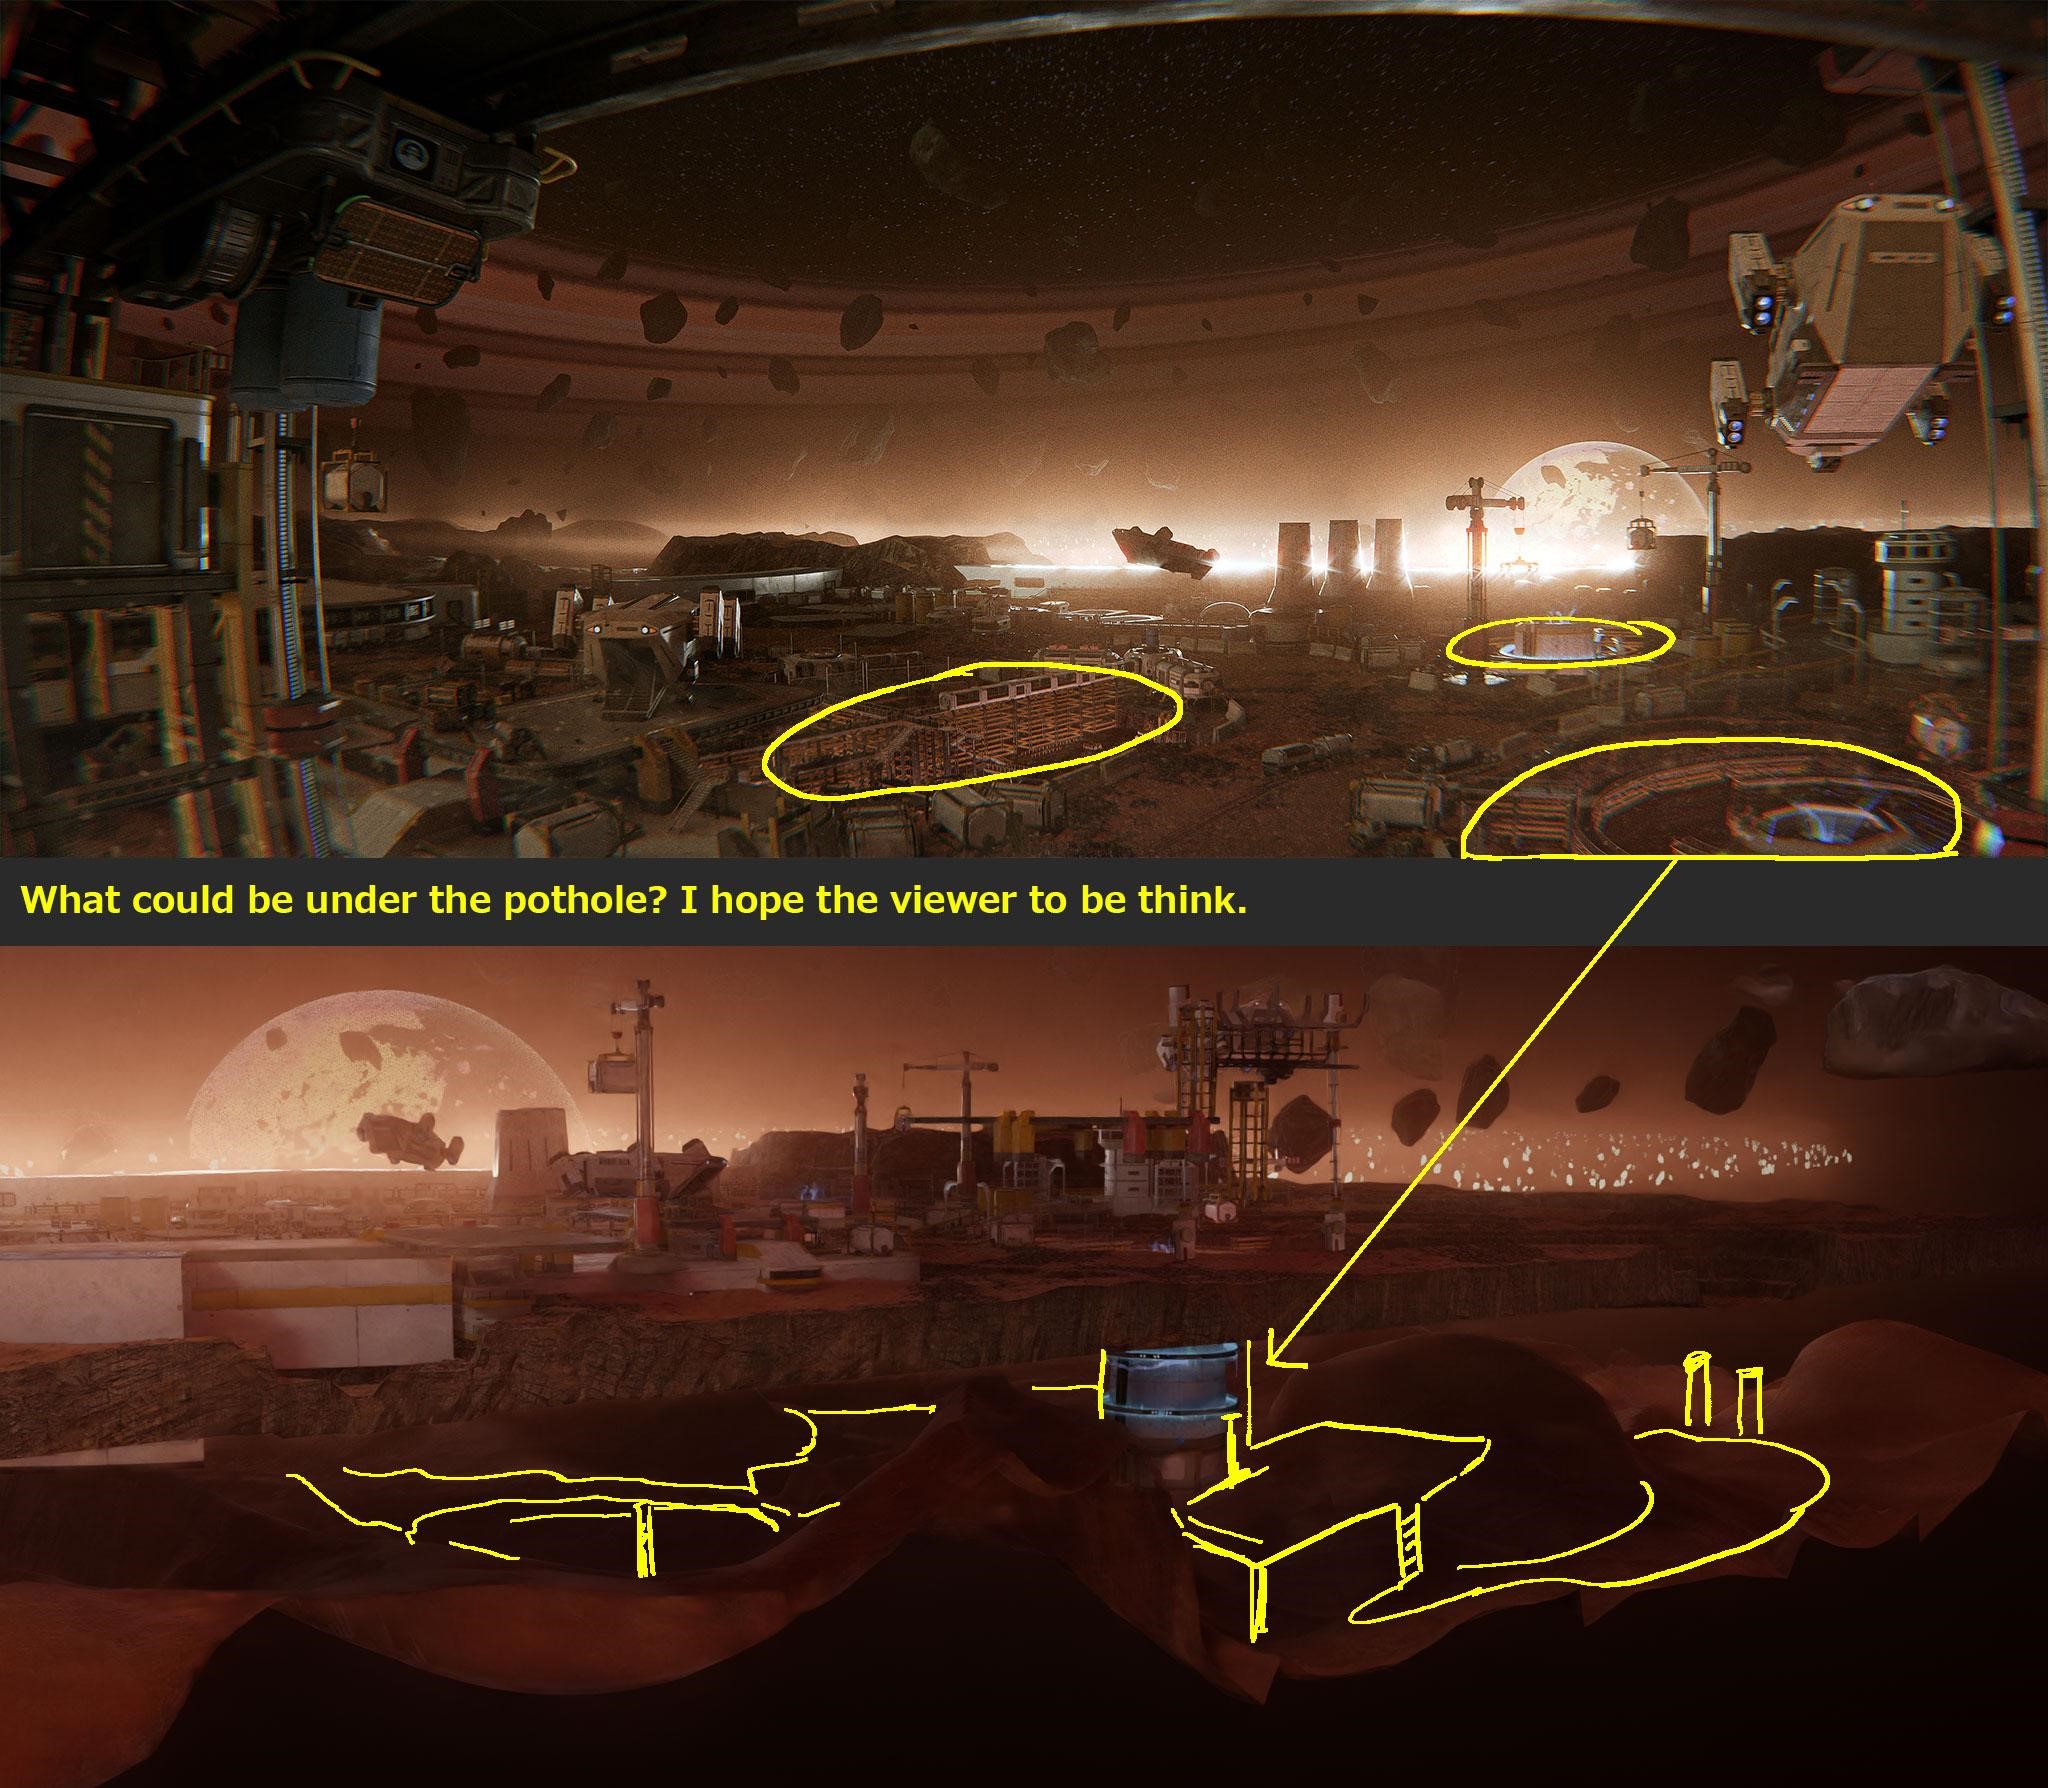
Use perspective to divide each object into different areas to attract the viewer’s attention.
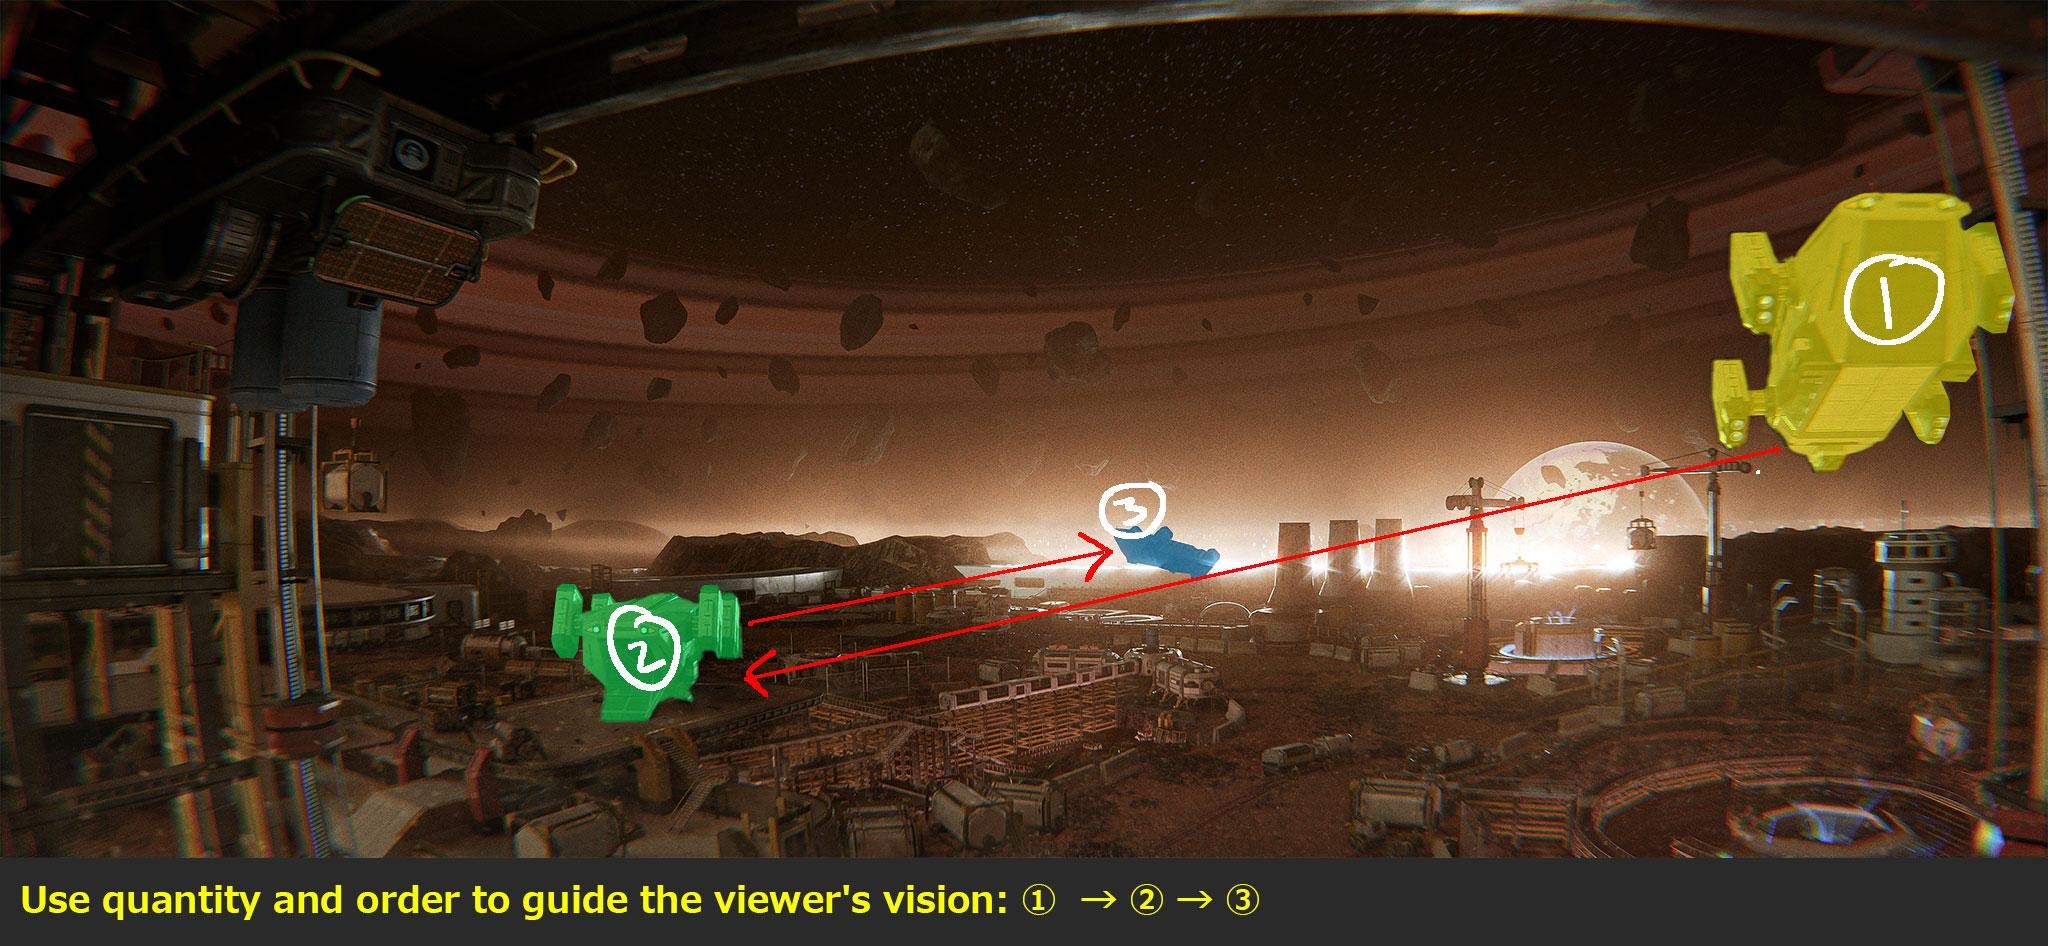
For example: I set 3 spaceships in the scene and used their scale and quantity to guide the viewer’s vision.
Here’s another example of using the quantity of potholes to guide the viewer’s vision.
After determining the shape of the terrain and camera angles, I try to modify some of the models to match them and make the scene as visually appealing as possible.
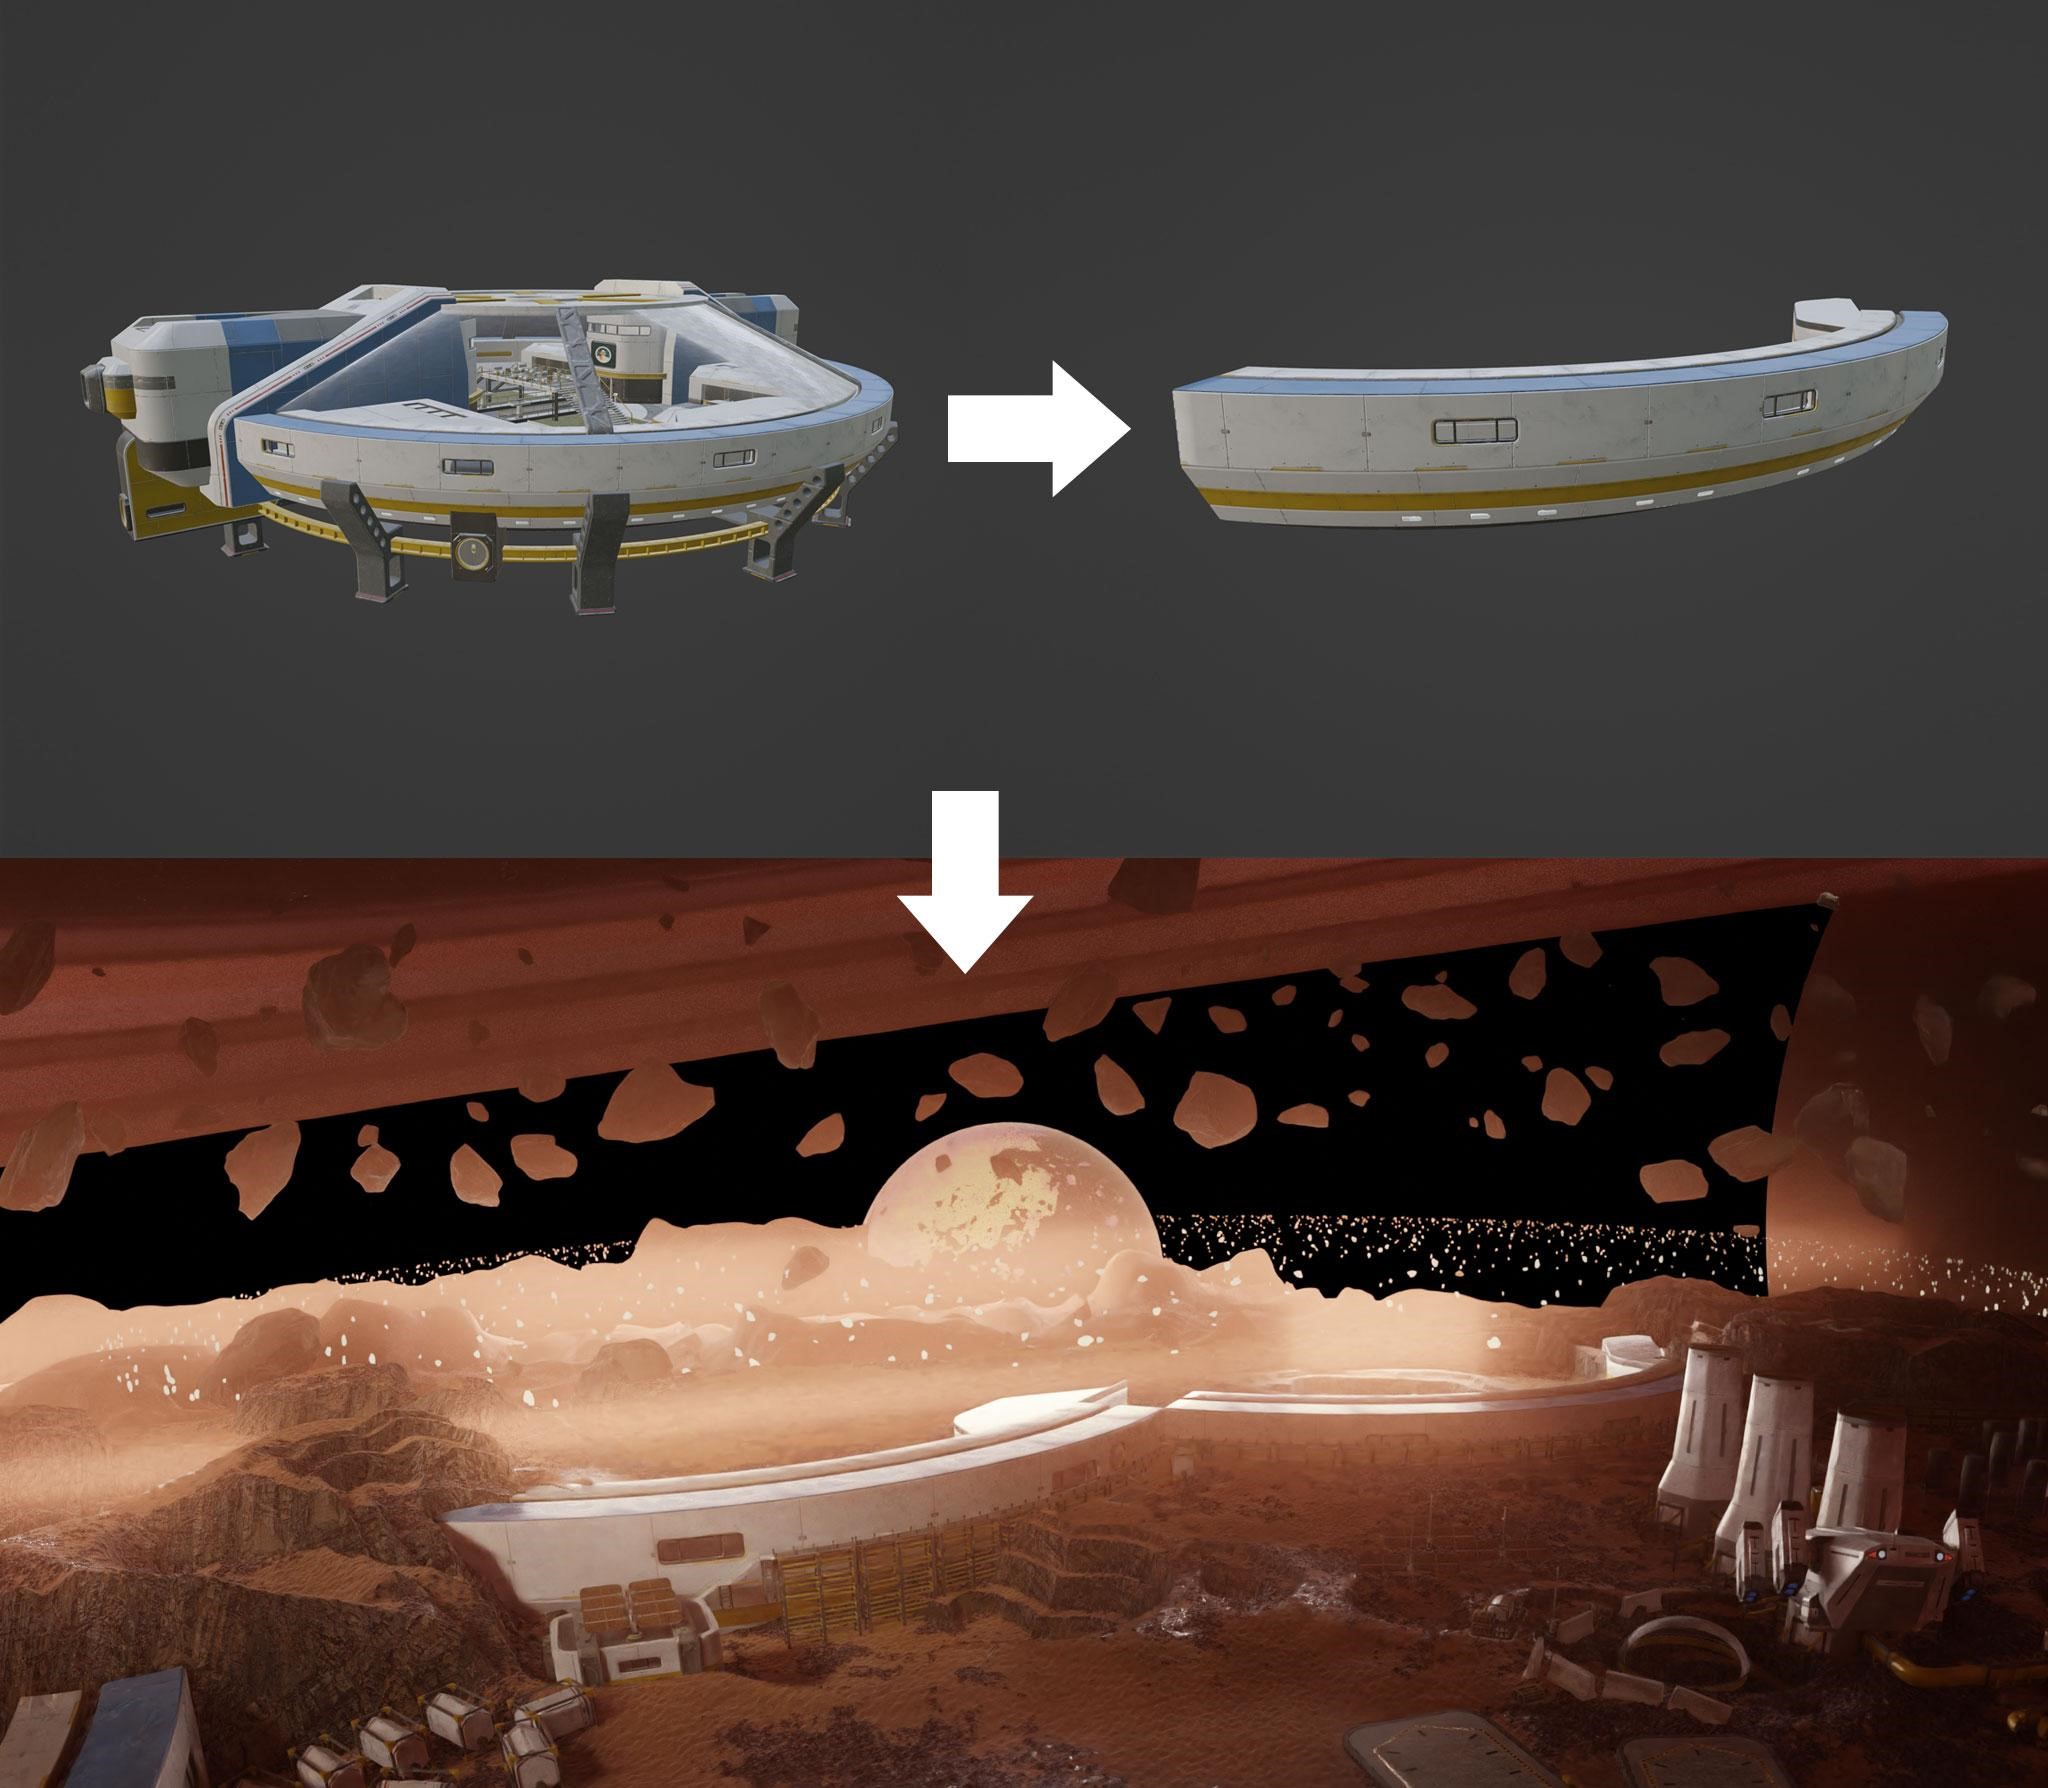
When placing items, I aim to guide the viewer to think about what happened in the scene and expand the regional space of the scene.

For example, the viewer may wonder what is under the pothole or where the train tracks or roads are going.
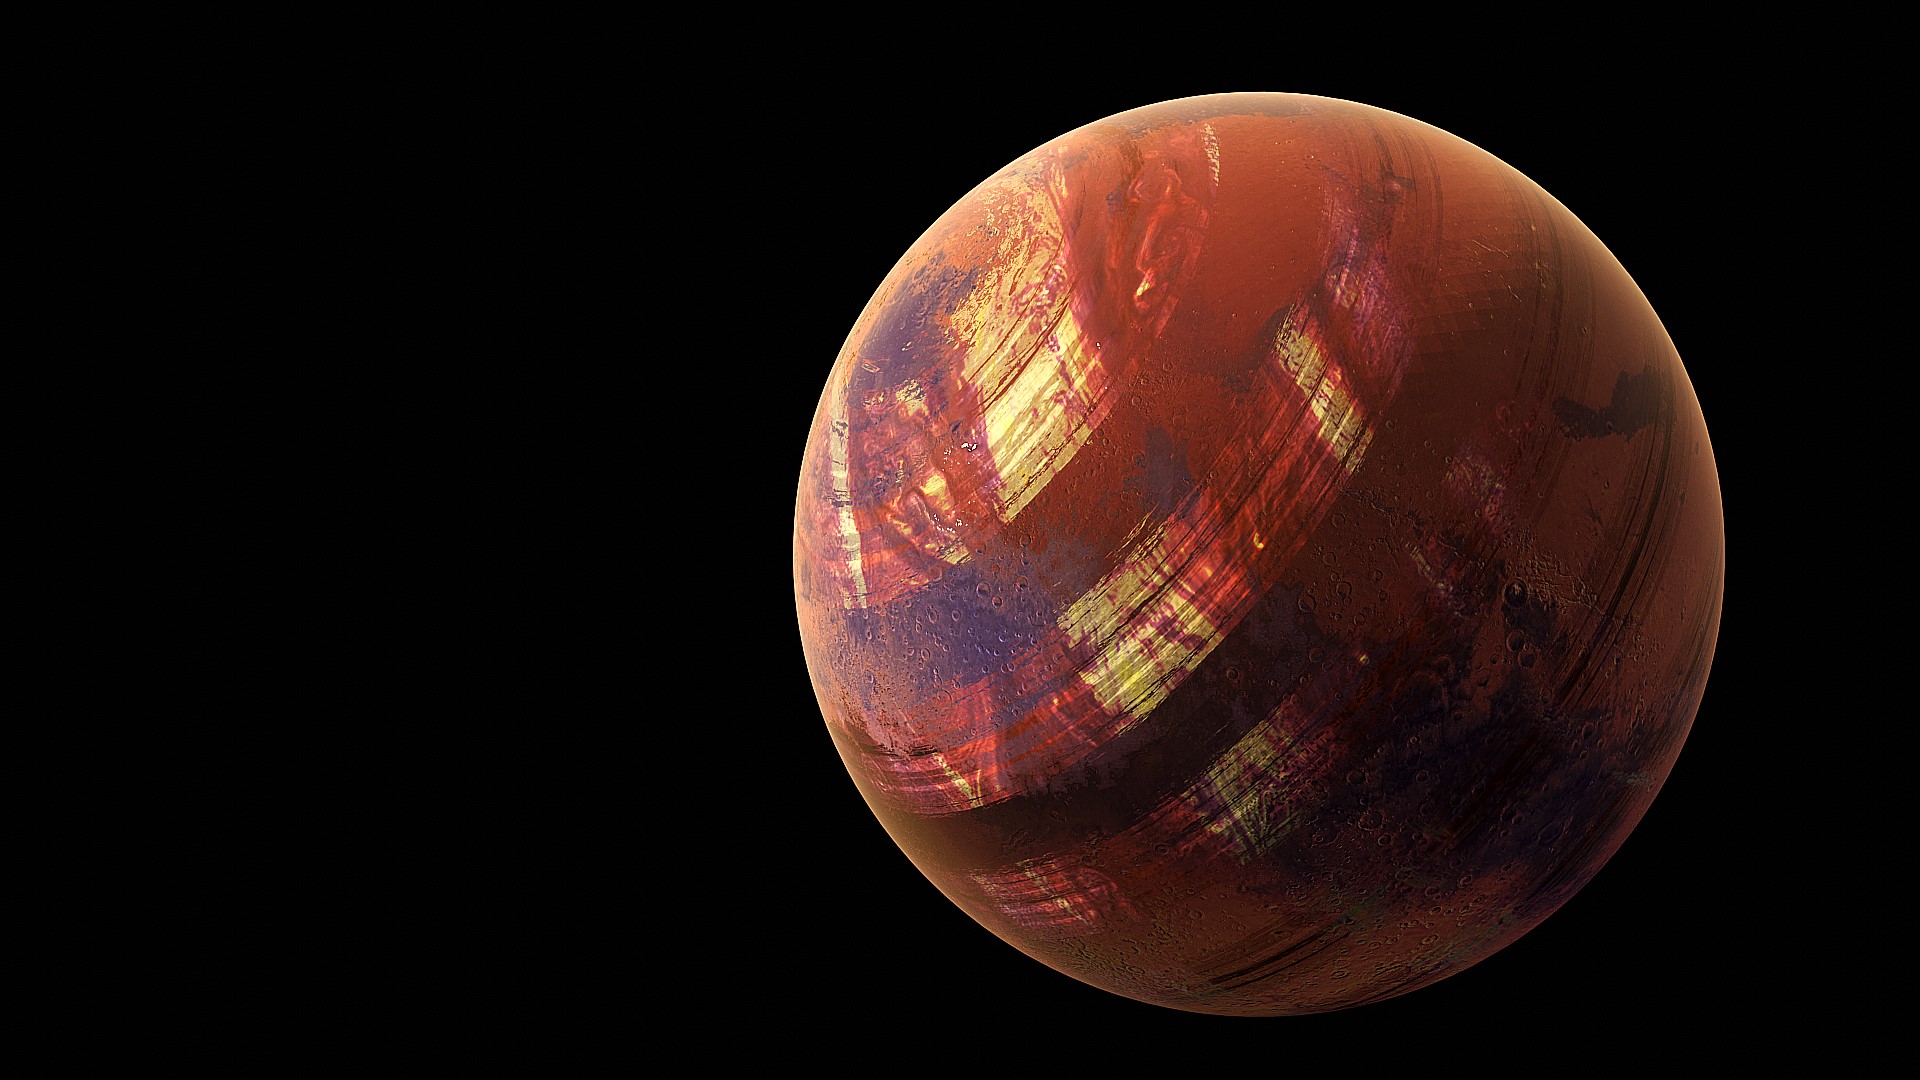
PLANET AND STAR
Regarding the production of planets and stars, I will not go into detail here. However, I learned some processing from Creative Shrimp’s SPACE VFX ELEMENTS tutorial, which I highly recommend for those interested in space subjects.
COLOR DESIGN
I mainly use these three colors in the scene.

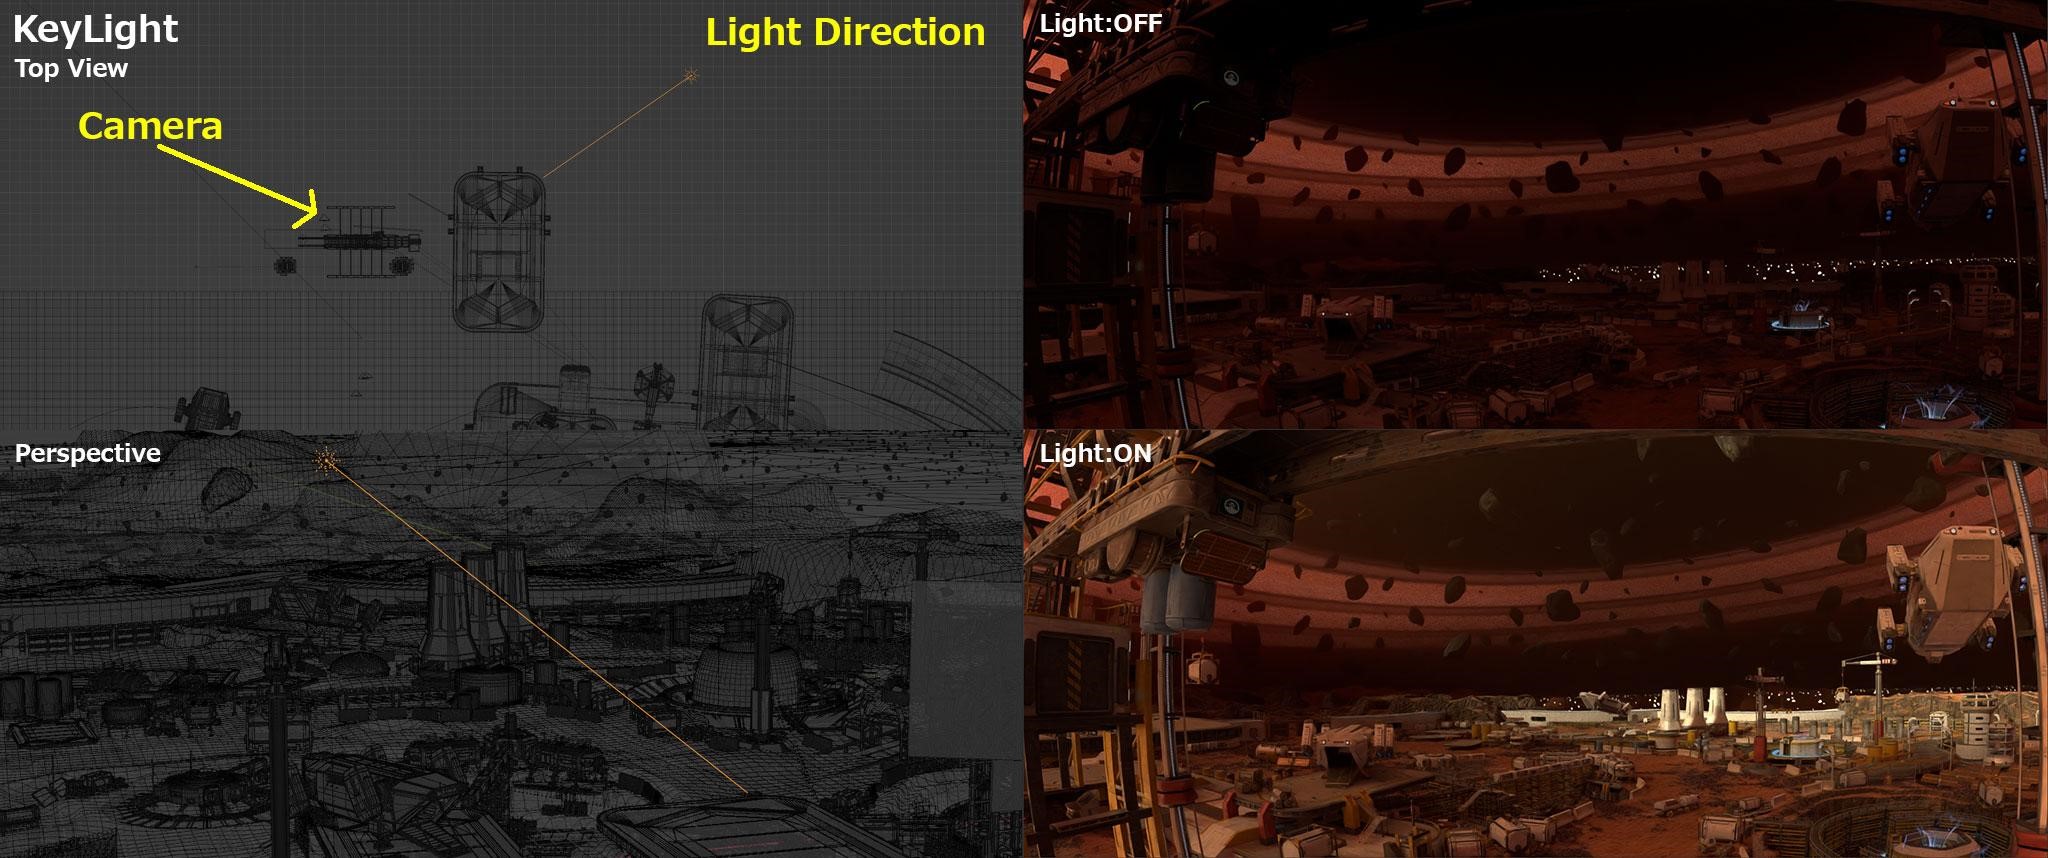
LIGHTING
For the lighting part, I mainly use these three types of lights to control the scene:
- A key light
- An area light
- A back light
A key light to control the main lights of the scene.
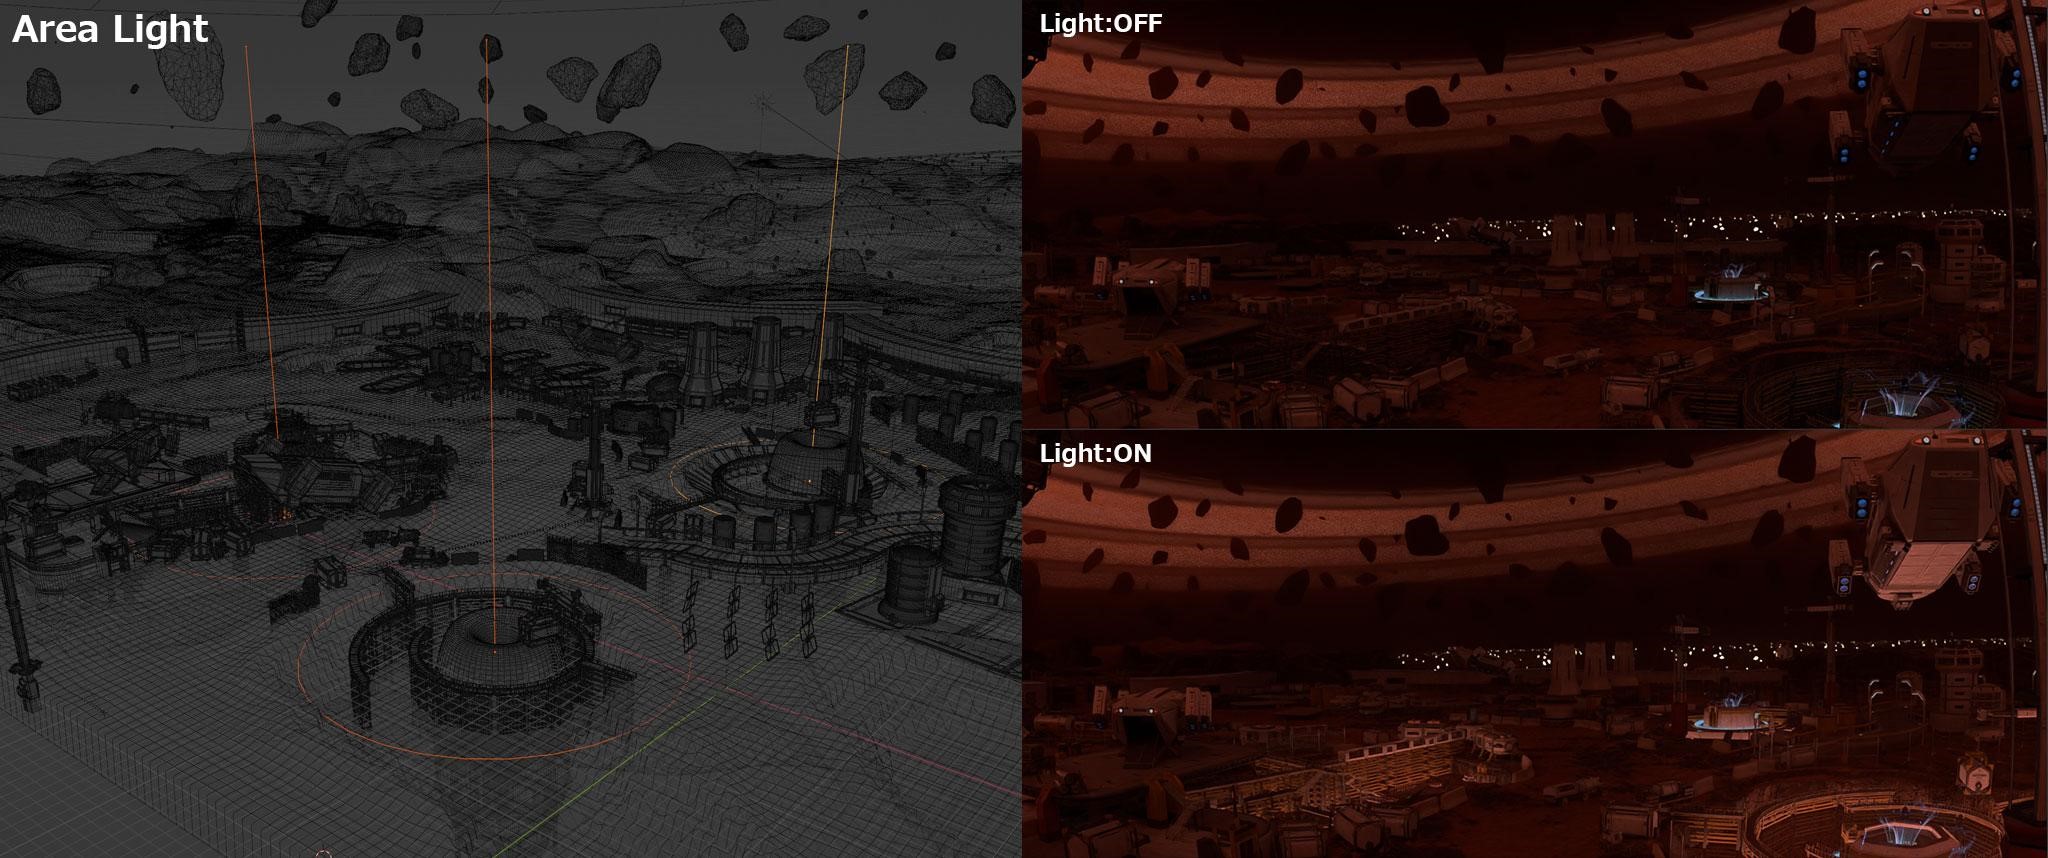
An area light set under the pothole to enhance vision.
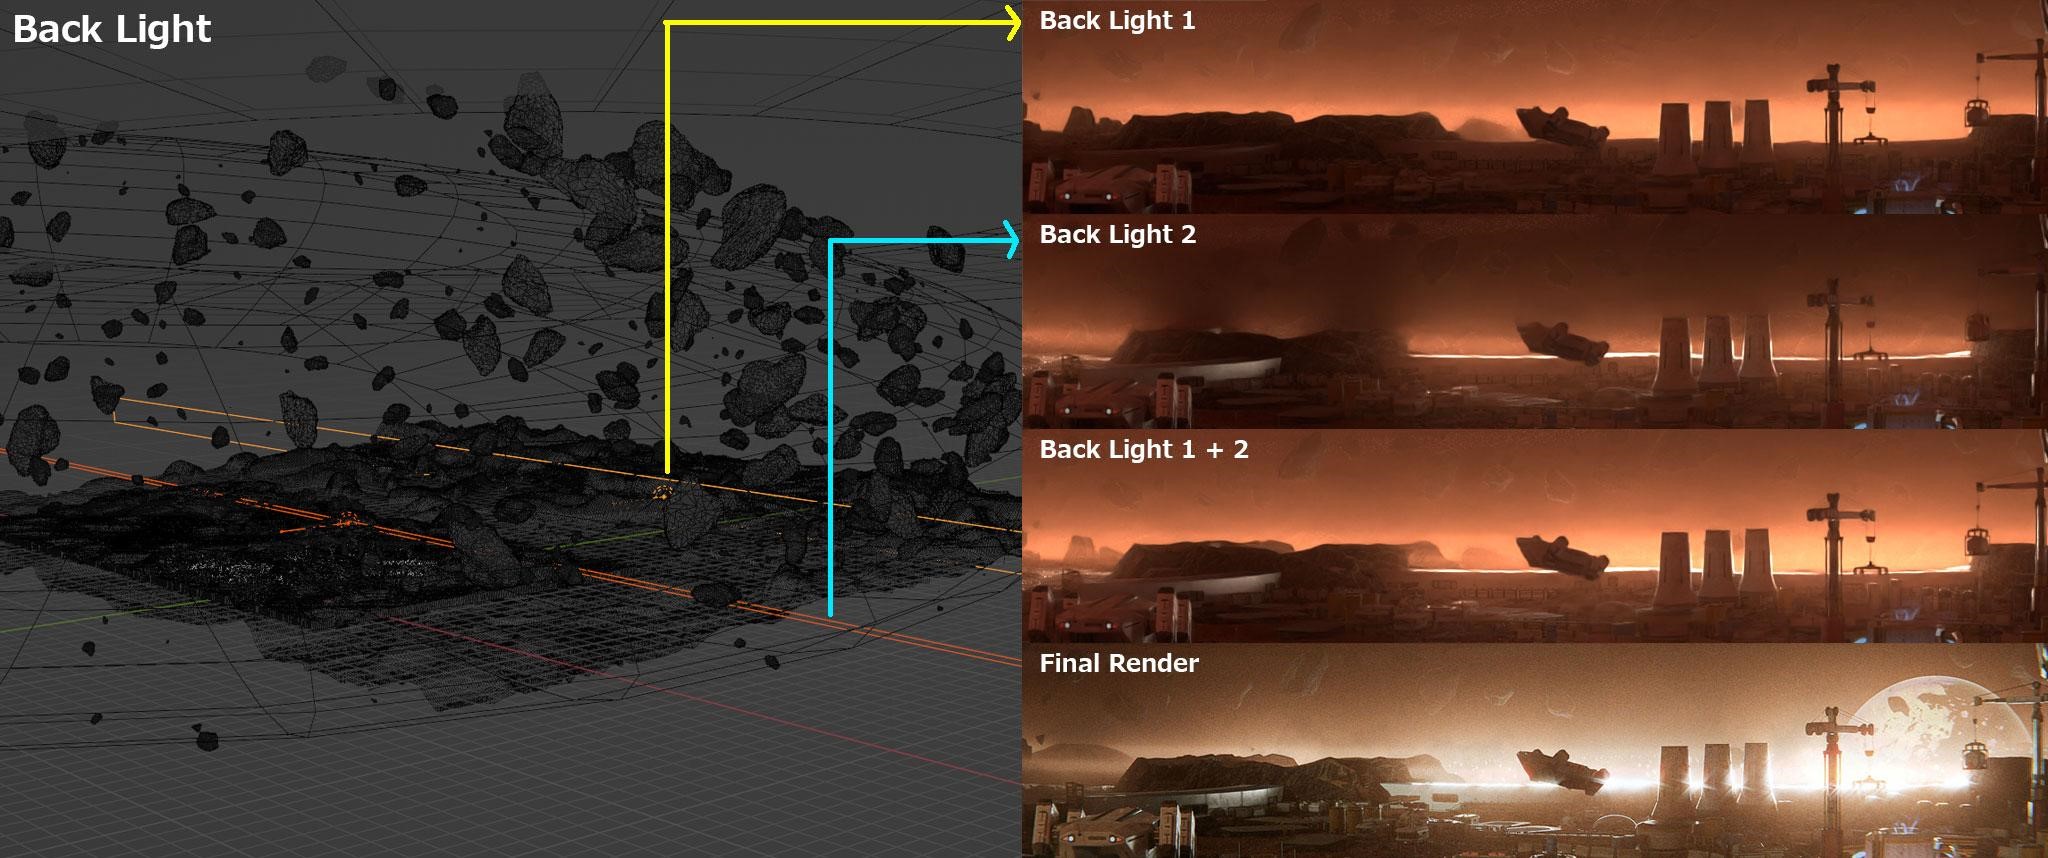
A back light used for distant scenes and light-dark contrast.

The back light is the most important part of the artwork, and I deliberately added strong twilight to show the theme atmosphere. “Back Light 1” is the soft light in the background, while “Back Light 2” is the strong light shining on the city wall, creating a back-lit shot effect.
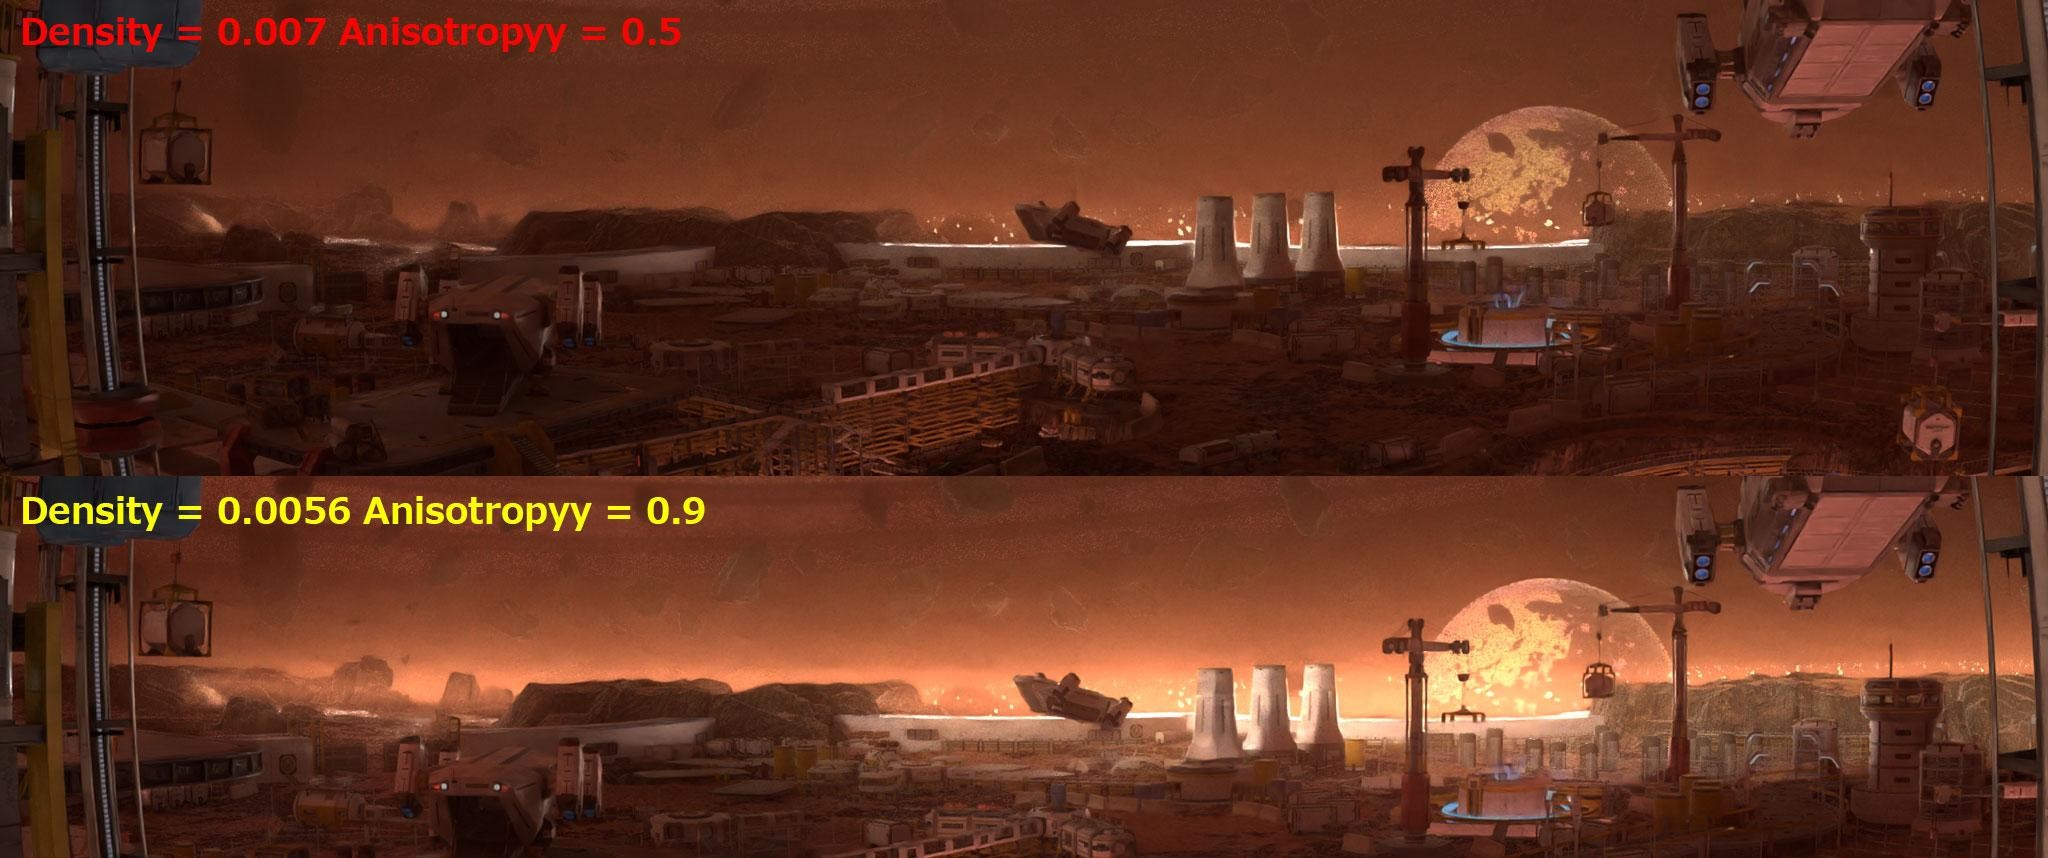
In addition to setting the lighting, set a huge box in the scene. Add the ‘Principled Volume’ shader to the box and adjust the values of ‘Density’ and ‘Anisotropy’.

Finally, I decided to use the settings of ‘Density’ = 0.0056 and ‘Anisotropy’ = 0.9, as they are the most suitable.
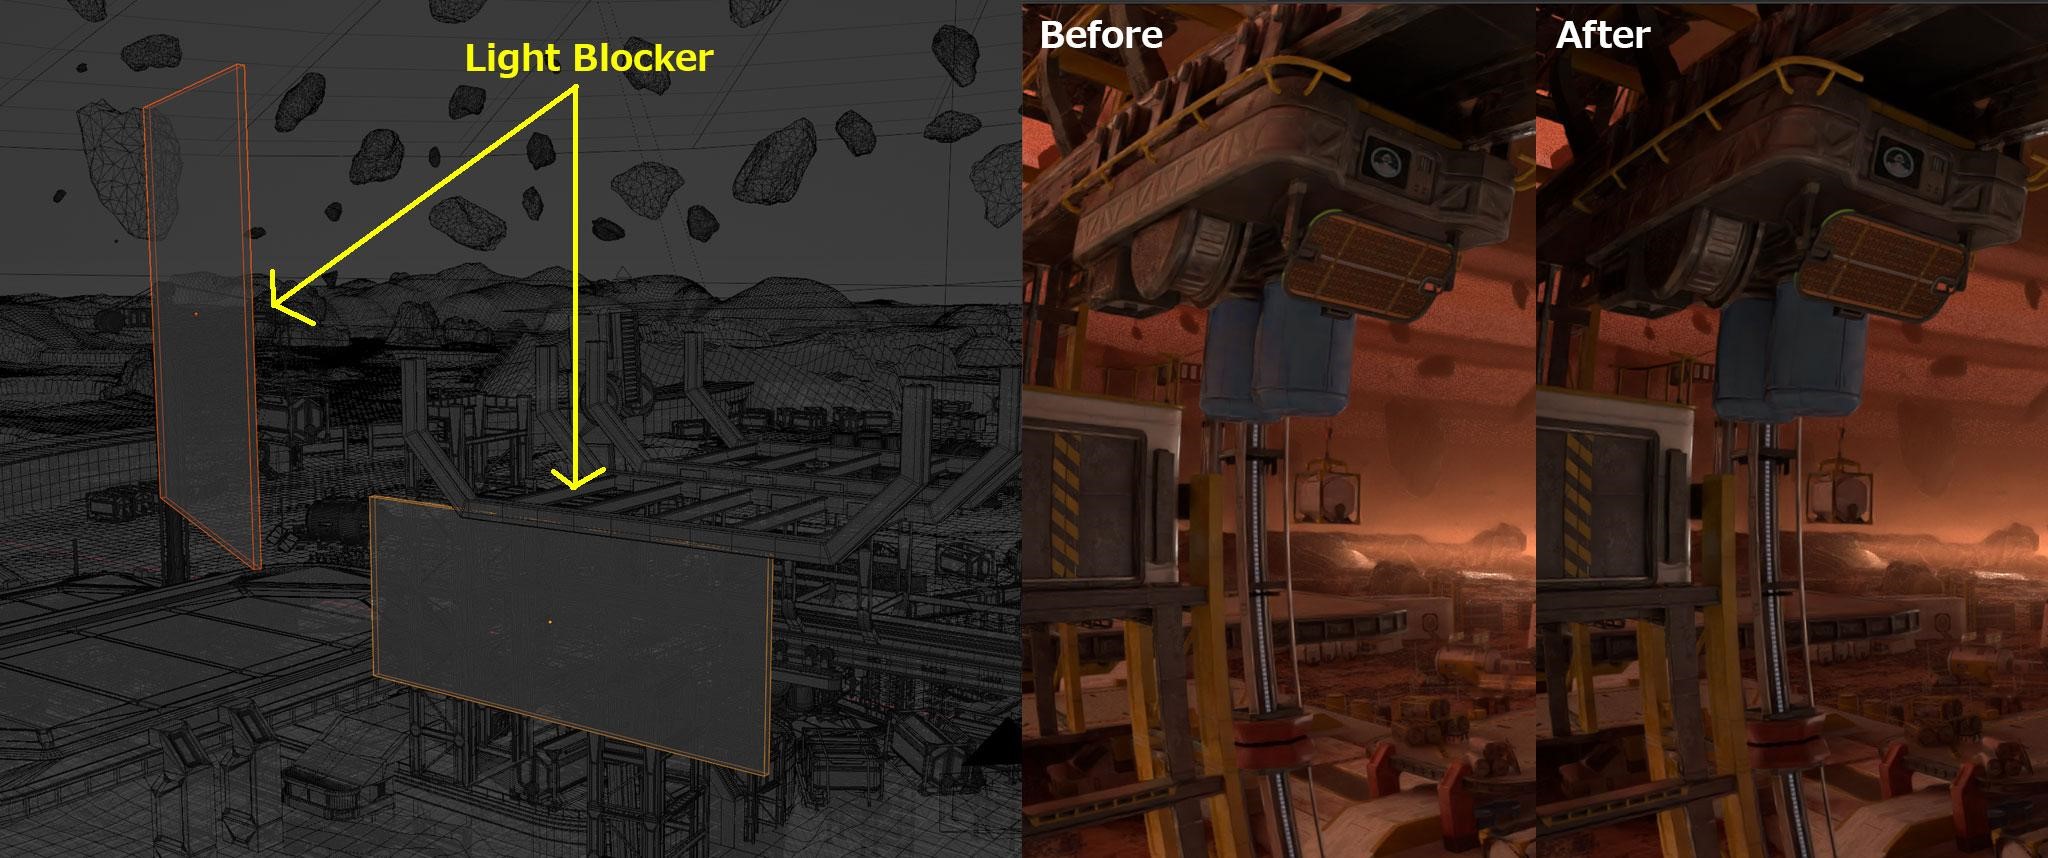
Since some areas do not want to have too strong lights, I set up some simple planes to block the lights, such as machinery in the foreground or mountains in the background.
POST-PROCESSING
When the rendering is complete, I enter the post-processing stage.
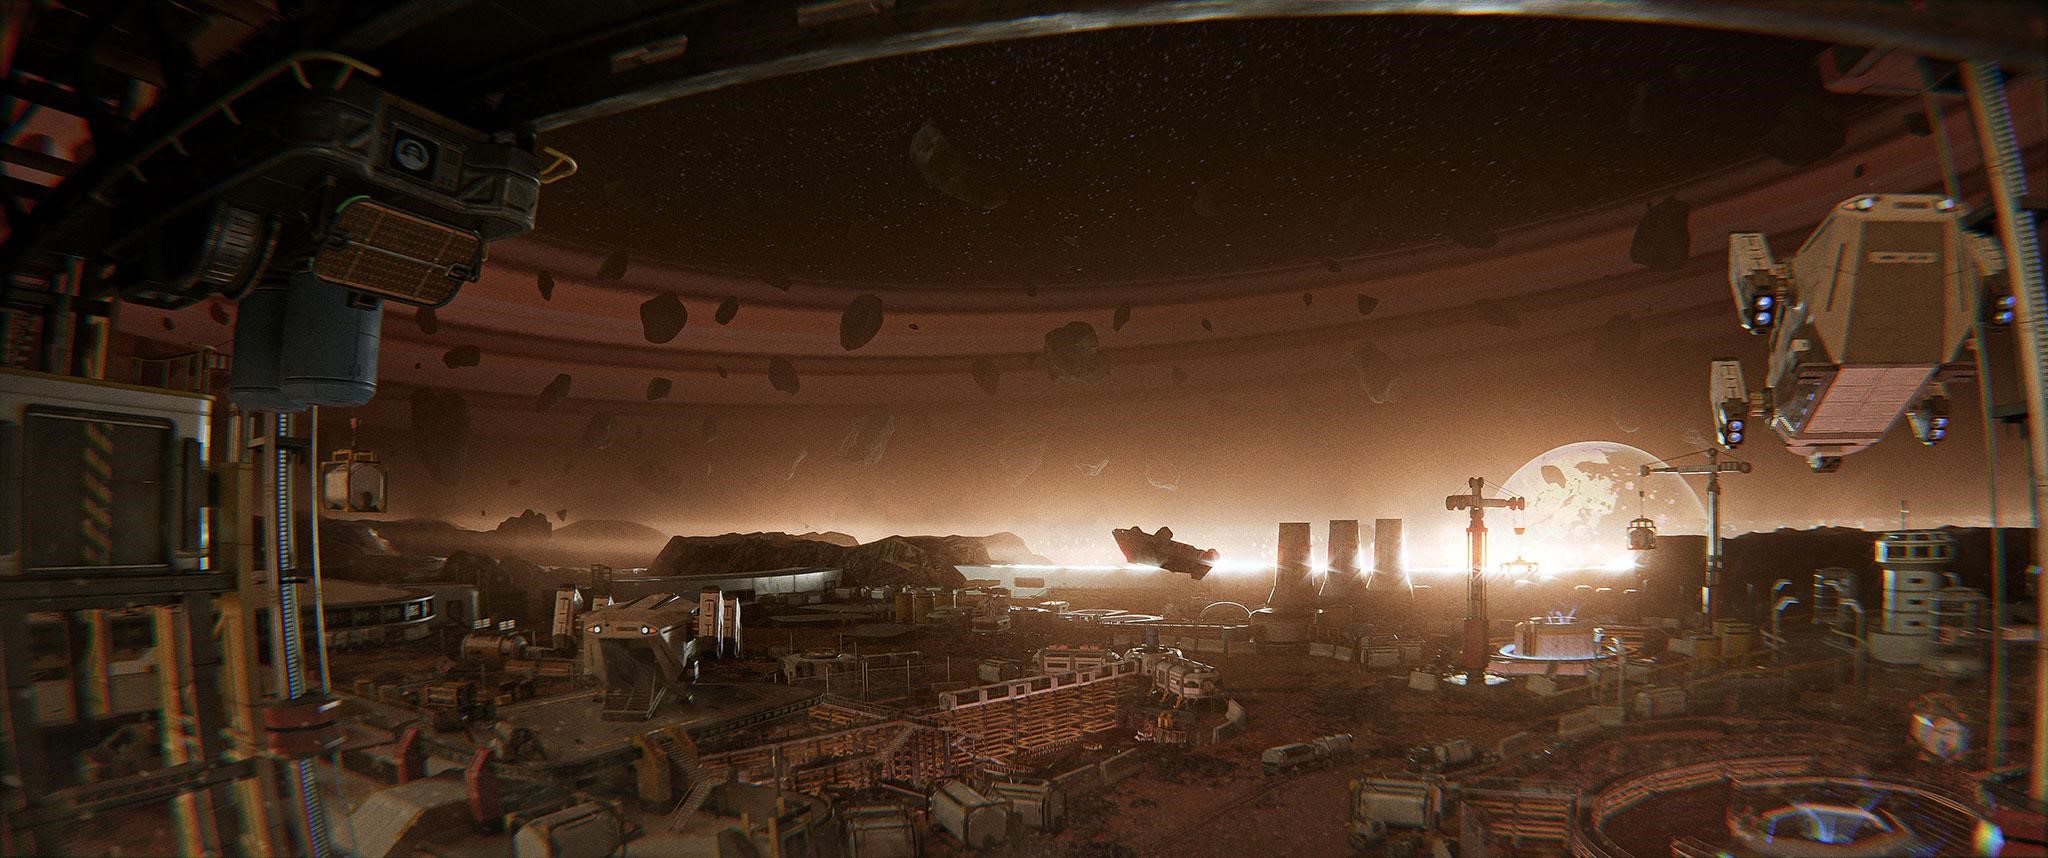
Here, I mainly added ‘Glare’ and ‘Lens Distortion’ to the image. ‘Glare’ can give the effect of ‘Lens Flares Star’, while ‘Lens Distortion’ combined with ‘Fisheye Lens Polynomial’ visually enhances a small amount of distortion. I think this visual effect is more attractive.
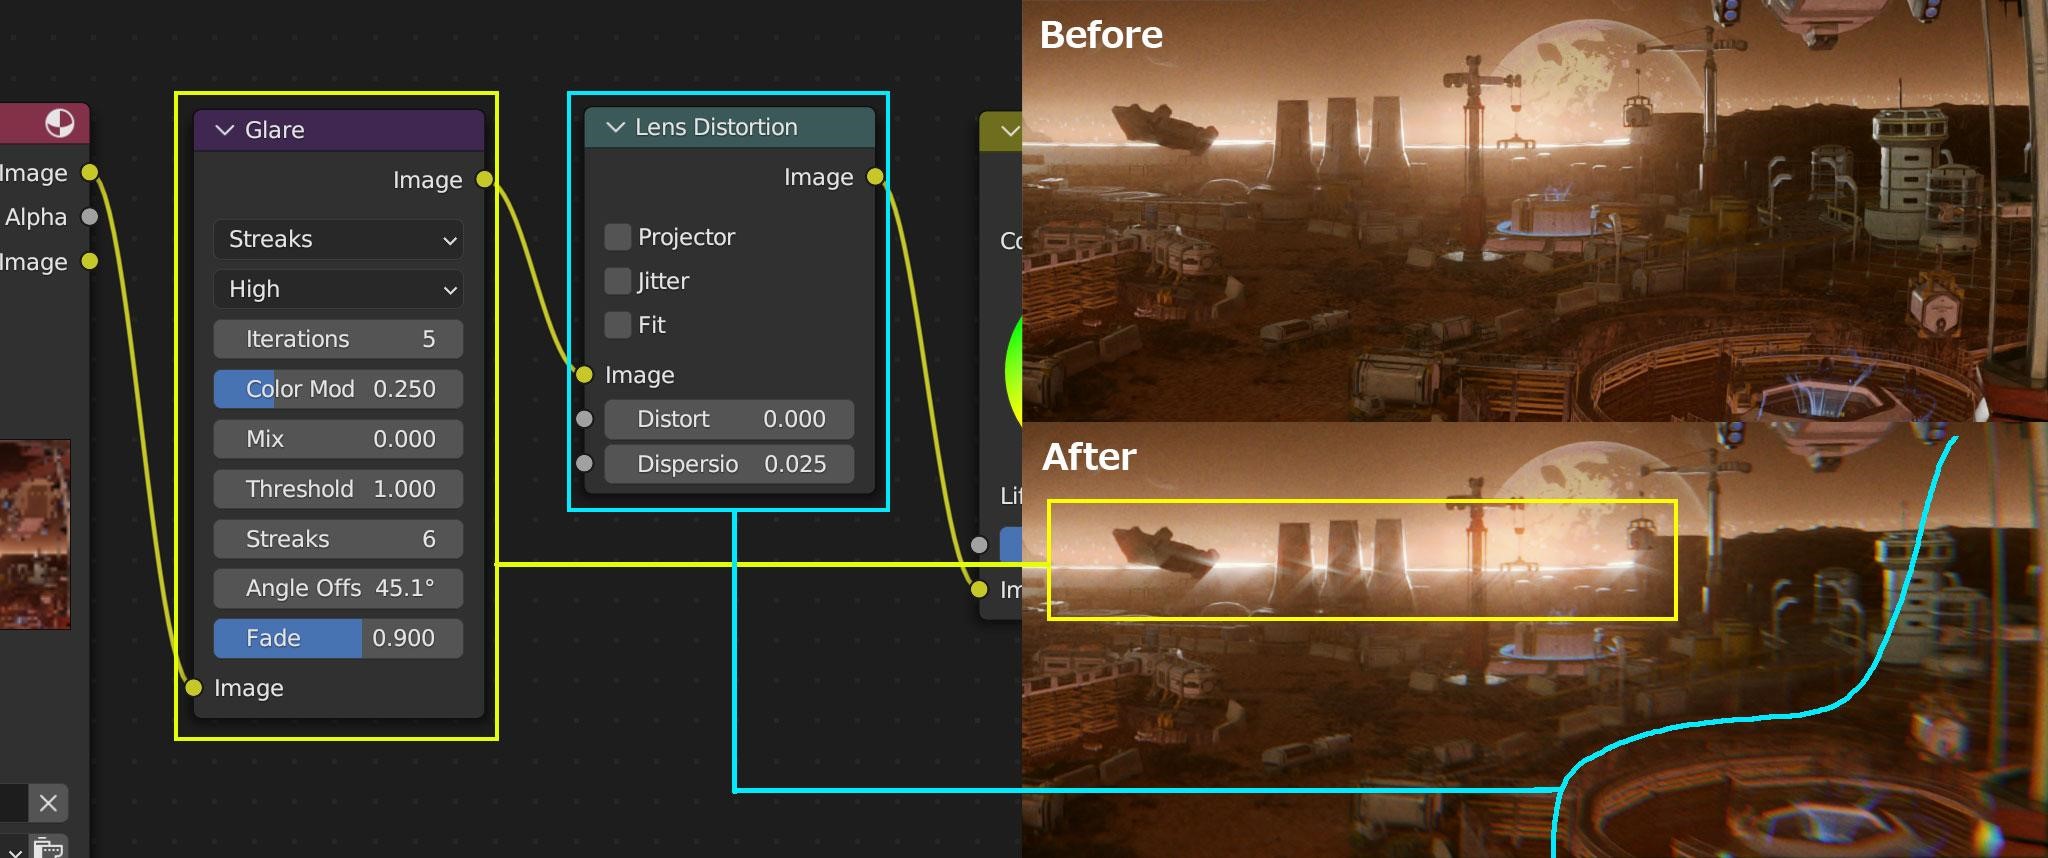
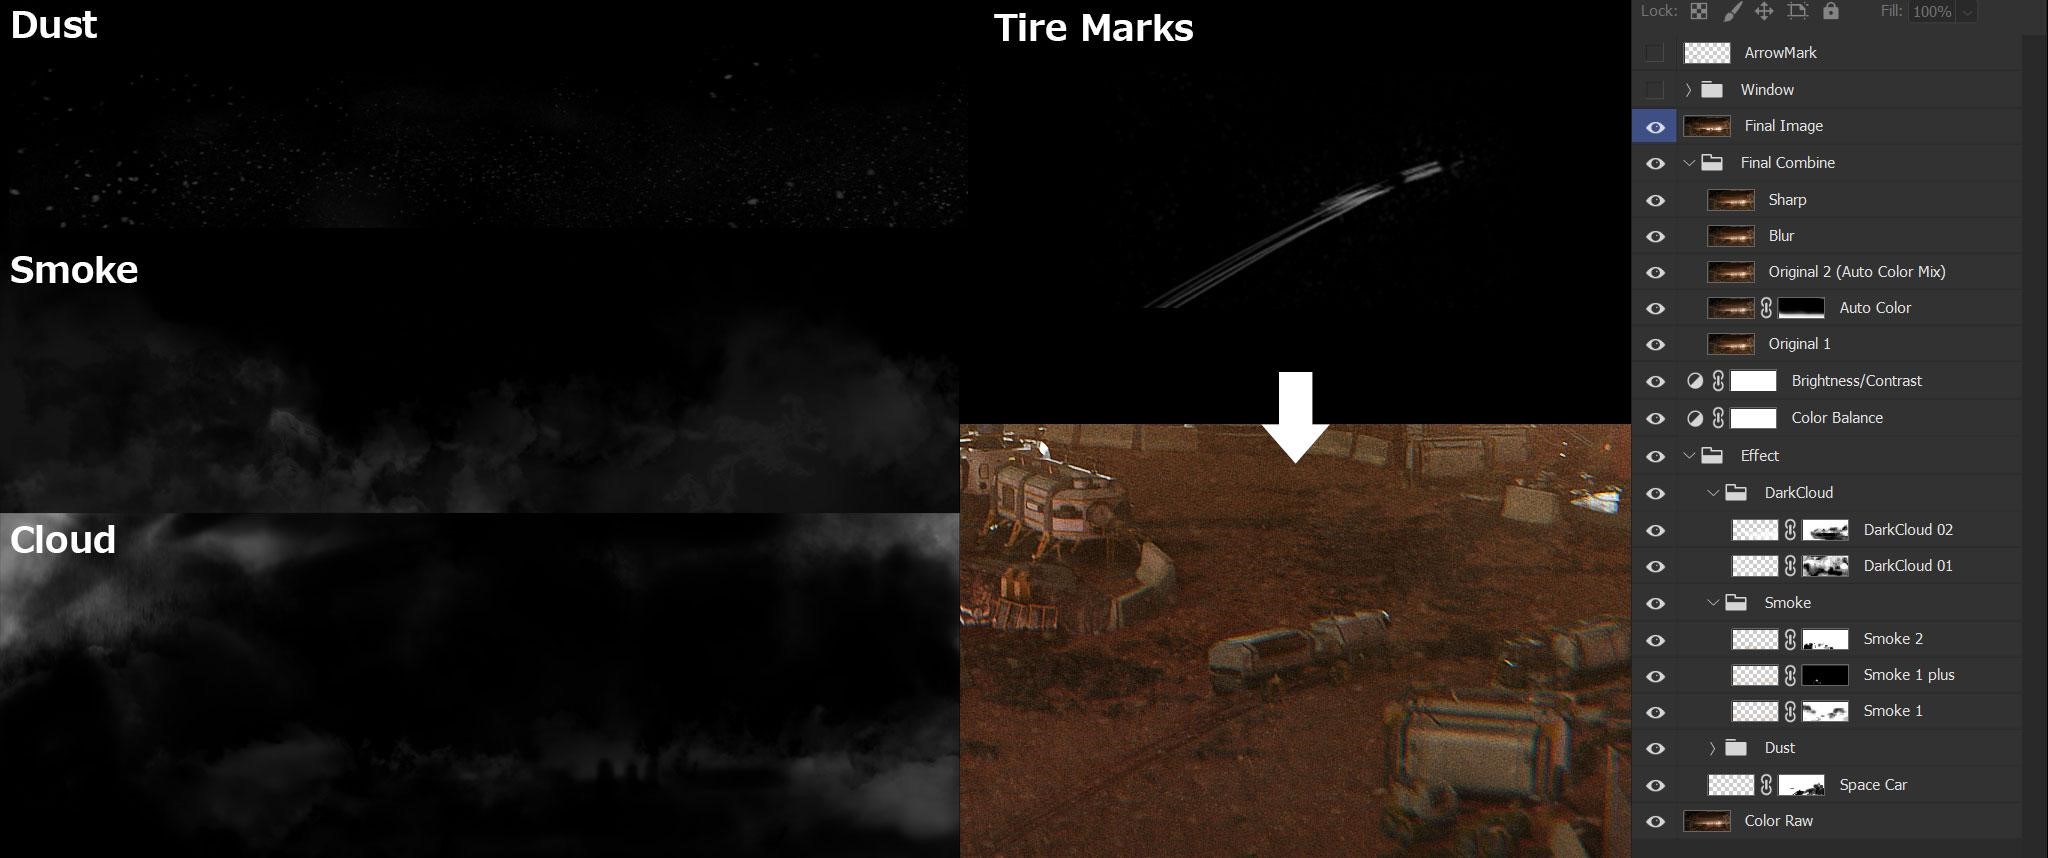
In the final stage, I do some basic retouching in Photoshop for the artwork.
For example, I may add some dust and smoke on a layer, or use the ‘Camera Raw Filter’ to adjust the color or lighting of the artwork to achieve a better result.
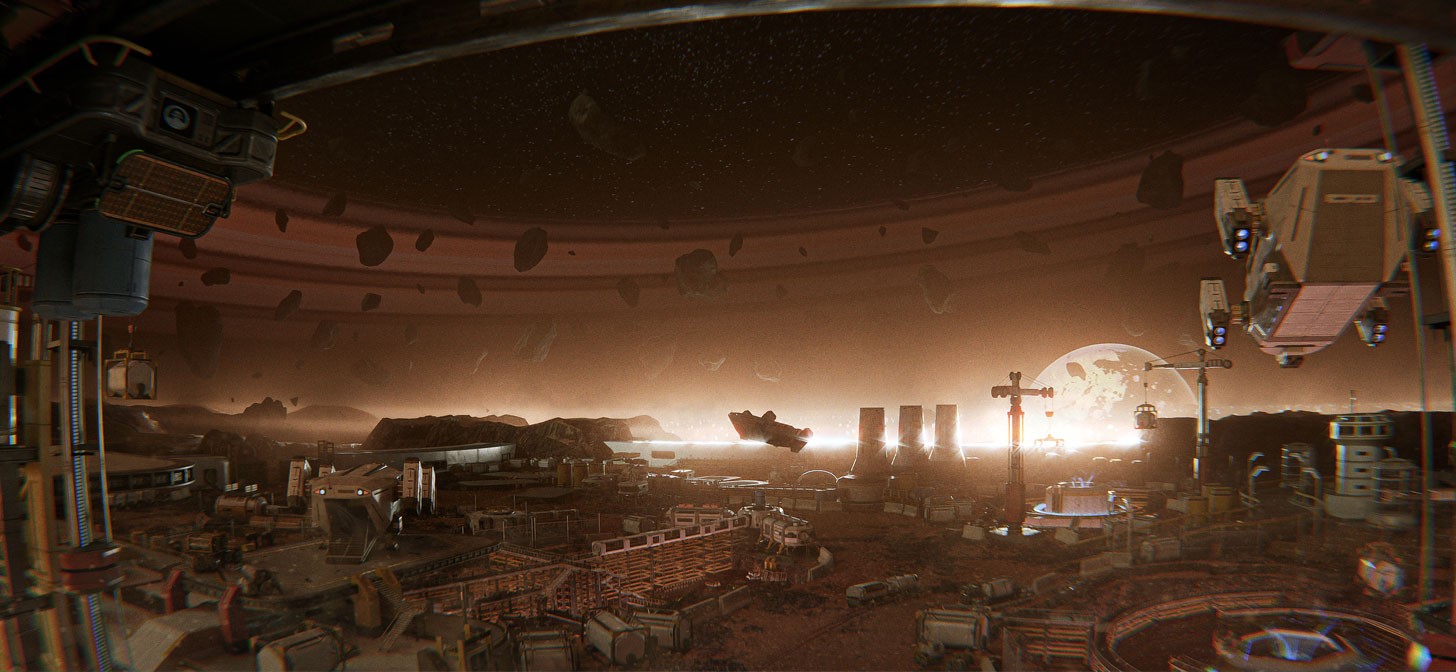
MISSION TO MINERVA
And there you have it!
Thank you for reading this article and I hope that you’ve learned something new.
About the Artist

Lamza, a game artist born in Hong Kong and currently working in Japan. In addition, they own a small indie team that is developing an indie game project.


