

Introduction
Hi, I am Aneesh. I started learning 3D Animation and Motion Graphics during my school time. I had a great interest in 3D animations and making video games. I am currently a freelancer working from my home studio.
I’d love to share the creation process of my new artwork, "Billie Eilish Portrait.”
Inspiration
For my artwork, I chose the famous singer, Billie Eilish.
Personally, I don’t know her very much, but I was listening to her song called “Bad Guy” and I had an intuition about making her portrait in 3D.
I always wanted to give a try upon myself to make a female portrait in 3D for a long time.
References
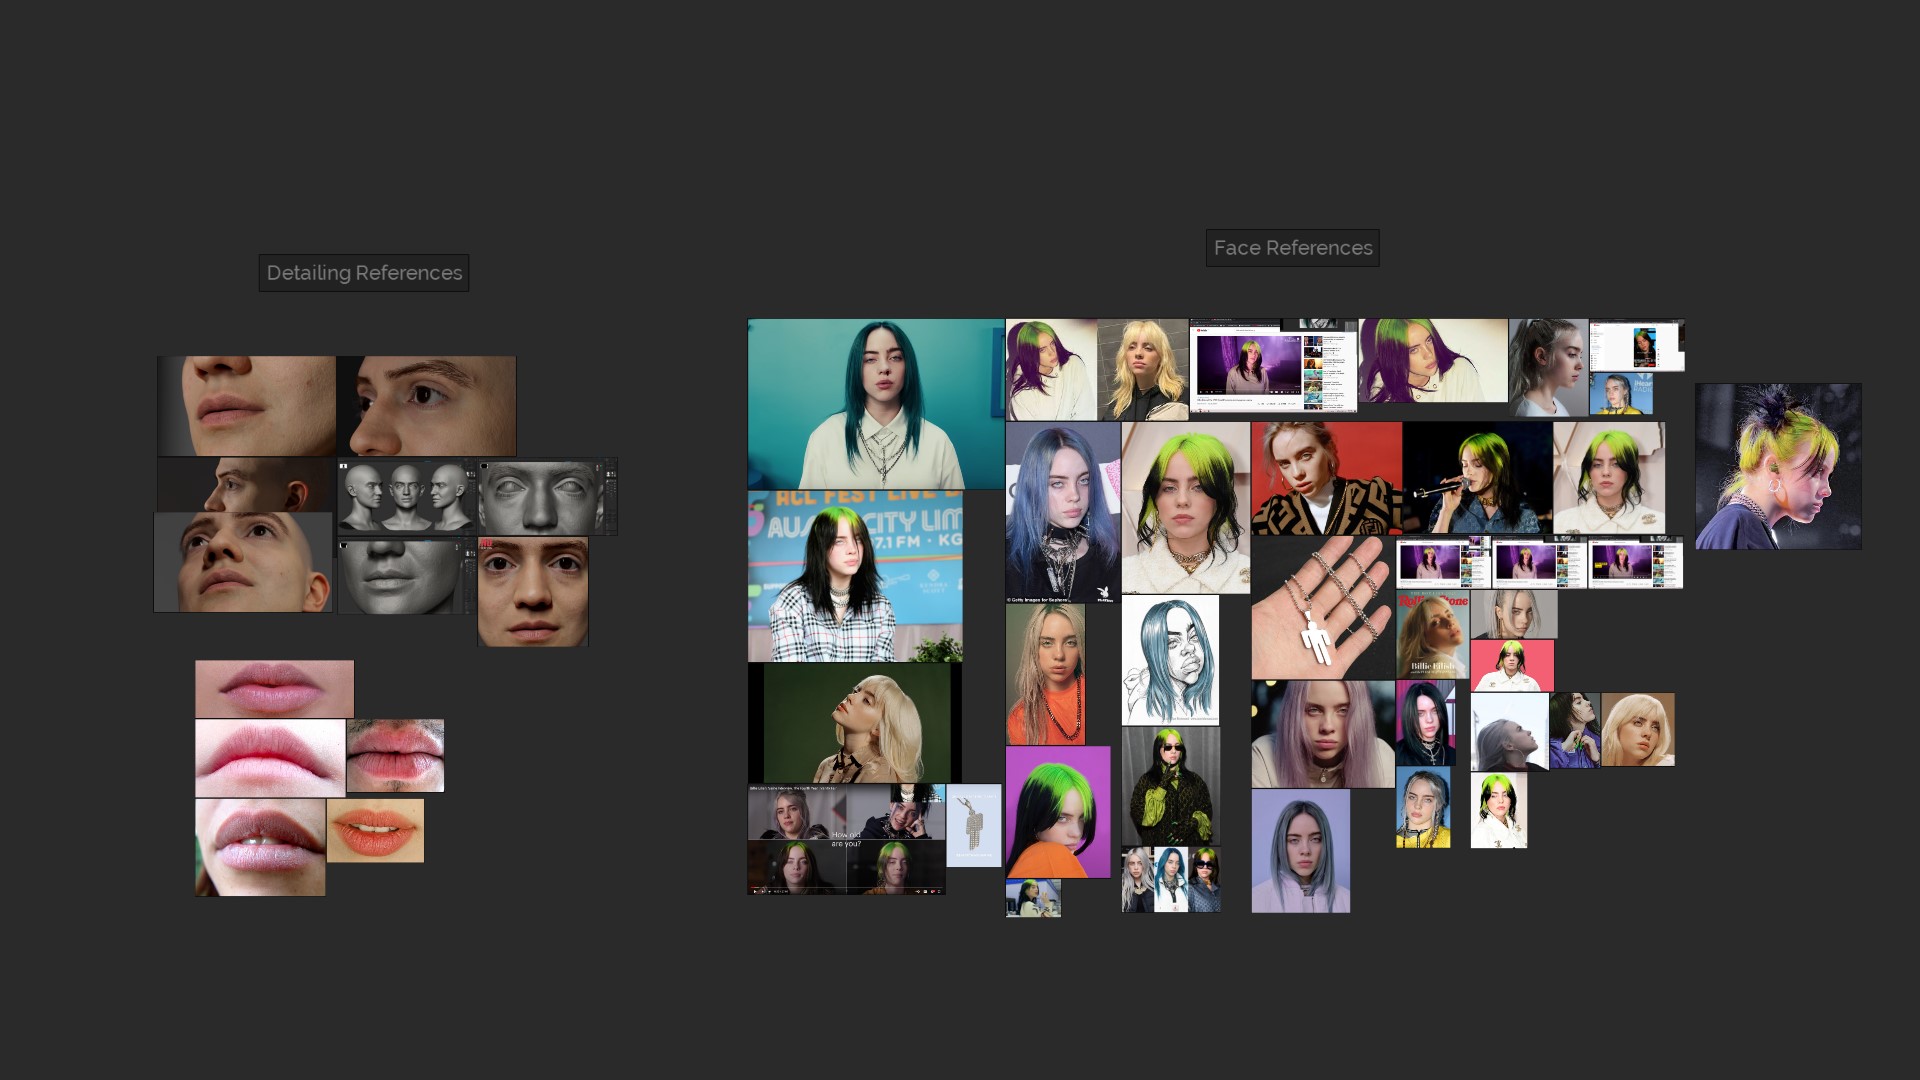
The first and most important step of making any portrait is to gather the best references. Try to invest a good amount of time in collecting good references. When you are making a ‘likeness’ portrait, make sure you collect photos from every angle of your person. Try to gather those images in which the person has very minimal or neutral expressions.
Sketching the Basic Model in ZBrush
For sculpting, I used Zbrush. I started with a sphere, dynameshed it, and started sculpting the head with the help of the references. Simply, I was just looking at her photos and sculpted the model accordingly.
I kept on increasing the resolution of the dynamesh as I needed more topology to refine the sculpt.
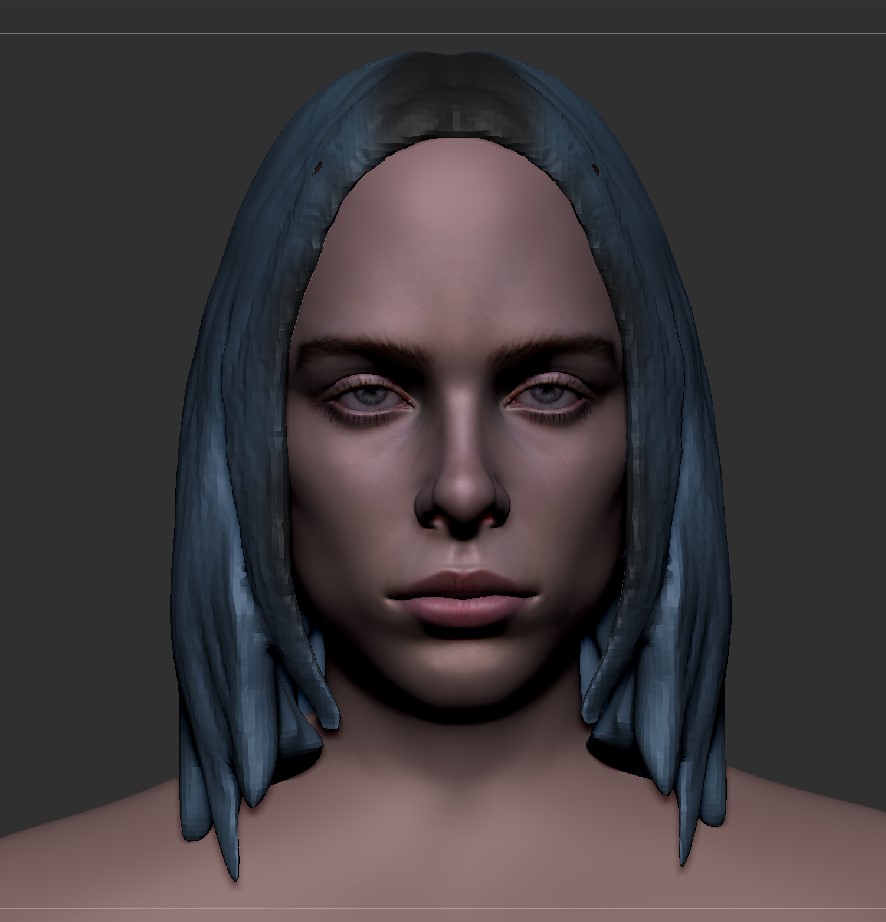
Actually, resemblance is very difficult for me because I can’t quickly analyze the basic recognizable facial features of a person.
I always take screenshots at every stage and then after a few hours, when I come back to work, I take a look at the screenshots and find out what’s missing and fix it again.
This way I can refine the portrait more and more.

Retopology and UVs
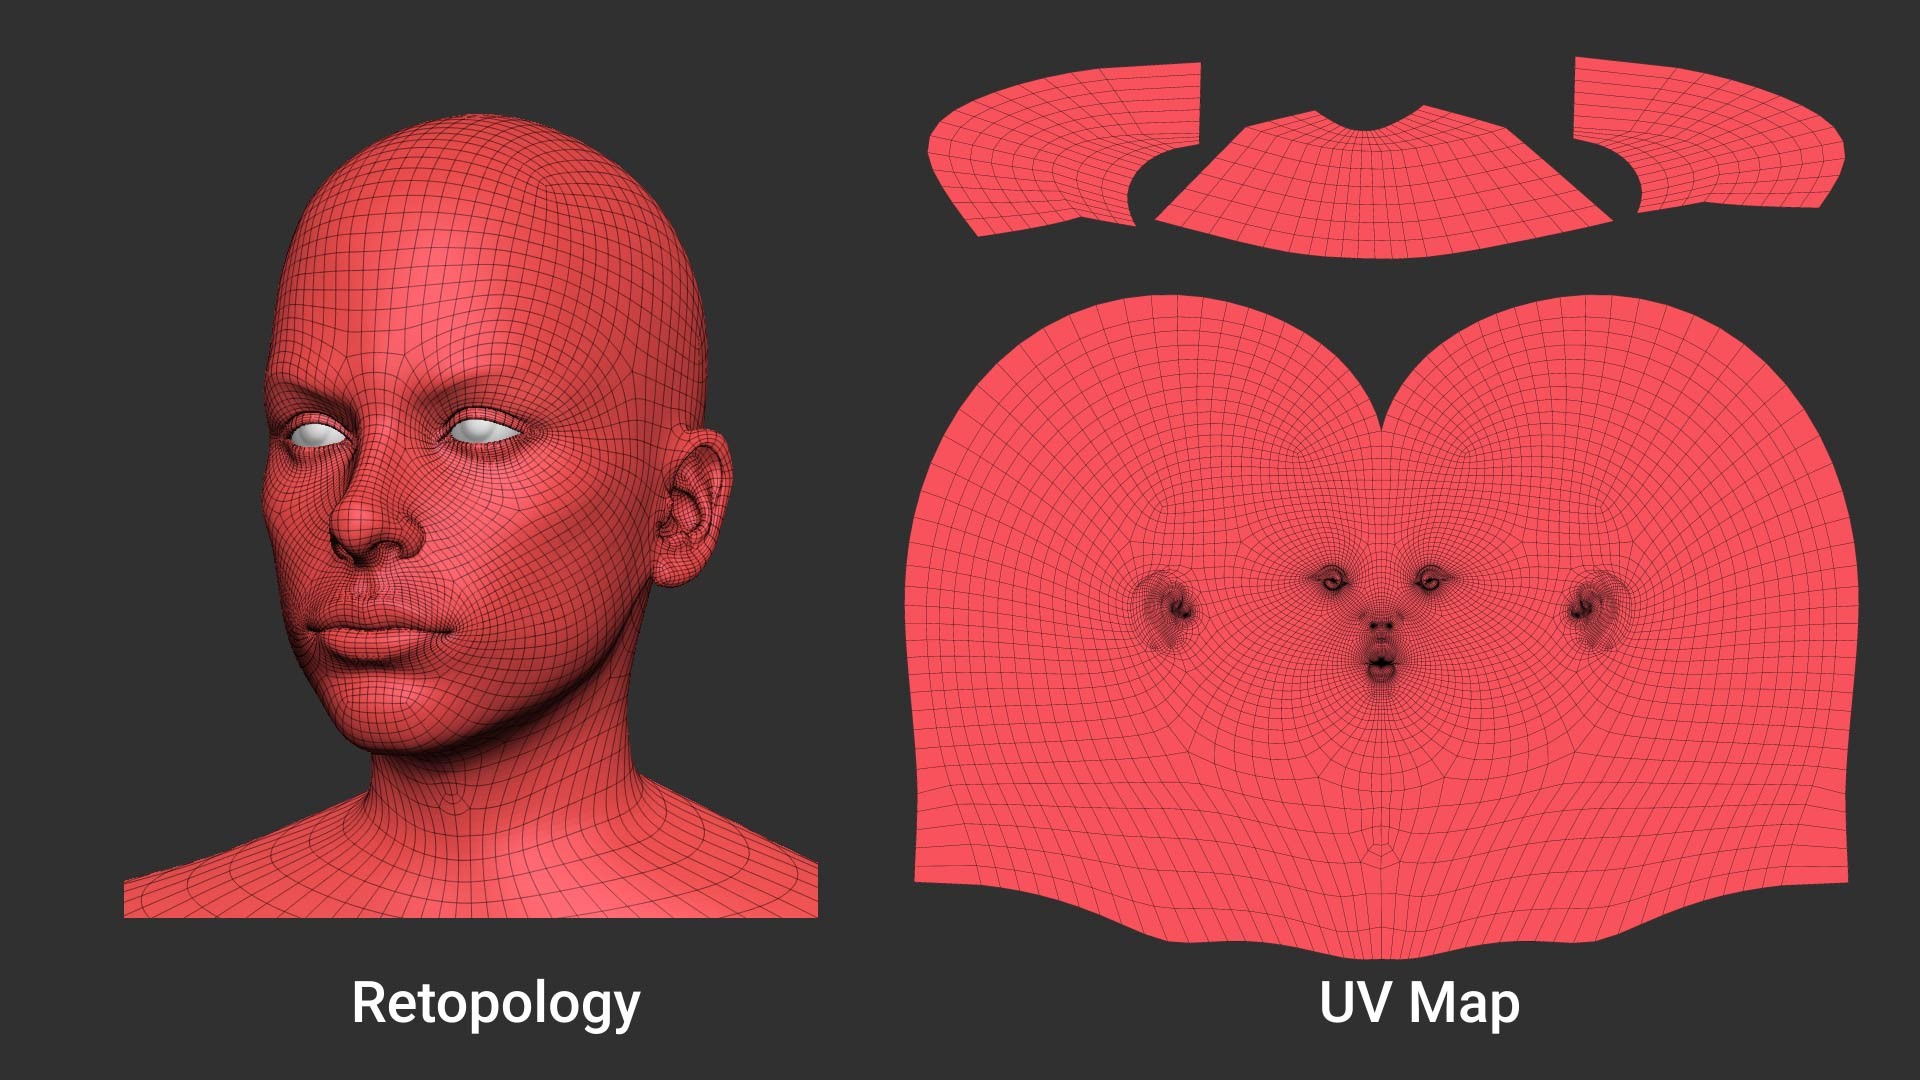
I used Blender for Retopology. I retopologized the whole head with appropriate head topology flow. Then I finished the UV unwrapping as well.
Making the Textures
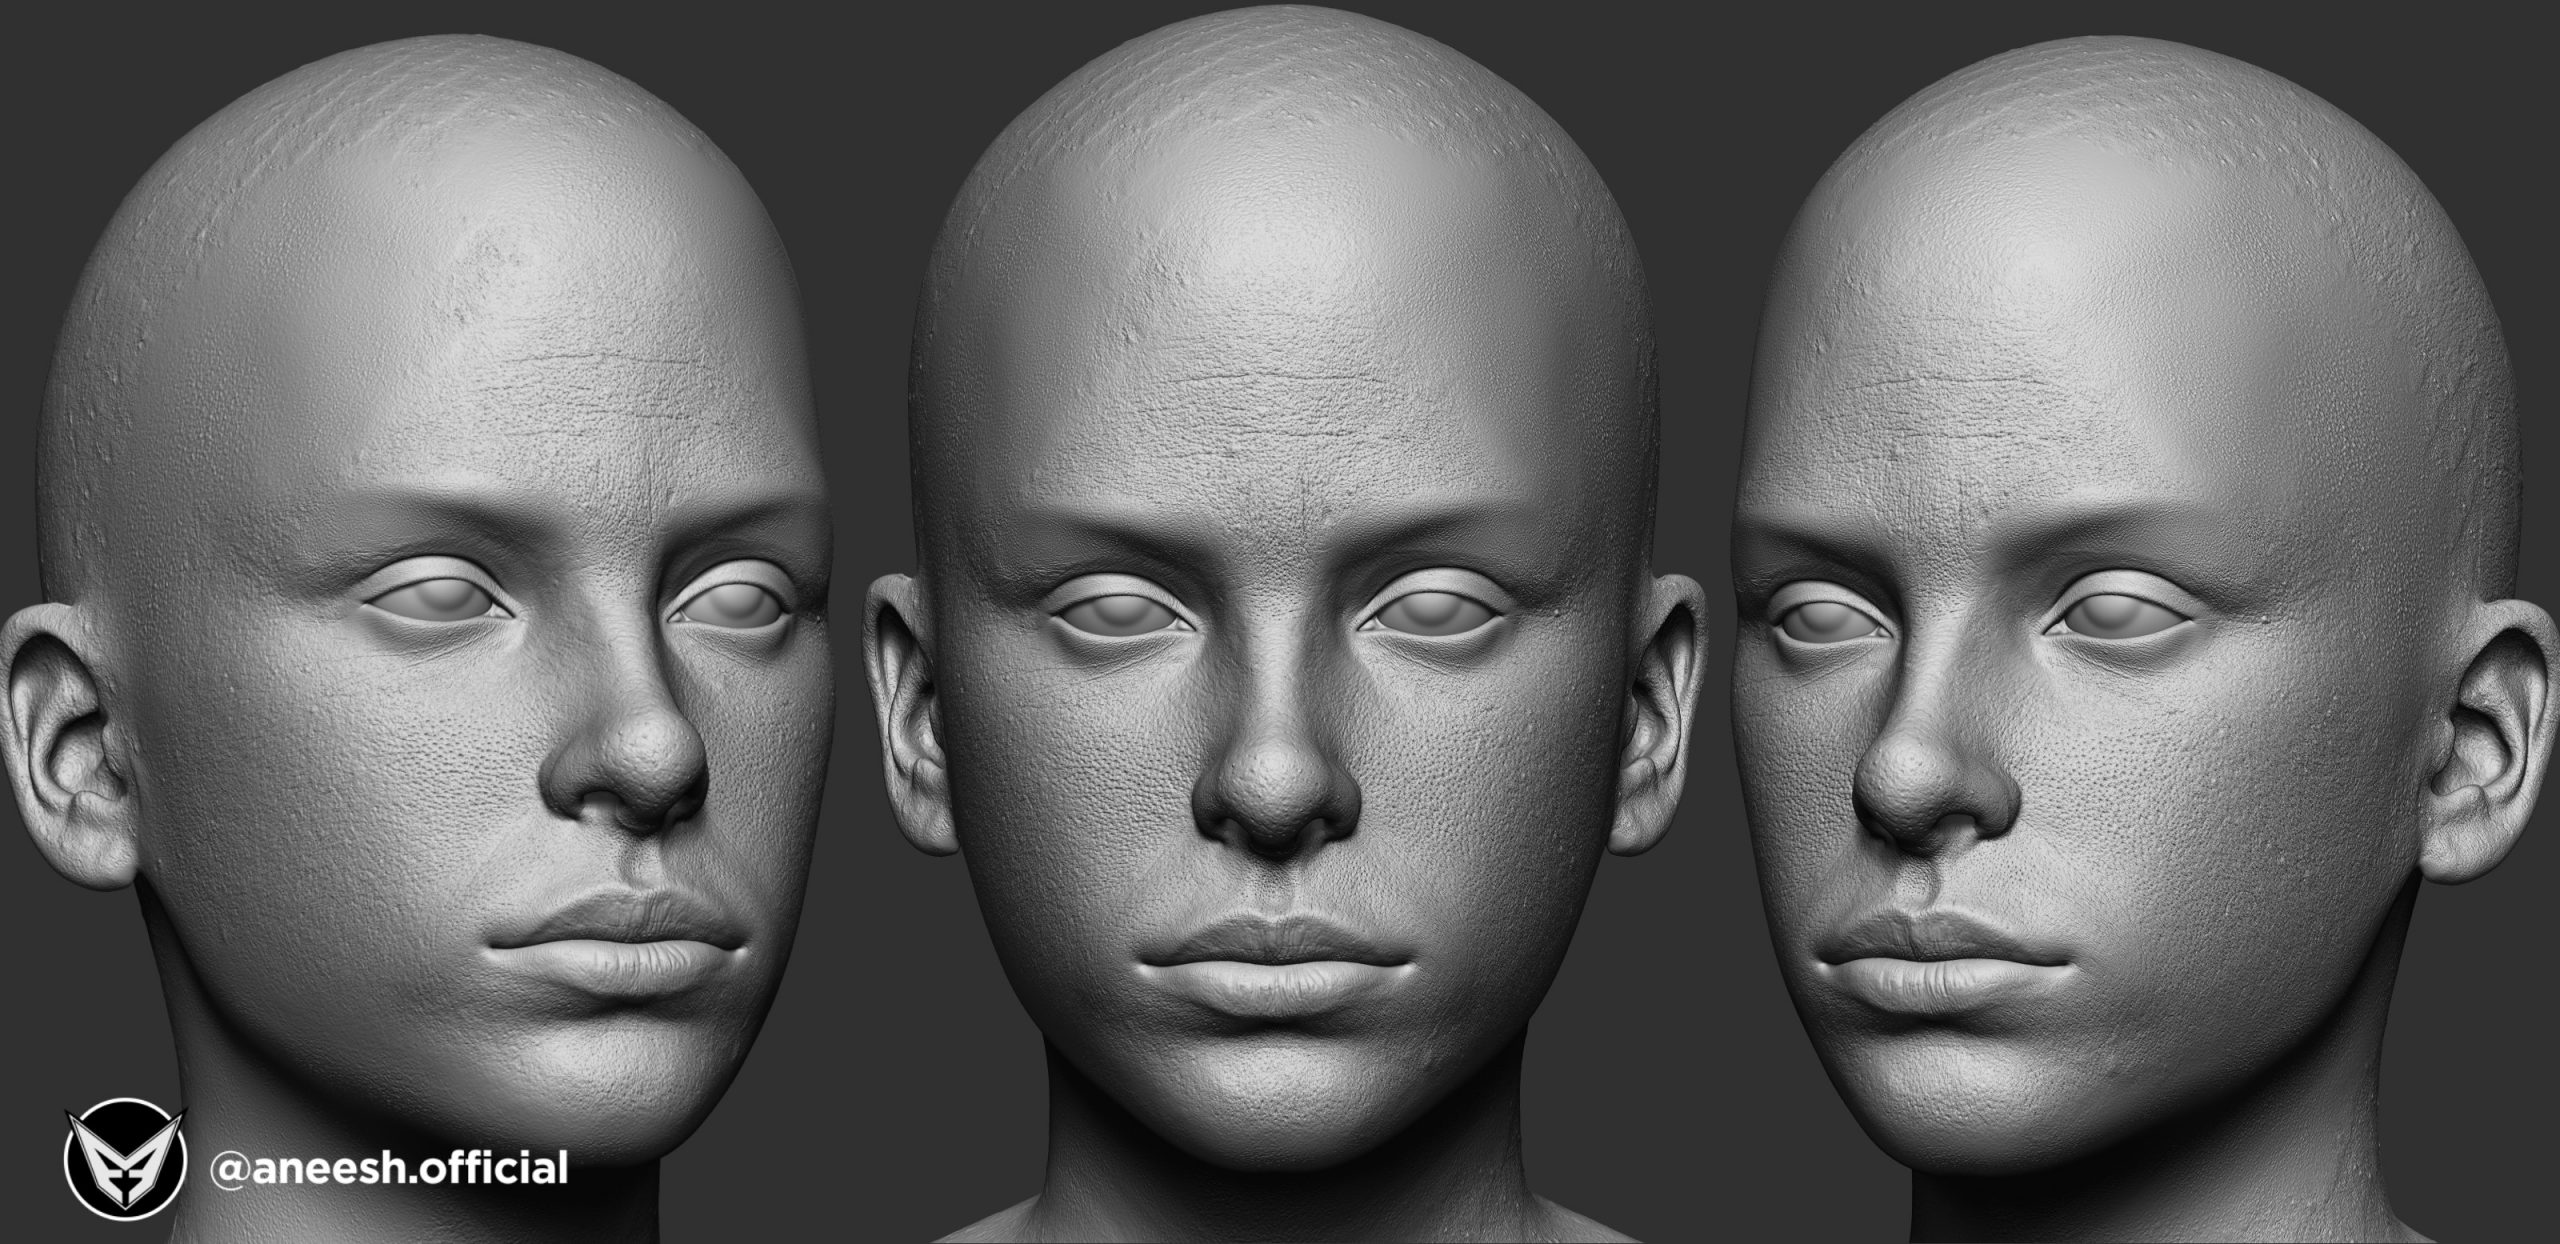
For the head, I used TextureXYZ for the displacement map. I also have a tutorial on my Youtube Channel. I separated the RGB Colors in the displacement map and applied them in Zbrush one by one with different opacities.
Then I exported the map with 0.5 Mid value and exr 32bit format from Zbrush.
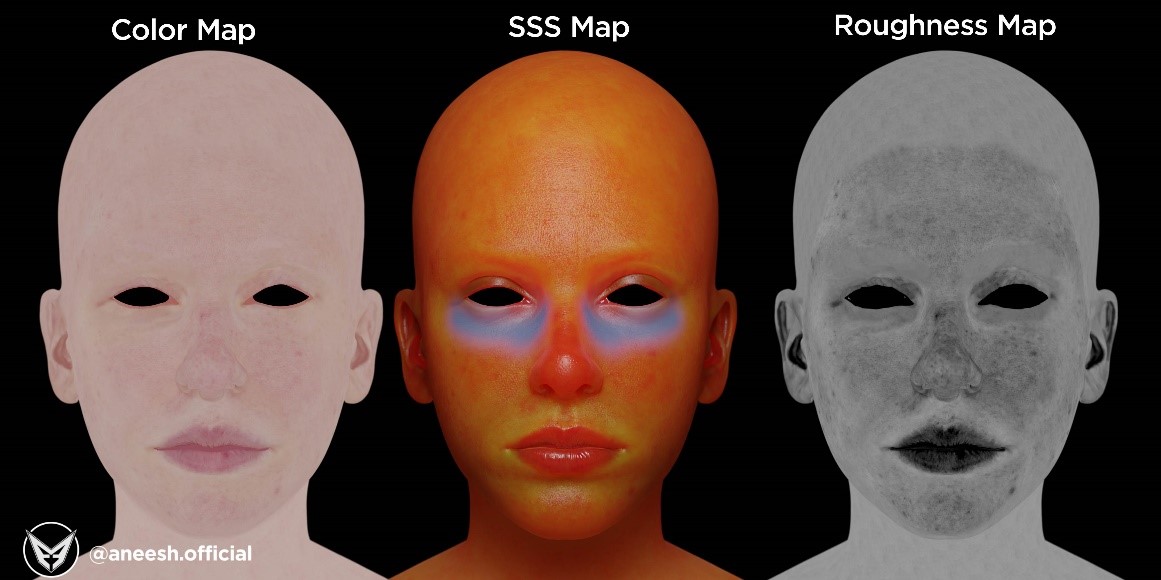
For the Color Map, I collected high-resolution female face color photos, did the projection paint in Blender, and finished the fixes and refinements in Substance Painter.
For the Roughness map, I used Substance Painter. The grey color values execute roughness and black color values execute more glossiness in the shader.
I also painted the SSS Map in Substance Painter. This is basically the scattering color map; the red areas are like more fleshy parts from which light can scatter more so it will render more redness in those parts whereas the yellow parts will have less value of scattering so it renders less redness there. This Map will be used for Subsurface Color in the Skin Shader.
Making the Hair
This is quite an interesting part for me. I used Blender particle system for the hair. I have many tutorials on my channel about this step. First, I assigned vertex groups for the left and right sides of the hair and then added the hair particle system with Interpolated Children. I also added some roughness and kink in the settings to make it look realistic.
Here is an example of my hair settings:


Making the Outfit
For her clothes/outfit, I took references of clothes from the song called “Bad Guy". I modeled the clothes and jewelry in Blender, made the UVs, and then textured them in Substance Painter. I also added a hair Particle System on her shirt.
Materials
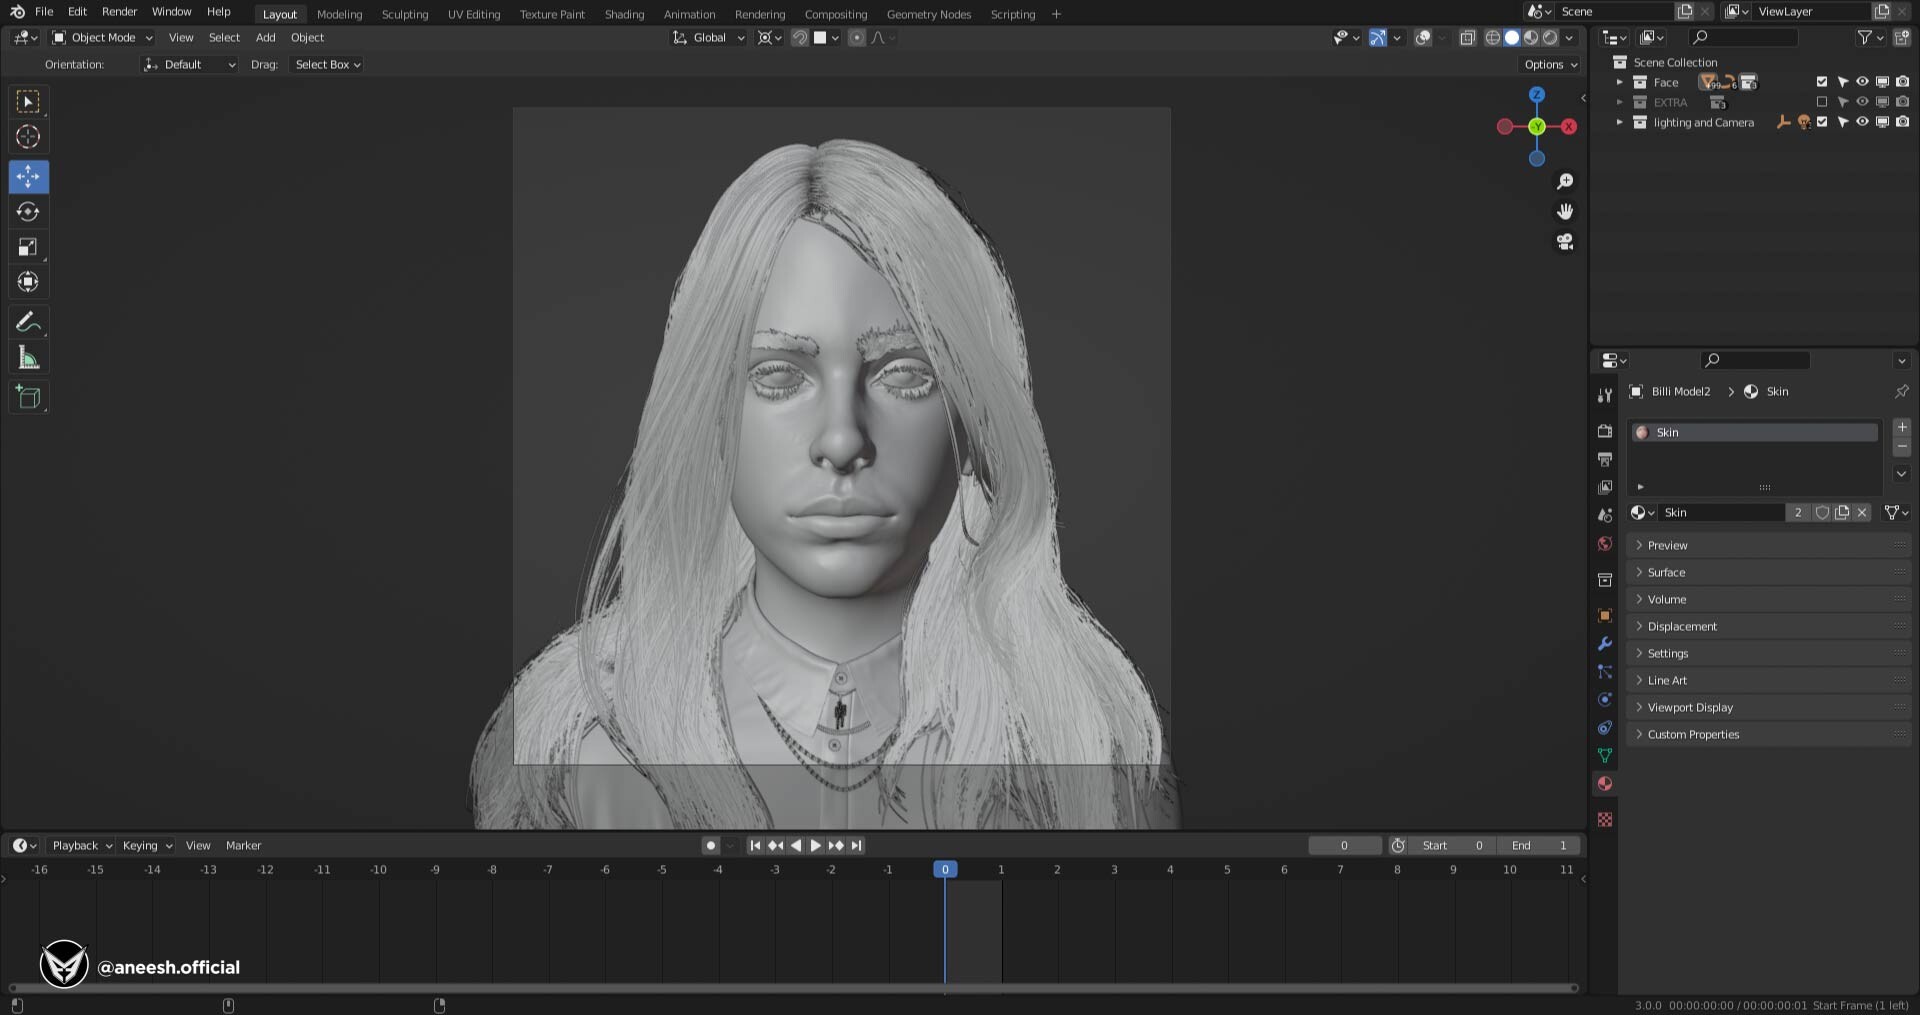
For the head model, I used a displacement map in the materials with Subdivisions.
To do this, go to your material properties, go under settings and set the surface type to Displacement and Bump. It will displace your mesh geometry according to the displacement map in the render mode.
Then I also added the color map and roughness of the models in their respective slots.
For SSS of Skin, “Random walk (Fixed Radius)” is better.
Lighting
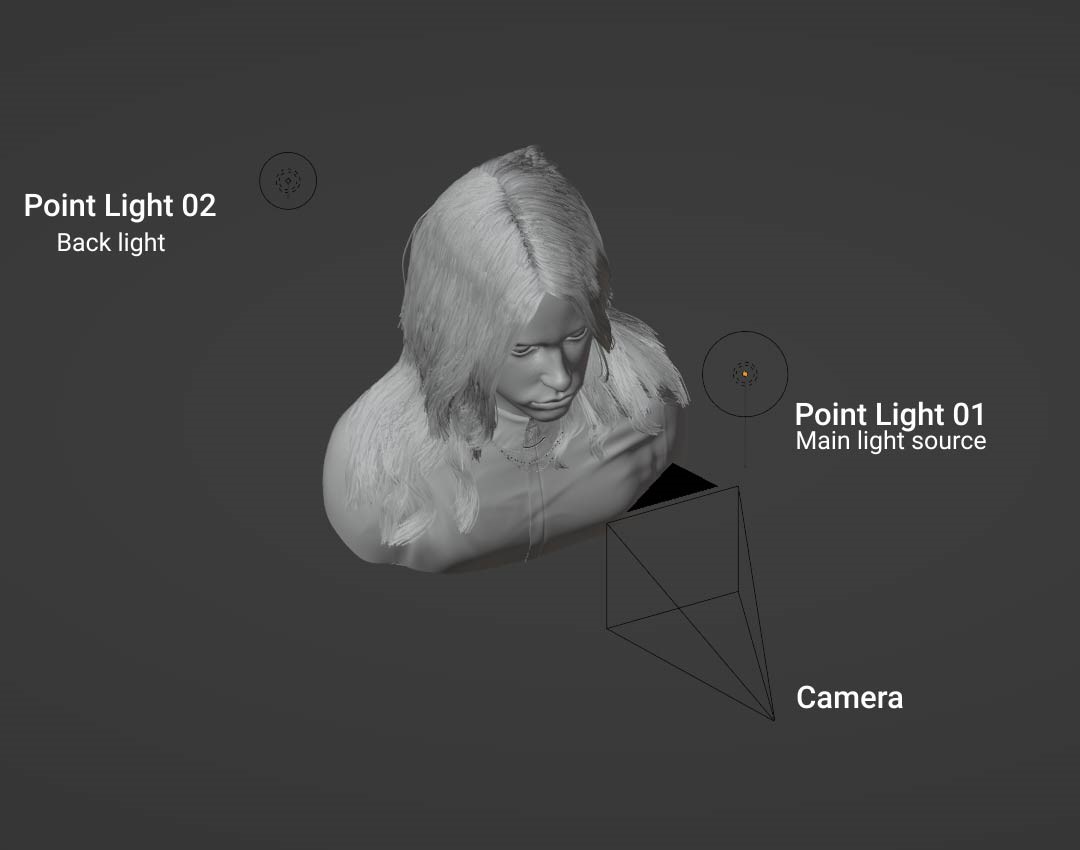
I used two lights for this scene and an HDRI with a very small amount of intensity.
Rendering
I rendered it in Blender’s Cycles Rendering Engine with 600 samples, 256X256 tile size and used Optix denoiser and 3125 X 3125 Resolution. It took me about 20-25 minutes on my 1080ti GPU.
Compositing & Finalizations
I rendered the output with transparency in Blender so that I could add the background later. I used After Effects for the composition and image finalizations. I gave it a black and grey color radial gradient for the background and finalized the image with some effects like chromatic aberration, sharpness, grain, and a very small amount of glow.
Billie Eilish


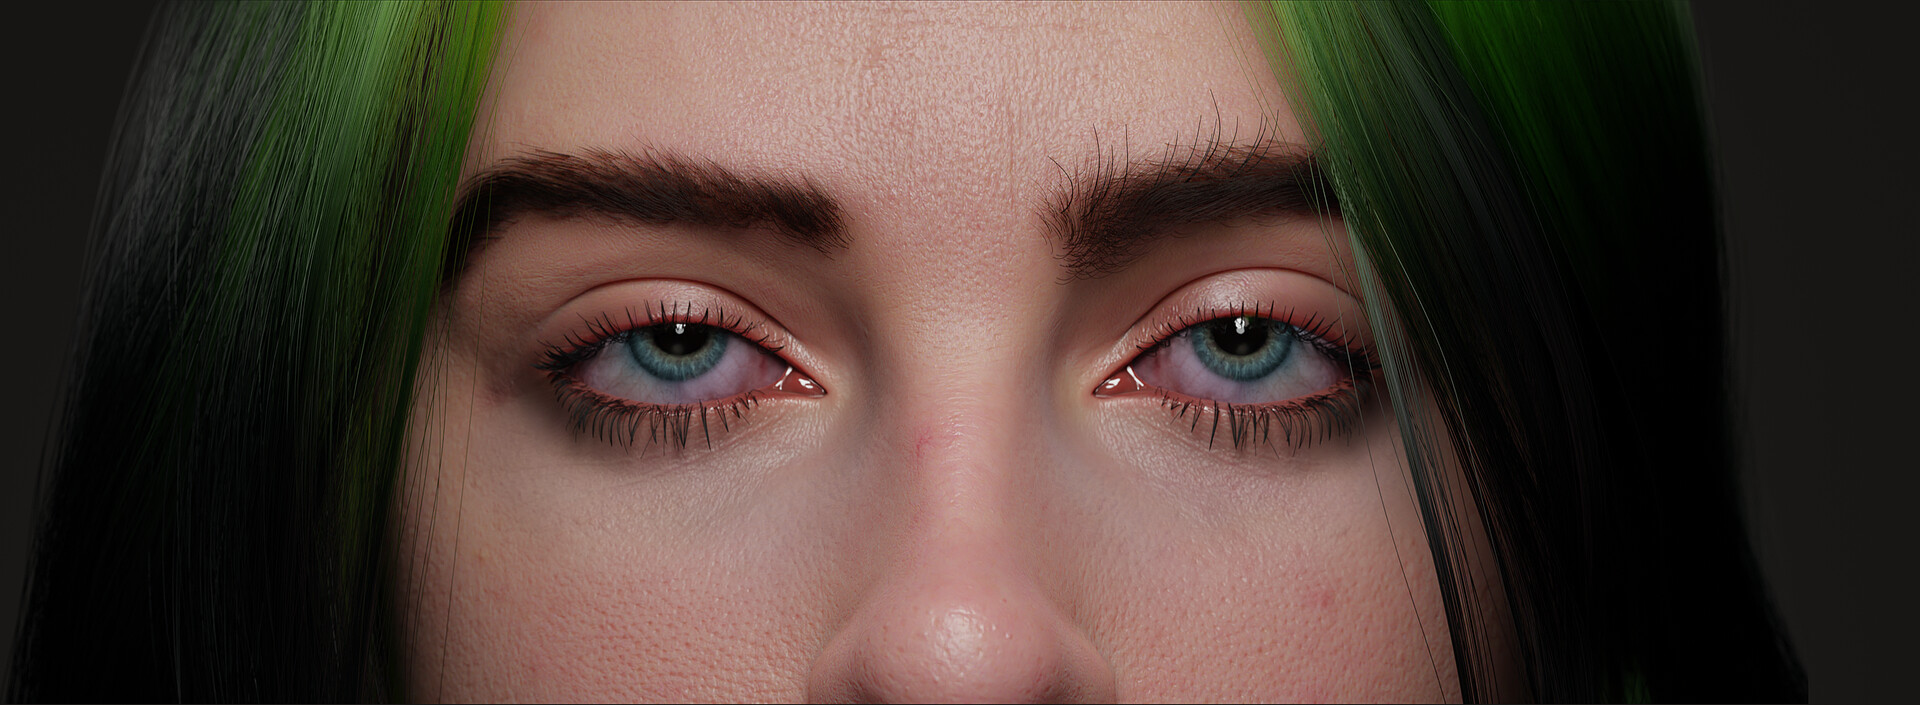

I am very satisfied with the output this time because, after a long time, I achieved a good likeness portrait.
Tutorials
I have a YouTube channel Called “Aneesh Arts" where I have covered most of the steps I used here. For example, Texturing for Realistic portraits, Blender Hair Particles, Displacement Texture Baking, etc.
Thank you for reading!
About the Artist

Aneesh Chandra, is a 3d artist currently working as a freelancer from Vancouver, Canada.
1 Comment
Very cool as if alive
I'm a fan of Billy