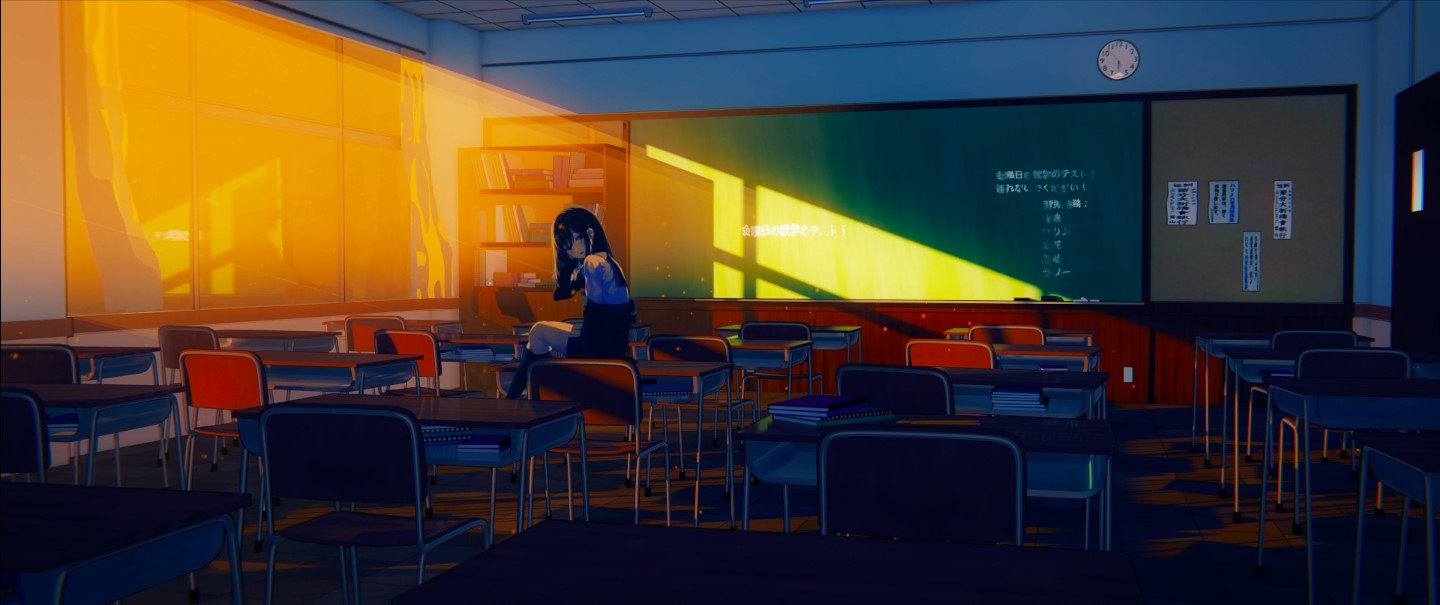
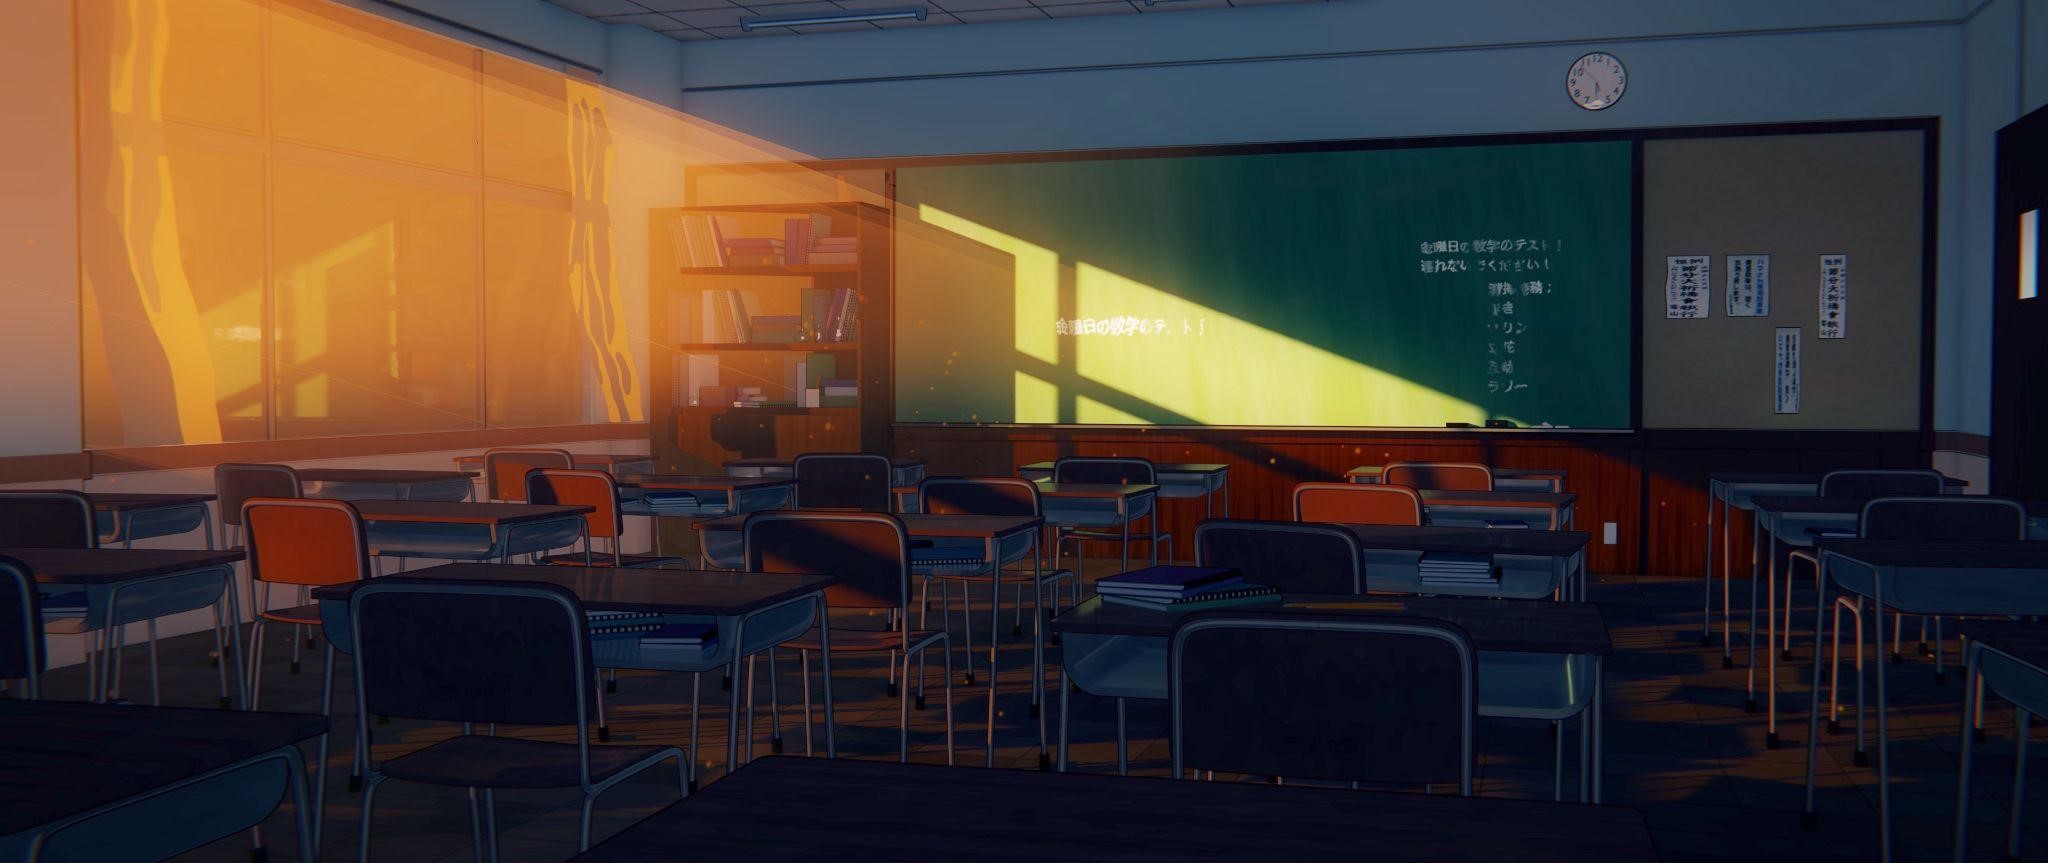
Behind the Scenes: Anime Classroom Environment
Introduction
Hi, I’m ALLO (Theo), a high school student who lives in the United States. I’ve been making digital art for about four years, but only started learning 3D applications two years ago when I picked up Blender. Since then, I’ve never been able to put the amazing software down; the potential is amazing!
I’m really interested in creating 2D effects in 3D, and I’ve dabbled quite a lot in creating stylized scenes over the past few years. I consider this project a collection of most of the strategies and “hacks” I’ve invented while experimenting with toon shading and stylized 3D.
Collecting Reference
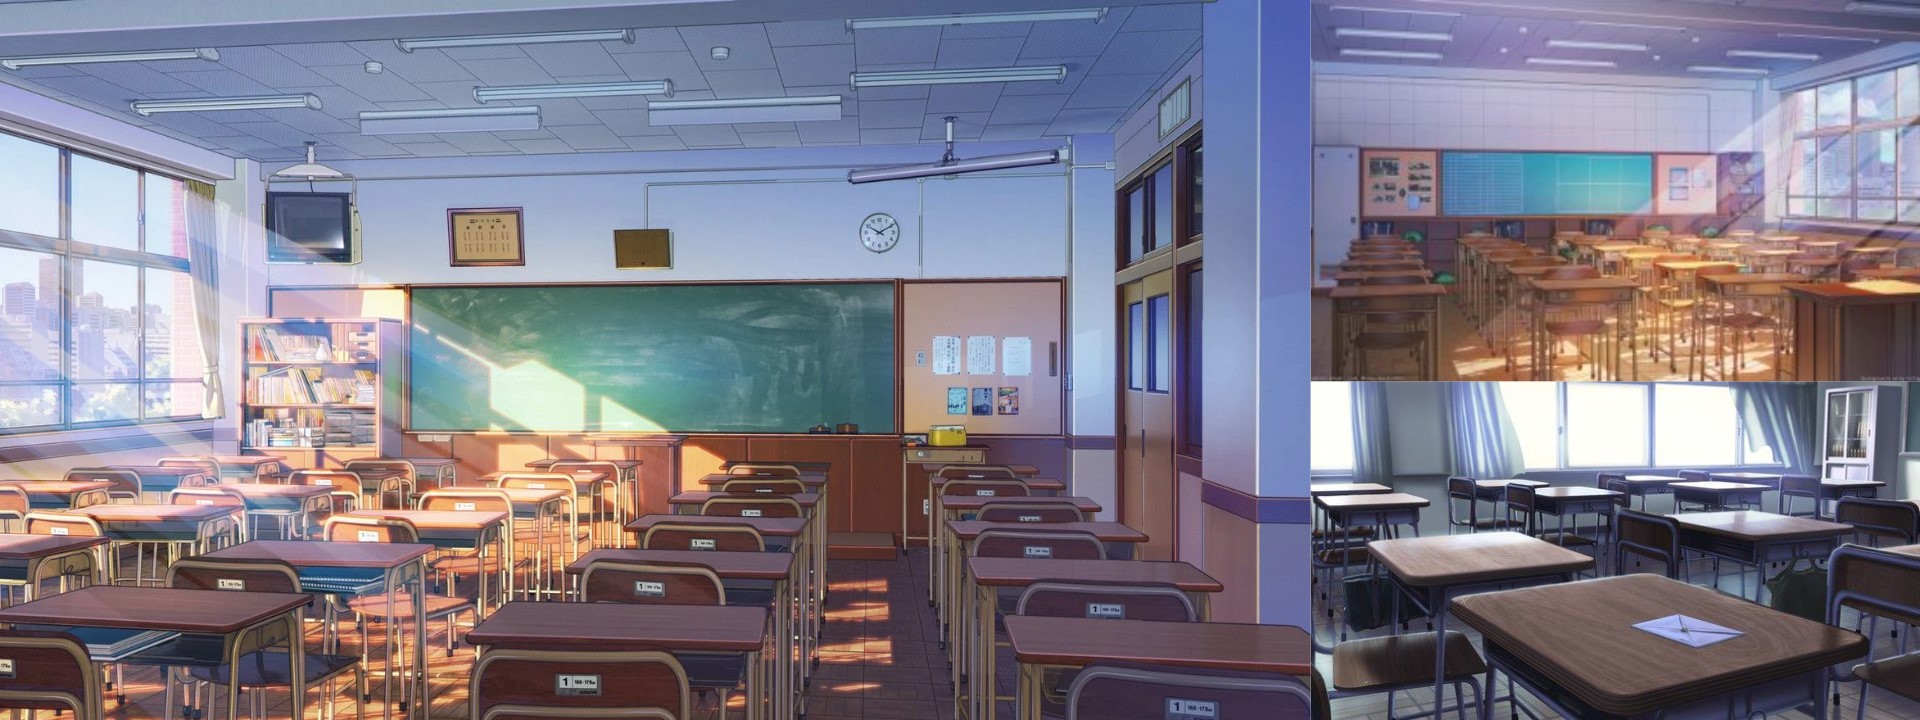
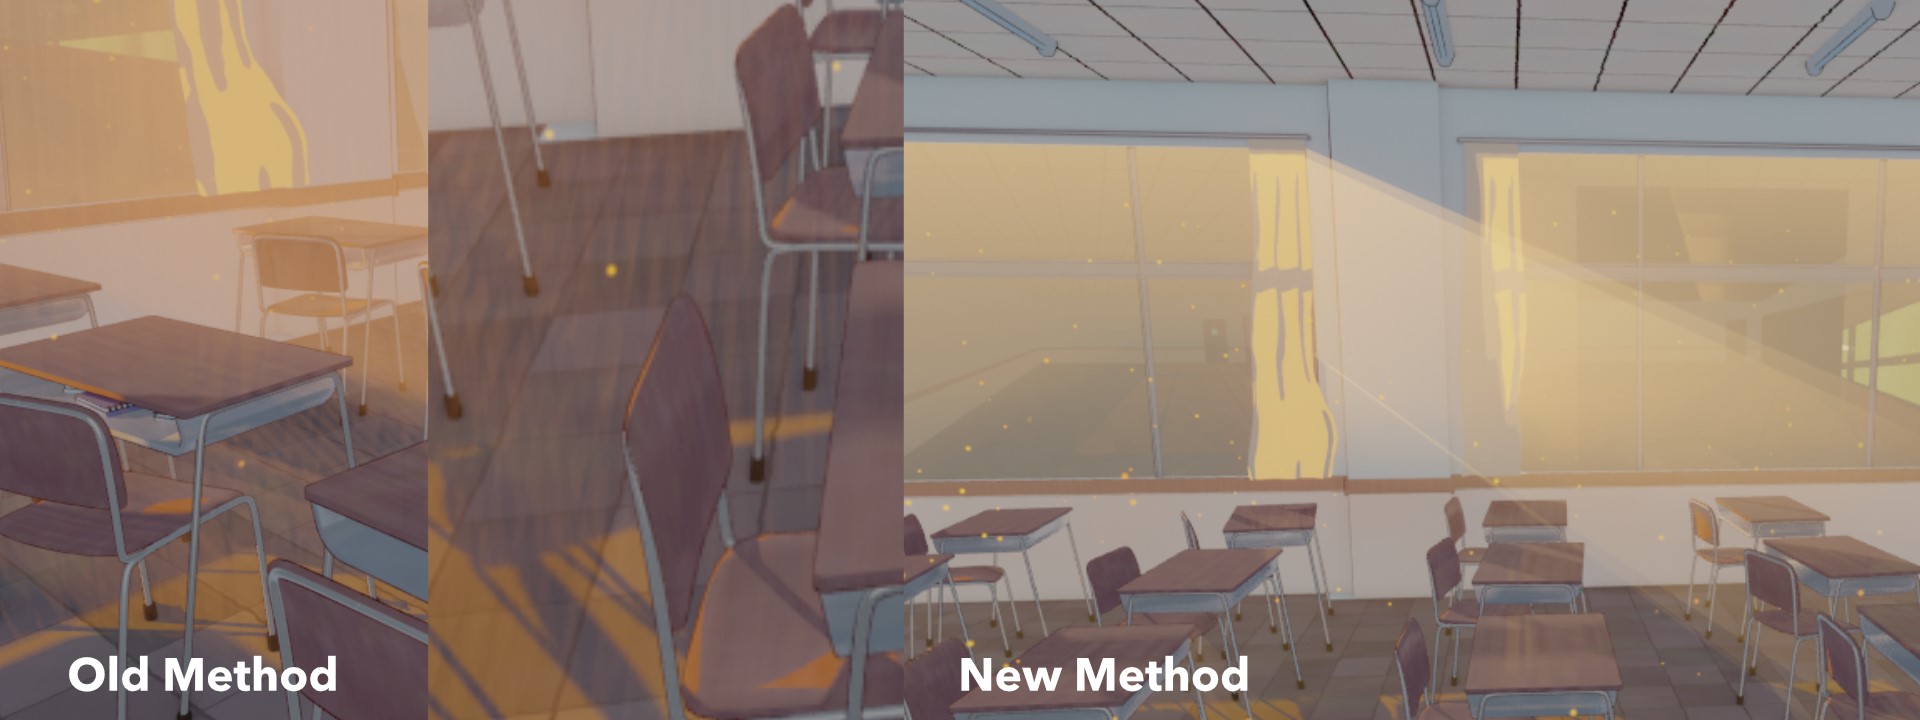
Throughout the process of creating this scene, I mainly relied on one reference image as my main inspiration, but I also used a lot of references for specific materials such as wood, metal, and glass.
Modeling
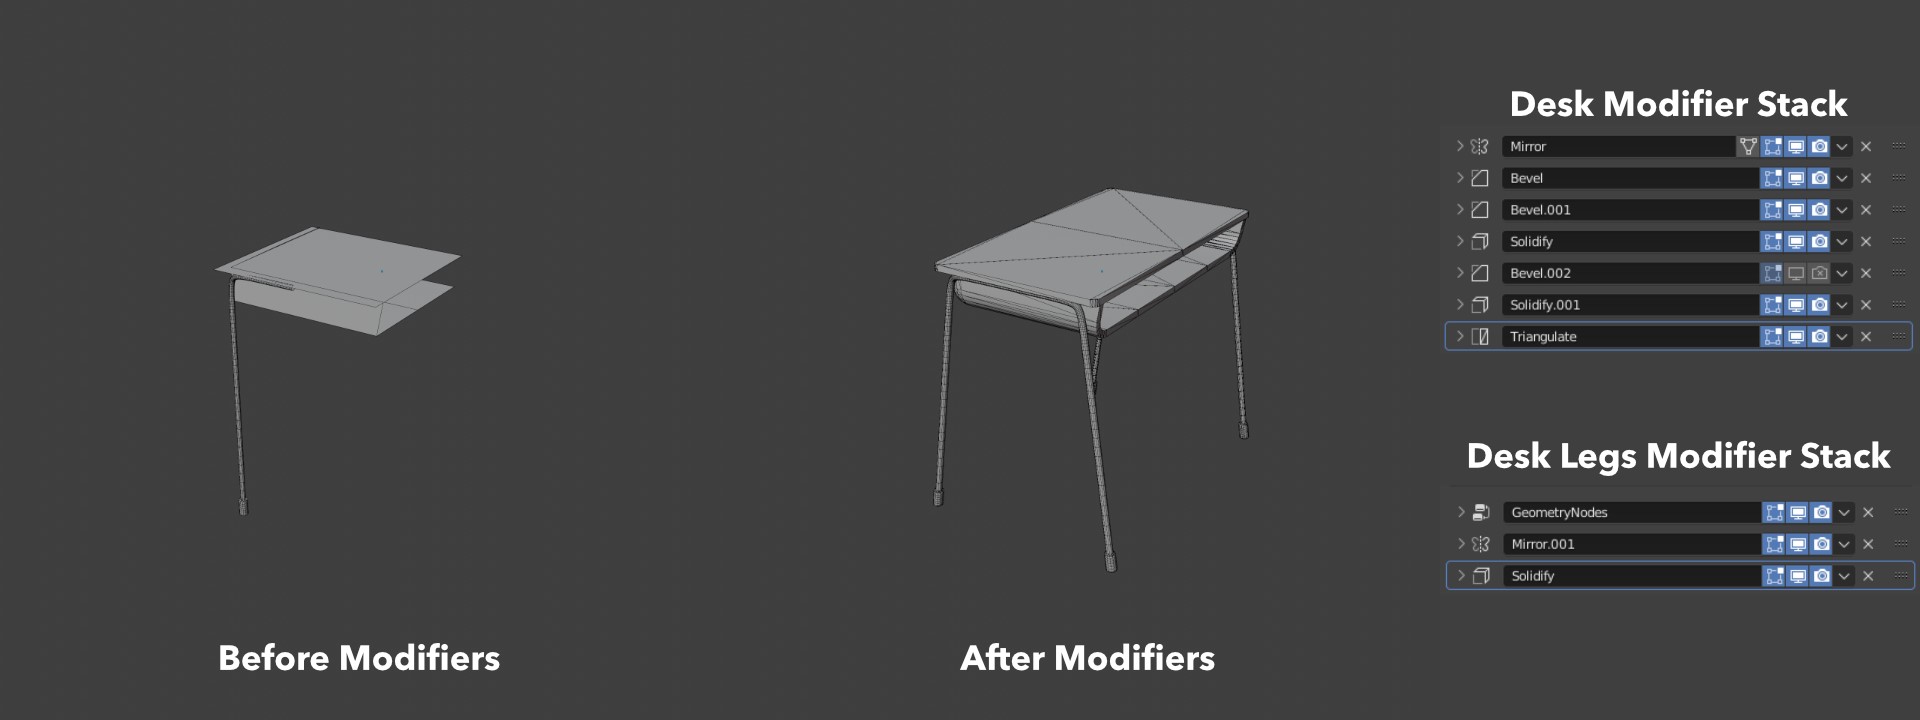
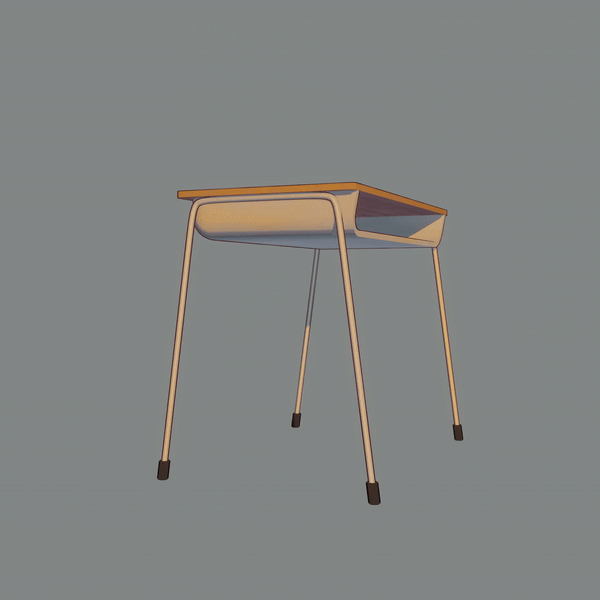
My modeling process was quite simple overall. I tried to keep things as easy and procedural as possible. One good example is the desk and chair asset. I started with very simple shapes and curves and then used Blender’s modifier system to achieve the entire asset procedurally.
For the room, I kept everything simple, starting from a cube and modeling with loop cuts until I had the shape down. I knew that shading and texturing are most important in this type of project, so I made sure not to spend too much time on modeling.
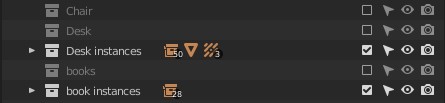
Instancing
Throughout this project, I made sure to use as many instances as possible to increase performance. All of the desks, chairs, books, and bookshelves are instanced to keep the scene running as smoothly as possible.
Shading
The bulk of this project is shading and texturing. Everything in this scene is textured procedurally inside of Blender, except for the use of four image textures: two posters from textures.com, a text sheet created by me that was used for the whiteboard, and the cutout of the character.
For this project, I used EEVEE for rendering, so I could preview everything in realtime, and have access to the Shader to RGB node, which is how I achieved all the toon shading.
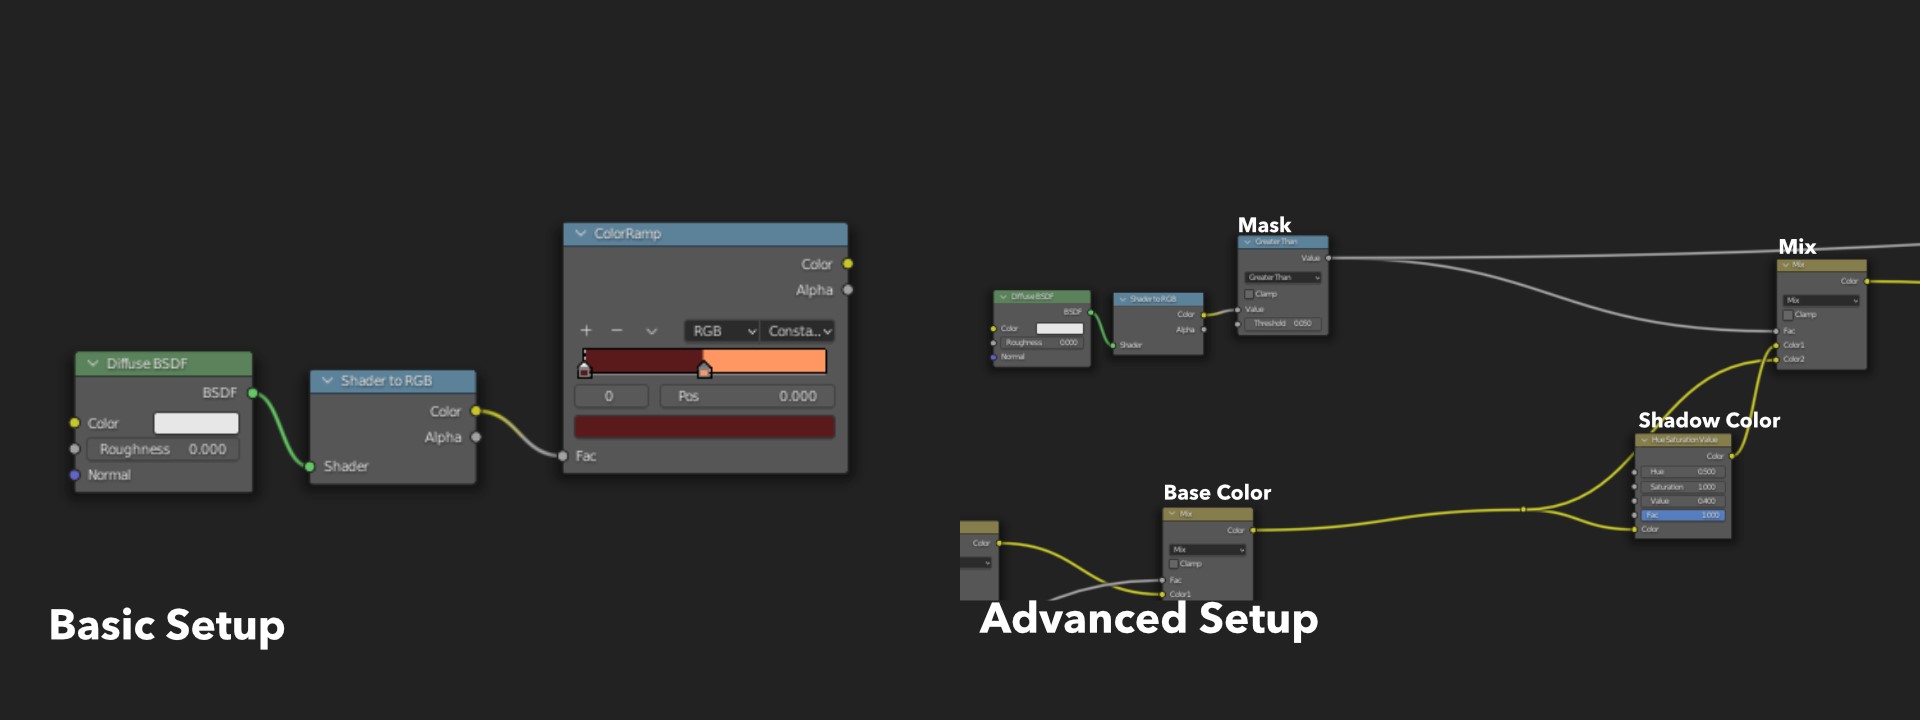
Shadows
Most people will use a simple toon setup with a ColorRamp, but I find it too basic and without much control. I opt for a more complex and useful setup that gives a lot more freedom, instead of multiplying the shadow mask over my base color layer or manually mixing between my shadow color and light color.
Reflections and AO
Some people might be surprised by how much I relied on EEVEE’s “realistic” rendering tools such as ambient occlusion, Screen Space Reflections, and baked reflections to achieve my stylized result. Many of my shaders have a glossy shader added on top of them to give a soft reflection and make the whole scene feel more cohesive.
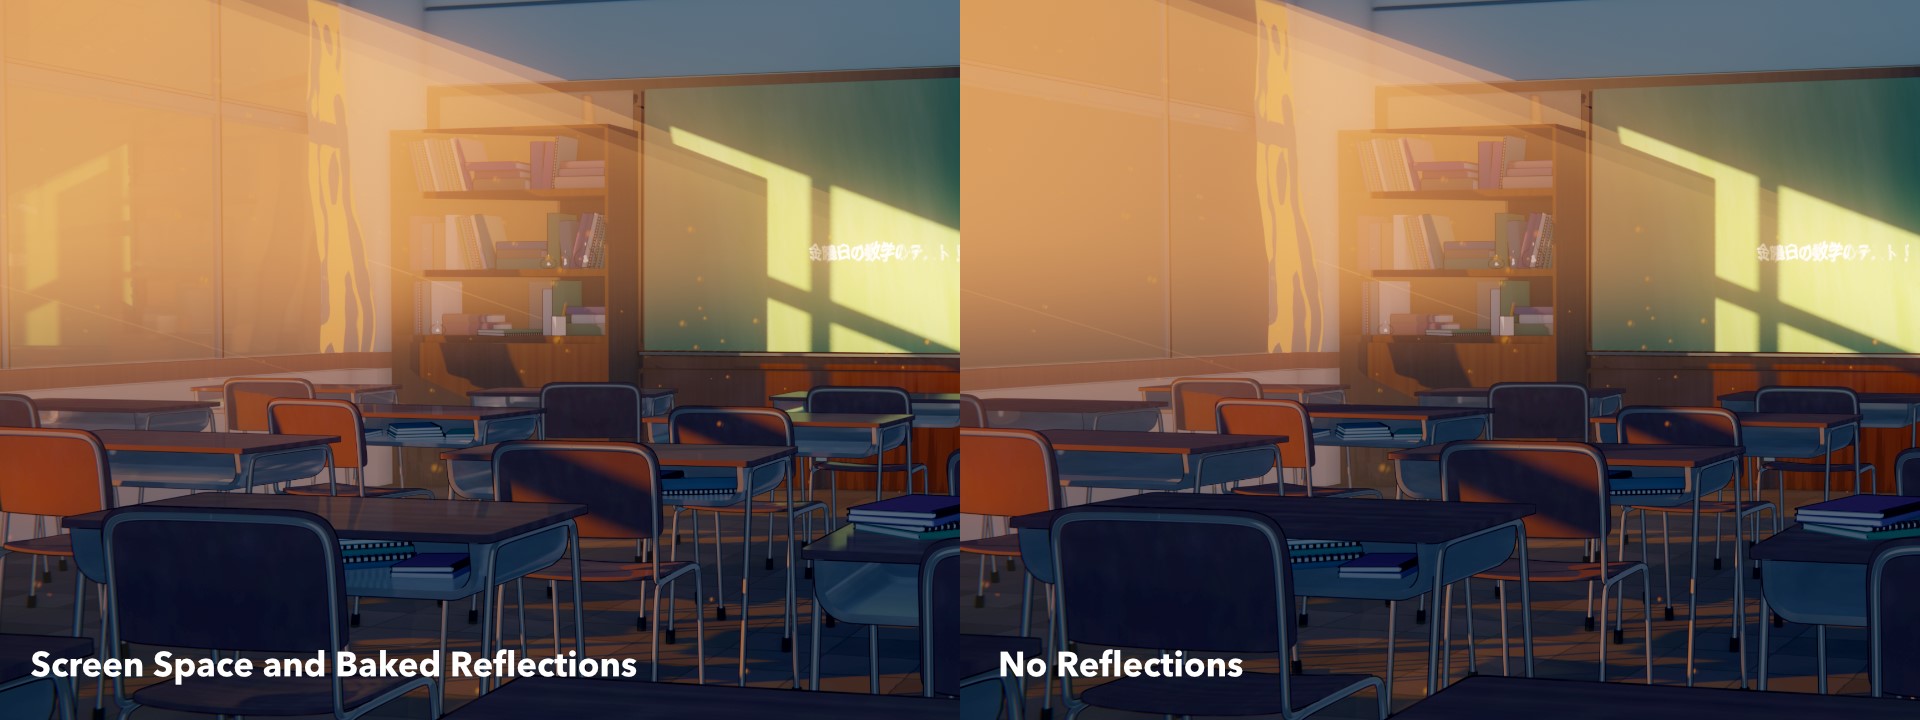
Most of the scene runs off on Screen Space Reflections, but the windows are baked to give more accurate results.
For metal objects, I not only used realistic reflections but also faked reflections with the Layer Weight node to keep things more stylized.
Texture Generation
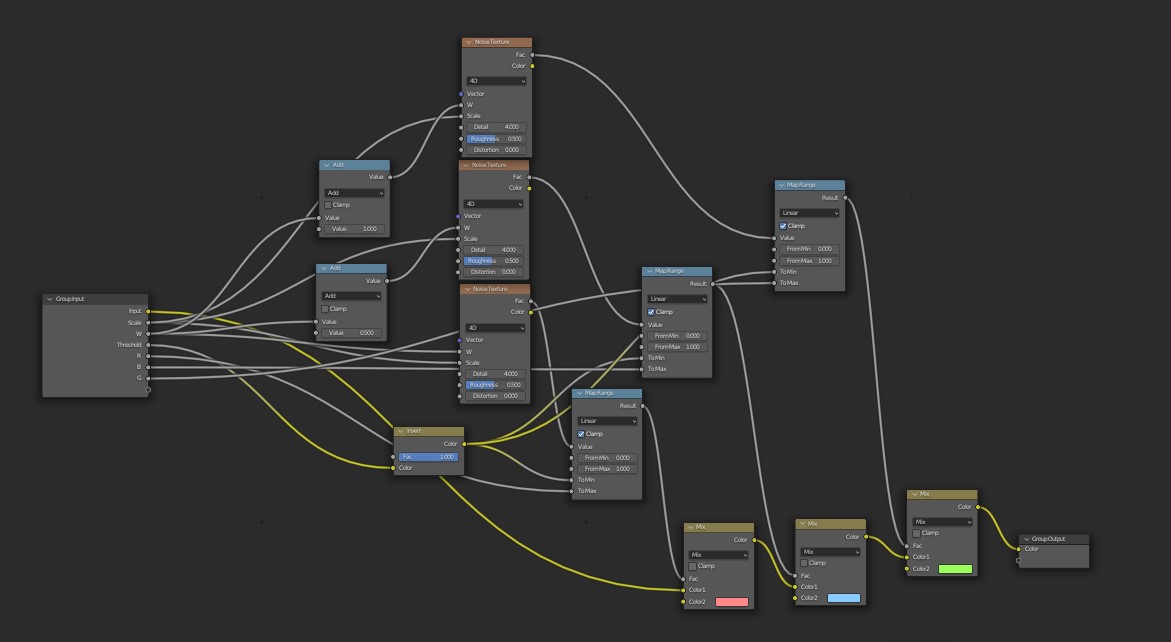
All the procedural textures are generated with different techniques, mostly Noise Textures, but I also used Voronoi Textures and Brick Textures. Another very helpful node was the Ambient Occlusion node, which was great for adding depth into corners.
I also used different vector manipulation strategies to create masks and manipulate the shape of textures in my scene.

Outlines
For outlines, I used the simple “Inverted Hull” method which worked really well and gave a great result.
Node Groups
Throughout this project, I used a few, super-useful Node Groups. One used a workaround to be able to sample light color from a scene inside a toon shader. By separating the light saturation, I could use it as a mask for coloring a shader.
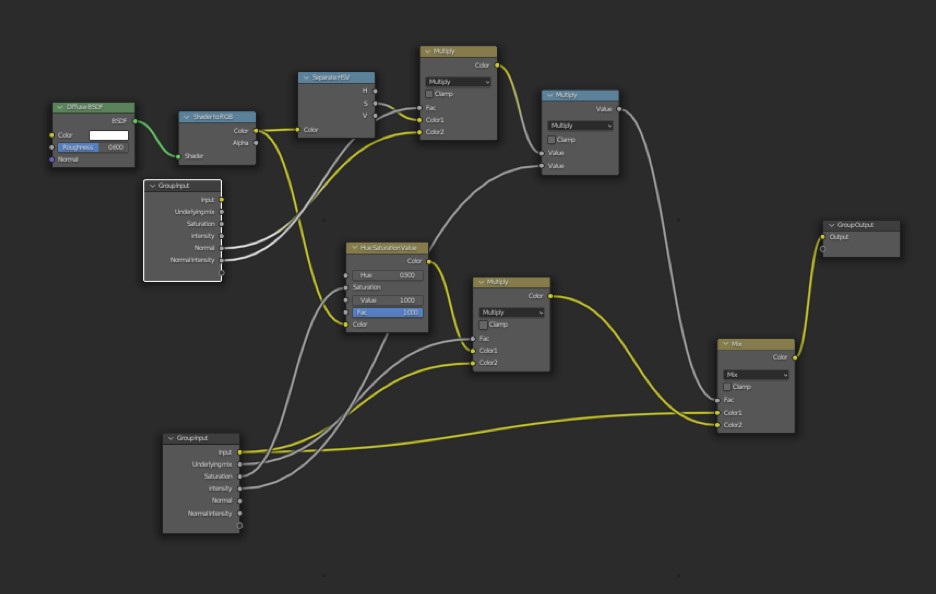
I nicknamed the other main Node Group “DECOLOR”. Using this node, I could vary the color of my shader, mixing in random RGB values through noise textures. This helped a lot in adding more variation to my colors, giving the whole scene a more hand-drawn style.
There was one more node Group that I used for giving shadows a blue hue. The group itself was very simple, but I used it in almost every shader to make sure all the colors matched properly.
Geometry Nodes
I used Geometry Nodes in two main places: the curtains and the “volumetrics”.
For the curtains, I used Geometry Nodes to add displacement for animation. Originally, I had used a Displacement Modifier but I didn’t have enough control over my texture so instead, I decided to use Geometry Nodes.

I initially had a very different technique for the “volumetrics” than in my final render. My first idea was to use a fake volume cube by creating a stack of planes with a modified shader. It worked pretty well, but when I used a higher count of planes to achieve higher resolution, performance was slow. Additionally, the effect would only hold up when the camera was perpendicular to the planes; if not, it became quite choppy.
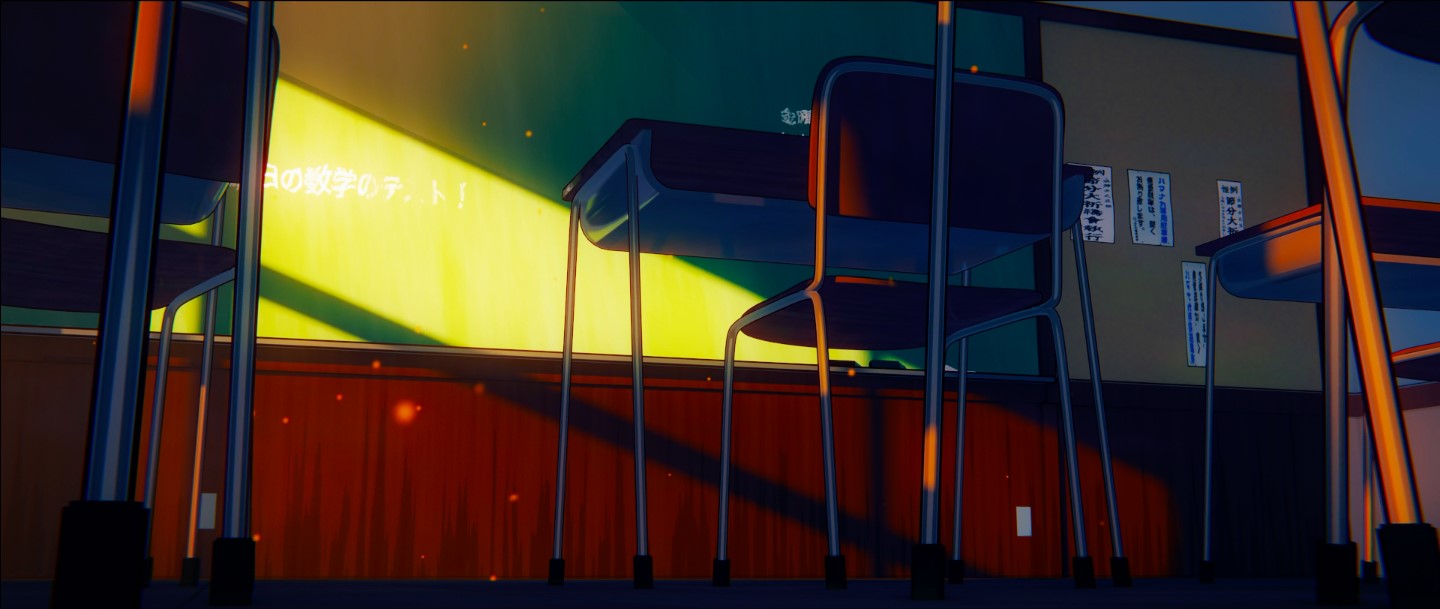
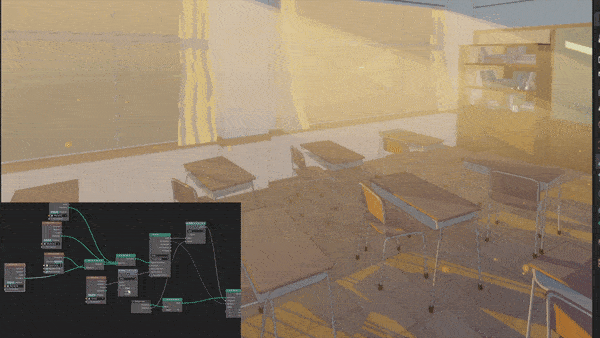
My final version used a vastly different technique. Instead of mainly using shaders, I used Geometry Nodes, specifically the “Geometry Recast” node. With this, I could shine “light” through the windows and calculate where it would hit objects in the classroom. Then I simply applied a shader to my mesh, and voila! I had a performance-light solution that was completely 3D, so it could be viewed from any angle.
I added a few effects like particles, and everything was done and ready to be rendered!
Compositing
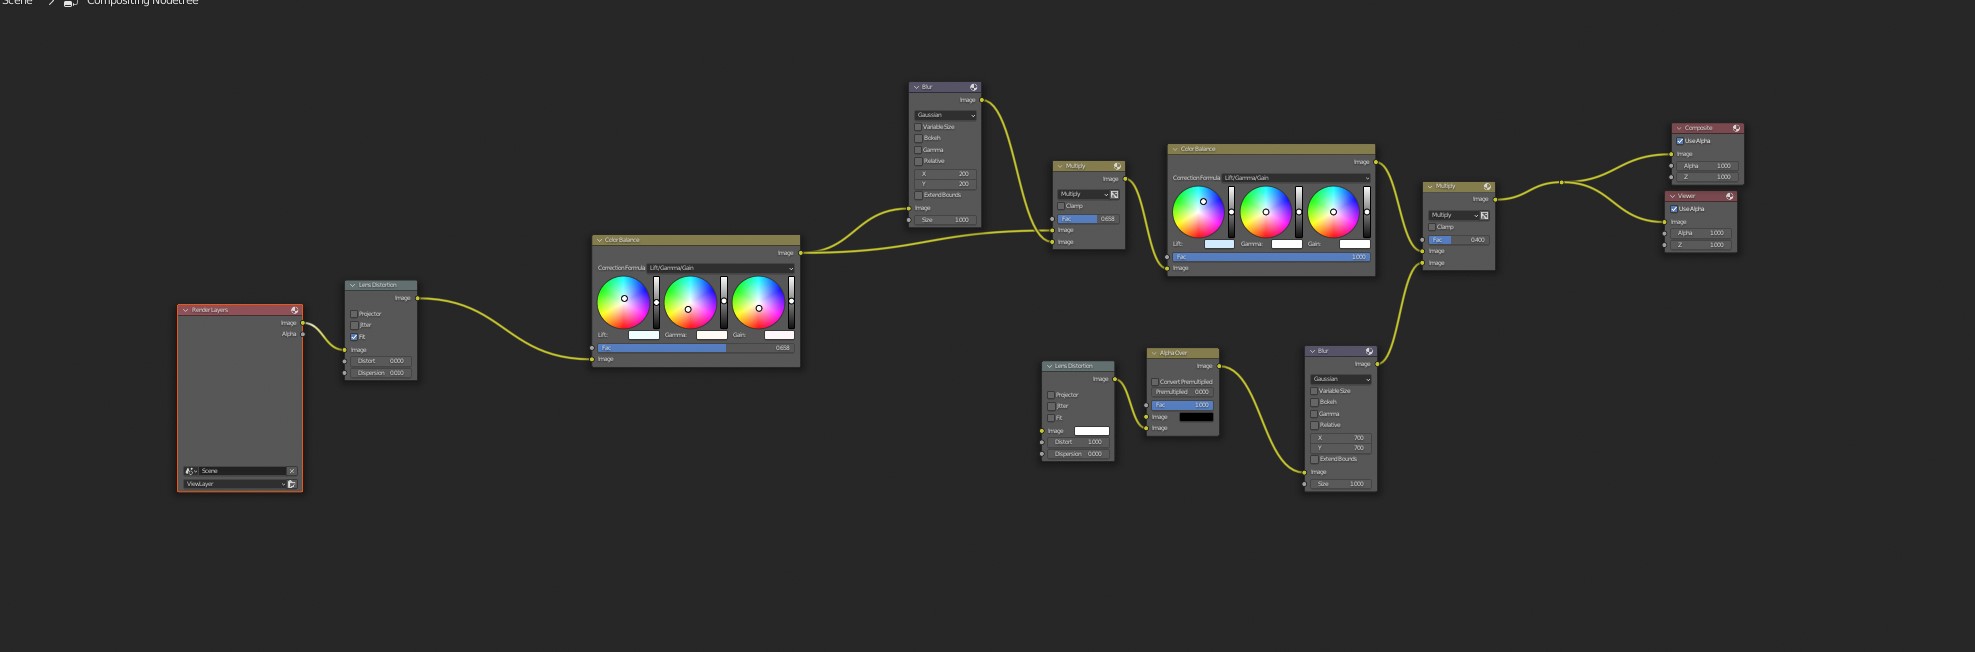
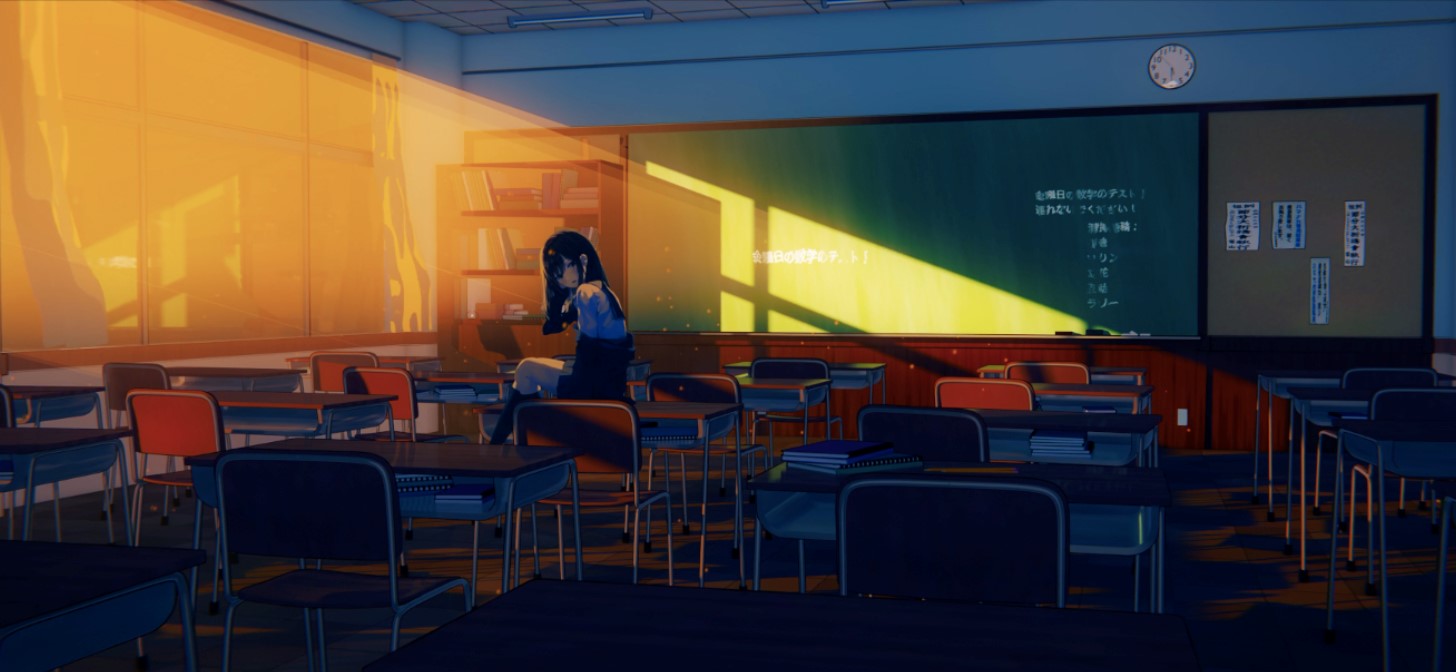
The lighting in my final render looks quite different from the viewport, much darker and moodier. This resulted because I wasn’t quite happy with how the final image was looking–––the values weren’t different enough and the colors were too soft.
My solution was to simply blur my render and multiply it over itself in post. This is almost all I needed to take my render from a flat image to a beautifully moody scene. I added a few other effects like lens dispersion and vignette, but overall the compositing was quite simple.
Conclusion
Toon shading is a wacky, messy, and fun experience that is a real treat to work on! I hope this article could help shed some light on my process and my little tricks. I had a blast making this scene and writing this article!
If you’d like to see my future work, feel free to drop a sub to my YouTube!
Anime Classroom Environment
About the Artist

ALLO (Theo), is a student and a digital artist.


