
Behind the Scenes: Oat Liqueur Distillery
About me and my inspiration
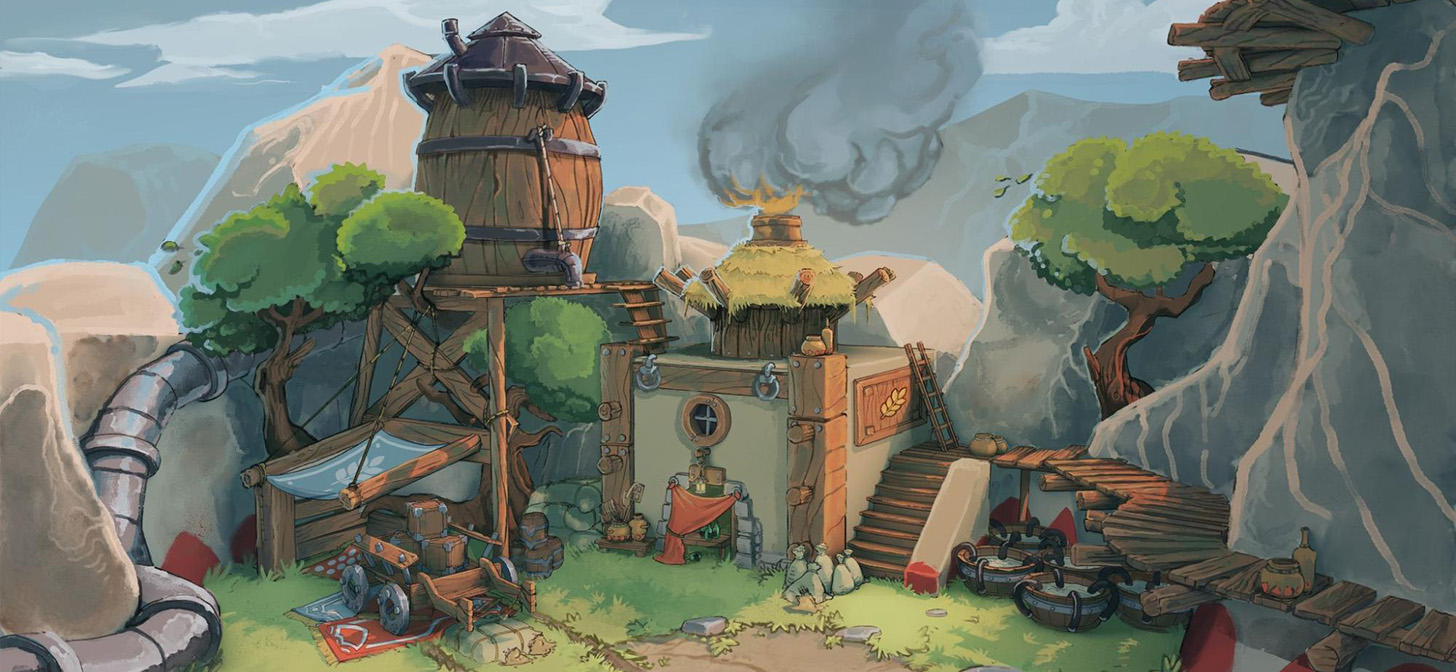
My name is Joshua Jay Christie, I live in South Africa. I grew up in a small surfer town called Port Alfred, my brother and I literally spent our childhood skating, surfing, and drawing. I went to a farm school where I was able to just play and play and play some more. I think this playful side of me still gets to come out in my artwork. I am a concept artist, animator, and visual development artist currently working in the game industry. I am also a lecturer at the Academy of Digital Arts in Cape Town. I previously studied multi-media, earned a degree in visual communication, then furthered my studies in a concept art higher certificate program.
I largely taught myself 3D. I don’t see myself necessarily as a pure 3D artist but I use it to visualize the 3D space of my paintings. I try to get a nice hybrid of 2D and 3D. What brought me to painting this piece? Well…I’m vegan…haha…and I would kill to live in a factory that makes oat liqueur and oat milk. I currently live off the stuff. My girlfriend actually suggested that I do a series of oat mill paintings and this one is the second piece of the series.
Sketching
This Oat Liqueur Distillery piece was built using a combo of 3D and 2D software. The first thing you gotta do is have an intention. It’s all about intention. I like to write out a one-liner to point me in the direction I want to go. I started out with a few sketches on paper just to see what shape language I wanted to go with.
When starting your sketches on paper, keep it real loose, I don’t use all the fancy tools, I just use a simple HB pencil and normal paper—keeping the tools simple helps you focus on the idea and design rather than getting caught up in the wrong things. Fill up a few pages of ideas, shapes, and general assets you want in the scene, then explore the shape language a bit. Don’t be precious about the sketches on paper. I always start off on paper, it keeps me grounded before I move onto the computer.
Modeling
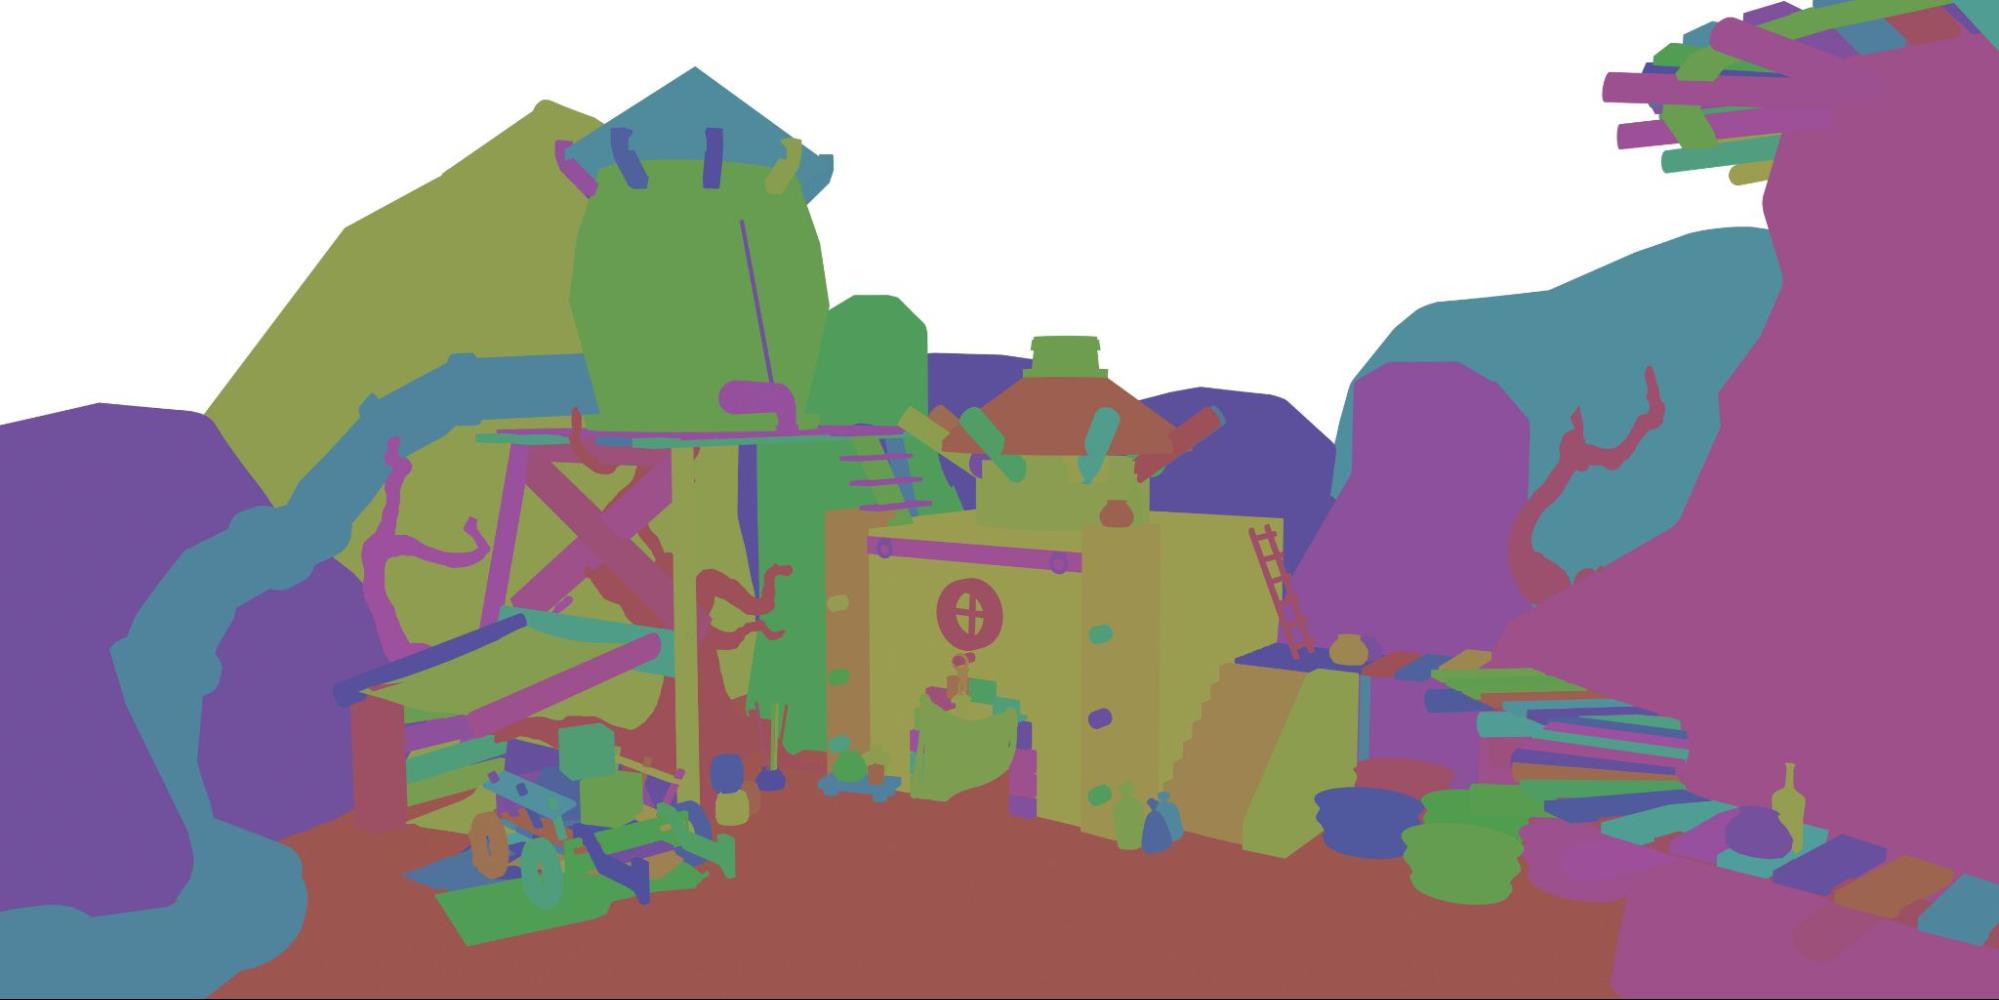
I then got an idea for where I wanted to go with it and moved into Blender to block out some basic forms in 3D space. I find it really user-friendly to go about it this way before committing to one design from the get-go; basically, it’s easy to make changes and move things around.
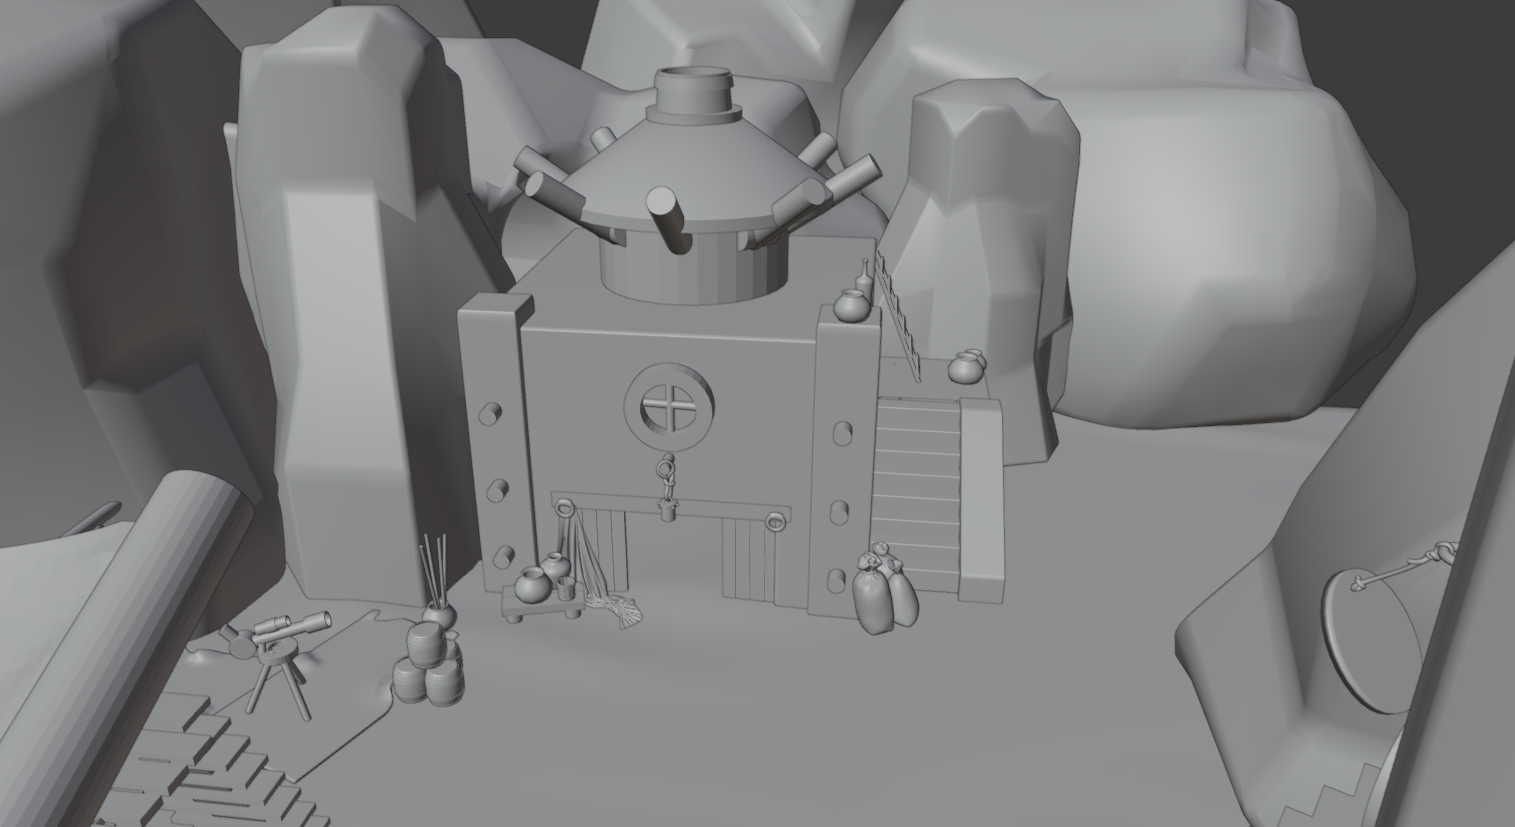
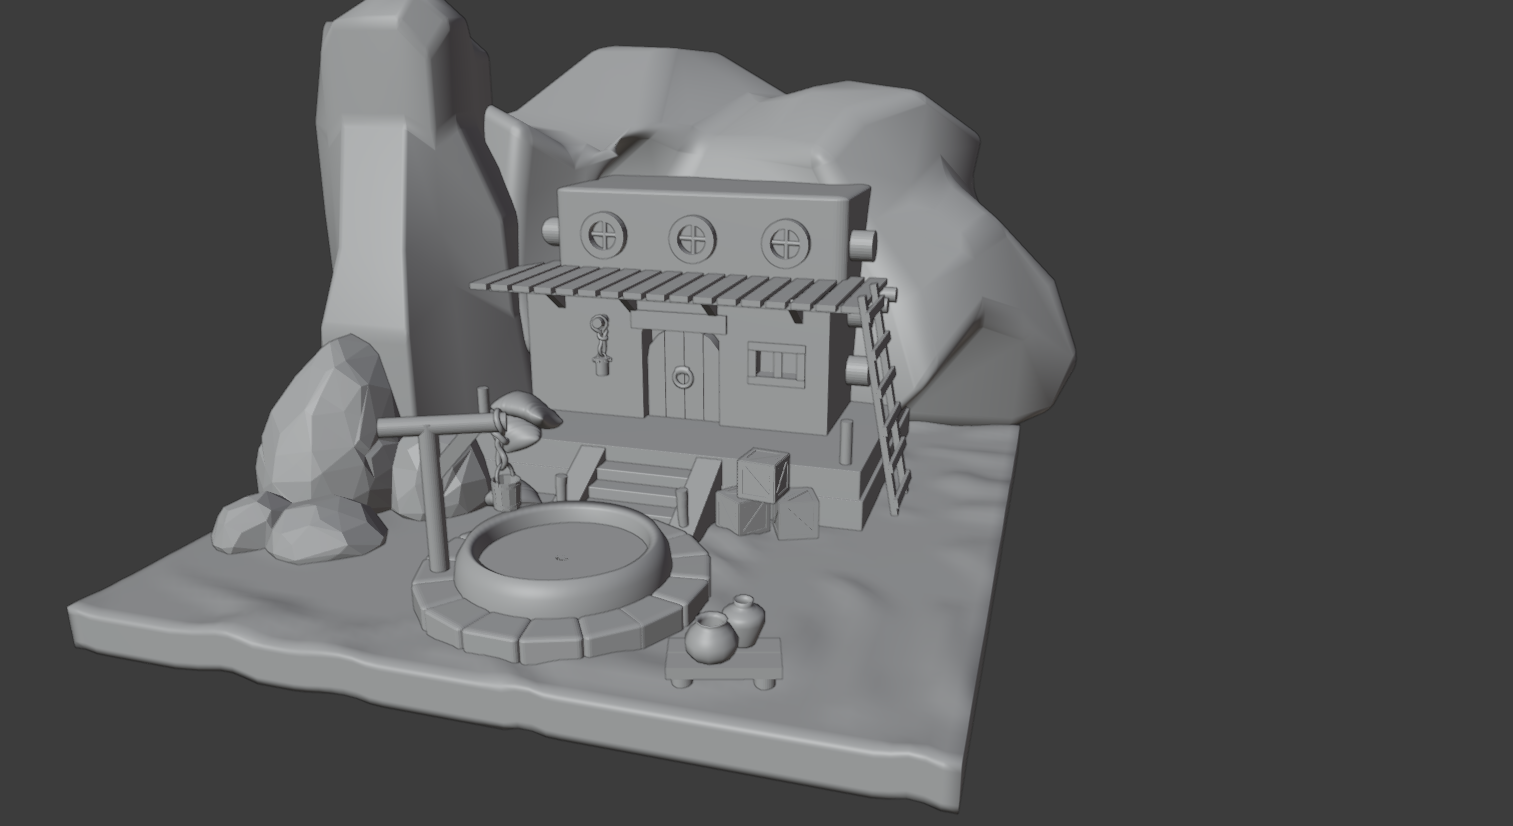
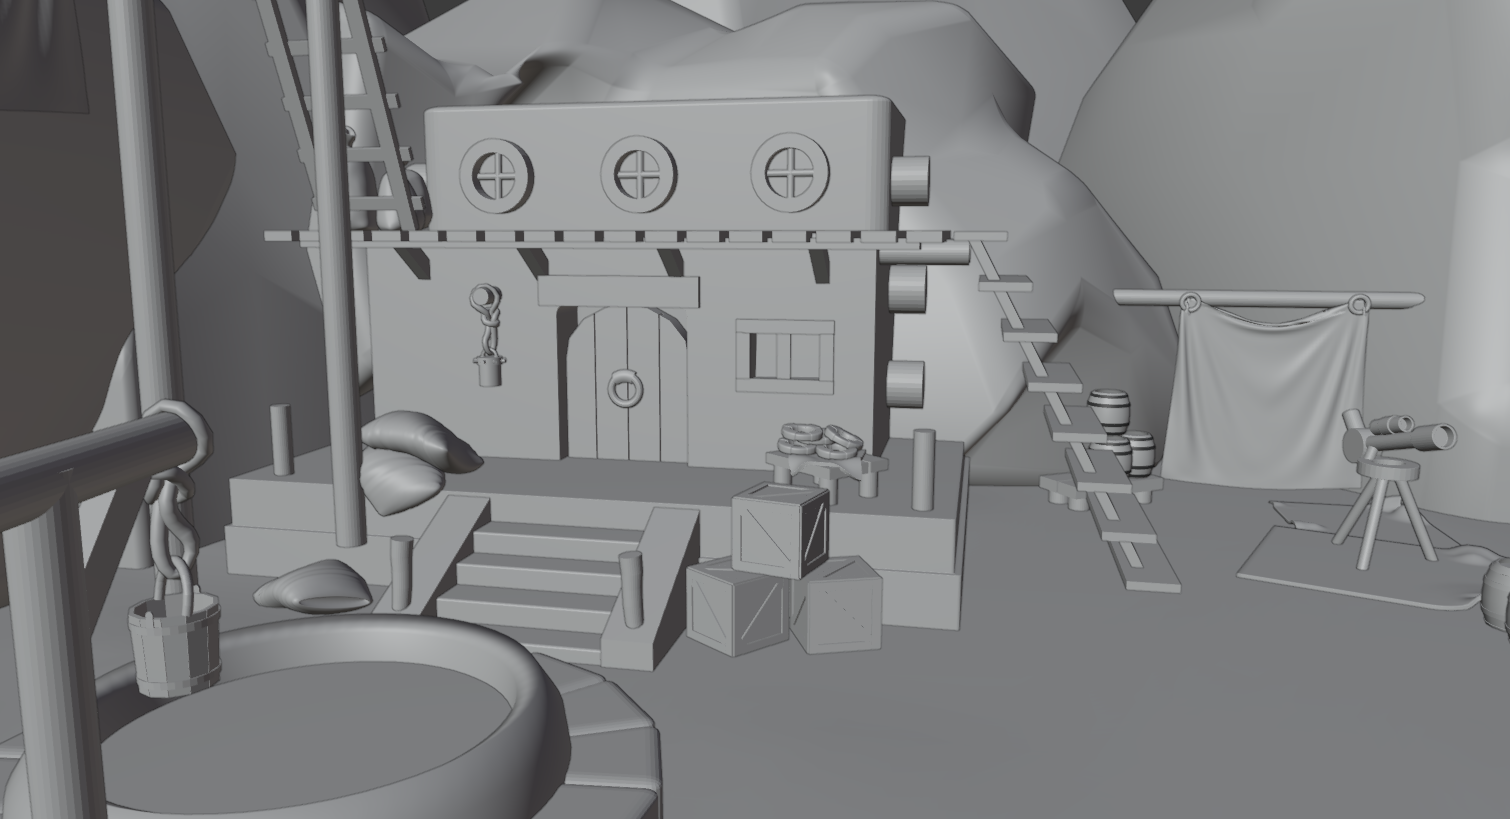
The 3D software is for blocking out shapes and placing objects in space. I don’t use 3D to decide my color for me, I prefer to add them layer by layer in photoshop, I feel like I have more control over them there. The kind of look that my style leans towards makes it harder to predetermine colors in Blender, for example some artists like to set each object to a flat color and then let the color of the light interact with it. I prefer to just use 3D for my general shapes and perspective set up.
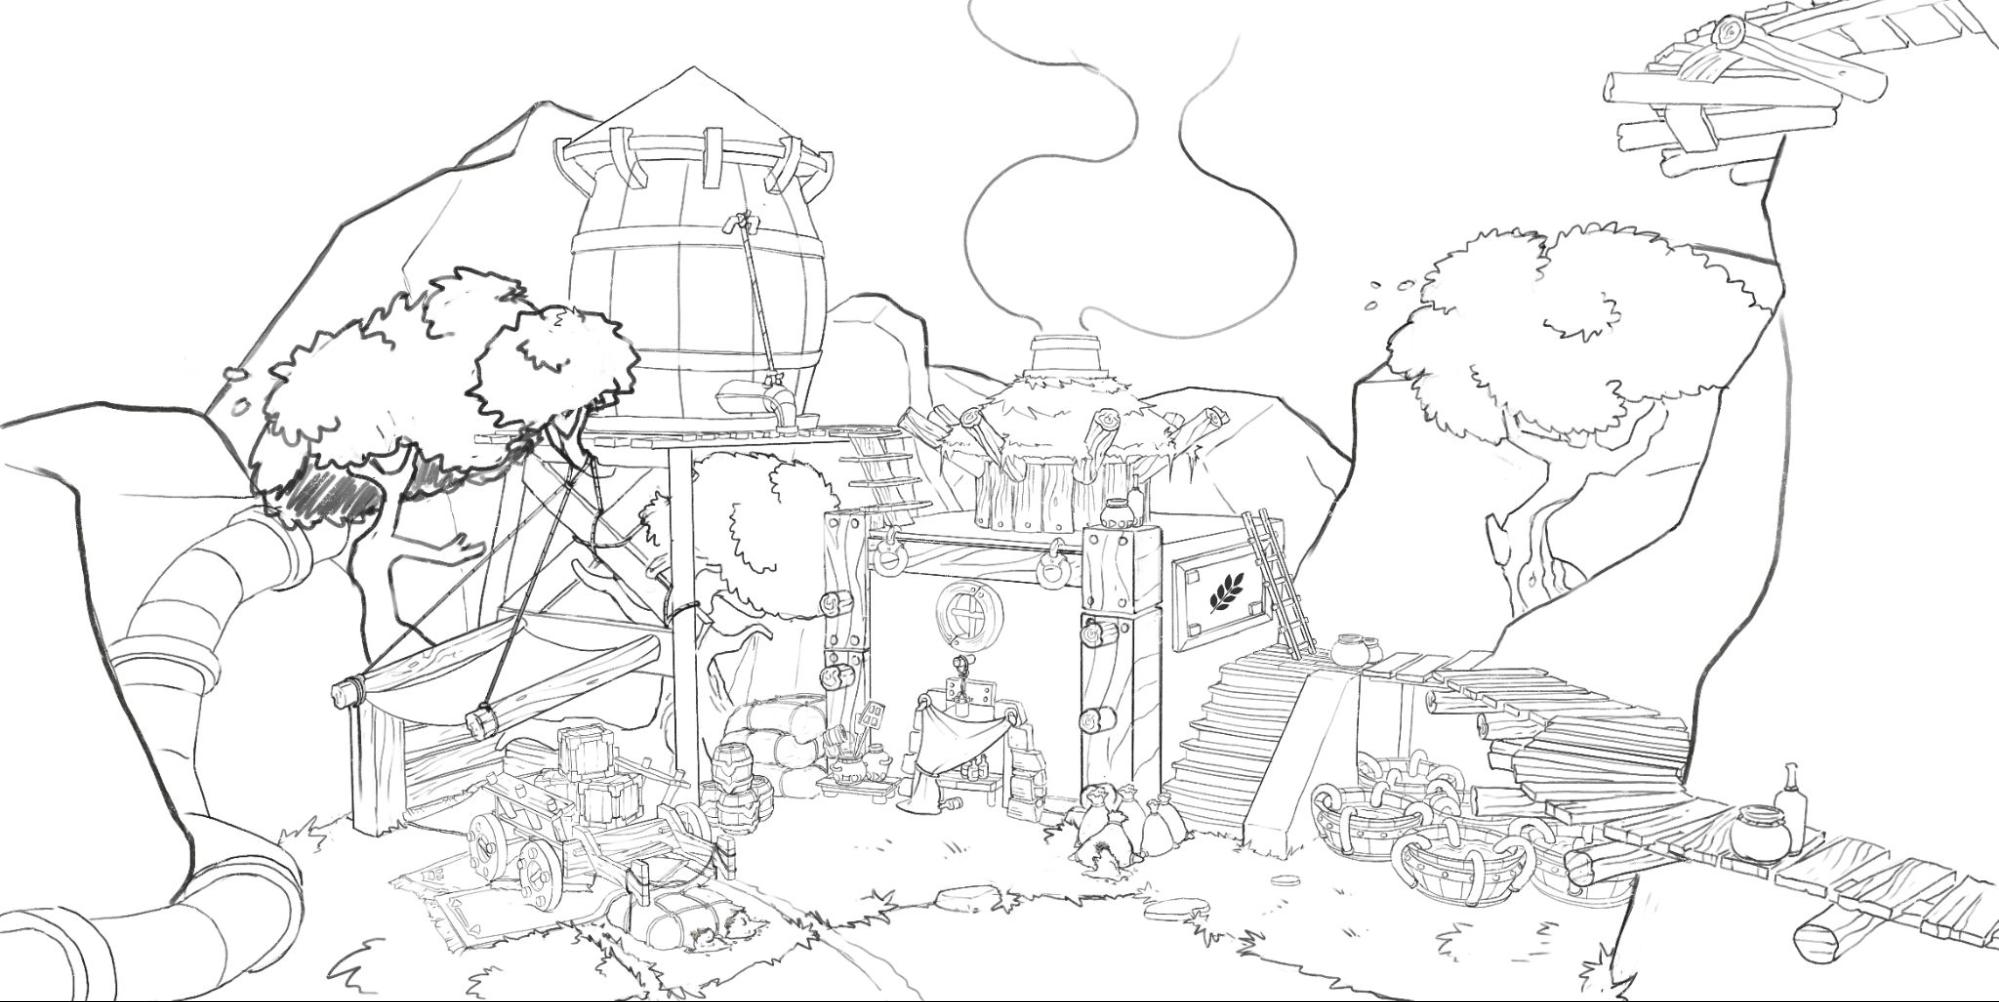
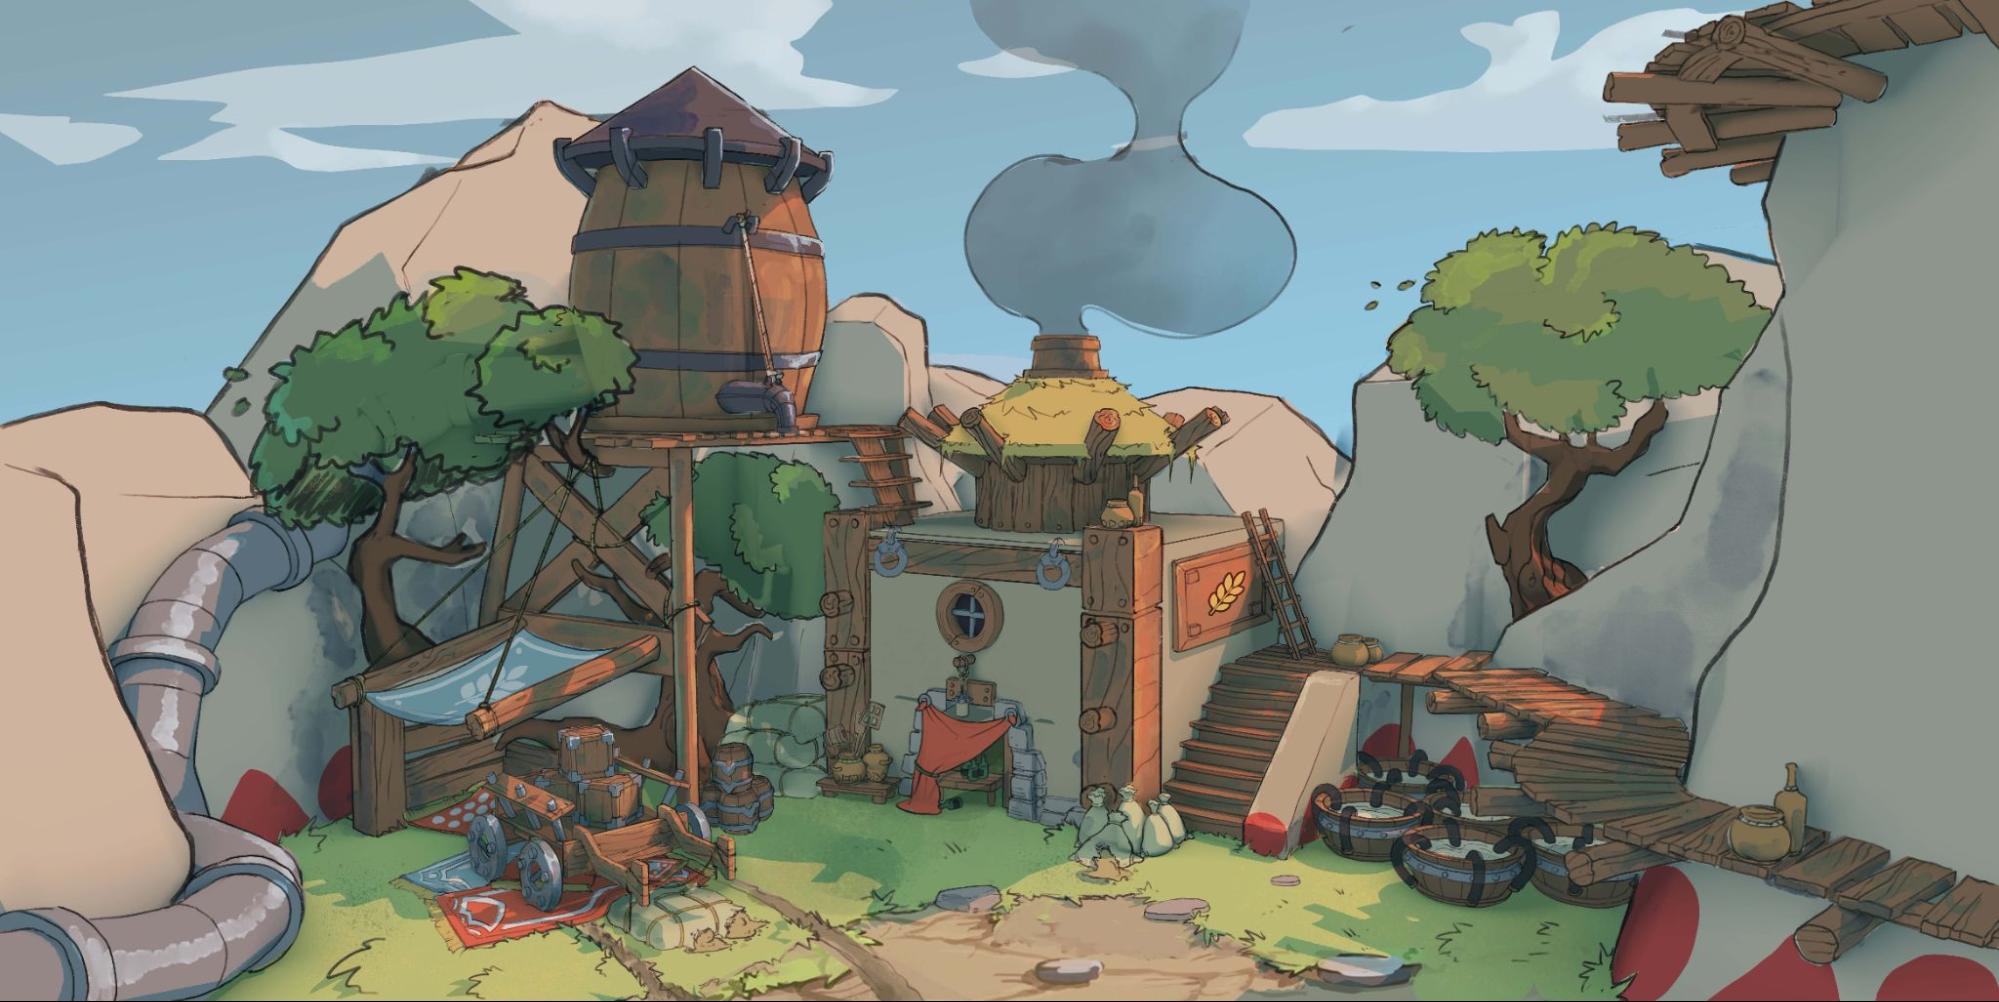
I then like to do linework over the 3D model to break away from my image looking purely 3D. The linework phase of the drawing process is a good time to make any more changes or add any assets to the piece. I also use this linework phase to make the space looked lived-in by adding details such as wood grain, little cracks, stones in the wall, hanging plants, shaggy-looking hay, leaves flying around, wagon tracks, organic-looking tracks, smaller parts of existing objects…whatever makes sense for the story I’m trying to tell.
Painting
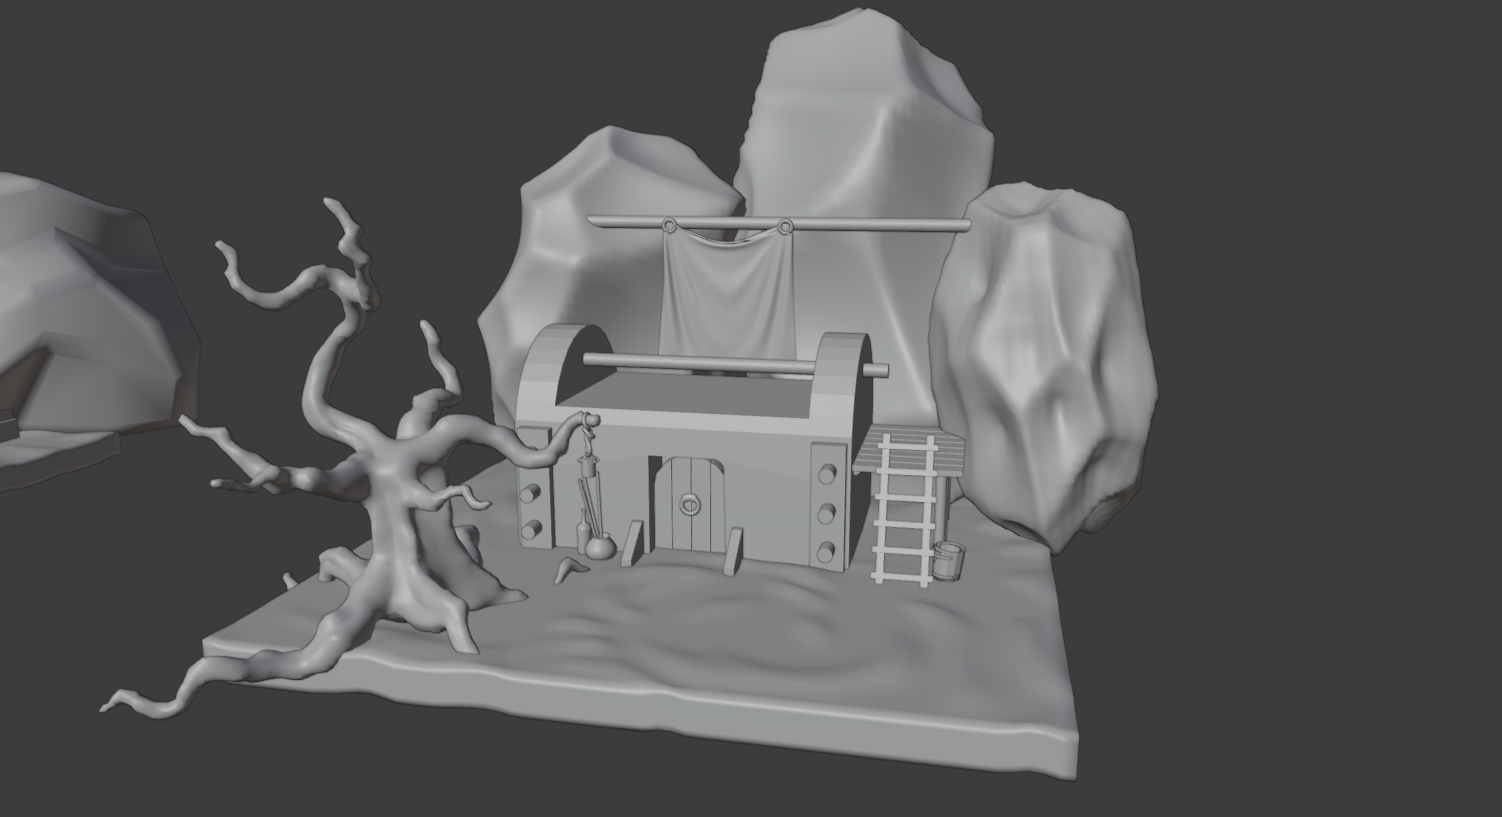
Building a painting is all about iterations—the more iterations, the better the ideas become—and as visual people, we like to think on paper or in a visual space. I have found that using 3D for making thumbnails is easy because it lets me change the camera angle to whichever one I think works best for each thumbnail.
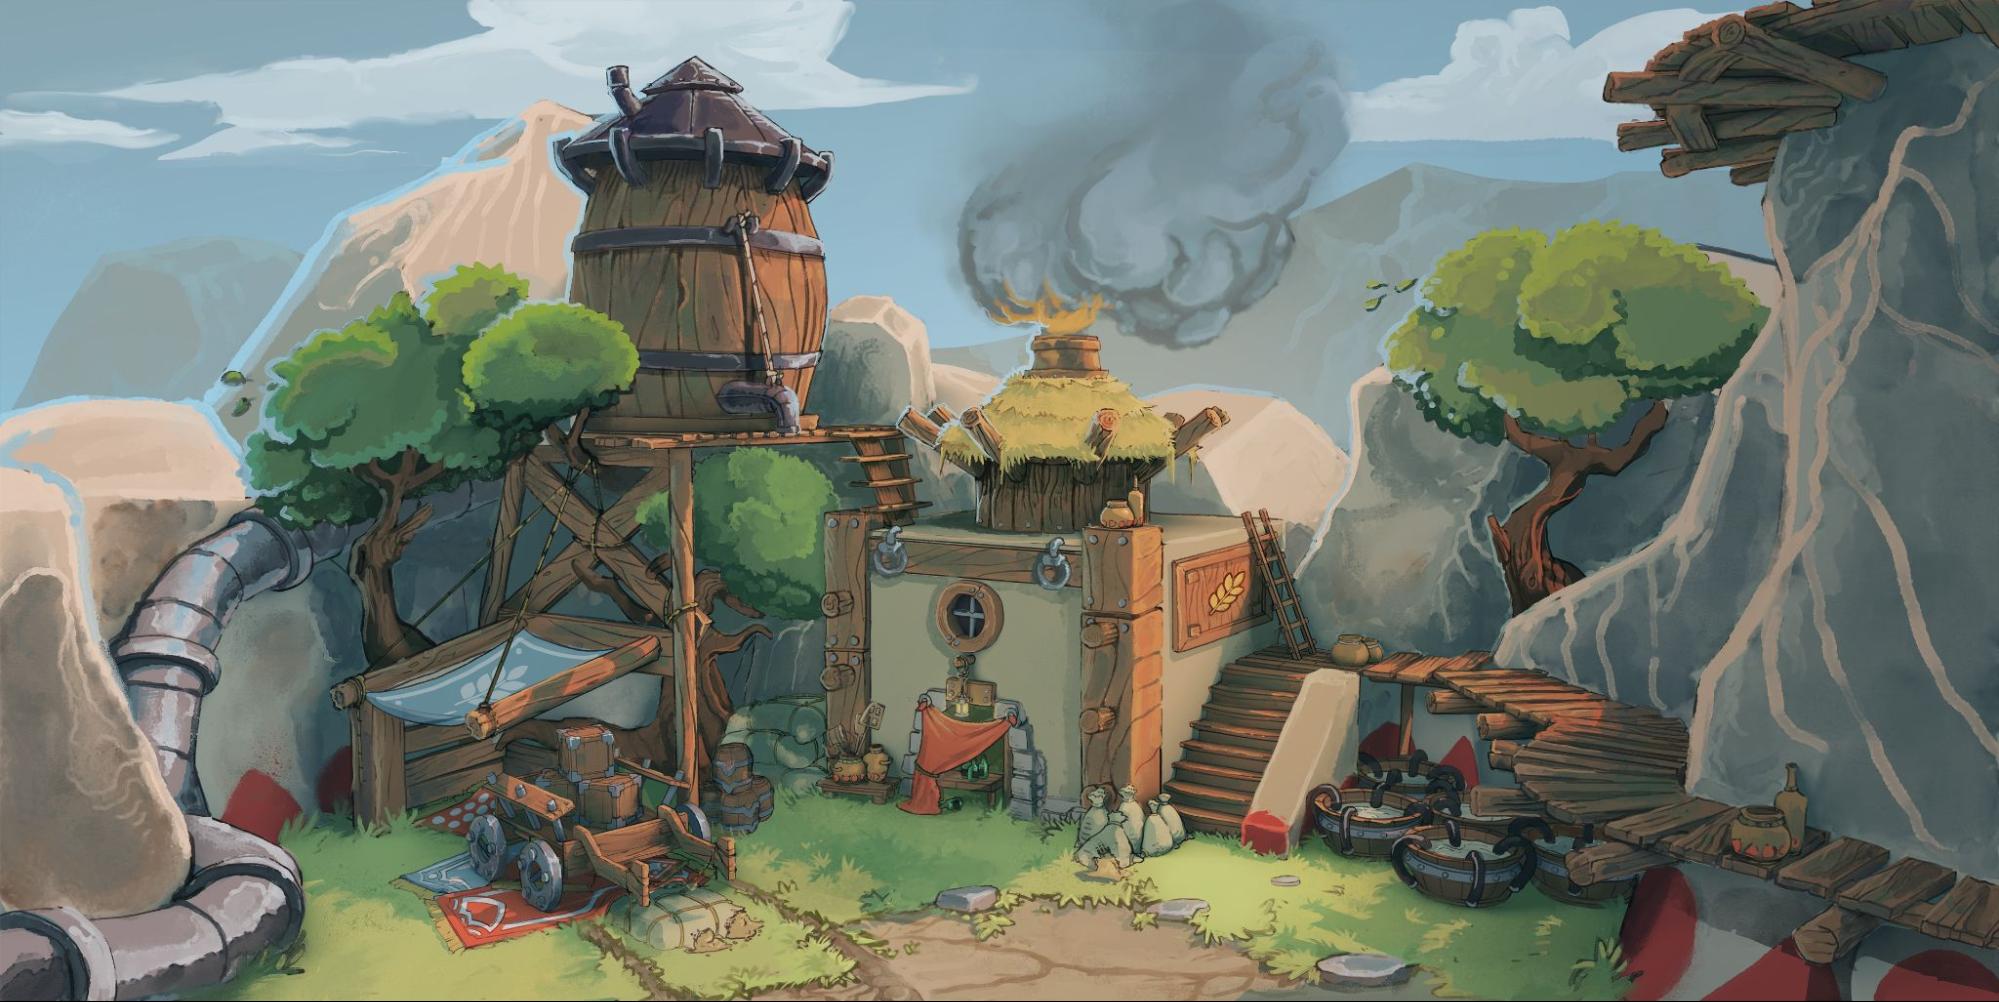
When moving into the actual painting process, you want to add flat colors first and then start building up your light and shadow. I like to keep my shadows on two layers using multiply and darken blending modes. Darken is good for adding extra color variety into the shadow area. I typically use more blues, greens, and purples in my shadow areas. But what colors you use are entirely dependent on the light setting in your piece. A good tip to remember is that warm light equals cool shadows and cool light equals warm shadows.
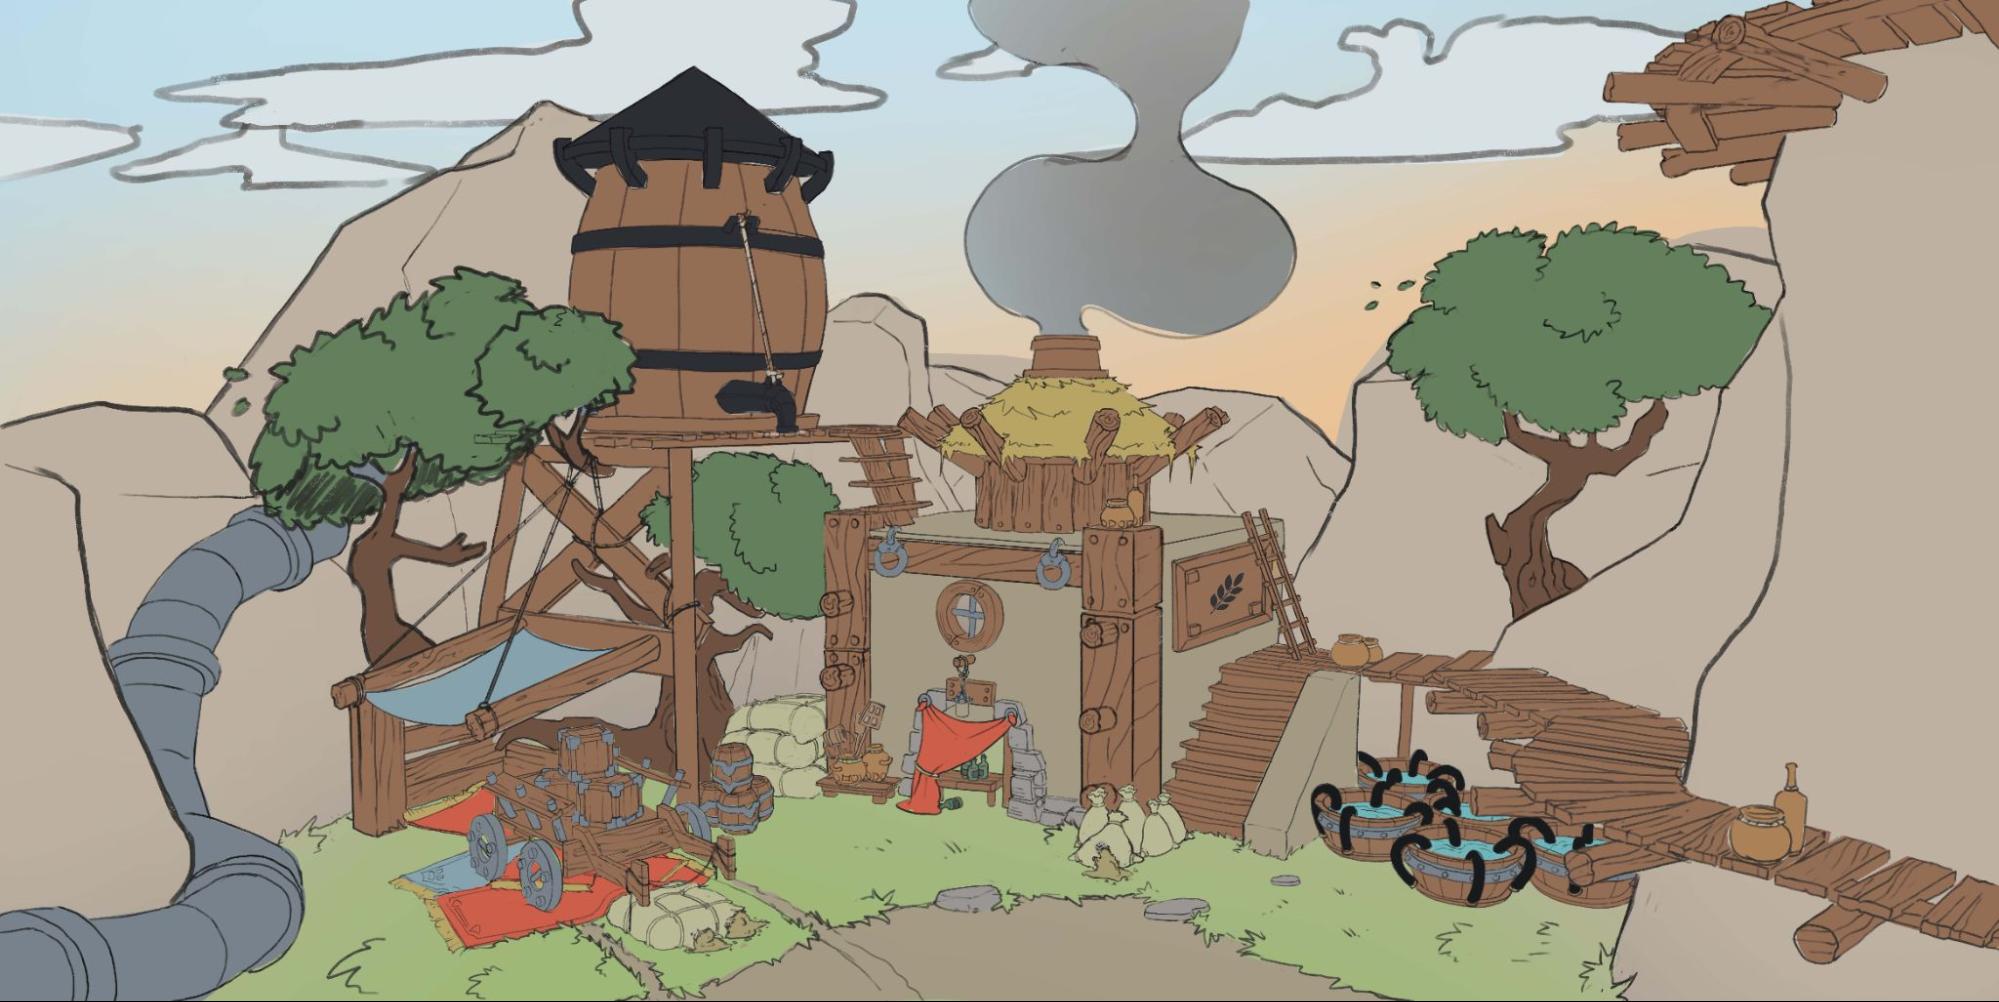
I then move to my light layer and use an overlay blending mode to get a general light going. I try to mix up different colors in my light area that still make sense; for example, on my wood grain I will use reds, oranges, yellows, and browns to contrast the cool shadow area. Remember to keep in mind the actual color of your light source—this will affect your reflective and diffuse surfaces differently.
After this, I use hard-edged lighting where I want certain areas of the piece to pop. So, for example, you’ll see the blue edge lighting on the left side of most of the objects in the scene and a light yellow on the right side of the objects; this double-edge light makes things pop out properly. This is not necessarily 100% accurate, so this is where your taste starts to come in—I mean, this is art, we’ve got to break the rules a bit sometimes. I fully believe in learning the rules properly so you can break them like a pro.
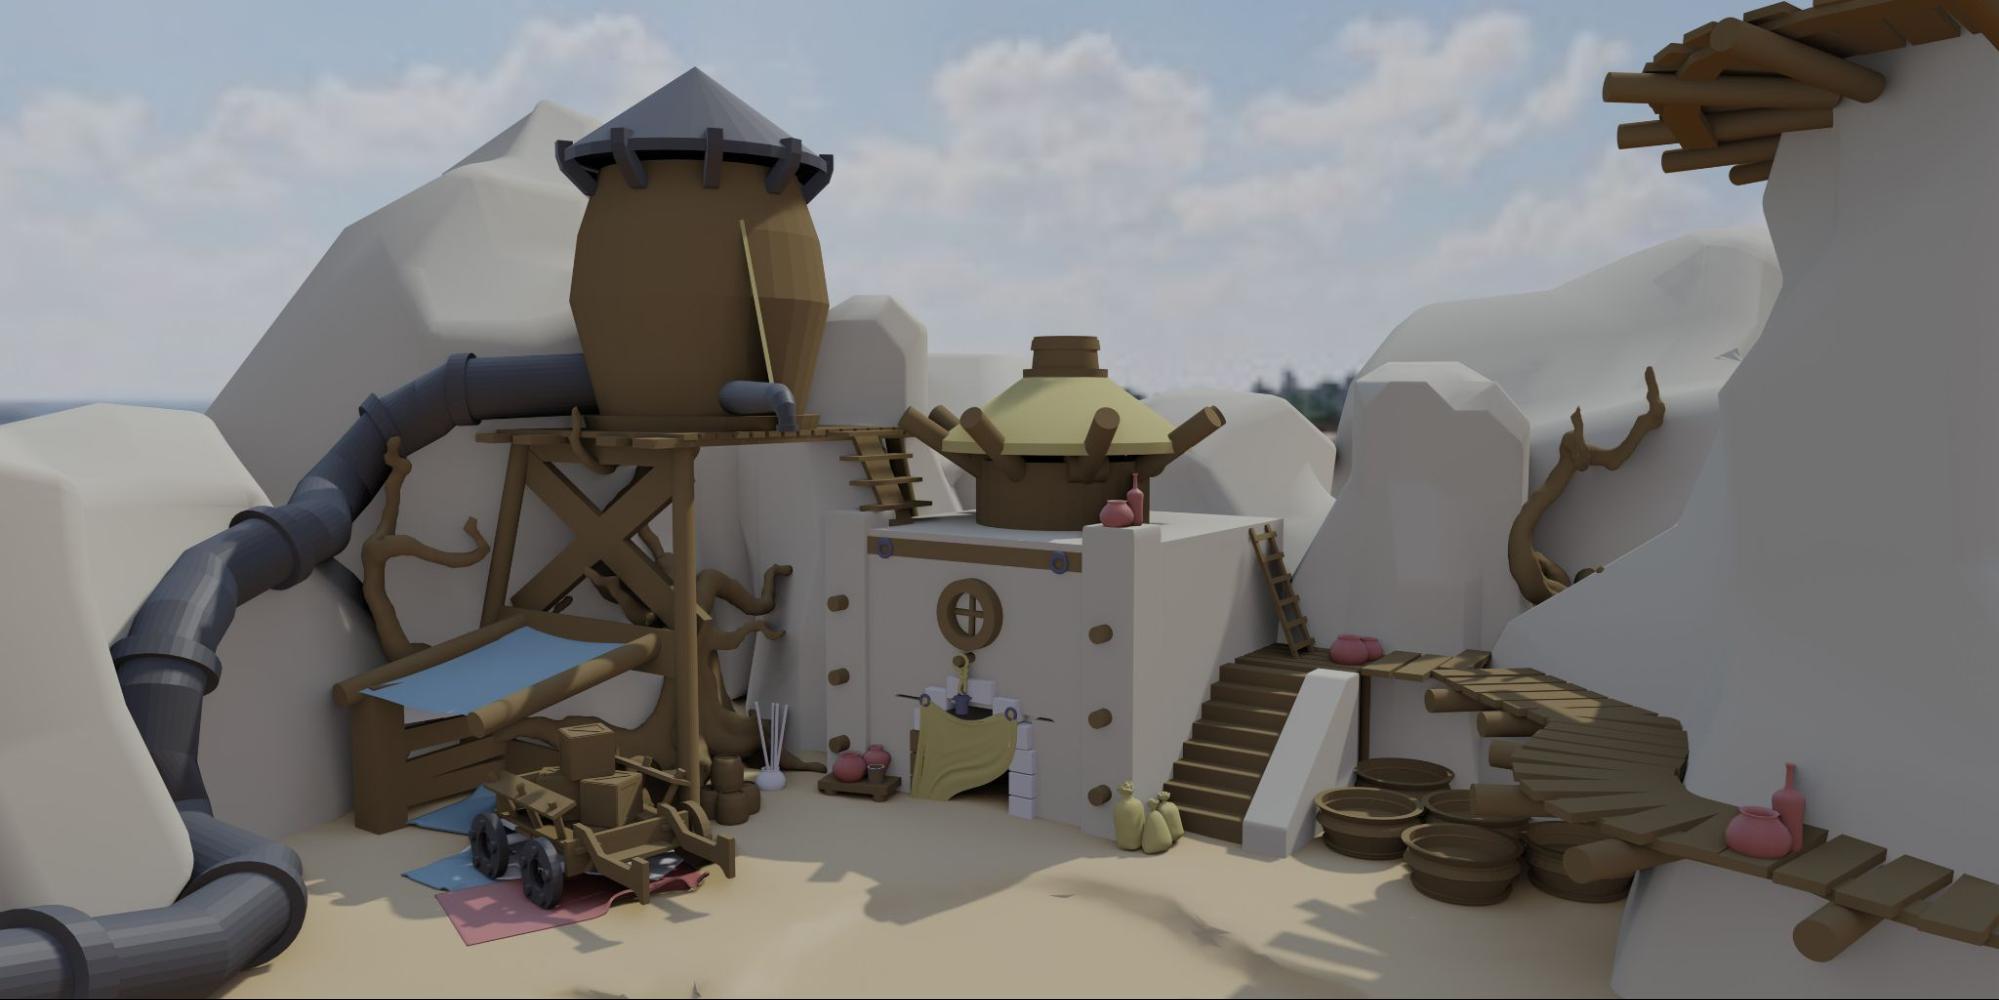

Now that all the light, shadow, and general colors are in place, I could go in and refine anything I thought needed more work. For example, adding reflectivity to certain surfaces or polishing that flower pot, or defining the design on that tank. At this point I like to go in on one layer and paint over what I have; I like using one layer at this point so I don’t break my own flow of the painting process. I just keep my fingers on the ‘[‘ and ‘]’ keys as well as on the ‘i’ key to color dab at any point I feel I need to.
I also use 3D to export different render passes for selections in the 2D painting process, so I have light, dark, and separate object selections before I even start painting. The problem I find most of my students run into is that they feel limited by the 3D software or like they have to stick to the 3D model strictly. It’s just good to remember that you can change and edit things right until the very end. I like to do some planning but also let myself figure a few things out along the way. It always feels like it then keeps the energy of the piece alive.
Tools
I like to use all tools available to me while keeping a very specific style to my work. So my process involves paper, 3D software (Blender), and 2D software (Photoshop, Sketchbook Pro, or Procreate). Using a lot of different software programs to create art can be hard because you don’t want the computer to make the art for you, which is why it’s incredibly important to have a very specific look in mind before starting. I love to do loads of research beforehand; what the functionality of the assets in the environment is, who lives here, what do they do, why did they decide to live here—it’s all about telling a story so that it makes logical sense. I also don’t like to take too long on the painting process, I like to finish my pieces in 2 or 3 sittings max so that it does not feel too disjointed.
I also recently got a GTX 1660 SUPER VENTUS XT oc graphics card and it’s more than enough for the type of work I am doing. You want to have a graphics card that doesn’t slow down your momentum. I am also using a Huion Graphics Tablet (Huion gt-220 v2 (8192)); it’s a tablet screen that you can draw on. I find it nicer to have a separate screen for my reference images. The program I use for reference images is called PureRef. It’s great because you can have different sections of images in one document while keeping everything together.
About the author
 Joshua Jay Christie, Concept Artist and Illustrator from Cape Town.


Realy nice project! Thanks for sharing your process. It is a great mix of both 2D and 3D.
Really amazing how many procedures make up one illustration. Most eloquent explanation! Even made it simple to understand for a non-digital reader
Awesome no worries at all!
Such a fun process! Thank you for sharing. I sometimes struggle to work 3D into my process, will stick to this workflow in the future.
I love it man! The whole feel and detail makes me think i already know the guy who works there…if it can be called work. Brilliant stuff, well done!!
haha i want to be the guy who works there
LEGEND EXPLANATION!!!! Thanks for taking the time to go through it all.