About me
Hey there! I’m Aloïs, a 21-year-old student in 3D concepting and VFX (1st year) and aspiring environment artist from Lyon, France!
I started using Blender in high school 6 years ago; at first, it was just a hobby, but then I started to consider 3D as a real work opportunity and passion. It combines creativity and science, which I love. I started my 3D studies this year!
Inspiration and Ideas
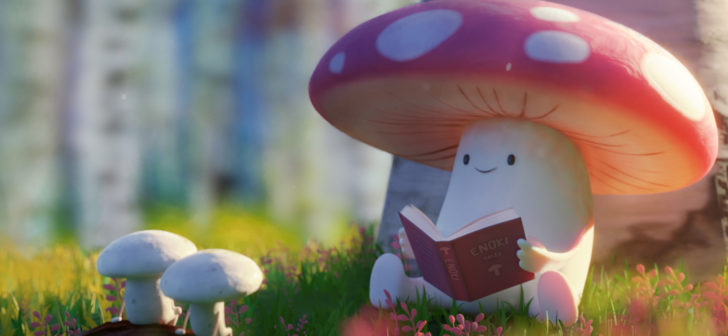
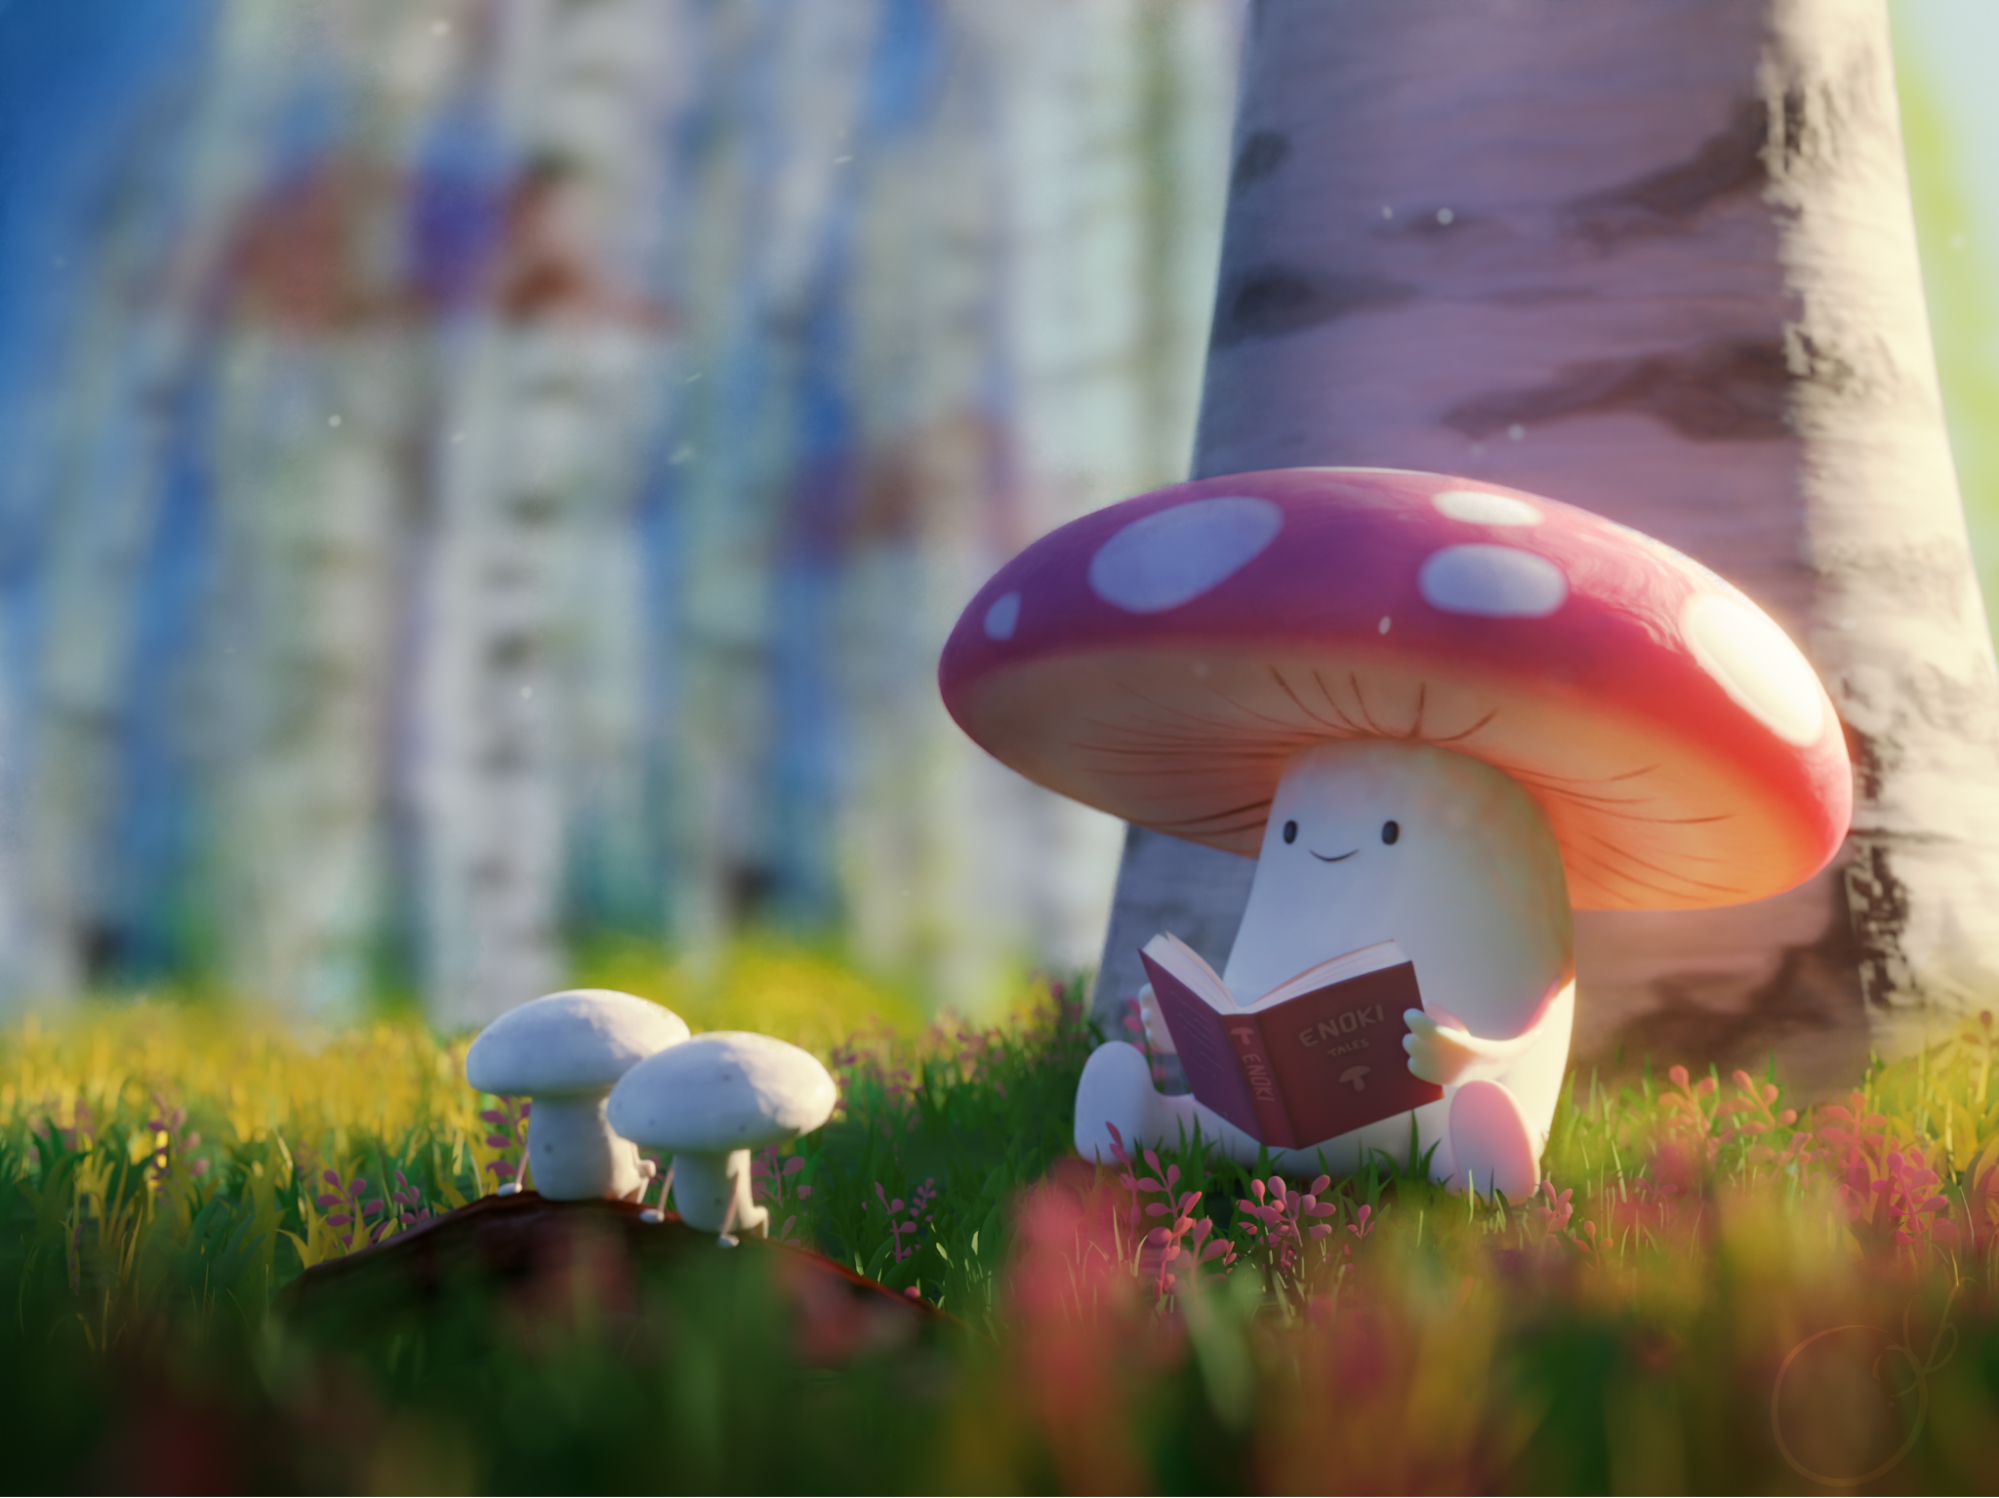
This project was a Blender workshop brought to my class by our teacher. We had one week to reproduce the Enoki Tales illustration made by Goro Fujita.
View this post on Instagram
This project was quite a challenge because we had to proceed through all the parts of a real production, from the layout to compositing in Blender and Photoshop in a single week. The most challenging part was to recreate this cute atmosphere and lighting, kinda fairy-like.
Step-by-step Process
Setup and Layout
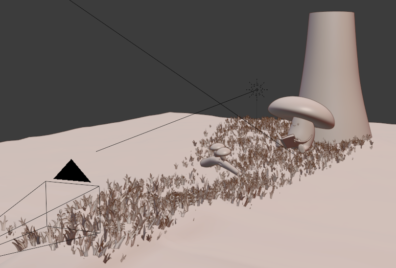
To recreate this scene properly, it was important to get the proper camera setup and object proportions. The focal length was set to 100mm, giving this proximity effect on those small characters.
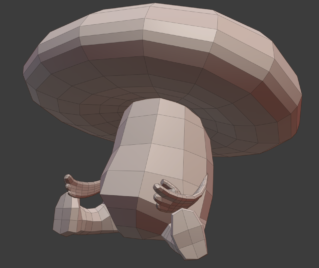
The second step was to make the layout with simple primitives and work around them. I kept those simple to have better control over the geometry and to adjust them to the original concept when needed. This way I didn’t have to rig the character or take care of complex topology, which was time-saving in the process of a weekly school exercise.
Modeling
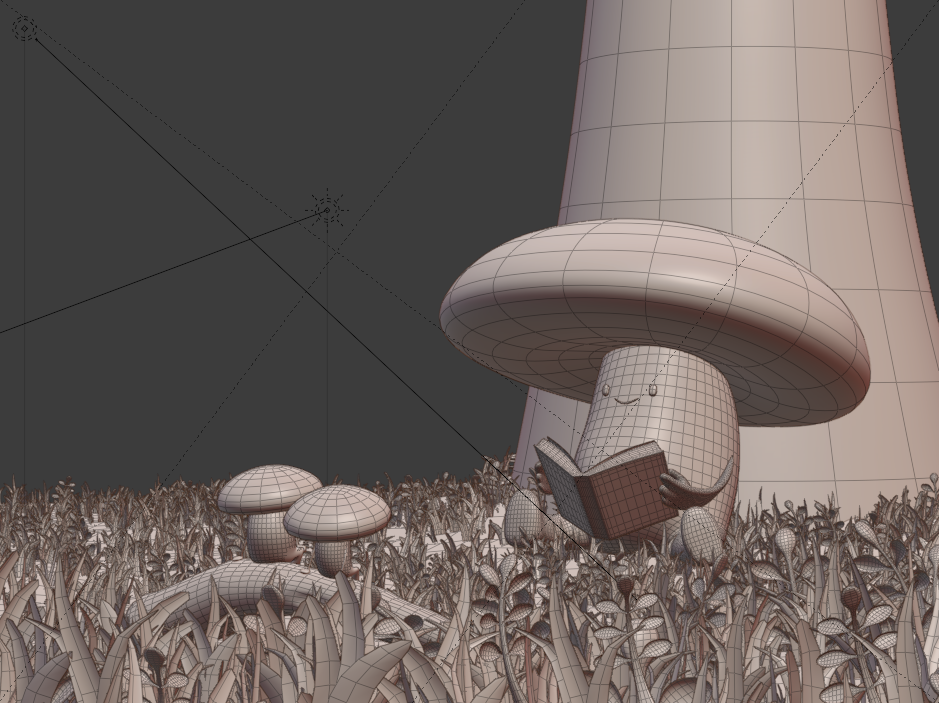
As I said in the previous part, the modeling was very fast, staying as simple as possible, deforming primitives, and then applying subdivisions with modifiers. The fact that we had to deliver a single image made the process faster; proportions and hidden parts are not always clean.
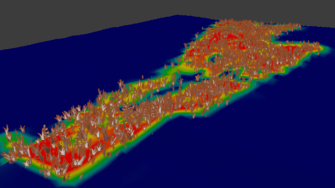
For the floor, I used a particle system scattering three simple grass geometries. I used a weight factor on the emitter plane to get a better random noise effect and, to get better control over the scattering itself, I limited it to the camera angle for a better rendering process.
Shading, texturing, and lighting
This part was the most interesting and challenging for me. There were multiple techniques involved, including procedural, common texturing, and alpha masking. Let’s start with the book!
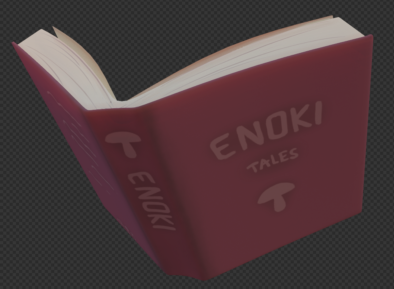
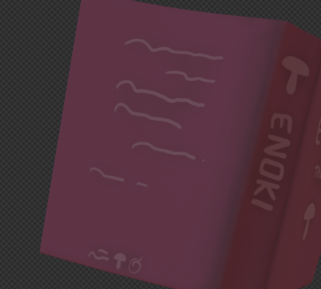
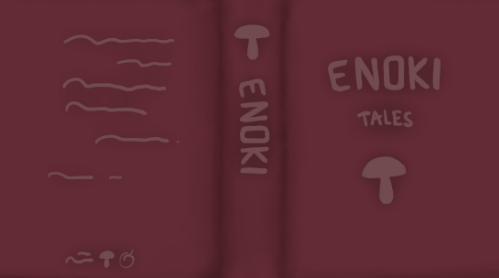
The texturing here is quite simple, one UV island for the cover and another for the pages. Since the style is kinda cartoony, I didn’t bother modeling all the pages and made the number illusions with simple strokes. As you can see, there’s a little symbol next to the mushroom on the back cover: my signature, which is barely visible on the renders. I did the texturing and other 2D “parts” in Photoshop.
For the wooden bark, I made a simple UV cylindrical projection, cutting the bottom and top parts of the meshes since we can’t see them in the render. I worked with PBR wood textures to simplify them into a cartoon style, which works well for this type of render.
The mushroom textures were made using alpha masks created in Photoshop in order to have better control over the shading inside Blender. The bodies themselves were made using a procedural noise to get some contrast with the darker tones. For the first time, I tried the Subsurface Scattering parameter, which made the render appear more natural.
Let’s jump into the procedural part (my favorite)!
I didn’t push the grass base very far since it’s barely visible in the renders, especially with the grass blades over it.
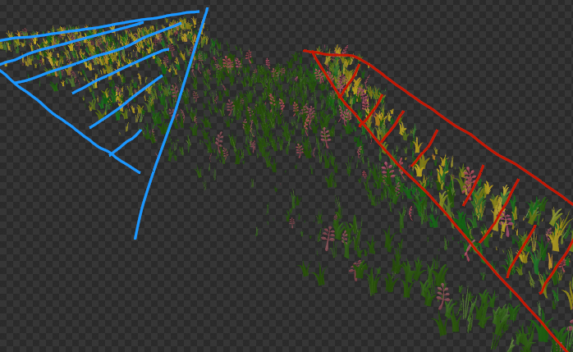
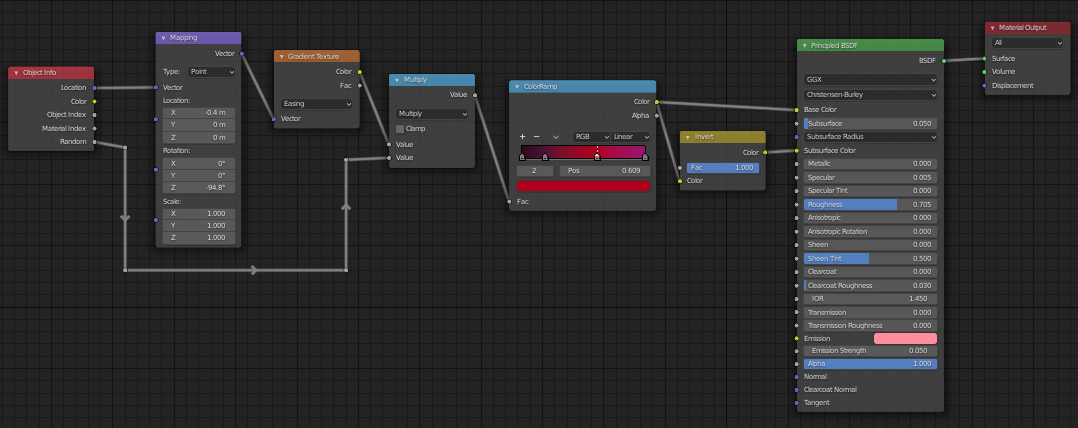
So now we’re jumping into the best part, which pushed the render even further: the grass blades’ materials. As we saw before, there are three little objects, scattered into the plane we just saw right above. For the first iterations (the greenish ones), I made a procedural system (completely improvable for reuse purpose) driving the randomness of the brighter colors, such as yellow tones, where the sun hits. I simply used the transform parameter of the mapping of two noise textures, rotating and moving them to match the shadow of the tree.
I also added a subsurface scattering parameter to give a more appealing look to my grass blades. The reddish iteration is an easier variation of this system.
The result, when combined with the lighting, was really convincing and bought me a step closer to the original piece.
The light setup itself is really simple: a sun light, an ambient light to get a blue tone on the darker part of the image (which I’ll play with in the compositing) and that’s it. Thanks to the SSS, the mushrooms look awesome!
Rendering and compositing
The rendering was done using Cycles (CPU) with 512 samples and OpenImage denoiser. The ratio here is the same as the original image (1.34 ratio) and the resolution is 3840 by 2876 pixels.
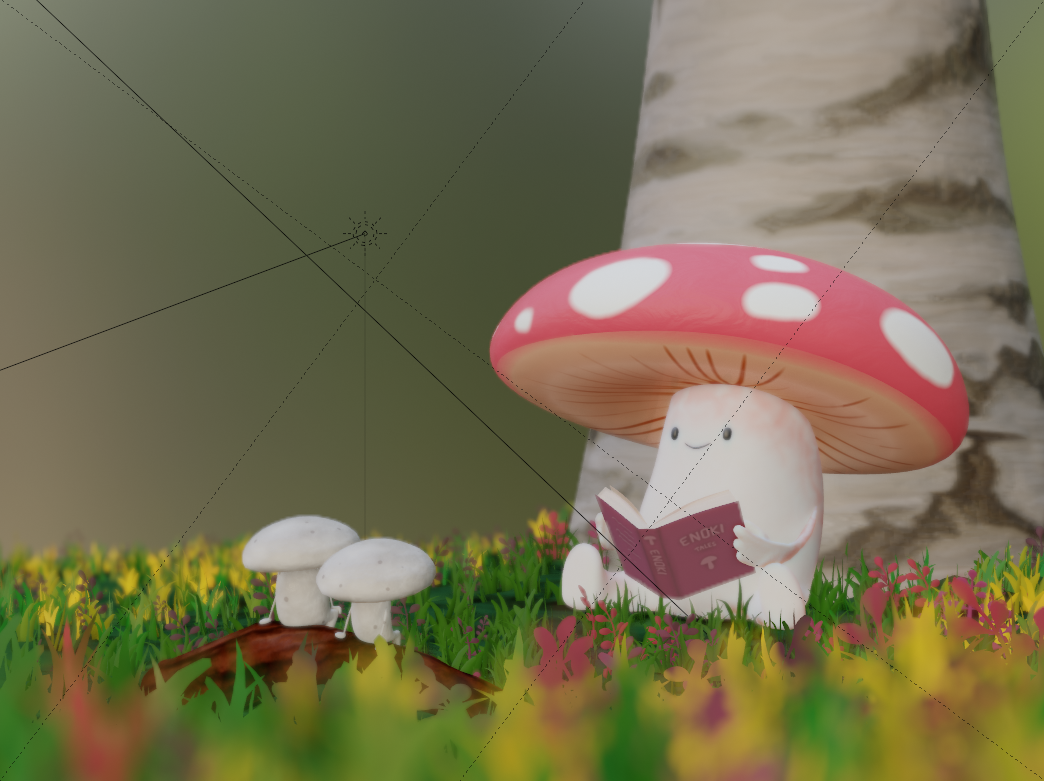
The camera setup is in a perspective type, with a focal length of 100mm, as I said before. I made the render with a depth of field factor, putting emphasis on the small size of the scene, making the visual more believable and closer to the original, and more appealing at the same time.
Next step, compositing! To recreate the background, I used a simple birch forest image that I modified, adjusted the camera lens and color to merge the layers smoothly. And voilà for the Blender part!
The following step was done with Photoshop, which was a bonus in the notation process of the exercise. I just made simple and minor adjustments, leading to the final image.
Final words
Thank you for reading through! I want to also thank the BlenderNation and Blender Artists staff for their hard work, gathering content and creators from everywhere, thanks to my school and teacher who helped me to get this result ( F.Carrobourg, if you're passing by, thank you for this workshop and your help!).
About the Author
 Aloïs “Pom” Coissard, 3D/VFX artist and student








2 Comments
Great work! I love the procedural grass texture.
Incredible :o