Behind the Scenes: Valentine’s Day Scene with Geometry Nodes
About
Hello, I am Gaonirico from Argentina, I’m a freelance digital artist. I started learning about Blender around 2013, watching a tutorial per week and imitating what they did in the videos. Although, I must admit, at that time my main 3D modeling program was Sketchup because it had few buttons to memorize, haha. I just completely switched to Blender 3 years ago and since then it has become a program that I love very much and I would never change it.
Since I was young, I have liked drawing characters and then, with 3D modeling, I realized that I also like creating landscapes and scenes. Blender allows me to do both. Last year I learned how to use shading nodes to create illustrative effects or an NPR style. And earlier this year I learned a bit about Geometry Nodes to automate the creation of landscapes and some models.
[sponsor id=’qarnot’]
The project
The idea for this work was to create a scene for Valentine’s Day. For that, it occurred to me to draw with Grease Pencil a married couple, who were sitting on a bench in a square. Much of the environment should be created using Geometry Nodes and by applying a cartoon effect to the shading of the 3D elements. All this I proposed to myself as a challenge, as a test of what I had learned in all these months of the pandemic. And I was also curious to see how this would all come out, haha.
Getting started
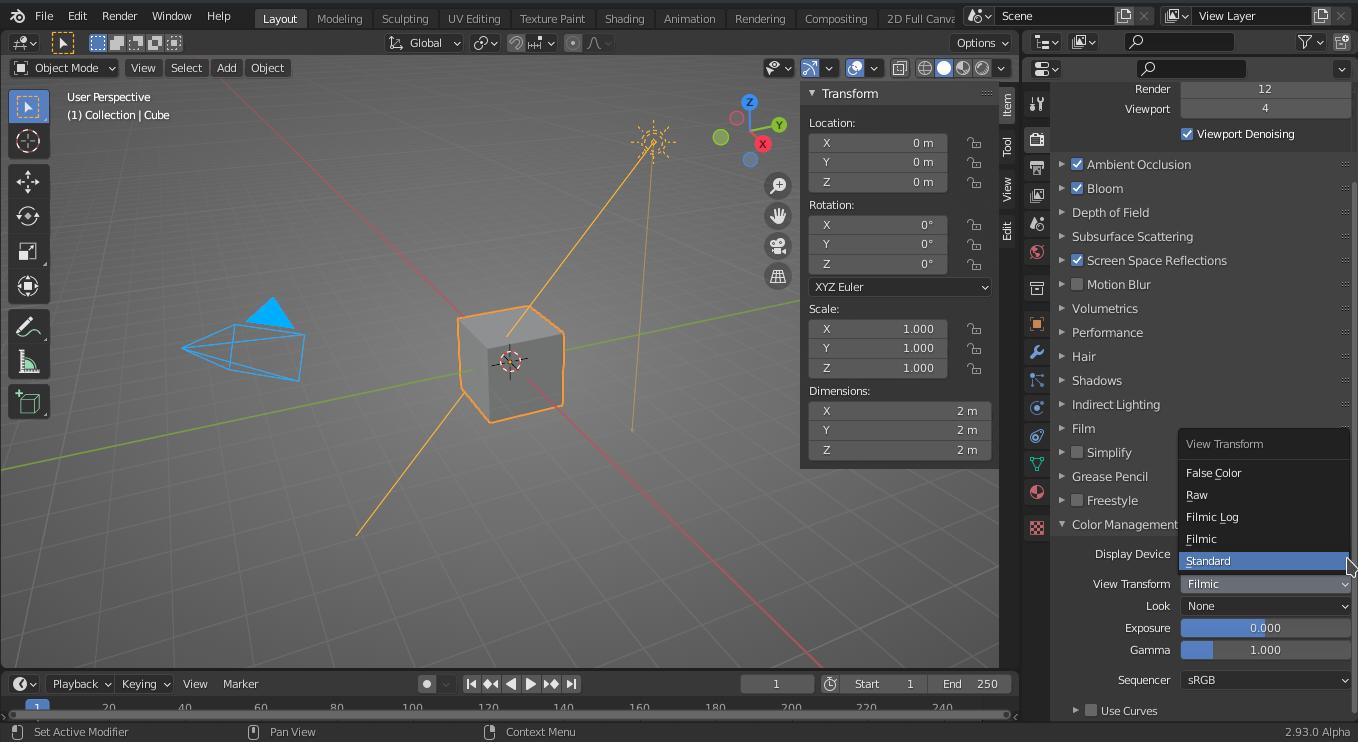
The first thing I did was to change the Filmic option to Standard in the color settings; that way I had more control over the bright colors that, in this case, one wants to see when it comes to this NPR style. For the render engine, I use EEVEE.
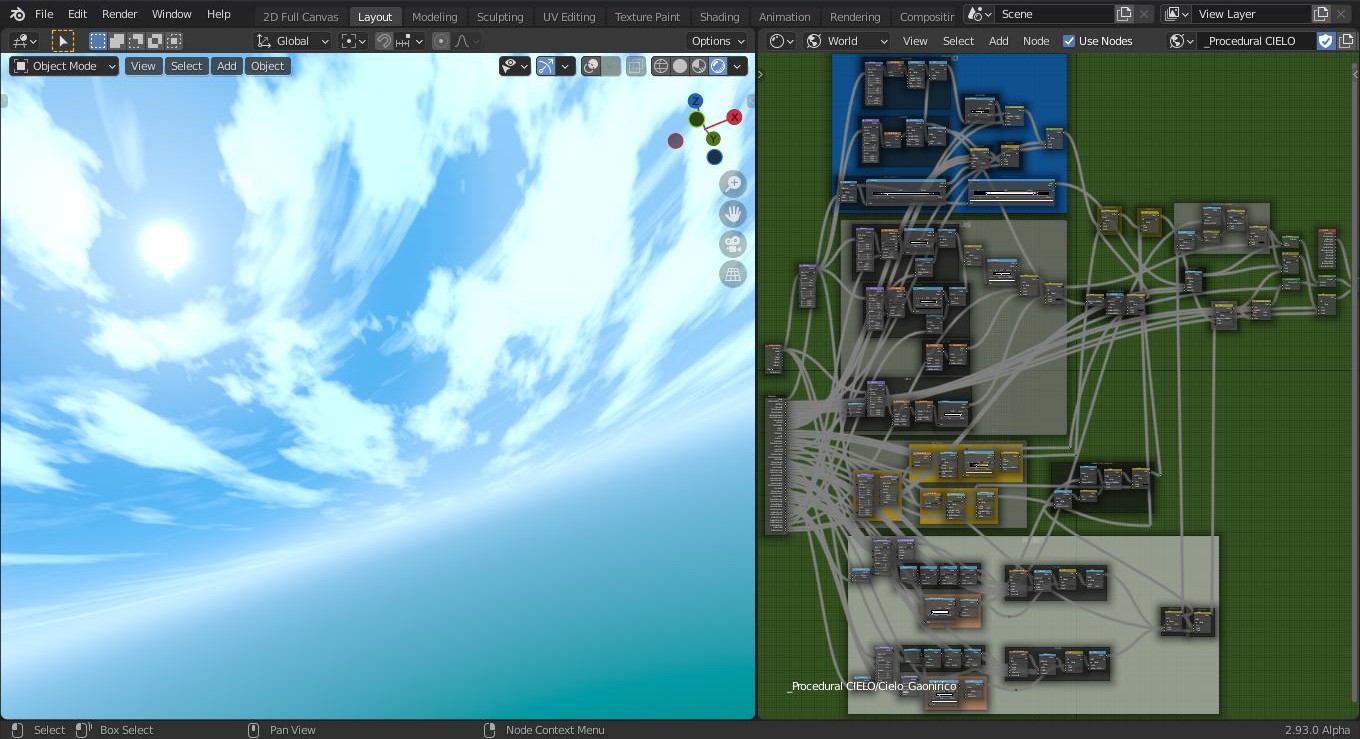
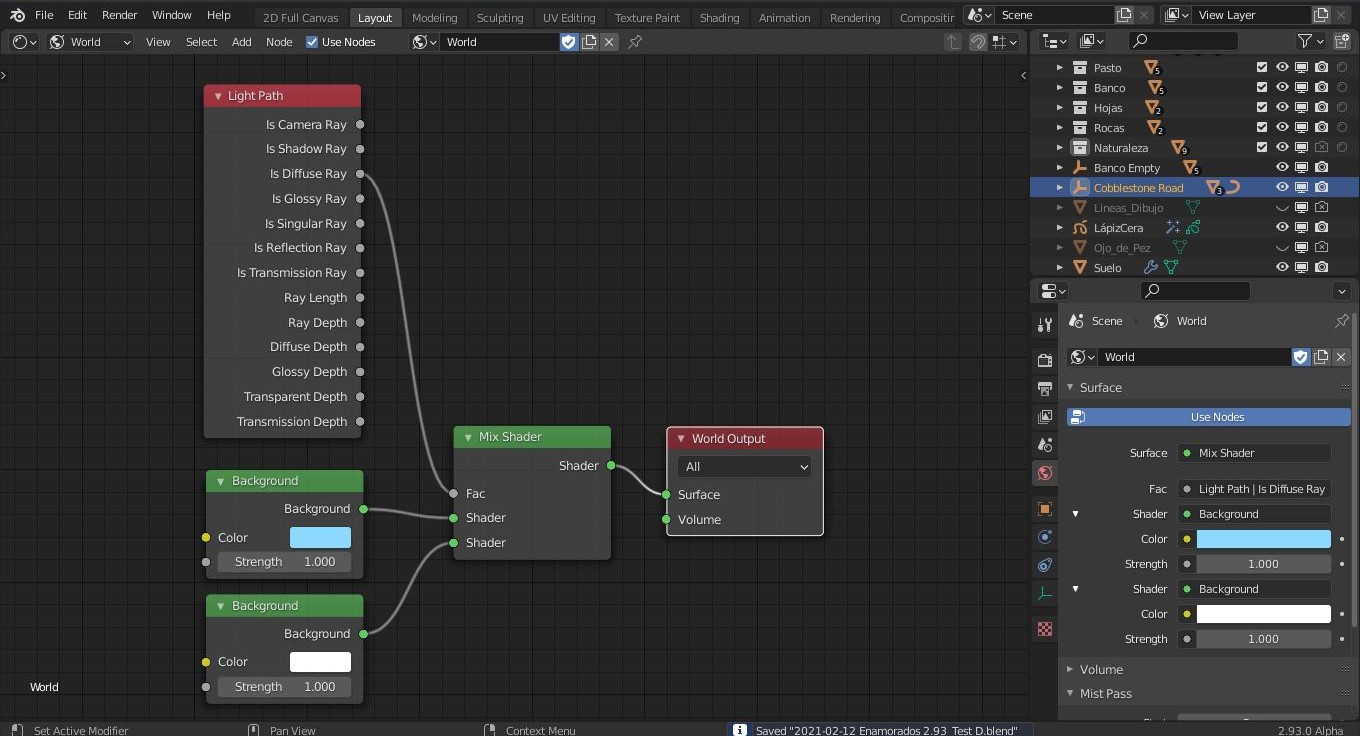
In the shader world I place a procedural sky, which I had created months ago and that allowed me to have a sun, clouds, stars or a trail of the northern lights if I needed them. With this sky I can make color changes and adjust a lot of parameters that I don’t normally find with EEVEE’s default sky.
Modeling
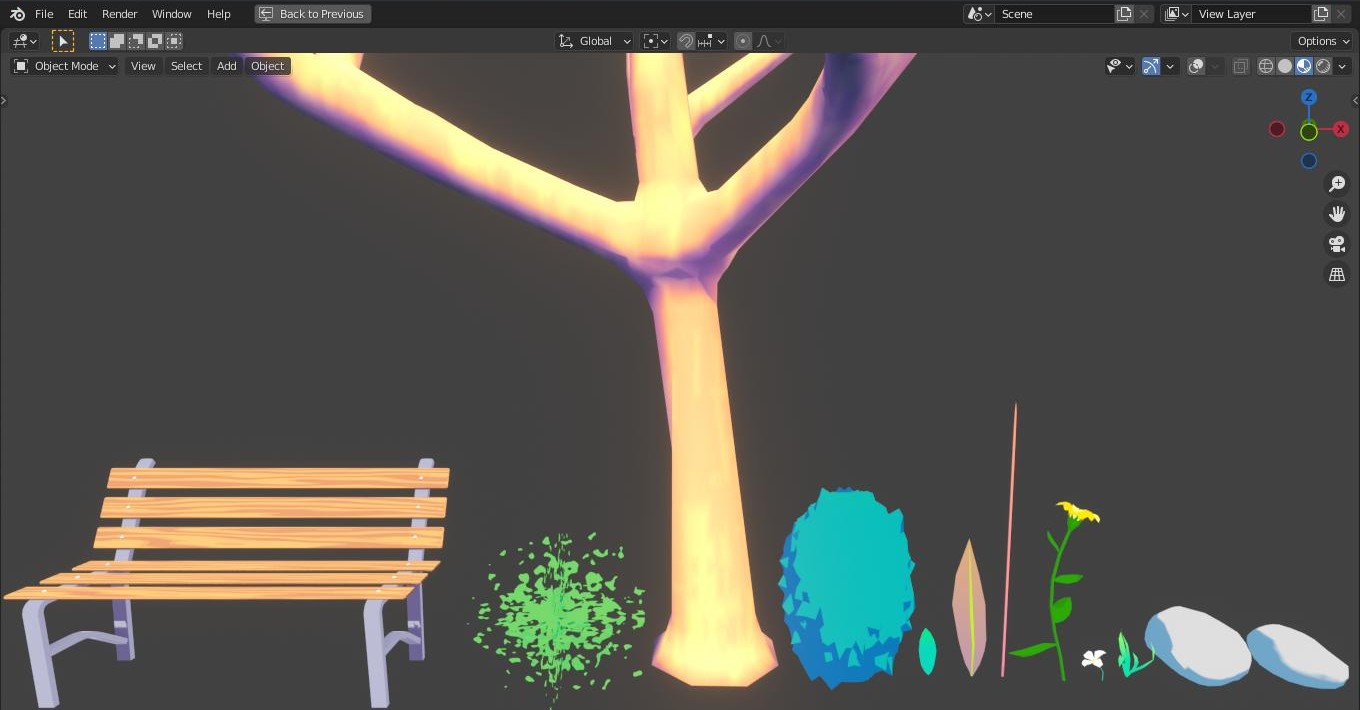
Then I modeled the different objects that I needed to use in the scene. These had to be as simple as possible, using the smallest amount of polygons so that populating a scene with these elements does not overload the capacity of my video card when using EEVEE. Keep in mind that EEVEE is more limited to the VRAM capacity of the video card, while Cycles mainly uses the RAM installed on the motherboard, which allows it to calculate scenes with more polygons and shadows. This is something that I always keep in mind: the capacity of my PC, which is entry level, with an Nvidia GT1030 video card, a Ryzen 3100 processor and 16GB of RAM.
Shading
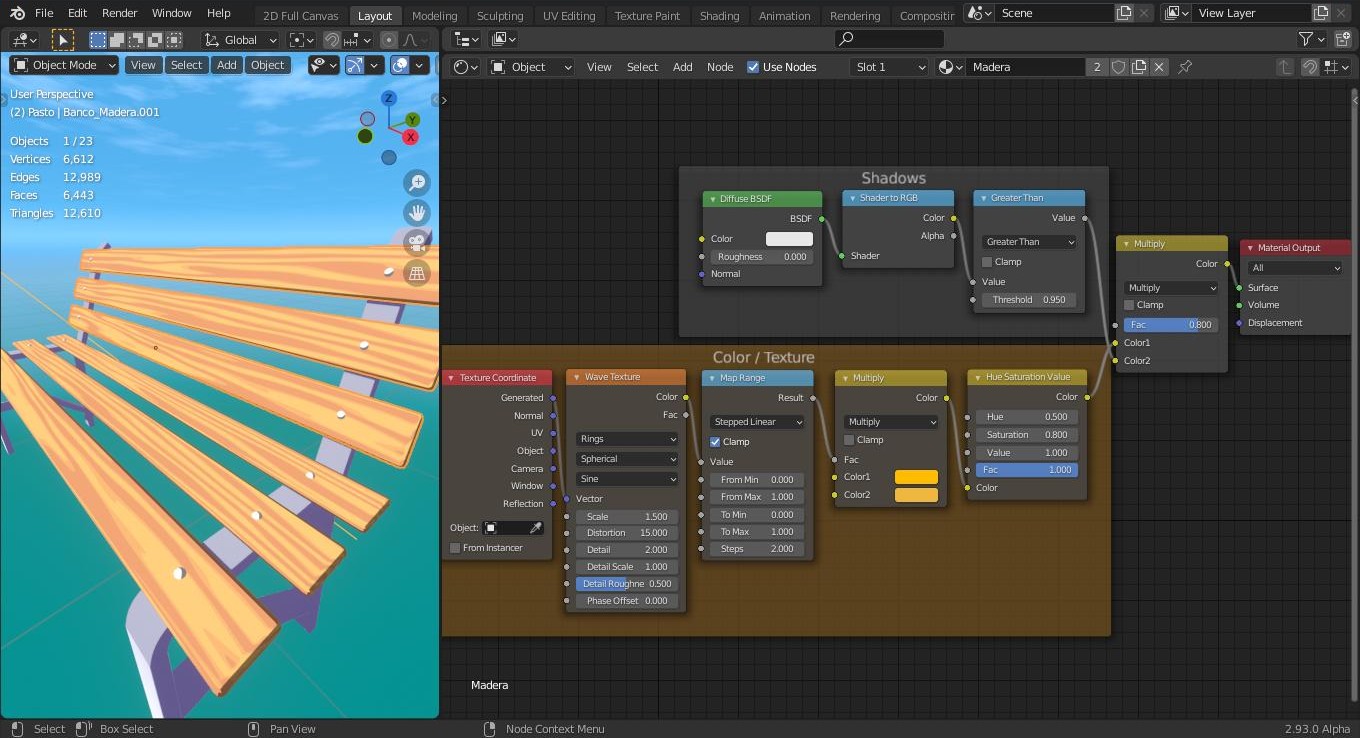
I also try to make the shaders as simple as possible, as they can also consume PC resources if you are not careful, especially when there are many elements in the scene. The normal thing in the process is to create the shading with a “diffuse” connected to the “shader to GB” which can be controlled with a “Color Ramp”, or a math node like the “Greater Than”. And then in another line below I create the color or texture for those objects. Then I mix the color and shading with a “Color Mix” node.
Characters
Before starting to draw the characters, I created a second sky with a flat color so that I was not distracted by background details while trying to draw lines. This configuration of the second sky also prevented its color from affecting the colors of the objects in the scene. This approach gave me more control of lighting and shadows when necessary.
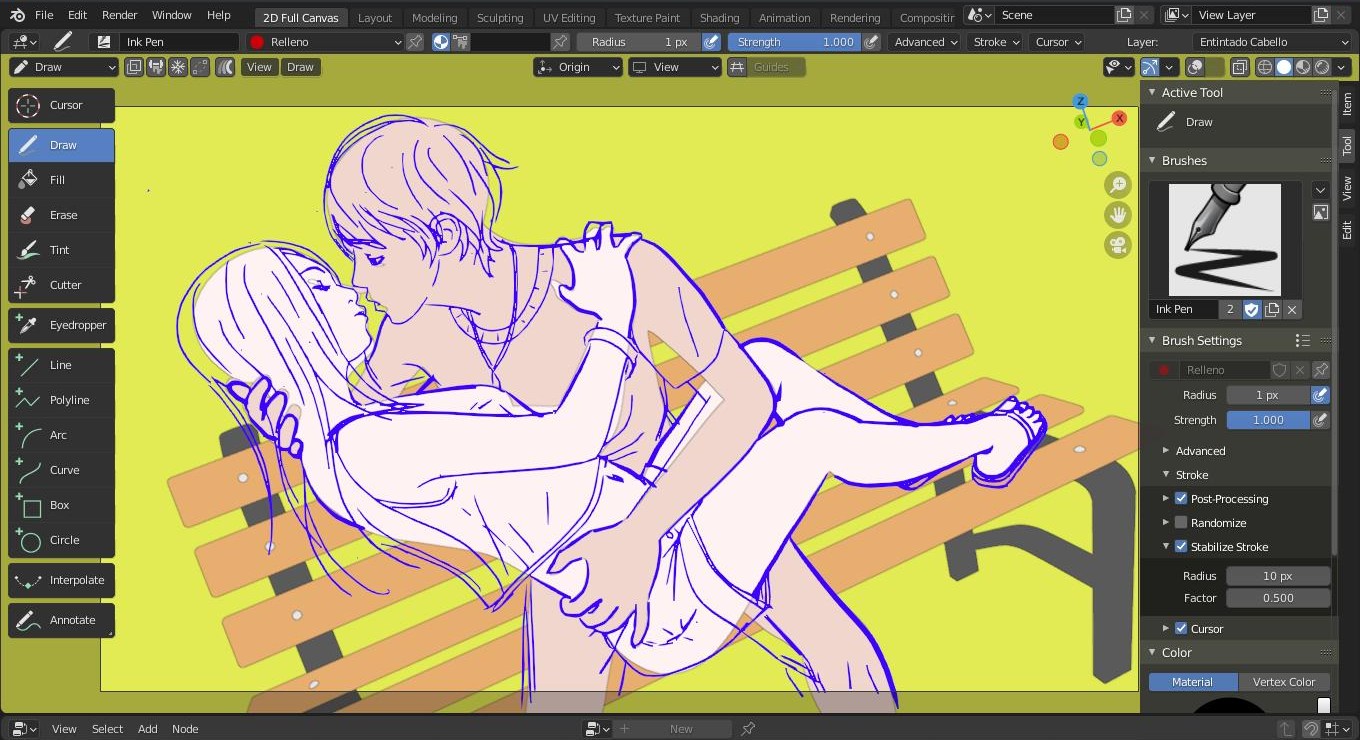
Normally I would draw without a reference but in that week a follower had asked me in a chat if it is possible to use 3D models of characters in Blender and pose them to draw, as is done in paid programs such as Manga Studio and Clip Studio Paint. So, as a demonstration, what I did was create the characters with Make Human (as an alternative, the MB-Lab add-on could be used perfectly), imported them into Blender, and posed them in the way I had imagined.

From there, having the camera fixed at the angle that interested me, I began to draw the characters with Grease Pencil over the 3D models that I had posed.
This method of creating a 3D character and posing it can be very useful both for those who are beginners in drawing and still have not mastered proportions well, as well as for those who need to make complex illustrations and need to draw characters from different angles to decide which is the best approach. It also allows the artist to try different lighting and shading directions (as can be seen below). But the downside is that it requires a bit of practice at first to pose the characters in 3D, particularly if the artist has never tried it before.
Plants
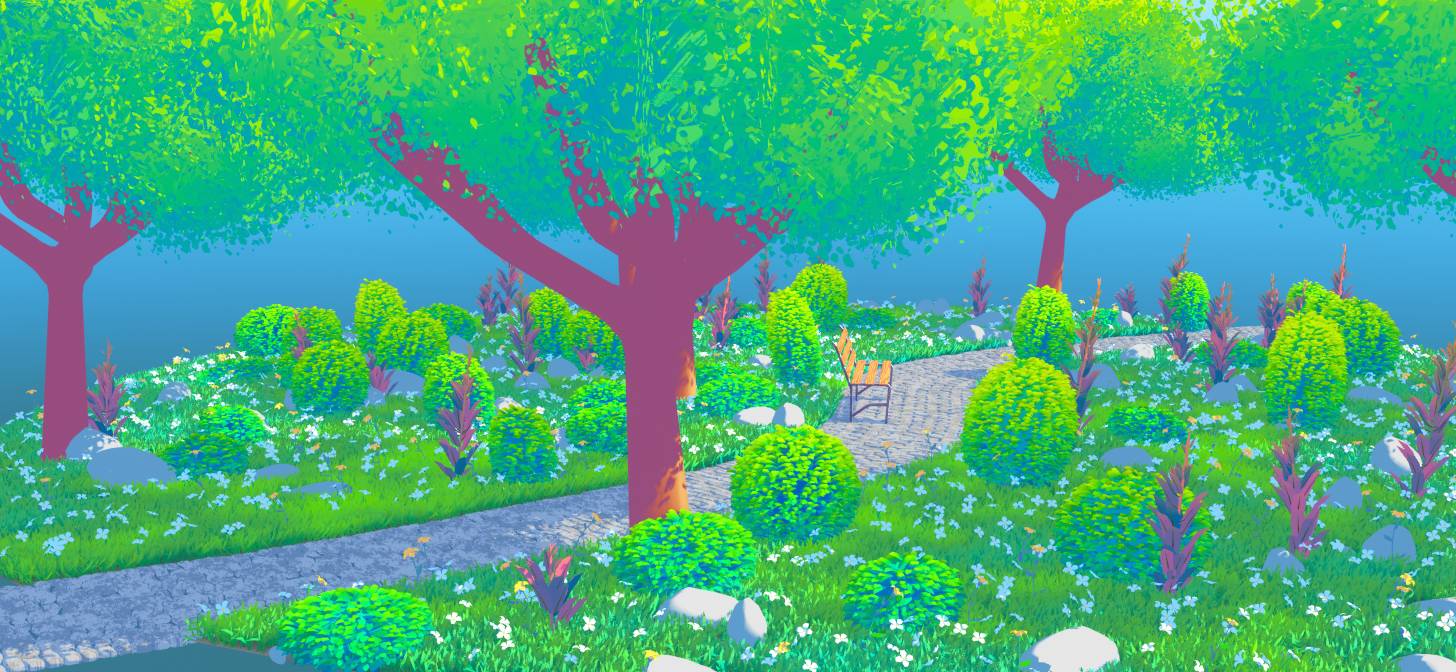
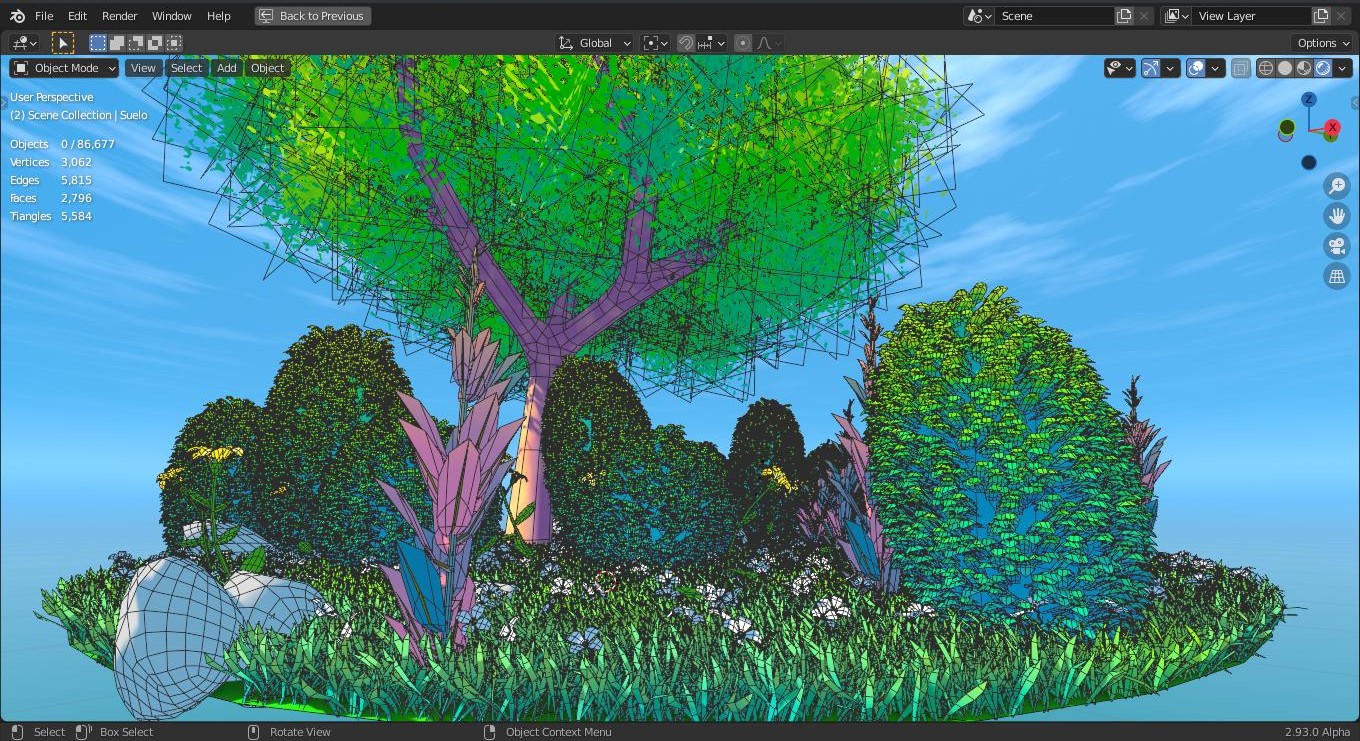
The next thing was to create the node tree with Geometry Nodes to populate the stage with nature. On the one hand, the stones, the grasses, and the flowers were completely finished elements, so the line of nodes for these objects turned out to be very simple because what they do is disperse those objects on the surface. But for the shrubs and plants with red leaves, I separated their trunks and leaves so that more variations in height and width could be created without changing the size of the leaves themselves. This led to the shrubs and plants with red leaves having 2 lines of nodes, as can be seen in the screenshot.
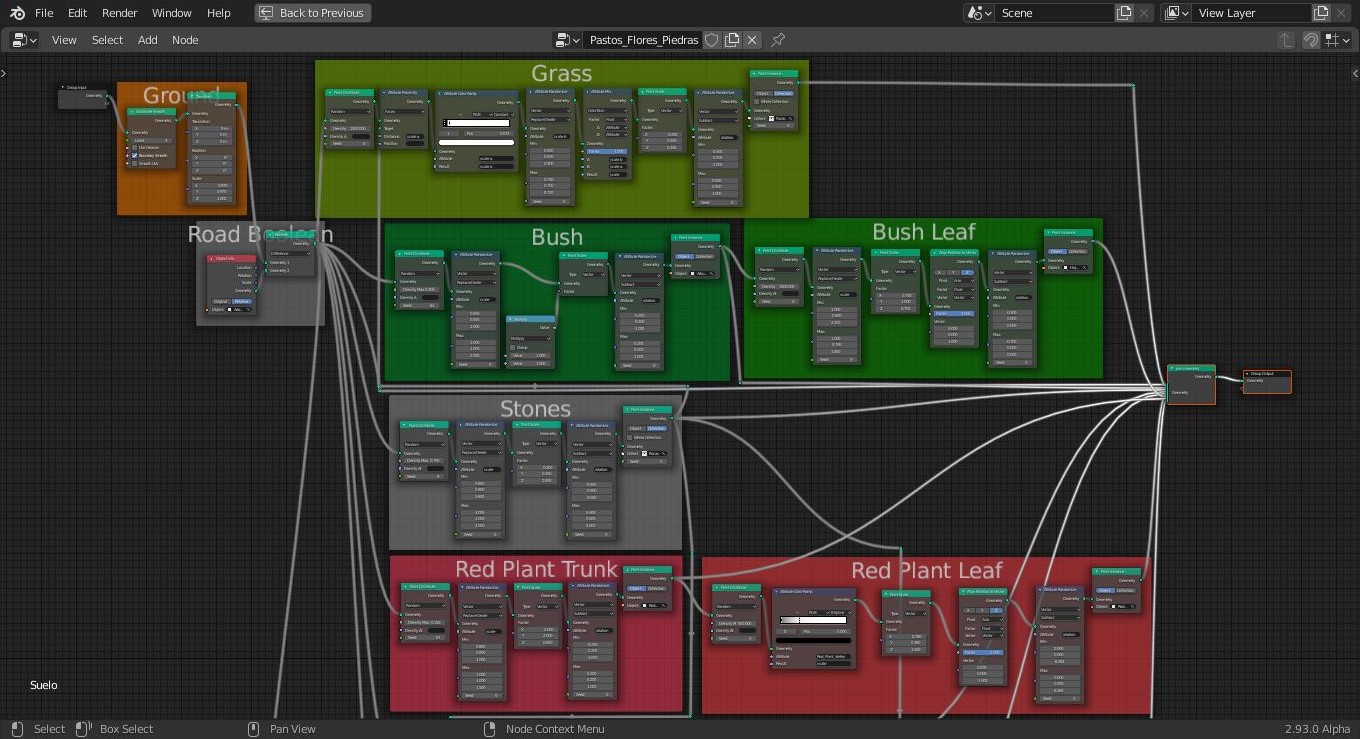
As a result you get a lot of sparse geometry on a plane.
The path
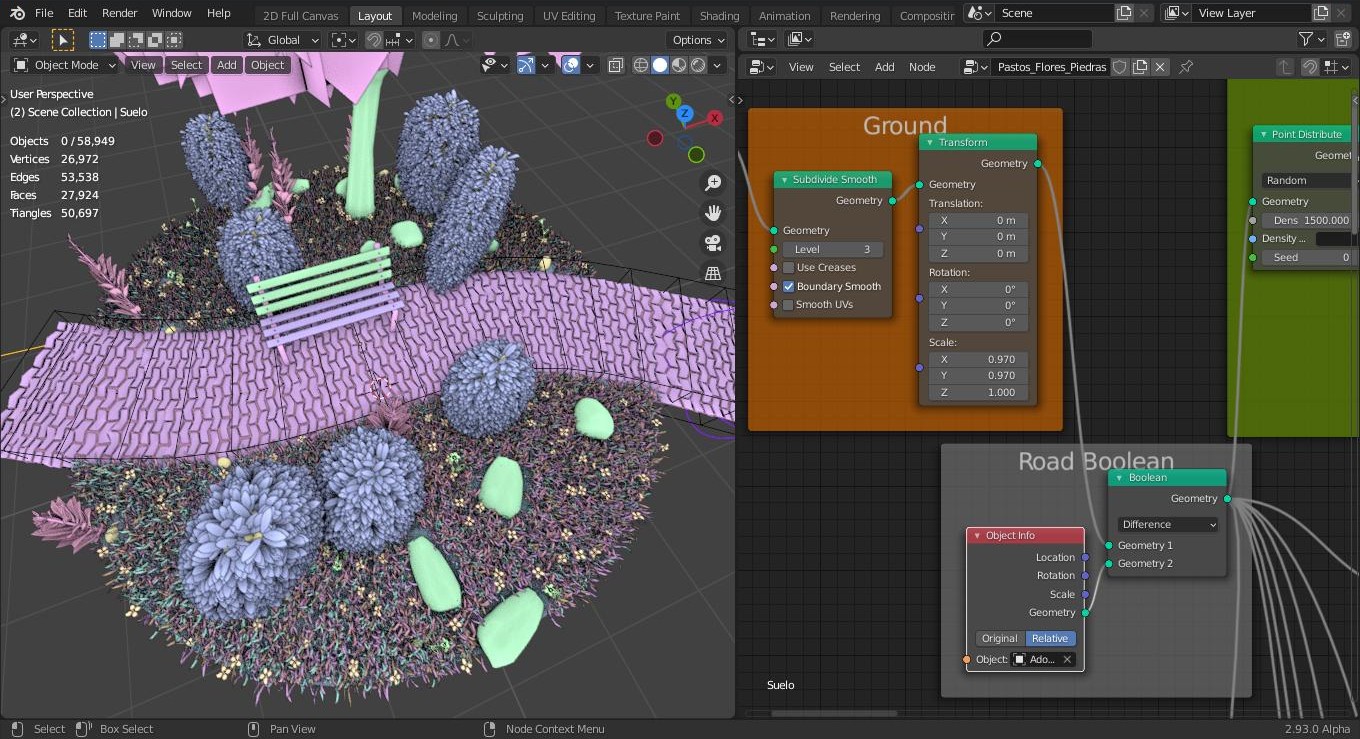
Finally, I created a cobblestone path, which is repeated along a curve that controls it. This path is necessary so that the bench has a firm place to rest and because it is also aesthetically beautiful to look at.
This curve also controls a “cage” (a mesh of a stretched cube that repeats and joins along the curve) that is invisible when rendering; in the 3D view I made the cage look like a wire so as not to interfere with the result of the Boolean operation for which it is used. Here is a screenshot contrasting the landscape in dark and the cage in orange to better appreciate what I mean.

A Boolean operation is added to the Geometry Nodes of the terrain, which creates a difference between the ground and the cage.In this way, a hole is produced through which the path controlled by the curve passes and outside of which the objects are dispersed on what remains of the ground This Boolean operation demands very little from the PC due to the small number of polygons that the ground has and the invisible mesh (the cage).
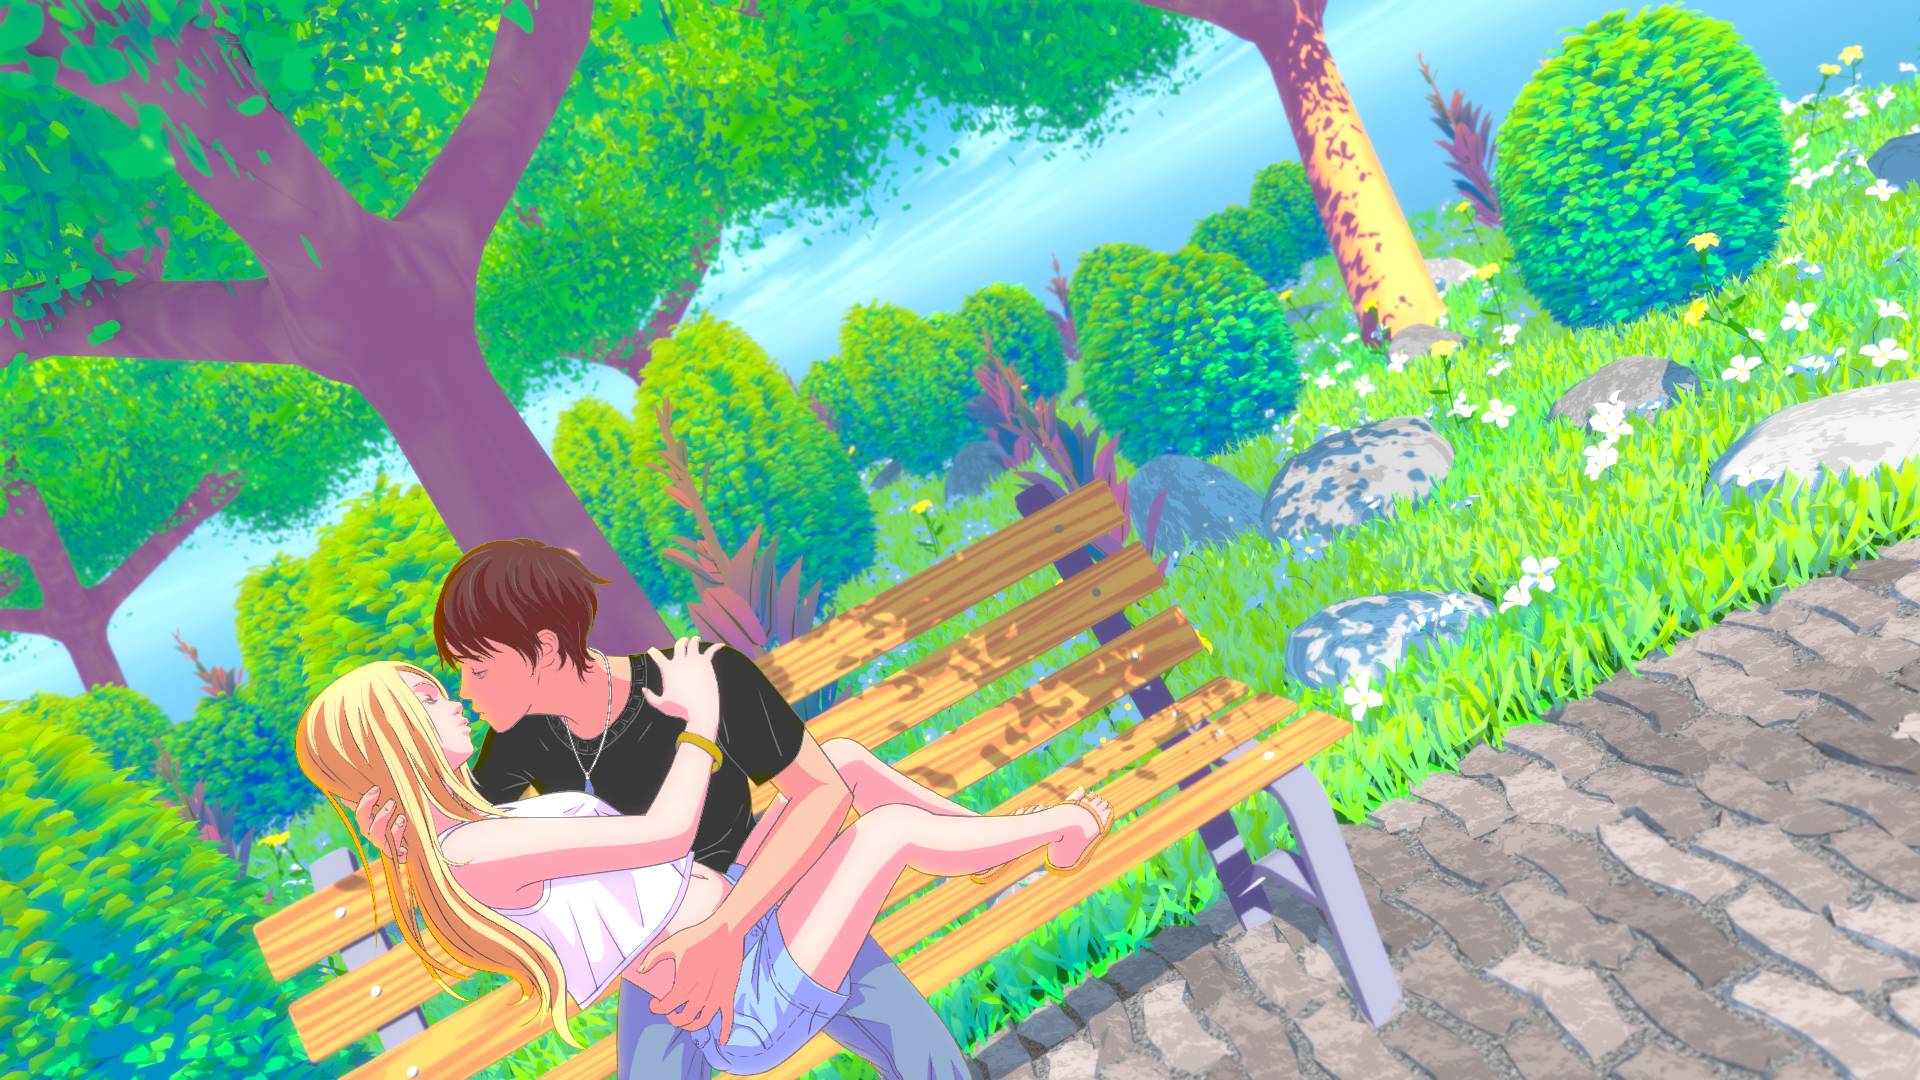
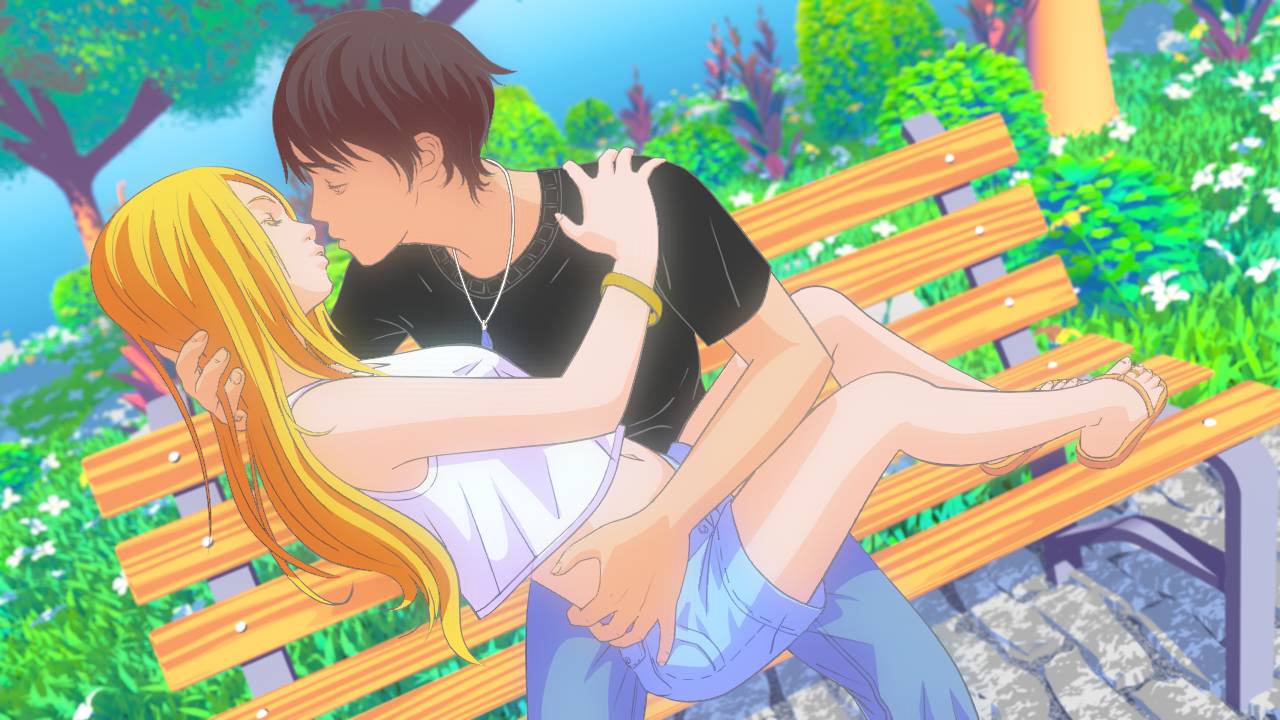
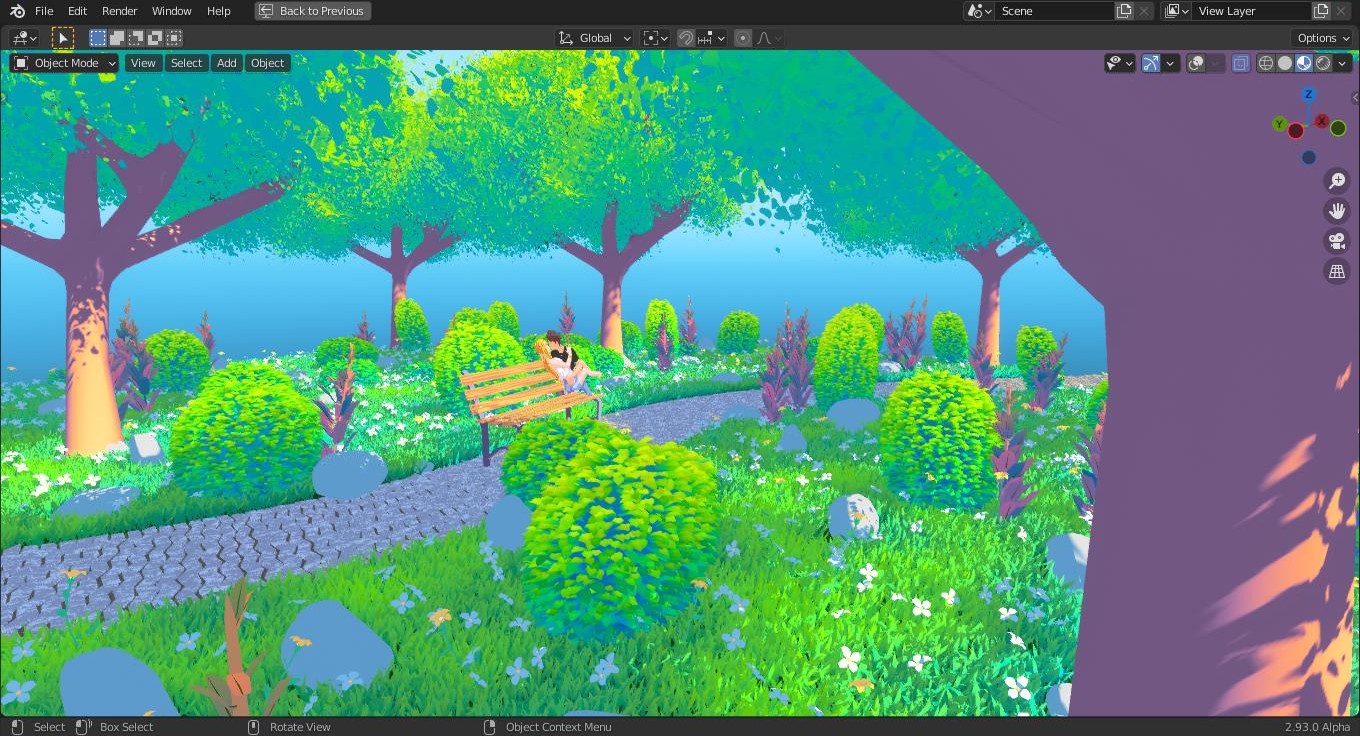
Once everything done up to there was unified with Grease Pencil, procedural shading, lighting and sky, a bit of lowpoly, and Geometry Nodes, you get something like this:
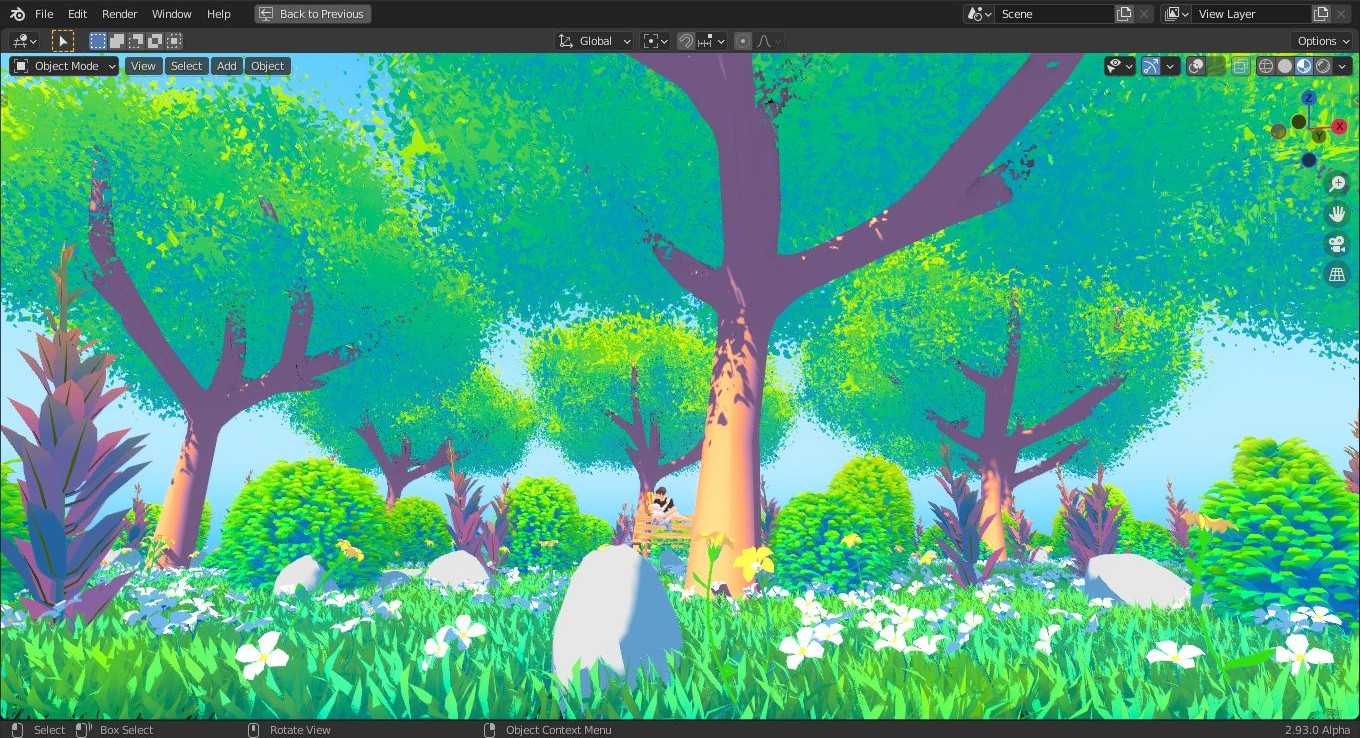
And here are some extra shots testing other angles of the landscape, which, being partly procedural, can be extended as much as desire and allowed by the characteristics of the PC.
And, in summary, that was more or less the process and the setup of the scene.
Conclusion
Geometry Nodes is a very new tool and one that is growing week by week in the development versions of Blender, so we have seen only a fraction of its full potential. It allows us to parametrically 3D model many different things, not just scenarios. I have seen examples of users who have created buildings, cakes, suspension bridges, cliffs, snow, etc., all done procedurally thanks to Geometry Nodes. And it is relatively easy to learn, although many imagine otherwise; normally 5 or 7 nodes will be used repeatedly to generate scenarios as before with the particle system. In just one month, it has become an indispensable tool to achieve many things that were previously more complicated, and it will be more versatile when the missing Modifiers are incorporated into Geometry Nodes (as of the date I am writing this, the boolean, subdivisions, divided edge and triangular are included).
With Blender, there are always new things to learn so it is difficult to get bored with this program, haha. Personally, everything I have learned and what I will continue to learn is focused on creating scenes where drawing and 3D merge. Since I was little I enjoyed Japanese animation, manga, and RPGs and it has been my motivation to recreate what excited me so much. With a friend, I have planned to make a short comic strip after the end of the year using Blender as the only program. I’m also creating procedural materials to put on sale in a few months. I still have things to add and improvements to make to the procedural heaven that I showed here. There is really much that I hope to be able to do and that requires a lot of time and dedication because I am not a prodigy but someone who achieves things with a lot of effort and patience.
About the Author
 Gaonirico, freelance digital artist from Argentina, dedicated to 3D modeling, shaders, illustration and comic drawing.


