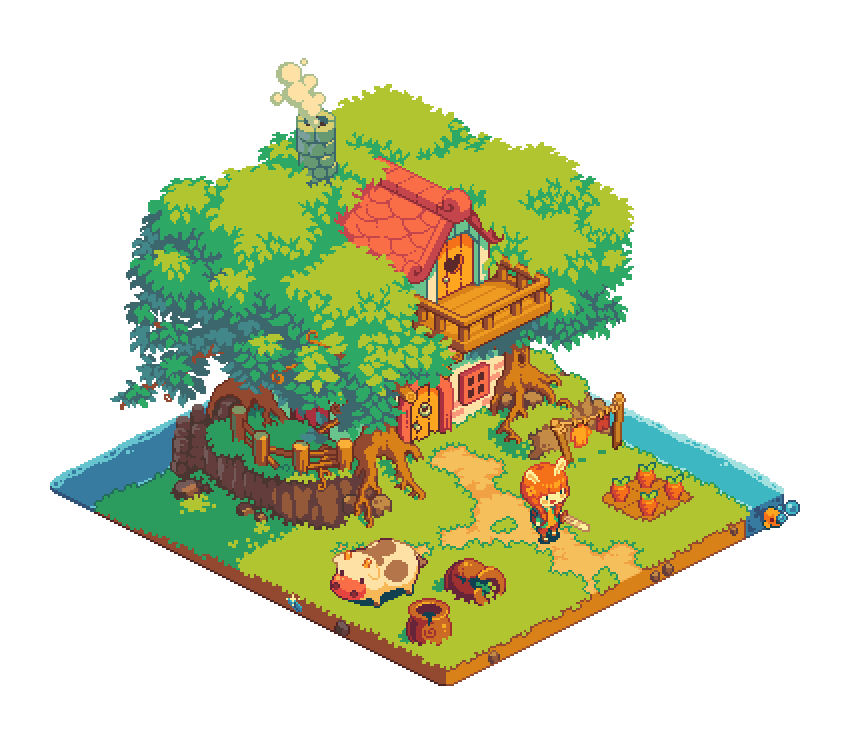
Behind the Scenes: Tiny Town

About
Hello! I am Carlos Cavalcante, 32 years old, and I am a Brazilian game artist currently living in Helsinki, Finland.
I’ve been working in the mobile games industry for almost 10 years, both doing hands-on art or art directing/team managing, but mainly for 2D games.
In terms of 3D art, I am quite new to it. I started to learn 3D around 2 years ago for a specific project called Battlelands Royale. I decided to go with Blender, and it was the best decision I ever made because it changed my career focus completely.
[sponsor id=’qarnot’]
Tiny Town motivation and inspiration
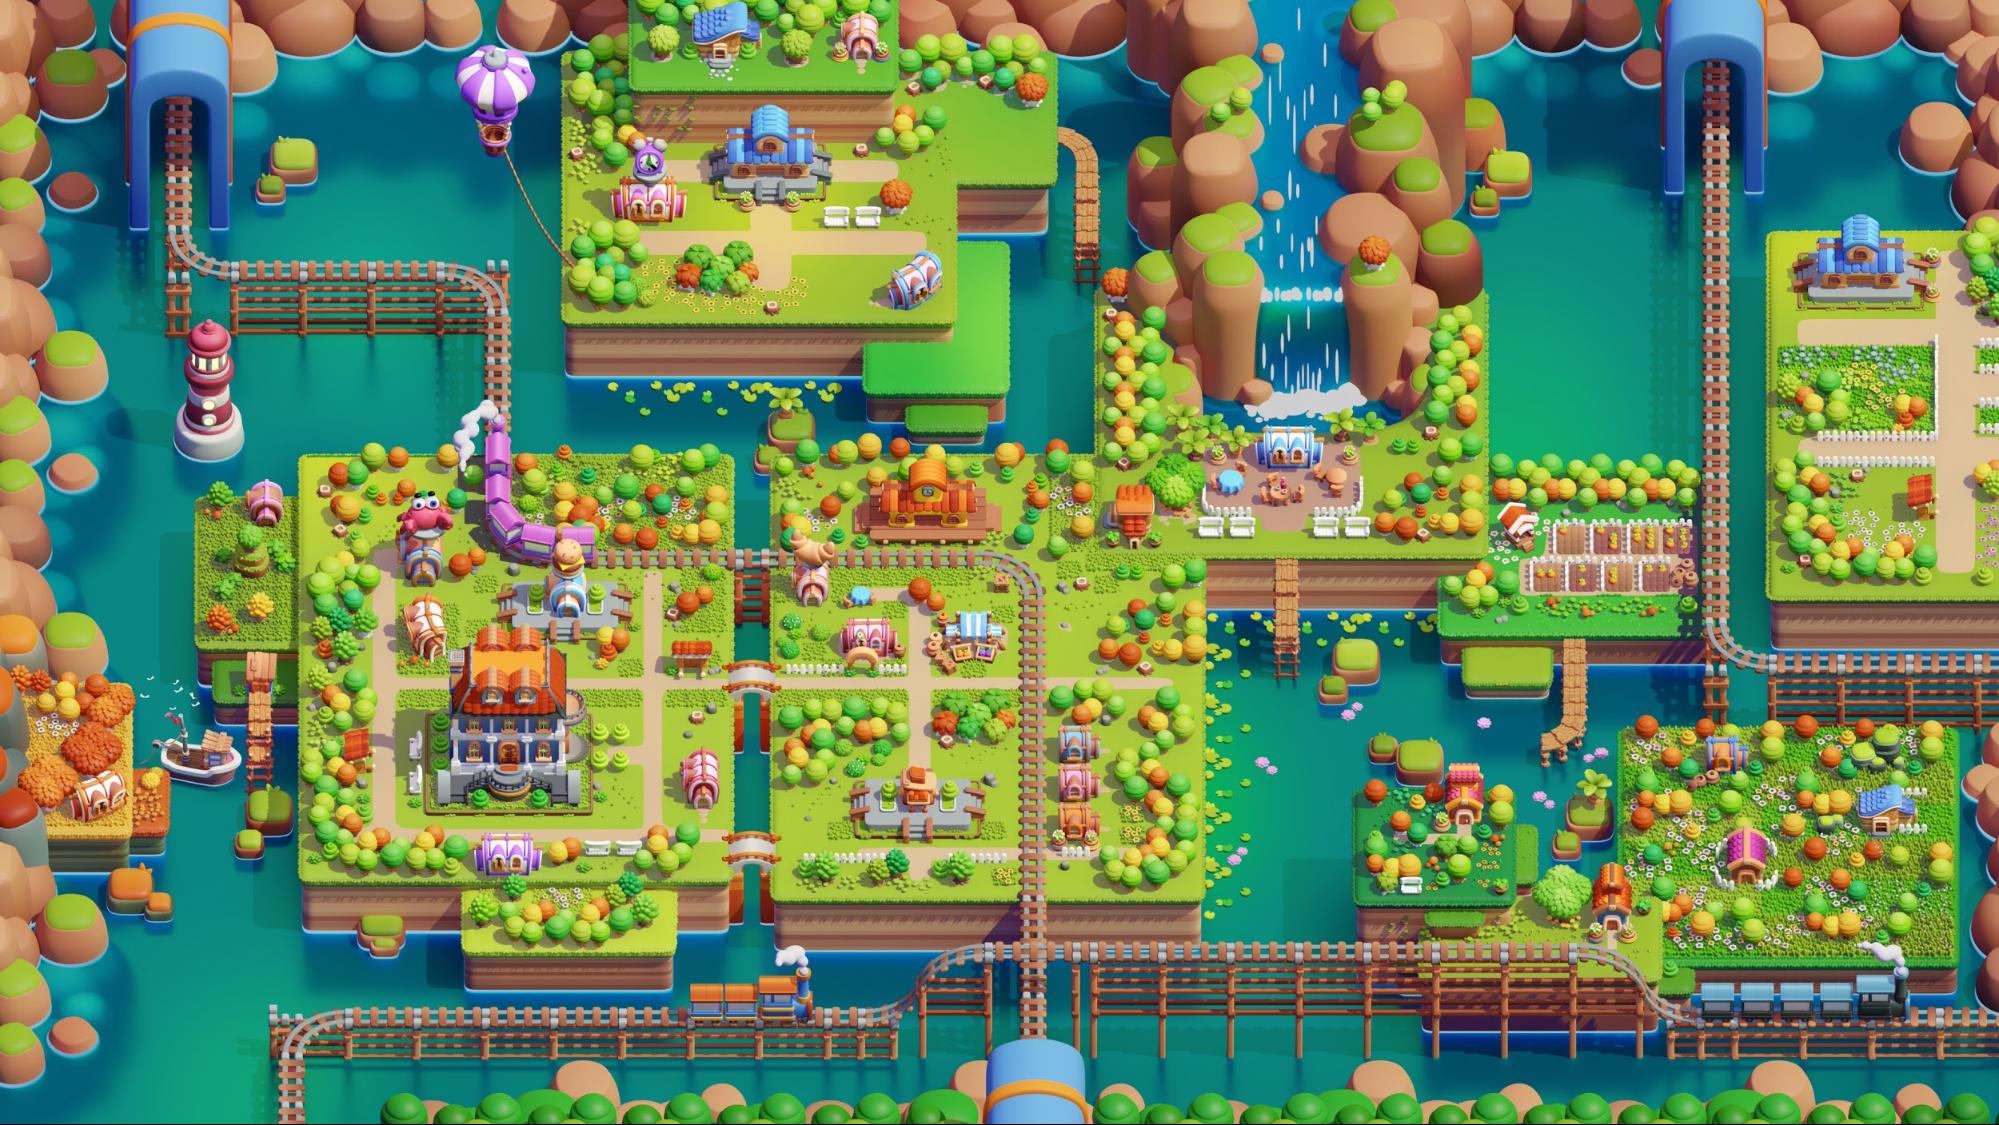
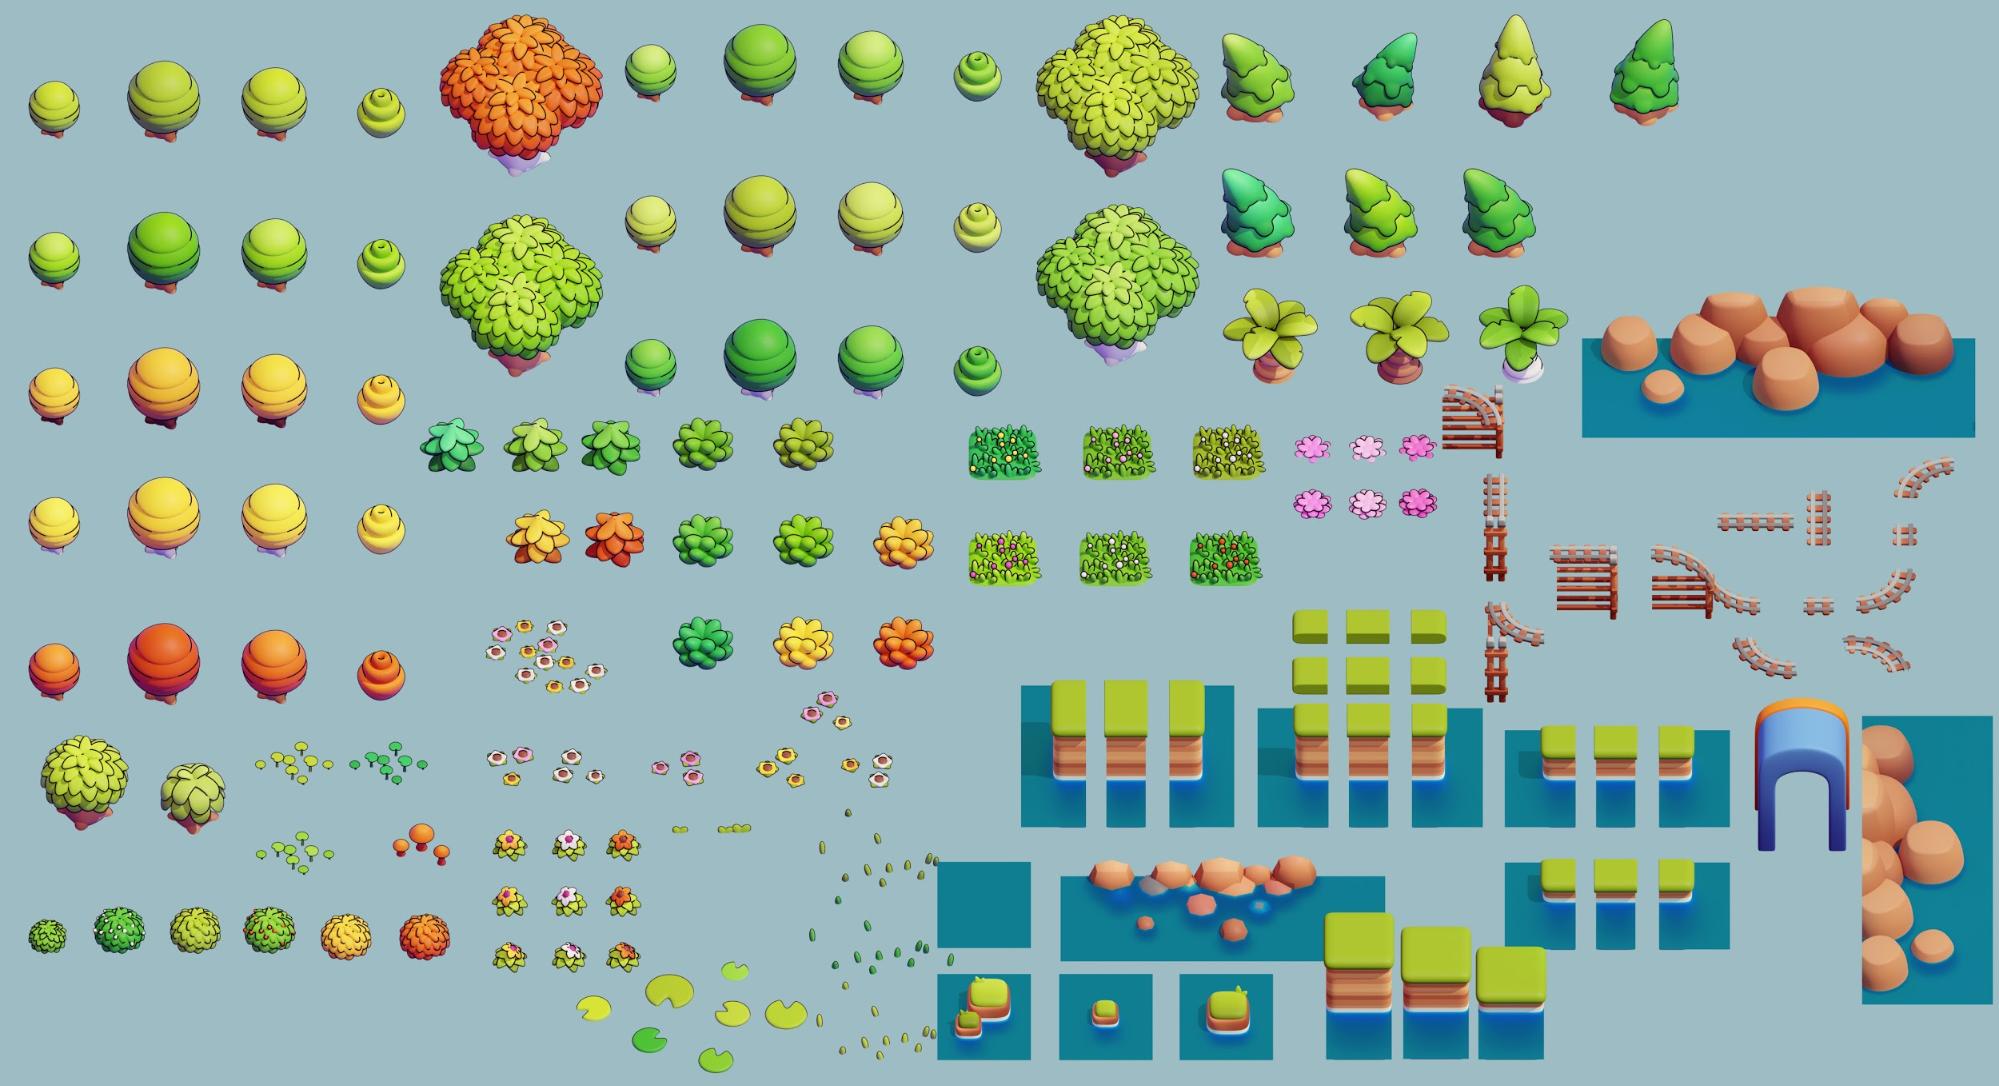
I am always trying to create new personal art direction mockups, the same way I would do for an actual game project for the company. It’s not that common for me to create isolated assets—I am always trying to create full mockups. And I wanted to create something that people would like to eat just by looking at it :D
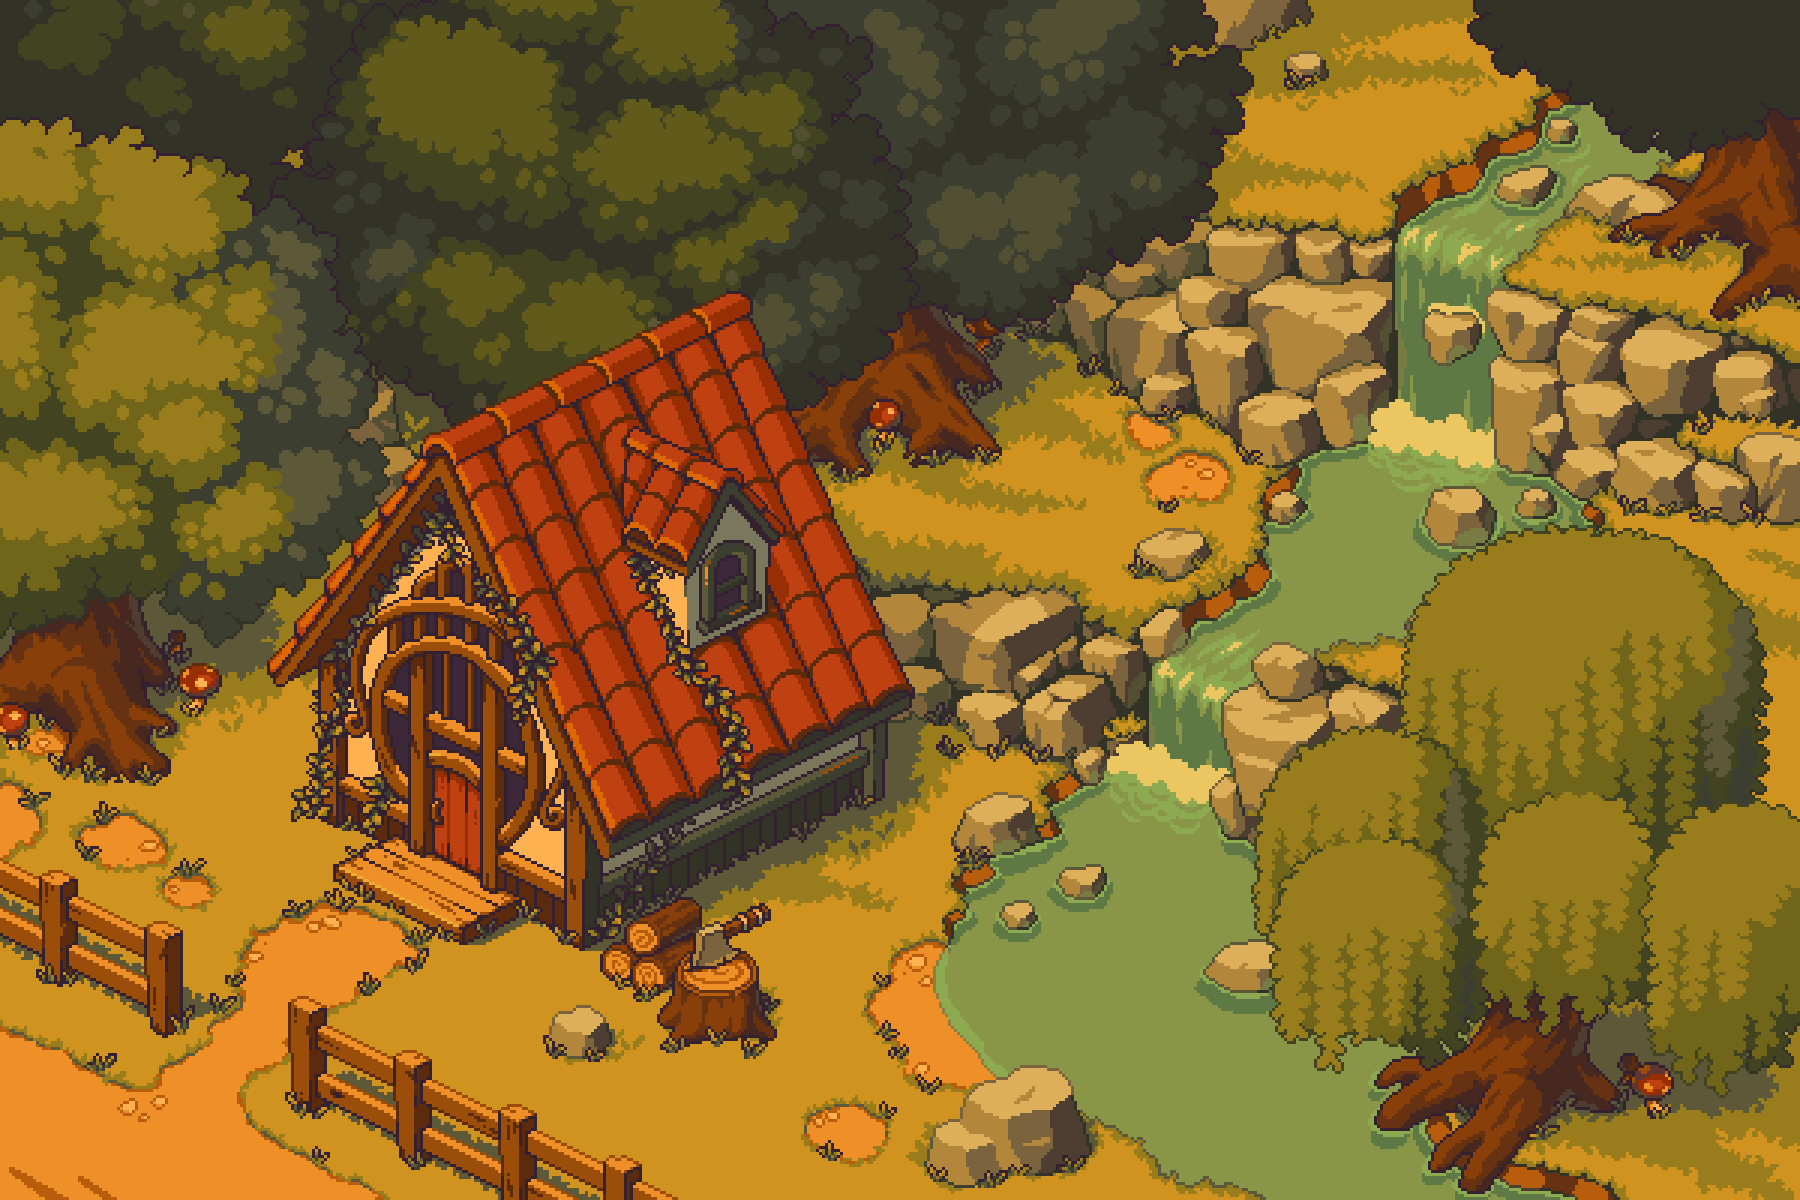
I take a lot of inspiration from pixel art in general, even though I have never done any pixel art in my life, but it inspires me a lot. Also, I am always looking at the awesome artists on my Twitter timeline. Some images that inspired me a lot for this work:
Tools
For this mockup, I went 90% Blender 2.82 (Cycles render engine) and 10% Photoshop for compositing render passes and color adjustments.
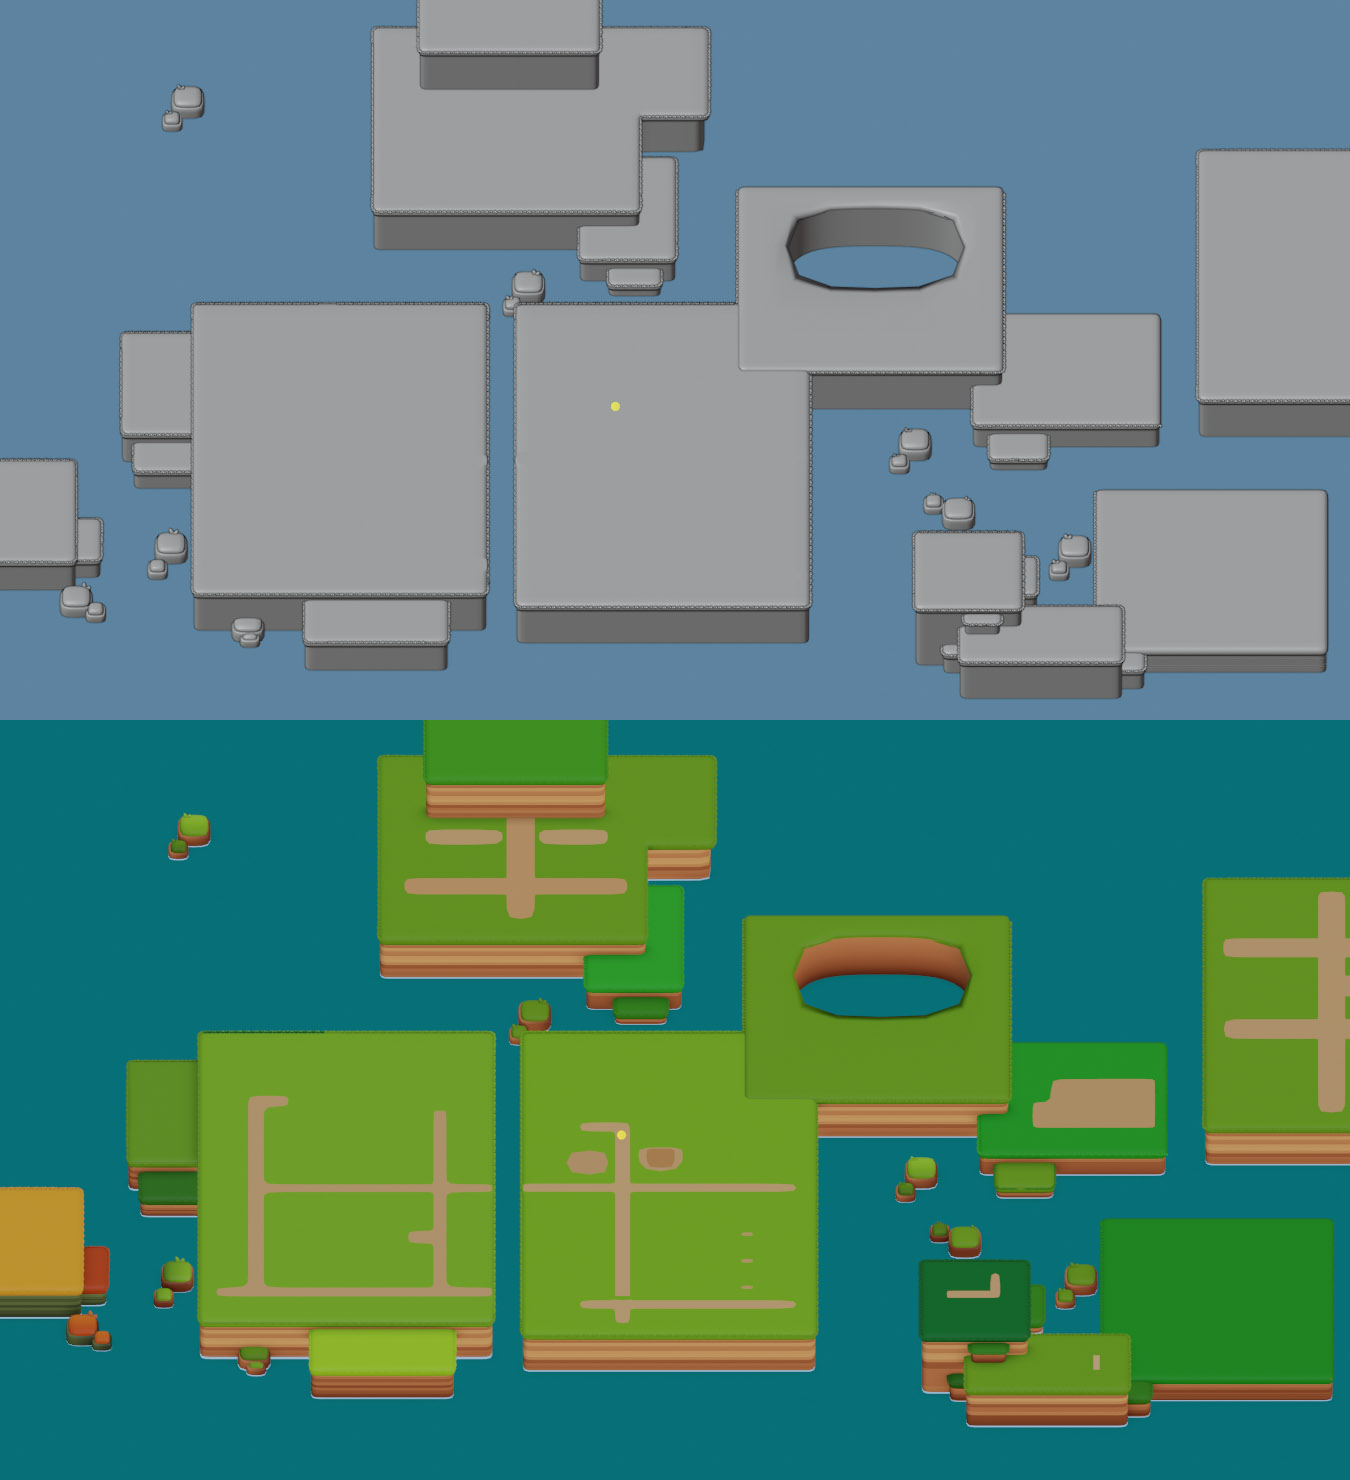
Modeling
I never do sketches before creating a mockup. Maybe that’s something I could start doing, but so far I feel like I can explore more doing box modeling rather than sketching things.
My starting point is to find a nice layout for the island: key points to add height and terrain variation to make it look more interesting, and lees like a chessboard with pieces on top. I decided to keep the camera as orthographic to preserve the classic top-down RPG aspect.
Lighting
Once I am happy with the general layout, I set the light sources and basic material setup, depending on the mood, weather, and time of the day that I want to display.
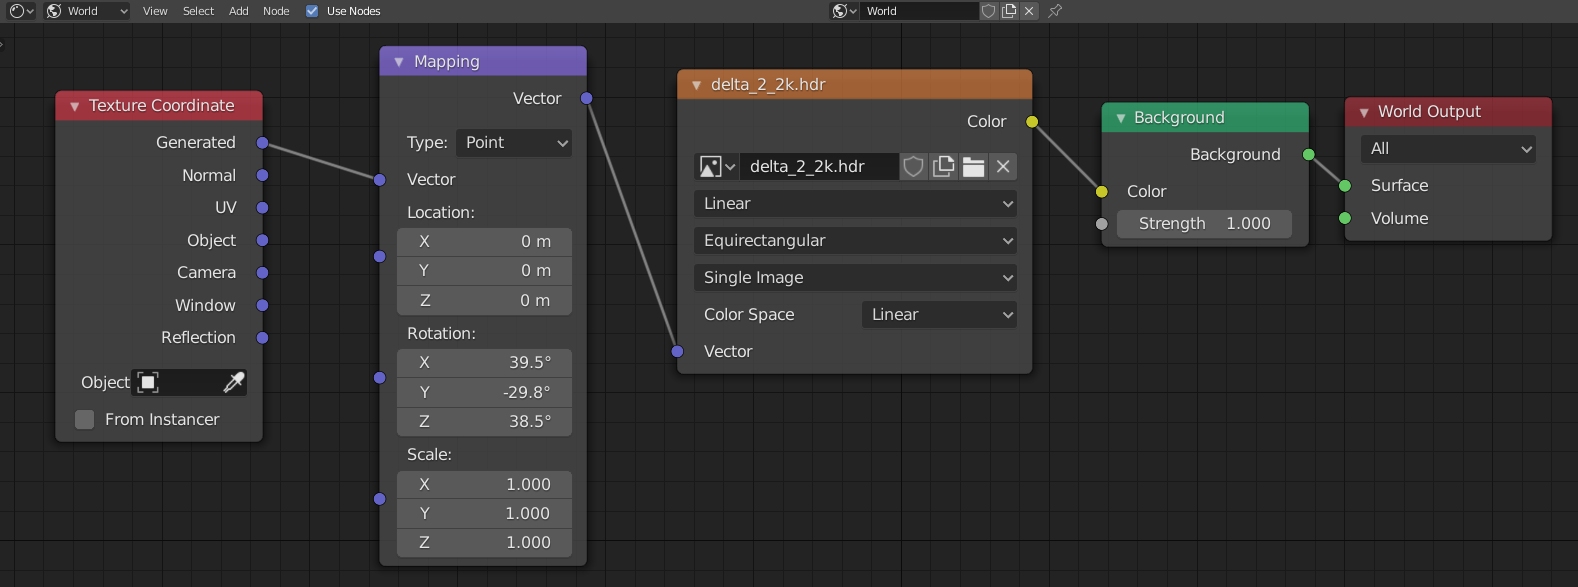
For the world illumination, I set an Environment Texture node setup using the Delta 2 HDRI Image by Greg Zaal and then I attach a Texture Coordinate + Mapping node so I can control the shadows’ directions with it. All my shadow information comes from this environment texture.
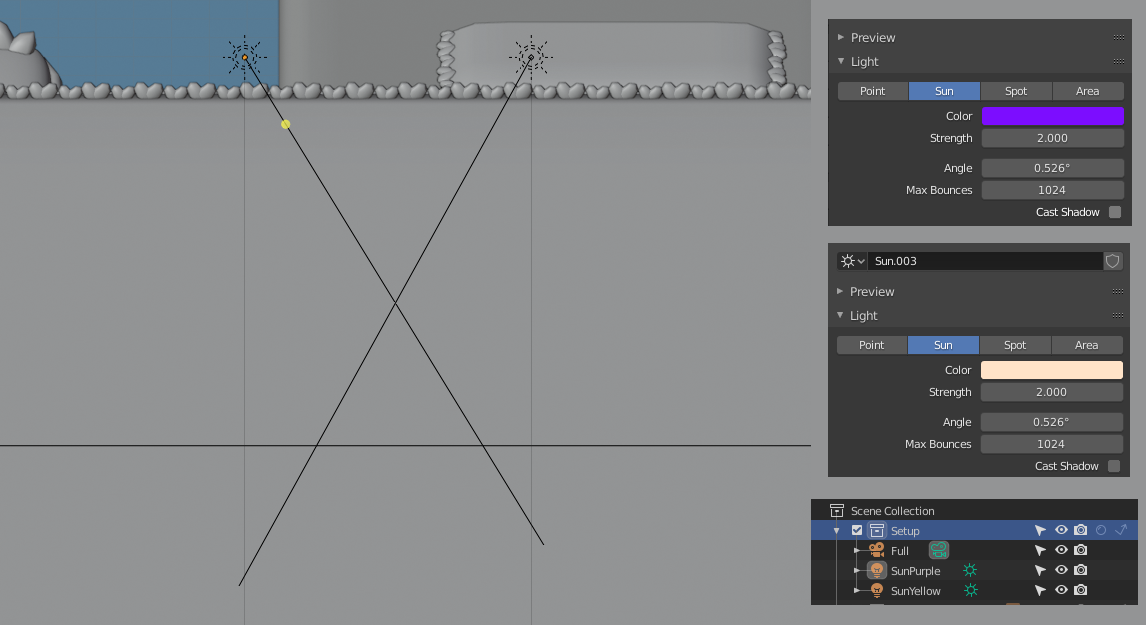
Then I add two sun lights to the scene. I disable Cast Shadow for both (since shadows come from the HDRI image). One lamp gives some nice yellow sunbathing to the scene and it has a similar position as the HDRI rotation specs in the mapping node; the other sun light tints my shadows with some warm purple. I always place my cameras and light sources inside a specific collection (usually called SETUP).
Shading and UVs
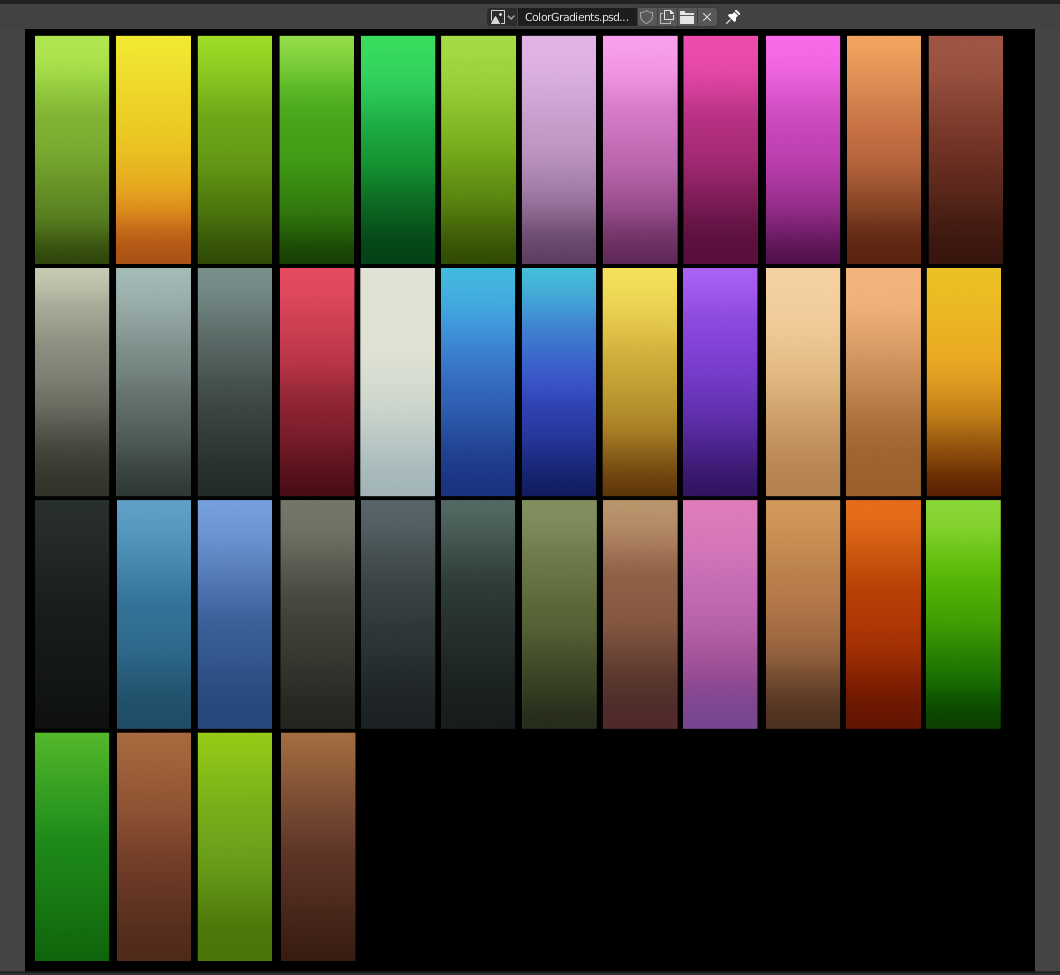
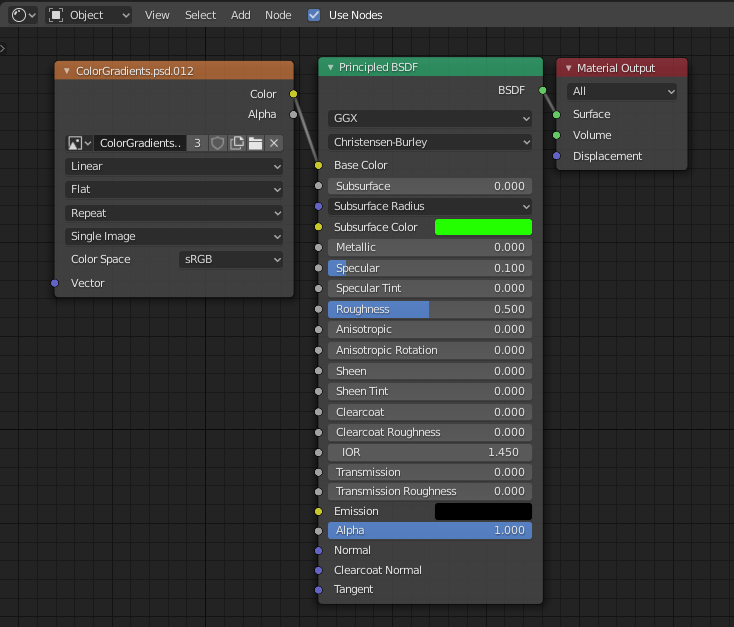
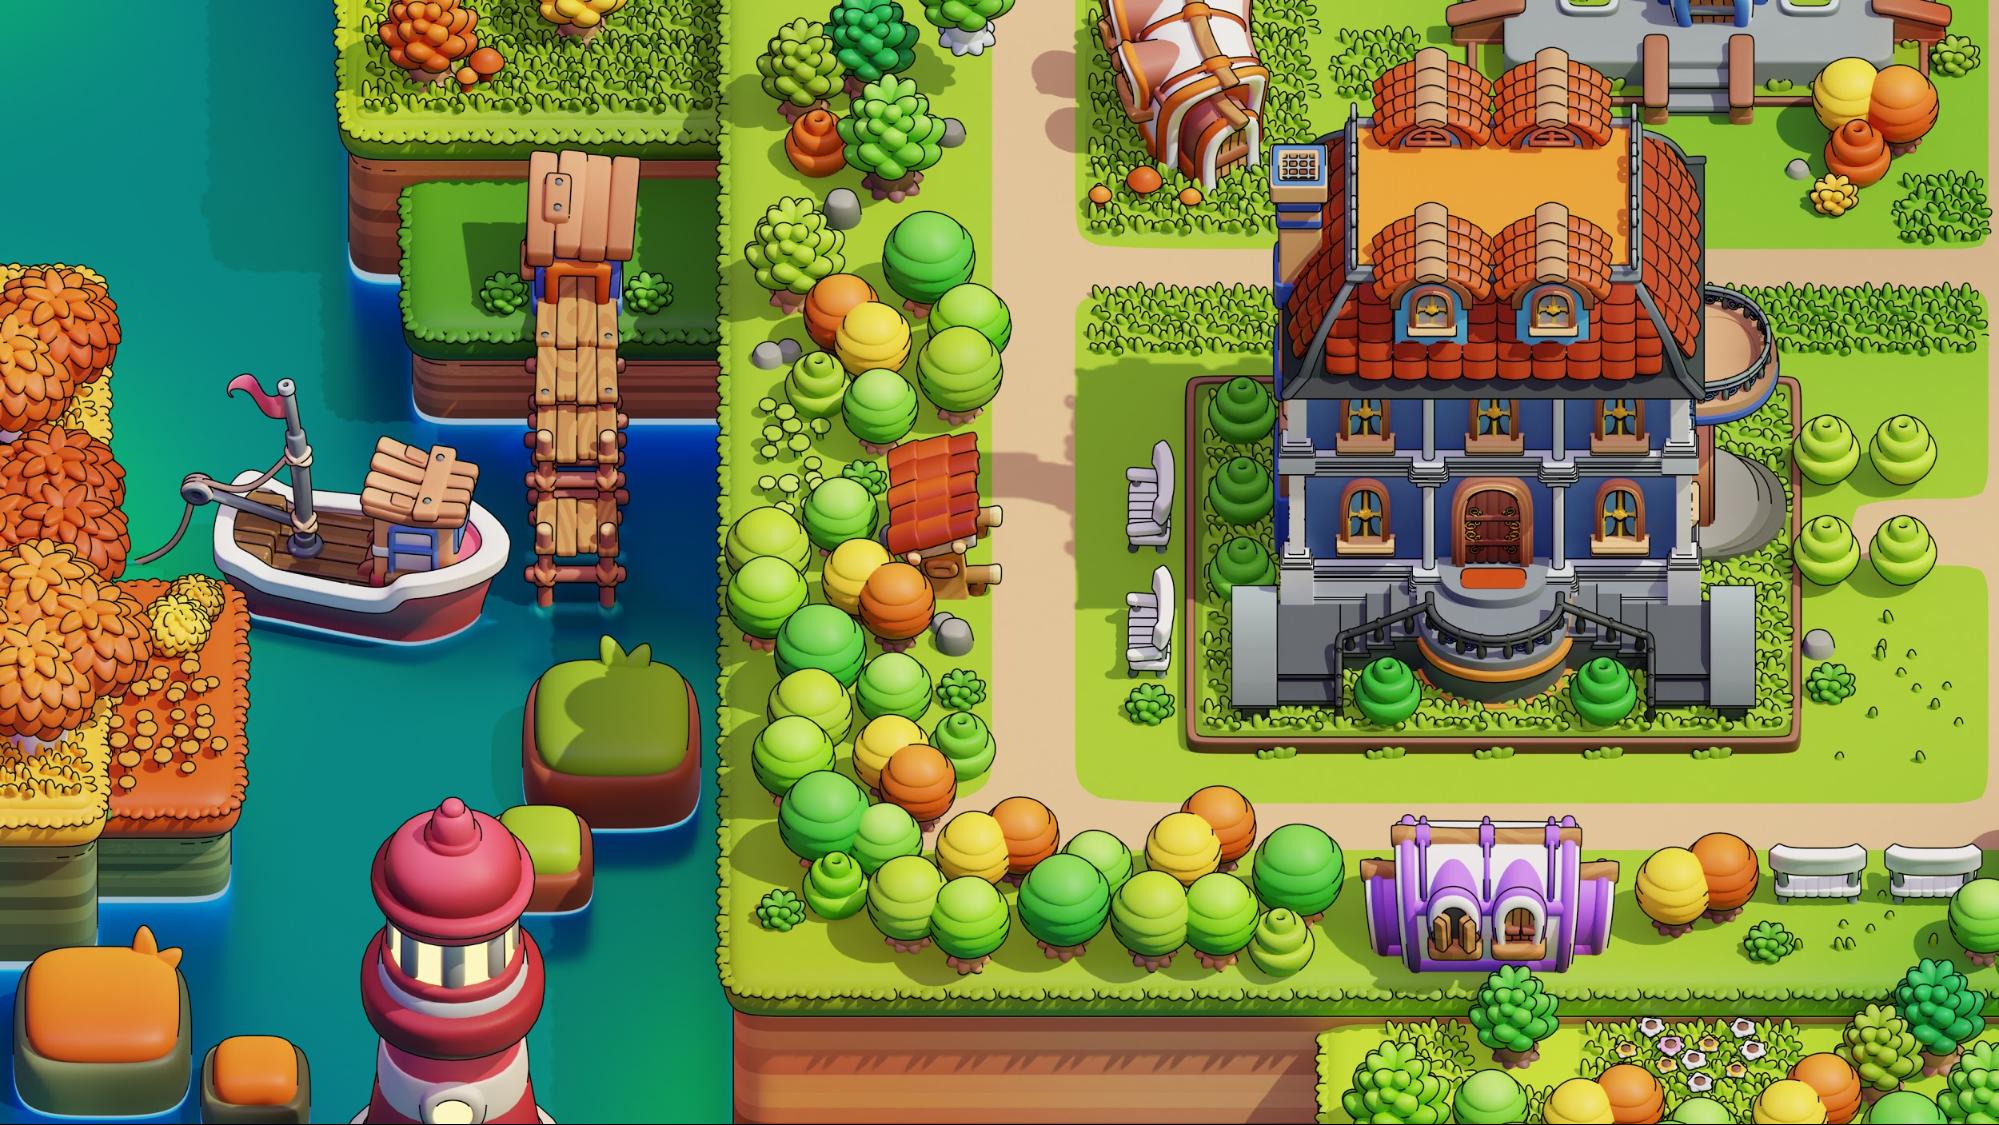
The object materials are no big deal at all. A simple Principled BSDF with a bit of specular and 0.5 roughness to make things look like a plastic toy, but not too much. Color information comes from a single texture that contains some gradient swatches.
There’s extra material setup for water, but we’re gonna get there ;)
The modeling, in general, uses the Subdivision Surface modifier to help me achieve smooth results and rounded shapes. For the terrain, I also use planes with the solidify modifier on top for the grass patches and ground, so I have better control of thickness.


For all of the models in the scene, I start with a simple cube, then set a Subdivision modifier with viewport subdivision set as 1 and then some extrude (E) and inset (I) to build things up. The end result has a total of 2 subdivisions.

I use the “lazy UV” method to texture (actually I use this for 90% of my work). I go to front orthographic view (Numpad 1), then in Edit Mode, I select all the model’s faces (A), press U, and select Project from View.
After that, in the UV Editor, I select the entire generated UV map and scale it down (stretching on the X-axis) to make it fit in the gradient stripe. Then I select individual parts and move them to the correct colors and sizes across the gradient.
To scatter trees and other natural elements around the scene, I tried to use hair systems but gave up because there was always some weird overlapping happening. What I ended up doing was creating groups of things, like a tree tile for example, and then using Array modifiers to scatter them here and there, and then placing individual trees by hand to break the pattern and repetition. The same applies for mushrooms, grass patches, lily pads, bushes, etc.

Compositing
After my scene is built and I have a nice composition, it’s time to render and composite things in Photoshop.
I break my scene into different collections that might be rendered separately and imported as individual layers in PS.
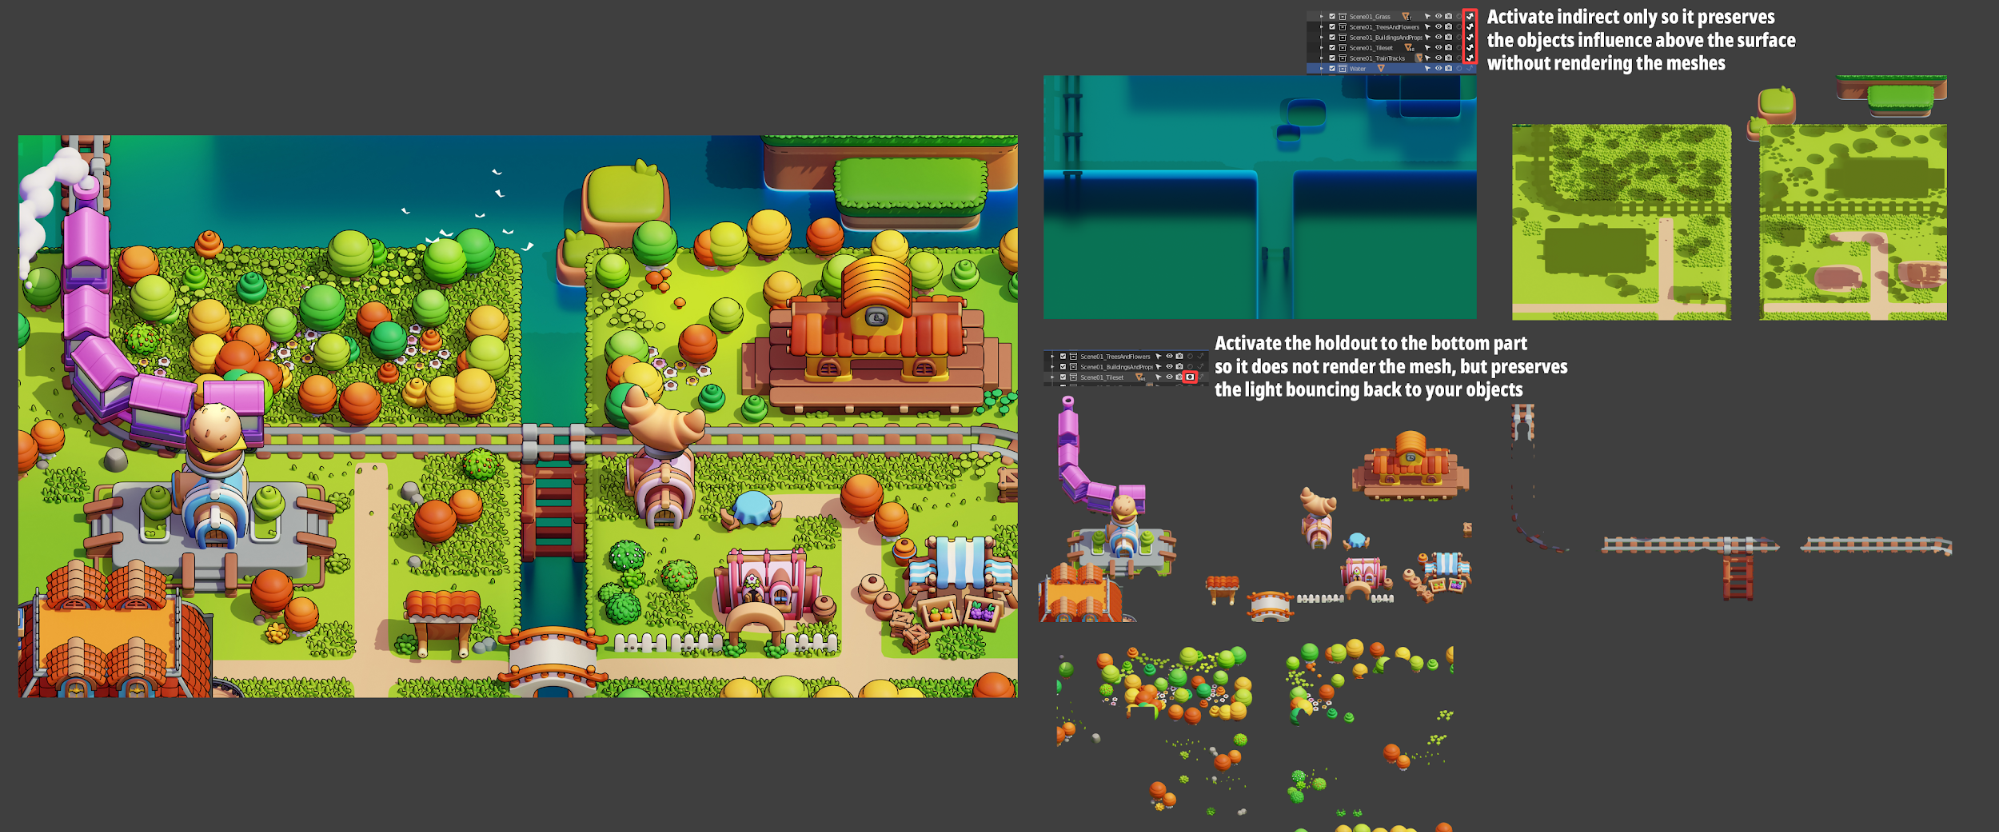
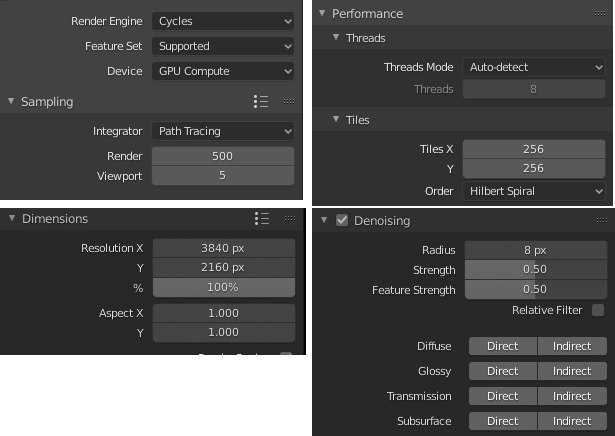
These are the basic settings I have in the scene
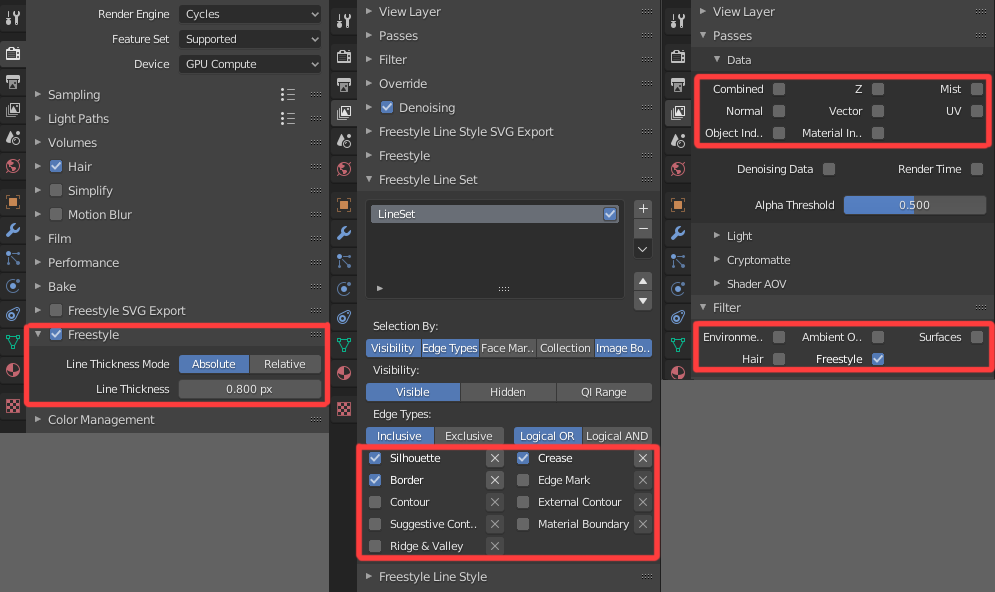
After I render all the individual collections above, it’s time to generate the outlines to be composited in PS. I put the render sample values down to 72 and check the Freestyle option in the render properties, set the outline settings in the layer properties, then uncheck all the Data passes and keep only Freestyle active in the Filter. This way, I render only the outlines on a transparent background.

These are the layers I have in Photoshop, coming straight from Blender.

I add a Color Balance to make my shadows a bit warmer and my highlights more yellow.
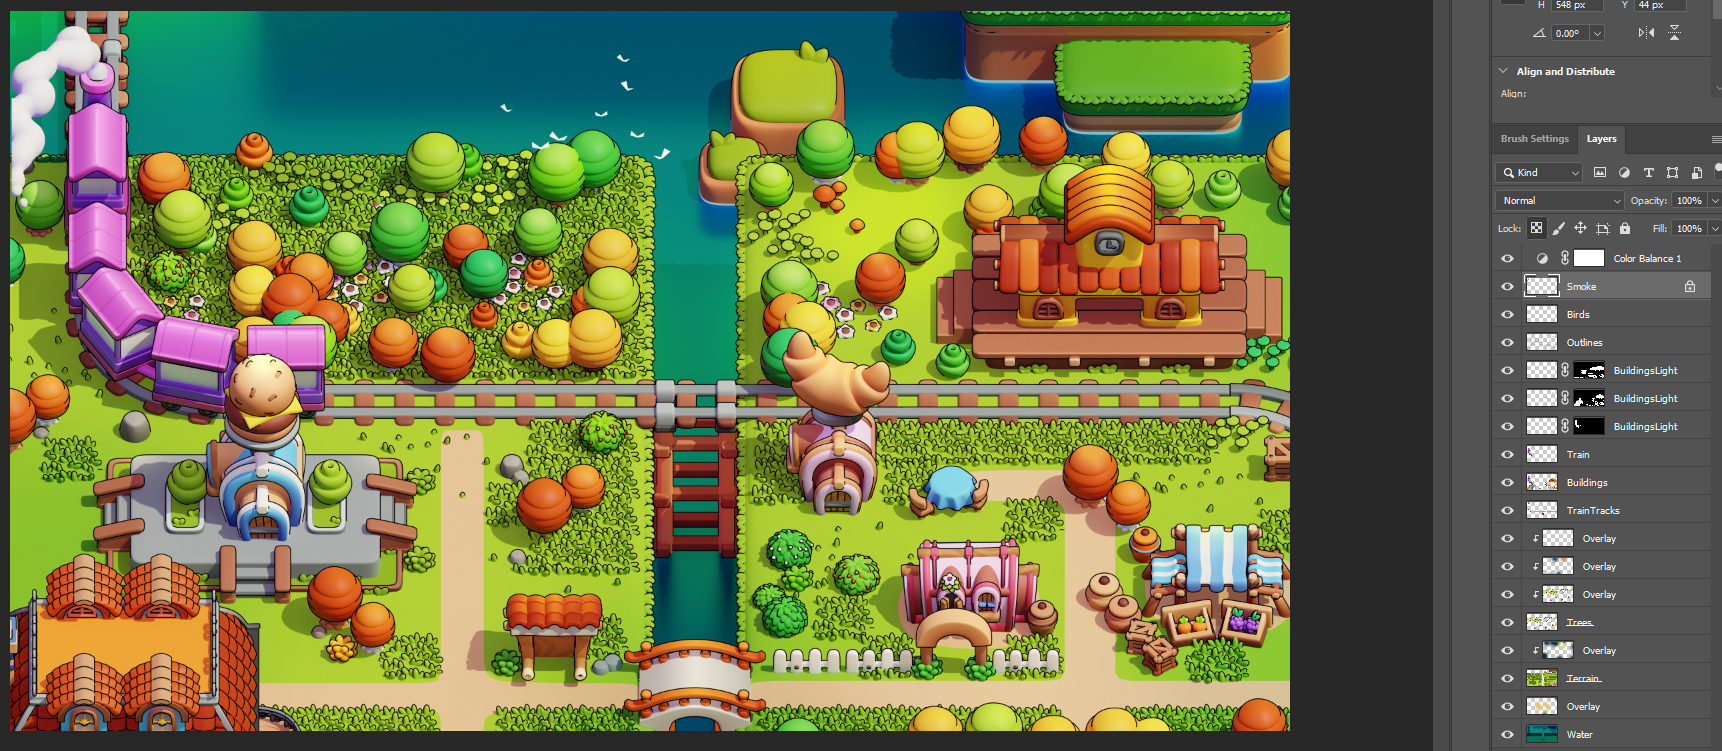
Then I start to add some Overlay blending layers to enhance light and specular here and there.
BONUS!
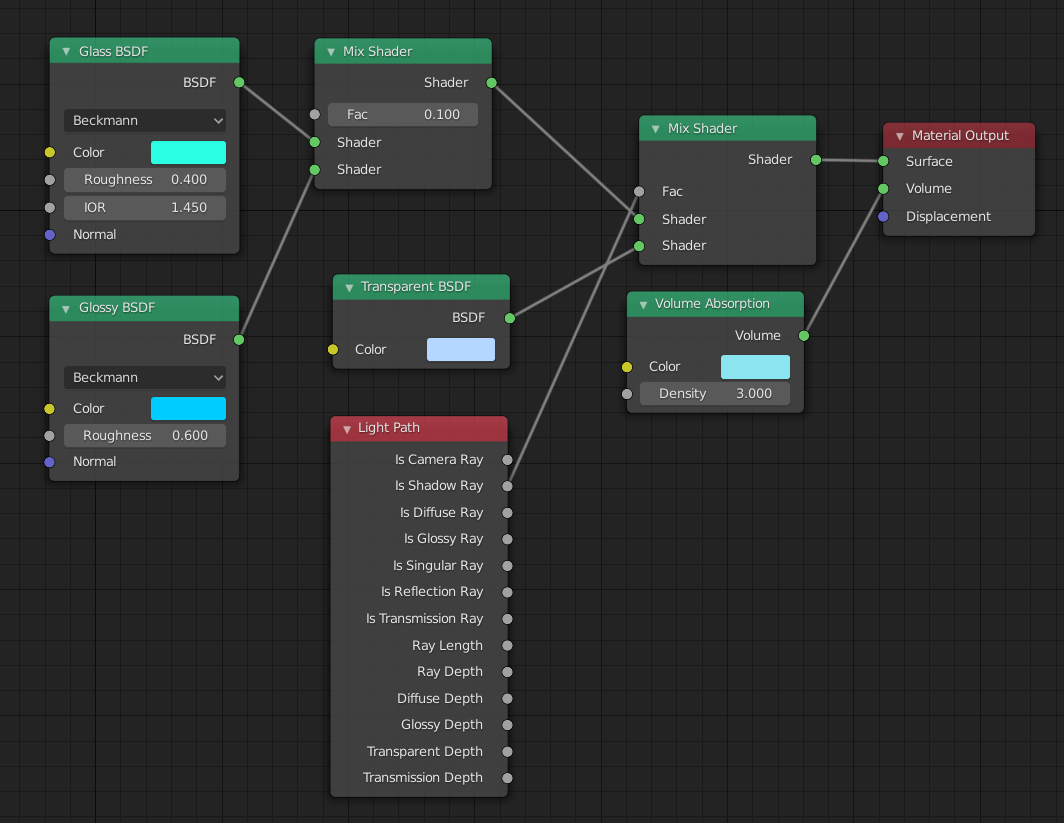
The water material uses a simple transparent Glass and Glossy mix, with a Light Path and Volume Absorption to give some underwater feel to things below the water mesh.
I hope this was helpful! Of course, there are many things here and there that might not be fully covered in this article but feel free to contact me on Twitter and drop a message!


Keep practicing and see you next time!
About the Author
 Carlos Cavalcante, Game Artist


Beautiful!
This is lovely
thanks for sharing your technique!
This is amazing.
I can’t seem to get Sherbet Lollipops out of my head when looking at your work. Fascinating insight to your working process.
I love this style of art. It’s reminiscent of Charles Wysocki, Jane Wooster Scott, Mary Singleton, Medana Gabbard, and Bob Pettes. Were you influenced by any of them (or other folk artists) or just pixel art?
Not to mention: Grandma Moses who practically started whole folk-art tradition single-handedly.