
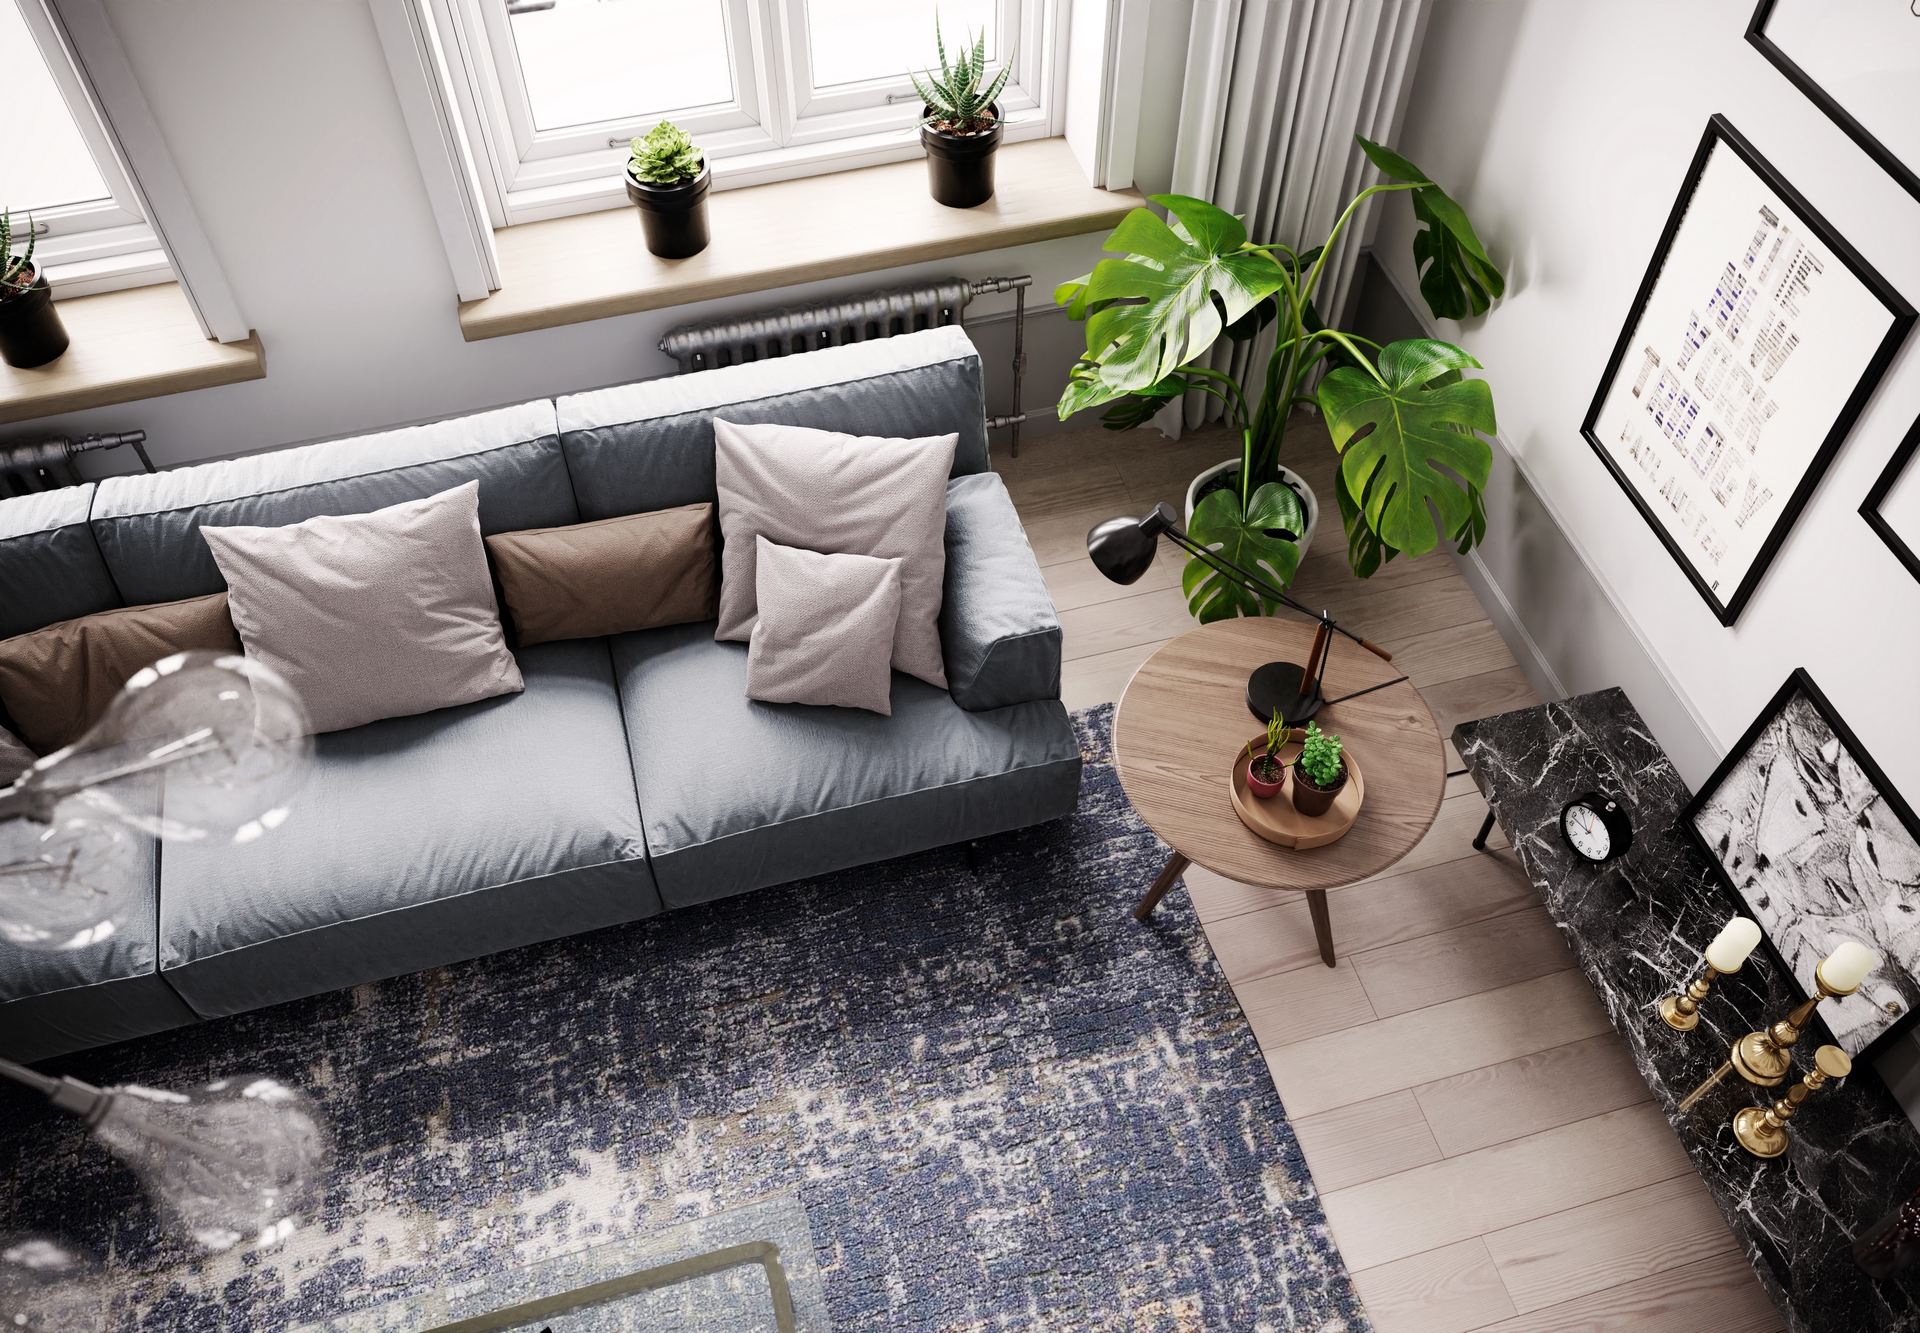
Behind the Scenes: Scandinavian Style Living Room
About
Hi, my name is Kristian Budi Santoso. I’m currently working as a freelance architect and 3D visualizer in Semarang, Indonesia.
I’m self-taught and always interested in new things about CGI.
I started visualizing in 3D in 2005 to support my design job as an architect and sometimes I help other people visualize their ideas.
In the beginning of my career in the 3D visual world, I used 3ds Max as the main tool.
I have known about Blender since 2009, and tried to learn, but I stopped because at that time Blender was very difficult to learn. Blender tutorials for architecture were few. The software also did not have a capable rendering engine for archviz at that time.
In the middle of 2017, I was again interested in Blender, because at that time it was much better. One thing that made me interested was the interactive rendering mode in the viewport with the Cycles render engine.
I think that’s enough for my introduction. Let’s start with the topic.
Inspiration
After seeing many tutorials and doing a lot of research, I decided to make an interior artwork from scratch.
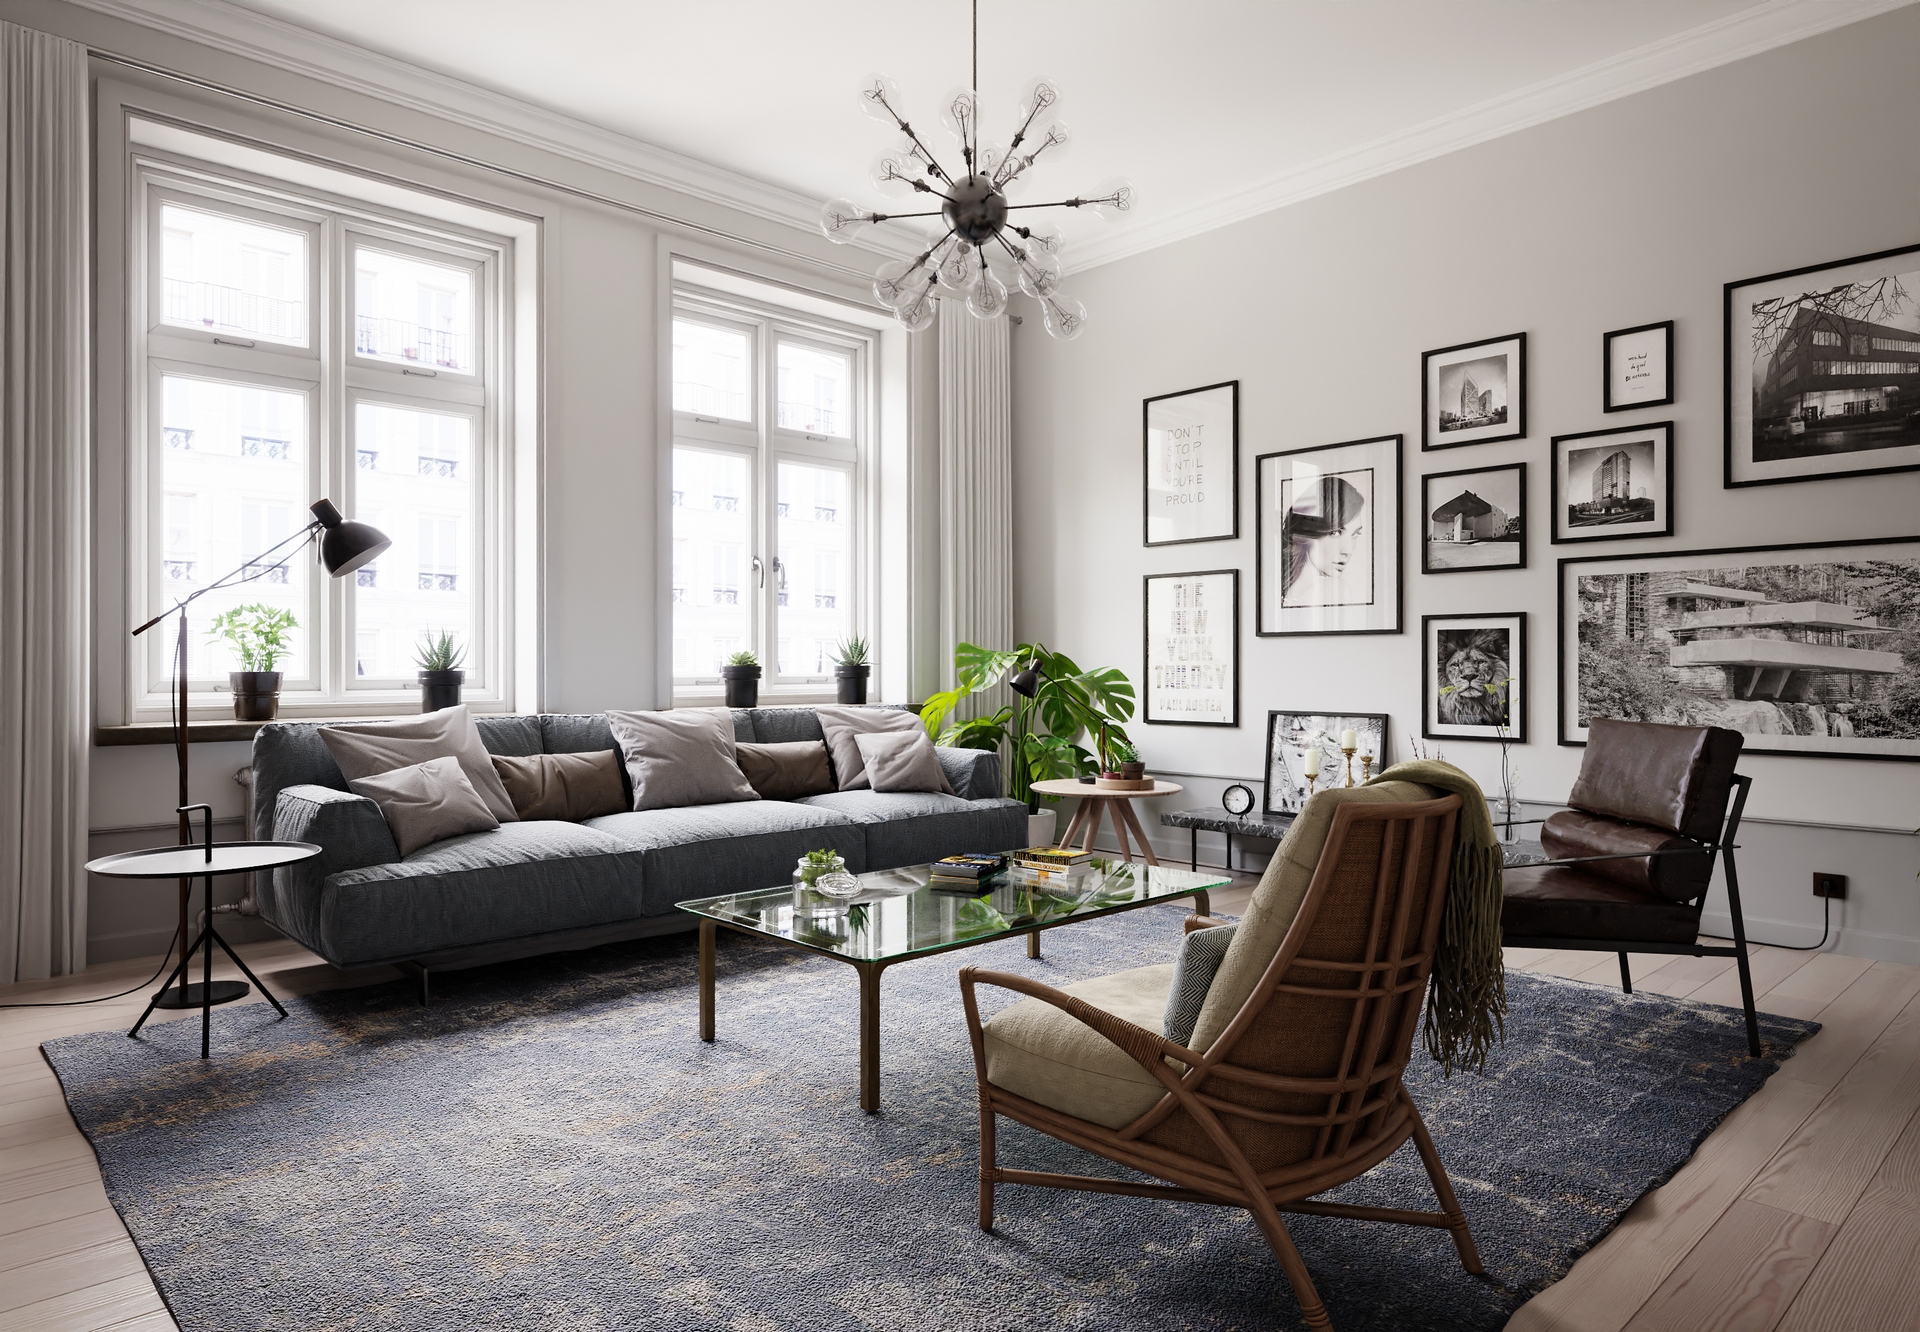
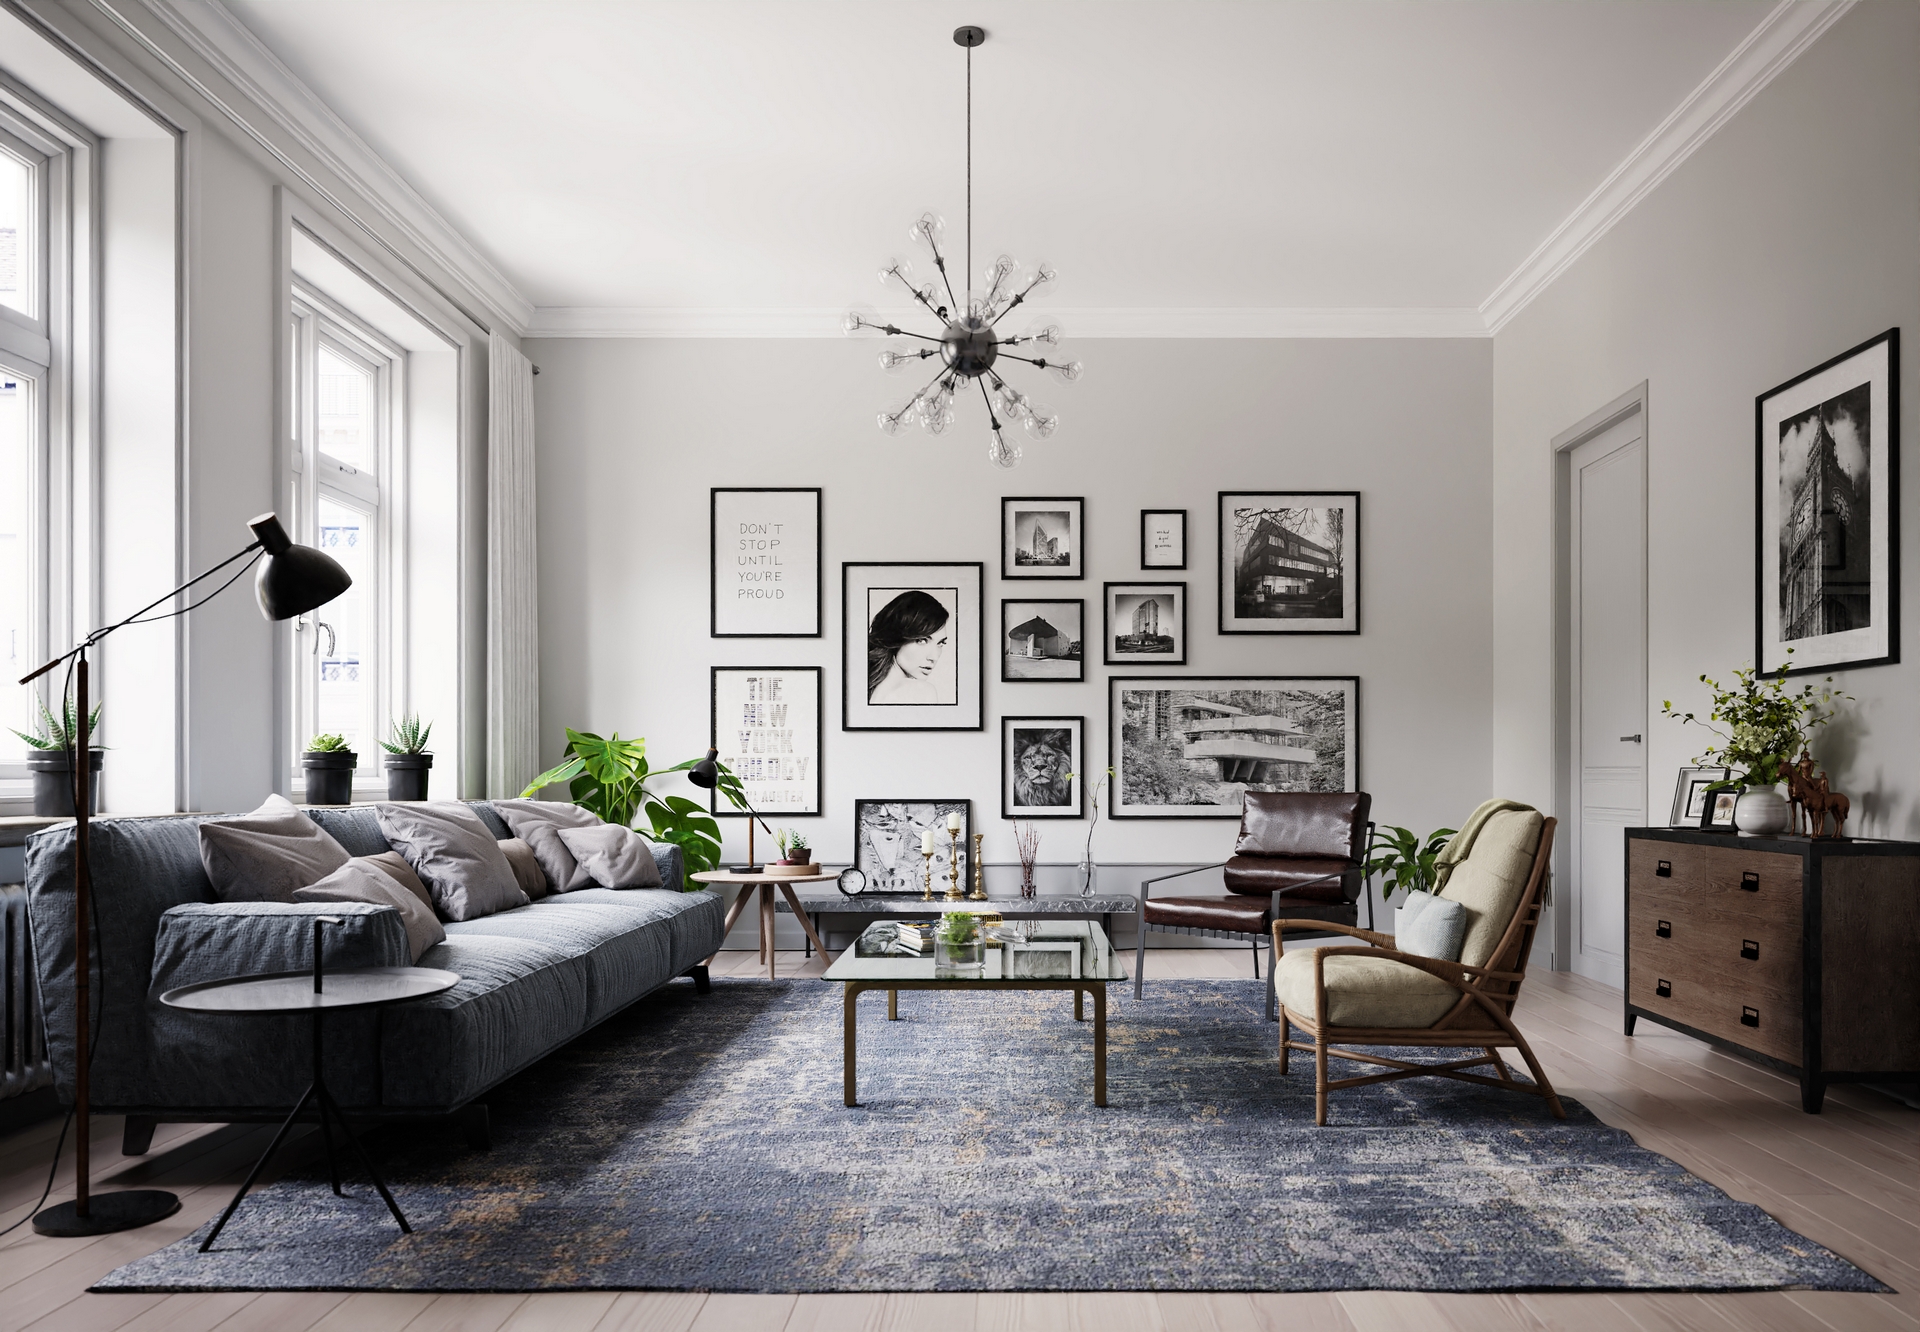
I like Scandinavian-style interior design that is bright, clean, and combines modern and traditional elements.
Then I started looking for inspiration on the internet. You know, every 3D artist needs a reference right?
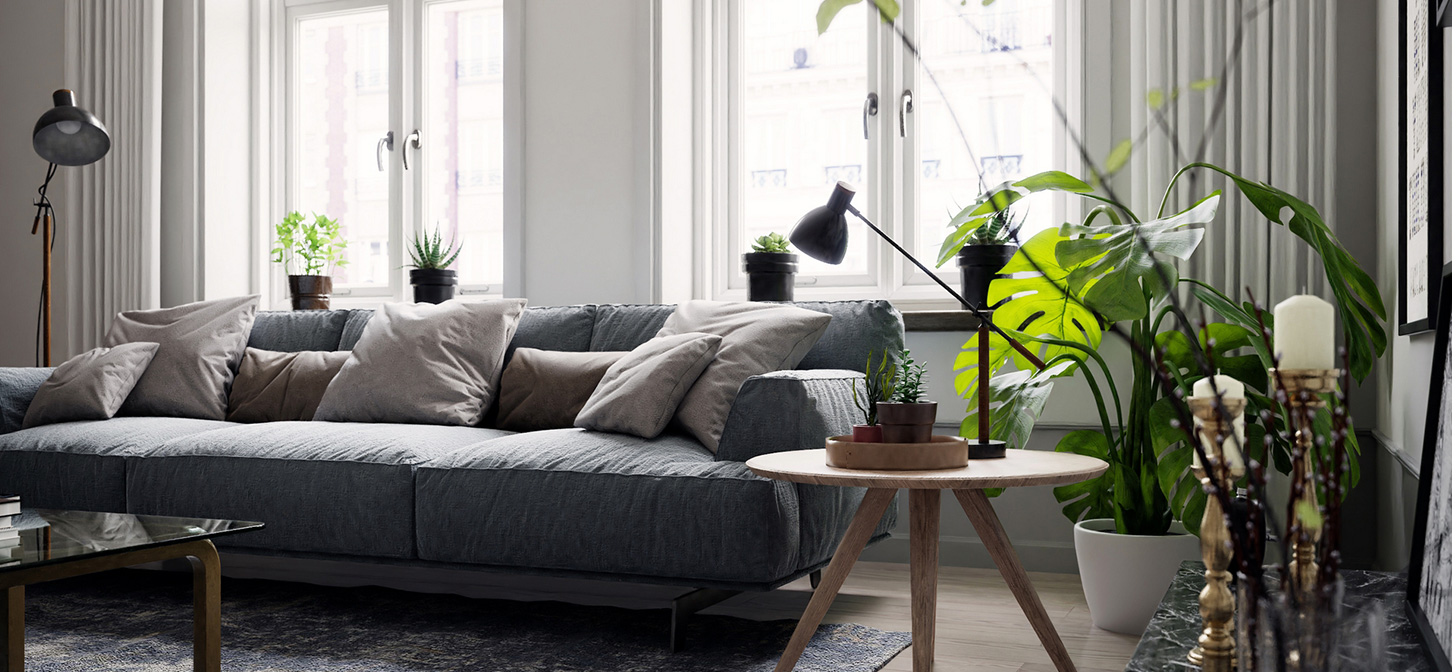
I found this good picture after searching for a few days.
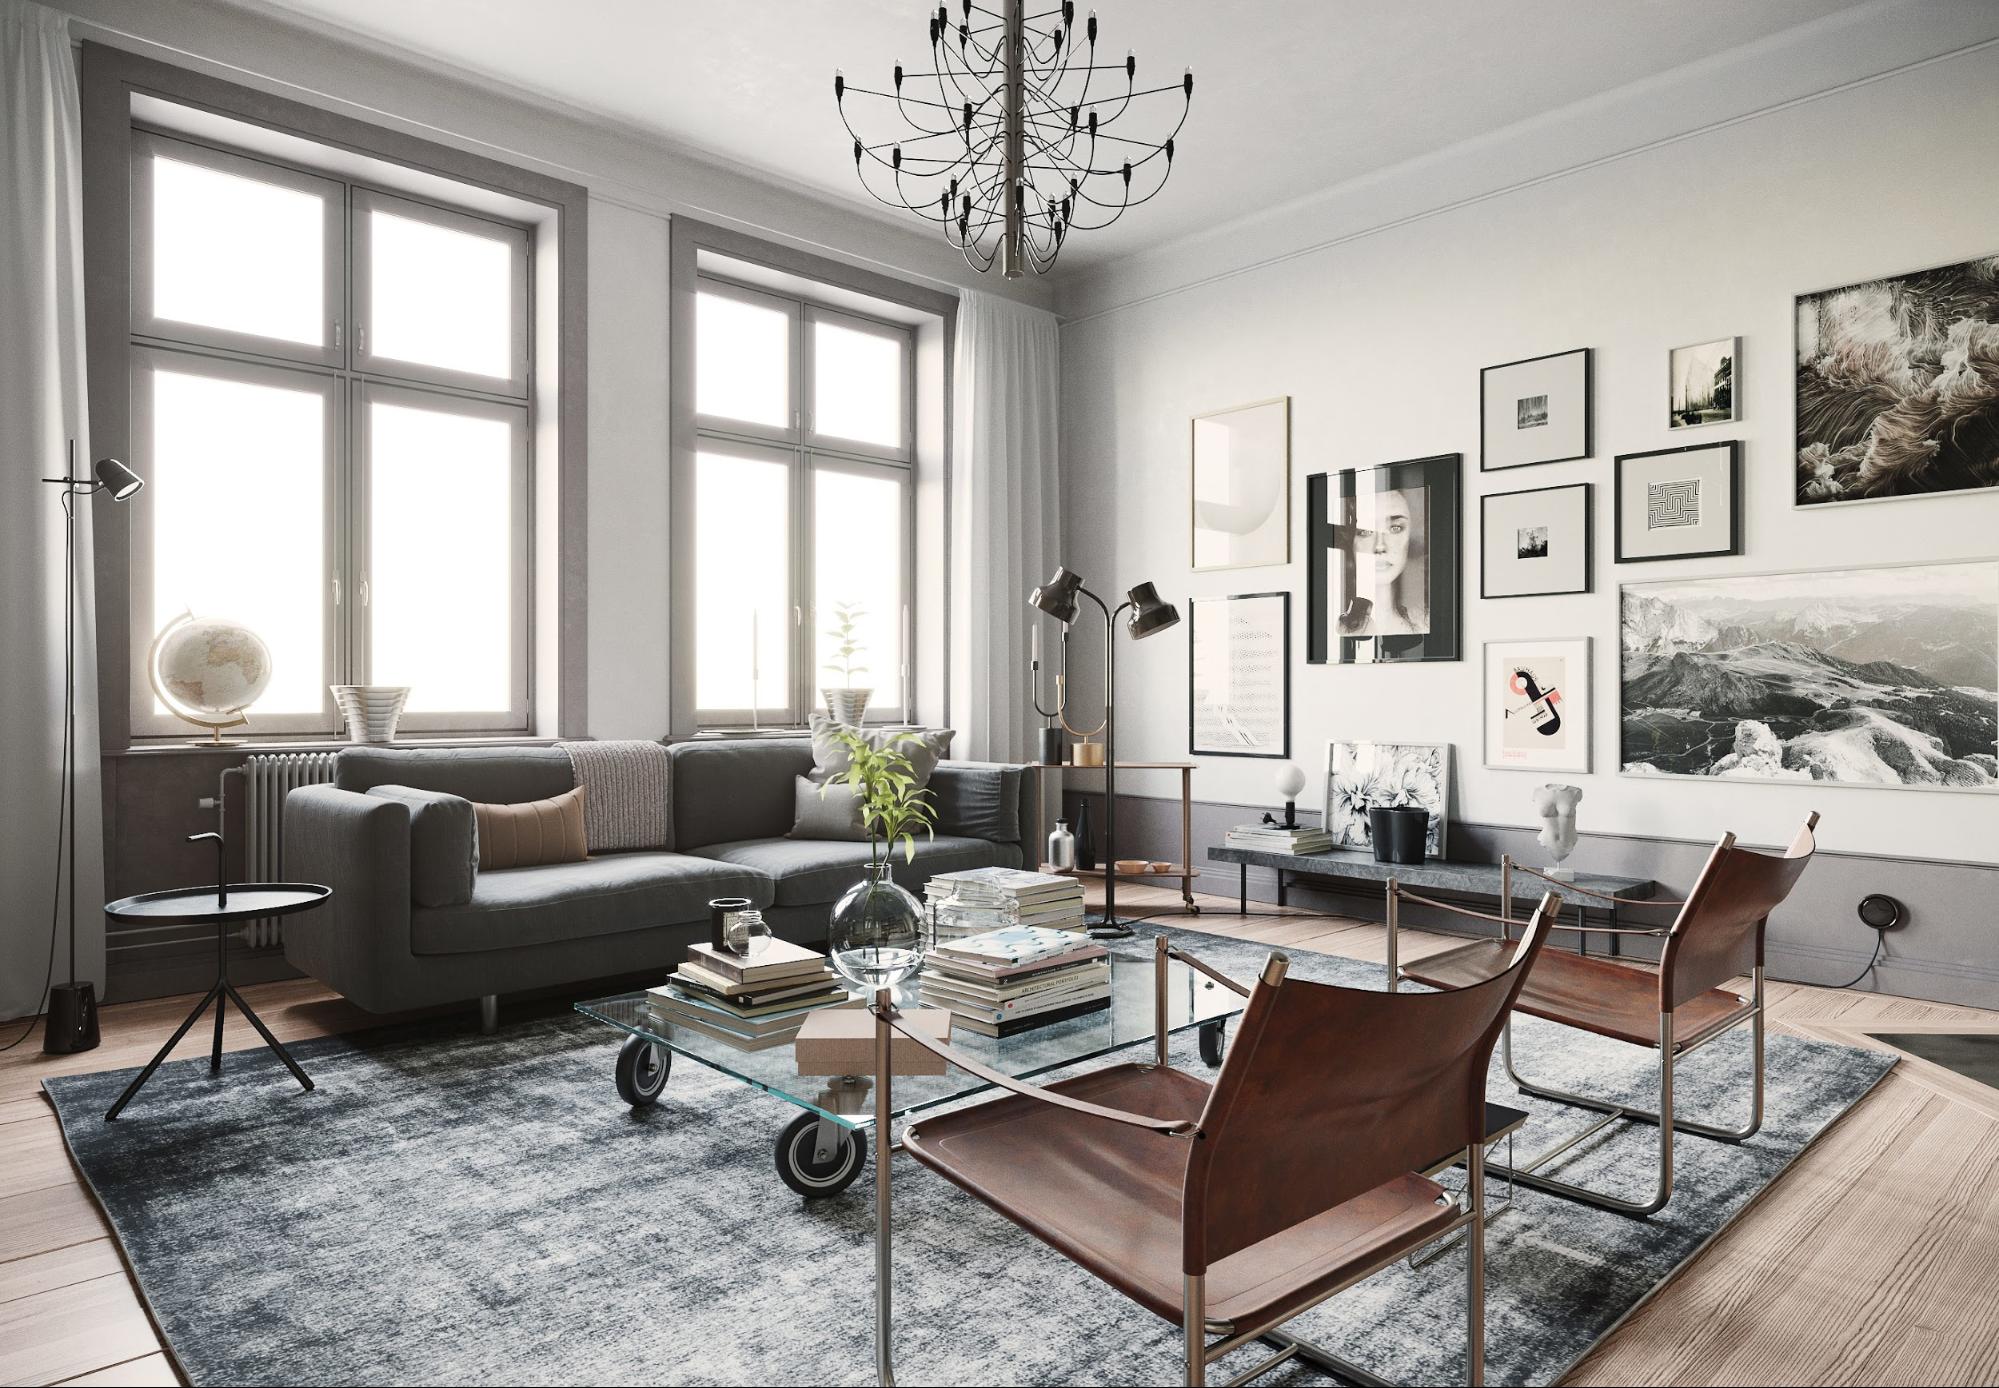
Initially, I thought this was a photo. Then I realized it was a 3D image created by an artist named Angelo Ferretti. He used Cinema4D and Corona to create this amazing image.
So, I decided to make the Blender version of this scene. But later, I decided to make my own version.
Modeling
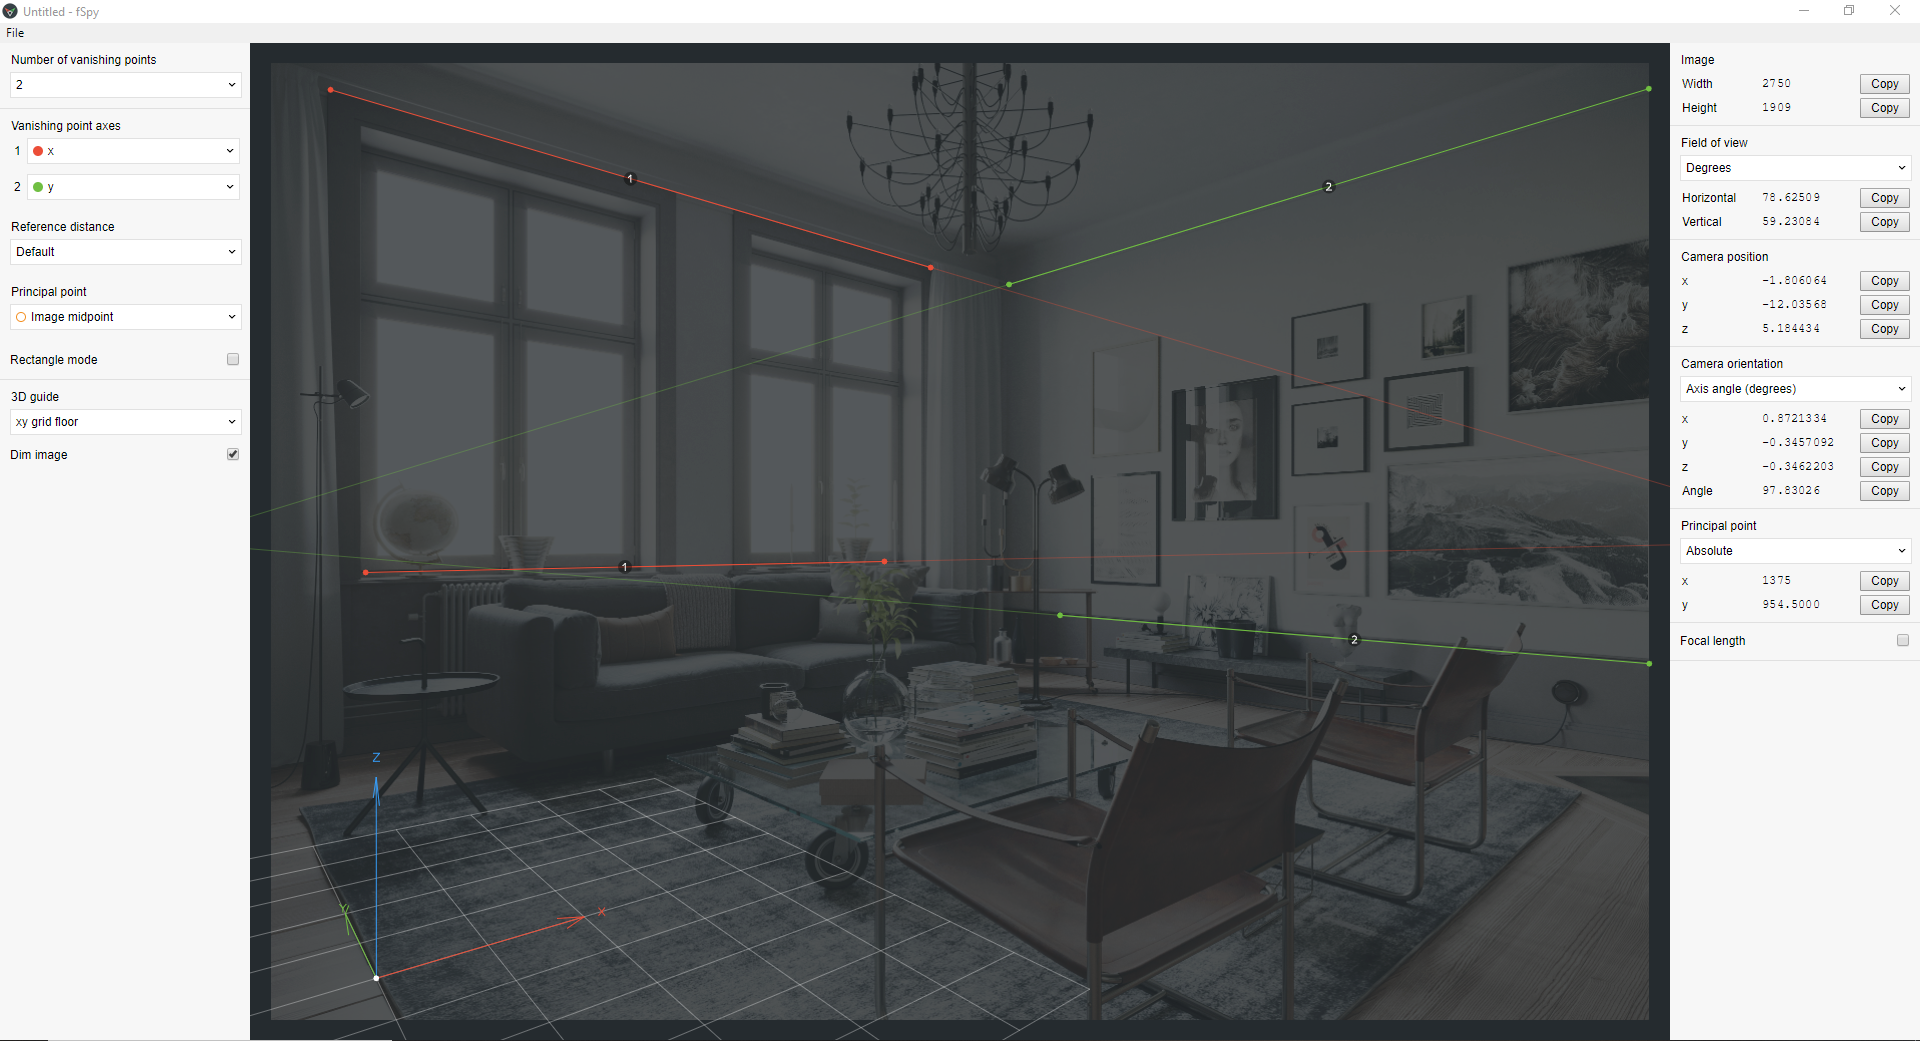
First, I loaded this image into fSpy, a still image camera matching software. It’s a free and open source software. The goal was to create a camera whose position and angle of view matched the reference image.
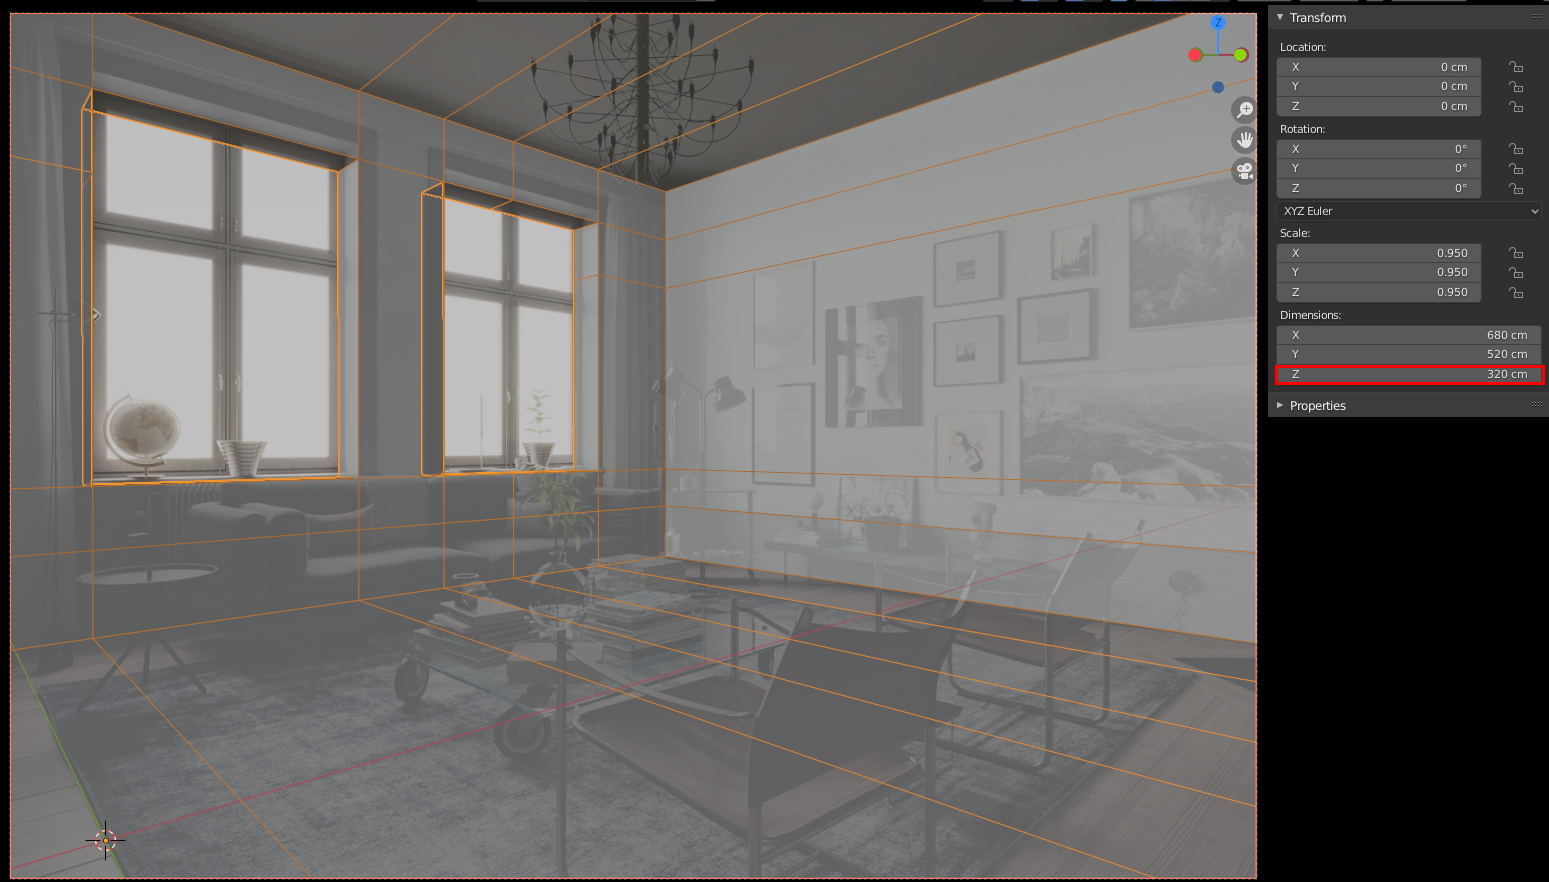
Then I imported the results into Blender and started to make the room. It is important to set the scale of the room properly. In my scene, I took the ceiling height (320cm) as a reference. I scaled the room and camera with point 0,0,0 as pivot until I got the desired size. I set the 3D cursor as a scaling pivot and kept an eye on the z dimensions in the properties panel while scaling.
The next step was to finish the modeling step, in this case I did not make the entire room accessories.
I used premade assets from many sources. Doing so, I can focus my attention on shading and lighting.
I made the floor with the Archipack add-on. It’s very handy because it can automate UV unwrapping and randomize the material assigned to the planks.
Not all assets were ready to be used—many of them had to be re-meshed and re-shaded. I also used free assets as much as possible.
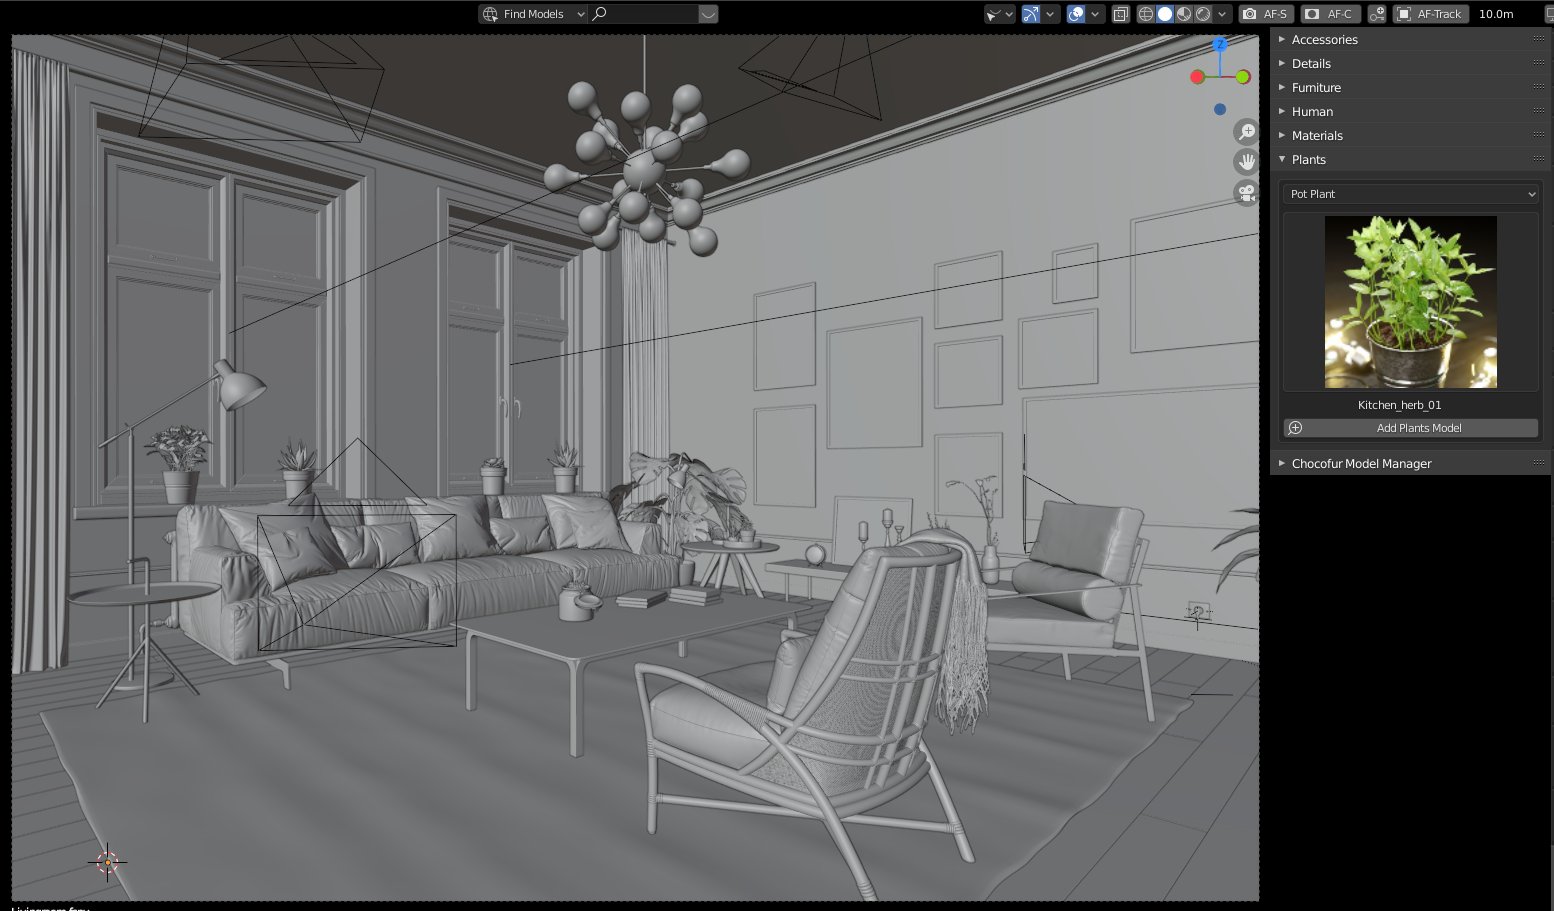
I used the Model Manager add-on from Chocofur to make things more organized. It takes time at first, but afterward greatly speeds up my work.
I used the reference image to get the correct position of the furniture.
Shading
I made my shader node as simple as possible. I used Principled BSDF for almost all the material in this scene. I used a PBR texture whenever possible, and, when it was not possible, used a “fake” PBR with a color ramp converter for bump and roughness map.
I can’t explain all the shader settings, because there were too many.
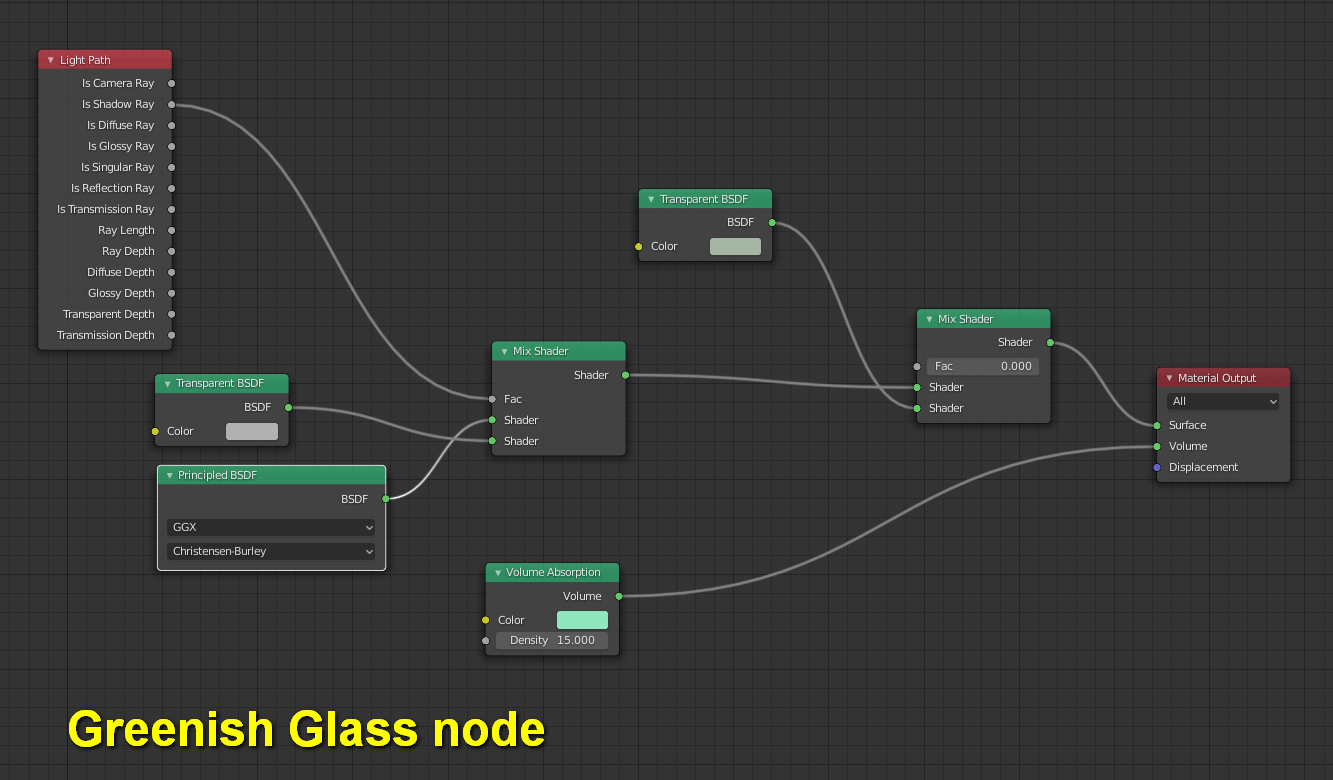
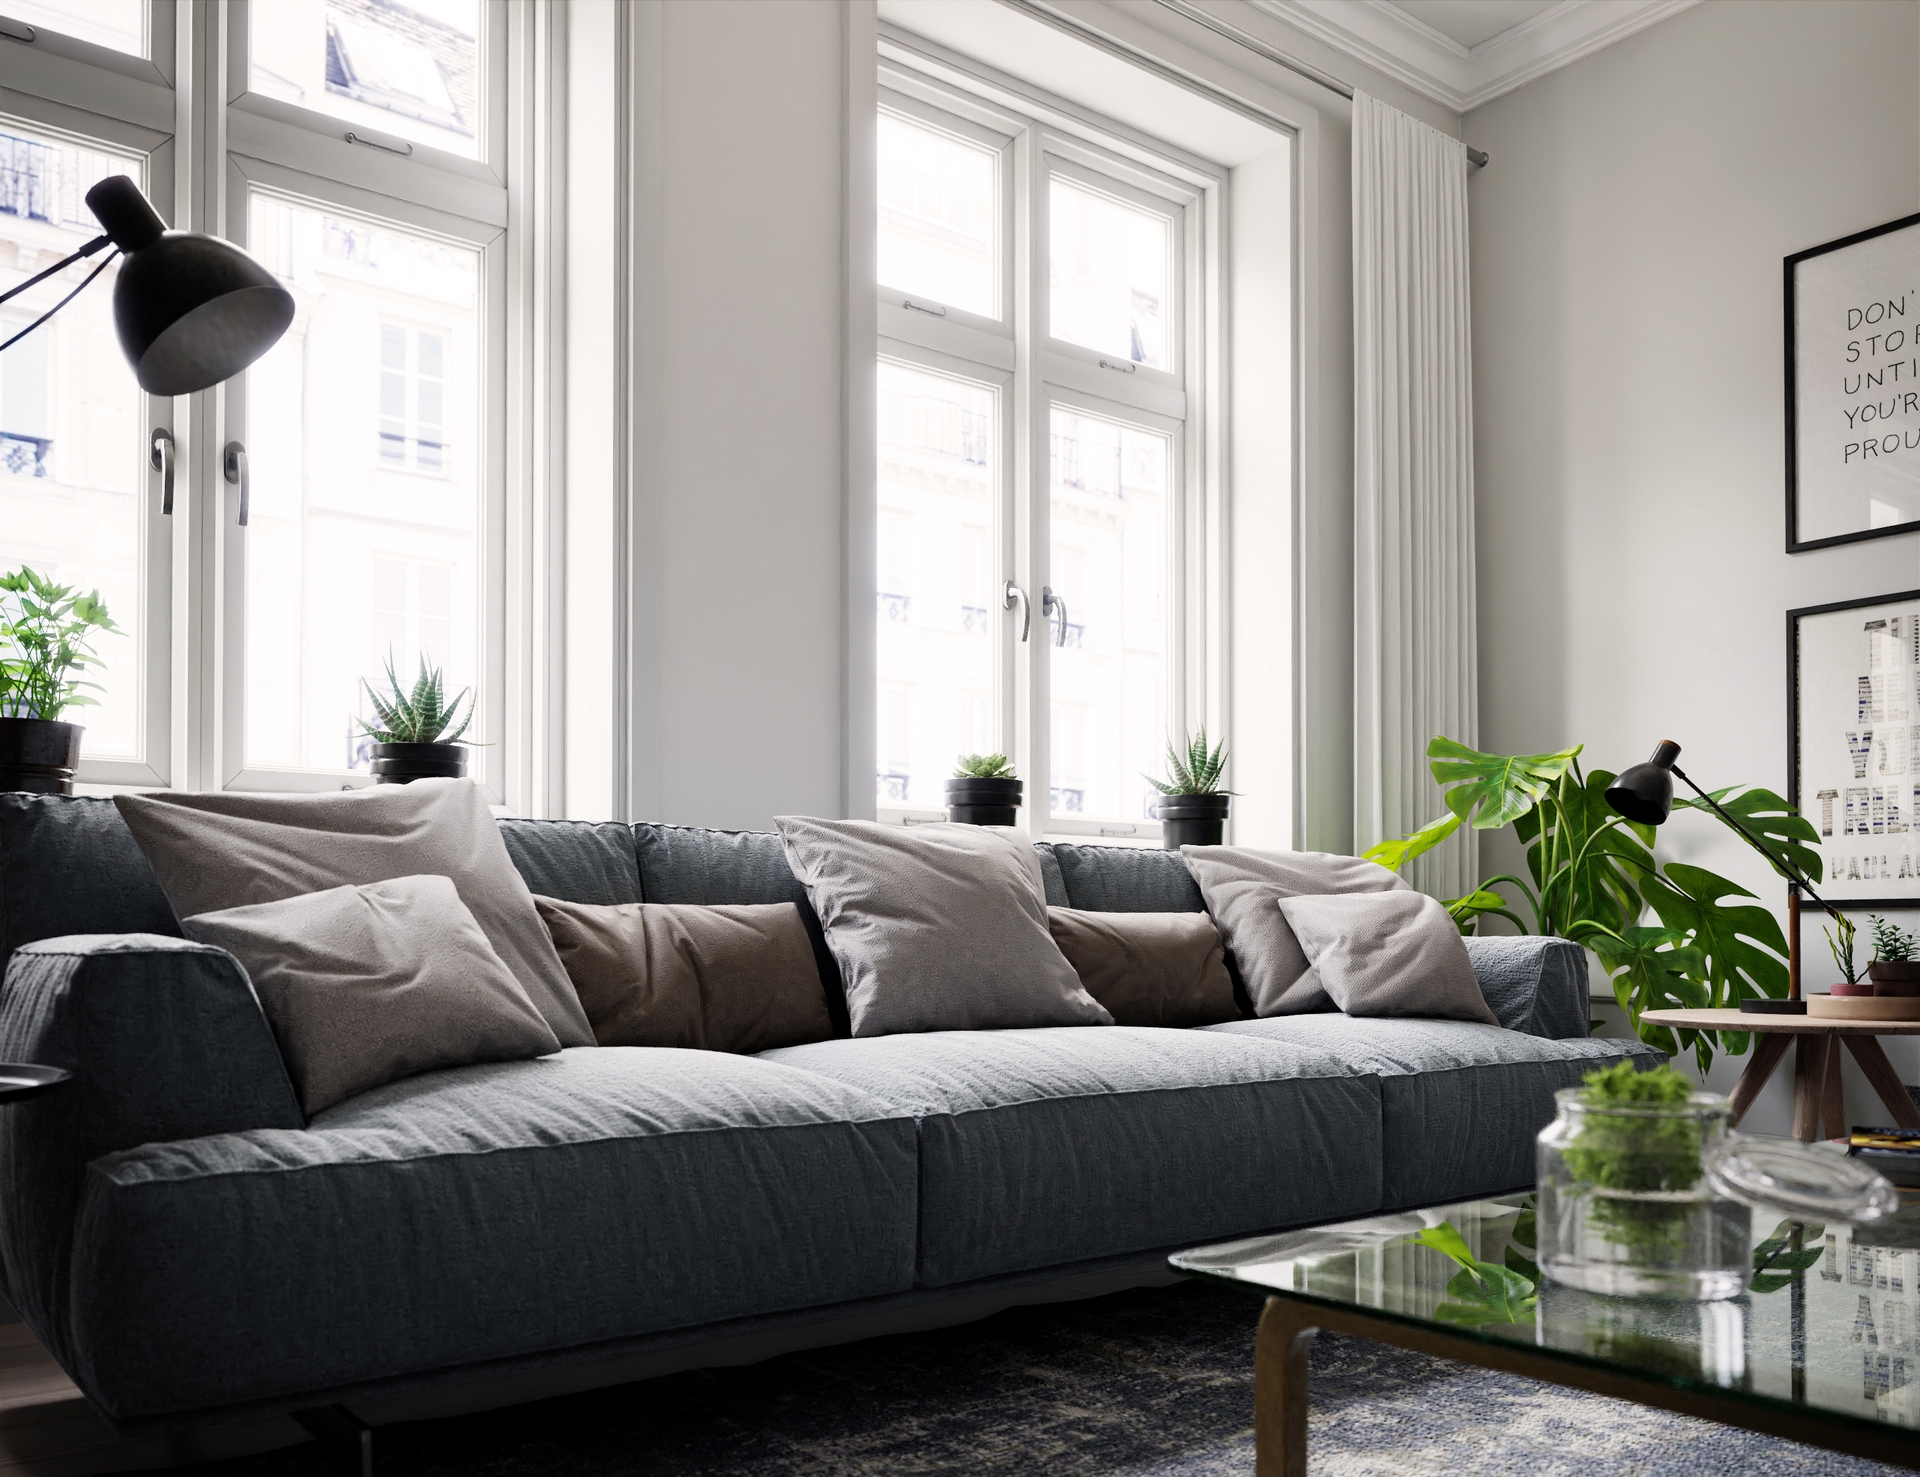
The most important was the leaves, for which I added a translucency shader to the main shader. For the sofa, I used a Principled shader with the Sheen value set to 1. Also for the glass tabletop, I added volume absorption to the volume slot, which gives the glass a greenish tint.
The textures are from CC0 Textures, Chocofur, and from the internet.
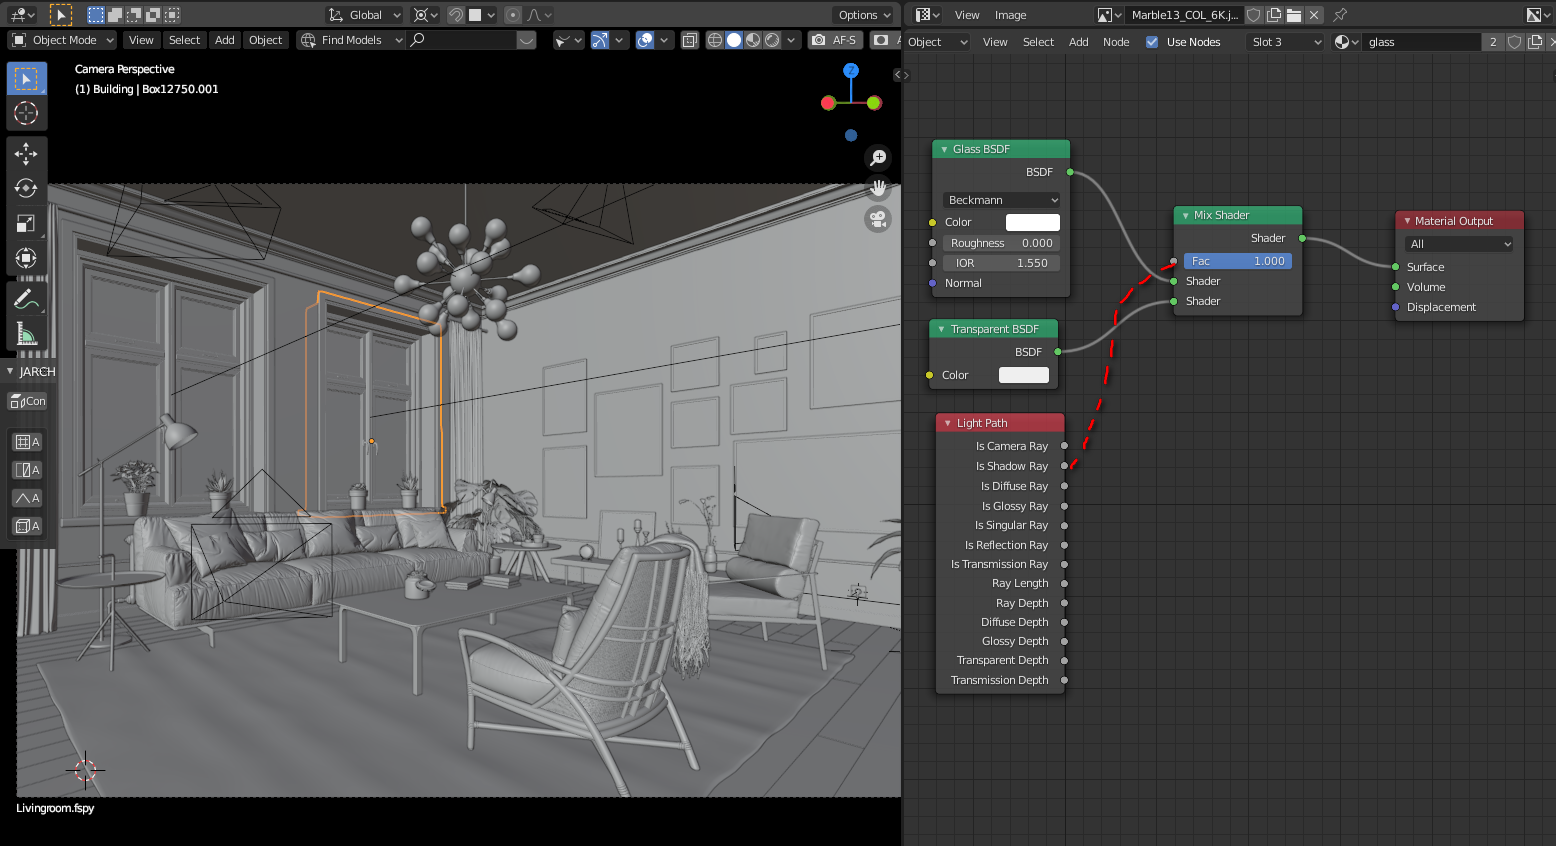
For window glass, rather than using traditional nodes consisting of a Glass Shader mixed with a Transparent Shader to fake the shadow, I used only a Transparent Shader because there are no reflections contributed from window glass. I didn’t remove the glass in case I wanted to render this scene into a different mood. This node setting allows me to choose whether I need glass reflections or not.
Lighting
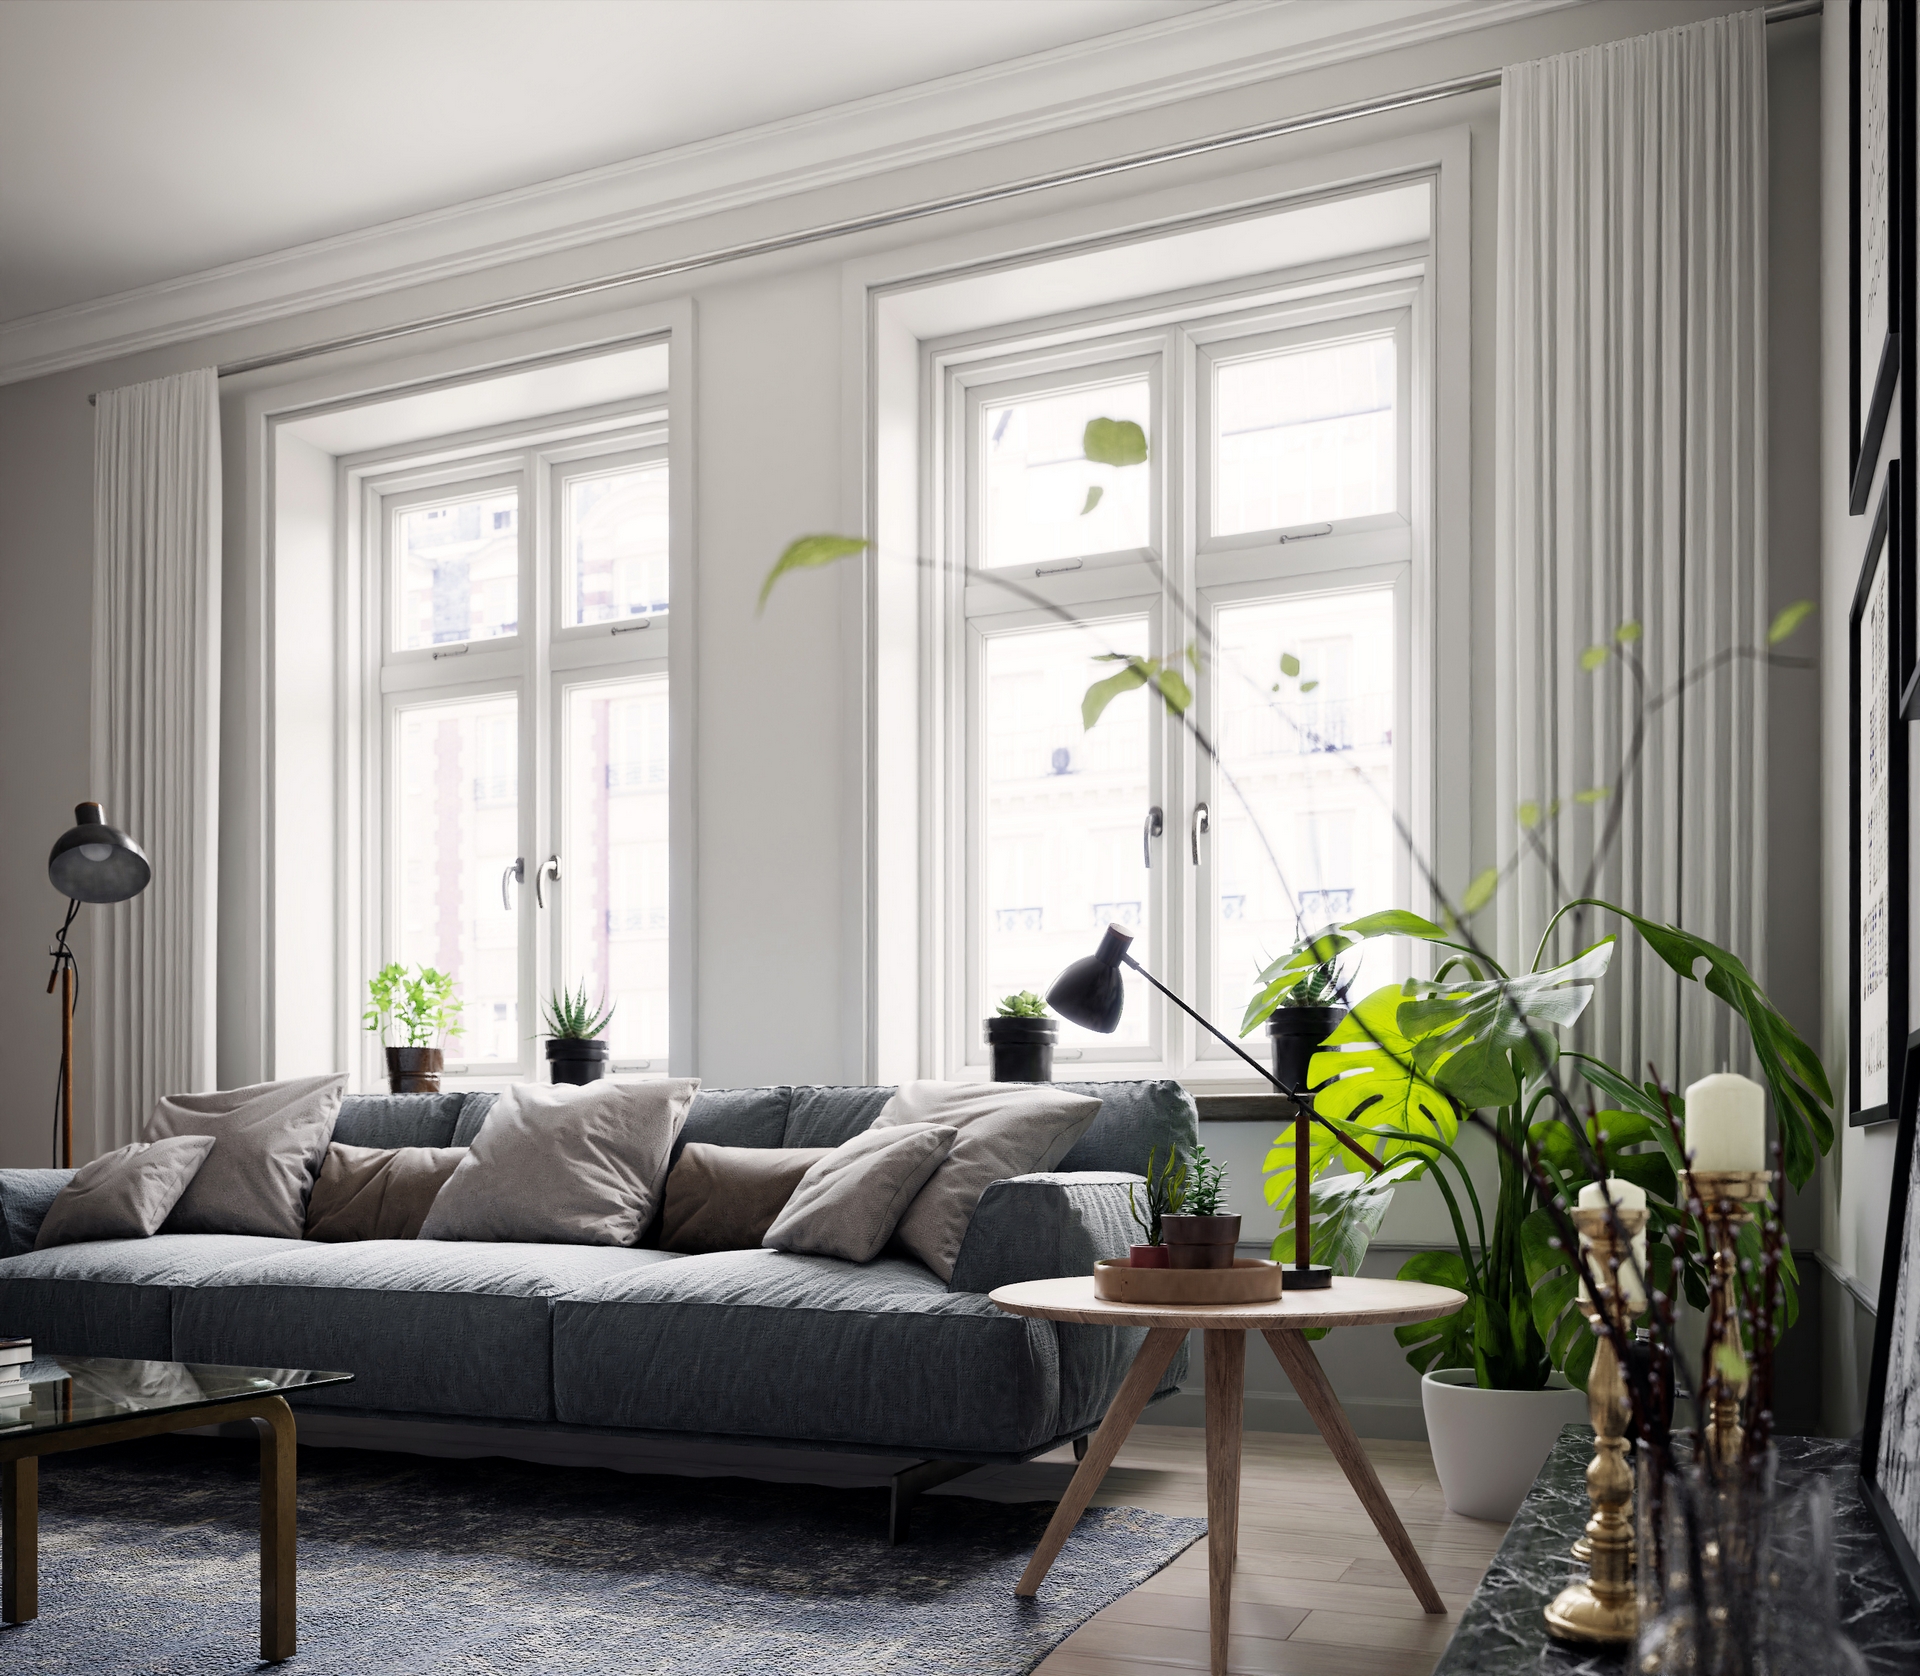
My lighting setup is quite simple. I used Photographer’s Lightpack 01 HDRI from Blender Market and two rectangle lights as portals. What I like about this HDRI is the accuracy of the light level according to the real world compared to a plain white background.
I used the Easy HDRI add-on to simplify the adjustment of the HDRI image.
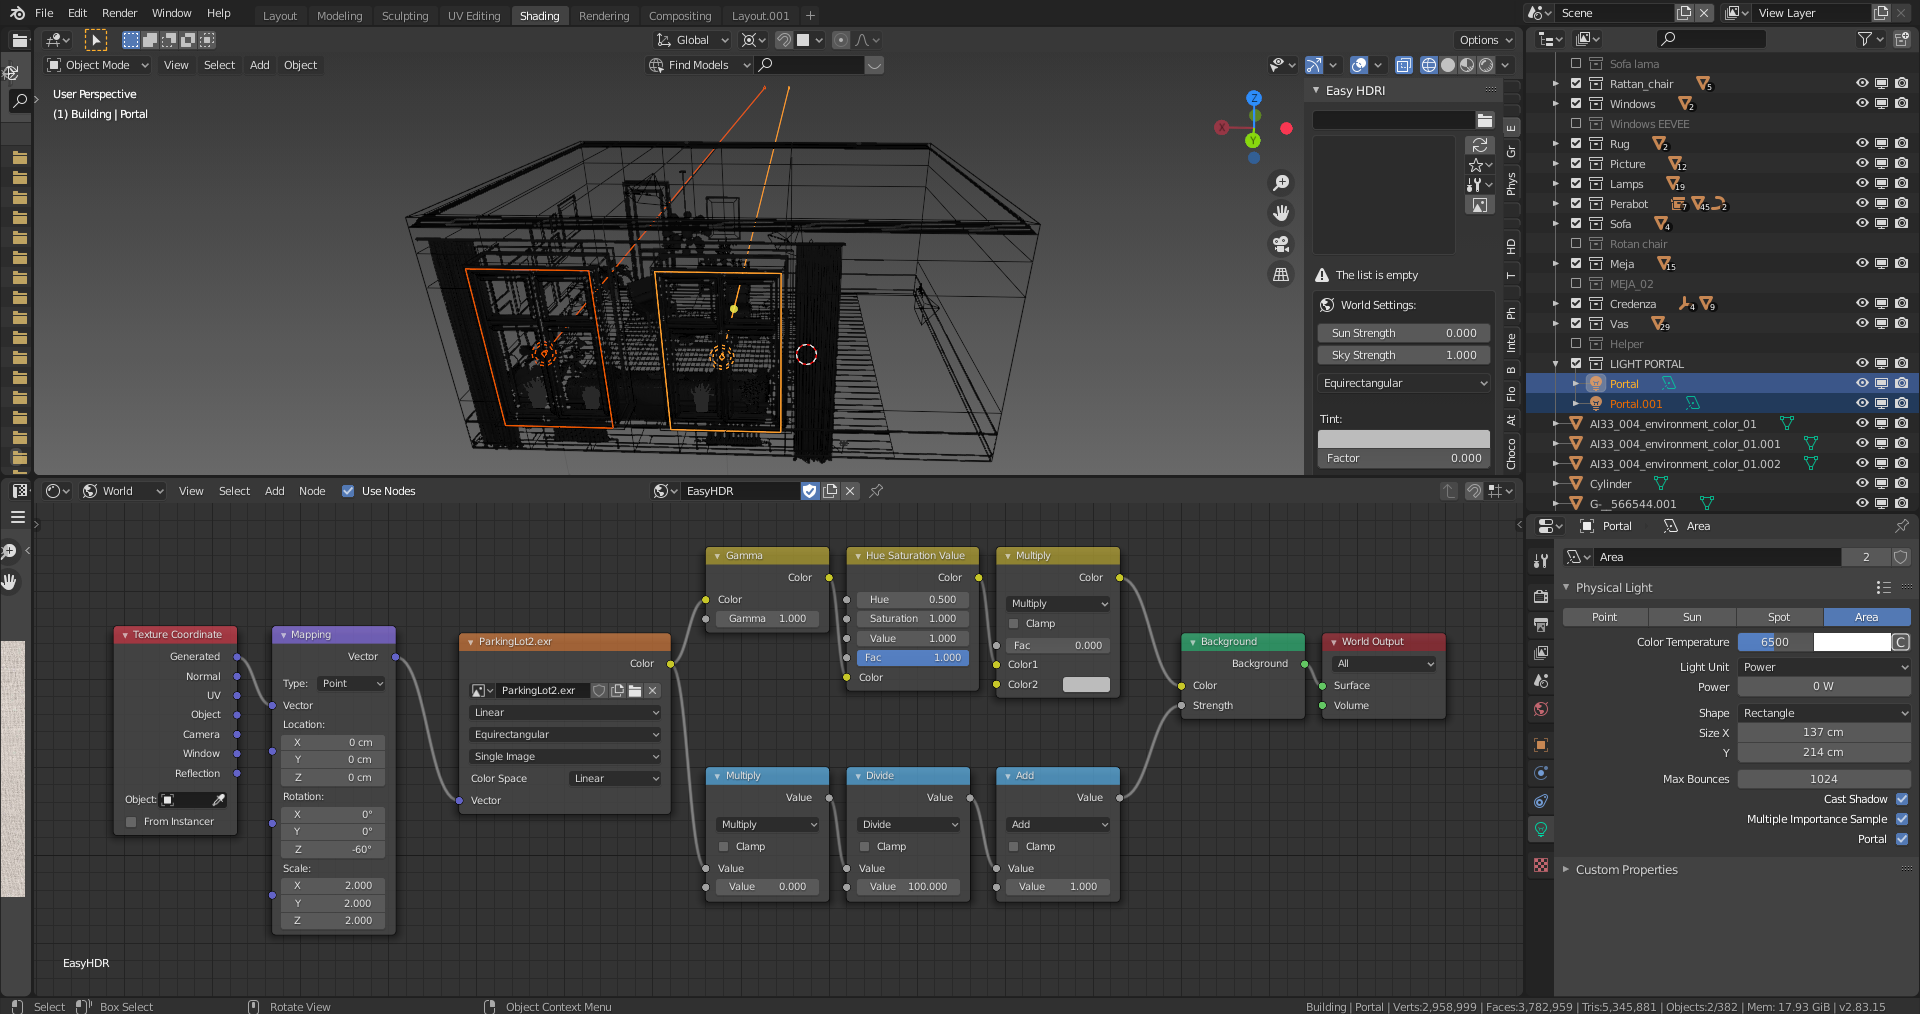
I used this lighting setup in conjunction with the Photographer add-on. These add-ons allowed me to adjust the lighting with the appropriate aperture and shutter speed values, just like a photographer.
Instead of using combinations of shutter speed and aperture (f/stop) values, I could use EV values. There is an EV value in every lighting condition. In my case, it was indoor lighting. I’ve looked for references and compiled this list:
Indoor, artificial light:
- Galleries: 8–11
- Sports events, stage shows, and the like: 8–9
- Circuses, floodlit: 8
- Ice shows, floodlit: 9
- Offices and work areas: 7–8
- Home interiors: 5–7
- Christmas tree lights: 4–5
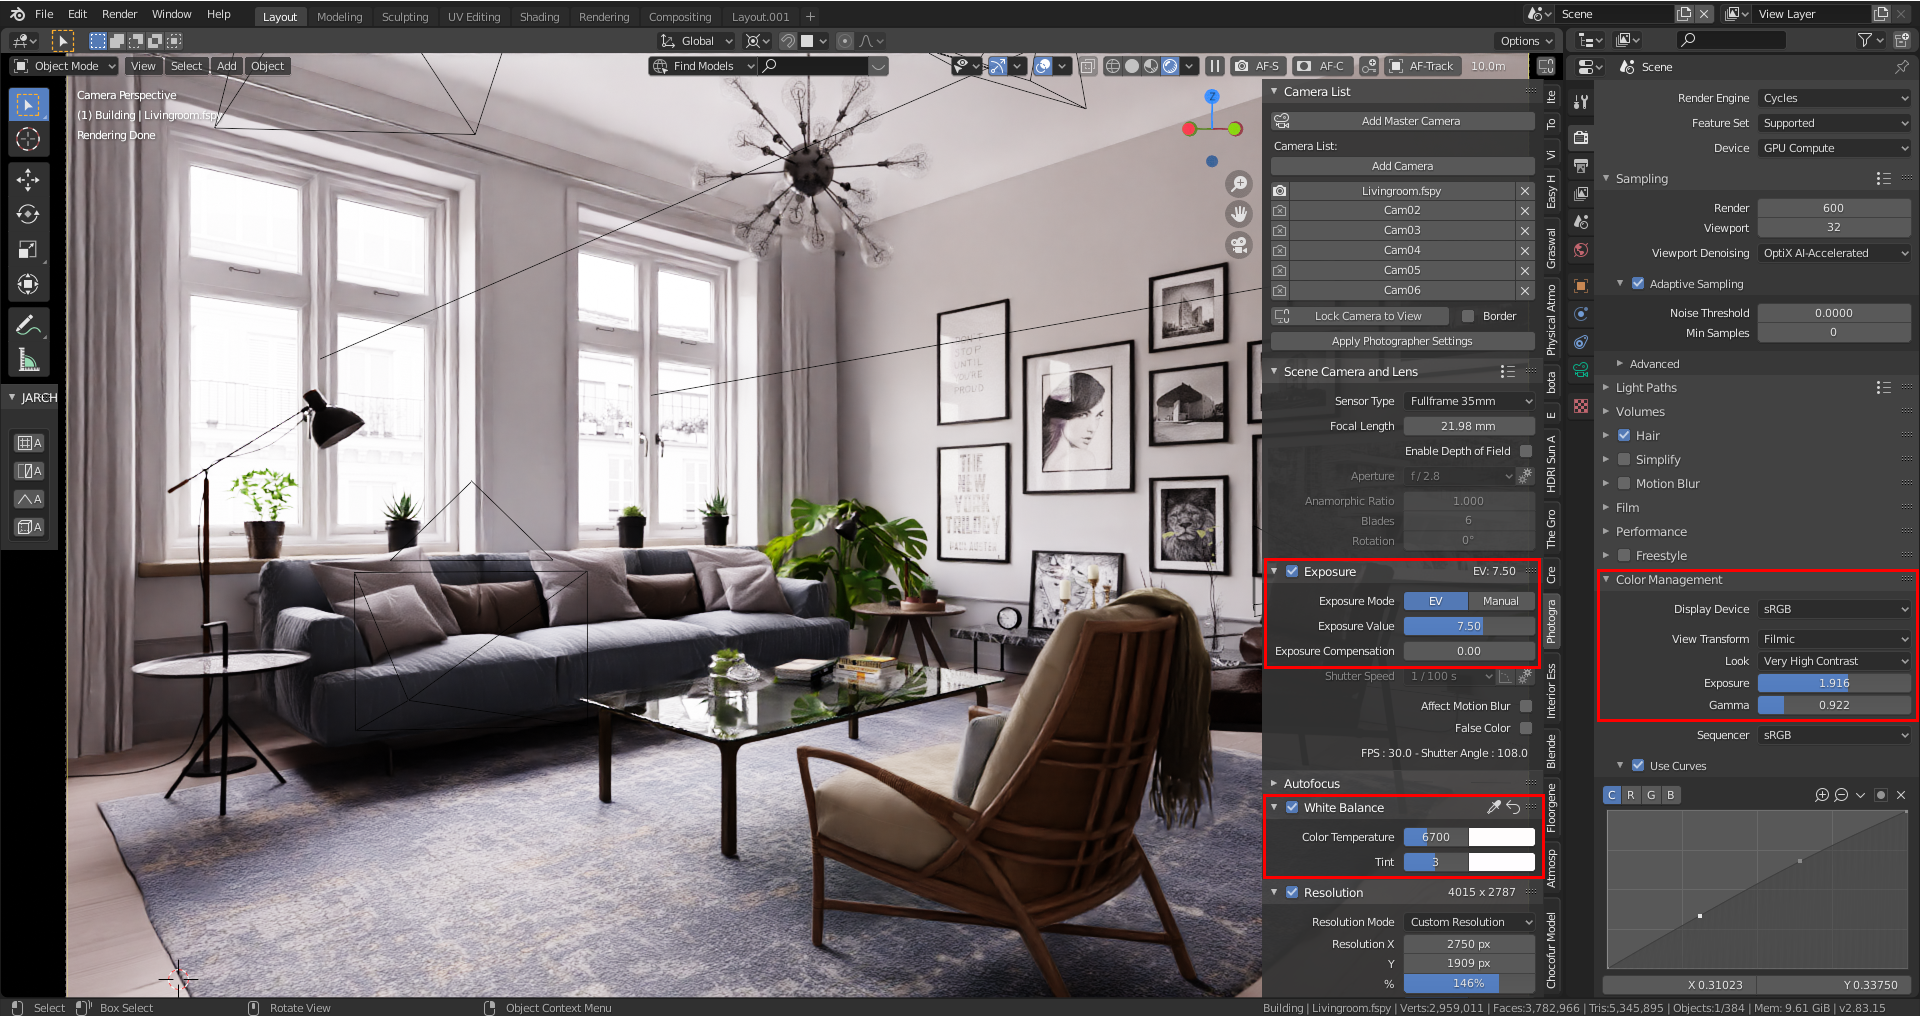
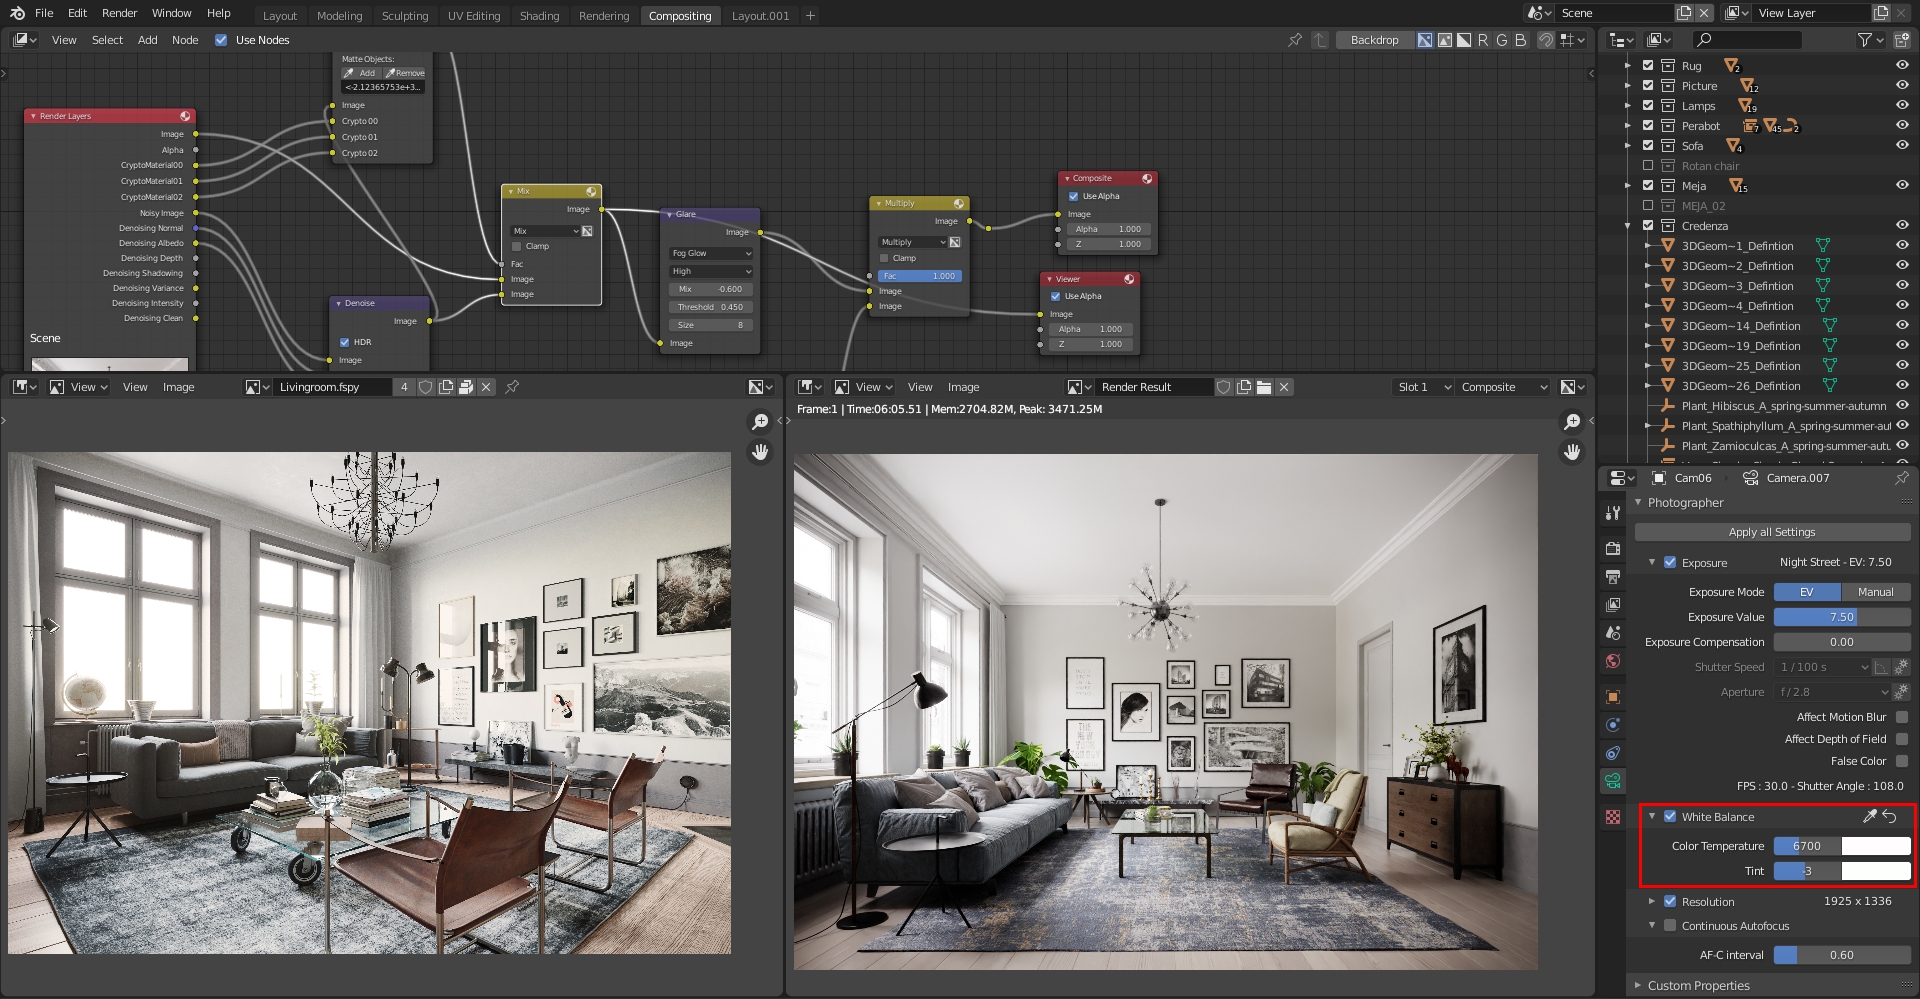
Then in Blender, I found that EV 7.5 was the most appropriate by doing several adjustments in viewport rendering mode.
I did some white balance and tint.
I set color management to Filmic and Very High Contrast.
Render Settings And Composition
Here are my render settings:
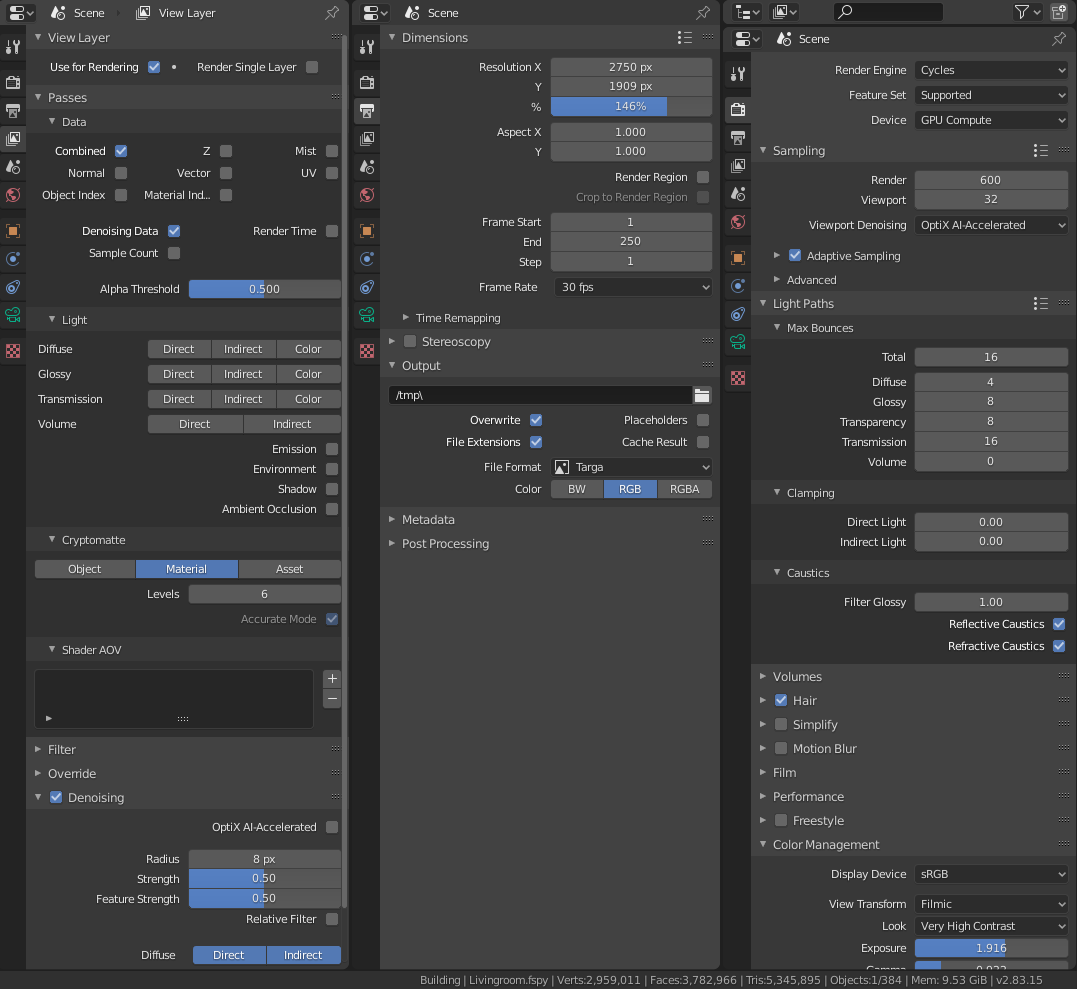
- I used GPU Compute, 600 samples, and turned on Adaptive Sampling.
- I set the clamping to zero to get accurate lighting (this depends on lighting conditions).
- In View Layer Properties, I checked Denoising Data and Cryptomatte.
- I also used native Cycles Denoising to maintain sharp details, like fabric and rug texture.
I tried to make the results of the rendering match, as much as possible, the reference without any post-processing.
Here are the composition nodes:
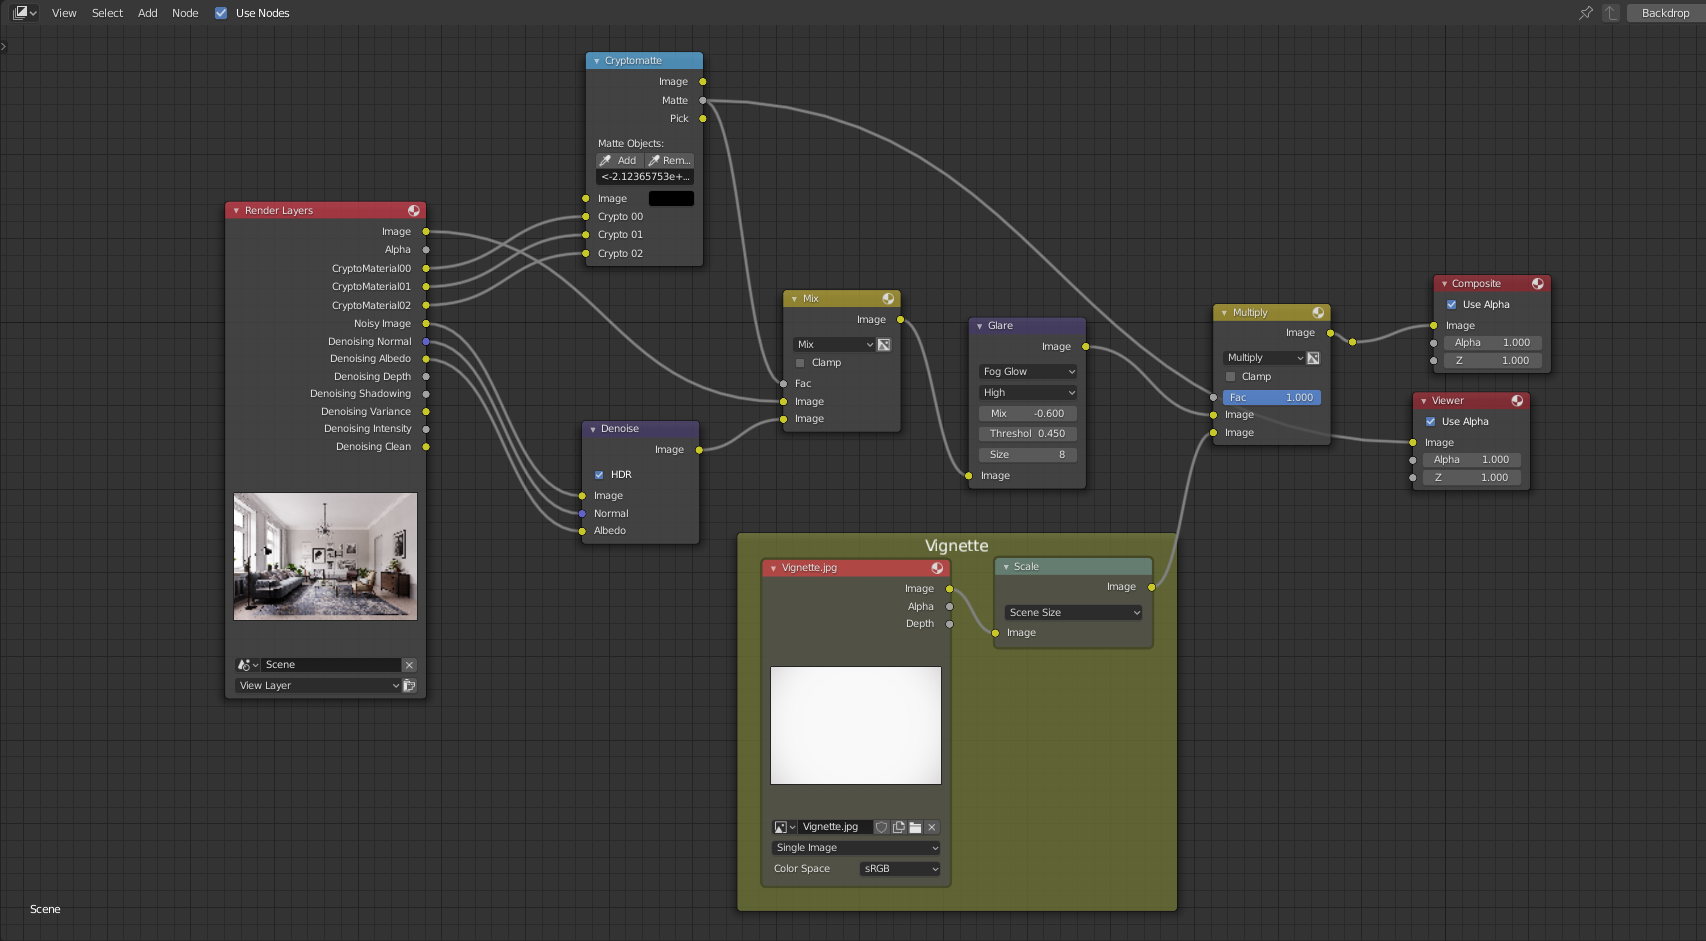
The idea was to mix the sharper result from Cycles’ native denoiser with Intel’s Open Image Denoiser to get noise-free while preserving enough detail with a low render sample.
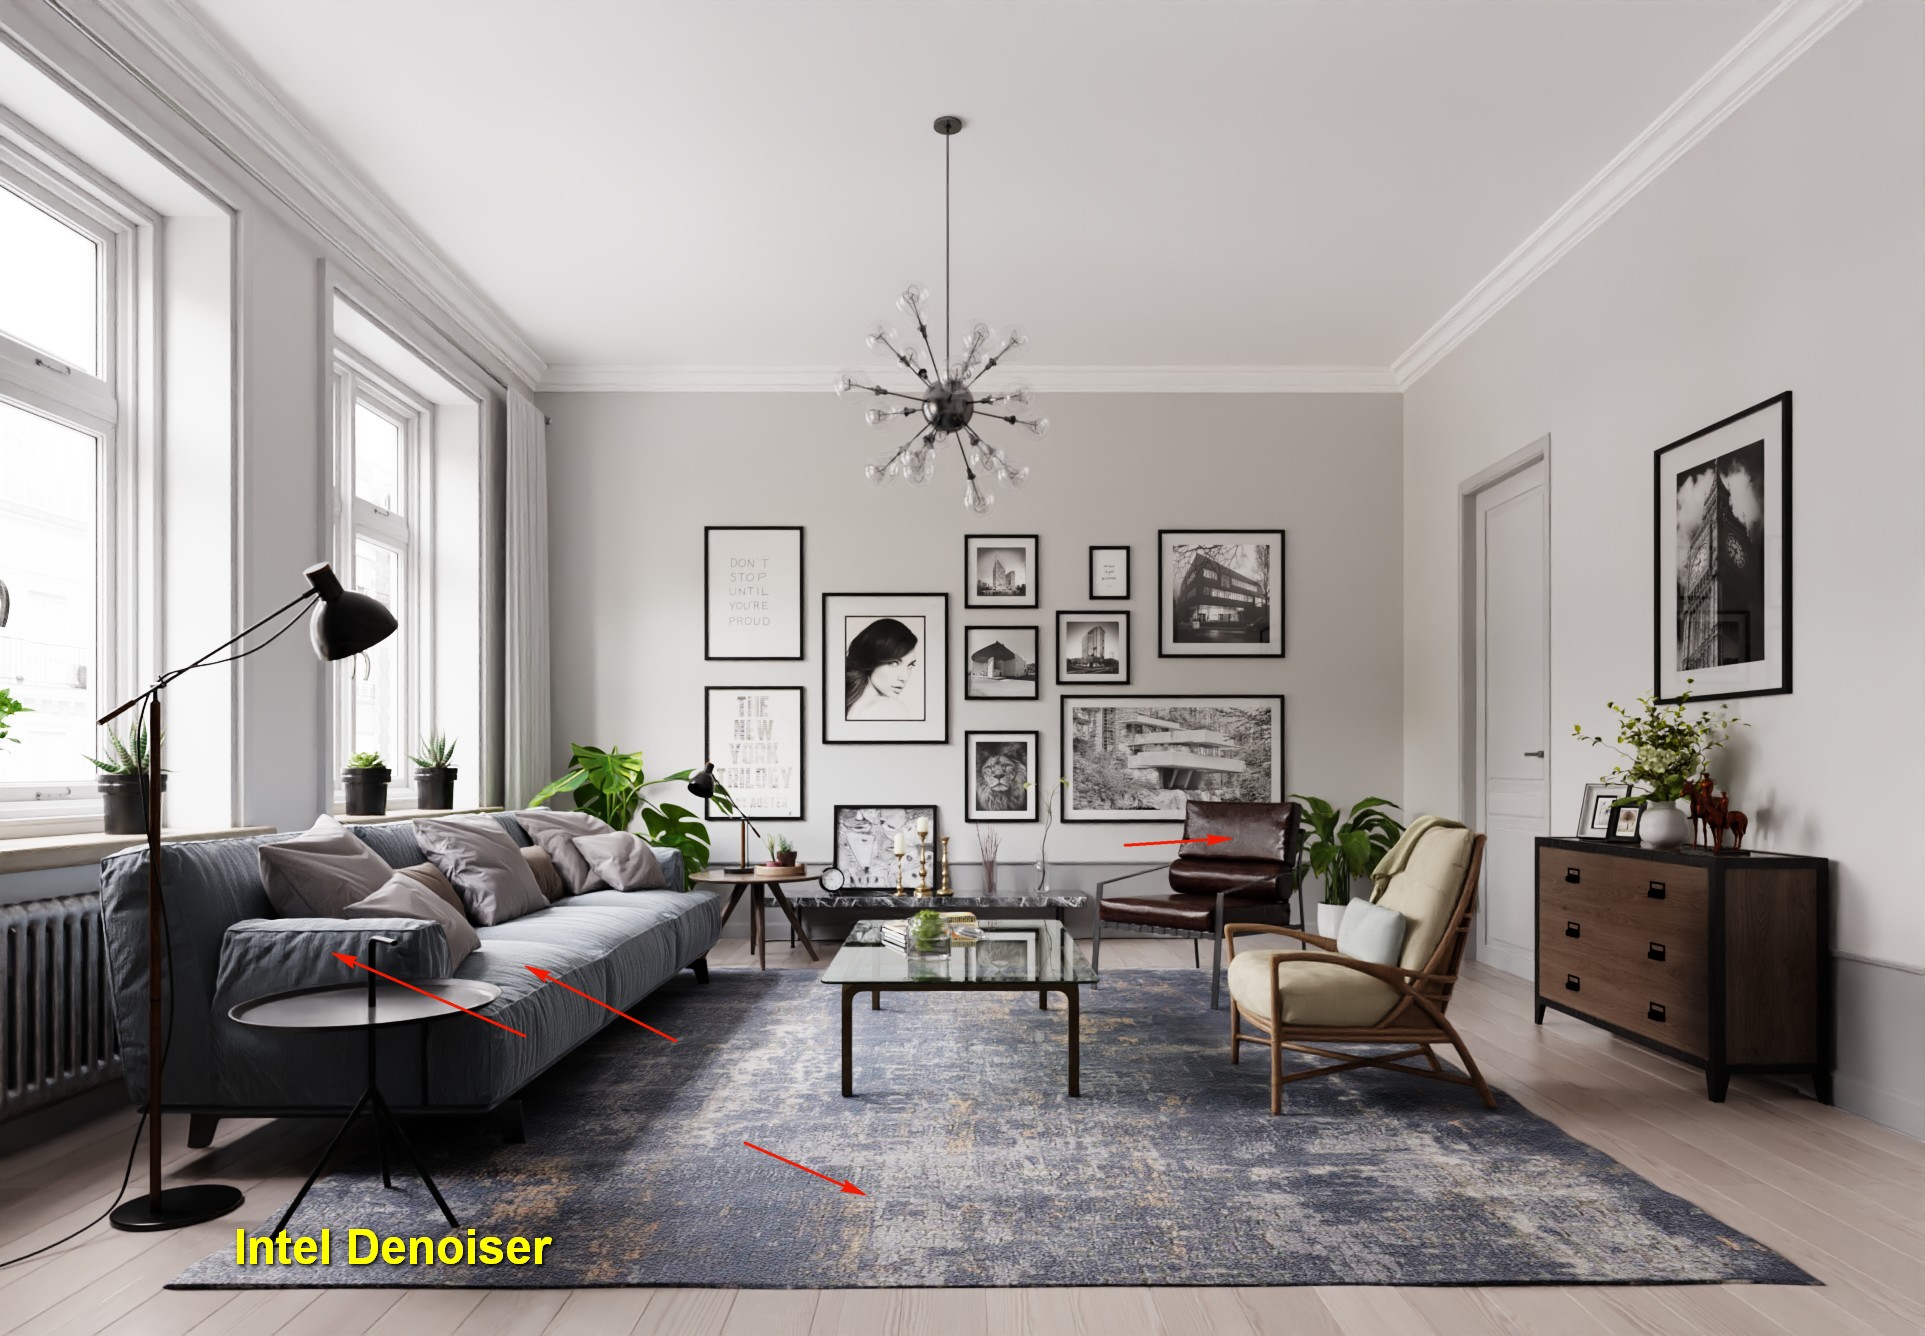
From my experience and tests, Cycles Denoiser generates sharp and detailed results with some blotchiness in the areas that do not get enough light. In contrast, Intel denoiser generates smooth results but at the same time, less detailed texture.
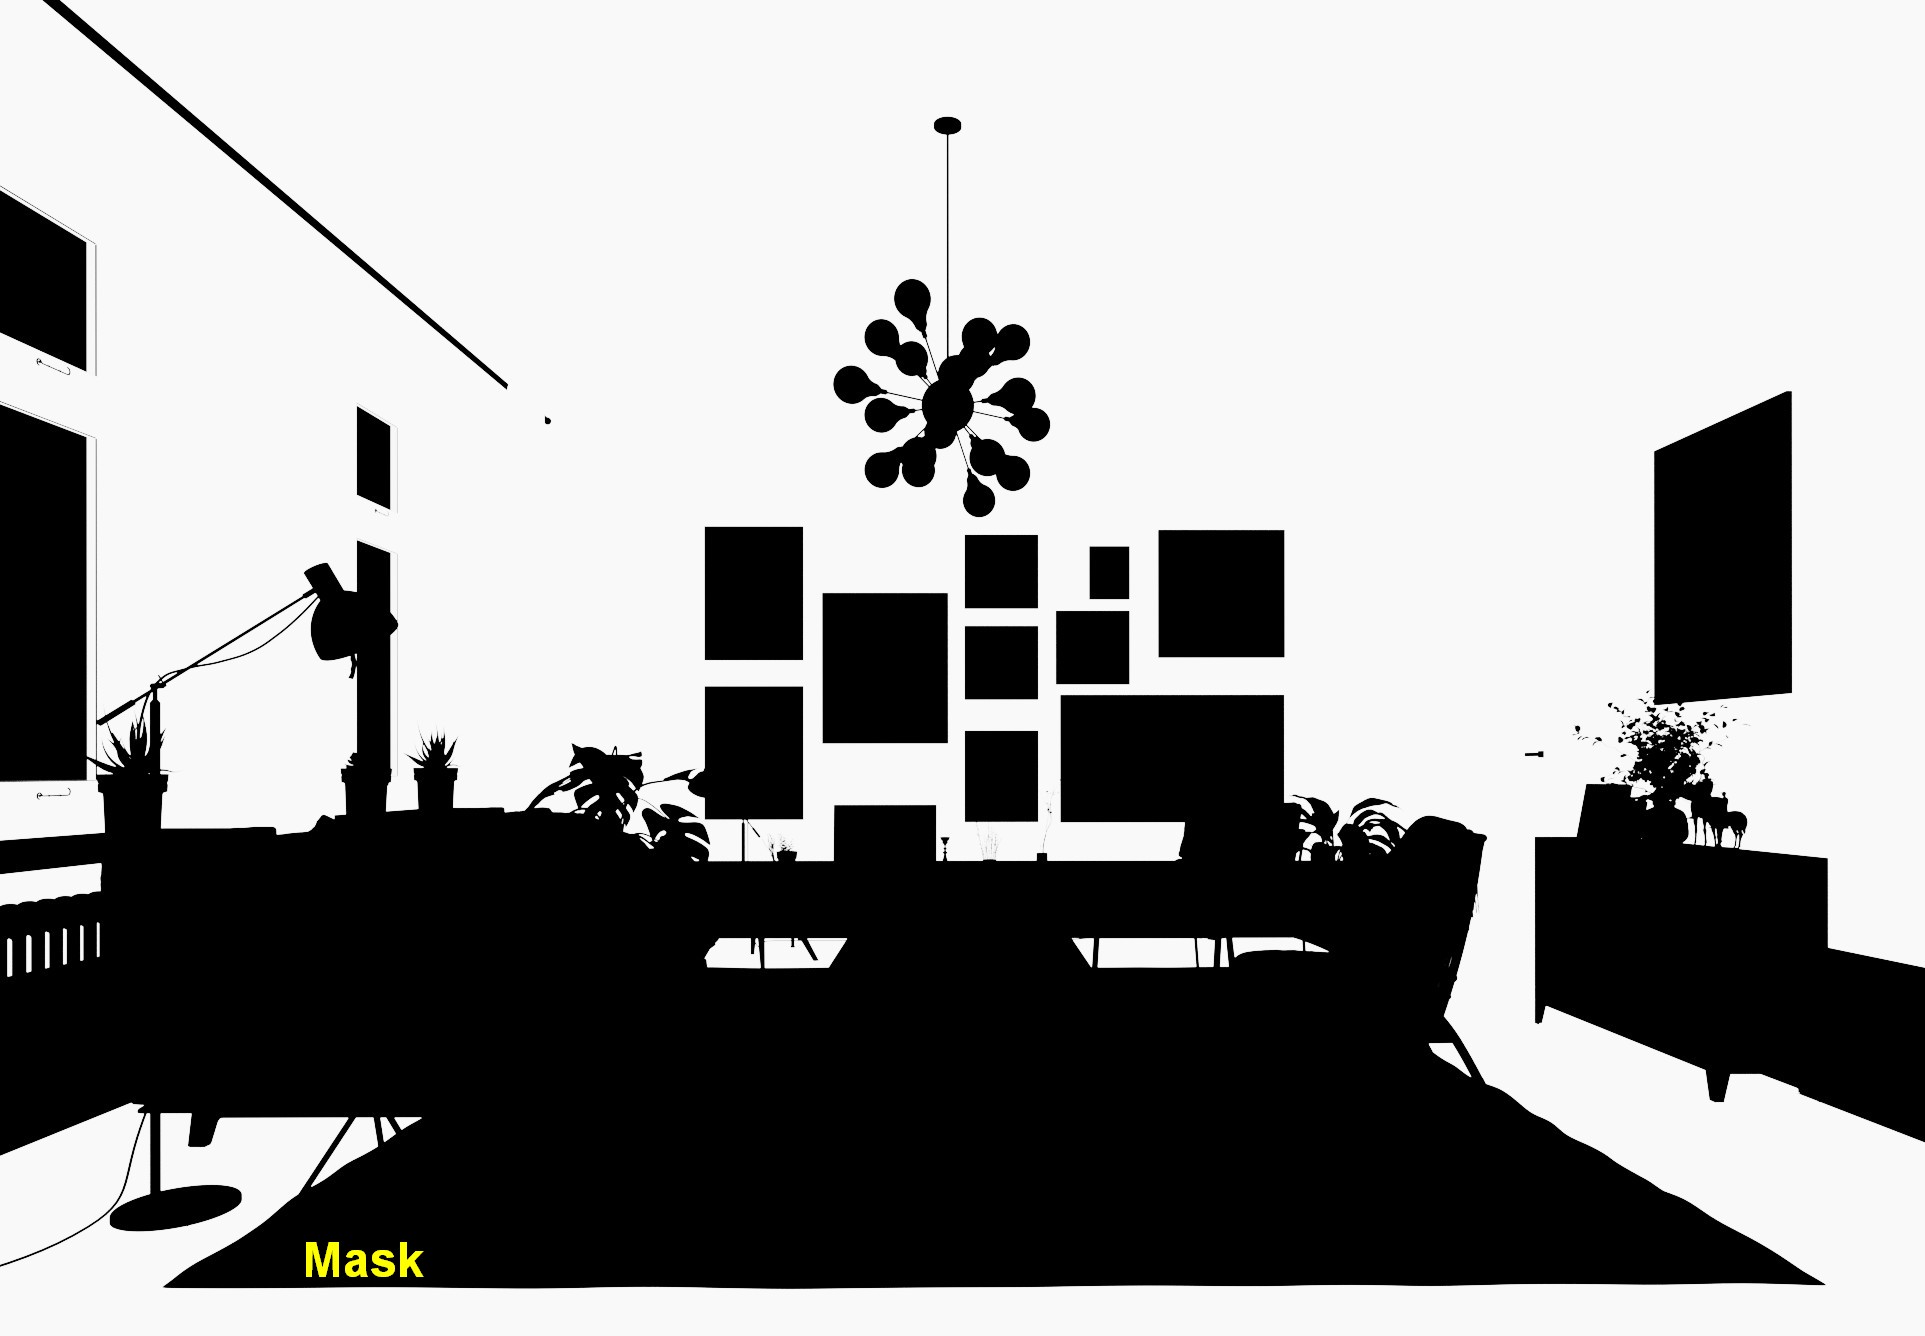
I used Cryptomatte as a mask between two images.
In my case, I picked only the wall, ceiling, door, window, floor, and curtain materials.
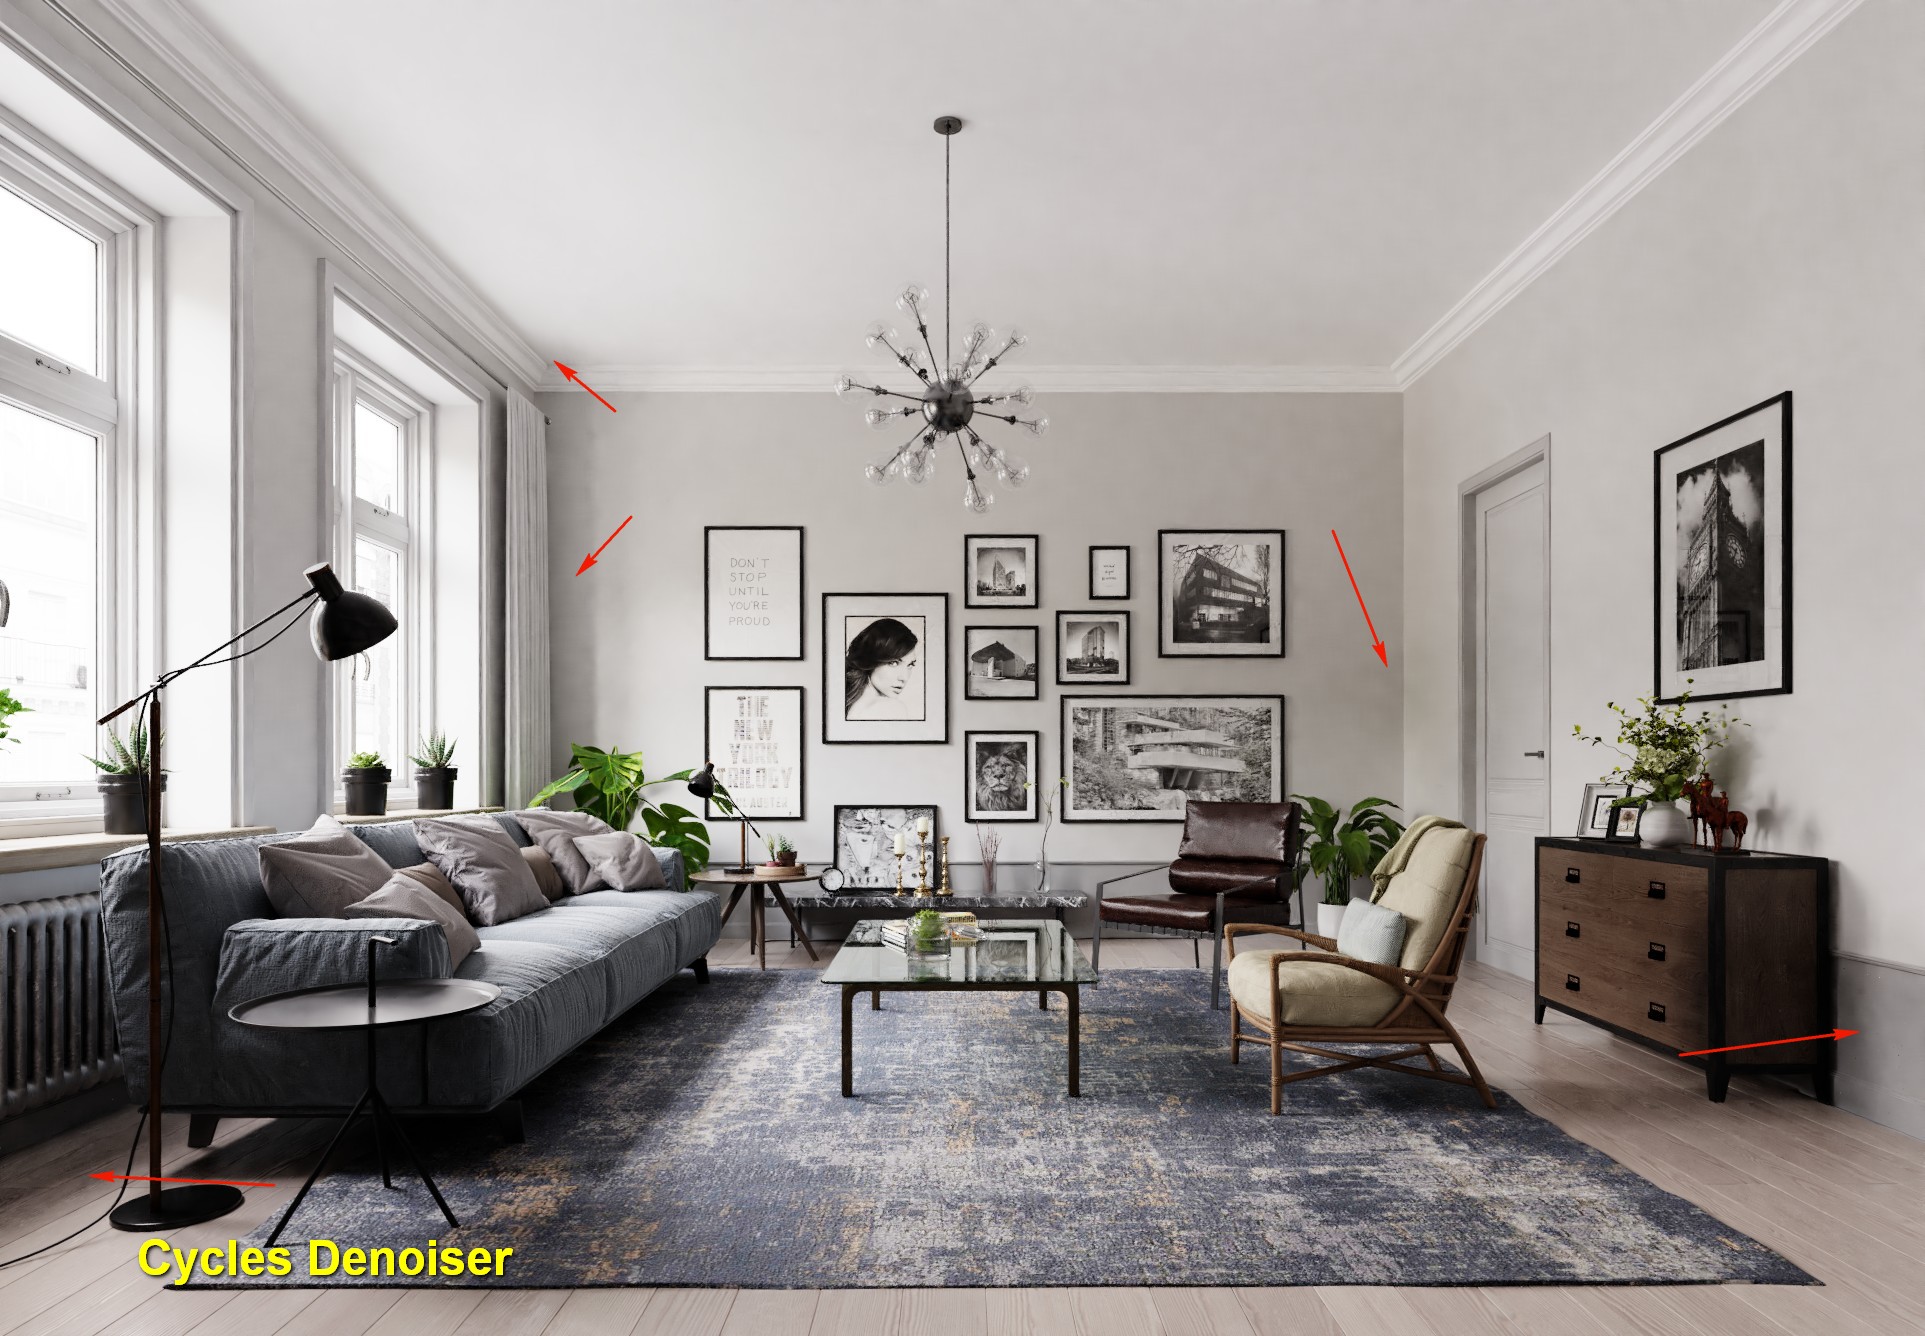
Here is the Cycles Denoiser image. Notice the blotchiness at the corner indicated by arrows.
And here is the Intel one, the details of textures have been wiped out.
Here is the mask image generated from Cryptomatte:
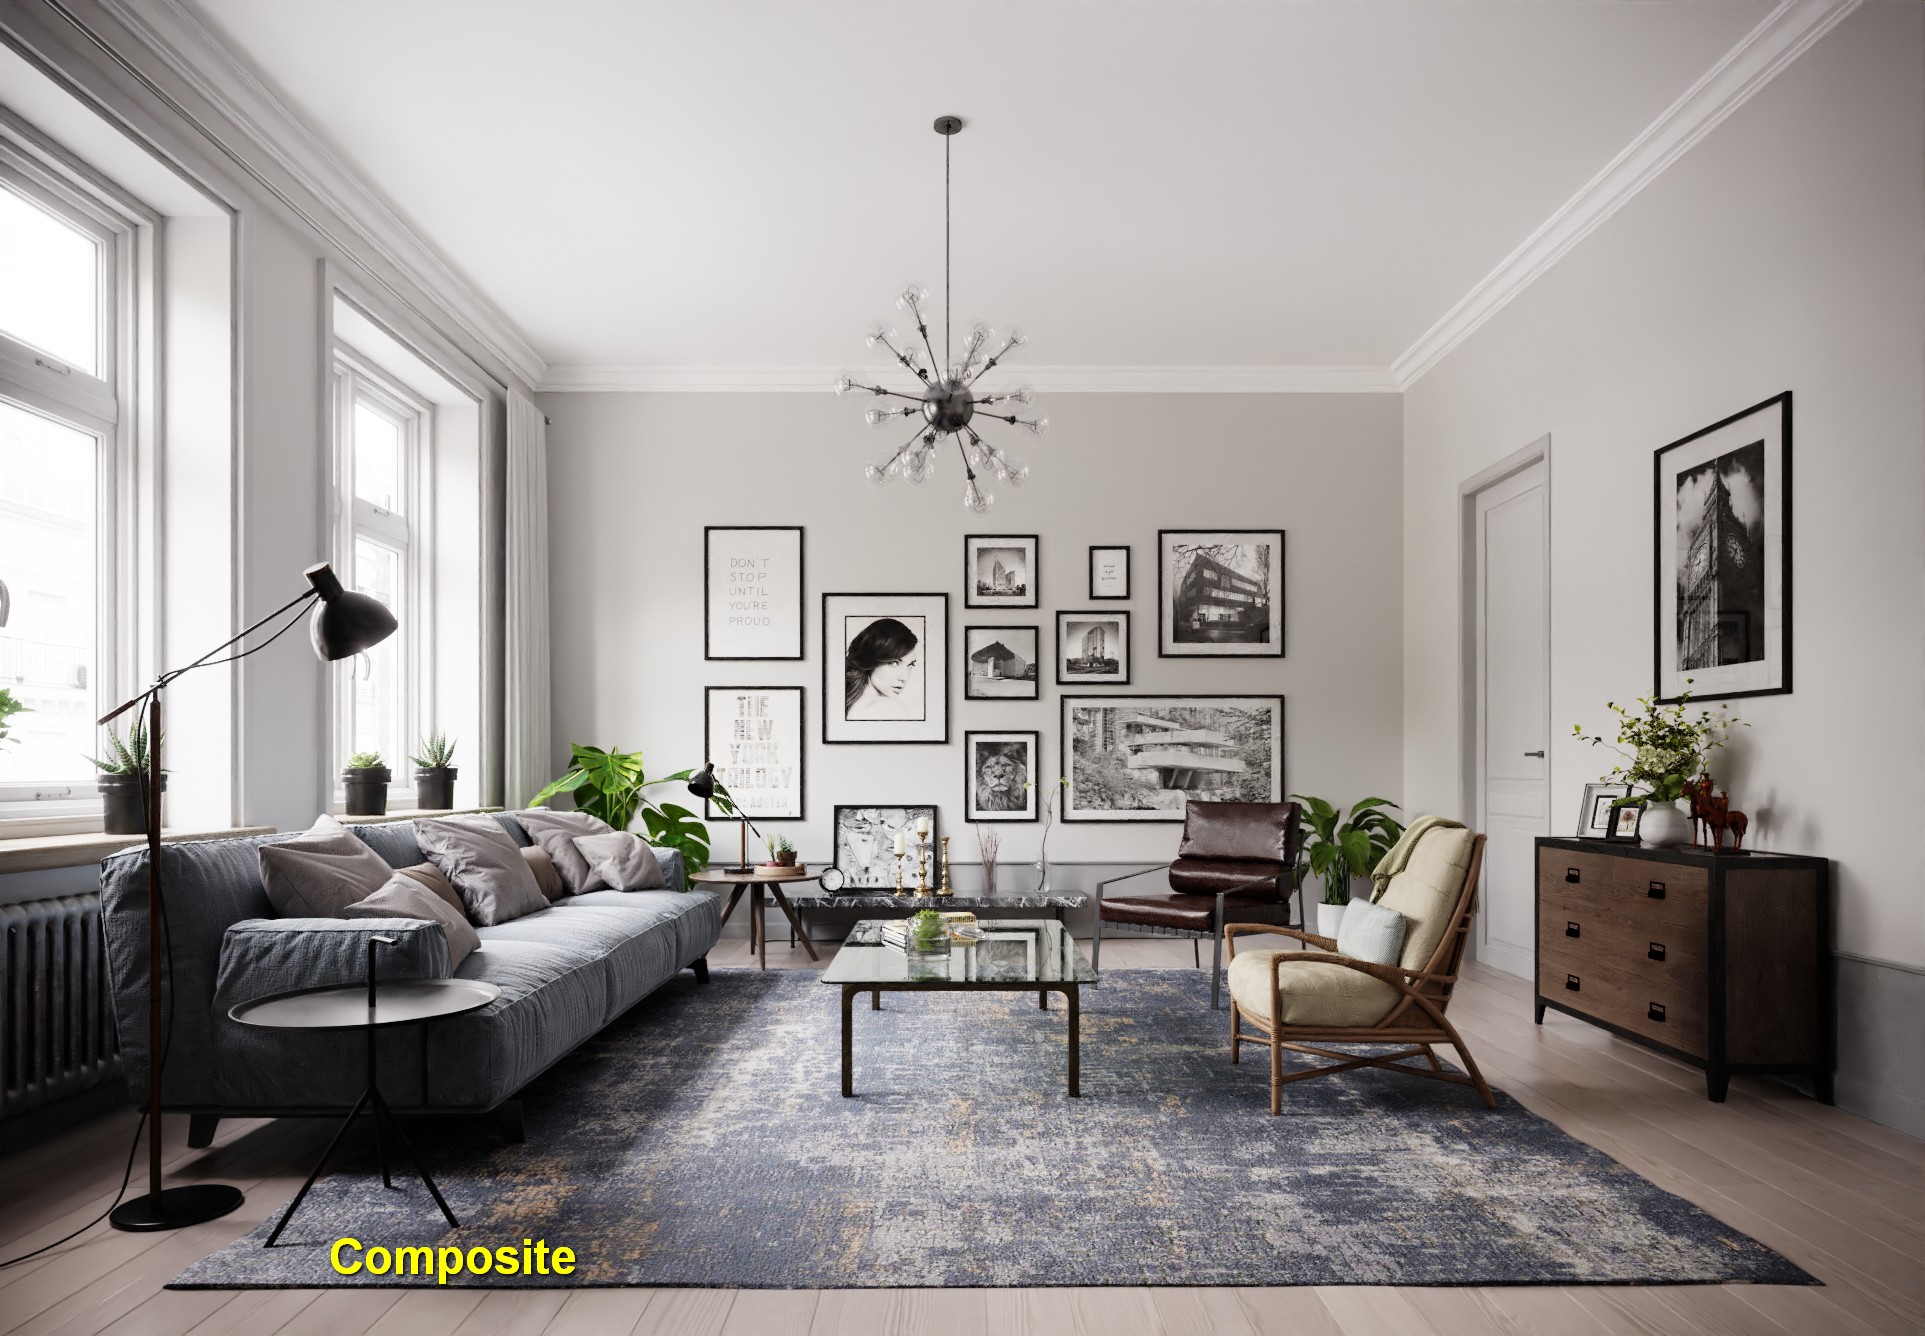
Below is the final composite image. I added glare and vignetting in this composition.
The vignette image is a white image with soft dark corners that I made with Affinity Photo.
I found that it’s better to do vignetting with a 32-bit image in the Compositing Node rather than using a 16-bit in the photo editor software.
Finally, I did a color adjustment to match the reference image.
The left image is the reference.
Here are some final images after I made a few minor adjustments in Affinity Photo to adjust the contrast.
That’s all, if you have any questions, please comment below.
My PC specs :
- Intel i7-6700k CPU
- 32 GB RAM
- RTX 2080Ti graphic card
- Windows 10 OS
- Blender 2.83 alpha
About the Author
 Kristian Budi Santoso, Architect and Architecture Visualizer, Semarang, Indonesia.


the denoiser trick is amazing! It is also my impression that the intel denoiser is too blurry and the cycles one blotchy and Optix denoiser still too buggy.
Awesome work! it looks so darn good!
Amazed about how simple your post work is. Means you have done stunning work with lighting and material setup