
Behind the Scenes: Andy’s Room

Background
Hey folks, I’m Oday Abuzaeed, an Egyptian 3D artist based in Cairo. I started using Blender in 2013 and it has been the main core of my work pipeline ever since. Unlike most Blender users who came from artistic backgrounds, I came from a purely technical one. I hold a degree in computer science and because of Blender, I got to specialize in CGI programming.
And you can check my work on ArtStation.
3D Background
Blender was my first interaction with the 3D realm and I watched—like most of us—tons of Blender tutorials on YouTube and read articles and that’s it. Personally, I believe that you can be a real master in Blender just by watching YouTube; it has tons of excellent content and the community is the best part (unlike any other community related to other 3D softwares), so for me, I got good because of the community.
Inspiration
Andy’s room was a final project for a course I am taking at an art school called Nayzak and they chose Andy’s room as the topic of the final project.
Process
For any project, the stages usually don’t change
References study
Usually, at this stage, you gather many reference images, as many and as clear as you can find. A wise artist once said, “ You are as good an artist as your references.”
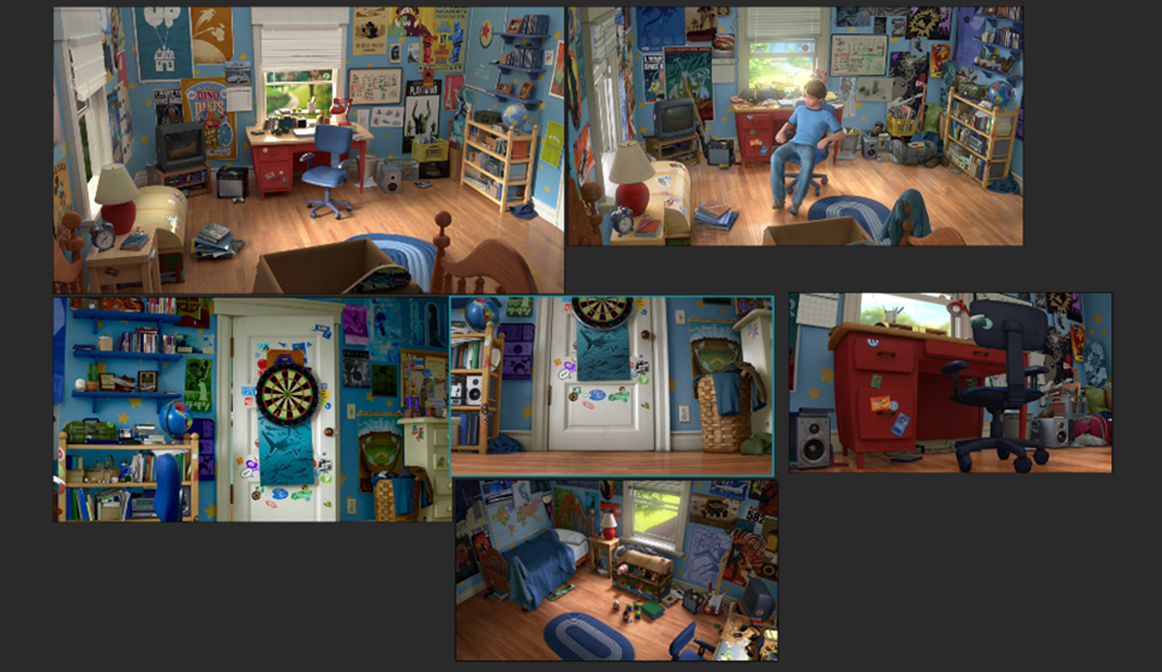
So I mainly gathered my references from the movie Toy Story 4.
Blockout
Unfortunately, most artists skip this stage and don’t know how crucial it is for the final result. In this stage, you start to place simple geometry or cubes to layout your scene, which helps to give a sense of the scale for each model and its relation with the surrounding environment.

Modeling
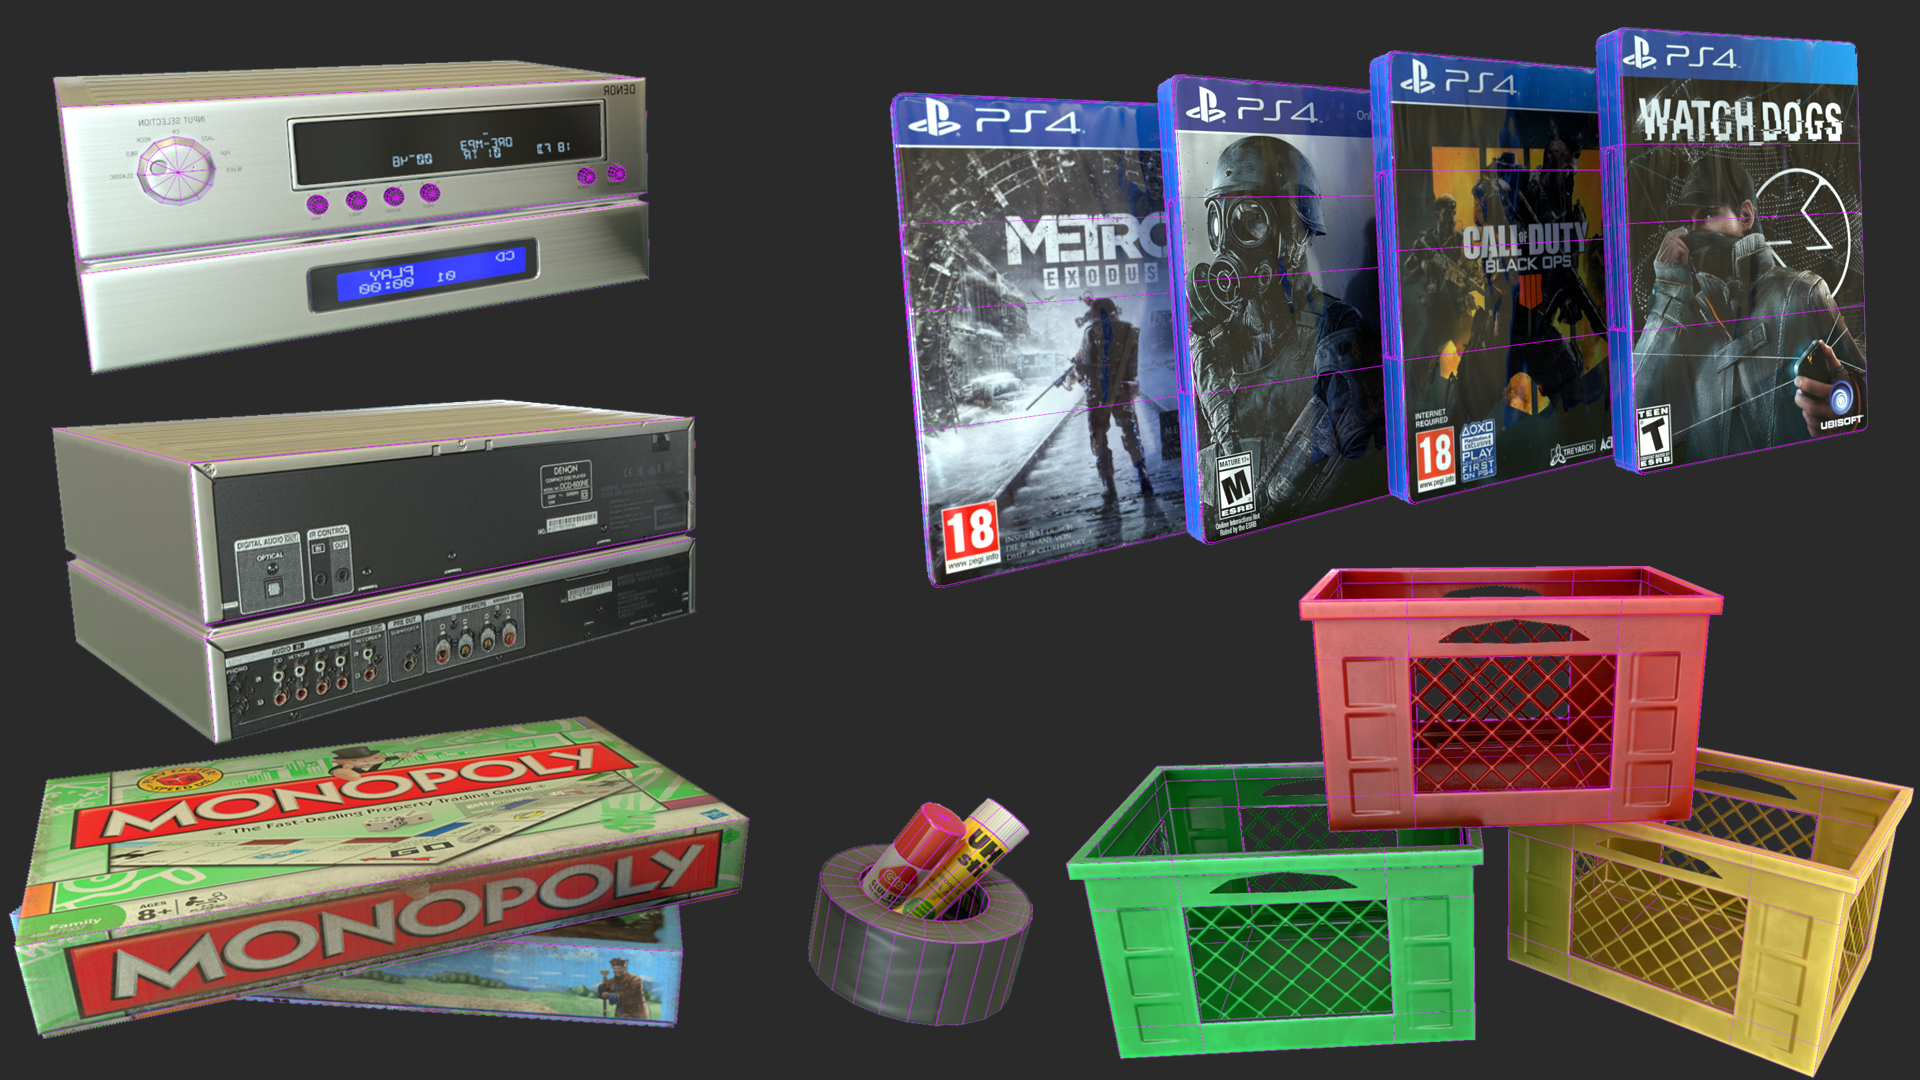
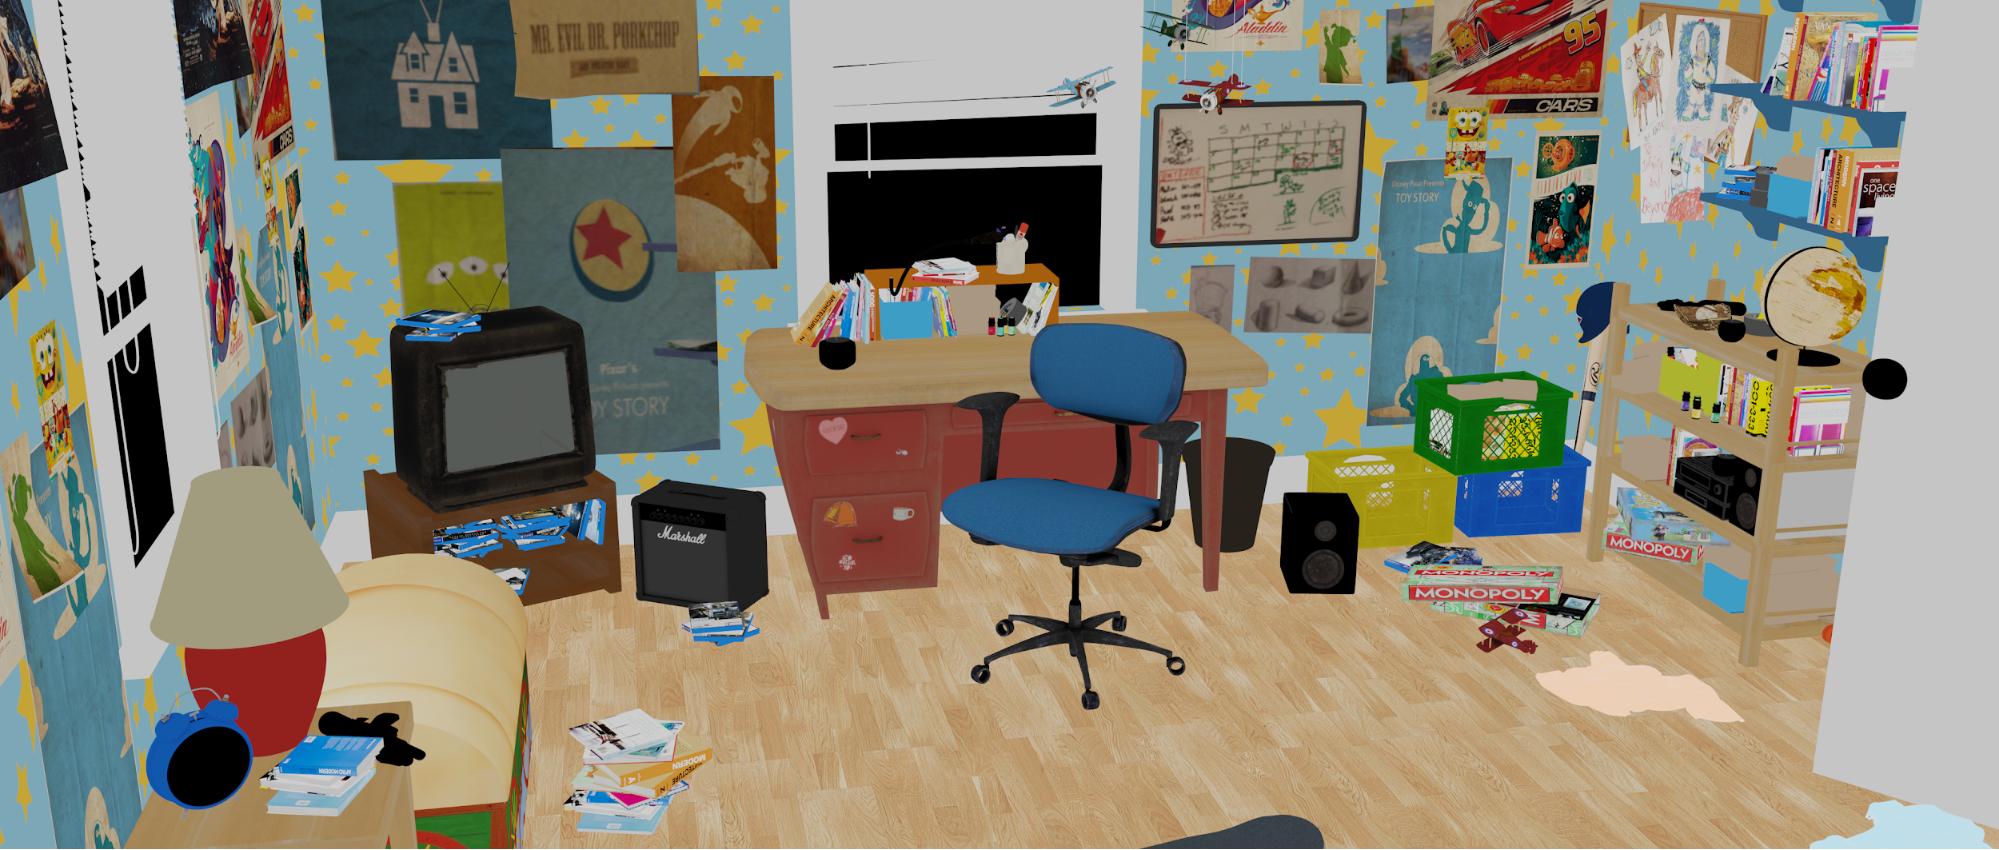
Now the fun part starts. I just took each cube or simple geometry and modeled it to give it the details and the shapes based on the references.

Texturing
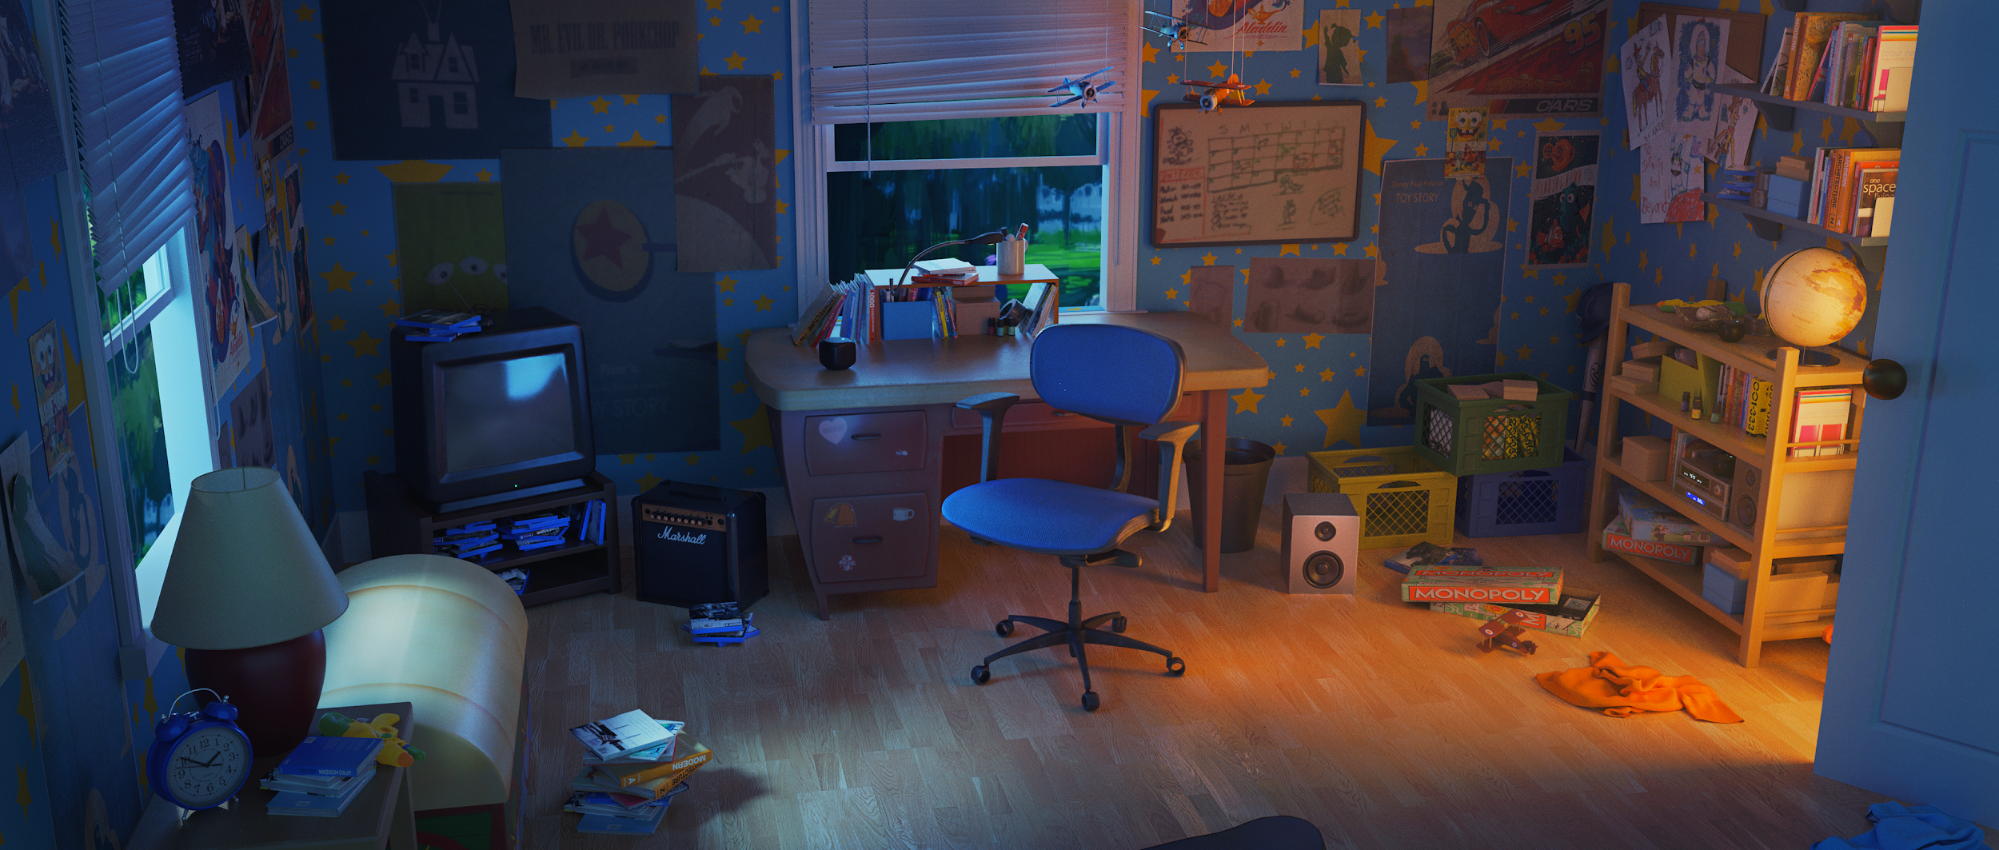
Now the real fun part for me! I really enjoy the texturing process. I usually use Substance Suite to texture my assets. For this scene, I leaned heavily on Substance Painter for most of the texturing process. I textured every asset separately because it helped me focus on detailing and gave a better result. This approach also puts less pressure on my machine.
And, if you struggle with Substance, you can check out my tutorial for texturing in Substance Painter.
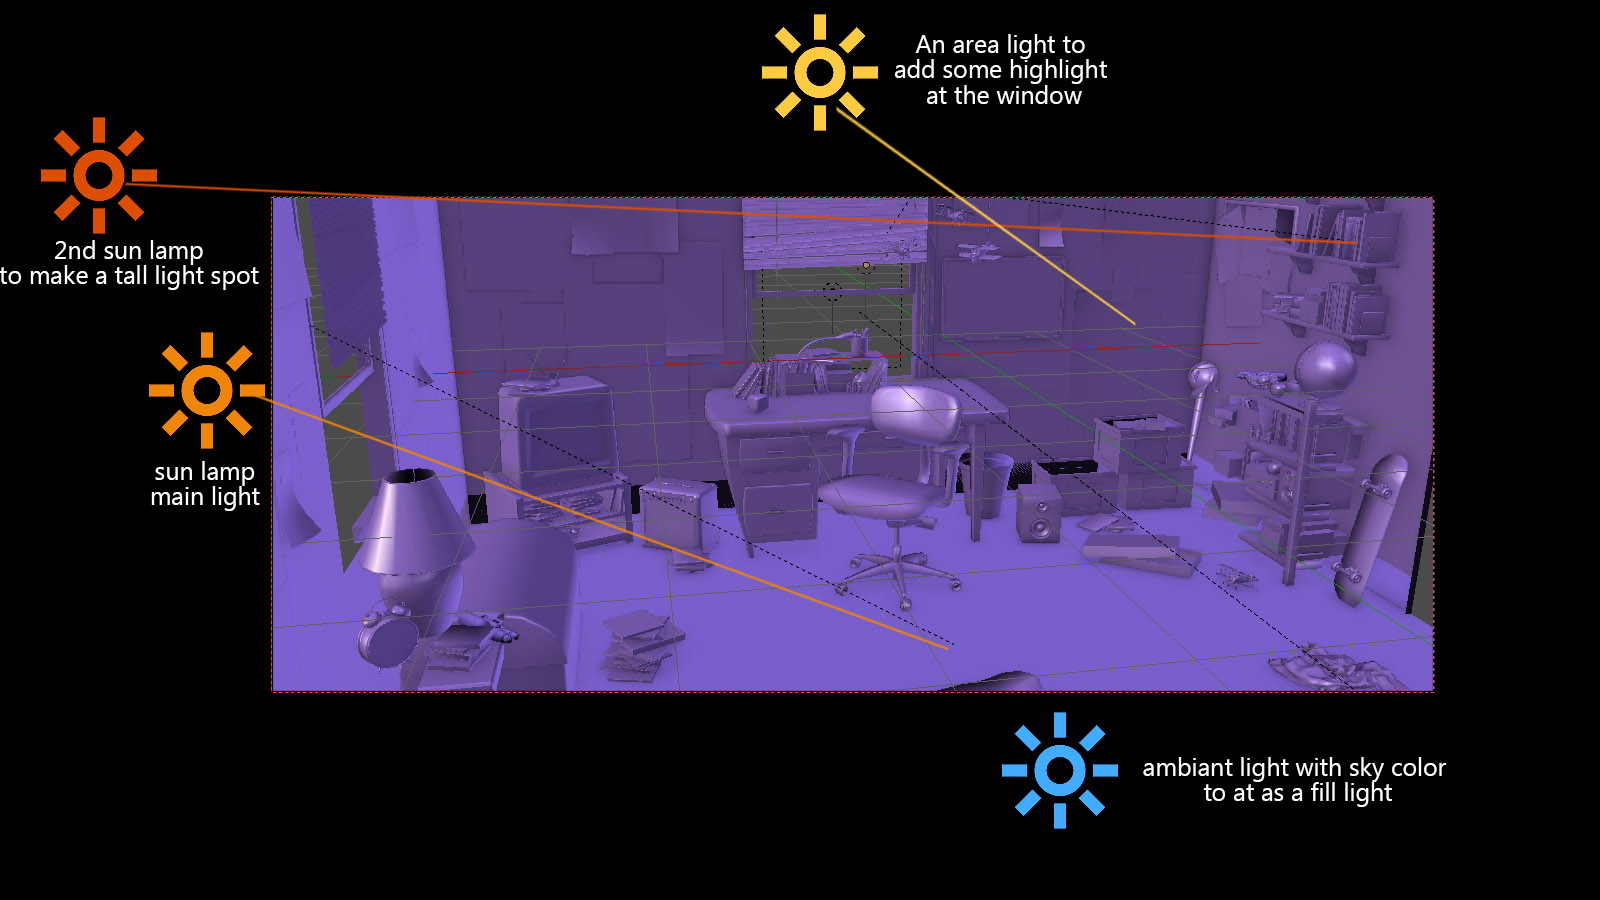
Lighting
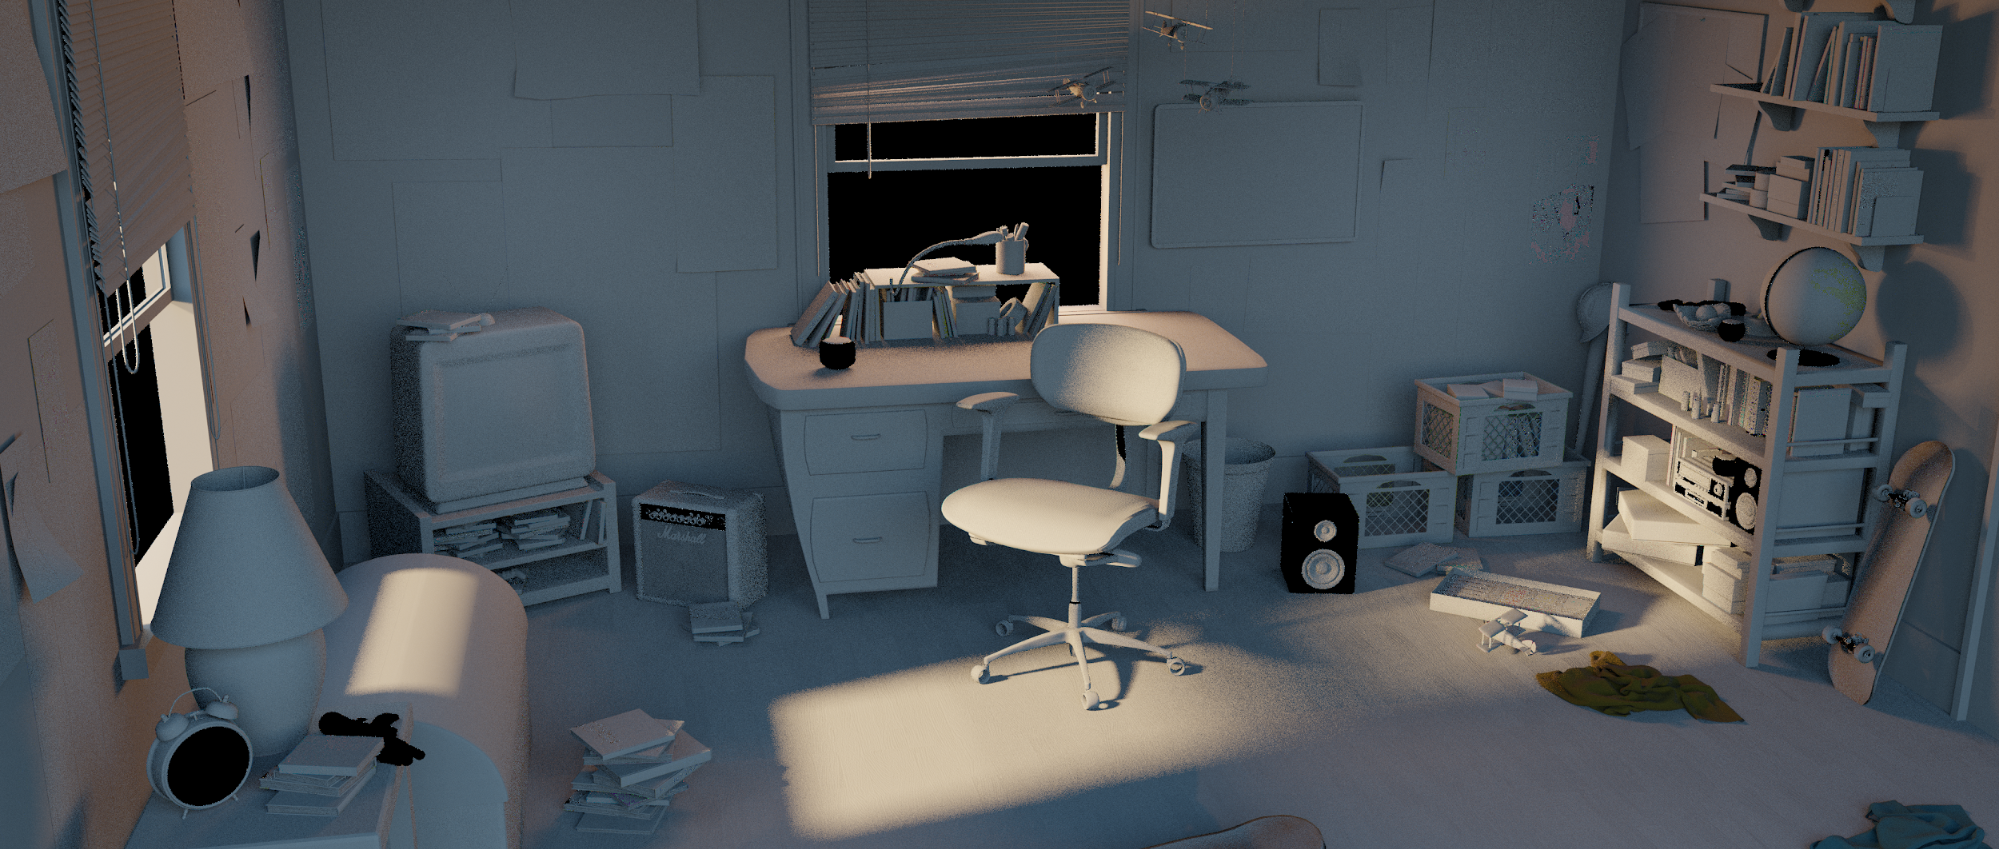
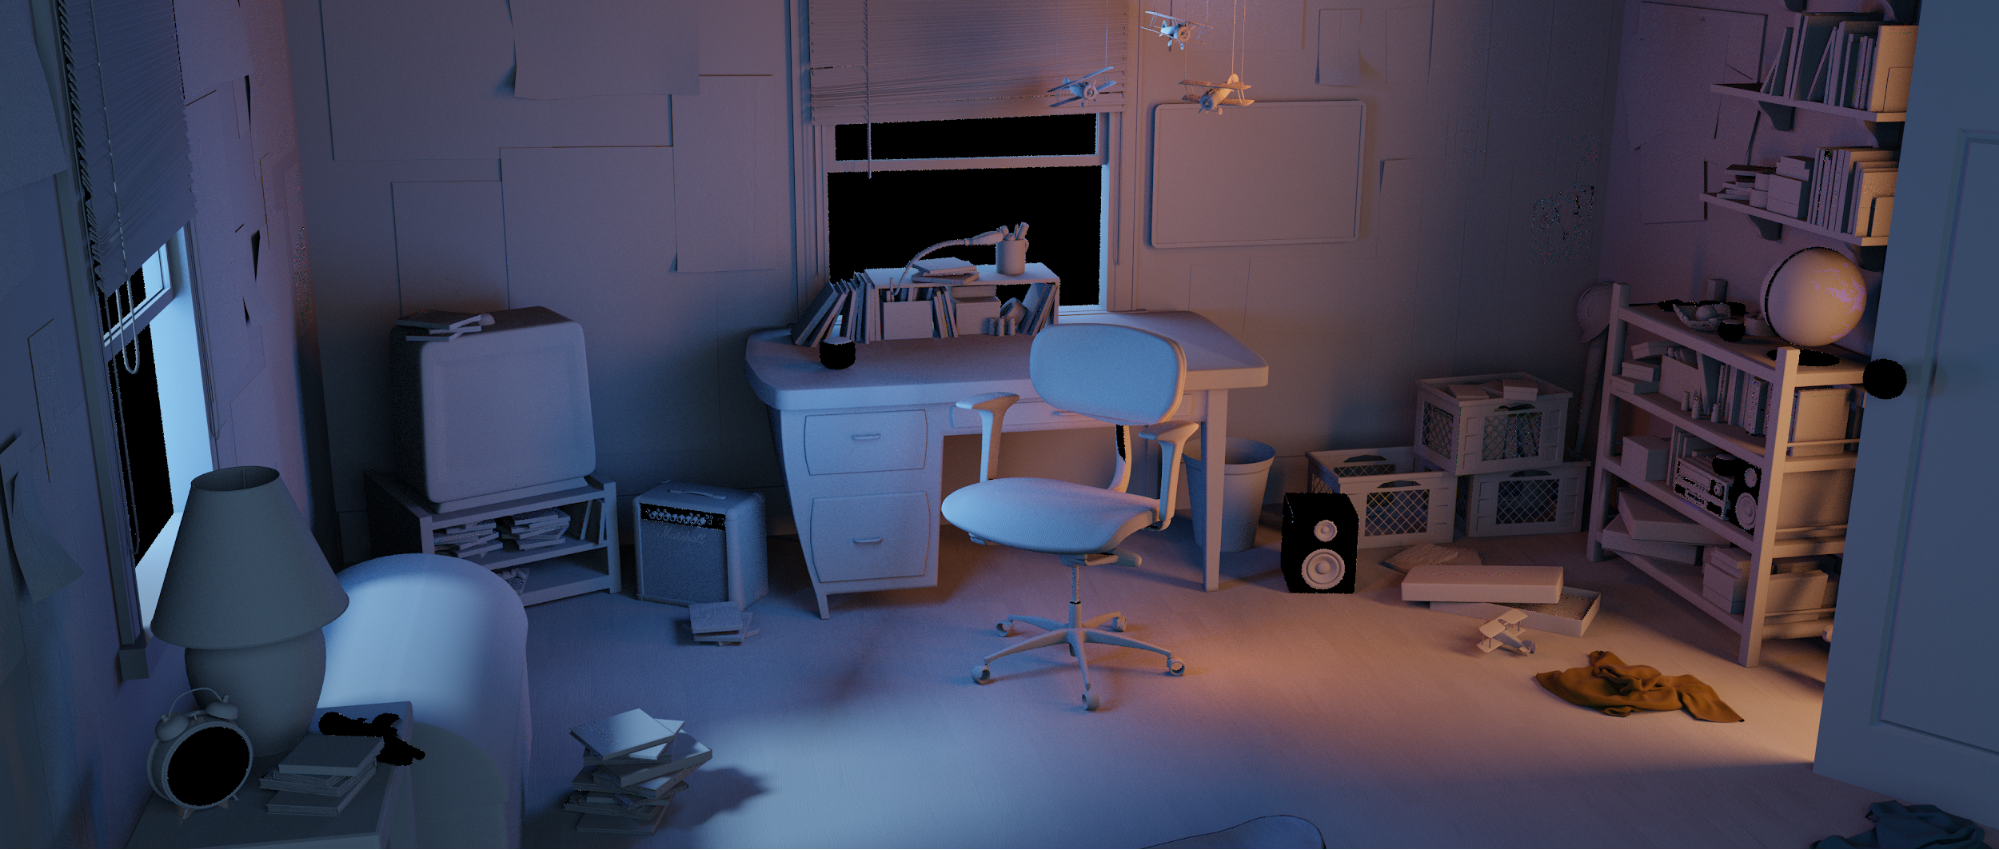
Now the real deal is here. Lighting is solely responsible for boosting an image to a whole new level. First, I searched for a light reference and then gave the whole scene a mid-white clay material so I could easily see the effect of the light.
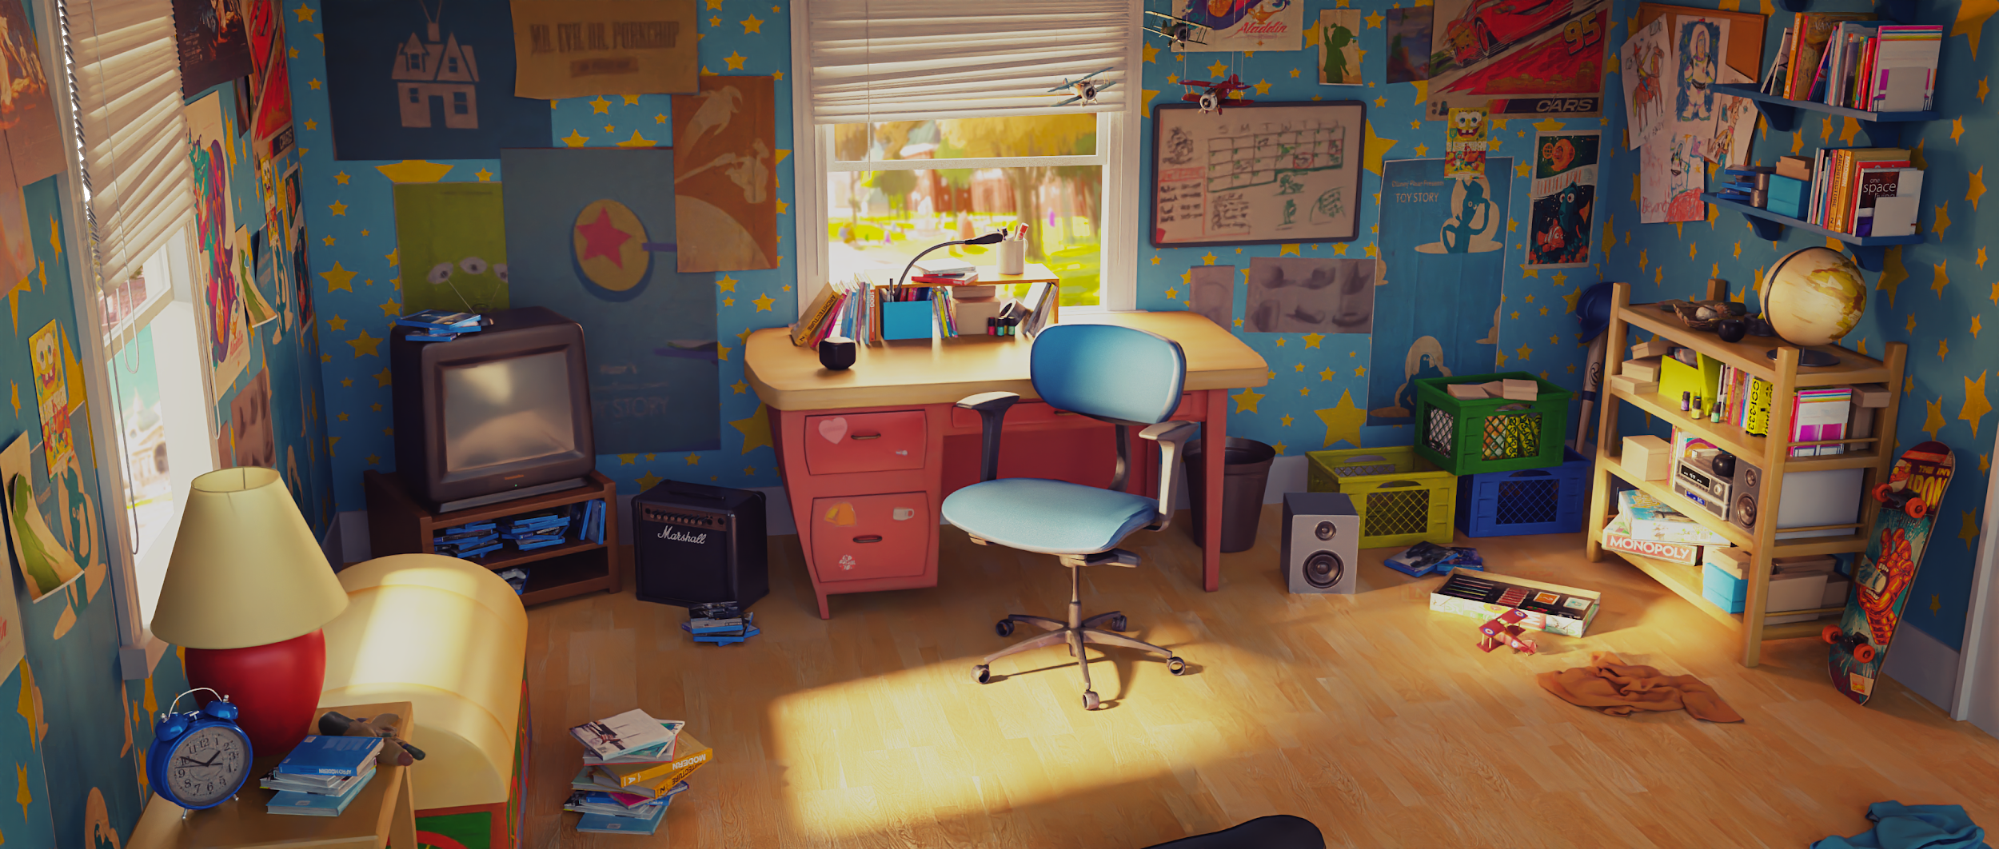
Post-Processing
Now it was time for the final touches such as adding blooms, tone mapping, and adding an outdoor environment beyond the windows. For this step, I used Blender compositing and Photoshop.
And that’s it, folks! Hope you learned a thing or two.
About the Author
 Oday Aubzaeed, 3D environment artist who is known to be a full-time geek and an open-source enthusiast.
Link
- Andy’s Room on Blender Artists


