Behind the Scenes: Nike Shoe Model
I’m Jakob Scheidt, a 17-year-old 3D artist from Germany. I’ve been using Blender for 6 years now. I’m currently focusing on modeling and texturing game-ready models.
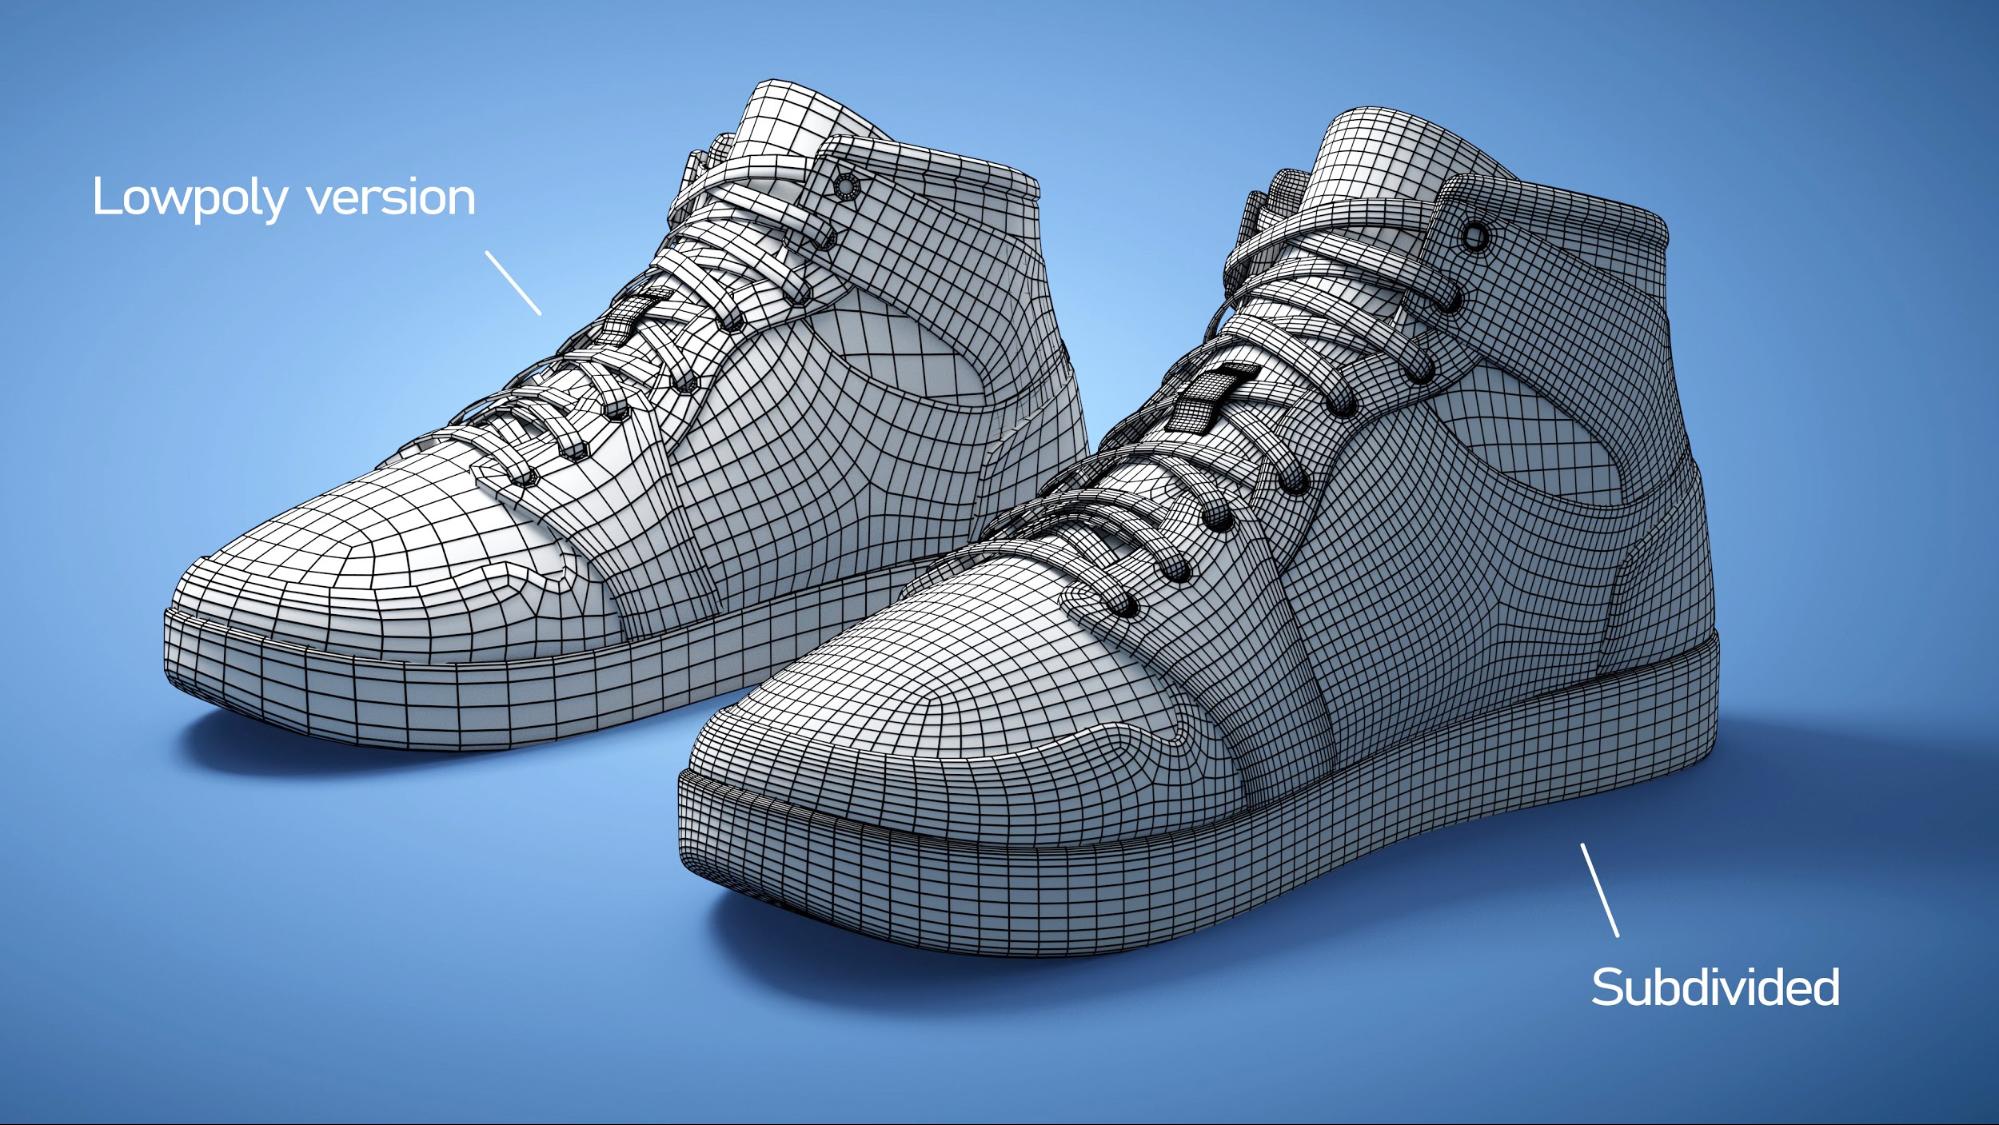
The goal for this project was to create a low-poly sneaker model with fewer than 10K faces, but with a realistic appearance.
Tools Used
- Blender 2.81
- Substance Painter
- Wacom Intuos tablet
Preparation
The first step was collecting reference images from different perspectives and photos of all the important details that should be included.
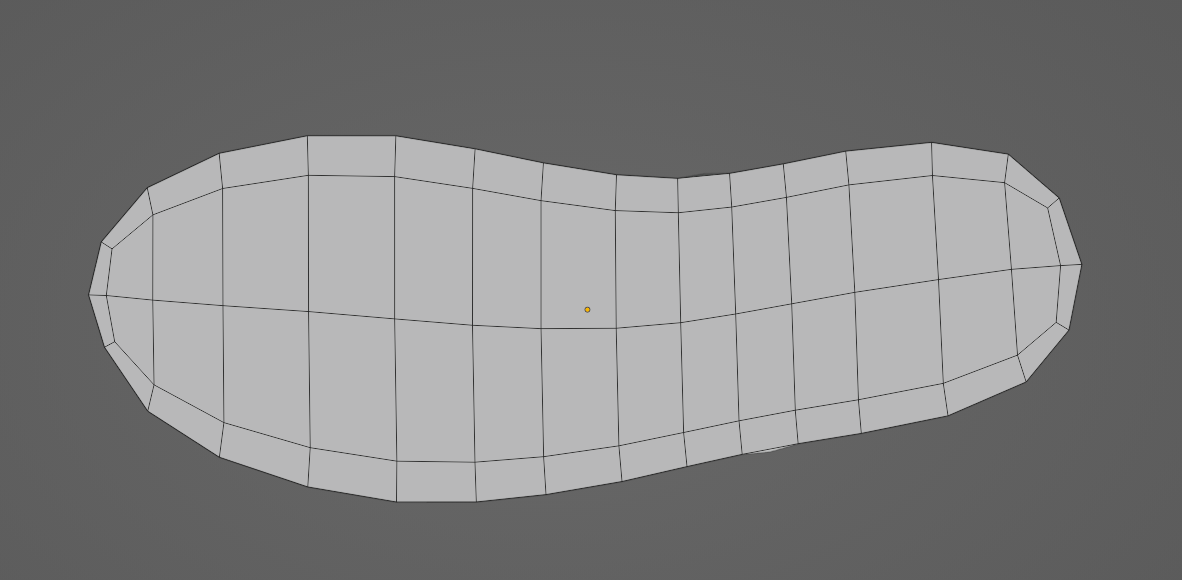
Step 1 – Basic Volumes
I added the first image of the sole and modeled the basic shape of the bottom of the shoe.

With an image of the side view, I adjusted the curvature of the sole and extruded the shape to create the base of the shoe.
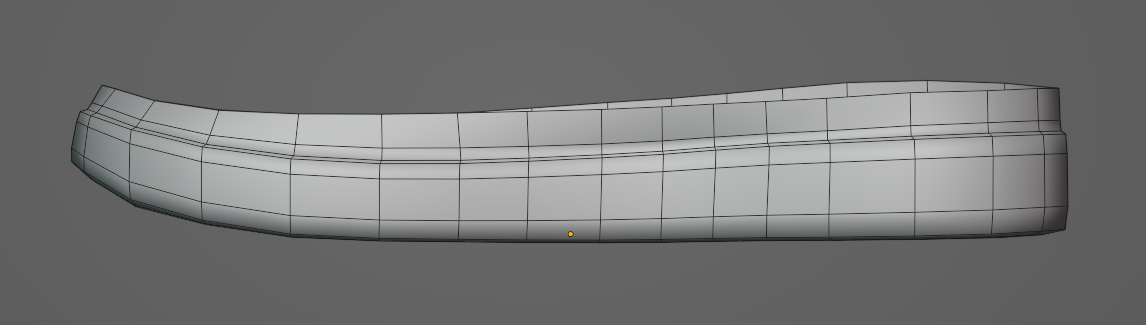
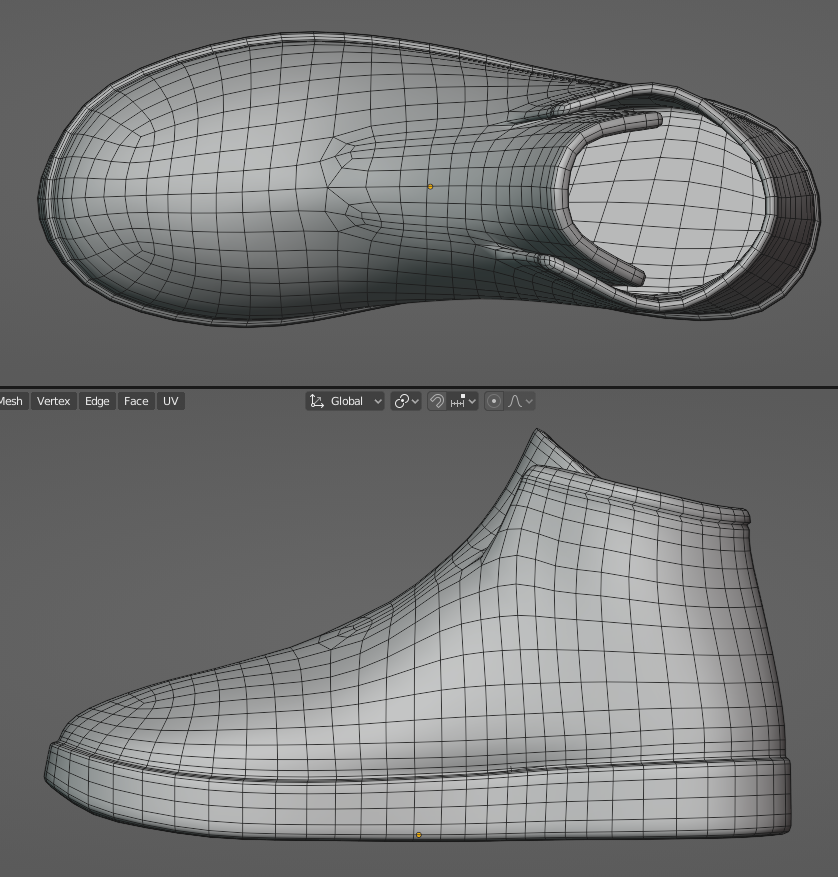
Then, working without the subdivision surface modifier, I extruded more loops to create the main volume of the shoe. It’s very important to use all background images for every loop, to get the subtle curves of the surface. Another difficulty is getting the perfect asymmetry of the shoe that’s not only present in the shape of the sole. Especially when looking at shoes from the top, you can observe the asymmetry of the loops.
Step 2 – Layers of Fabric
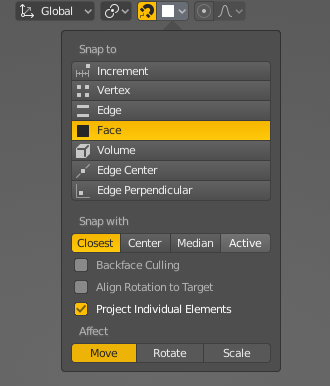
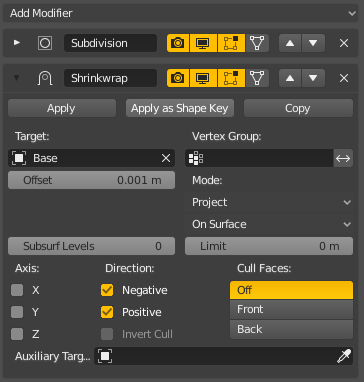
One of the most time-consuming steps was creating the different overlapping layers of stitched fabric. The basic workflow was to use planes with a shrinkwrap modifier to shrink the faces to the basic volume of the shoe. It helps to turn face snapping on for that step.
Then I offset the different parts slightly and inserted small details like the holes for the shoelaces.
Shrinkwrap setup:
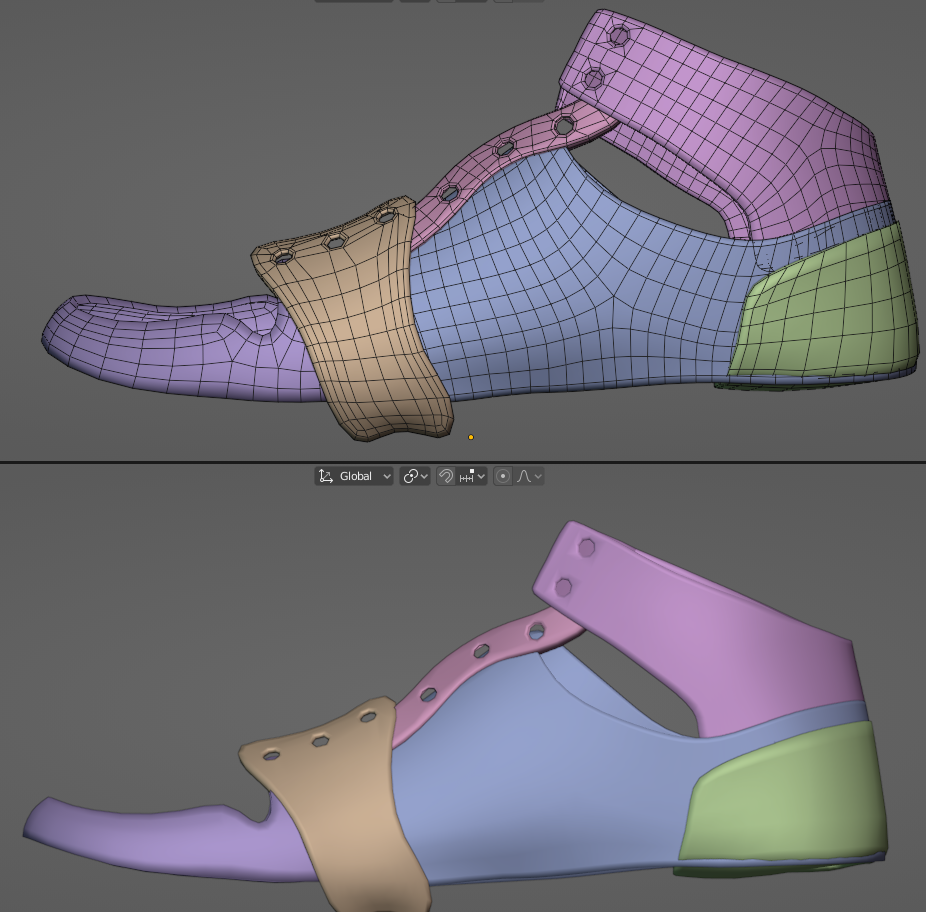
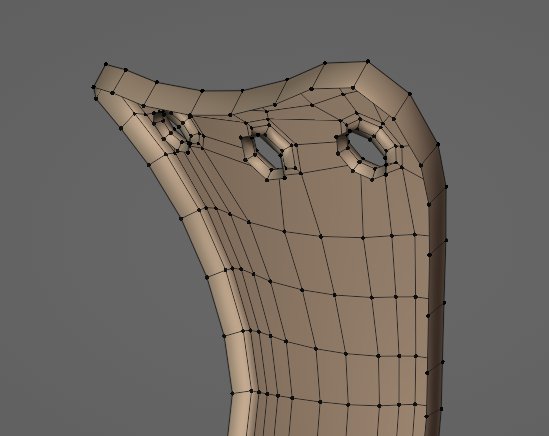
I also deleted the interior faces of the layers, to make unwrapping easier and avoid unnecessary topology.
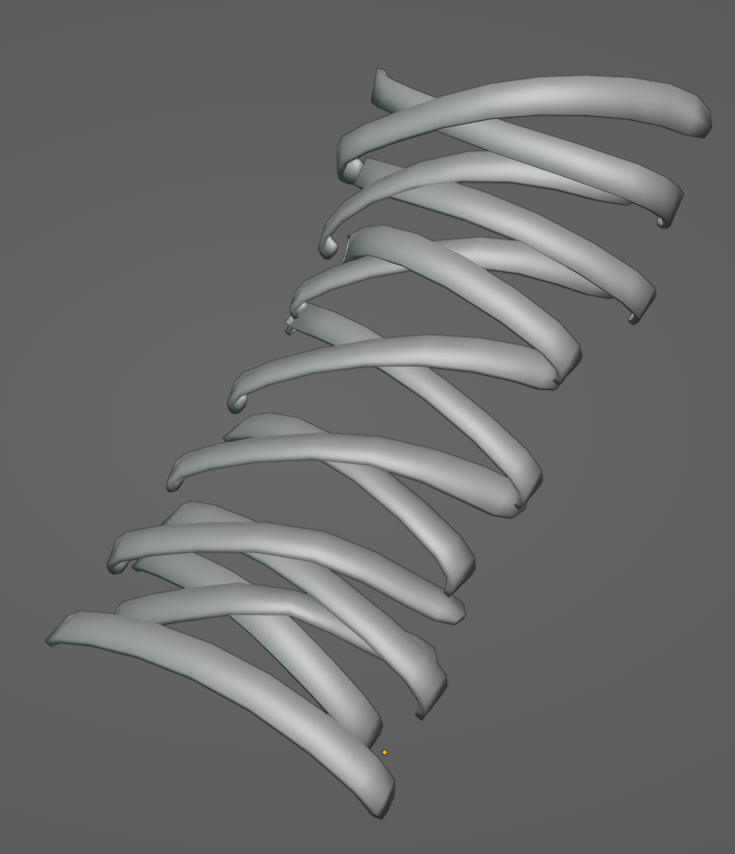
Step 3 – Shoelaces
For the shoelaces, I started using planes and added horizontal and vertical loops to achieve the right flow.
Step 4 – Details
The last step of modeling was adding small details. The challenge was to keep the polycount low, which is why I used very low-poly primitives.

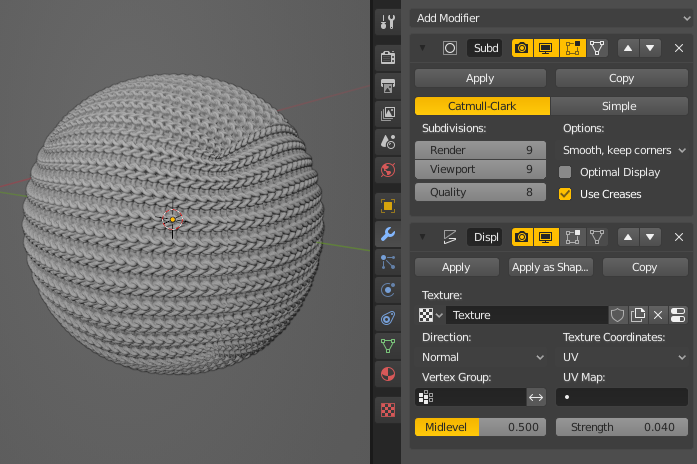
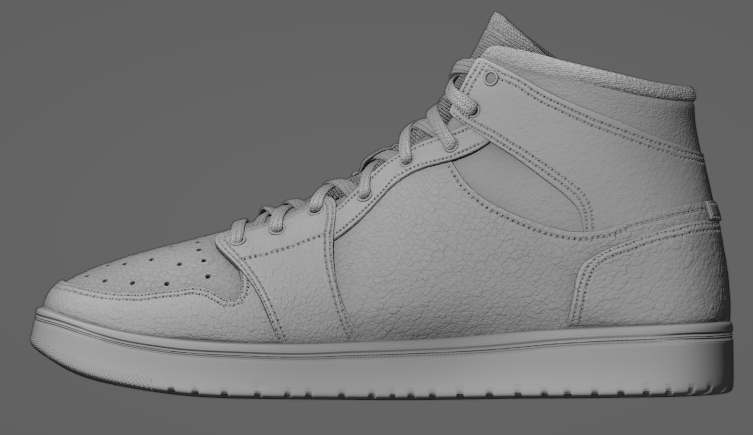
Step 5 – High detail sculpt
For texturing it’s always best to have a detailed sculpt from which to bake the normals, AO, etc. My sculpt had 17 million polygons at the end, but the result was a realistic texture.
I subdivided the low-poly mesh I had modeled and used various techniques to achieve detailed textures.
- Alphas: Black/white images applied to the sculpt brush to sculpt
- Displacement modifiers with height textures (leather, fabric, etc.)
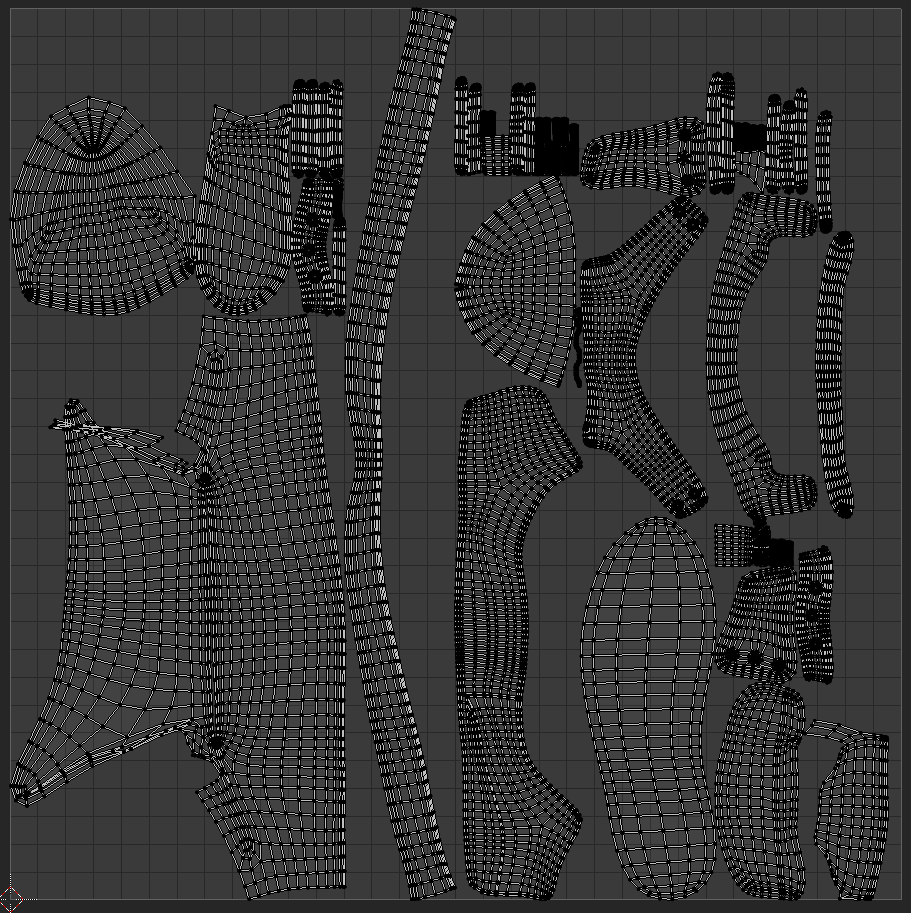
Step 6 – UVs
I tried to add the seams to areas that are hidden by other fabric layers. Most of the fabric pieces didn’t need any seams though, so I removed the faces of the side that isn’t visible.
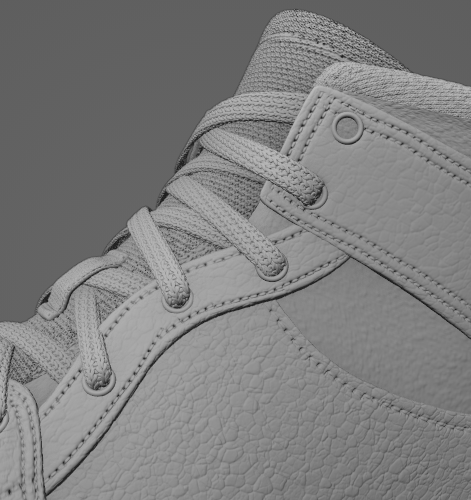
Step 7 – Texturing
I used the high-poly model to bake textures for the low-poly sneaker (Normal, AO, curvature, thickness). I used Blender vertex painting to create an ID map to be able to apply different materials to specific parts in Substance Painter.

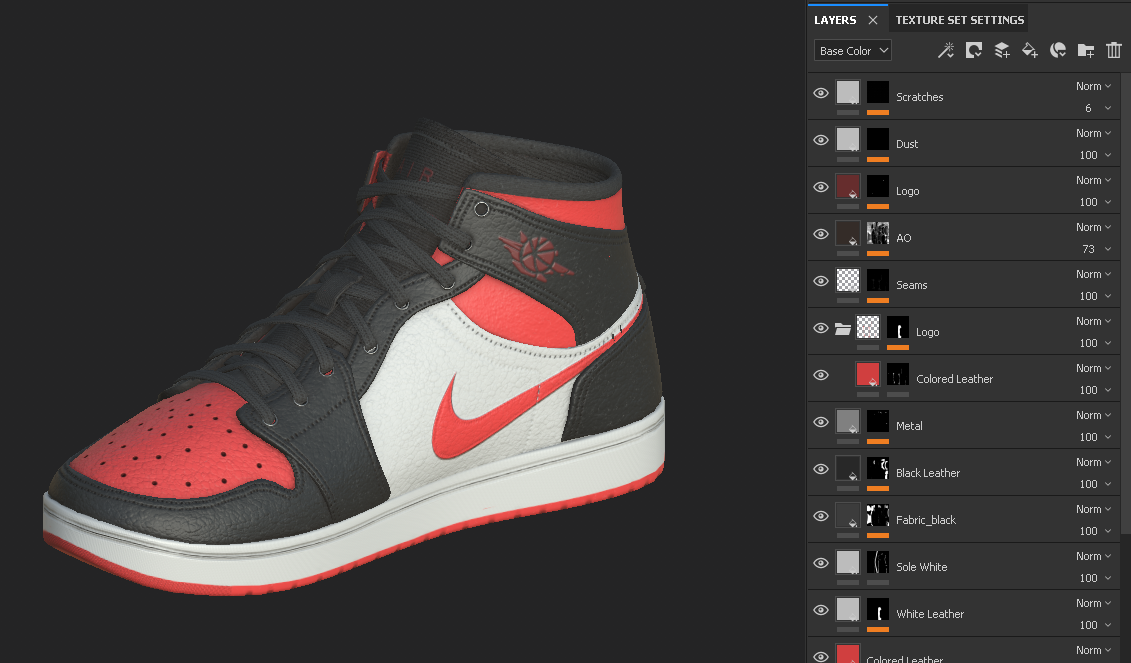
Using the ID map, I added different colors and roughness variations in Substance Painter. I exported the 4K PBR maps for use in Blender Cycles, Blender EEVEE, and Sketchfab.
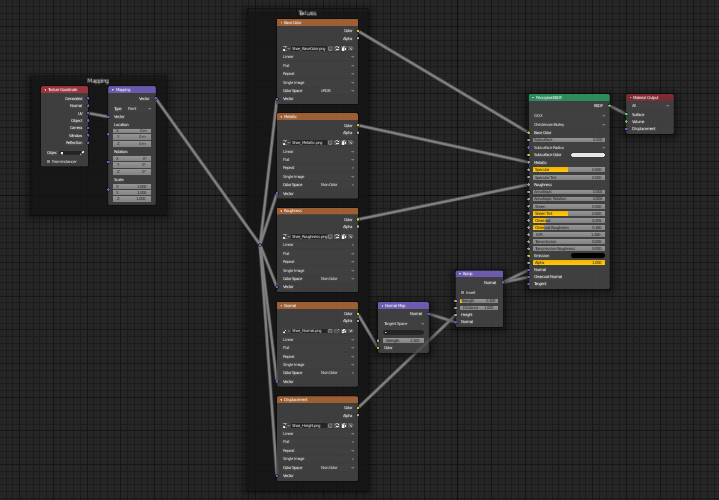
Step 8 – Lighting, Rendering
The shader setup was very easy, since the object only has one material, without any transparency or emission. I used the Principled BSDF node and connected the BaseColor, Metallic, Roughness, Normal, and Bump maps.
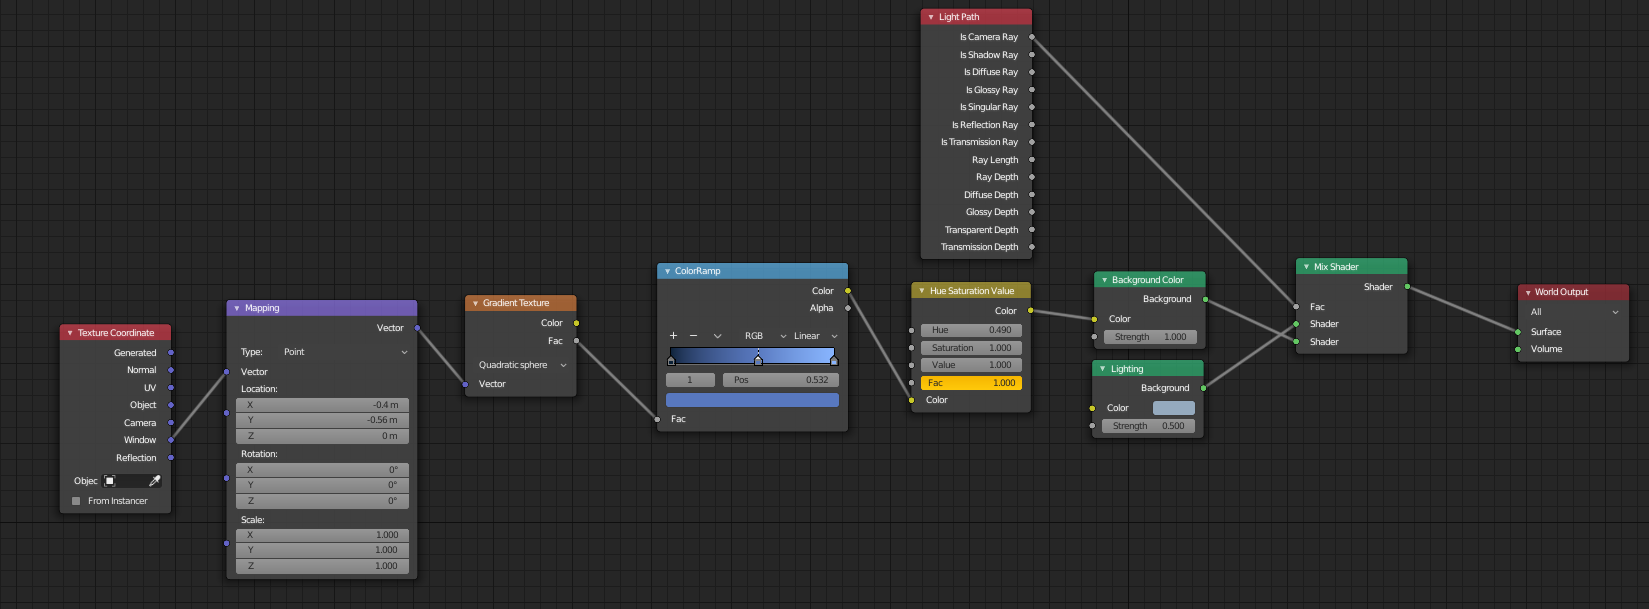
For the background, I didn’t want to use the same boring grey I use for all my renders, so I decided to use a light blue with a vignette. This is the shader setup for the world:
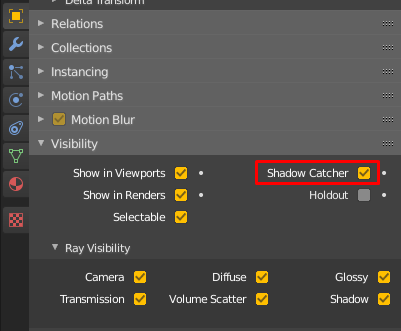
The ground is using the ‘Shadow Catcher’ option, to get some soft, ambient shadows.
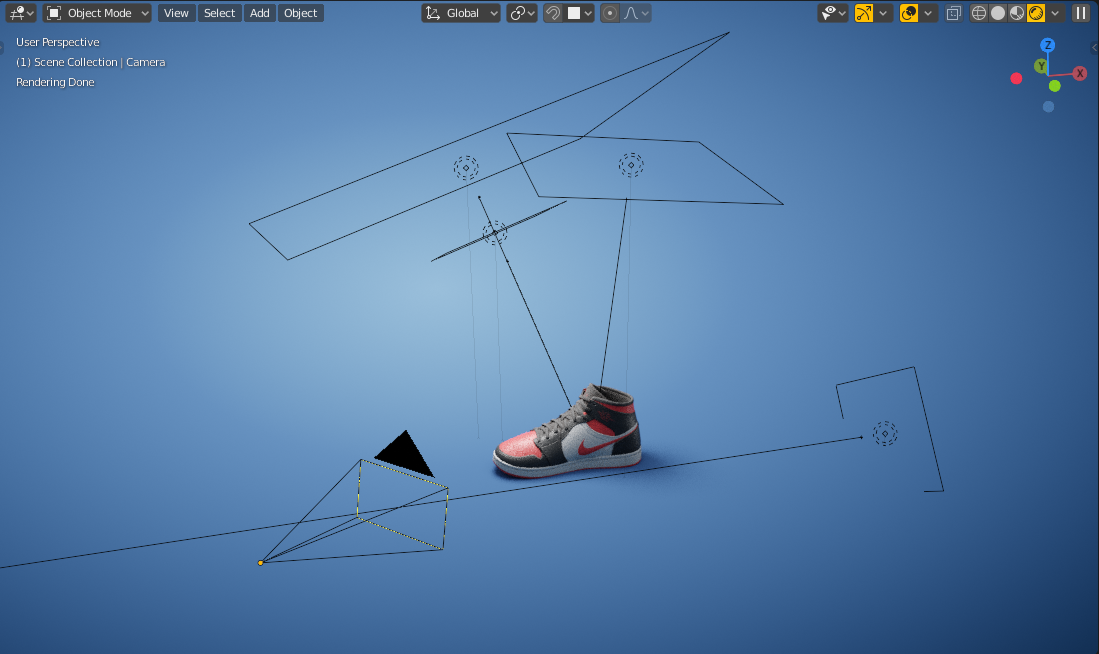
For the lighting, I stuck to big, soft area lights. It’s always important to observe the reflections and shadows that the lights are producing.
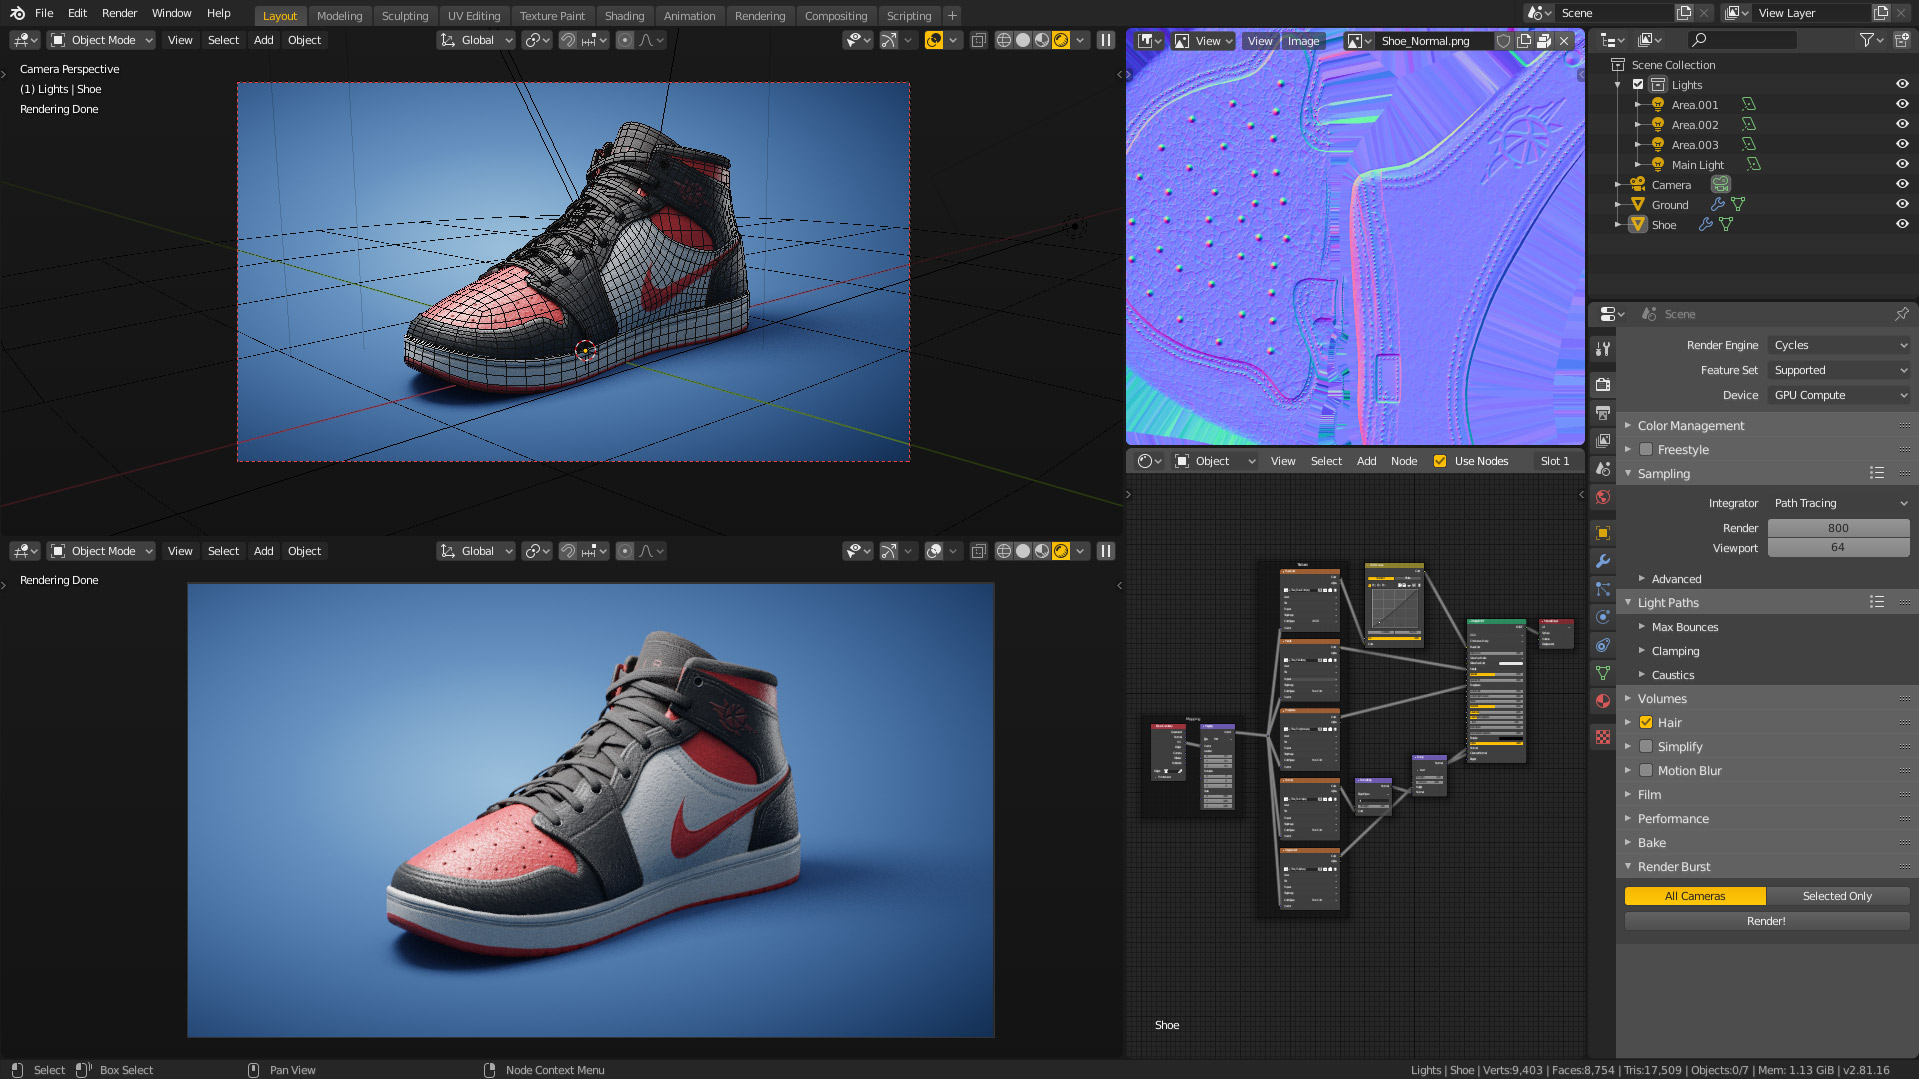
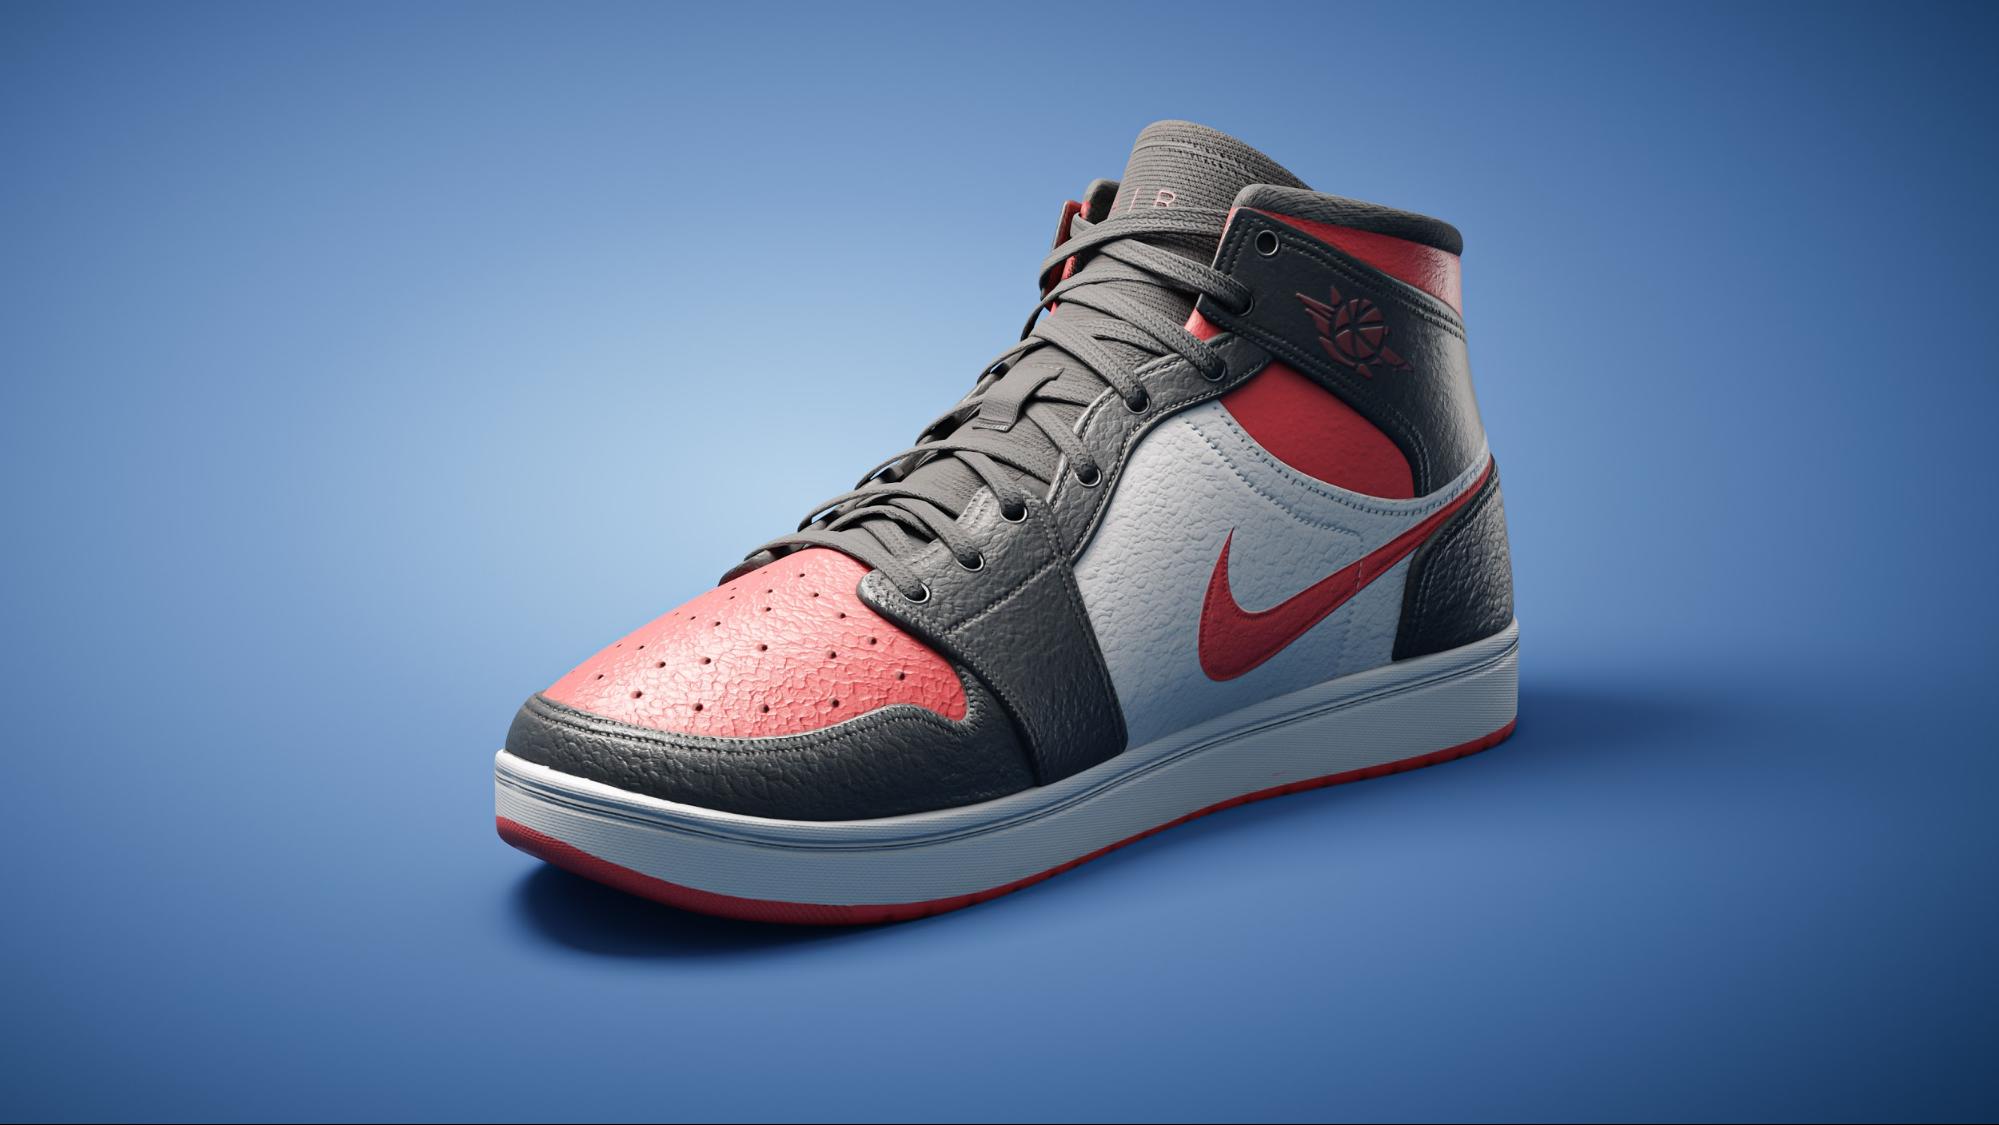
I rendered the final image at double full HD resolution using cycles, 1000 samples.
The image didn’t need a lot of post-processing since I had added the background in the world settings and adjusted the exposure in the ‘Color Management’ tab.
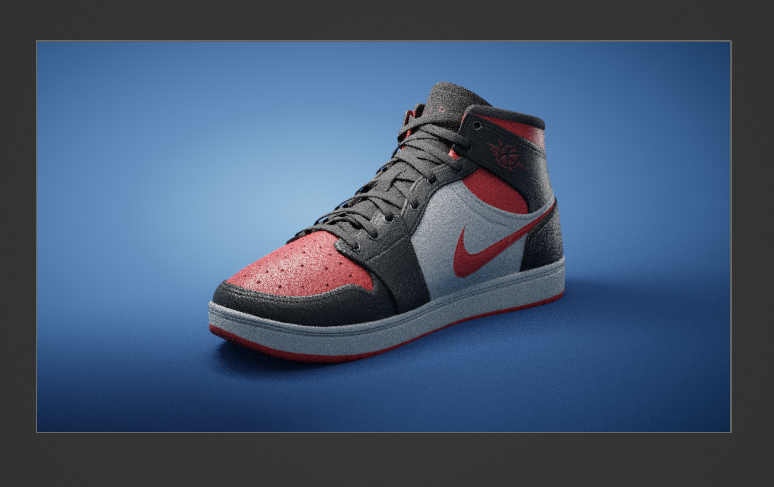
Final Result
About the Author
 Jakob Scheidt, 3D modeling & texturing artist from Stuttgart, Germany. Blender and Substance user.


Impressive.