Behind the Scenes: Miss Loan Villa Kitchen
Background
My name is Nguyễn Nông Ngọc Khánh, I live and work in Vietnam. I got to know Blender in 2009 quite by chance, and have loved it ever since. My main job is to create 3D visualizations from 2D sketches for architecture projects, and sometimes I get freelance jobs such as to model 3D objects or create very short animations or tutorials.
Inspiration
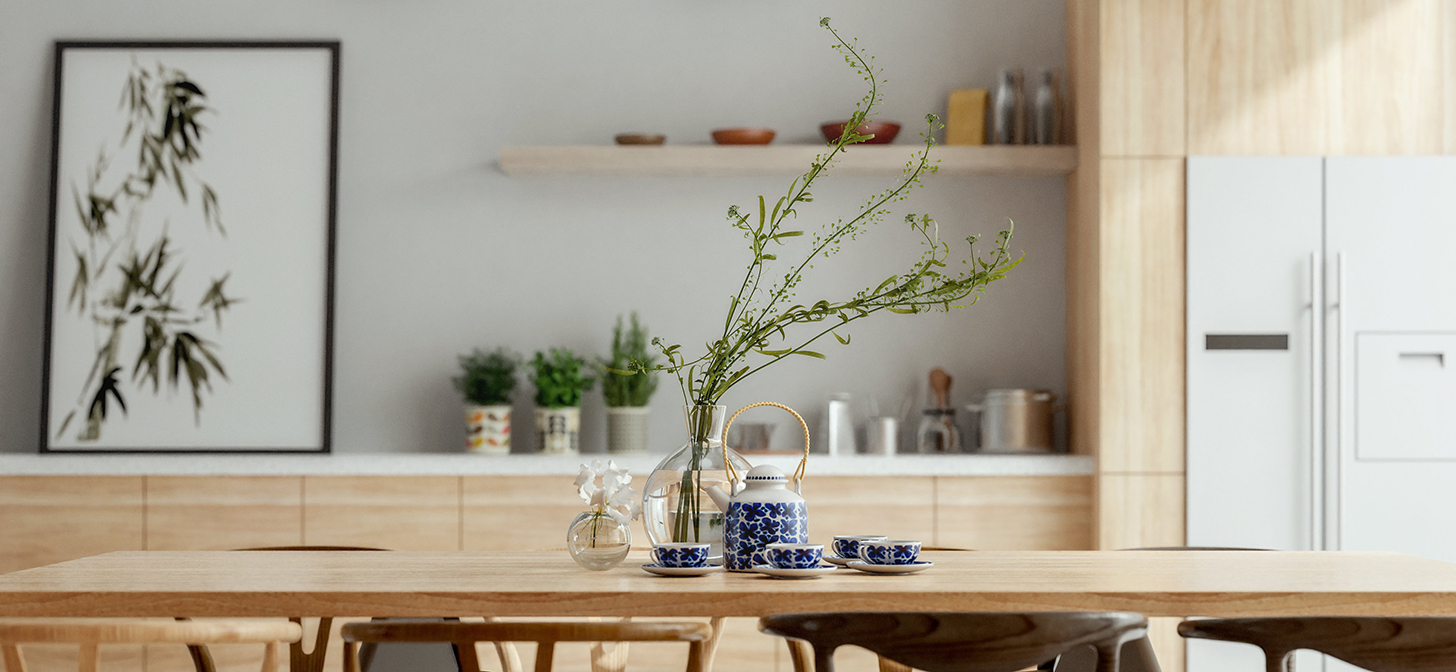
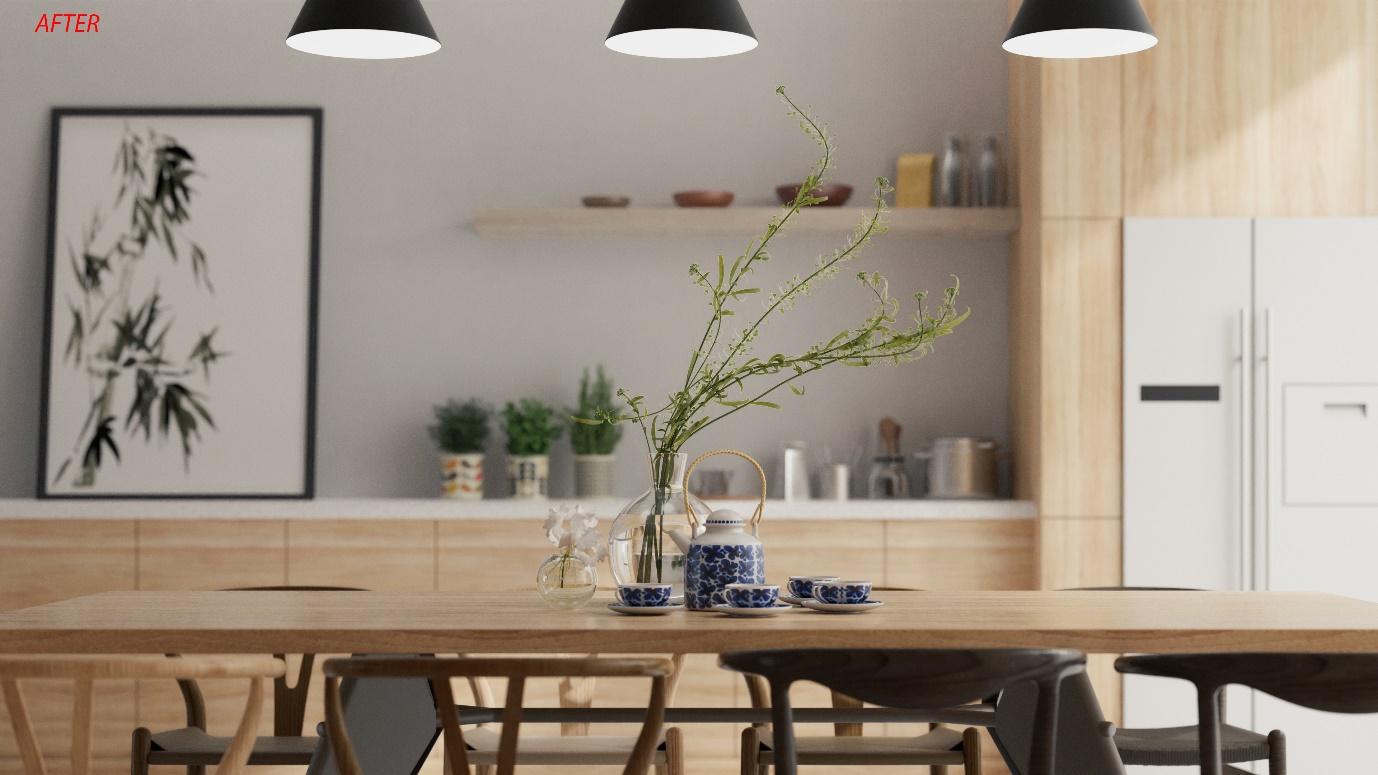
I always aim to improve my Blender skills by completing projects that achieve the result that I want. So I recreated a kitchen scene based on a project in Vietnam, to get something better, more realistic, more impressive.
After tweaking many times, finally, I reached my goals using materials and lighting.
Hardware
I used my computer for this project:
- AMD Ryzen 5 1600
- VGA GTX 1060 6GT OCV2
- RAM 4 Corsair 16 GB
Software
Everything was done in Blender, except post-processing, which was done in Adobe Photoshop.
Modeling
I modeled the wall of this house, based on the client’s specifications.

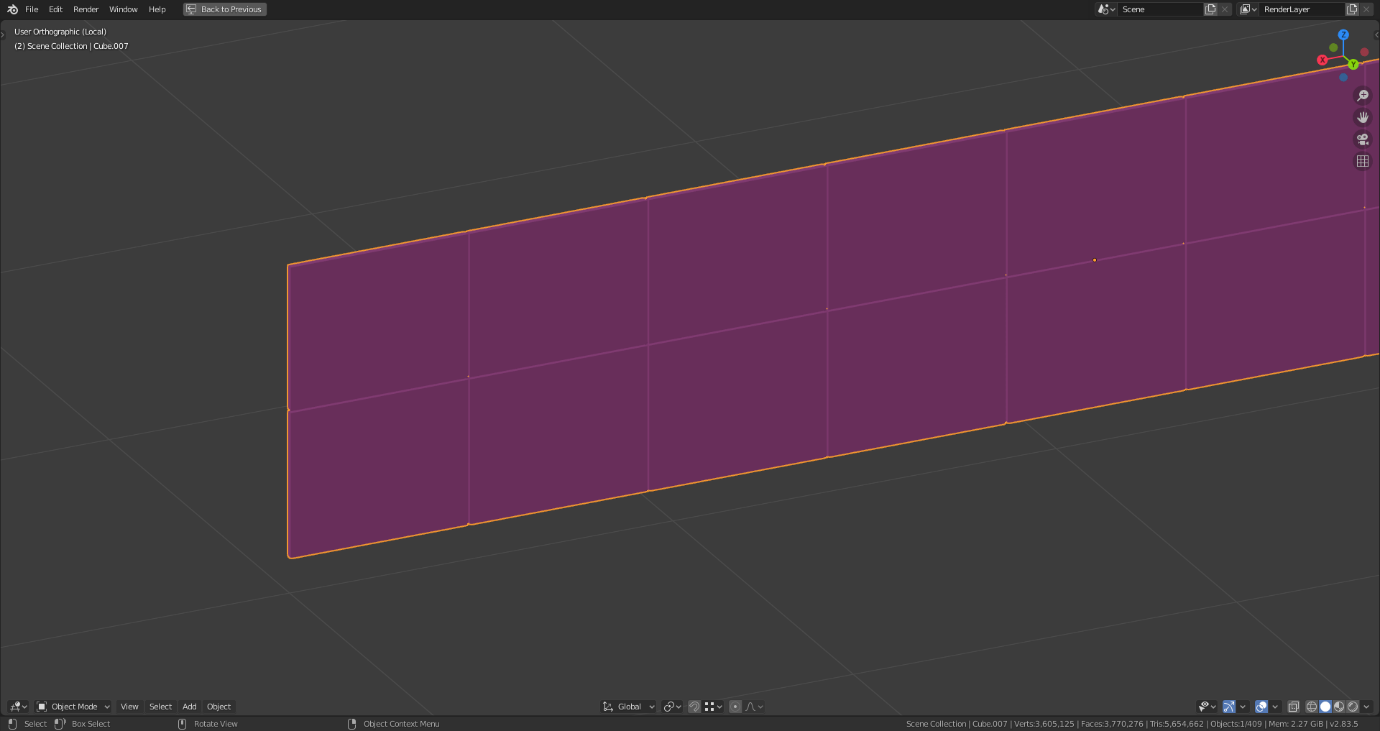
I modeled the doors, windows, stairs, and kitchen cabinets as simply as possible. For items such as the kitchen cabinets, I scaled a cube and applied an array modifier, adding a tiny distance between them. I did not use bevel because my camera did not zoom in too much.
UV Mapping, Materials
For all simple objects, I used the triplanar (box) mapping method with very simple material nodes settings.

About the nodes settings: I used an albedo texture, a reflect texture, and a dirty texture, mixed them all, and tried to create imperfect materials for a realistic result.
Lighting
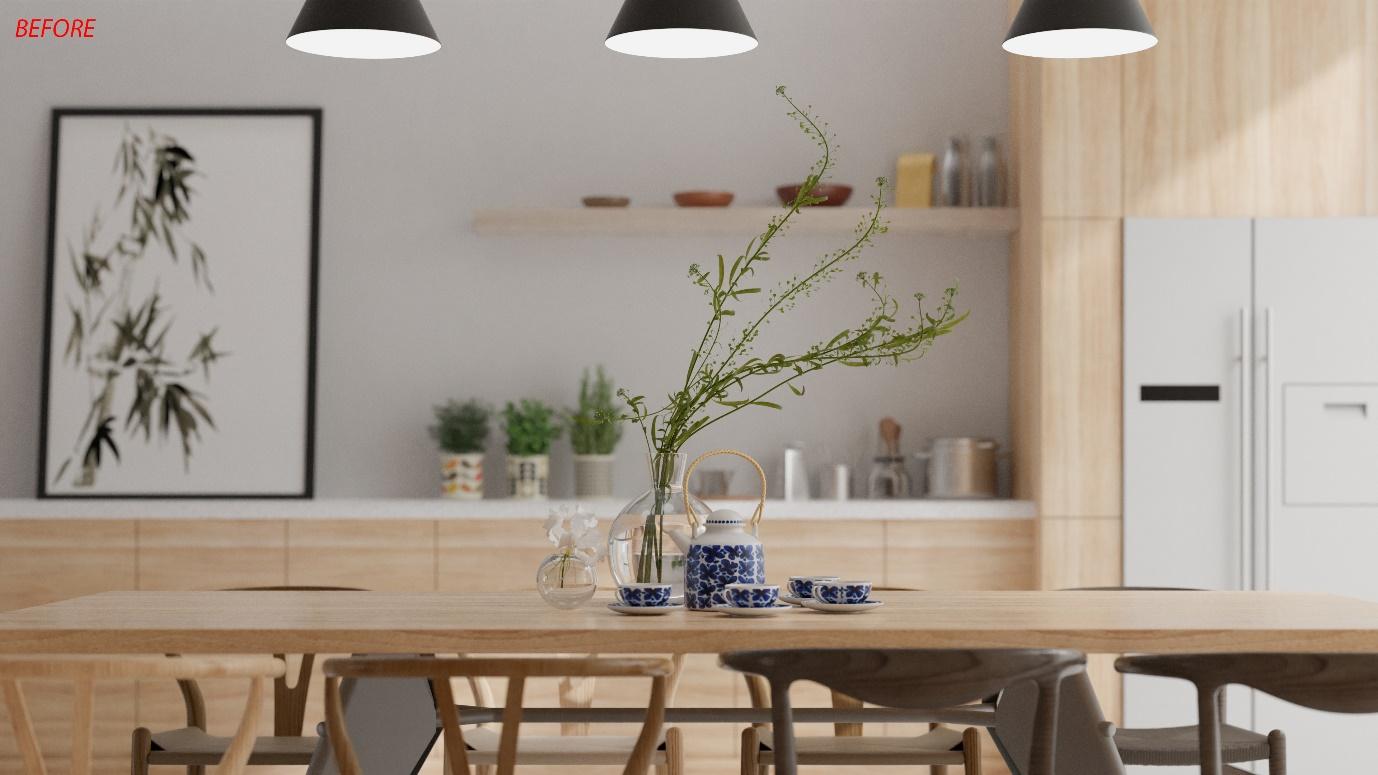
This part took most of my time for the test because I do not have a general method for every scene. After many attempts, I decided to keep the basic white background node with a strength of 6.
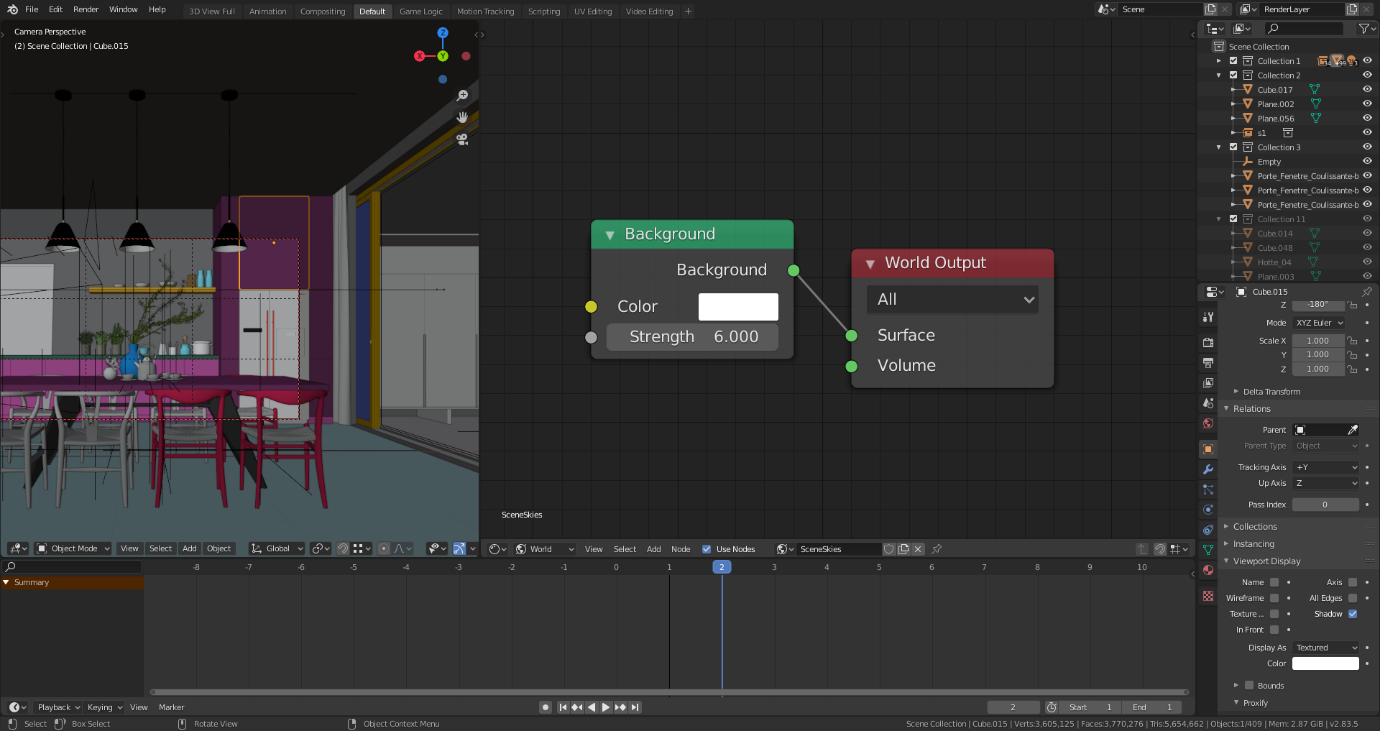
And I added a sun (for shadow mood and shadow contrast) with a strength of 6, too.
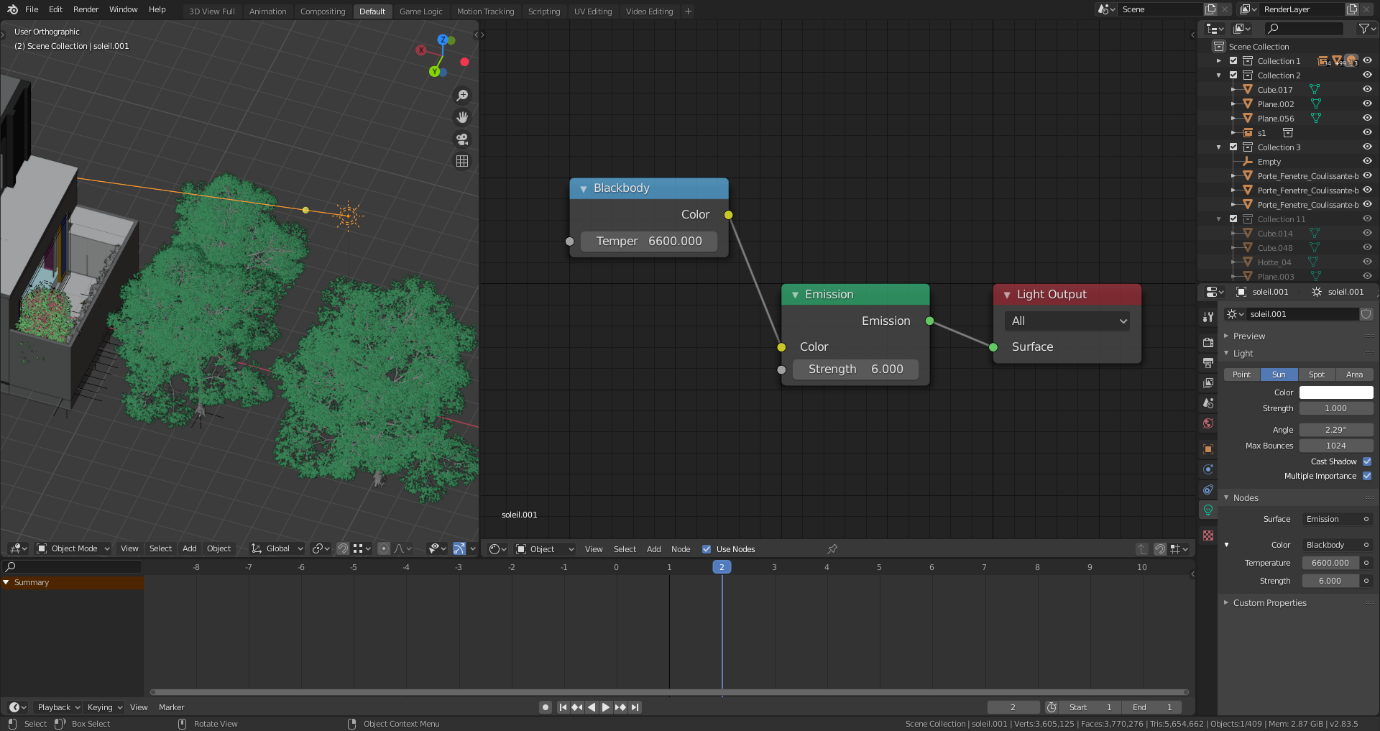
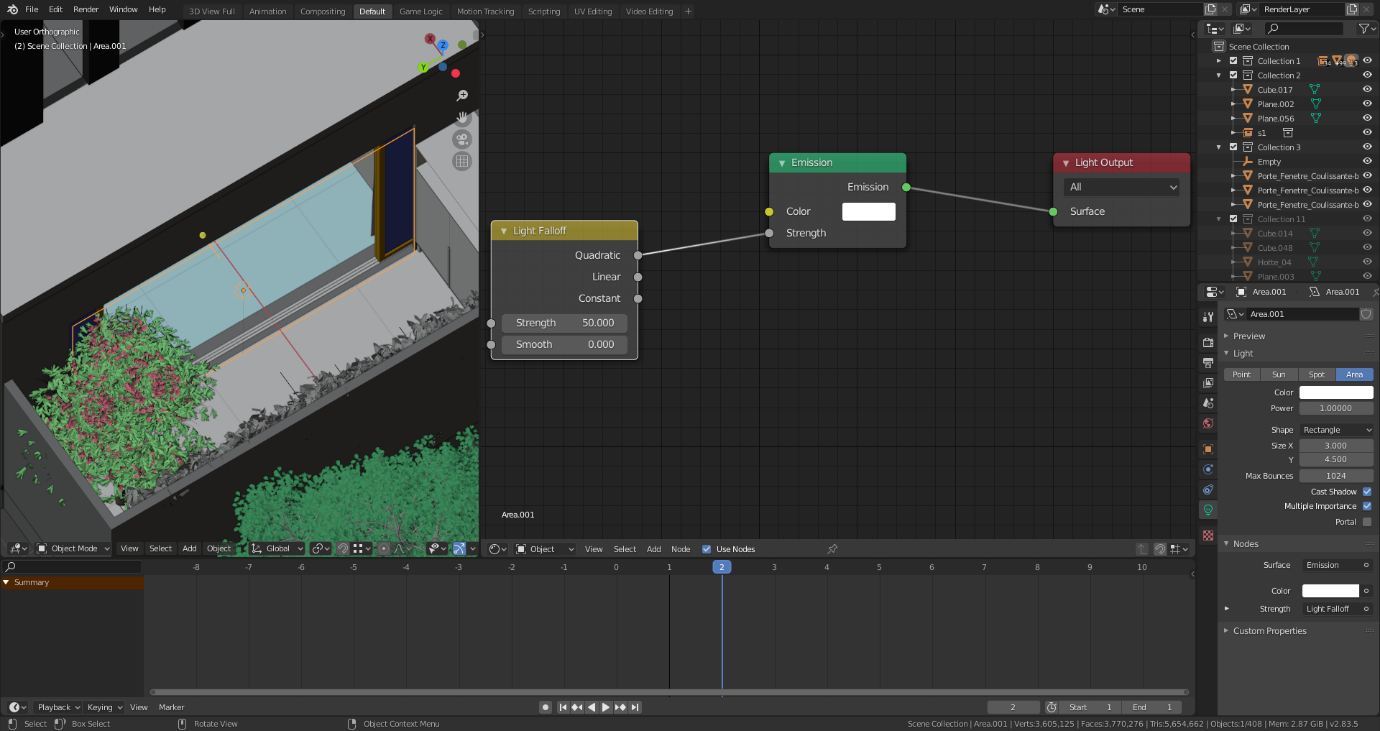
But it was not enough. The kitchen was so dark because the lighting did not reach into the kitchen as deeply as I wanted. If I increased the strength of the world and sun, the outside would be overexposed.
So I added an area lamp in front of the door to make it brighter with an emission strength of 50.
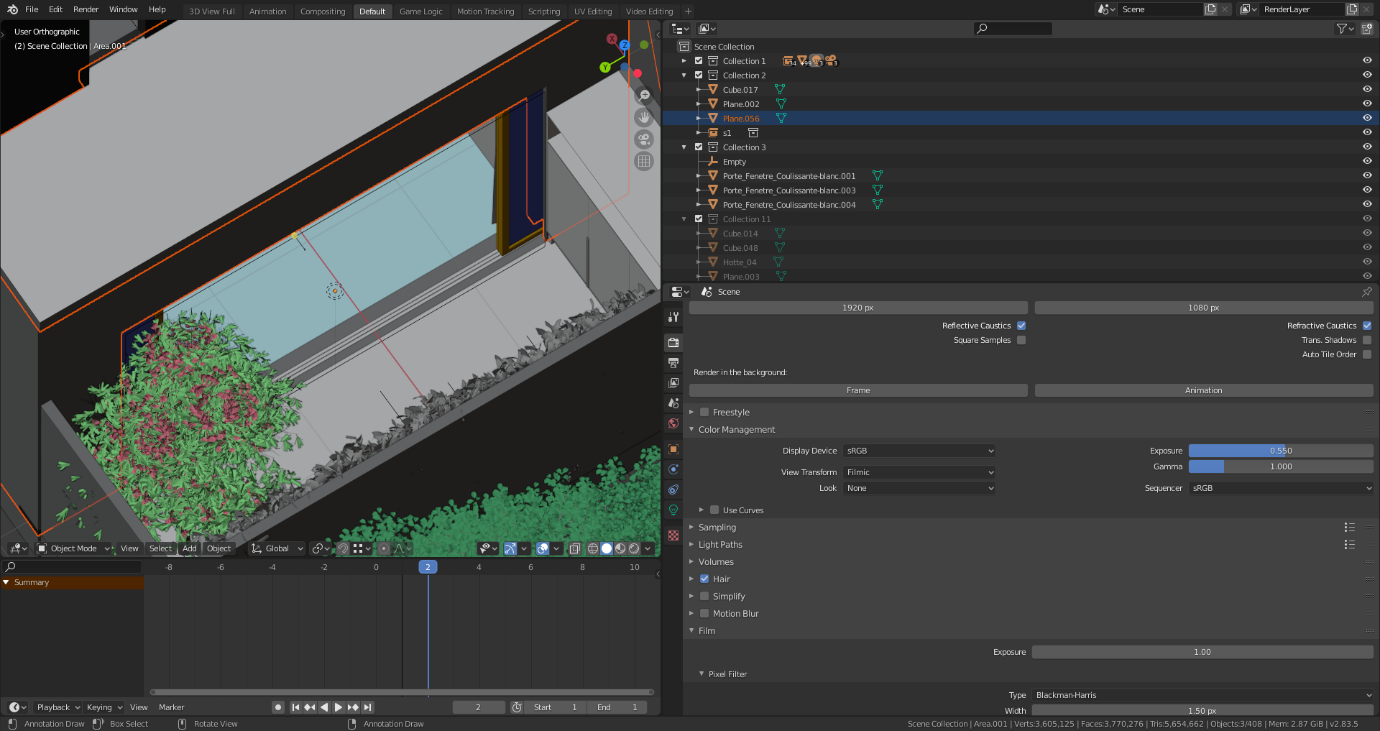
Finally, I changed the color management setting.
Props
I took decorative items from my studio’s library.
Compositing
I enabled some passes and rendered them for compositing.

I dropped them all into Photoshop for fast compositing (because I did not want to wait for Blender re-compositing).

Passes I used:
- AO, Shadow, Mist (Softlight)
- Glossy direct, Glossy indirect (Screen)
- Transmission direct, Transmission indirect (Color dodge)
And finally, I got something that was acceptable.
Thank you for your attention. I hope you enjoy my little article.
About the Author
 Nguyễn Nông Ngọc Khánh, I’m an architectural visualizer. I’m living and working in Hanoi, Vietnam


Nice one :) how can I send over freelancer projects? Any email address?
Cheers
Hi,I see you finding freelancer. Please contact me via email if you need one
[email protected]
Best regards
Hi SEBASTIAN, I’m Nguyễn Nông Ngọc Khánh. My email address is [email protected]. Could you send freelancer projects via this email? Thank you!
Nice and clean <3
Thank you so much JOHN!
Have a nice day :)
So nice, you’ re selling your project ?
Thank you for your comment PHIL LEBON! I’m not selling this project :)