

My name is Roman Salgado and I am a Graphic Designer. I like photography, video editing, and illustration but I decided to focus on 3D when I was in the middle of my university studies.
I started with other 3D modeling software (industry standard) but since I discovered Blender and have witnessed its evolution over the last few years, now I have made it my favorite program.
My modeling experience is almost always based on objects (e.g., cars, characters, video game assets), but I have always created them separately, as individual objects. For this project, I decided to create everything in a single composition (objects, lights, textures, particles, reflections, etc.).
I also decided to create this project as a good creative exercise to understand the design of objects as part of something bigger (a complete environment or composition). Sometimes when we create an object, it can appear well modeled, but then, when viewing the texture, it looks different than imagined. It may be a good model with a nice texture, but when placing it on a stage we notice that it is not in visual harmony with its surroundings.
For this exercise I used three things from which I take a lot of inspiration:
- My favorite animated series "The Simpsons"
- Low Poly isometric (one of my favorite types of modeling)
- Night photography
Process
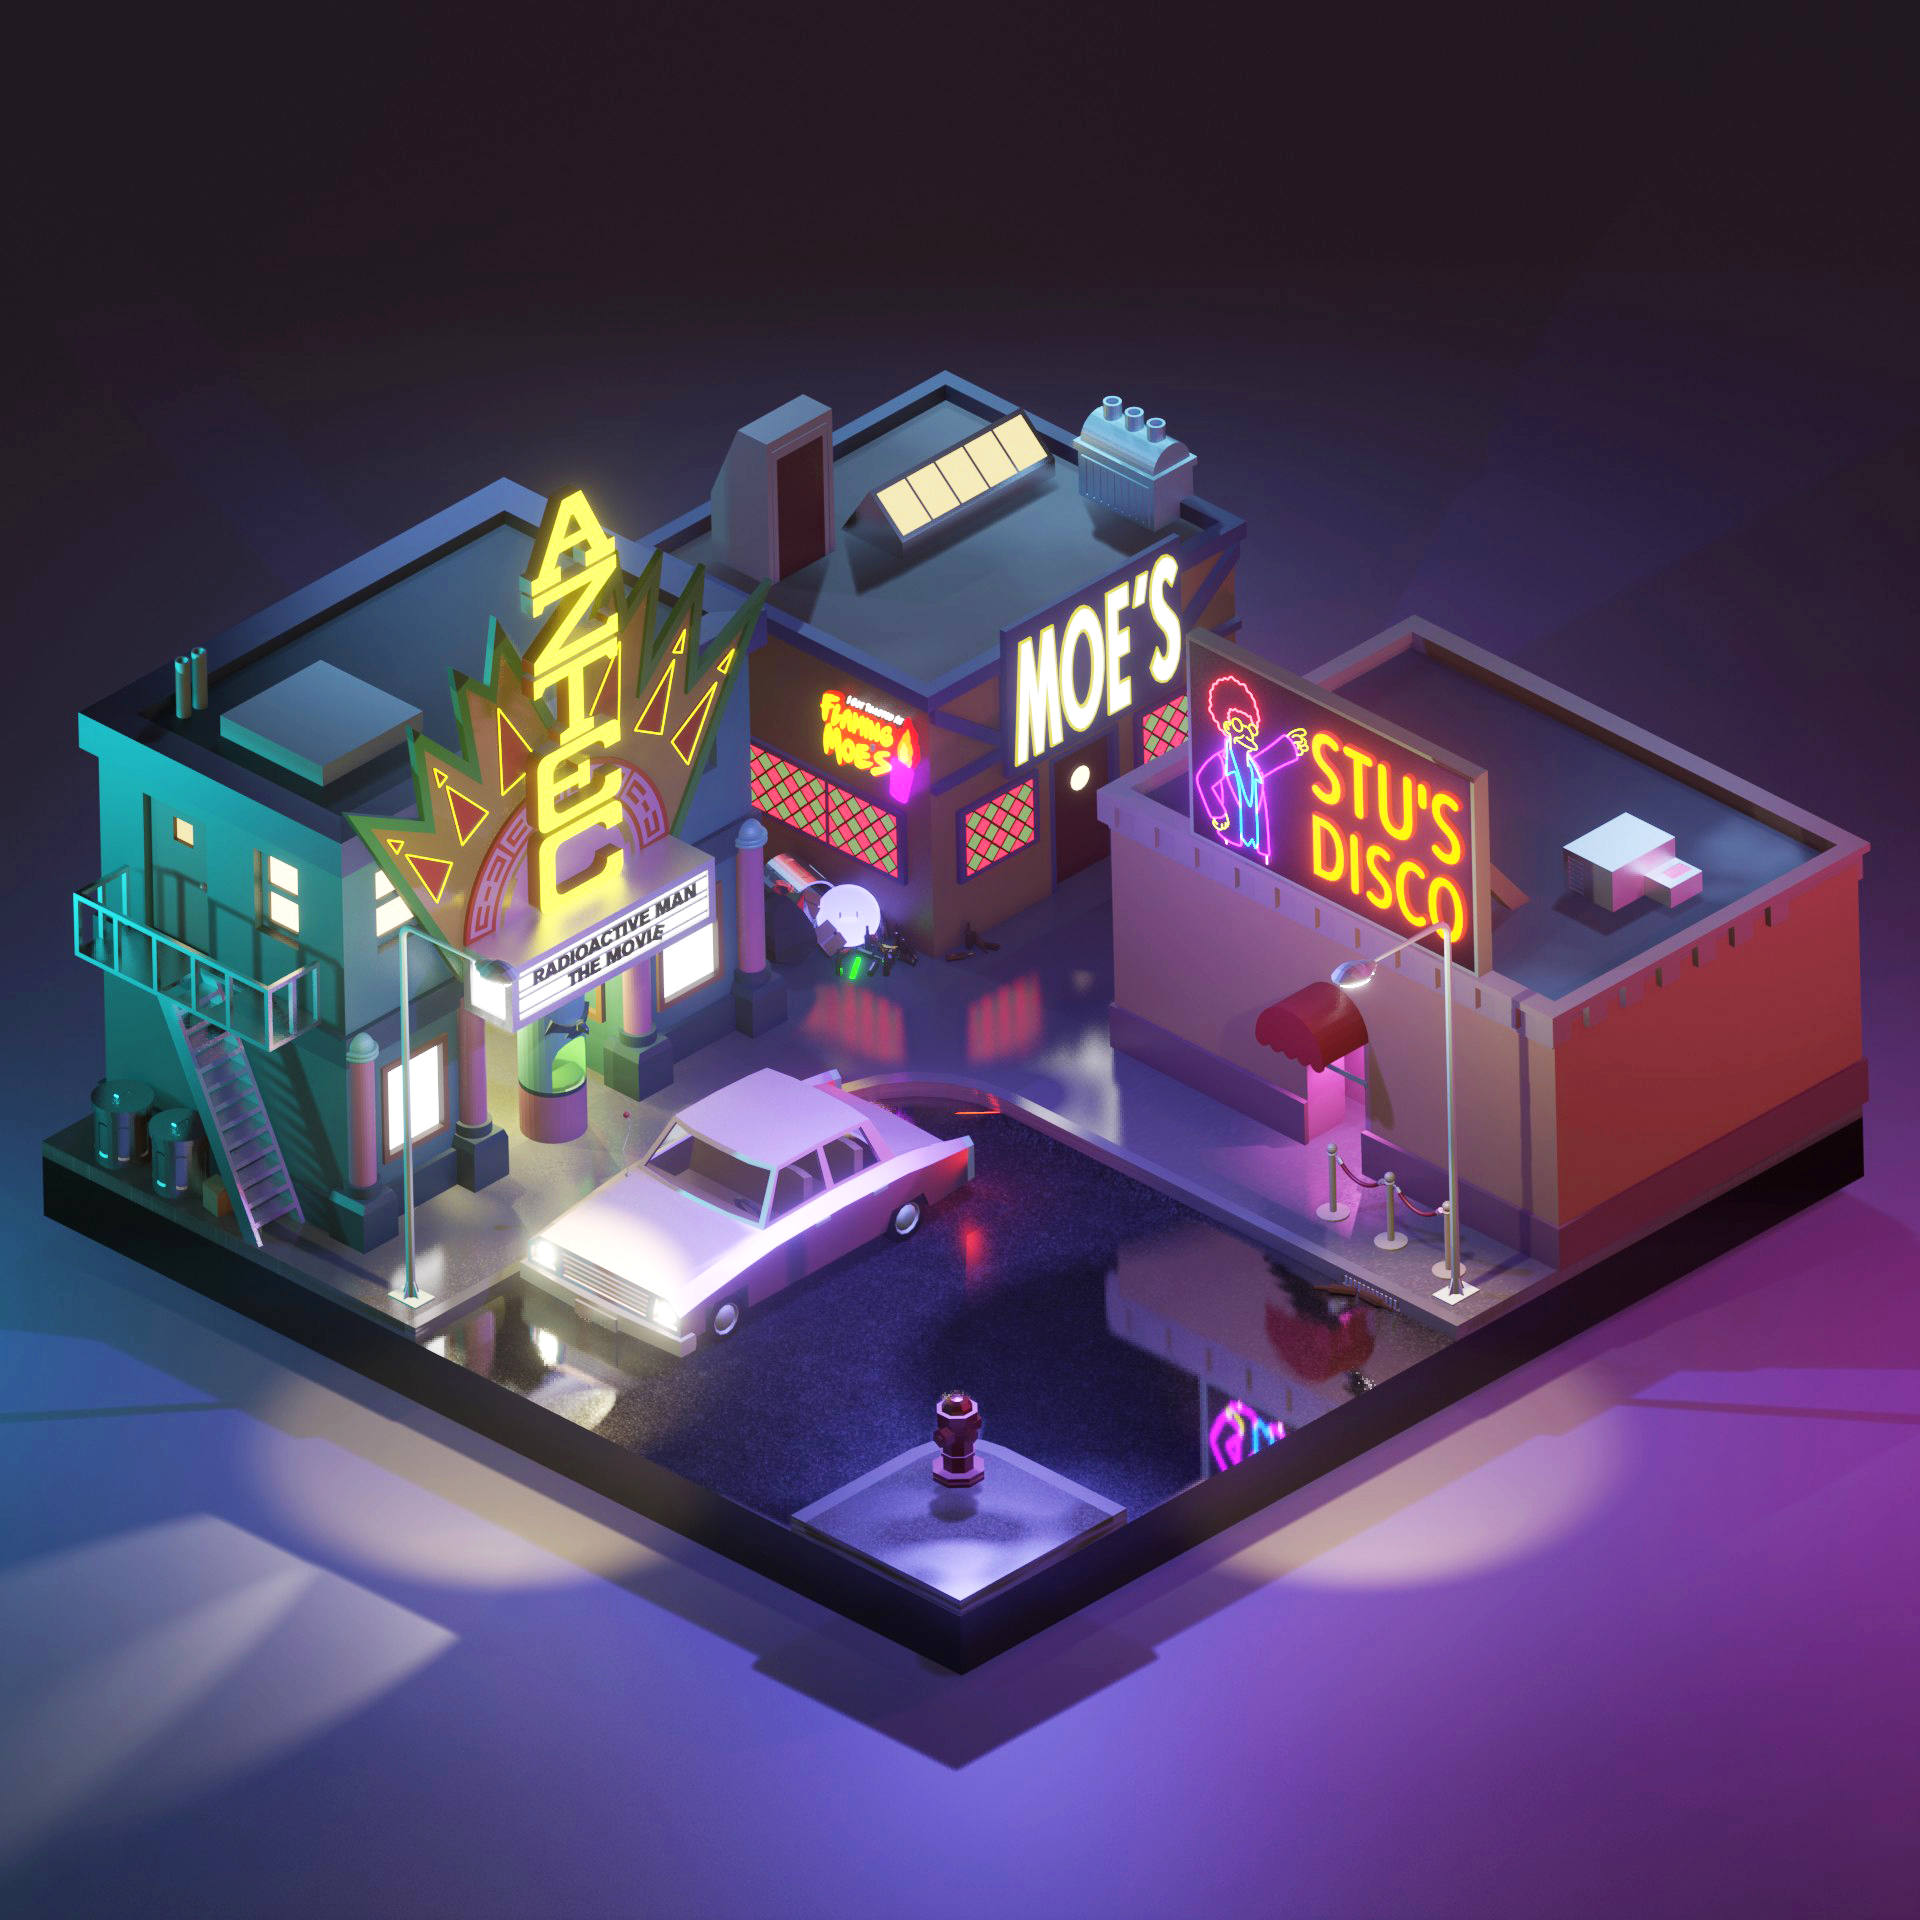
Street
To make the most of a night stage, the best advice is to use reflections. In this case, I used a wet street with some puddles, ensuring that lighting could bounce in different directions.

To get the wet effect, I used a shader that has a noise texture and separated it into three parts (street, sidewalk, and sidewalk limit).

Buildings
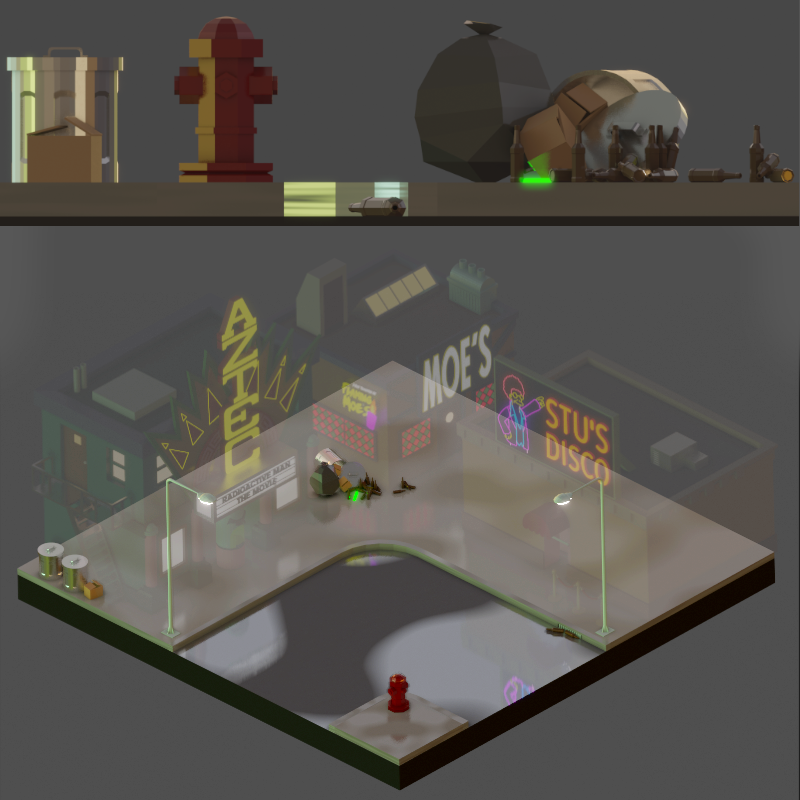
For the buildings, I decided to use 3 structures—cinema, bar, and disco—that could have exterior lights, which I would be able to use in favor of the composition.
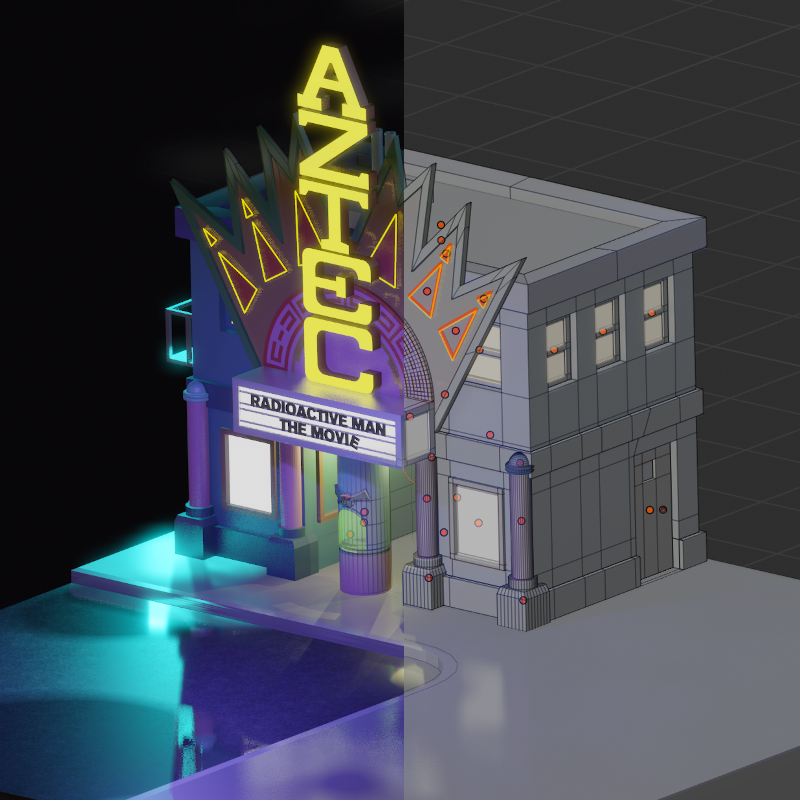
Cinema
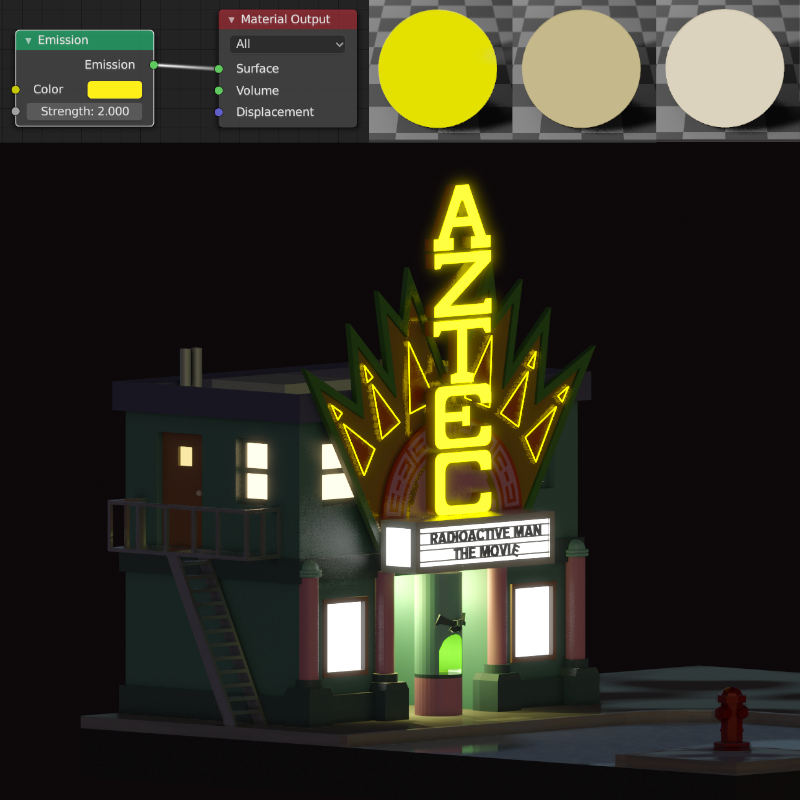
The cinema is the building with the most lights, and you can see how the wet floor helps to better reflect all the colors and lights. The structure is very simple because it is a low poly model, but that does not limit the detail of the building’s small parts.
In this image, you can see the luminous materials. I have turned off the general lighting so that you can see more clearly how they are simple emission shaders. The execution is simple but in each shader, it’s important to be careful that the color corresponds appropriately to the intensity of its light.
STU'S Disco
For STU'S building, I used the Nurbs Curve tool, since that tool makes it easy to create organic tubular shapes similar to the shapes of the neon tubes.

Moe's Bar
The most complicated building decoration was the logo on the side of the bar. It has a bit of detail, so I used a software called Inkscape to generate the .svg strokes and then imported them into Blender to generate the volume.

Details
The details are important because they give the composition the ideal environment. I decided to place them in specific places so as not to saturate the areas where they could easily go unnoticed.
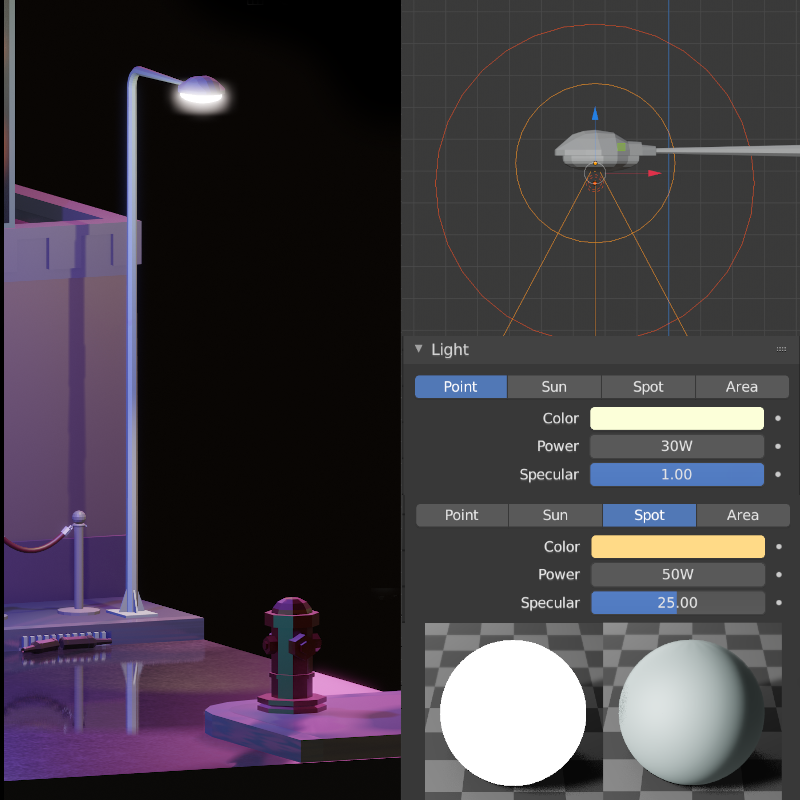
For street lamps, I used two types of lights and two types of materials. Some people might think that it is too much to use two types of lights, but the combination of colors and types of light gave me a rather peculiar result.
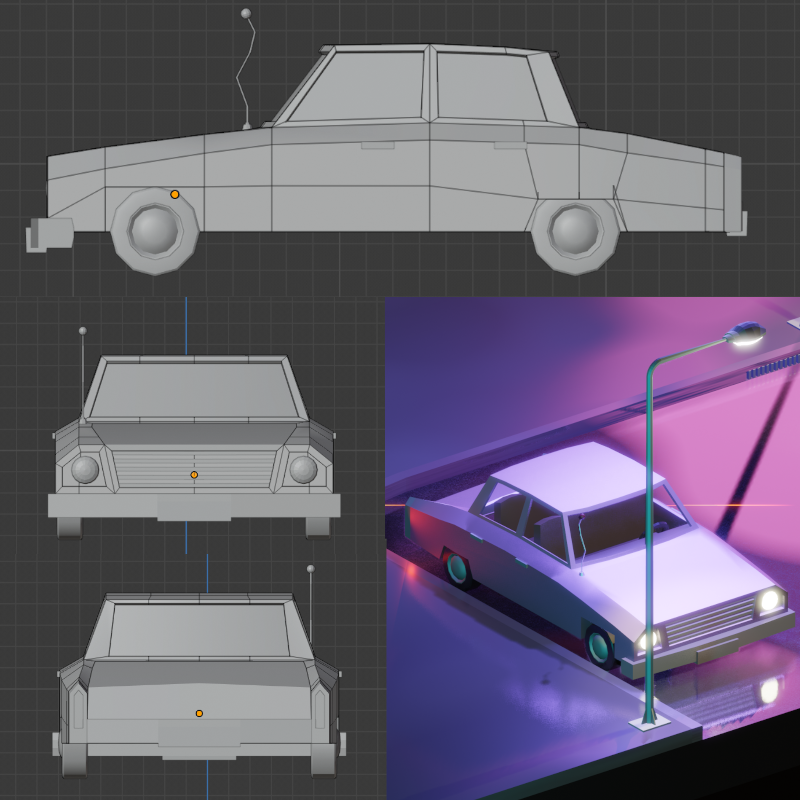
Car
In the beginning, I was a little hesitant about including a car, but after making the model, I discovered that it did not detract from the simplicity of the image. The car was the model that took me the most time to create; each car has its own essence and we must be careful not to lose that for the sake of minimizing the polygons.
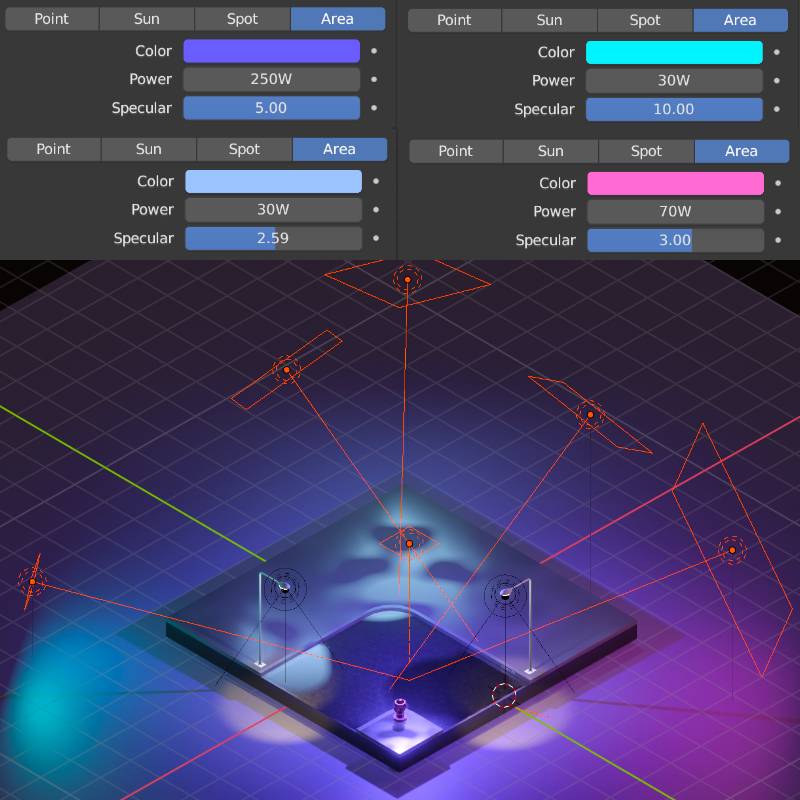
Lights
Lighting is the most important thing for me, I worked several hours on it. I used an HDRI of a night city, but I wanted to better control the reflections and the intensity of the colors depending on the area in which they were to be placed. So, in the end, I decided to use some area lights.
This is the final result with all the elements, I hope you can find the work process useful so that you can solve your compositions when the scenes are at night.
About the Author
 Roman Salgado, I am a graphic designer focused on 3D modeling, creator of video game assets and illustrator, I am currently working on an independent video game
1 Comment
Amazing scene and breakdown, great job !