Behind the Scenes: Embracing the Dark
INTRODUCTION
Hi! My name is Grigoriy Ignatyev, and I am a 3D Artist from Kazakhstan. I was inspired by video games in my childhood and had a dream to develop my own game. I was studying both coding and art which allowed me to fulfill my dream and release a few simple games. I liked the Blender 2.8 release and since then, I can’t stop spending all my free time making 3D art. My coding experience helped me a lot in creating shaders and geometry node setups.
INSPIRATION
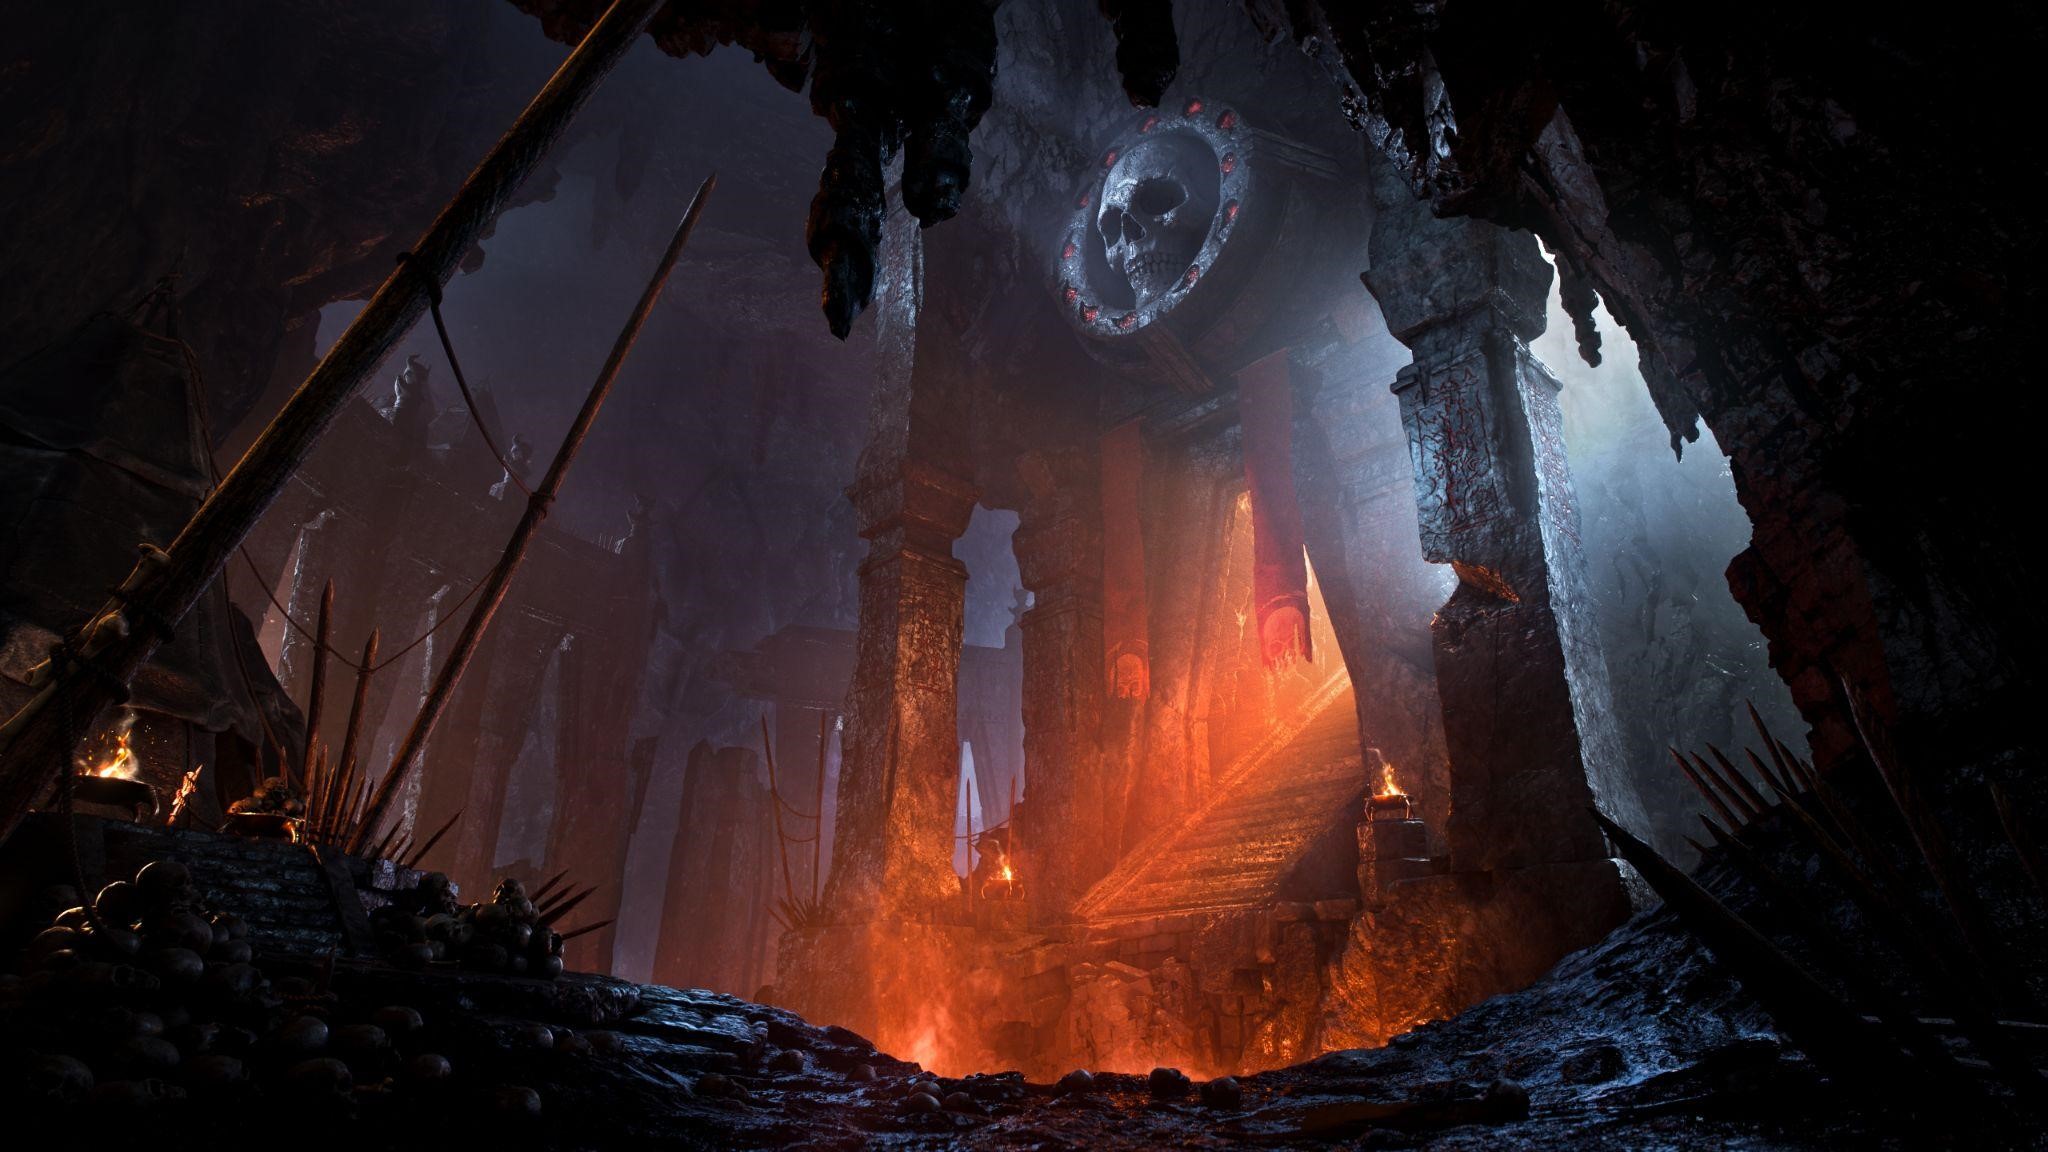
This unofficial, non-commercial fan art was inspired by the main menu scene from the video game, Baldur’s Gate 3. All the characters, names, and related elements are trademarks and copyrights of their respective owners. I thought it would be a great challenge to recreate all the assets and lighting. I also prefer path-traced renders so I wanted to see this scene with detailed assets, global illumination, path-traced volumetrics, and post-processing.
PROCESS
Block-out
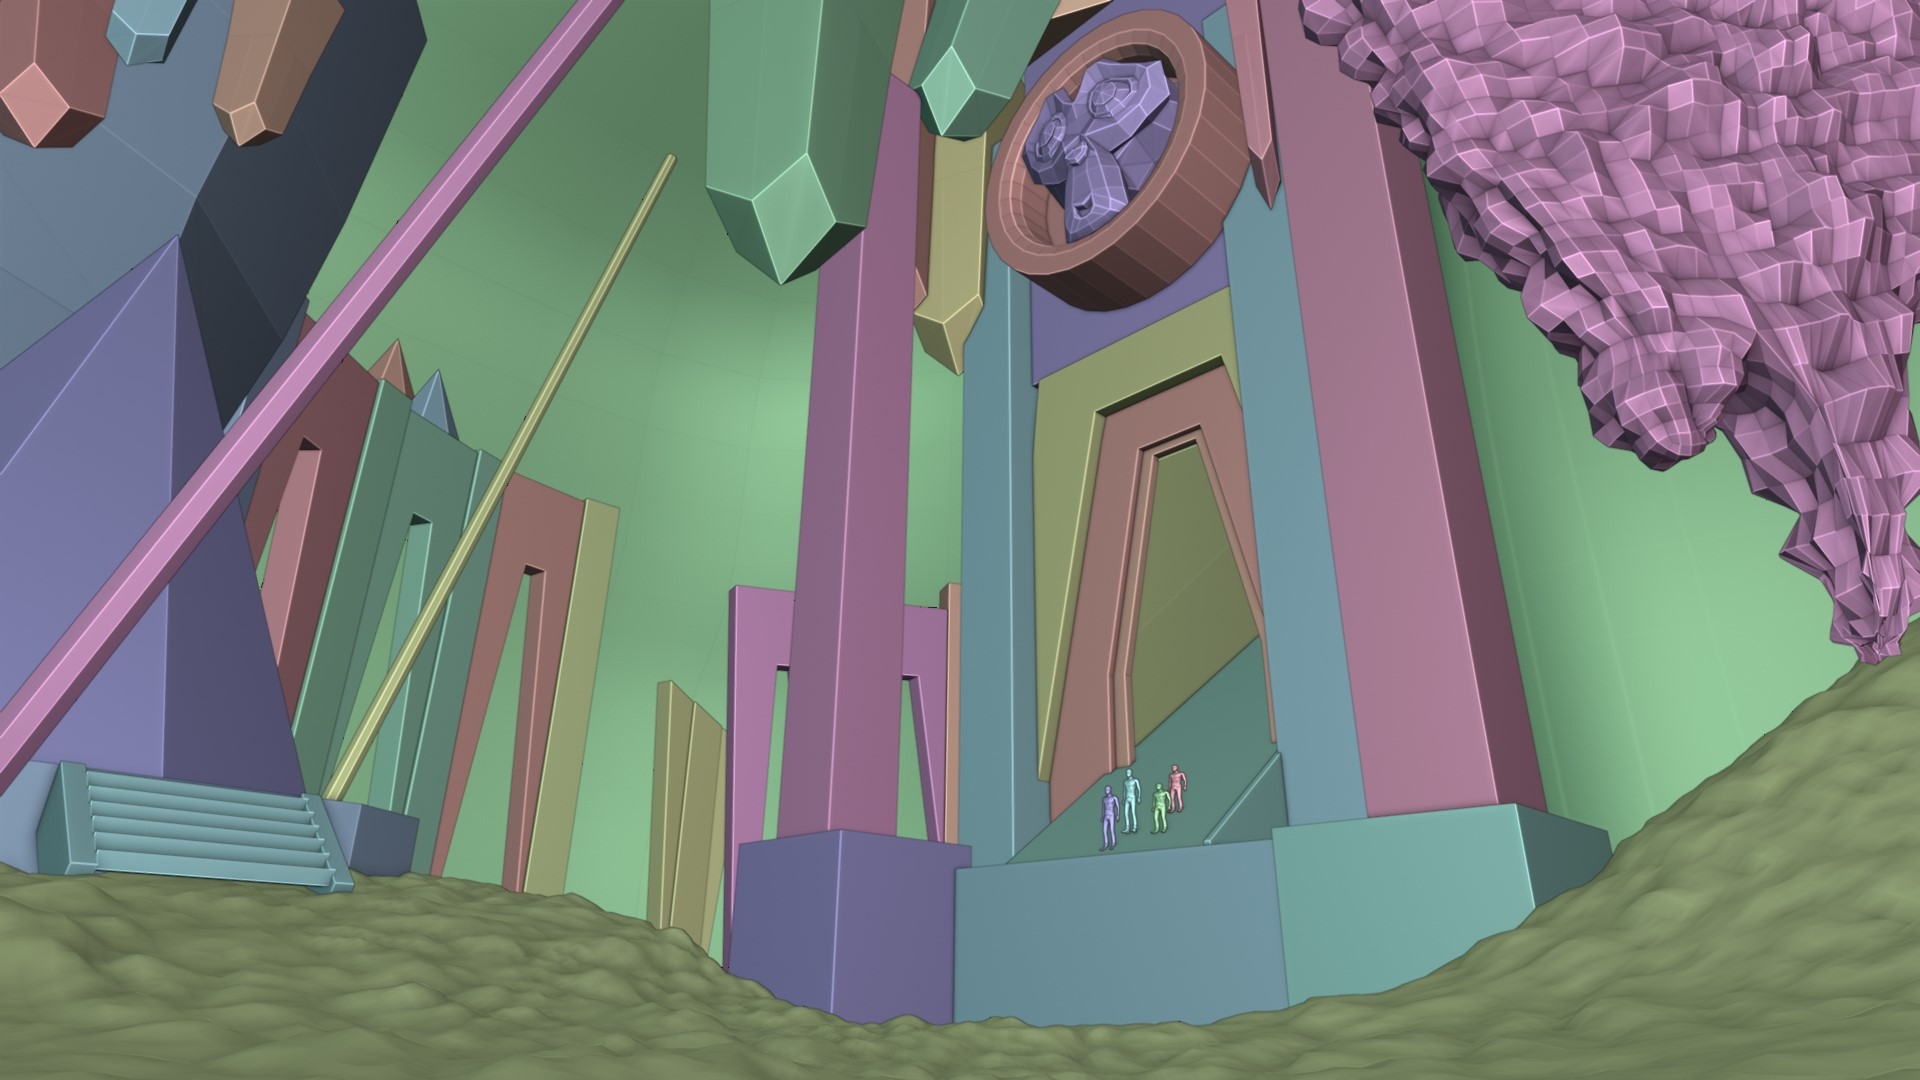
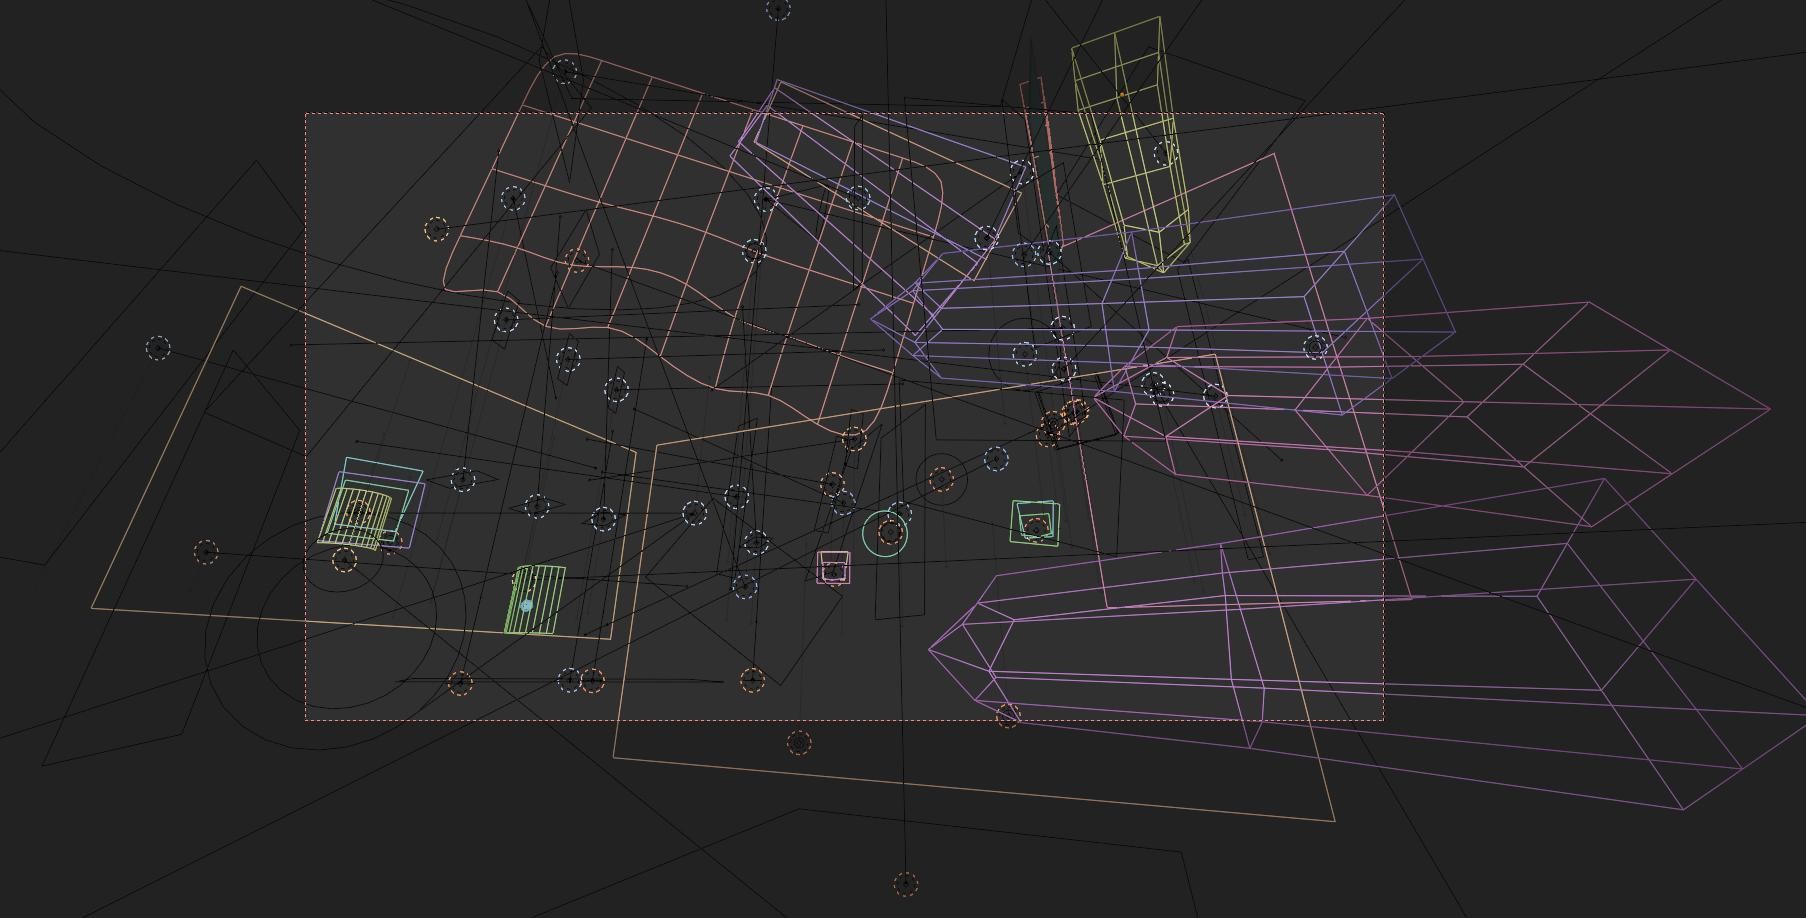
I used the fSpy tool to get the correct camera position and FOV using a screenshot from the game menu. I modeled and placed simple meshes to get an overview of the scene. I usually use the people model to simplify understanding the scale of assets and the whole scene. At this stage, I also write down a list of required assets and how to make them modular.
Modeling
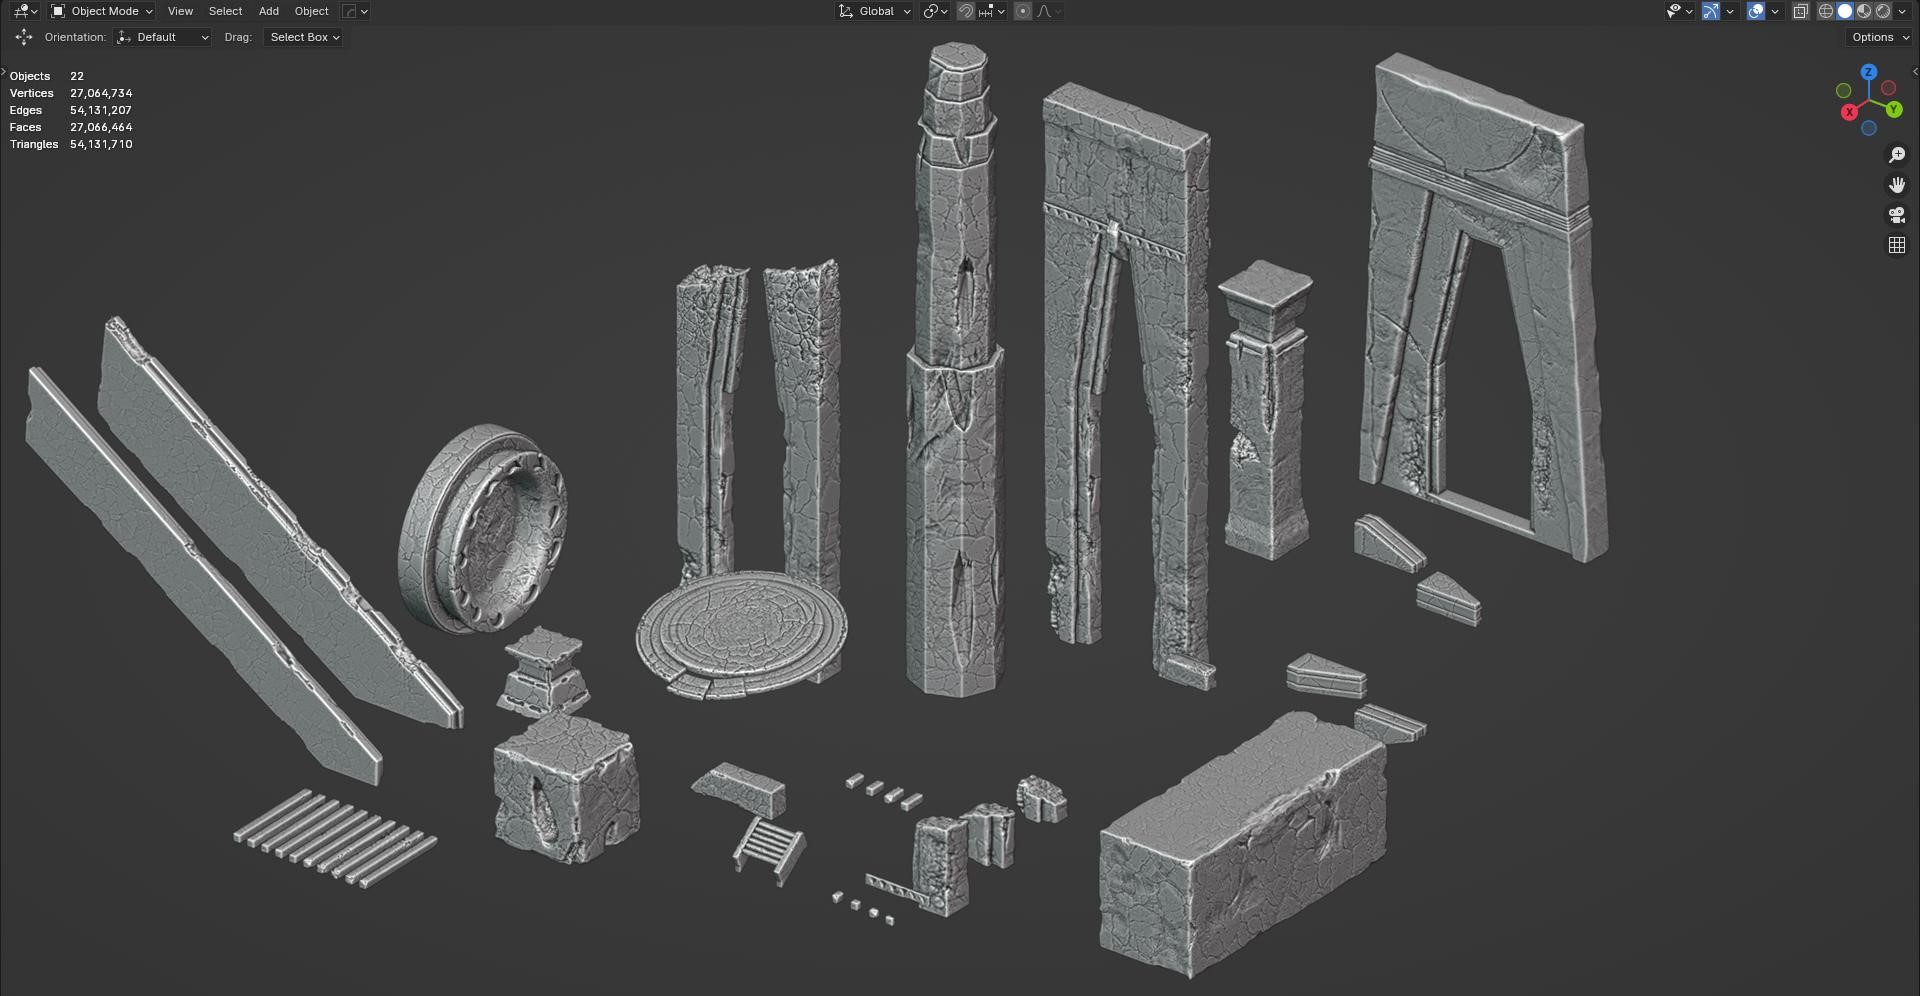
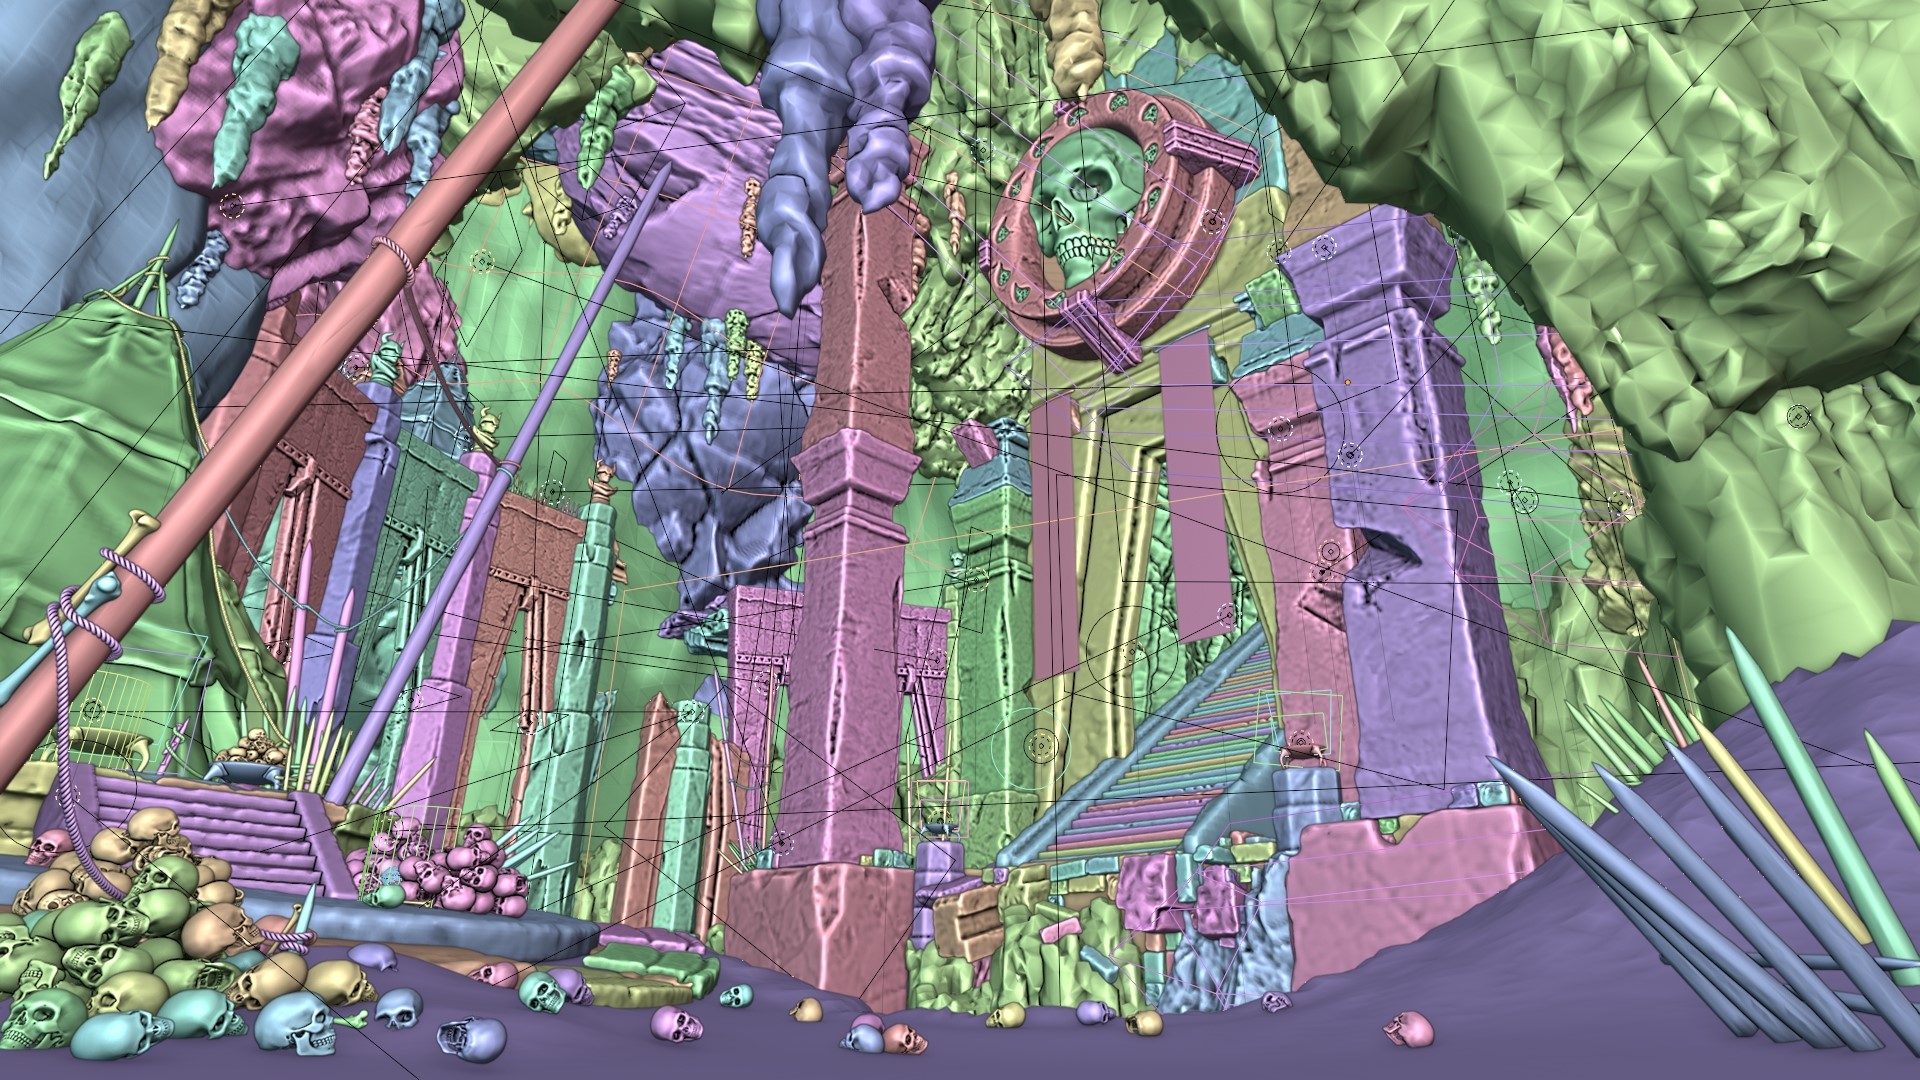
The modeling process for most of the assets was this: lowpoly asset, large damage with booleans, geometry nodes to make edge damage, remesh, triplanar displacement, and then manual sculpting with various rock brushes—all in Blender. The next stage is to unwrap a decimated version of an asset for baking and texturing with Substance Painter. I used 4 UDIM 4K tiles for stone structures and overlaid additional roughness, color, and bump details in Blender material.
I made lowpoly stone block assets with manually-created, large boolean cuts and geometry nodes for smaller edge damage. The smaller cuts were adjusted for each asset to get the desired look.
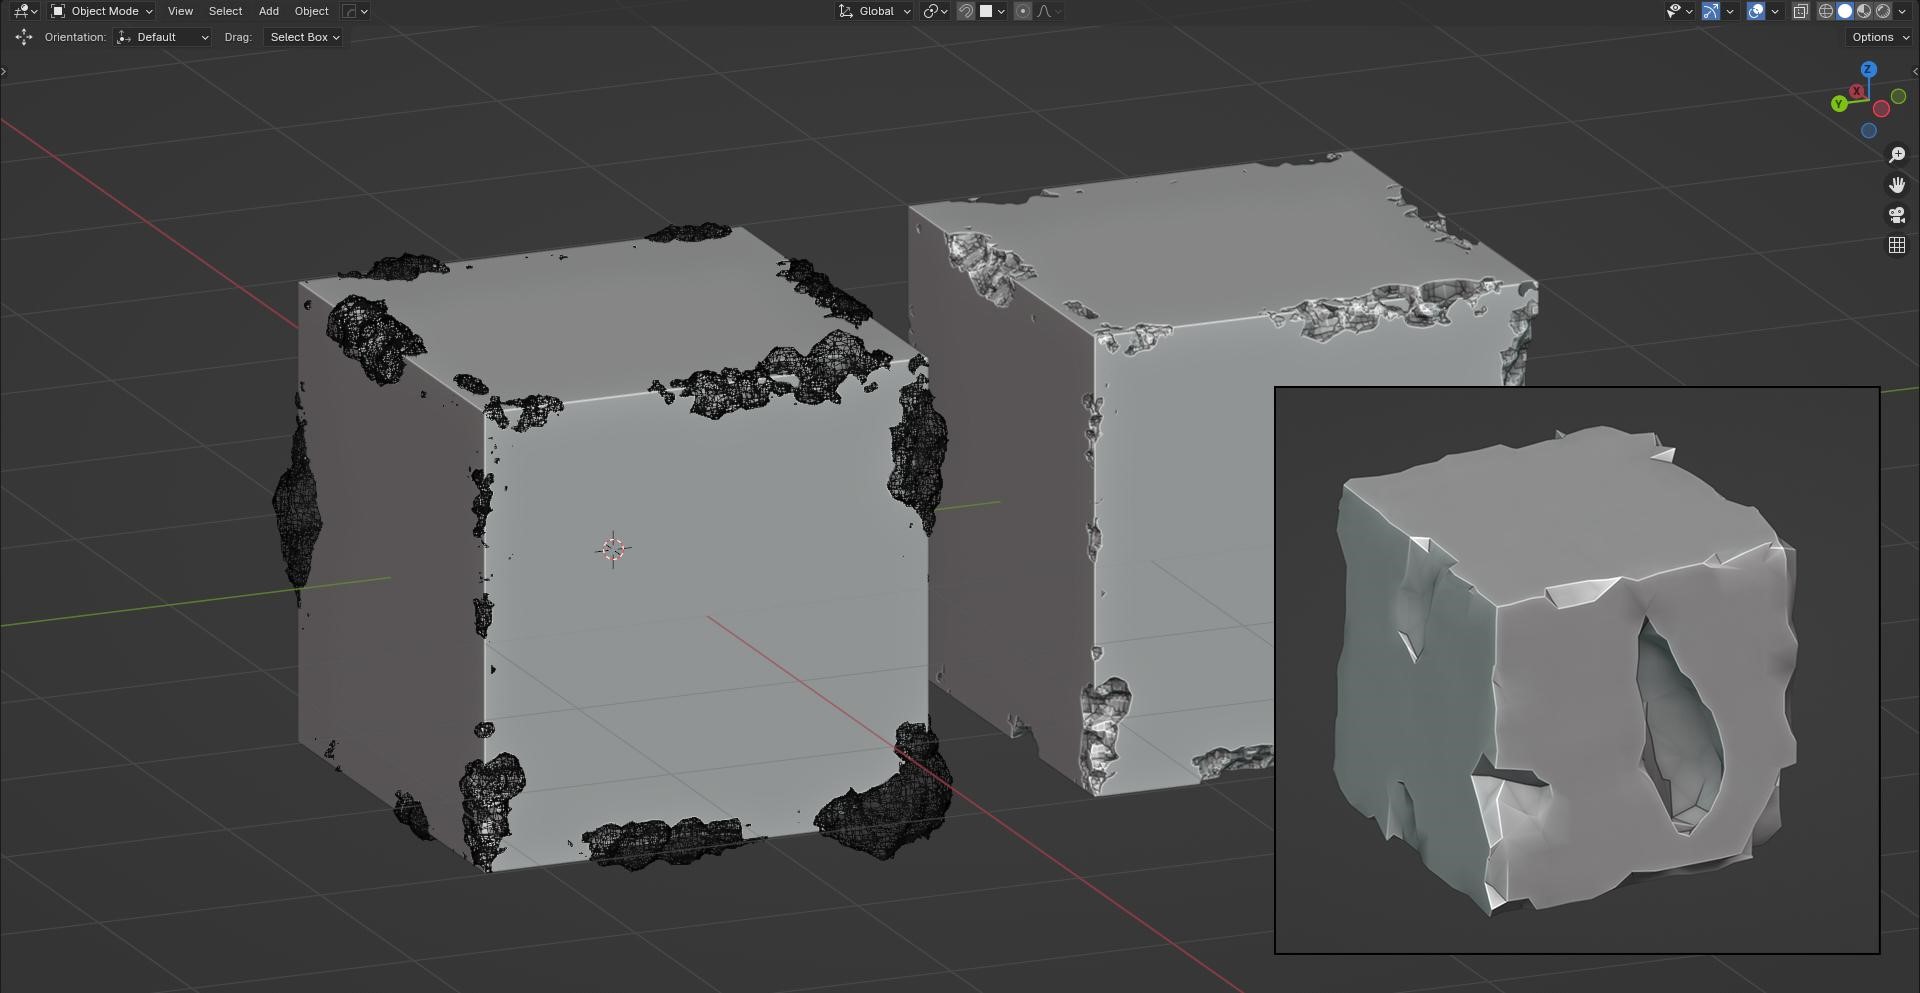
Then the node setup for generating edge damage. The idea here is to scatter randomized icospheres on the edges of the mesh and then combine everything with Mesh-Volume nodes. The result mesh is then used as a boolean object for the original lowpoly asset.
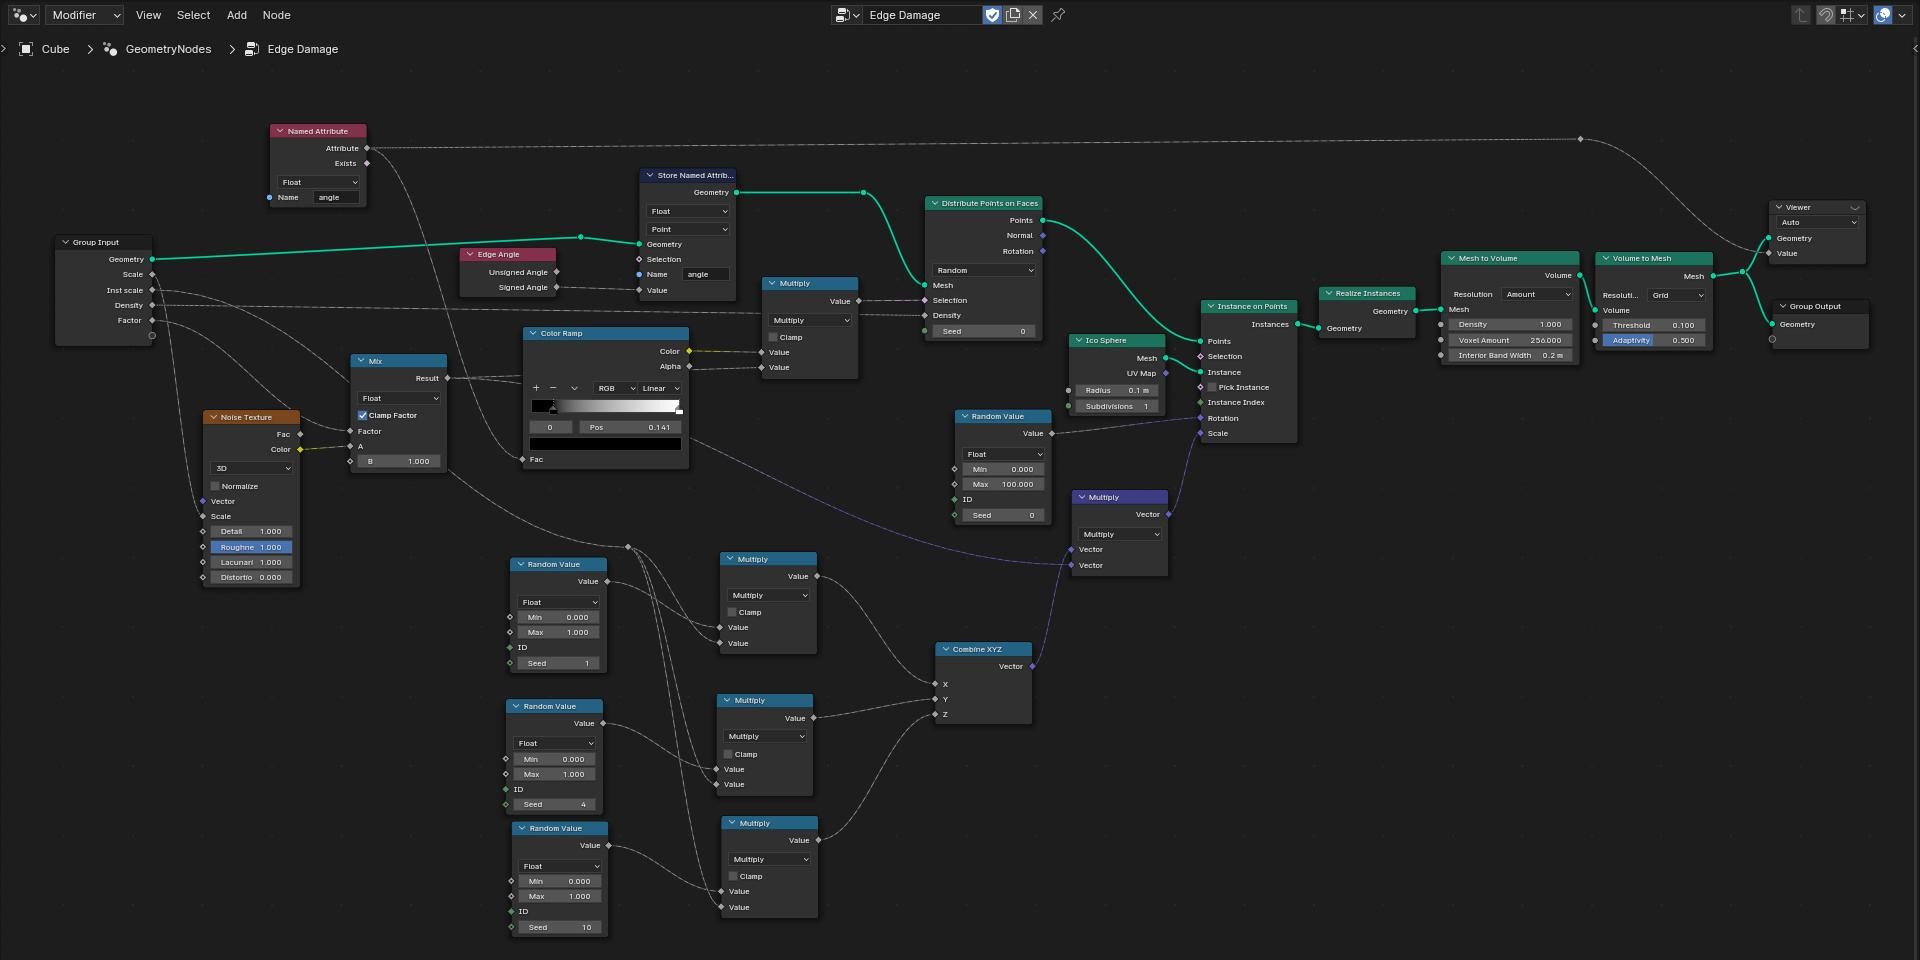
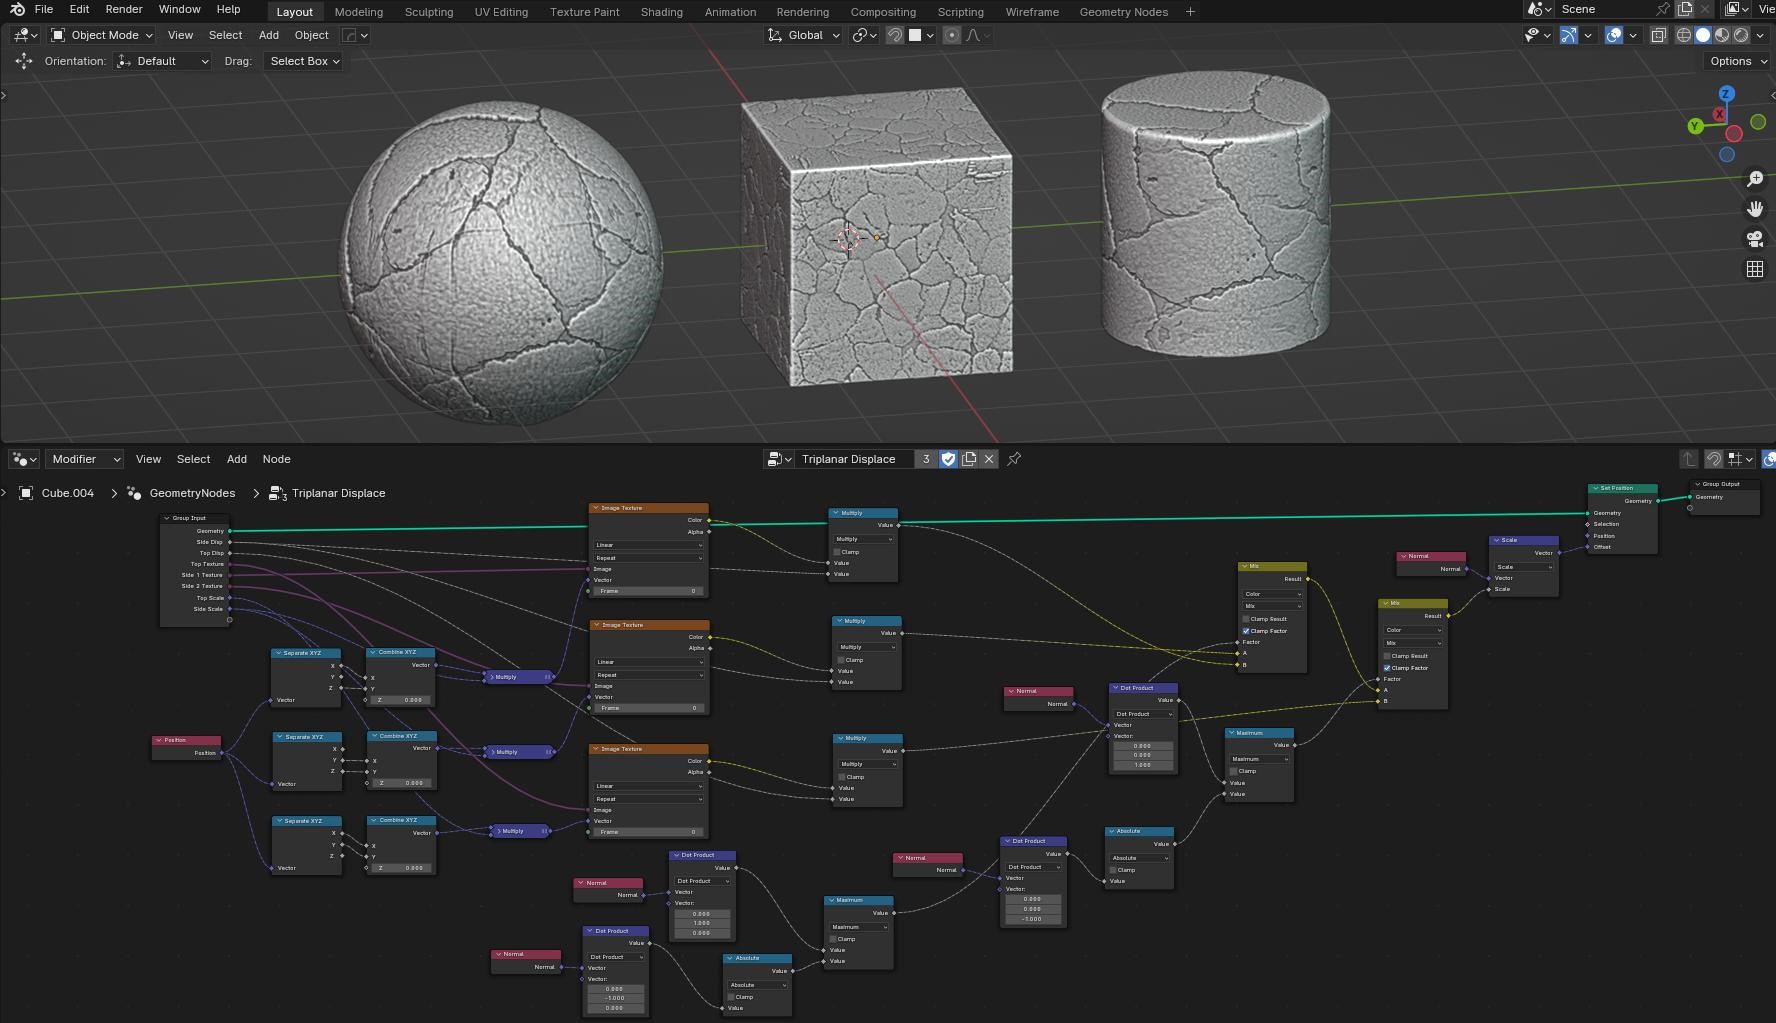
The next stage is manual sculpting. Here, I refined edge damage with a clay strip brush. I used a 10-year-old tablet for sculpting: this is still way better than a mouse. I also added damage with rock brushes, a few on this asset, and more on others. The column on the right side has a triplanar displacement geometry node setup enabled. It’s non-destructive and easy to experiment with the intensity and scale of displacement texture.

Here is the triplanar displacement node setup. Three textures are projected from three sides and mixed with masks generated with dot product vector operation. It helps to avoid seams but I still need to improve this setup to address issues on hard edges and add mask contrast parameter.
All the highpoly stone structure parts were created using the methods described before.
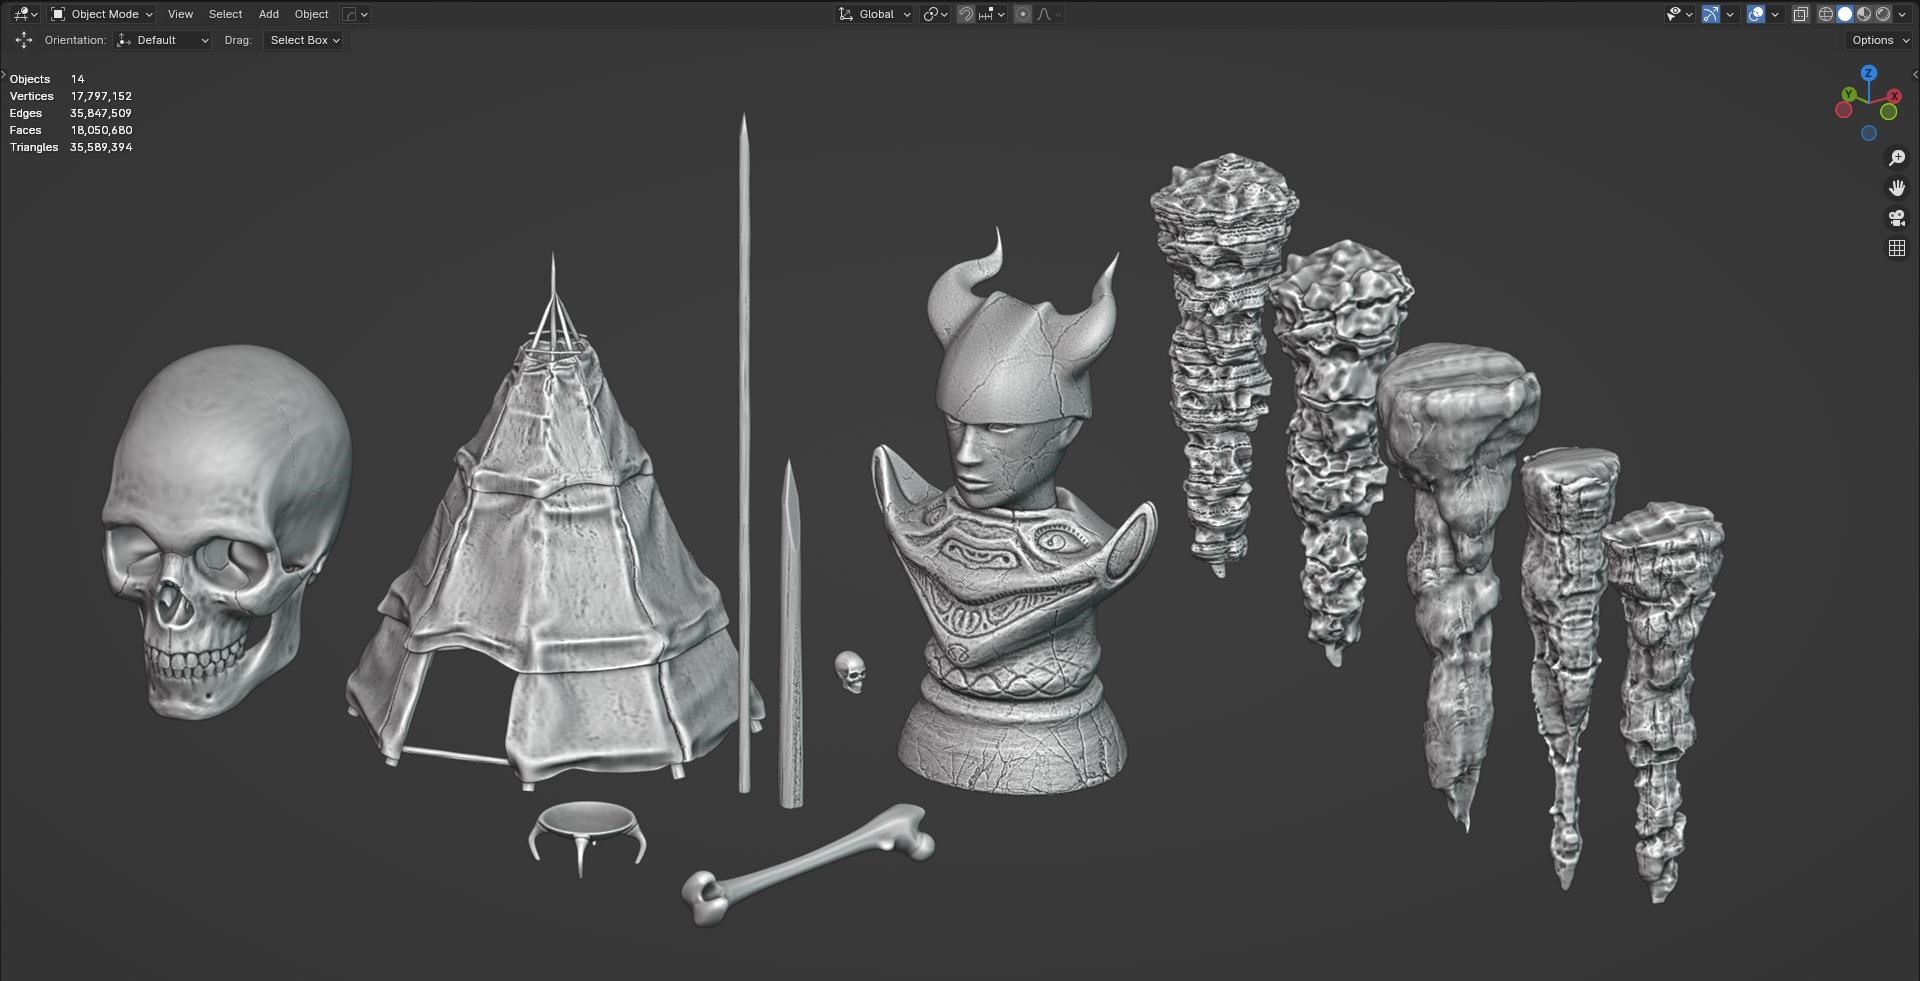
I created all the additional props as highpoly. I sculpted the skull manually using base mesh. The tent was created with three cloth simulations and manual adjustments. I modeled the stone statue using subdivision and then sculpted the details. The base mesh for rocks was generated with the rock generator, and then I used both displacement maps and manual sculpting to adjust the shape and add details.
Texturing
Texturing in Substance Painter is quite simple for these assets. I used baked curvature and AO for color information and tiled rock textures for small details.
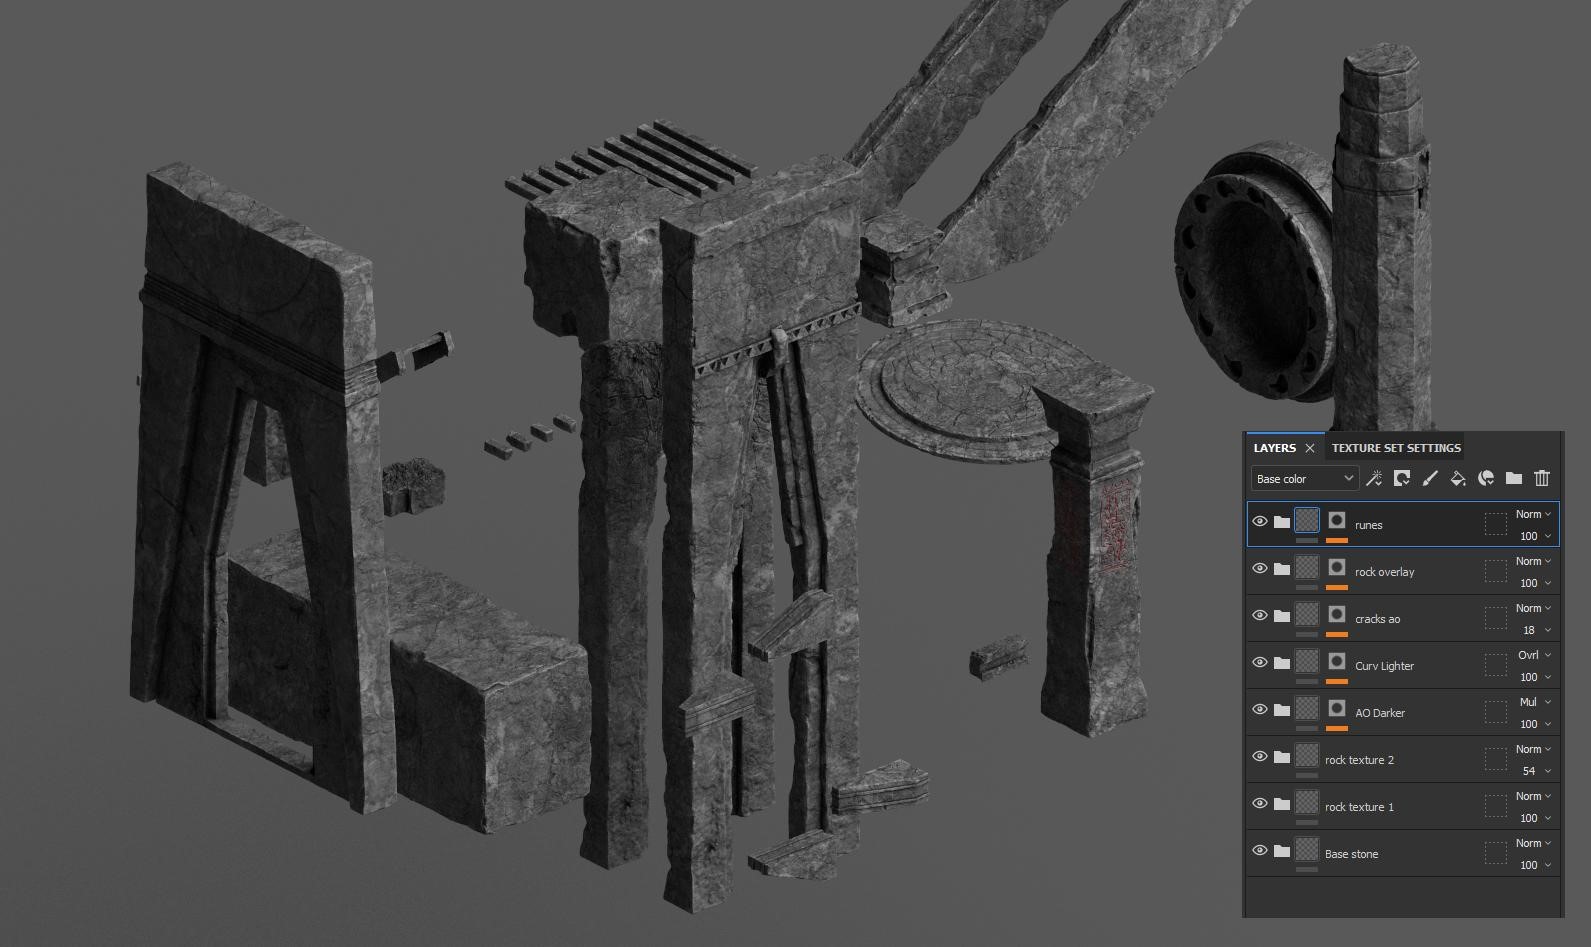
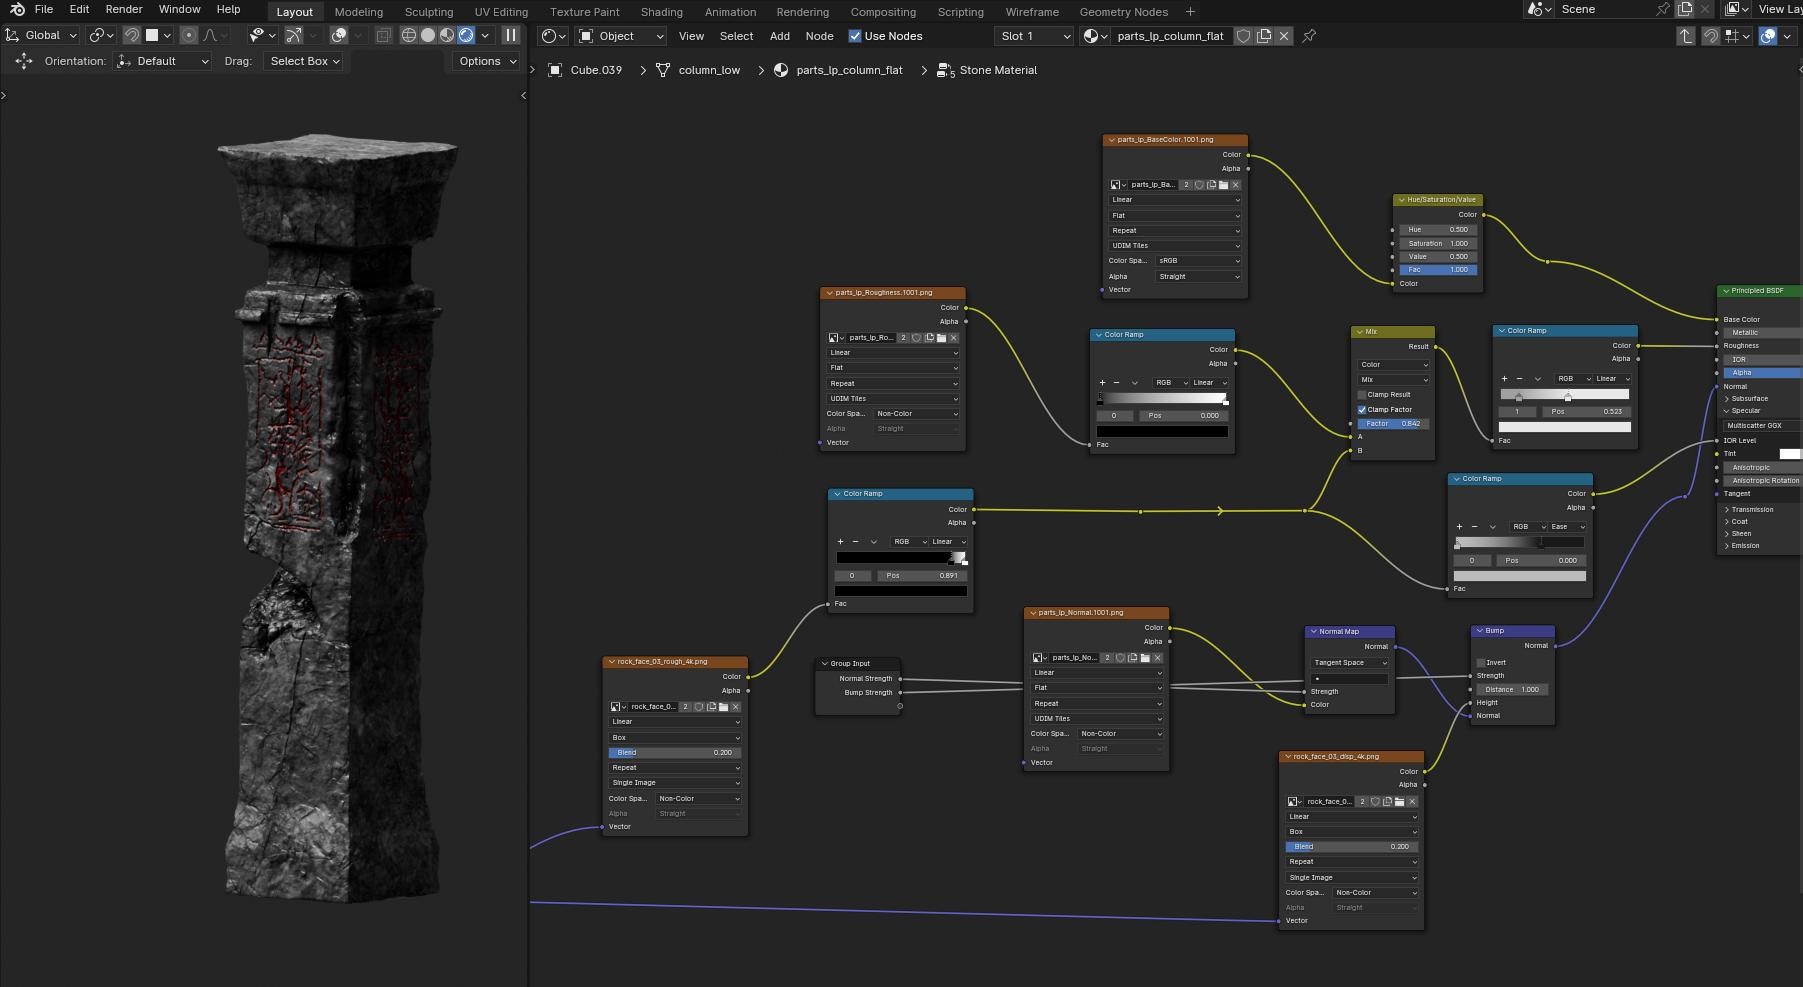
In Blender, I created a node group for stone material to be able to adjust normal and bump strength per asset instance. I mixed roughness and normal details with tiled rock texture to add small details over unique baked textures. Same for other assets—wood, bones, and leather.
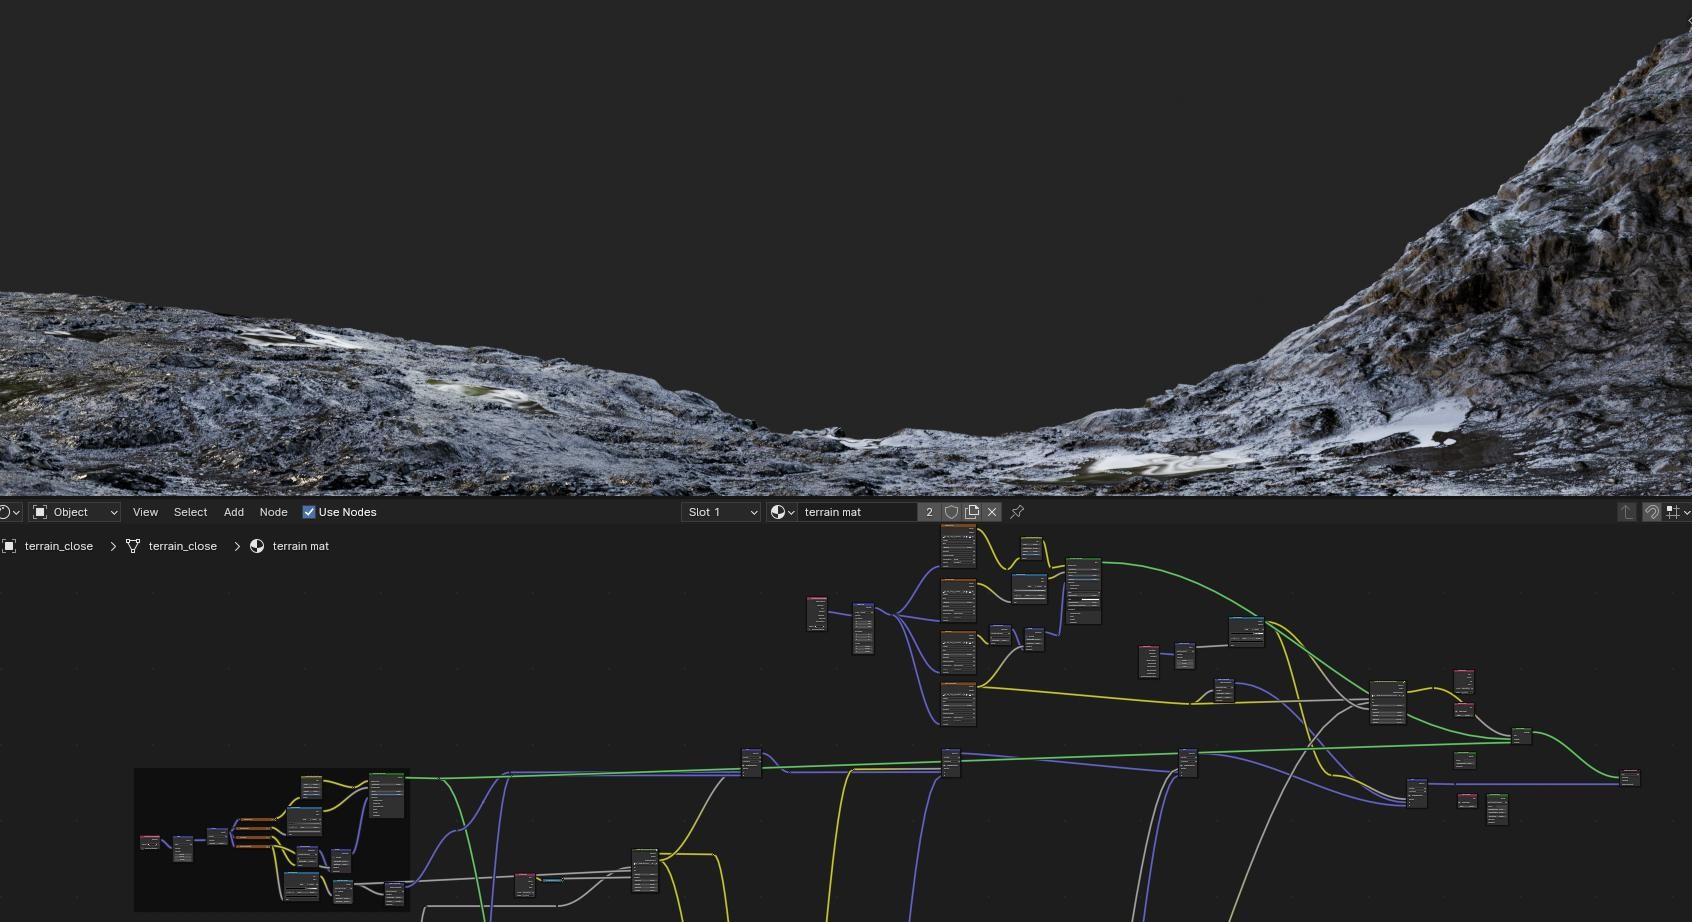
For the close-up ground, I used my premade node setup for mixing 4 textures by height and adaptive subdivision for displaced details.
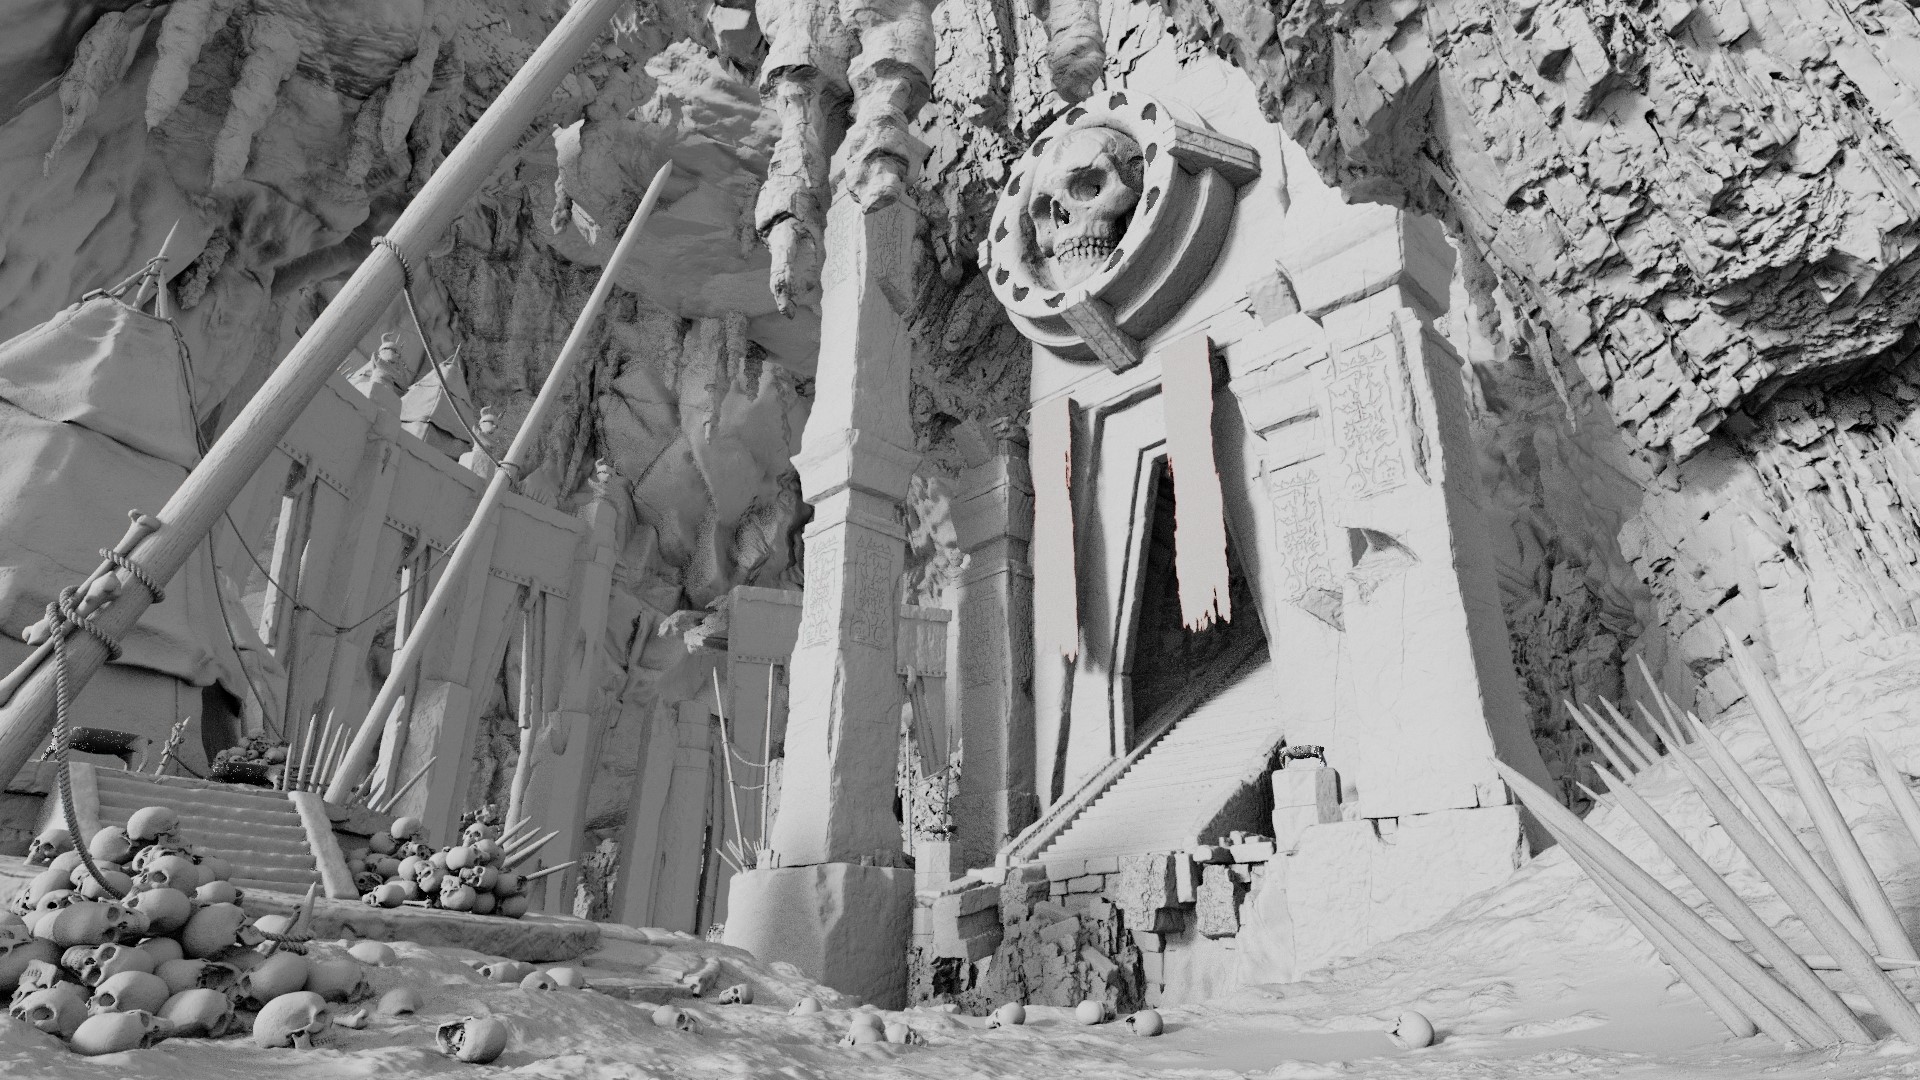
Preview of all textured assets with default HDRI.
Lighting
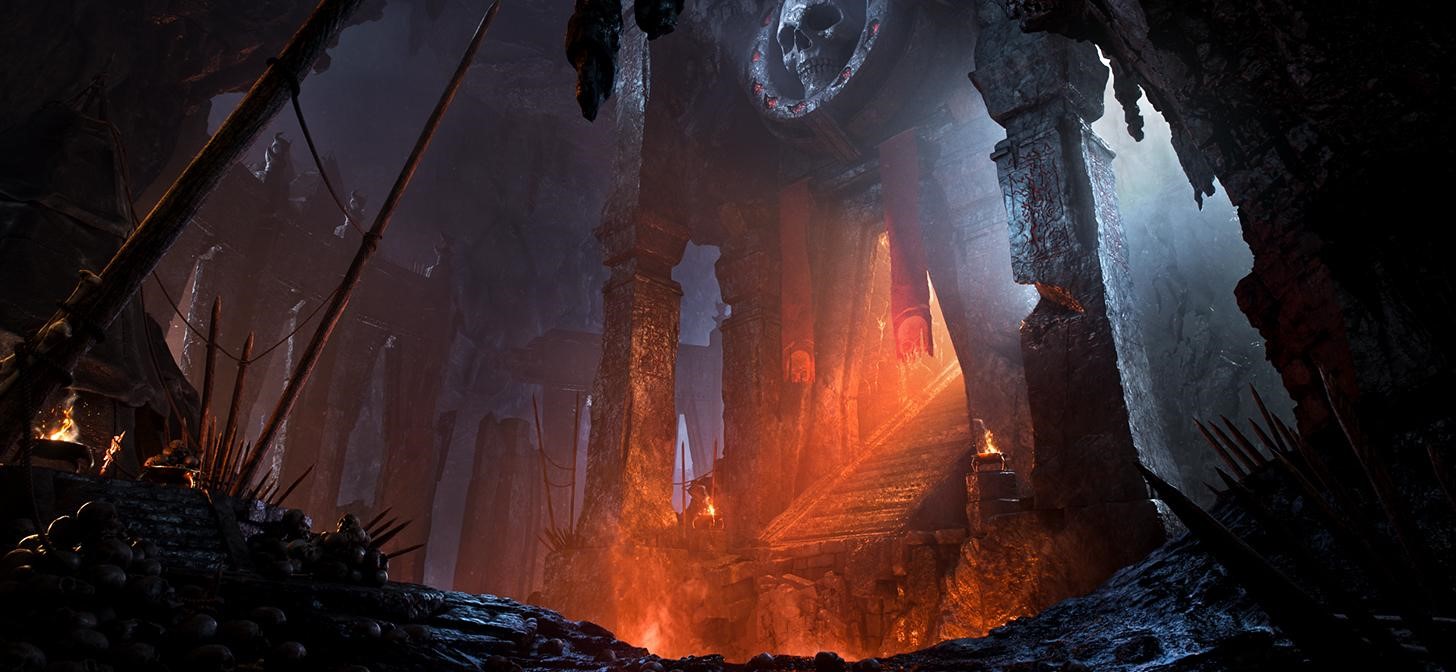
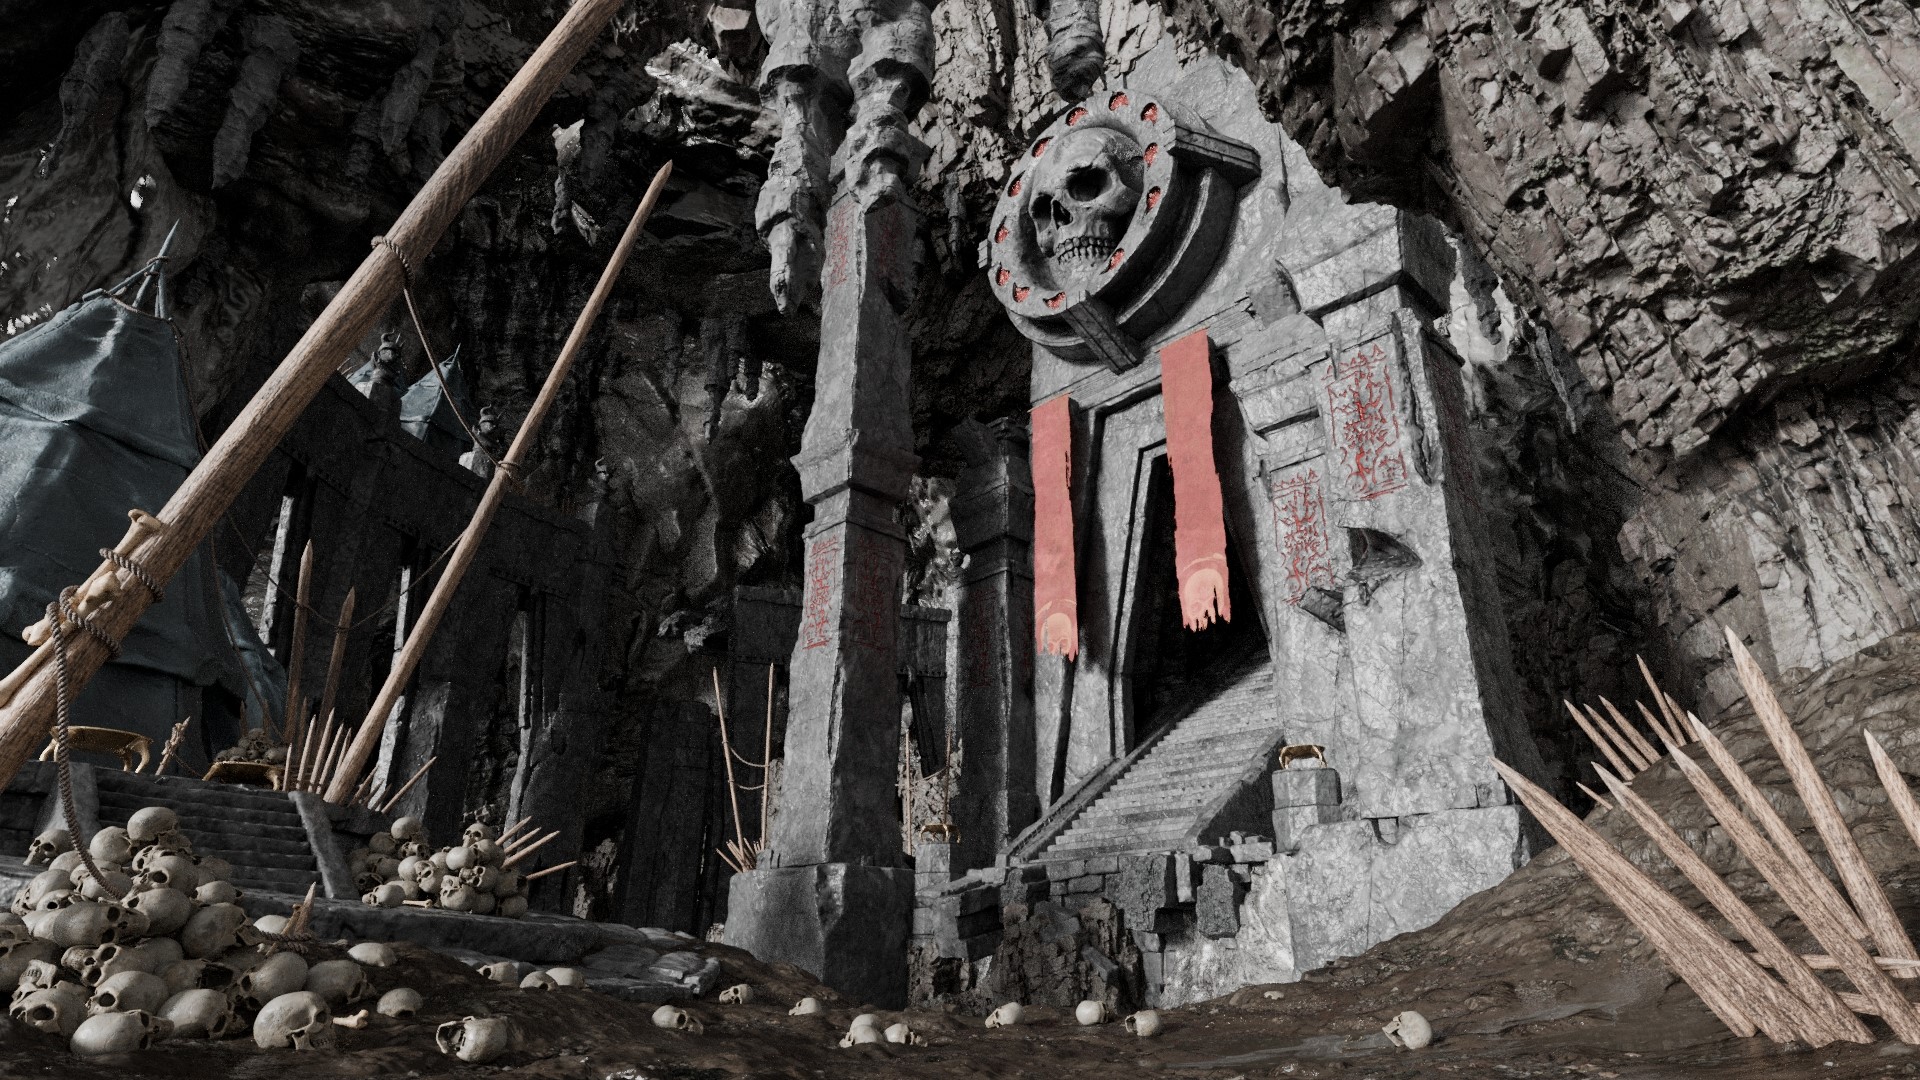
And here is my favorite part: lighting. For this scene, I placed 60 different lights to match the reference and change to my liking. I used some PNG images for effects like dust, clouds, fire, and invisible light blockers. Light blockers block different types of rays: diffuse, glossy, or volumetric where needed. In some places, I used a new light-linking feature to light only specific objects.
I added cold background lights, strong desaturated cold lights from above, warm lights from below, and strong warm light from an entrance to the dungeon. The last image has effects and light blockers enabled.
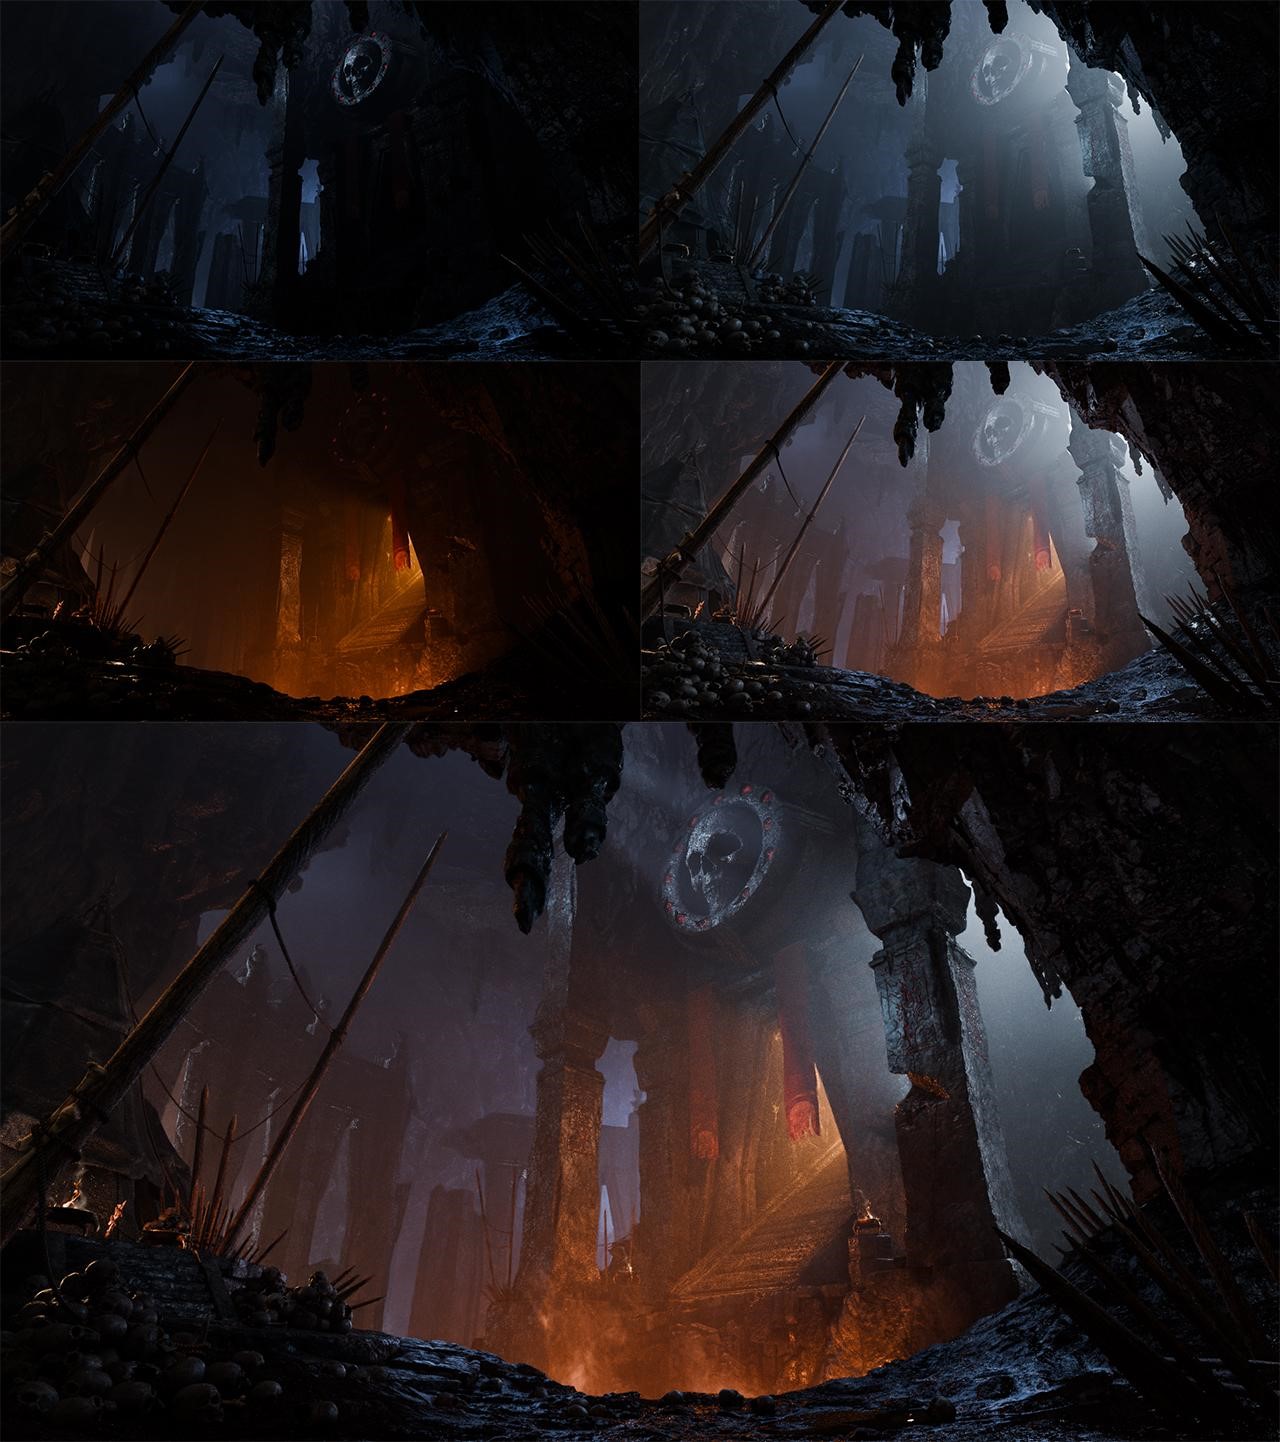
For volumetrics, I used one large sphere with a principled volume shader. Notice how the lack of volumetrics leaves the scene with no depth at all.
Post-processing
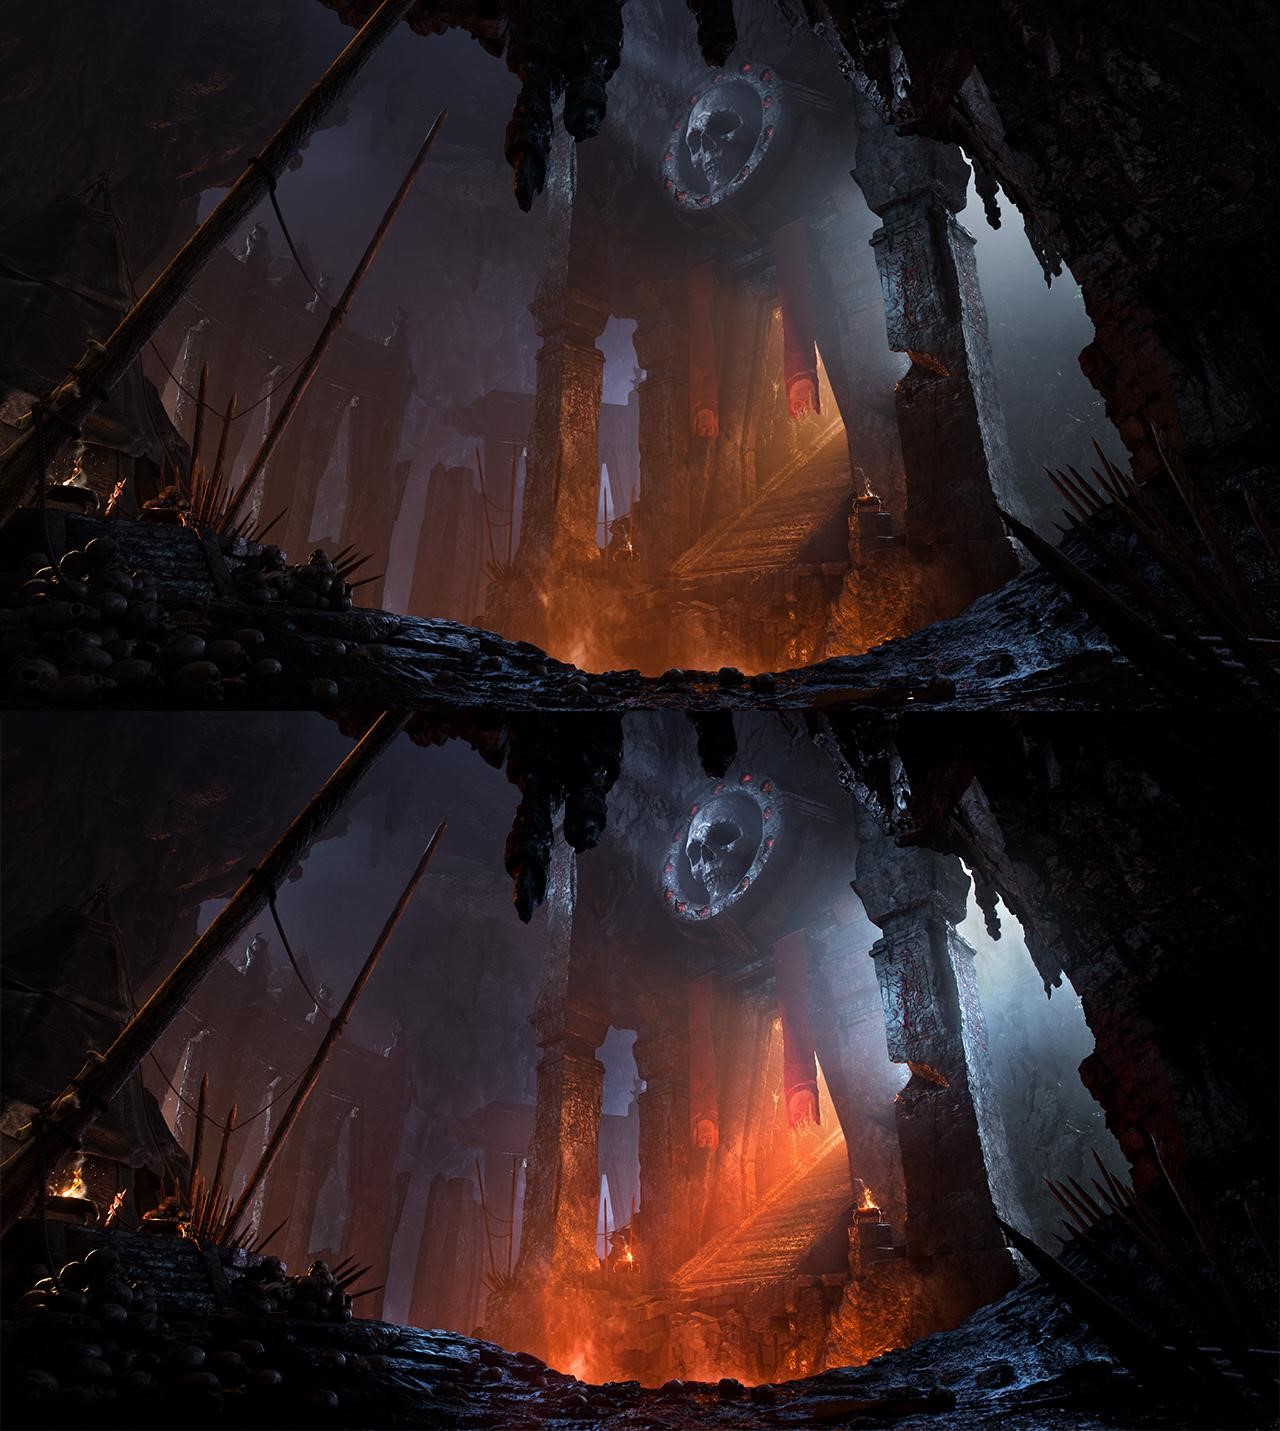
For post-processing, I did basic stuff like adjusting exposure, contrast, and hue. I added glow, chromatic aberration, and vignette.
The final 1440p render took 30 minutes to render due to volumetrics usage. The volumetrics pass was denoised separately. The scene was created and rendered with Core i5 4570 24GB RAM, RTX 3050 8GB GPU. I had no critical issues overall.
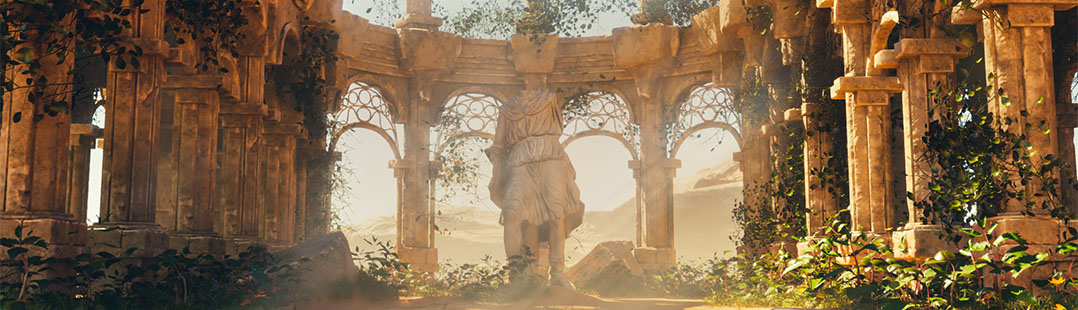
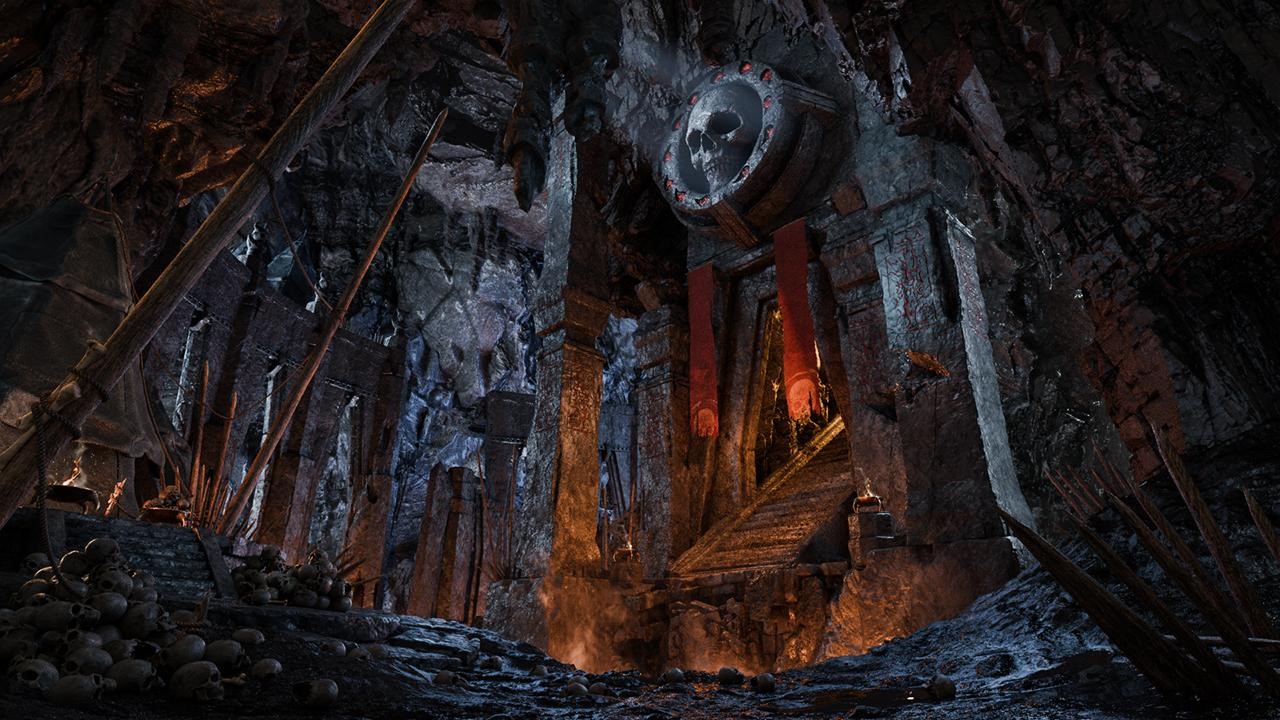
RENDER: Embracing the Dark
Video breakdown:
Thanks for reading!
About the Artist
Grigoriy Ignatyev is a 3D artist from Kazakhstan, working as a freelancer.


Good day, i learn a little 3D program. May I contact you ?
My Email is [email protected]