
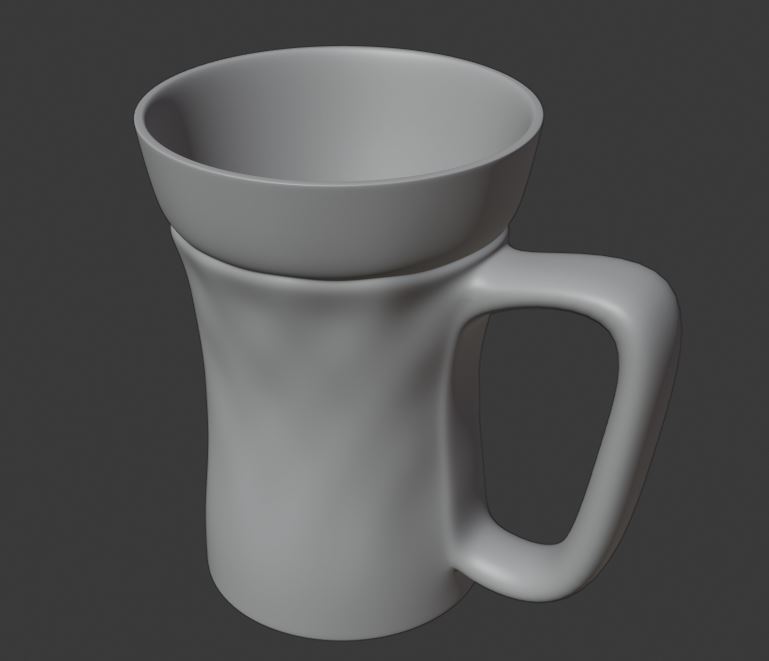
Creating CGI Beer Mugs

Hi, i’m Nishant Neeraj Agnihotri and I’m from India. i have been a self learning CG Generalist from 4 years, i’m also a civil engineer, Science passionate and during the culmination stage of my engineering i came to know about 3D designing. And after that my entire life changed.
MOTIVATION
Few months ago i was working on few random projects and thought why not make something relevant to liquid like cola, coffee or beer. Then i start looking for tutorials and find out plenty artists had worked on beer . Few of them had their own ways to make beer foam and bubbles.
But due to some reason foam just did not feel real. kinda okay, fine but not realistic. Well, that gave me a challenge to figure out how to make beer foam and bubbles more realistic. it was a complete experimental project and i really enjoyed it a lot. Took me like 20-25 minutes to figure out beer foam shaders. I checked plenty beer photos on google, had close eye on beer foam, the way it acts with light. Observed boiling milk one day to analyse few more physical properties, the way light was working with its transparency. Nothing is better than real life example. so i got the idea after watching that boiling milk. Pure physics. The Light spectrum.
MODELING
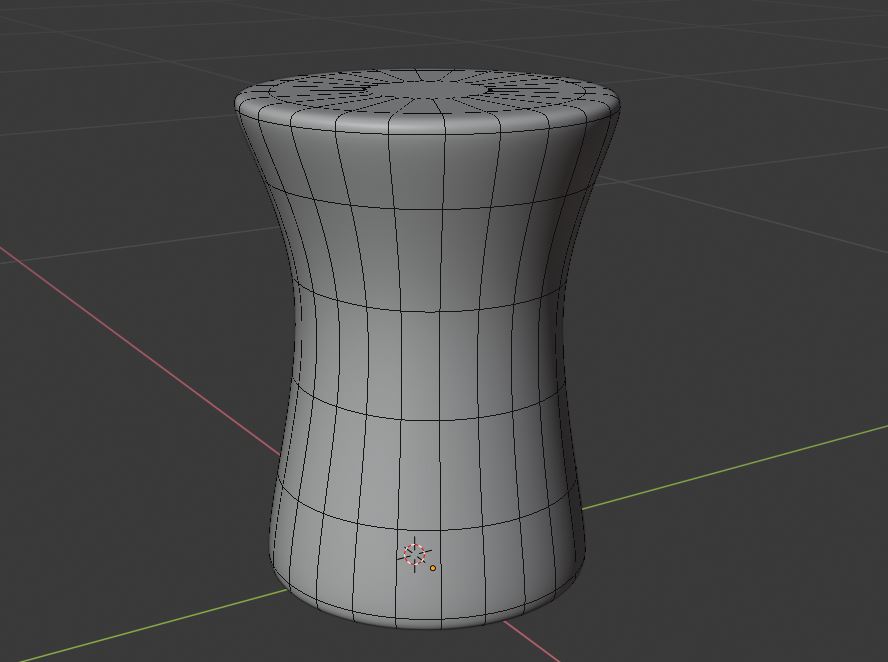
Well, Modeling was the fun part as always. Nothing much as compared to my master chief proejct. Just a simple mug, started to make with a mesh circle.
Then start building other parts from that mug, First: The beer liquor with bubbles added with particle system. Beer Liquor Mesh,
3 bubble layers for beer liquor

Put those bubble layers together as top bubbles, bottom bubbles and center bubbles.

Add those bubbles in beer liquor

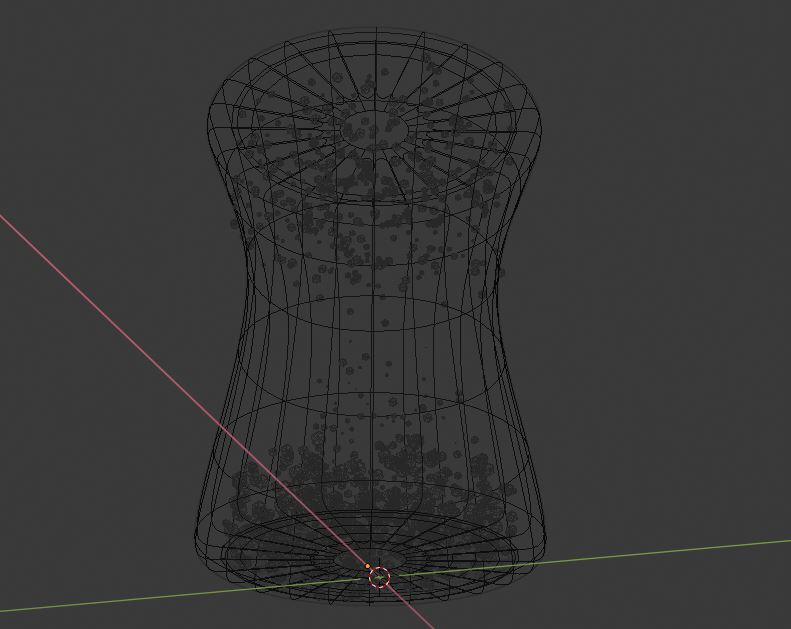
Wireframe of bubbles and beer liquor.
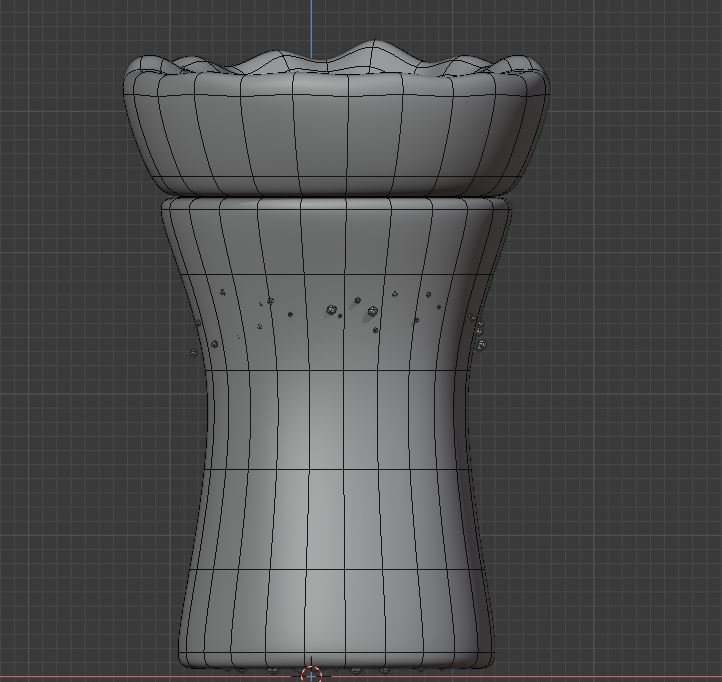
Second: Beer foam – create few displacements on top layer of it. So that i could get more or less real life disturbed and displaced foam right over the top of my beer liquor.

Beer foam right on the top of beer liquor.
Then added a particle system over beer foam to provide bubbles inside and around that foam. Conclusively those bubbles were the real deal to bring that realistic feel about beer foam.
And they did work pretty well.

X-RAY Mode of Entire Mug

UNWRAPPING
Technically, there was nothing to actually unwrap but i used a simple concrete texture on beer mug to provide condensation. So in result i had to unwrap mug only. But i could use another procedural texture rather than concrete. it would have worked pretty good too. Provided a seam in the center of mug along the side f its handle and unwrap it.
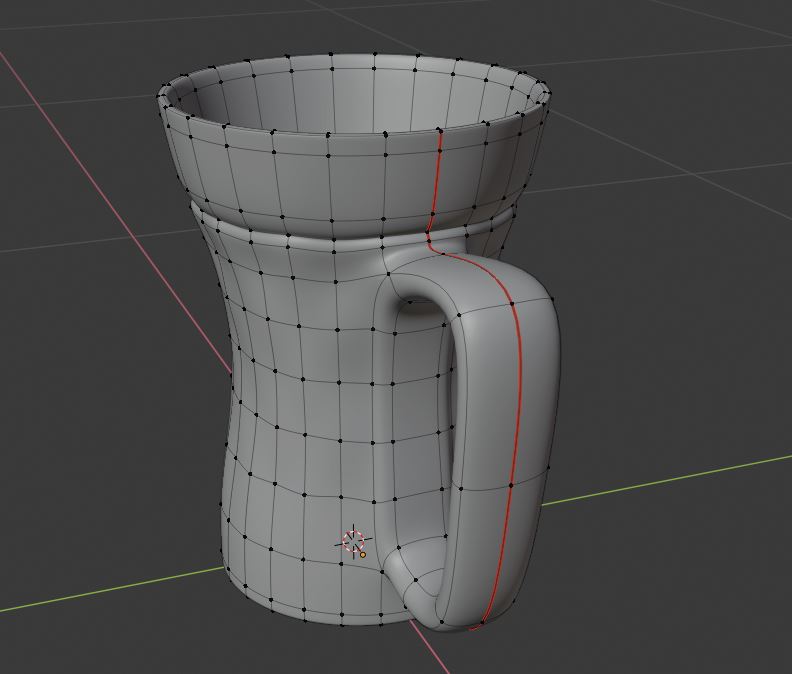
Unwrapped Mug’s mesh

TEXTURES
Well, this part of this beer mug scene is way way crucial.
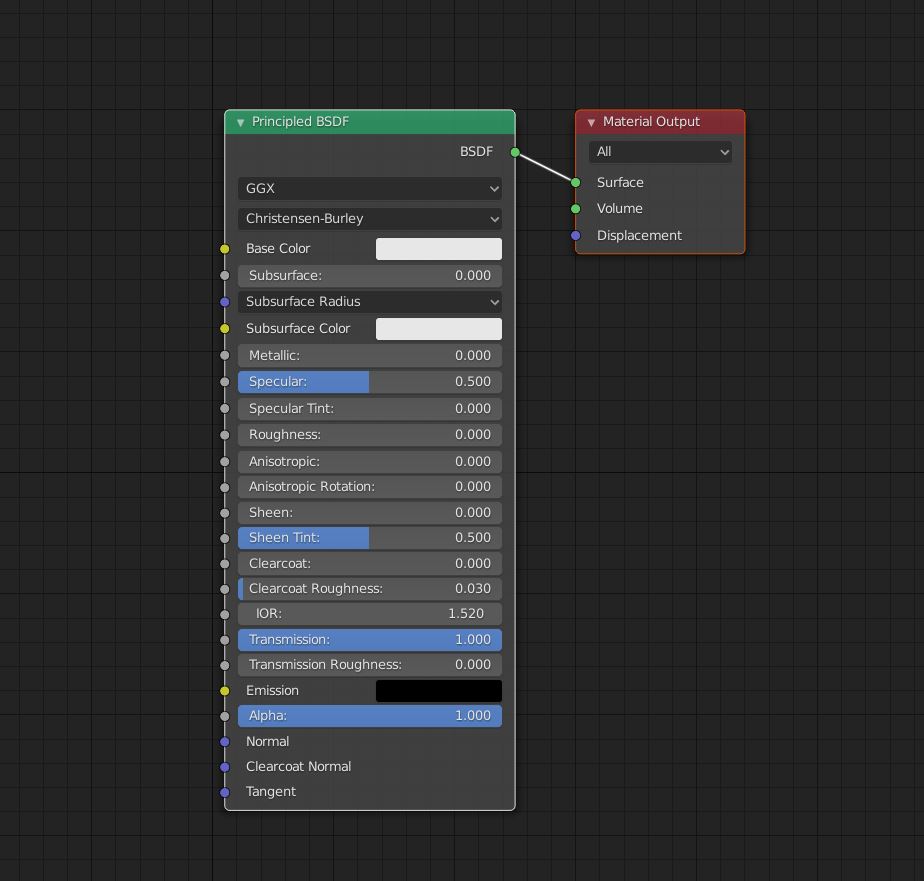
First: Mug- Simle glass texture with “principled shader” transmissionn crancked upto 1, roughness to 0. However, could use glass shader too but technically there is not much difference between both. Glass shader has liittle bit more color shift and an angular shift. But when it comes to this scene, it does not give much broader diiferentiation to the viewers eye. So i stick with “principled shader”.

second: beer liquor- Well again used a “principled shader” with a “volume absorption”.

Third: beer foam- well this texture and mesh was the 90% of my real reason to work on this project in the first place. This is the real deal and challenge. Core of beer’s realism.

I simply started with a “principled shader”, added a “RBG node” with a color near to beer liquor to add that tint in beer foam too. Then mix it with “MixRGB node”, add a white color to make turn the beer foam into more like a yellowish tint colored foam. I changed the “MixRGB node” type to “overlays”. Crank up the factor value to 0.7, so that foam scatter light into more white tone.
Then connected “MixRGB node” to “base color” as well as “SSS shader” in “principled shader”
changed “SSS shader” RGB values to 1, 0.9, 0.7. Cranked the roughness down to 0.
Now time to add some bumps otherwise foam would had look like complete milky speculated surface, so i added a “noise texture” and “voronoi texture”. Blend them together with “MixRGB node” as Add type. Then connect it “bump node” at minimal strength of 0.3 and distance to 0.1.
Then added that “principled shader” with “Transparency shader” at factor value of 0.75 otherwise beer foam can be a little transparent in rendering.
Then in last step i added a last important shader which is “volume scattter shader”, set the density and anisotropy both to 1. And connect it to volume in material output.
Fourth: Condensation- well, i used a concrete texture with noise texture to make condensation like hald chilled but wore of few parts just like happens in reality. Then connect that “Mix rgb node ” with roughness and used a color ramp to control the condensation to be more sharp or smooth.Also used bump map to make it feel like a overlapped seperate condensation layer. But understand the whole concept in tutorial. its little bit complex to explain in text.

Fifth: Bubbles- Simple “principled shader” with transmission 1 and IOR to 1.520 for strong reflections from bubble. At IOR 1( For air) reflections are not so good.. So to avoid that i had to crank up the IOR a little bit.
RENDERS
I made this project originally in blender 2.79b few months ago and then rendered it with procedural peanuts and few leaves. So these are renders from blender 2.79b


And remake this project in blende 2.80 for tutorial and render out these one’s


Youtube links for tutorial:
Feel free to contact on these social media links:


The Blender 2.80 project youtube’s link is dead :(