

Introduction
Hi, I’m Mobin, 27 years old and I’m a Turkmen living in Turkmen Sahra, located northeast of Iran. I studied civil engineering and right now I’m a part-time car mechanic and worker. I do drawings as a hobby and started getting into 3D about 1.5 years ago.
After I served my time in the army I was introduced to Blender through Steam, followed by the old 2.79 donut tutorials. I found sculpting in Blender very relaxing. These days you can find me doing more sculpts in the Blenderartists sketchbook section as Weekend.
Origins of the Project
I always found the long-time lock screen that I had on my PC very attractive, and one morning I began to wonder if I could sculpt it in Blender. Unfortunately, I never found the original illustrator of the image but I found the reference for it, which originates from around 2012.
Tools
All done inside Blender 2.81.
Total time: 3 hours
Sculpting and Modeling
I started sculpting from the basic shapes. I stretched out a sphere and duplicated it.
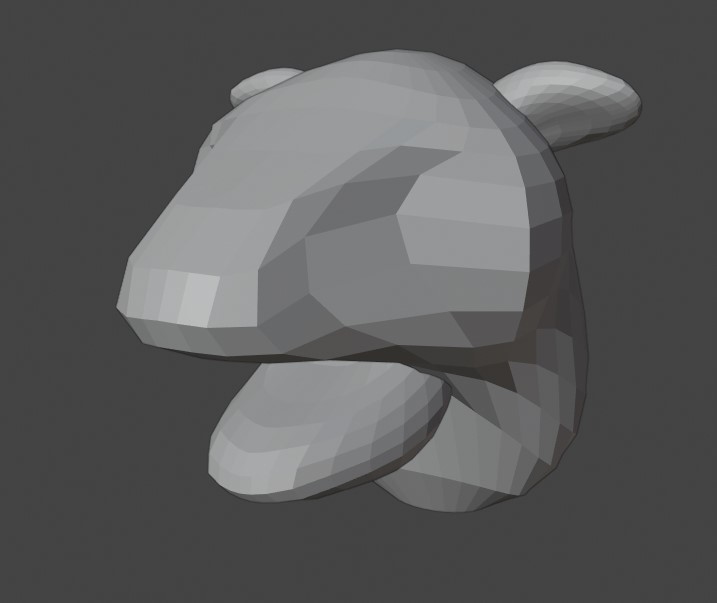
Then I adjusted it accordingly and made a base mesh out of it using the voxel remesher.
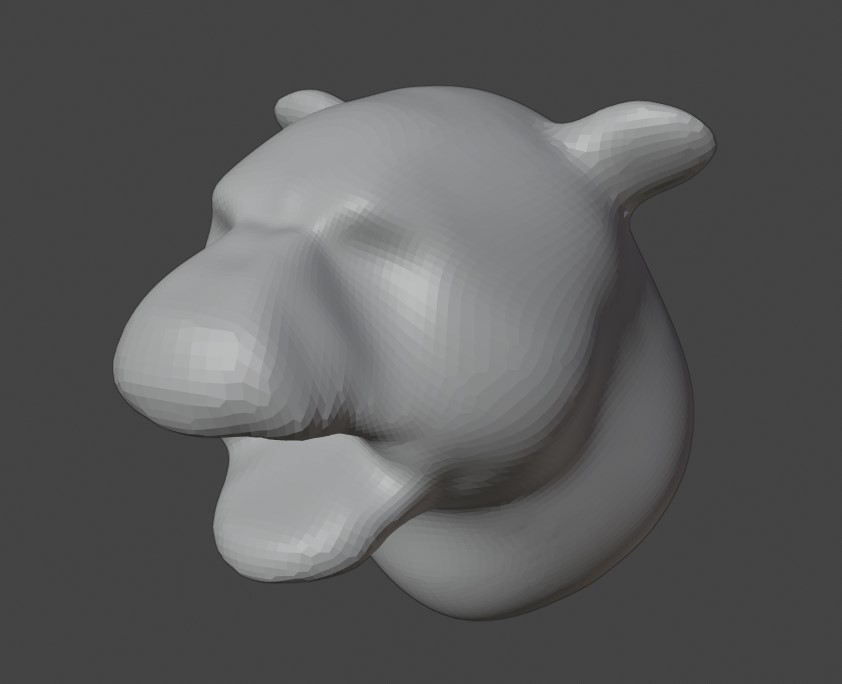
Now for the brushwork and to add more details.
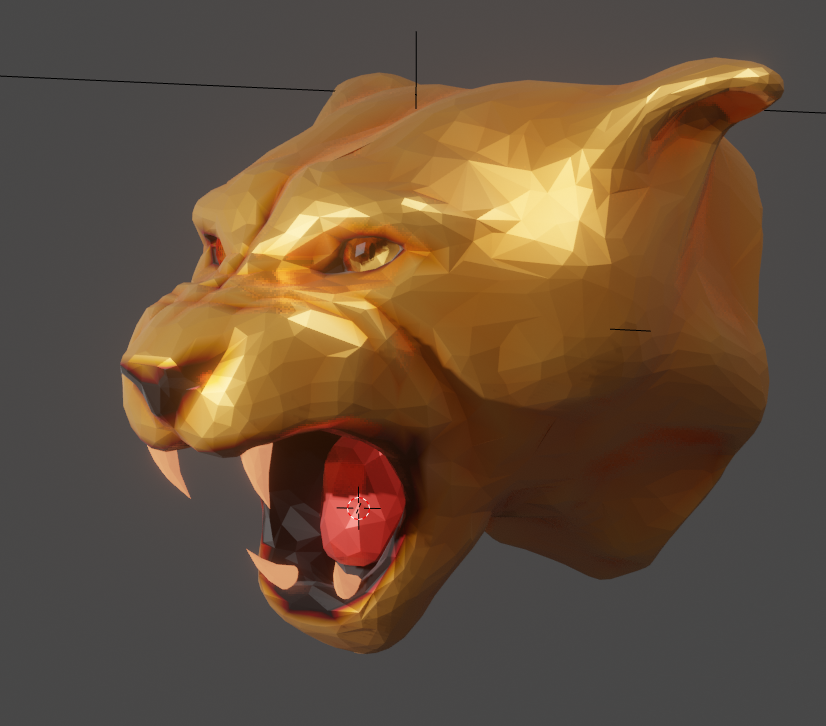
Brushwork took about 20 minutes to lay out the basics. I colored it using vertex paint and generation of dirty vertex colors (it generates something like AO as a vertex paint). I set my goal to be achieving an NPR look in EEVEE.
After that I found myself needing more references, so I googled mountain lions. (The original reference is a female lion, I presumed.)
At this stage, you have to find pictures from every angle. I mainly stuck with real-life references but I found that some drawings helped me to exaggerate the expression.
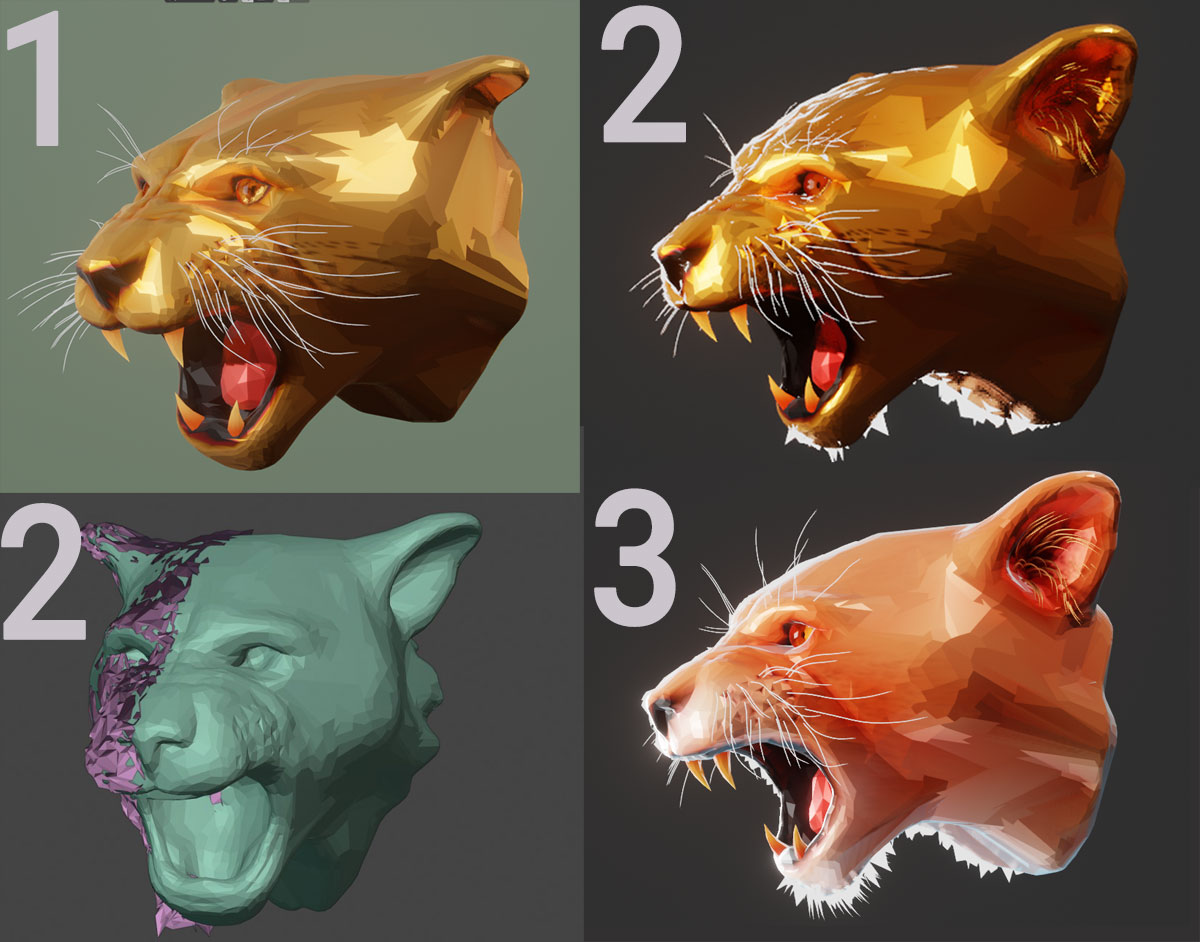
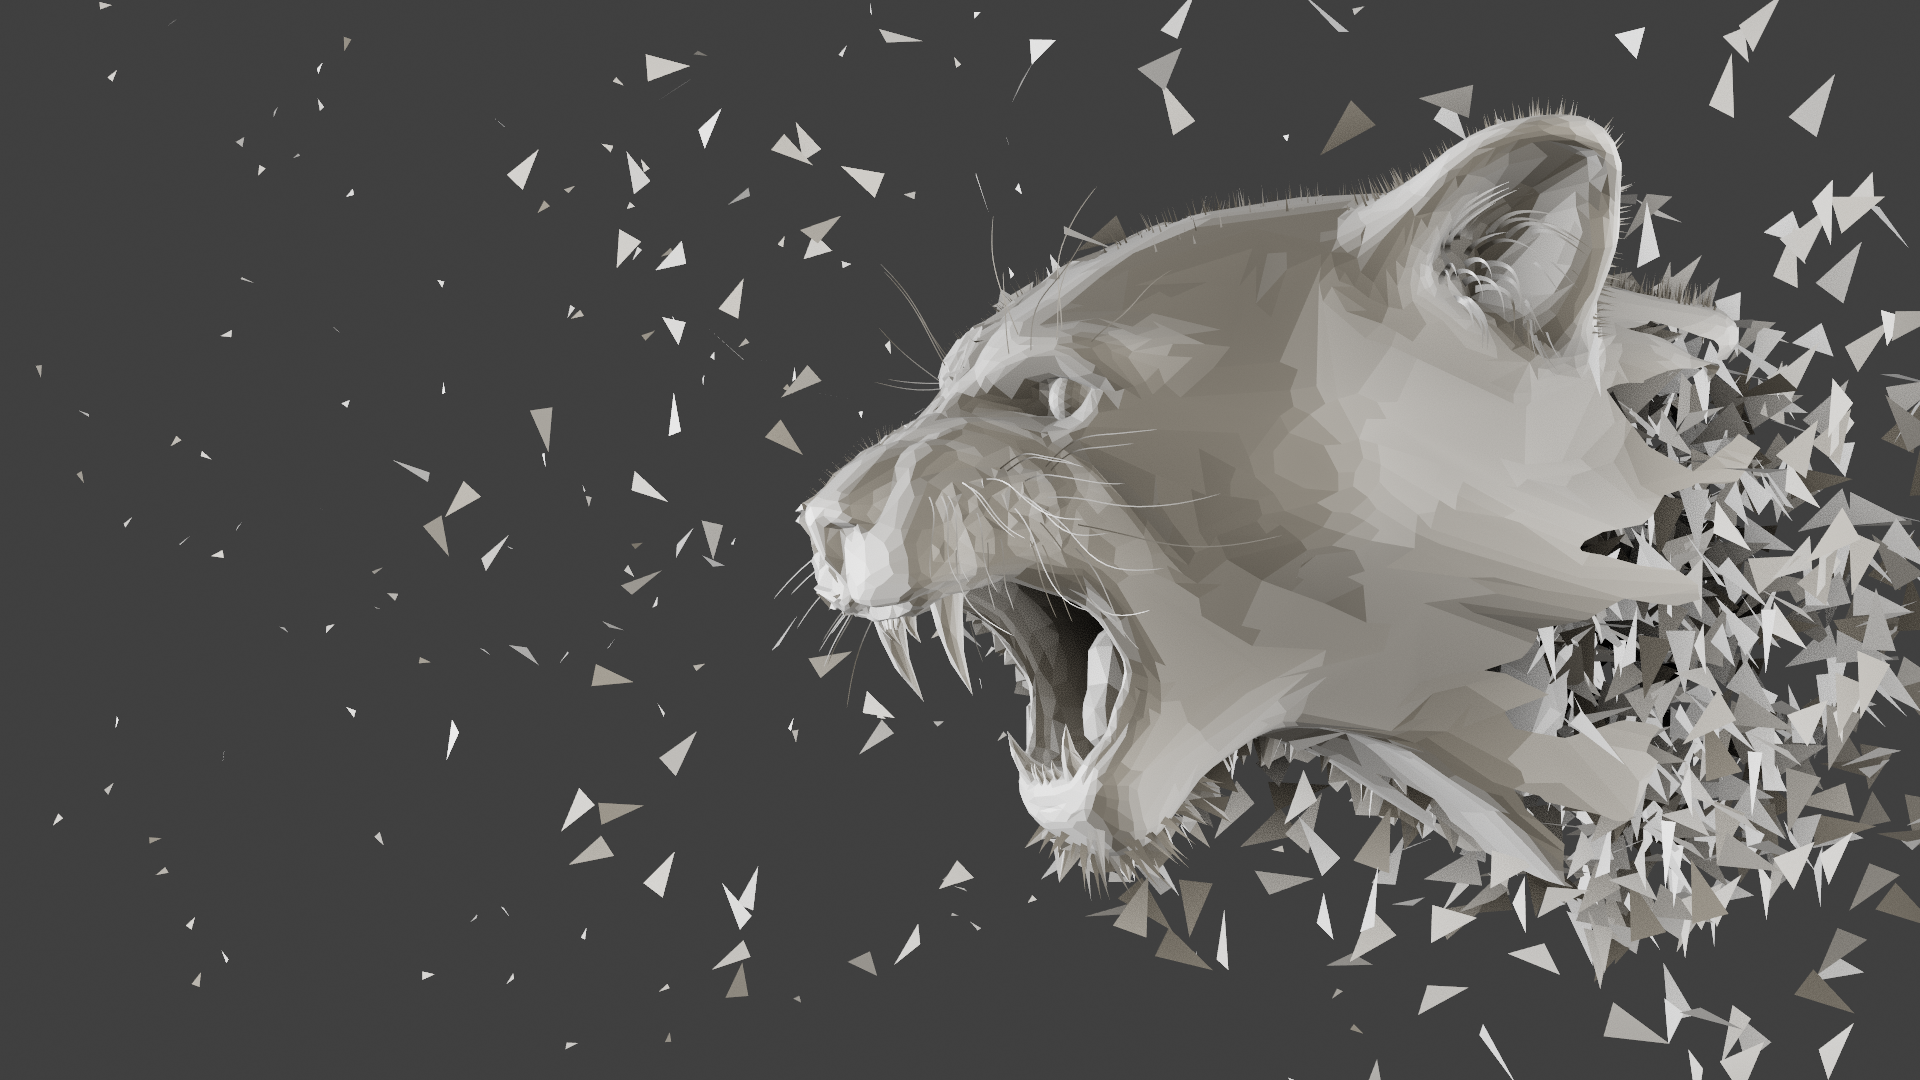
For a fixed look with NPR, grease pencil is a quick and easy tool. But I had not chosen a fixed camera at this stage and I was still experimenting with camera positioning. So the safest way to continue was hair particles. I made a white shader and applied it to the hair and planted the hairs one click at a time. (As shown on no.1)
To fake the look of backlighting, I colored the lion’s hair white. To achieve a look that was more on-point, I duplicated, inverted and fattened the lion mesh, randomized it, and hid the half that was facing the camera. (As shown on no.2)
I spent some extra time on the model doing sculpting, vertex painting, and adding extra hair particles. For the extra shine and shading on the lion, I just used the Principled BSDF with a metallic value of 0.9. (As shown on no.3)
To achieve a pixelated look and feel, I used the decimate modifier on top of my sculpt so I could edit it easily.
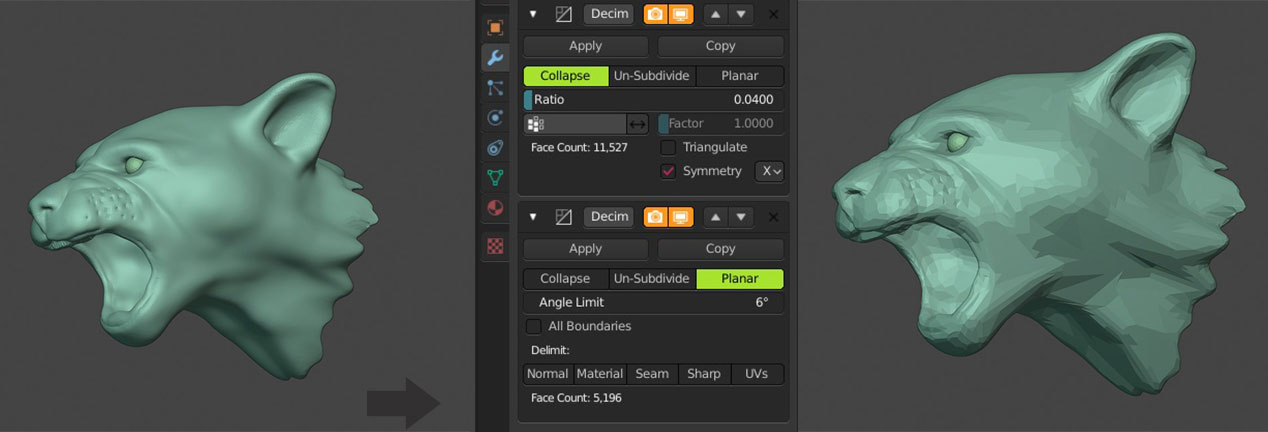
Two layers of decimation were ok for me. One for getting it to a low poly look and the second for getting that edgy look using planar decimation. Note that I had these modifiers from the early stages and turned them on to check if the sculpt was good enough.
Lighting
Lighting plays a large role in the feeling that NPR renders send to the viewer. Because I had faked most of my lighting before, I could just play around with lights to get the highlights that I wanted, as it was the only thing I wanted from them.
Final Render
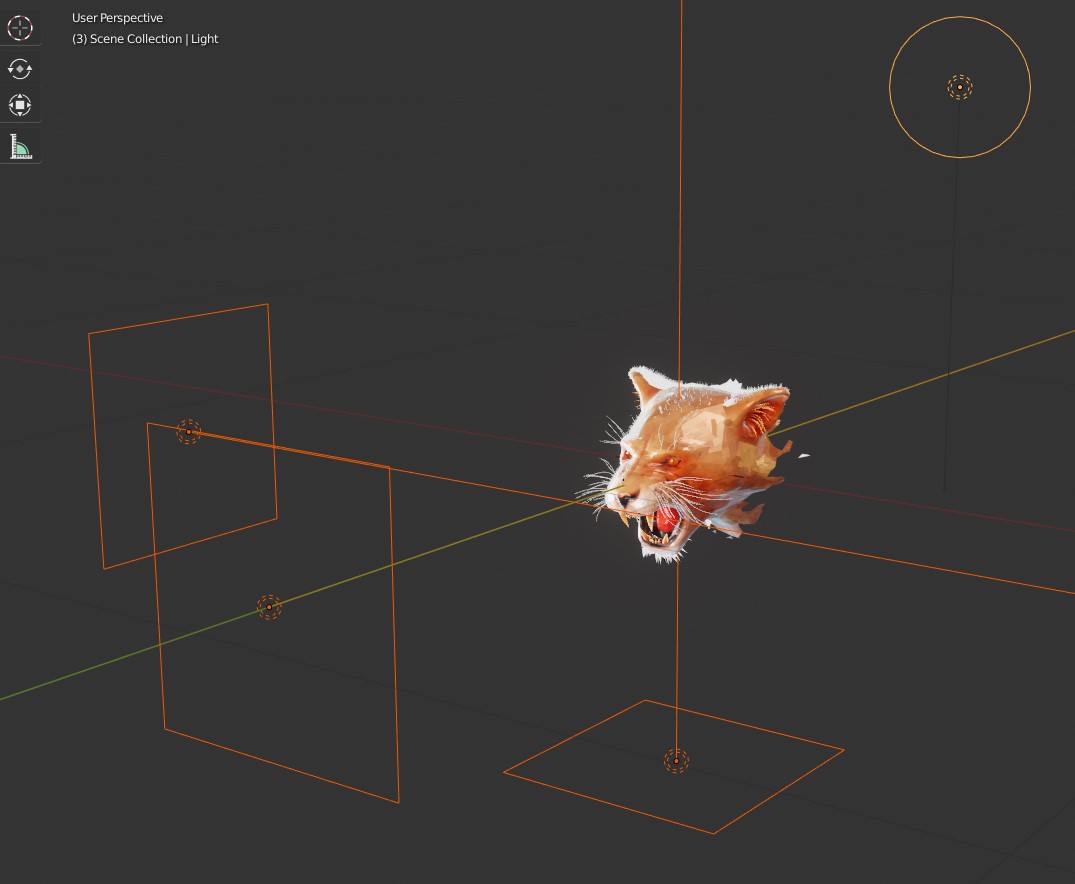
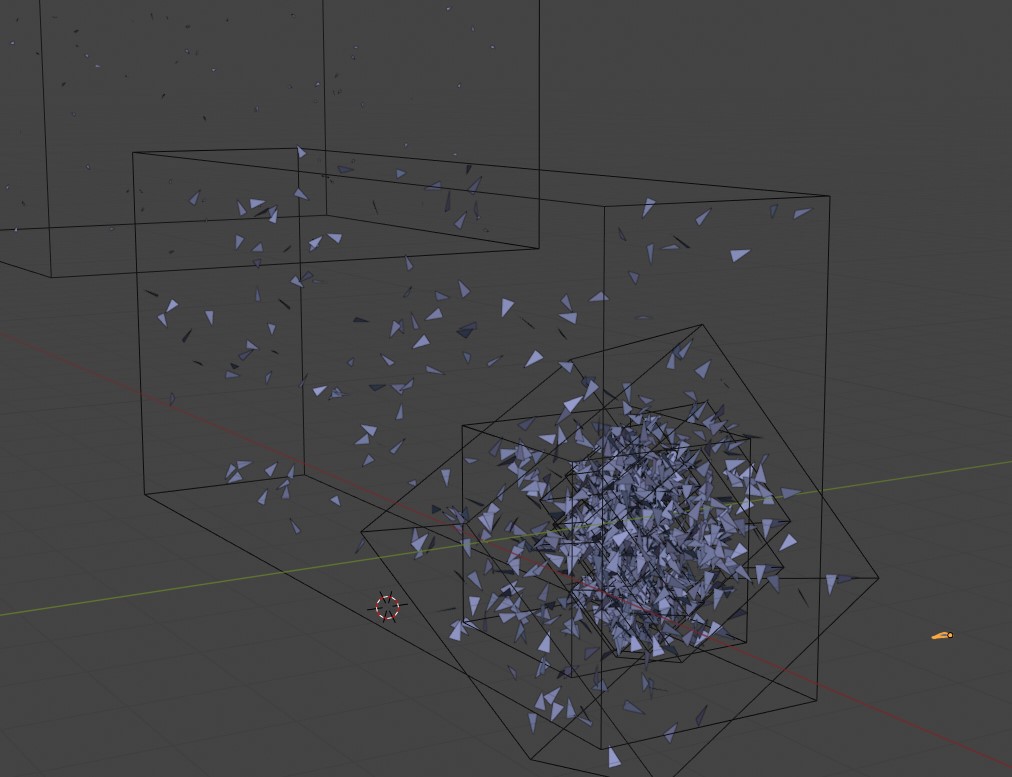
So It’s time to wrap it up! I added some extra particles around the lion:
For the background gradient I usually do this node setup:
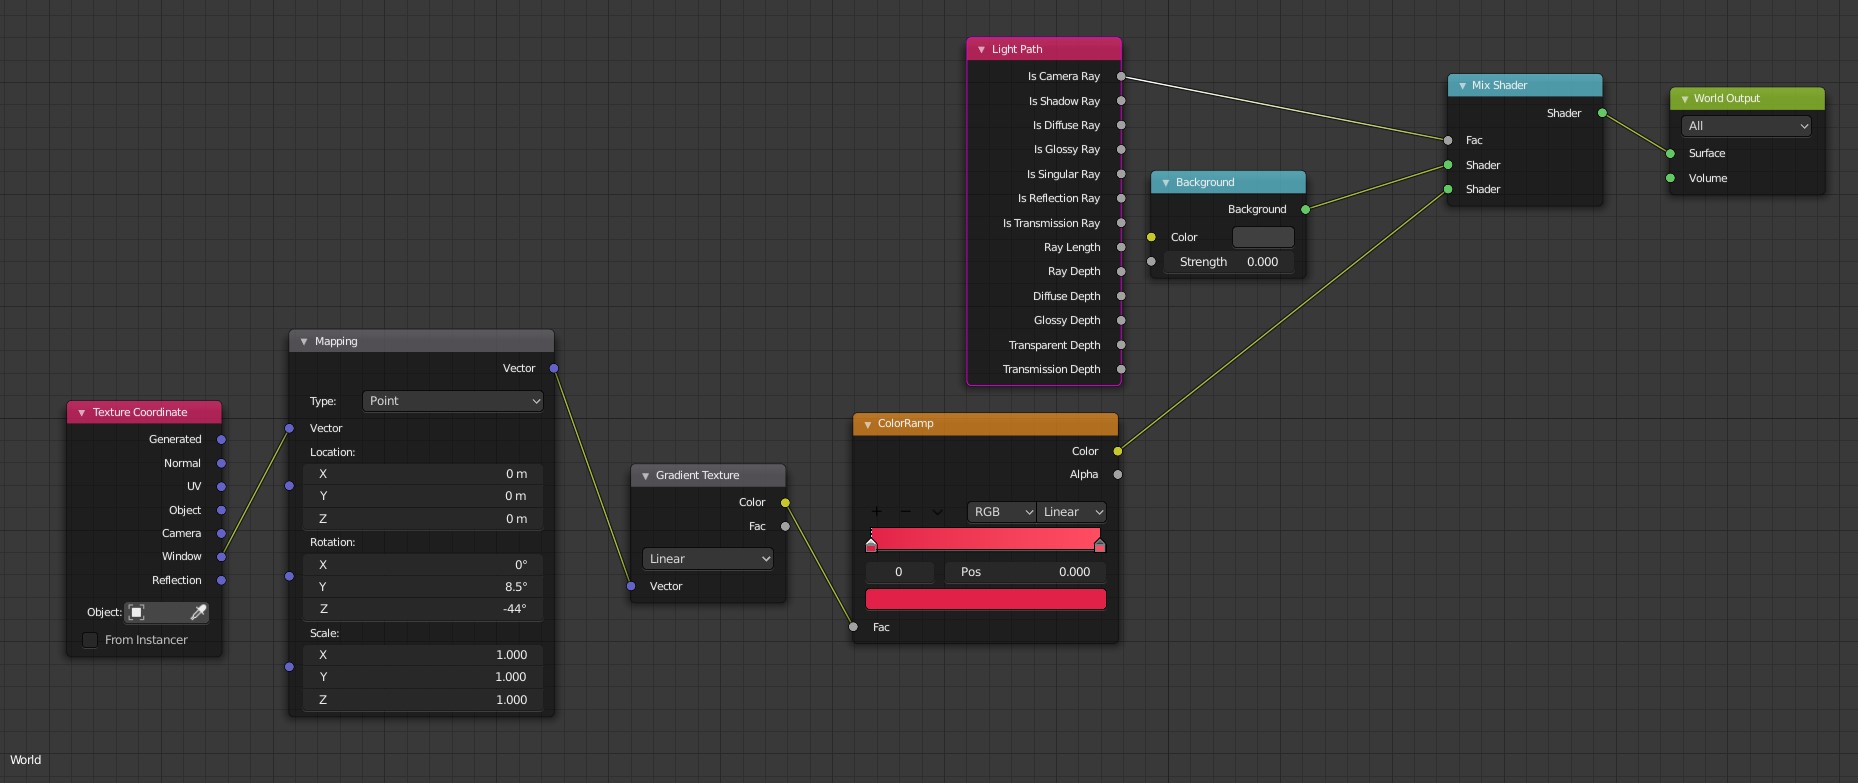
Making the color of background separate from what it actually emits lets me have more control over my final render.
And a little color correction in compositing. Nothing too complex:
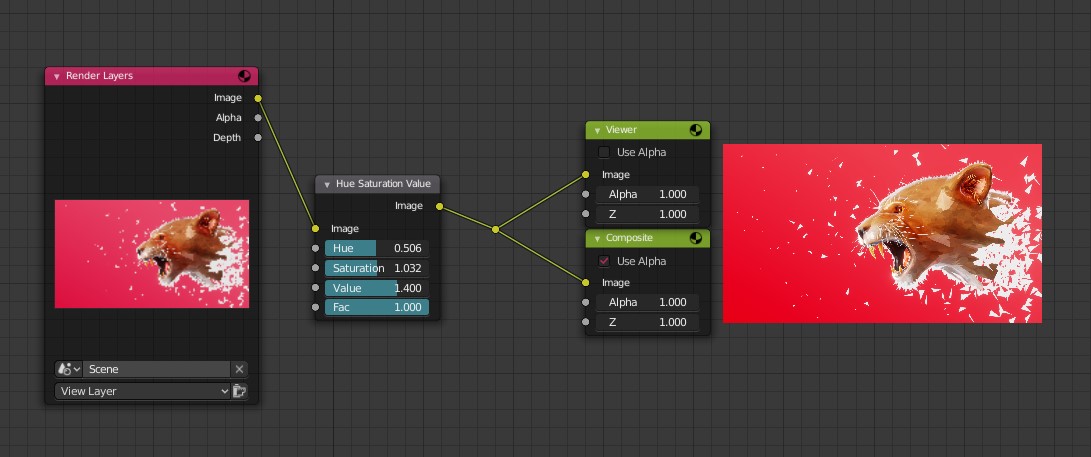
And there we have it!

About the Author
 Mobin (aka. Weekend) Part-time Hobbyist artist.
12 Comments
WoW dude great work! You have learned a lot in 1.5 years, stunning to see so much progress!
PS perhaps you should look how to do the disintegration with particles as well. That way you can even make nice animation of the lion. Ive seen a couple of them, i found 2 tuts in my list. Perhaps it can help you
https://www.youtube.com/watch?v=wm4rDDRcbDQ&t=3s
https://www.youtube.com/watch?v=d59AouNM9lk
You got quite some artskills i think, you sculpts look so good. Did you learn it all that quick? I mean people think if you can draw you can also sculpt, but its complete different artform
NOt sure my first comment got trough?
You got quite some artskills i think, you sculpts look so good. Did you learn it all that quick? I mean people think if you can draw you can also sculpt, but its complete different artform.
PS i have 2 nice tuts with with you can really disintegrate the lion. Perhaps it helps you
Dispersion Effect in Blender Part 1- Thanos Fx
https://www.youtube.com/watch?v=d59AouNM9lk
[016] Blender tutorial - Disintegration
https://www.youtube.com/watch?v=wm4rDDRcbDQ&t=3s
Thanks man. Well it wasn't easy at first and it's not any easier right now. But I manage. if you draw 2d with 3d in mind you might improve both ways. but yes they are different.
Thanks for the helpful tuts. Will look into them.
As I stated earlier when I first saw the image show up online in here somewhere a few weeks ago - FANTASTIC!! This is just great work!! I love it!! And really cool to see your workflow too. Excellent work!!!
Thanks man I was not a good writer so It took me lots of time and help to write this. :D
Great work, but sorry to ask such a lame question...
What theme is that?! Like the colours :]
I got the color theme from the references I used and made it more saturated. So I guess you could say McDonald's theme?!!! :D
Do you mean your image? I mean the interface theme! XD
wops! :D It's an sligtly edited Monokai Blender theme I found. Google it.
Thanks :]