
Behind the Scenes: Tomato in Trouble
Who am I?
My name is Victor Ascenção. I’m 53 and I was born in Caracas, Venezuela but currently, I live in Castelo Branco, Portugal. My formal studies were in Advertising and Marketing in the “Instituto Universitario de Nuevas Profesiones” in Caracas, Venezuela. I have always been interested in drawing and design and particularly passionate about the 3D world that still amazes me.
In my daily work I design products for our manufacturing company using SolidWorks but I also use other tools, such as MODO and Octane (as well as Illustrator, Photoshop, and InDesign) to create promotional materials for our catalogs and website.
My Experience with Blender
I decided to try Blender a long time ago, but for me it was very confusing on the UI side and, as a lot of people imagine, for things like “the right-click issue” :) , After version 2.79 I felt the direction of Blender UI was becoming more similar to other programs that I was familiar with, and on the arrival of version 2.8 and after reading lots of people saying how capable Blender is (even in other software forums), I decided it was definitely time for me to learn Blender.
I found that Blender is a very powerful tool and has this great community of very highly knowledgeable people willing to help everybody, an endless amount of great add-ons to do almost anything you need to do, lots and lots of amazing training available, so… here I am learning how to use this amazing tool while having lots of fun in the process.
I don’t have any formal training in any 3D (or 2D) application; I learn by doing, reading, and watching a lot of great tutorials available on the Internet.
About the “Tomato in Trouble” Modeling
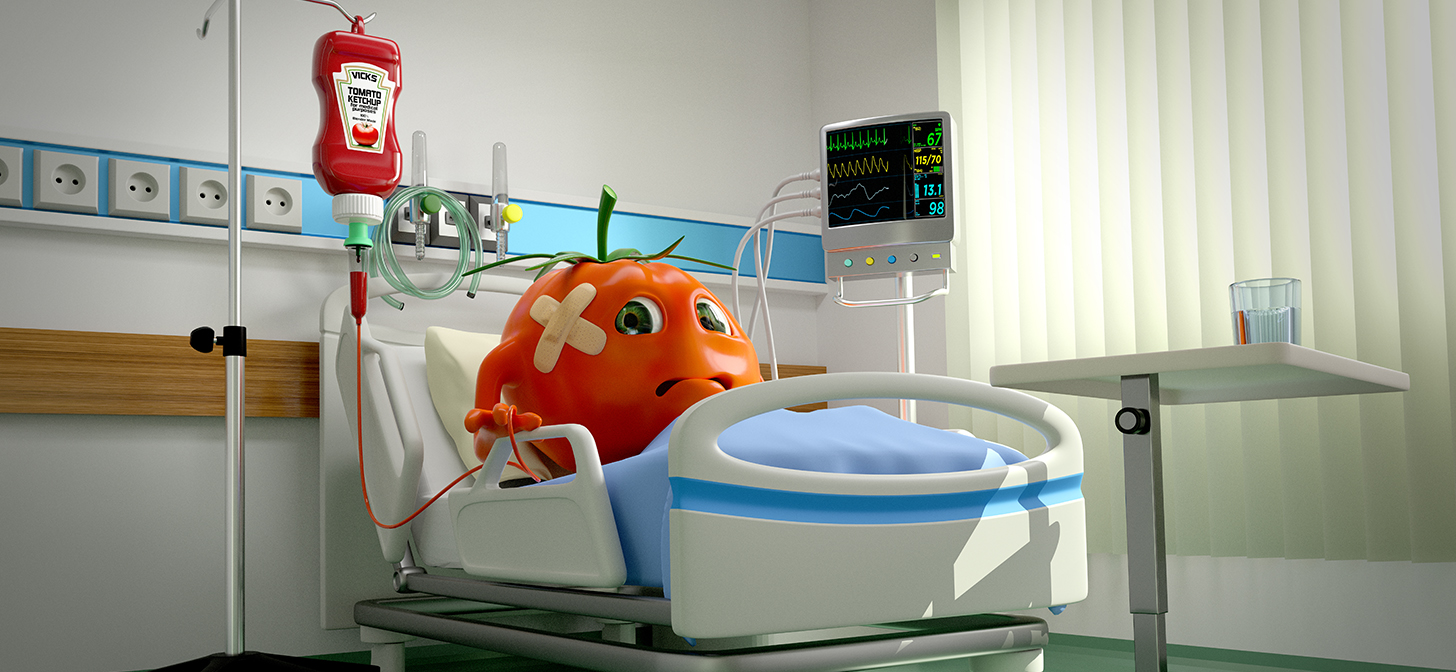
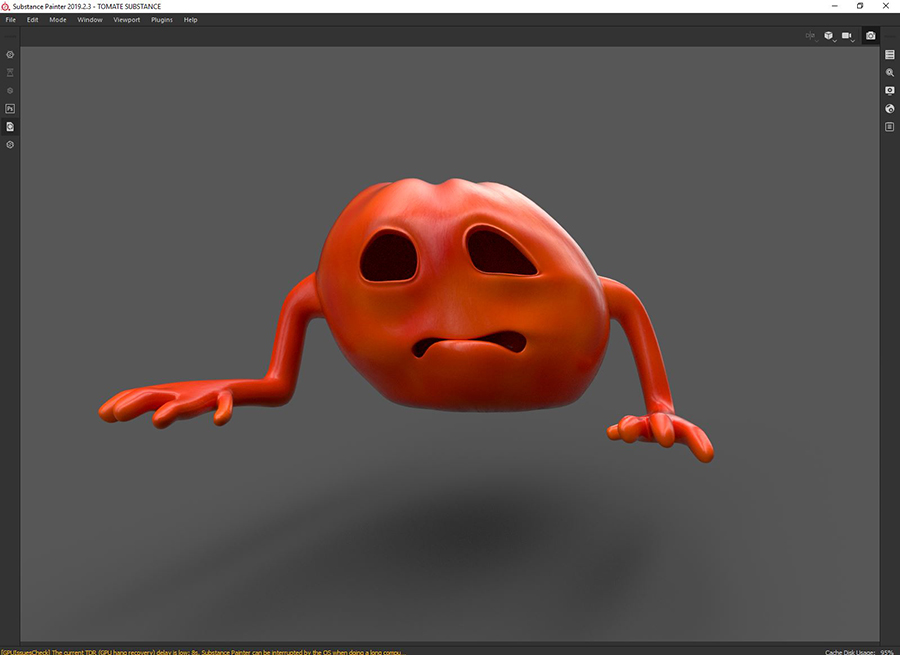
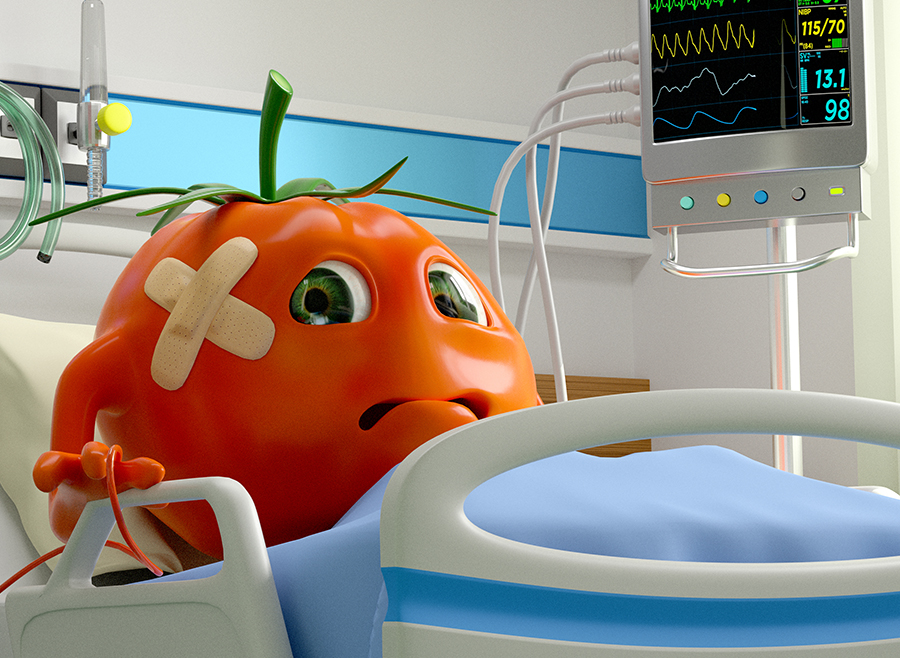
As I said, I like to learn by doing stuff, so one Saturday morning I decided to create something fun to try some Blender tools. The idea of a tomato that had had an accident seemed fun enough to me. then I started by model the little guy starting from Blender’s famous default cube.

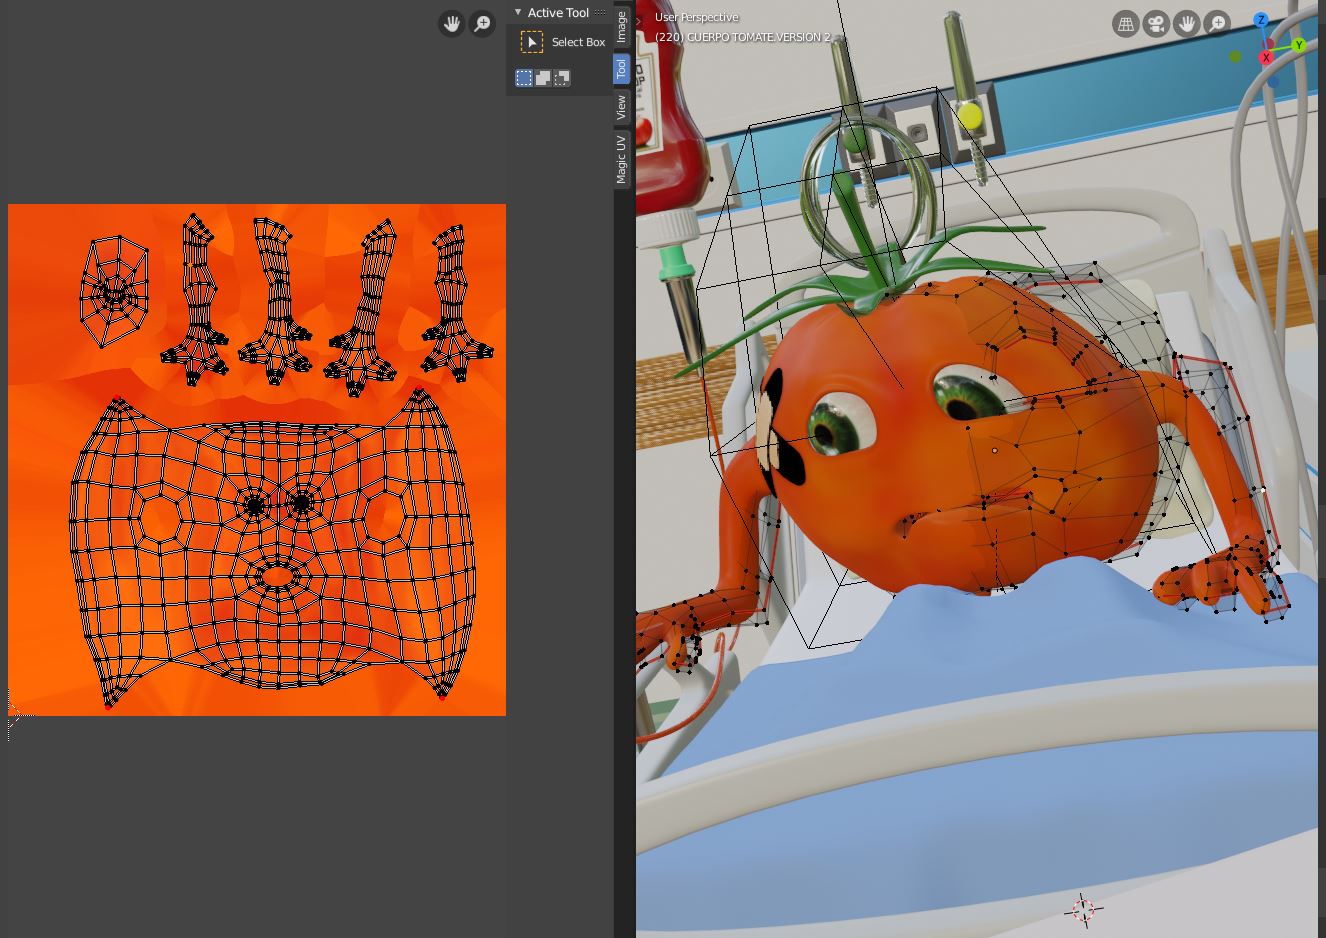
After creating the tomato, I UV unwrapped it and his eyes. Then I created the band-aids using the Shrinkwrap Modifier and modeling them directly onto the tomato’s surface.
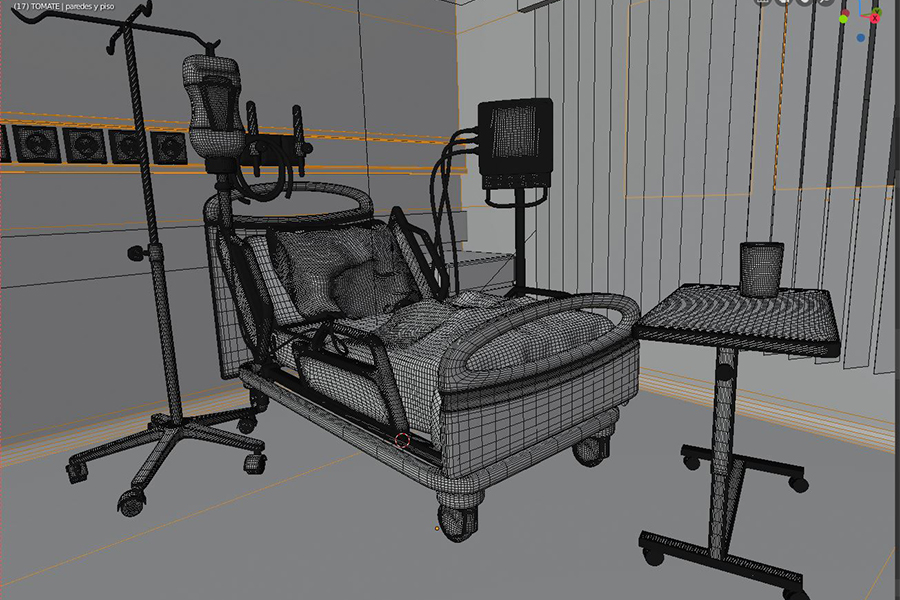
Starting with cubes, I created the mattress and the bed guards first in order to determine the hands’ position.
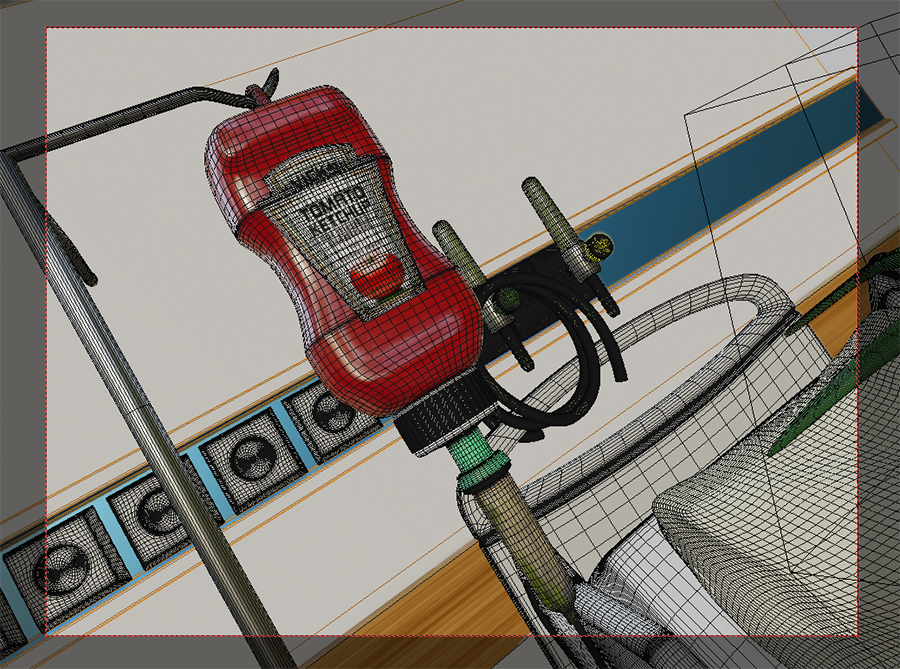
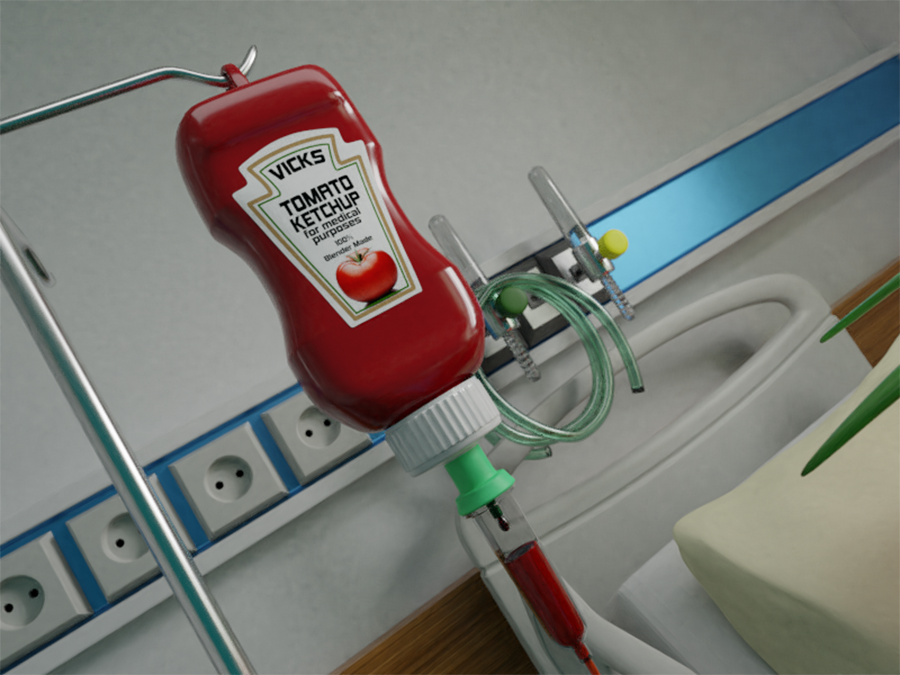
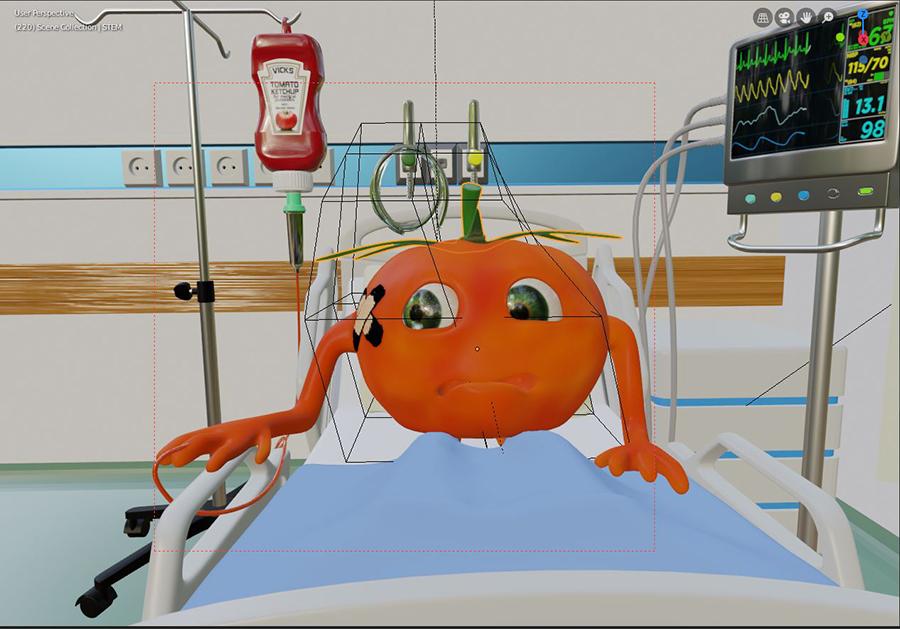
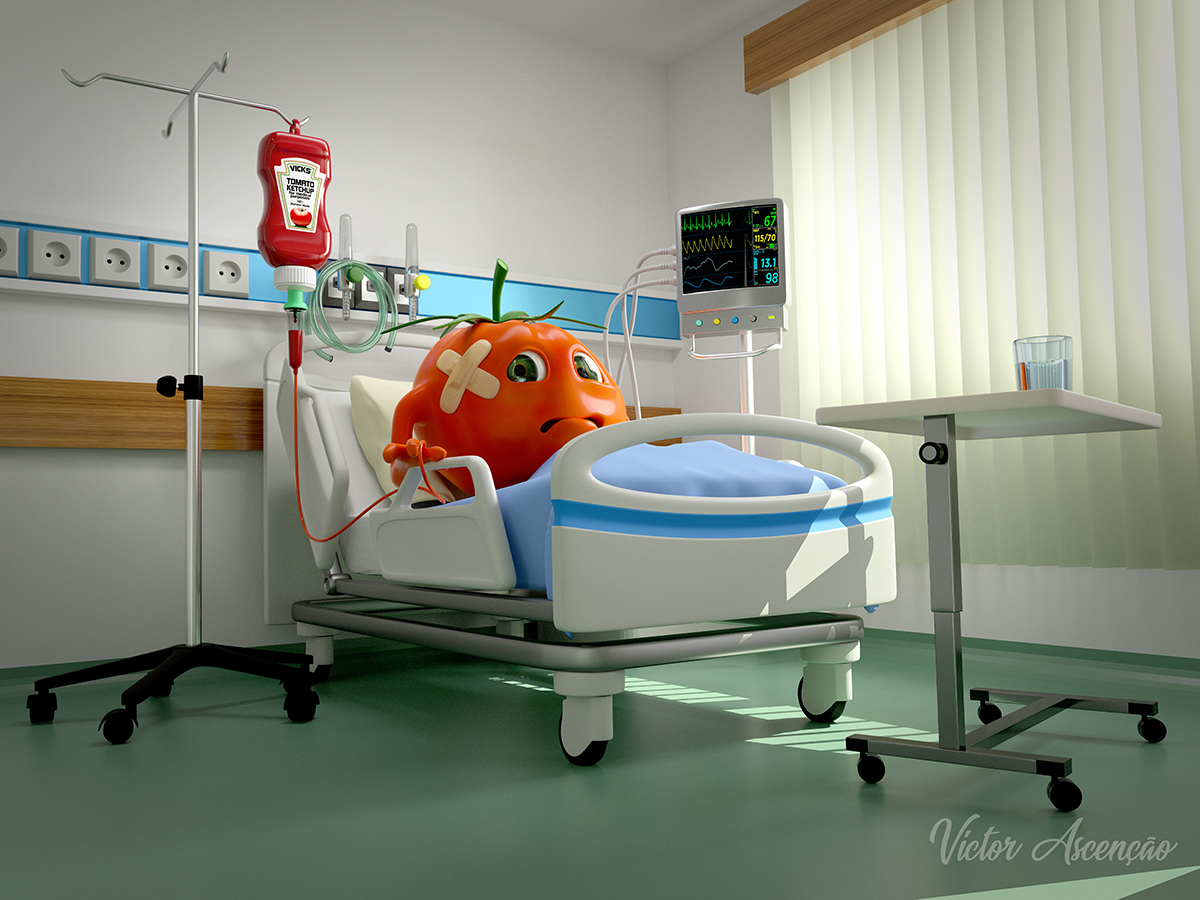
From the beginning, I was thinking I would put some saline solution or serum into his hand, but when I was about to model the serum bag, it just hit me, the guy is a tomato!! Why shouldn’t he receive a “blood” transfusion instead? and, well, I modeled the upside-down Ketchup bottle with the little handle to hang. It made sense to me that ketchup would be better than blood for an injured tomato.
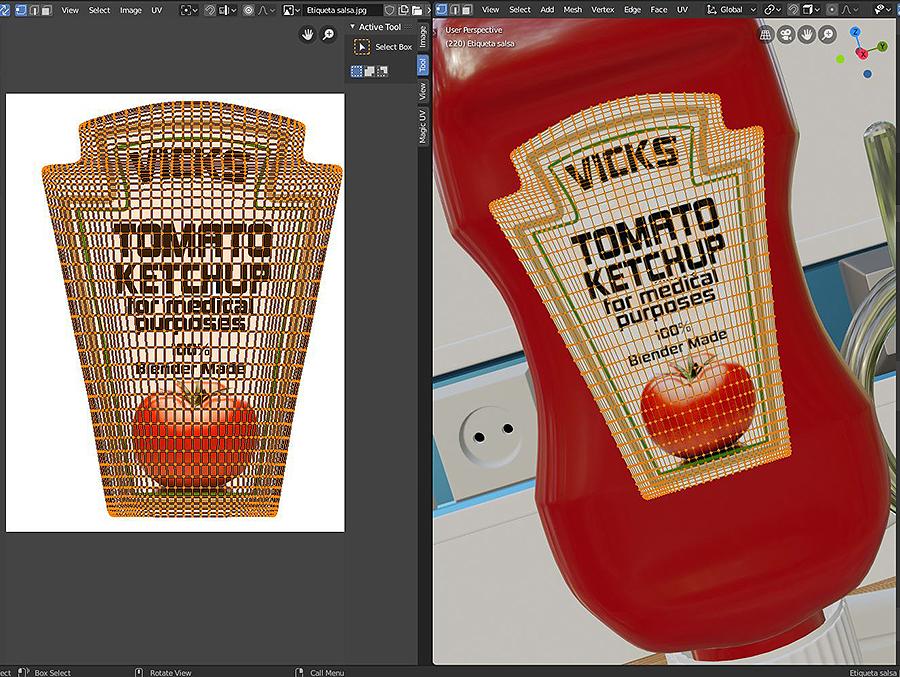
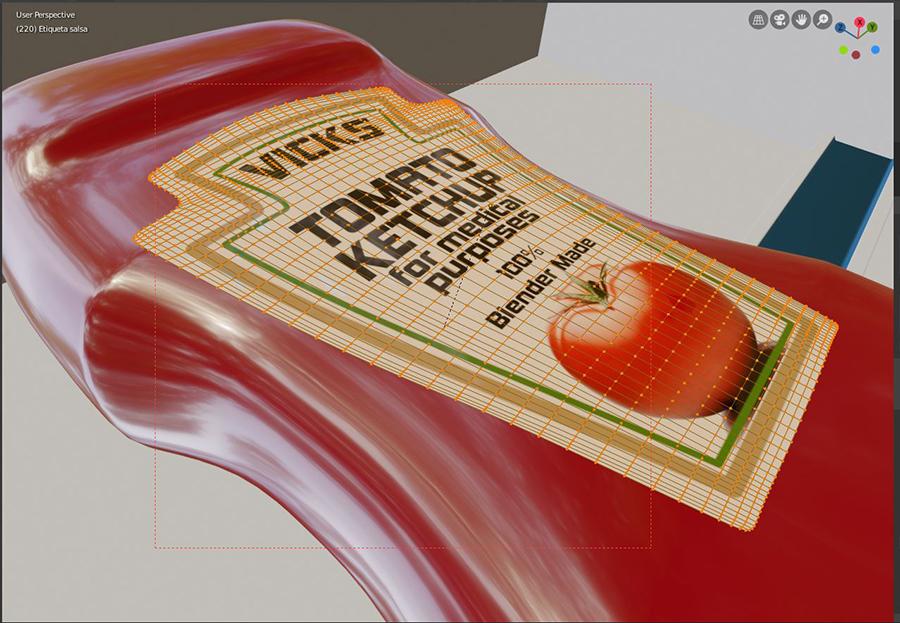
After modeling the bottle, I create a mesh from a simple plane with a Mirror Modifier so I needed to model only half of the label and apply a Shrinkwrap modifier to it. That way I modeled half the outer shape of the label directly over the curvy body of the bottle, and it was just a matter of filling the polygons in the middle and UV unwrapping it to apply a custom-made texture created in Photoshop.
For the blinds, I simply created one plane and applied an Array modifier.

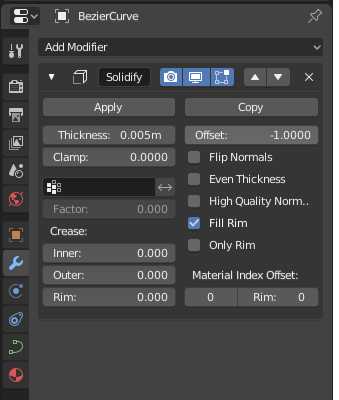
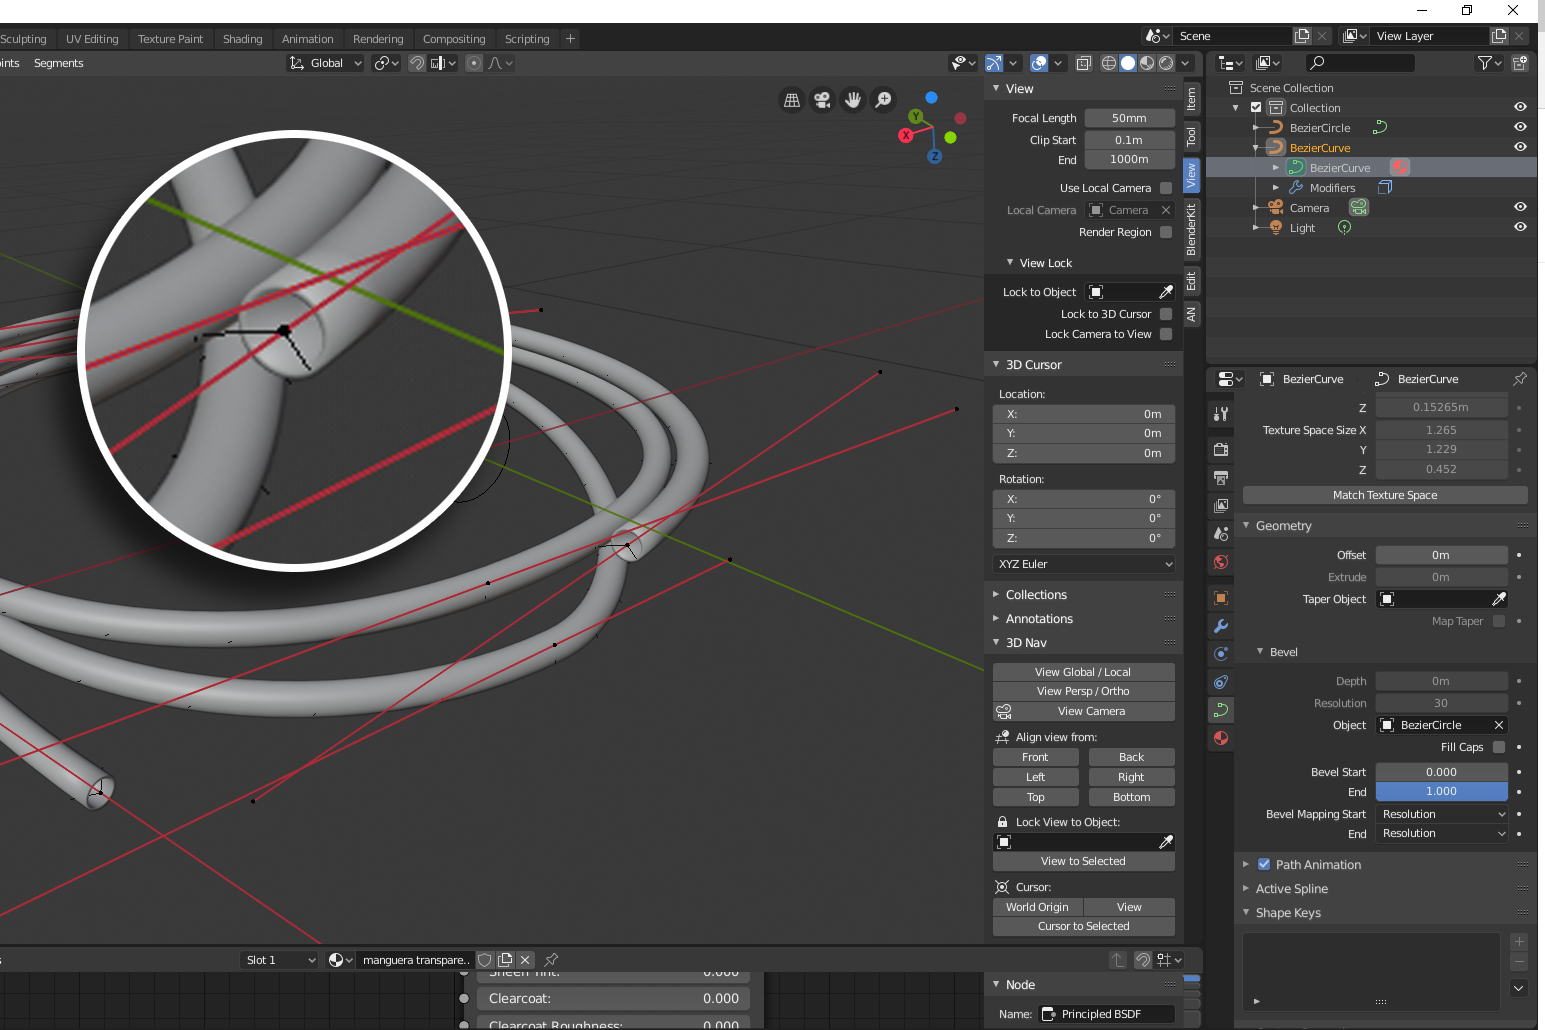
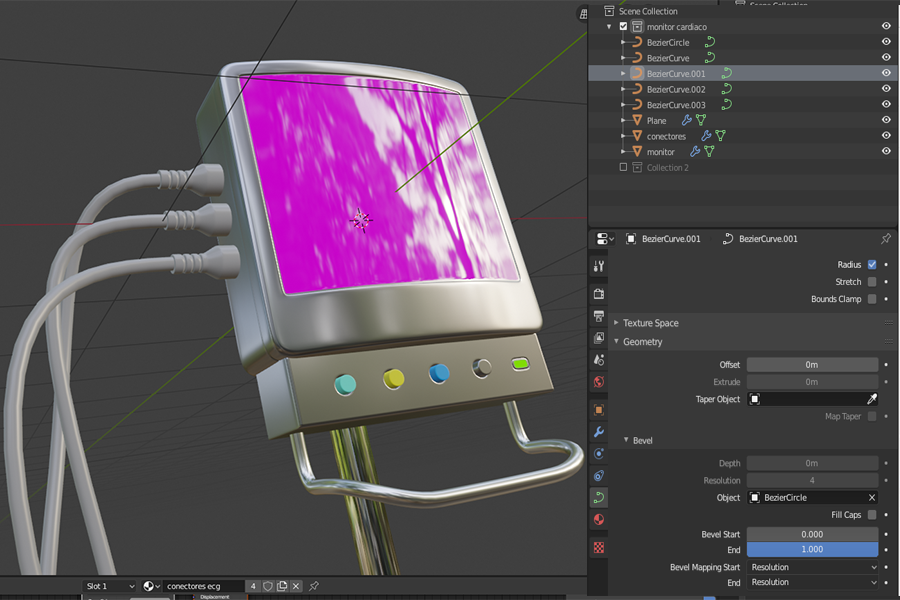
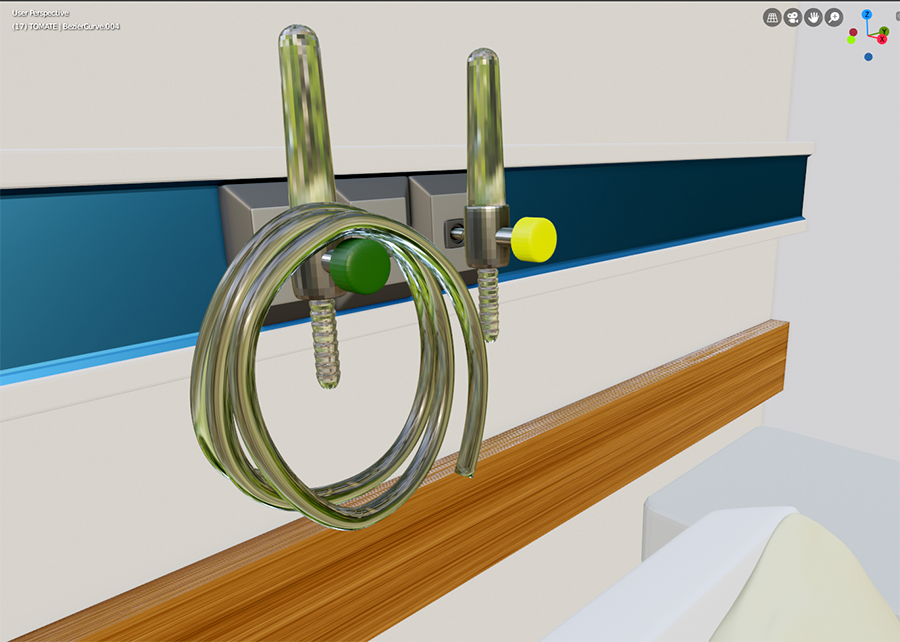
In the case of the rolled transparent plastic tube, I used the same technique as I used for the monitor cables and handle; it consists of combining a bezier curve for the path and a bezier circle acting as a bevel object that runs along that path, creating the tubular shape. To create the thickness on the transparent tube wall, I also used a Solidify Modifier and adjusted the thickness as needed.
For the blanket I created a plane, subdivided it 10 times and ran a cloth simulation over the little guy’s legs and feet and the mattress; for the pillow I created a basic shape and also ran a Soft Body simulation, “dropping” it between the tomato and the mattress to make it softly fit there.
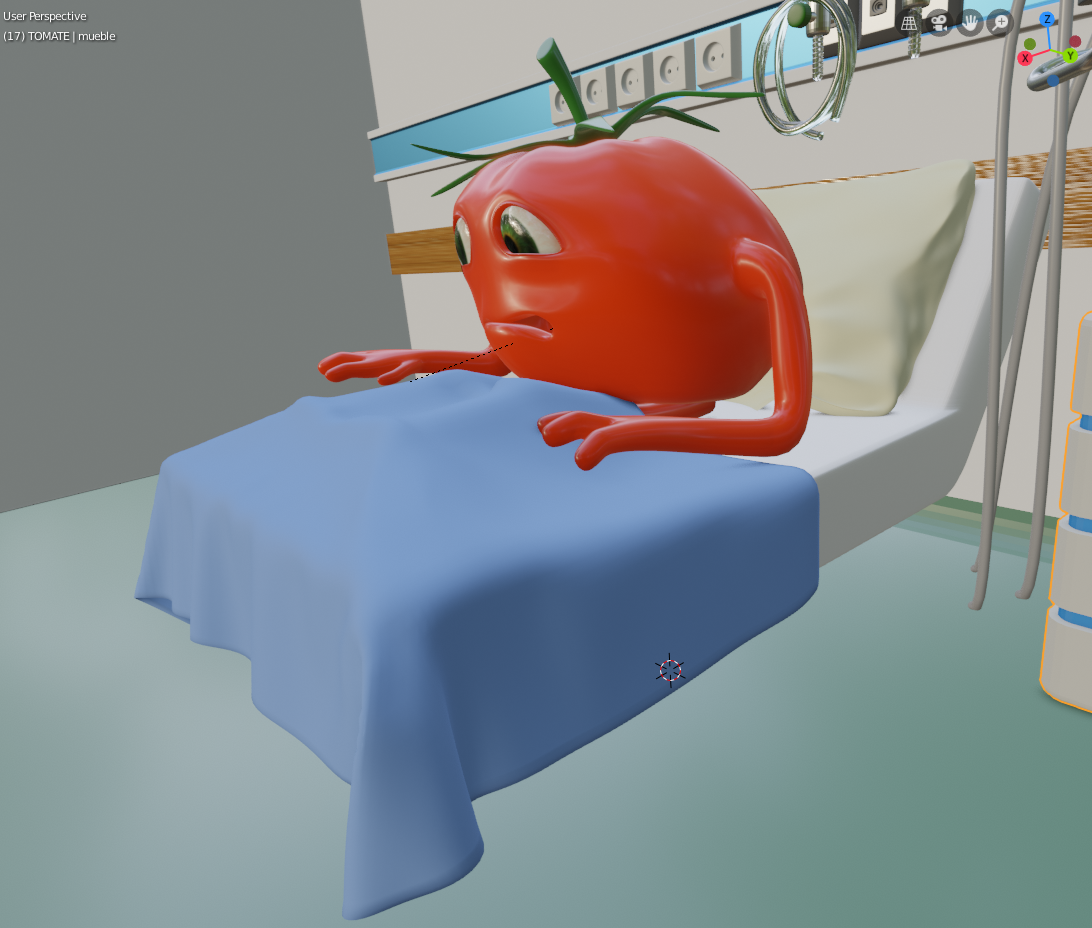
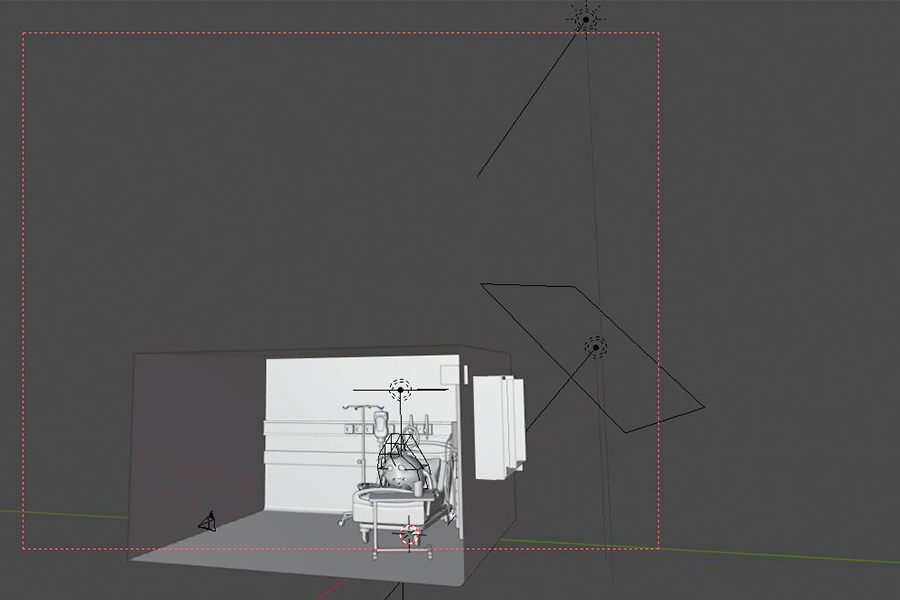
The pose of the tomato was slightly altered using a Lattice modifier to avoid the need to rig the little guy.

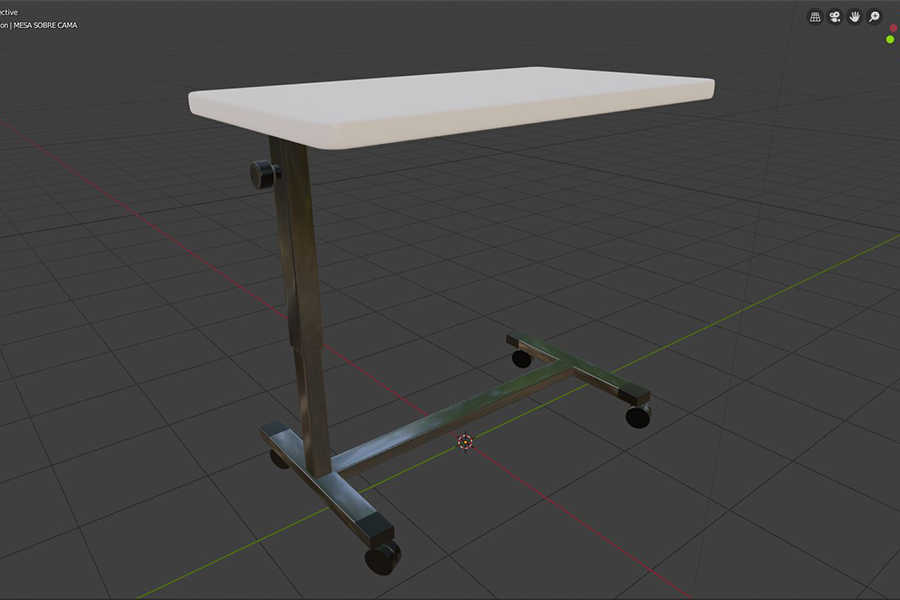
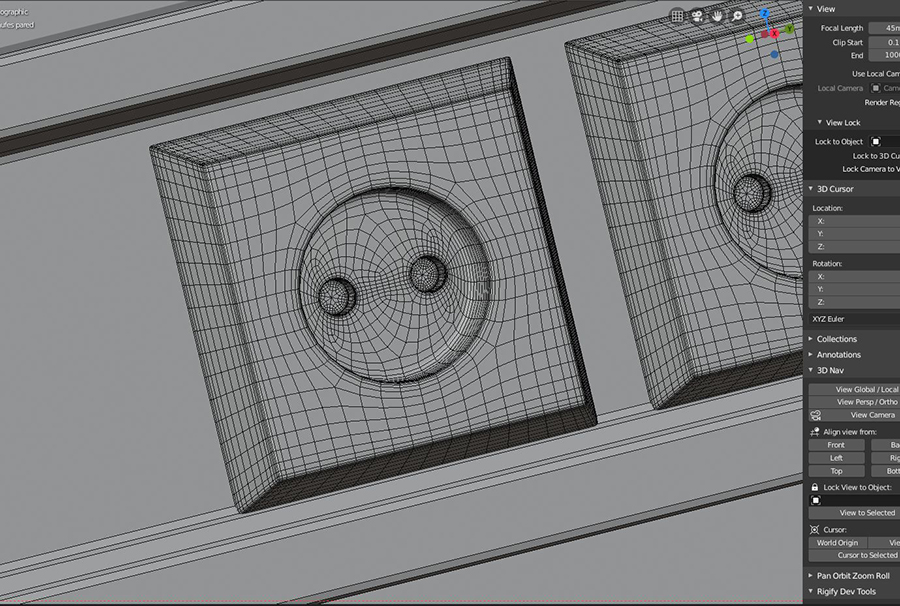
The table, the wheels, the wall connectors, the oxygen valves, everything was created from simple cubes, planes, and cylinders.
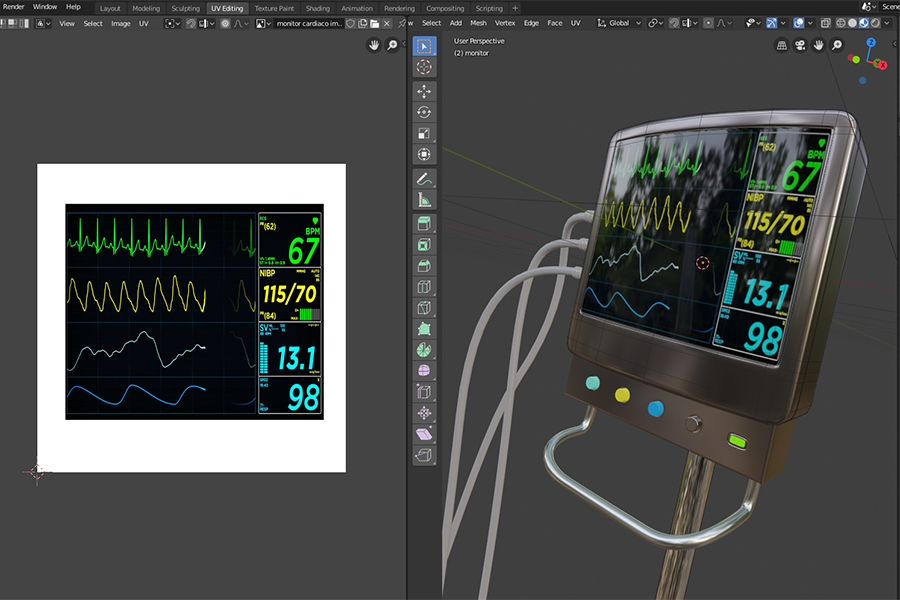
Textures and Materials
The materials on the whole scene are very simple. All of them, with the exception of the water in the glass, were created with the Principled BSDF shader inside Blender, changing the settings for each material depending on the color, metallic aspect, transparency, IOR, etc.
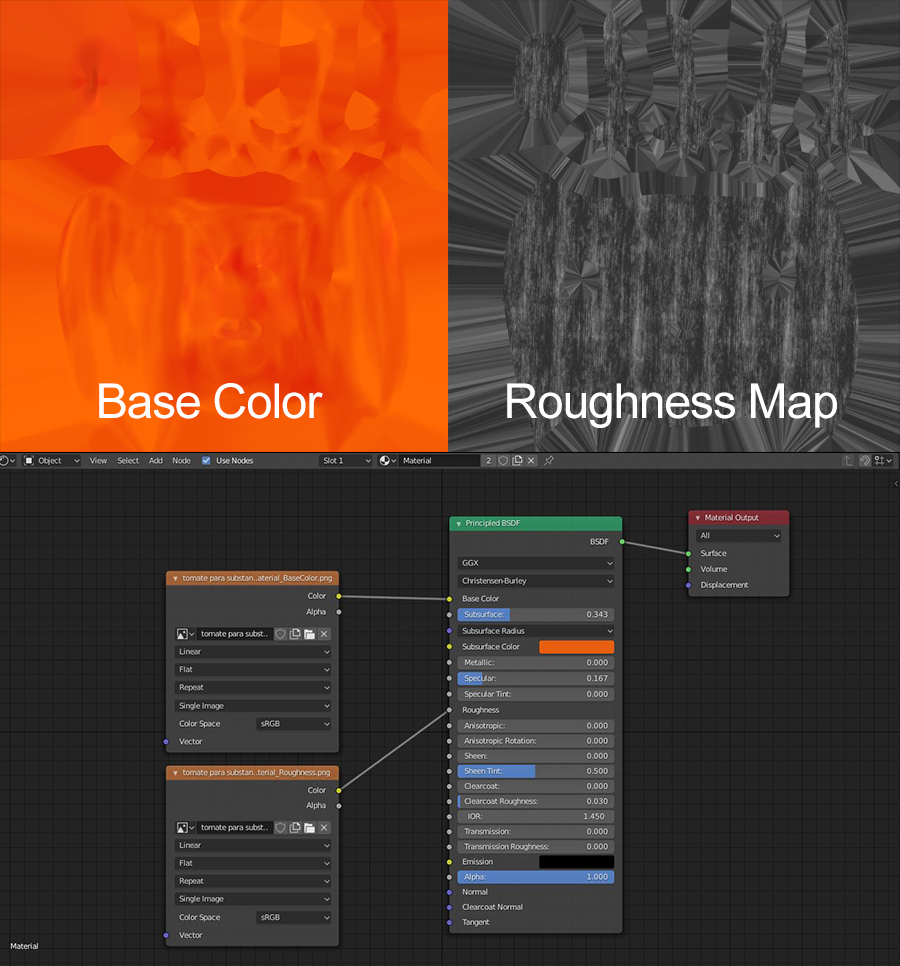
The tomato material is a Principled BSDF material with:
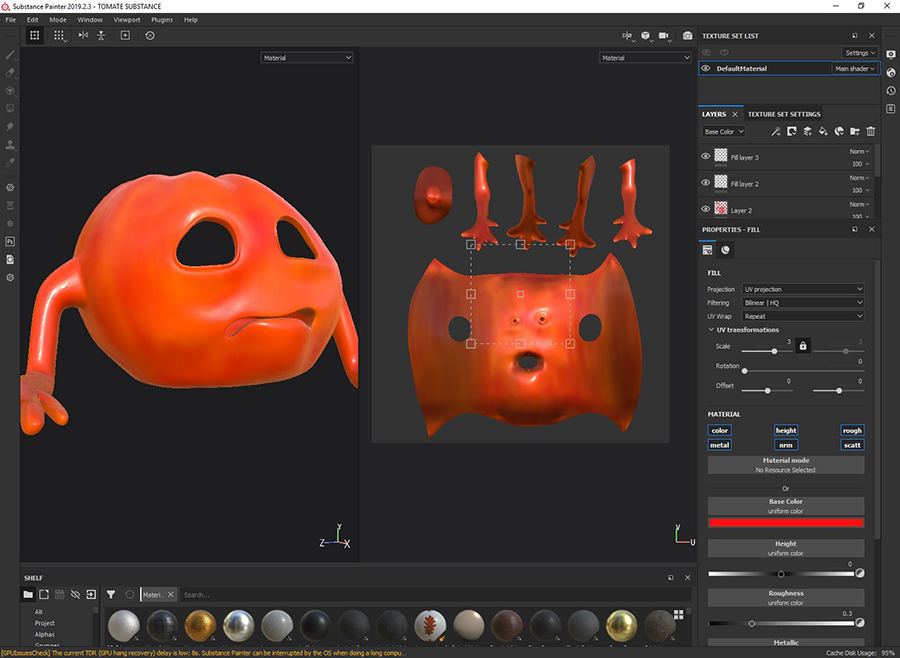
- a very simple texture map (painted in Substance Painter) connected on the base color,
- a roughness map that came from the Substance Painter material connected to the roughness node,
- a subsurface orange color with a level of 0.255, and the default values for subsurface radius.
The wood material on the wall is also a Principled BSDF material with a wood texture applied and a bump map based on the same wood texture.
Lighting the Scene
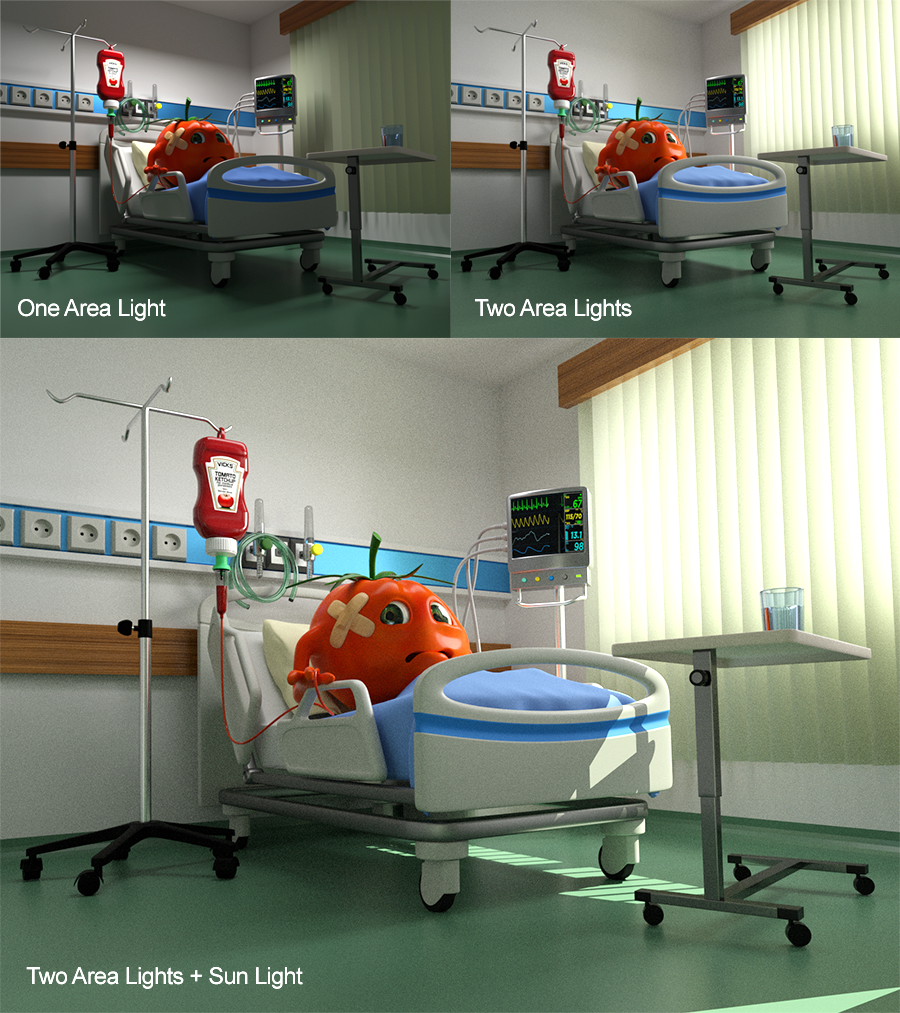
I like to start with a completely dark scene (slightly illuminated by the environment) and start adding lights and gradually feeling the impact of each light on the mood of the scene.
As I used Cycles in this case and I have a fairly capable computer with 2 GPU installed, the effect of each light can be seen pretty quickly, literally in seconds. I remember those days when we had to render for an hour or two just to have a glimpse of what we were looking for on the render. Now it is almost real-time with a decent computer when using GPU rendering, and also pretty fast when using CPU with a powerful processor. With that, the amazing preview on the viewport, and the EEVEE option, it is amazing how we can develop an idea very, very fast.
I started to illuminate the scene using only one Area Light over the tomato head. My initial idea was to create a night scene because I was looking for some kind of sad mood.
After some tests, I decided to add another Area Light outside the room, to make the light pass through and between the translucent blinds and create more interesting lighting.
Then I decided that if I added a Sun Light at the right angle, it would create some interesting projected light over the bed and on the floor, and found that the scene was more attractive that way, so I kept this final lighting setup.
Final Render
I rendered the scene as I said, in Cycles at 8000 x 6000 pixels because I wanted to blow the size up and then scale it down to hide little smears and splotchiness that the denoiser creates. So I used a 4 px radius denoise with a 0.5 strength and the result was pretty good and, using GPU render, was also very fast.
About the Author
 Victor Ascenção, Very curious 3D Enthusiast


Great image, simple but fun! :D
Thank you Gustav, indeed I was smiling while making it :)
so funny, a great idea. love it !!
Thank you Johan, glad you liked it.
Excelente!
Gracias Alexs :)
Nice breakdown of this wonderful image. I hope the poor guy has a quick recovery!
LOL yes Casey, he leaved the hospital after a couple of days, and is a very happy tomato now :)
Great to hear! My fingers were crossed! ;)