
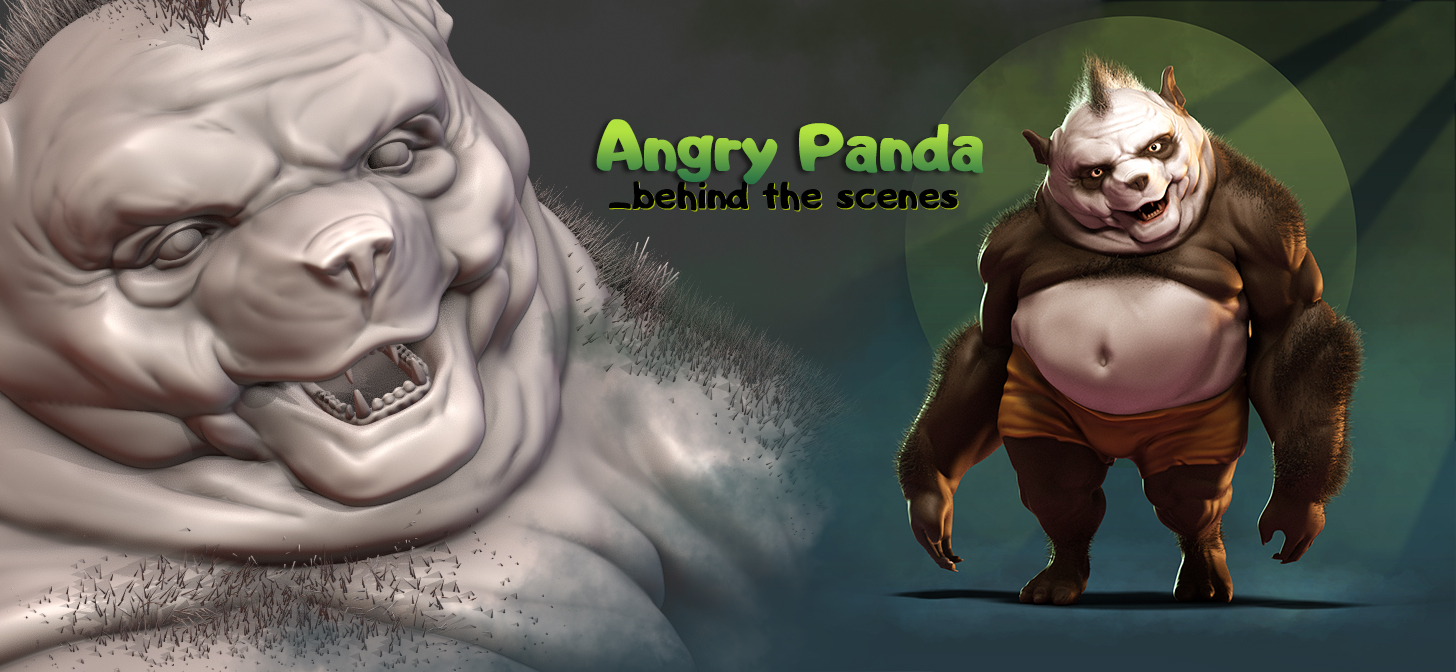
Behind the Scenes: Angry Panda
About me
Hi! My name is Grigoriy Ischenko, and I’m a freelance 3d artist. I’m living in the Rostov-on-Don (it’s in southern Russia). I am a self-taught artist. Since my childhood I dreamed of becoming a 3D artist, after I saw the cinematics of the StarCraft. It was very impressive for me (it was the year 1997). I was a 12-year-old. I started learning LightWave studio and some later 3ds Max. But I grew up, and had no opportunity to study preferred profession, then I went to university for Architecture.
After graduation I got a job as an architect. In time I came to realize that architecture is too boring for me and it was then that I met Blender (it was the year 2013). It was very strange for me that it was a free program with so many powerful features. I was interested and I started learning. And I loved the Blender. In the process of learning I did many things for fun, especially when I felt inspiration (like this). After some time I started selling my models in the Unity Asset store. I’ve earned a profit and left my job. I became free.
Now I have occasional requests for remote work. And I’m using only Blender to sculpting, modeling and animations.
About Panda
There was a little weekend-long competition, “Speed Sculpting”, in a social network. The competition had about 10 participants and no prizes. As an assignment, we received a sketch by Maxim Verehin (famous CG artist). You can see this sketch at the top right corner of my screenshot below.
I really like the new Blender 2.8, but I’m still using version 2.79 – it’s more stable and the interface is more comfortable for me.
I started with a basic mesh and skin modifier to make the first basic shapes. After that I turned ON dynamic topology and just started sculpting.
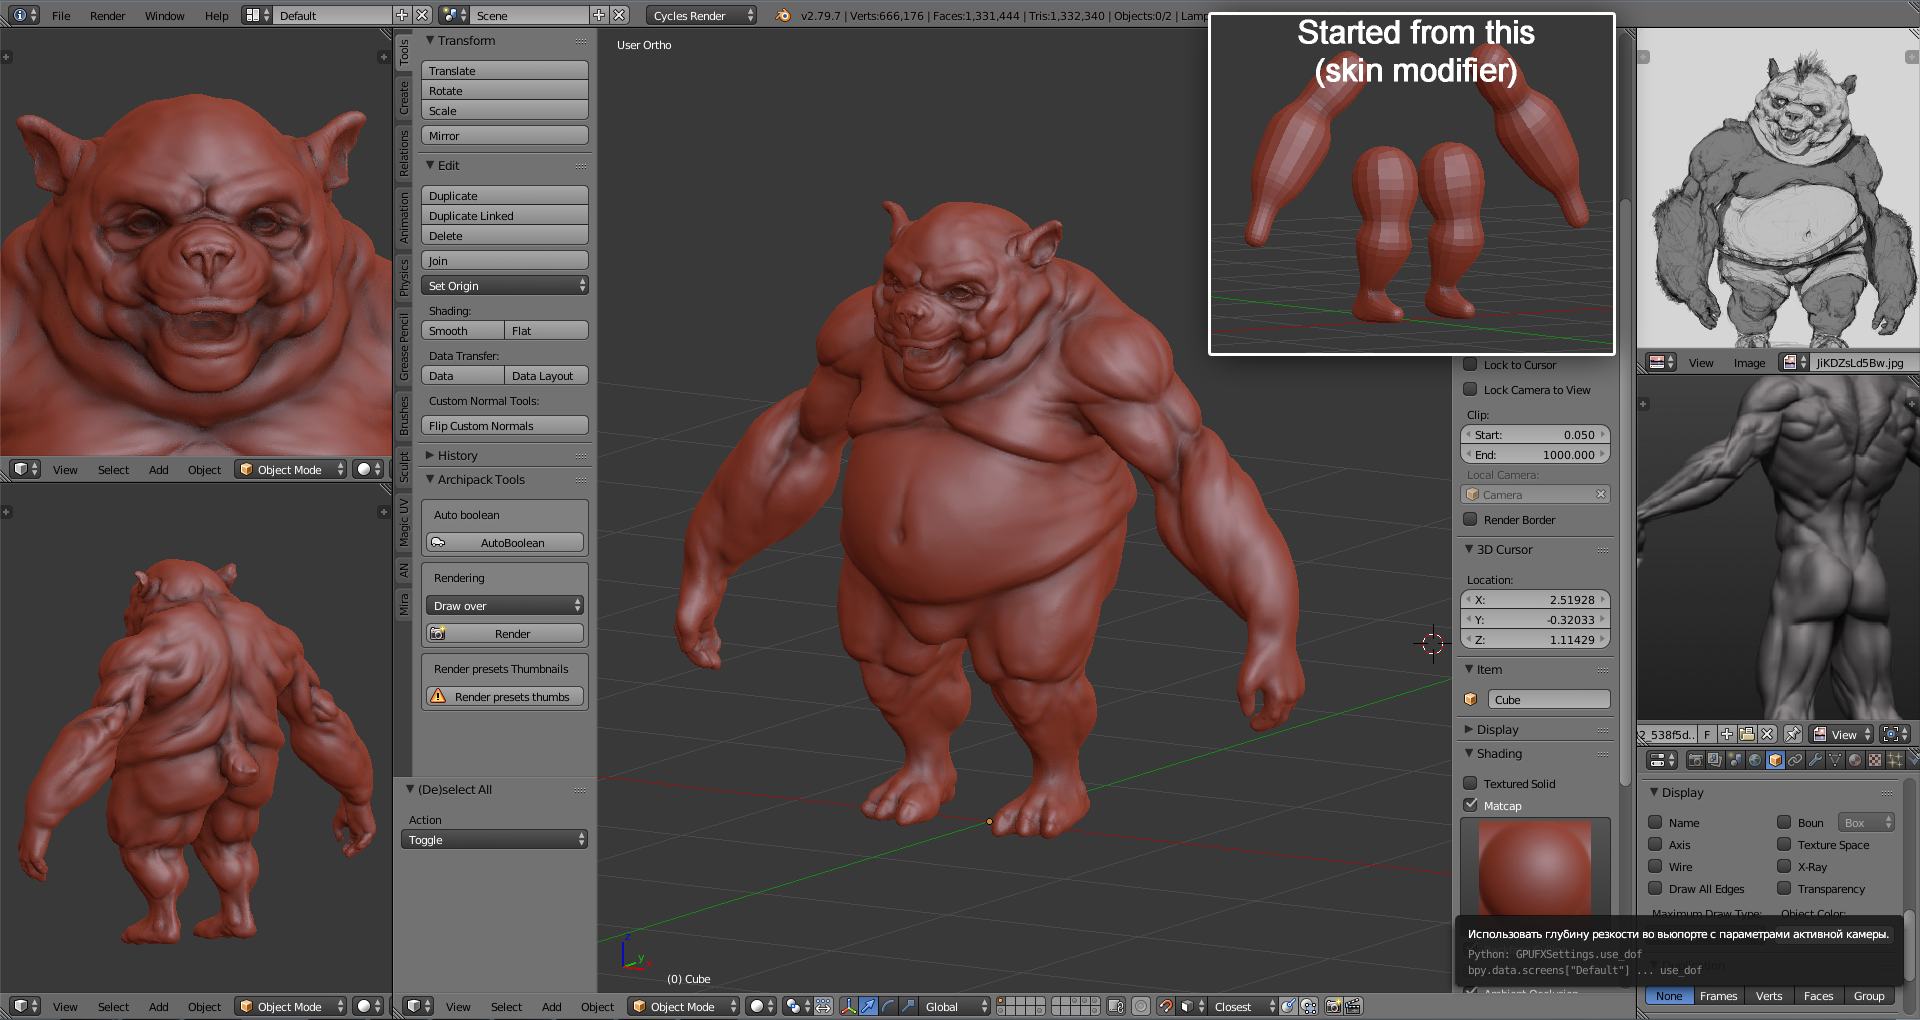
Next I made a retopologized mesh by hand without any addons. But I used ShrinkWrap modifier.
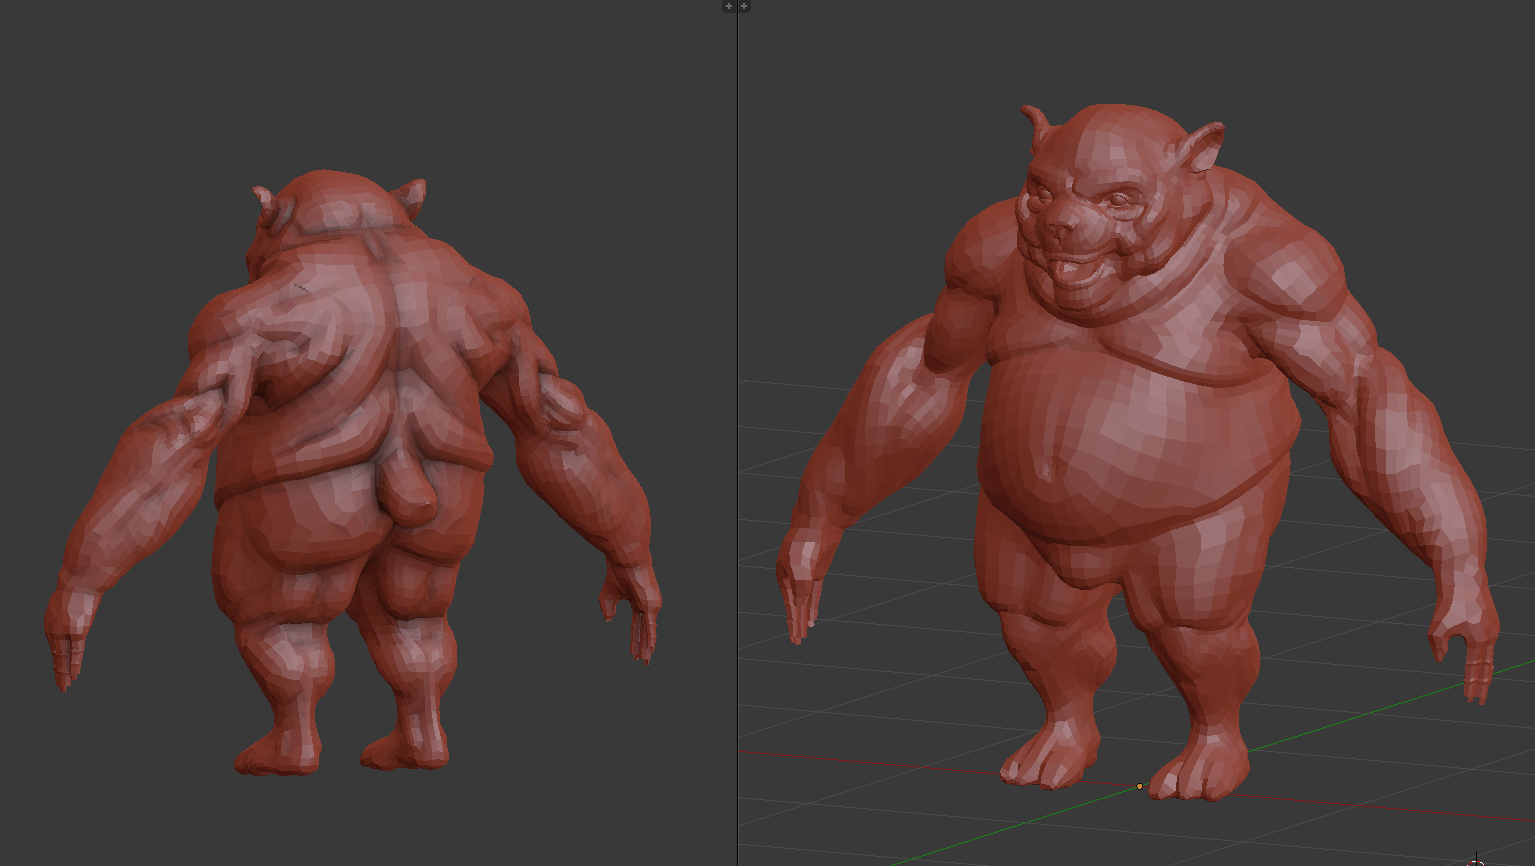
For the pants I just copied part of retopologized mesh, gave it thickness, and added multiresolution and sculpted it.
Next I created an armature and changed the pose of the character.
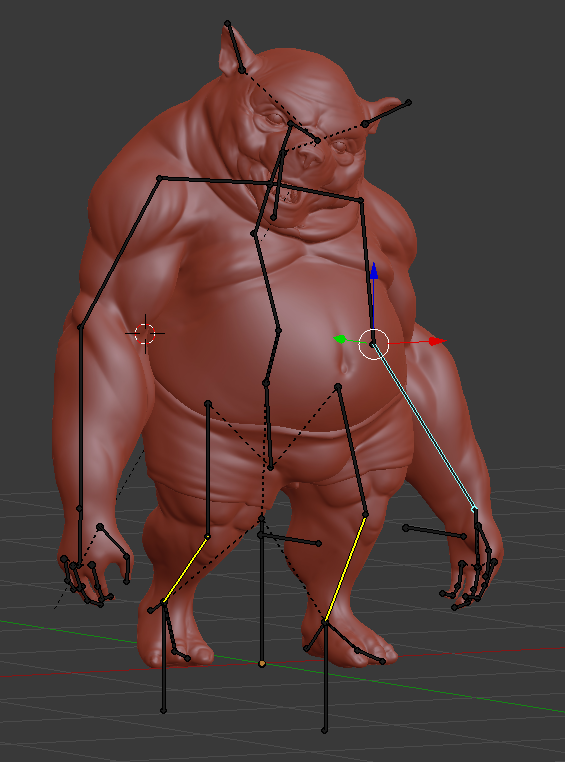
Then I added a Multiresolution modifier and cointinued sculpting.
By the way, Retopology and Multiresolution sculpting allow me to get a smoother and neater surface.
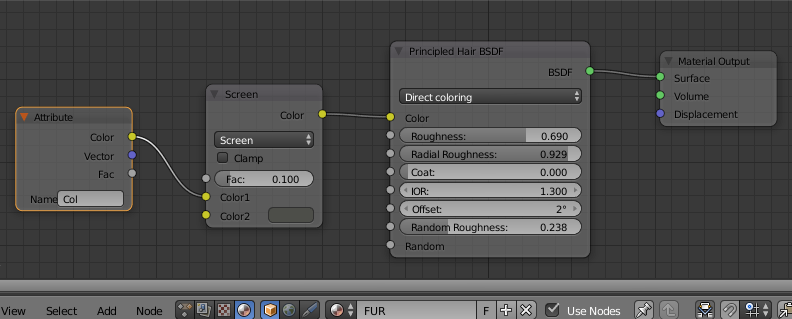
And finally I made a shader for coloring the sculpt. I used the principled shaders for all materials.
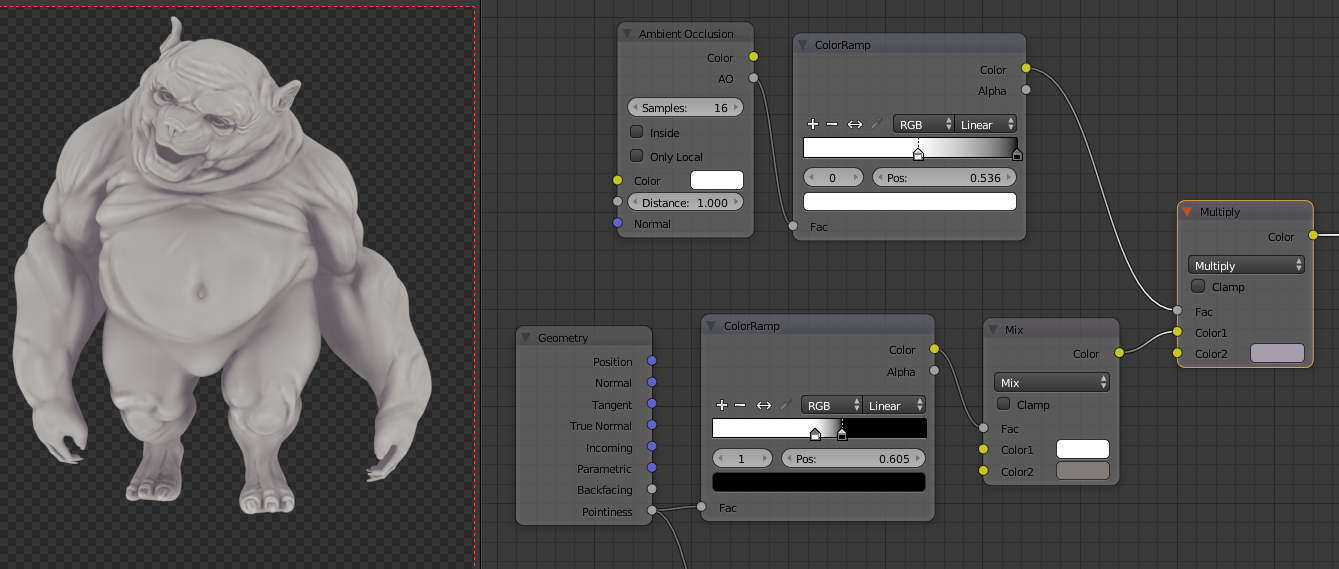
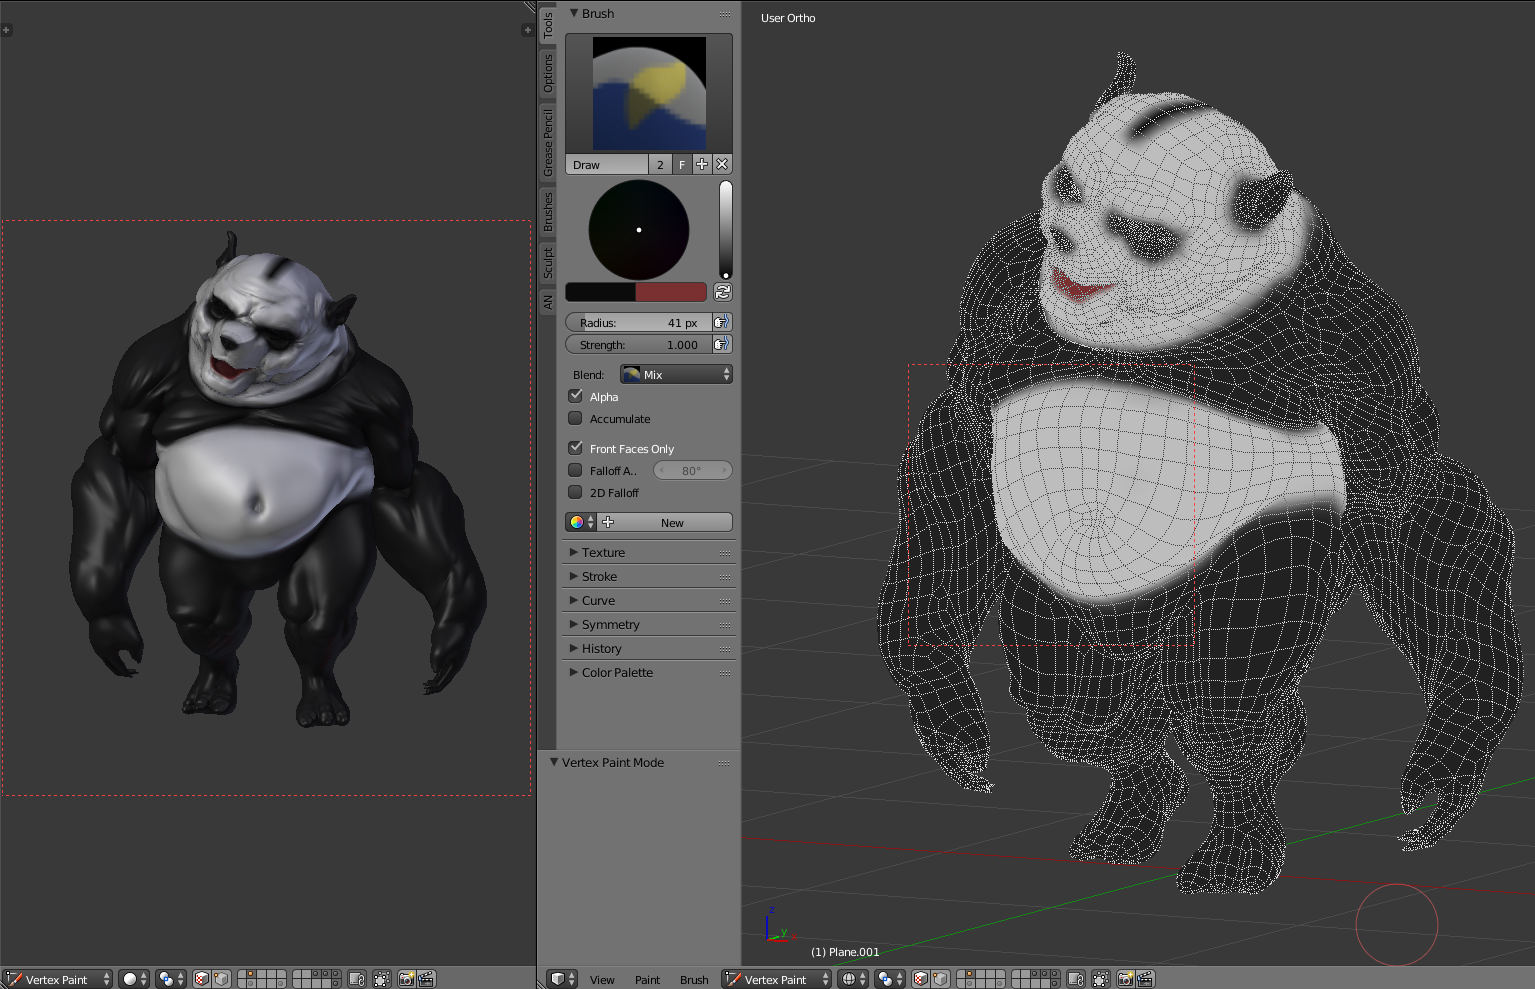
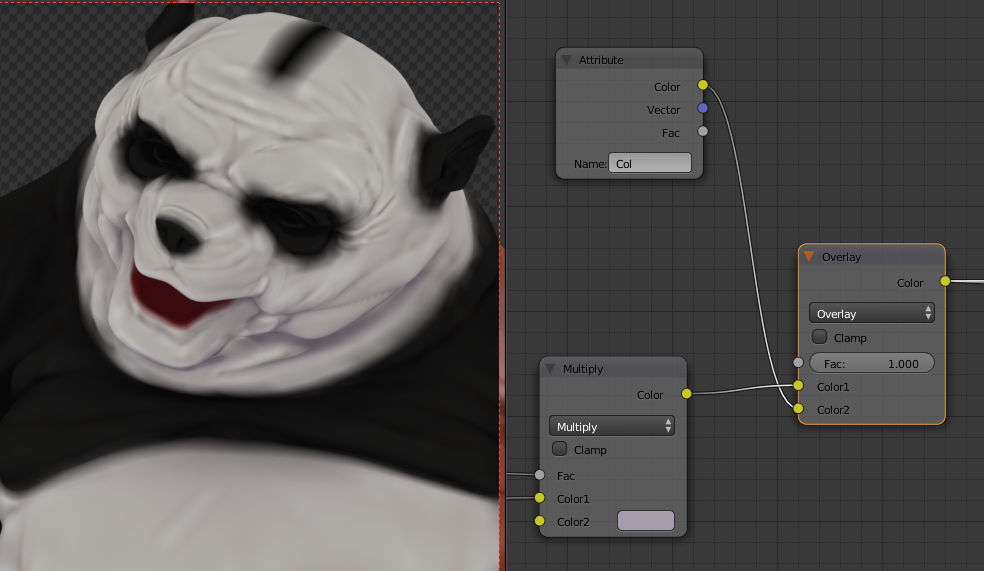
I painted vertex color and added these colors to nodes.
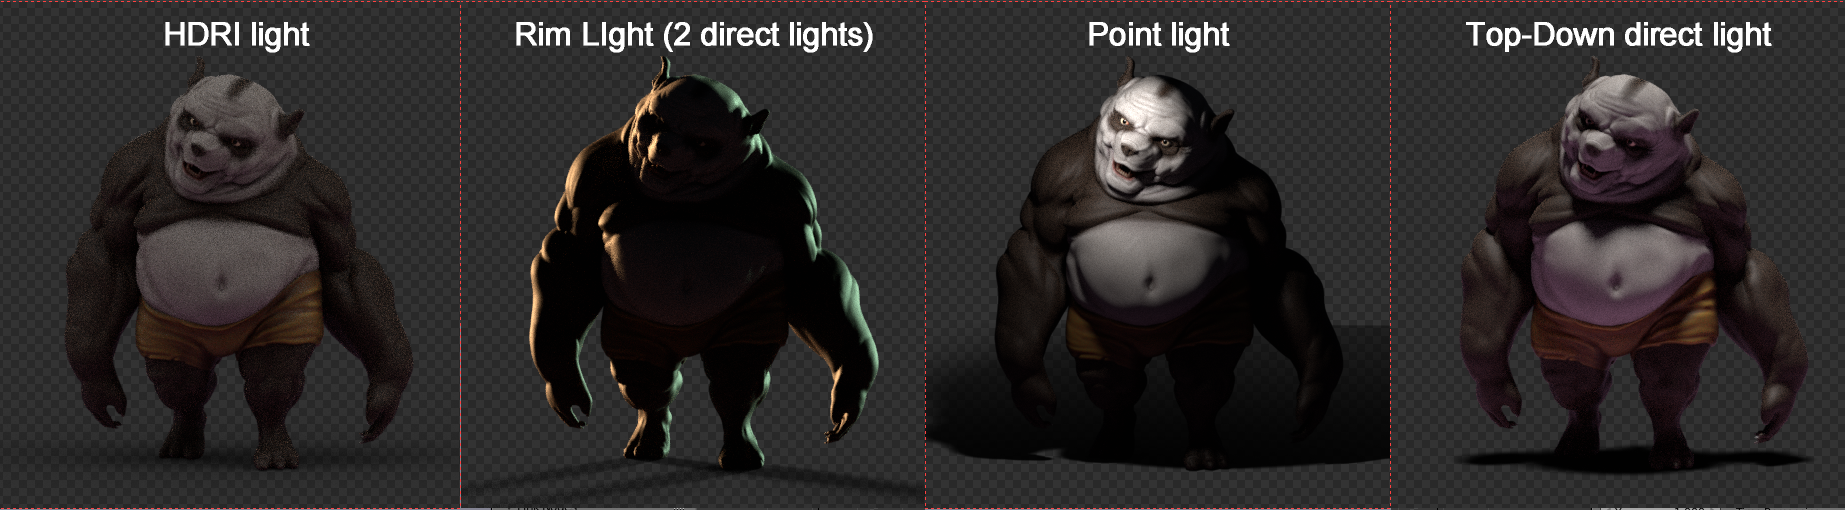
You can see lighting process in this pic:
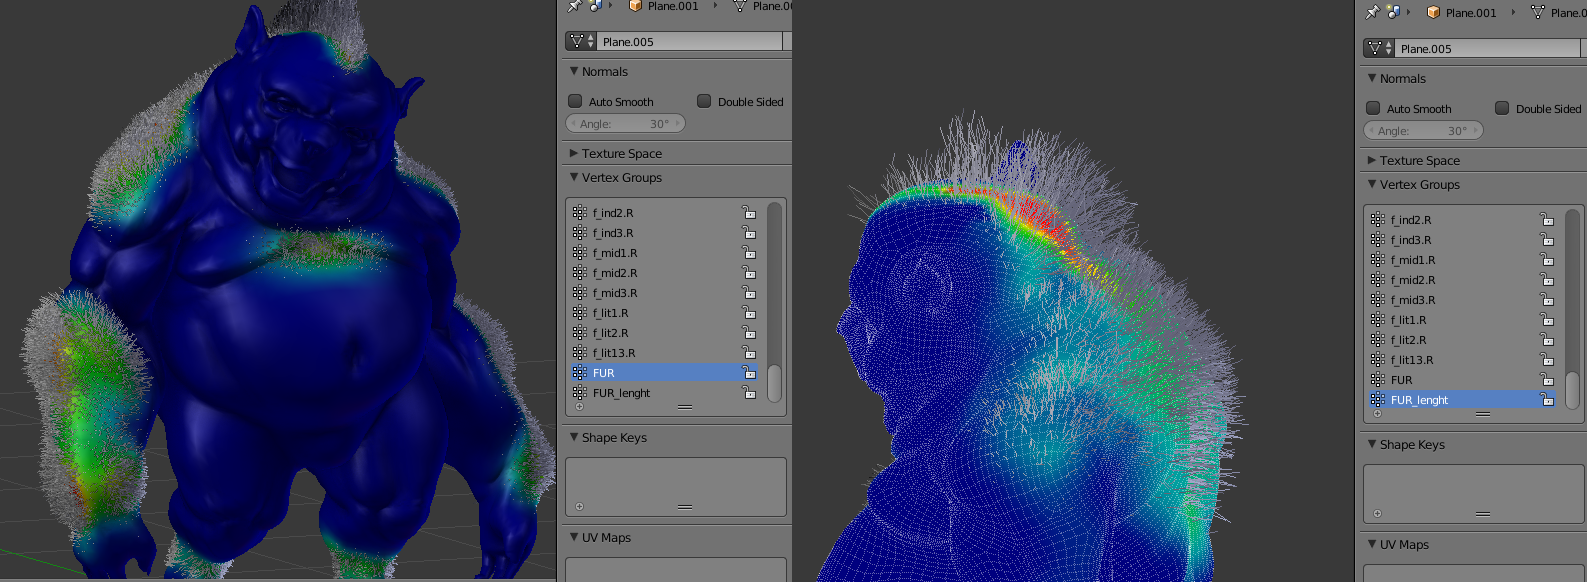
And to finish, I decided to make hair and fur, like in the reference, using a very easy and regular method. I made two vertex groups: one for density and the second for the length of hair.
And the hair shader was very easy too. I again used vertex color.
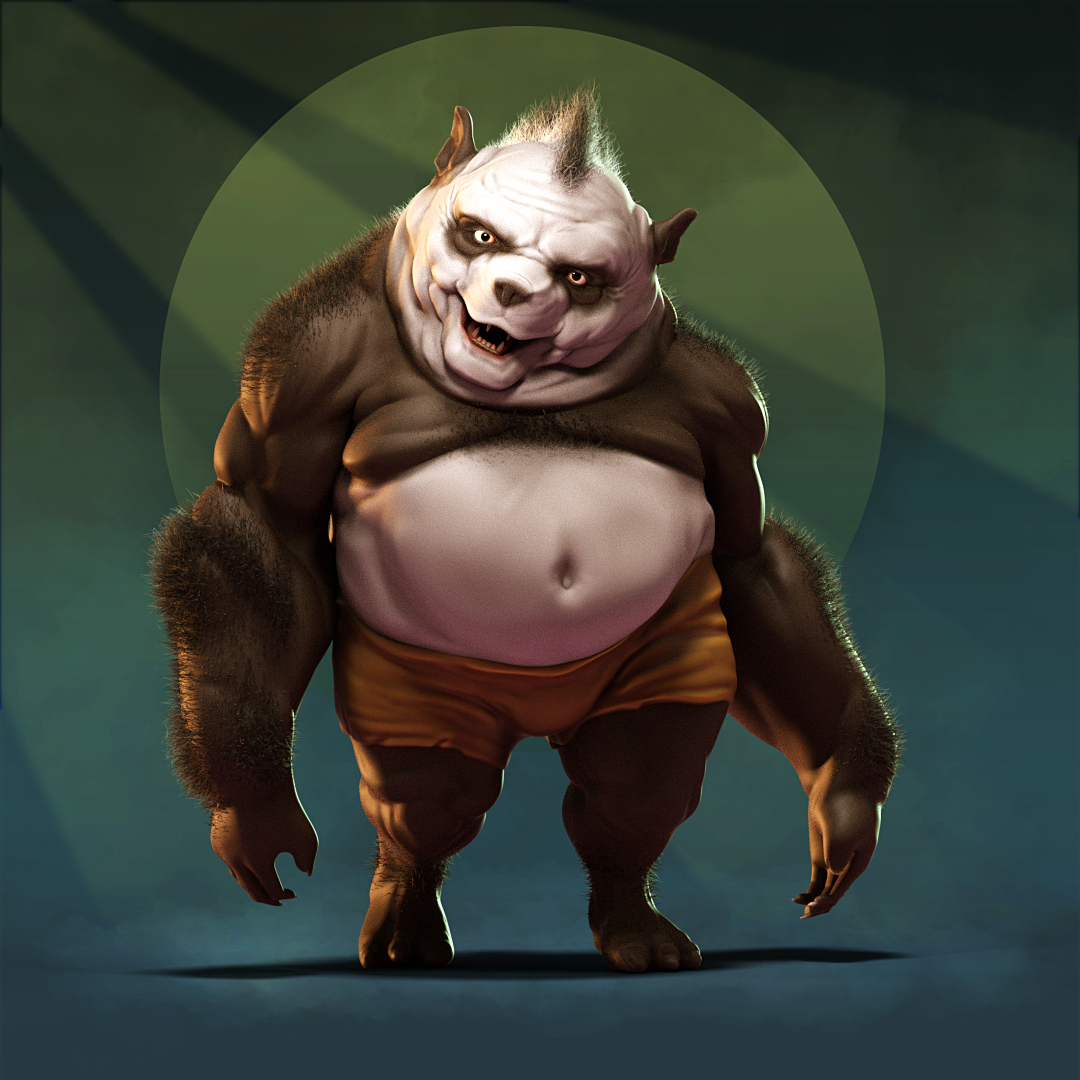
Final result. (The background was added in Photoshop.)
That’s all.
About the Author
 Gregory Ischenko, I’m continuing to learn. I know I have a long way ahead for me to be better than I am now. I want Blender to become the most popular and best CGI application.


Perfect!