Behind the Scenes: By the Window
INTRODUCTION
Hello, my name is Yao Chan. I live and work in Shanghai, China. I graduated from the Digital Media Lab of Central Academy of Fine Arts with a master’s degree in Interaction Design.
I initially worked as a senior UX designer in TCL Alcatel, Lenovo, Motorola, and SAIC-GM for over ten years. Since 2019, I have developed a strong interest in 3D art, and started to learn Blender and Substance Painter on my own.
As commissioned by WildAid, the 3D artworks I created for their Marine Program “Help Keep Our Oceans Alive” landed in various cities of China and were displayed at several famous landmarks such as the Bund in Shanghai, Beijing, and Shenzhen Airport and the GF Securities Tower in Guangzhou during 2022-2023. These kinds of work make me love this direction even more and want to continue to move forward. Currently, I am dedicated to creating 3D artworks related to my personal life experiences and interests.
INSPIRATION
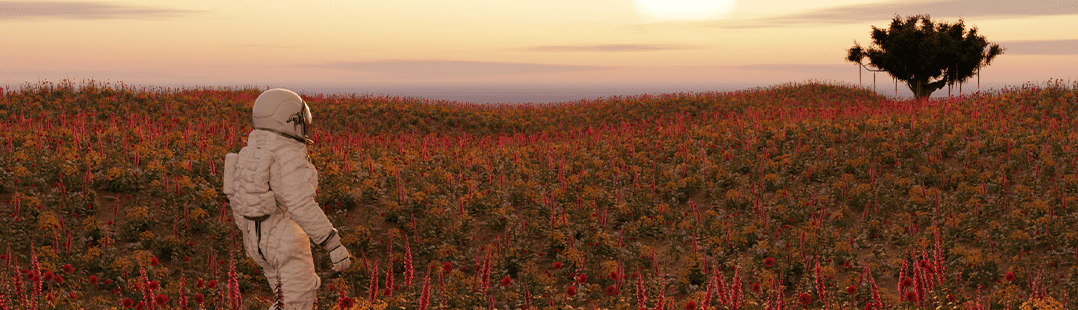
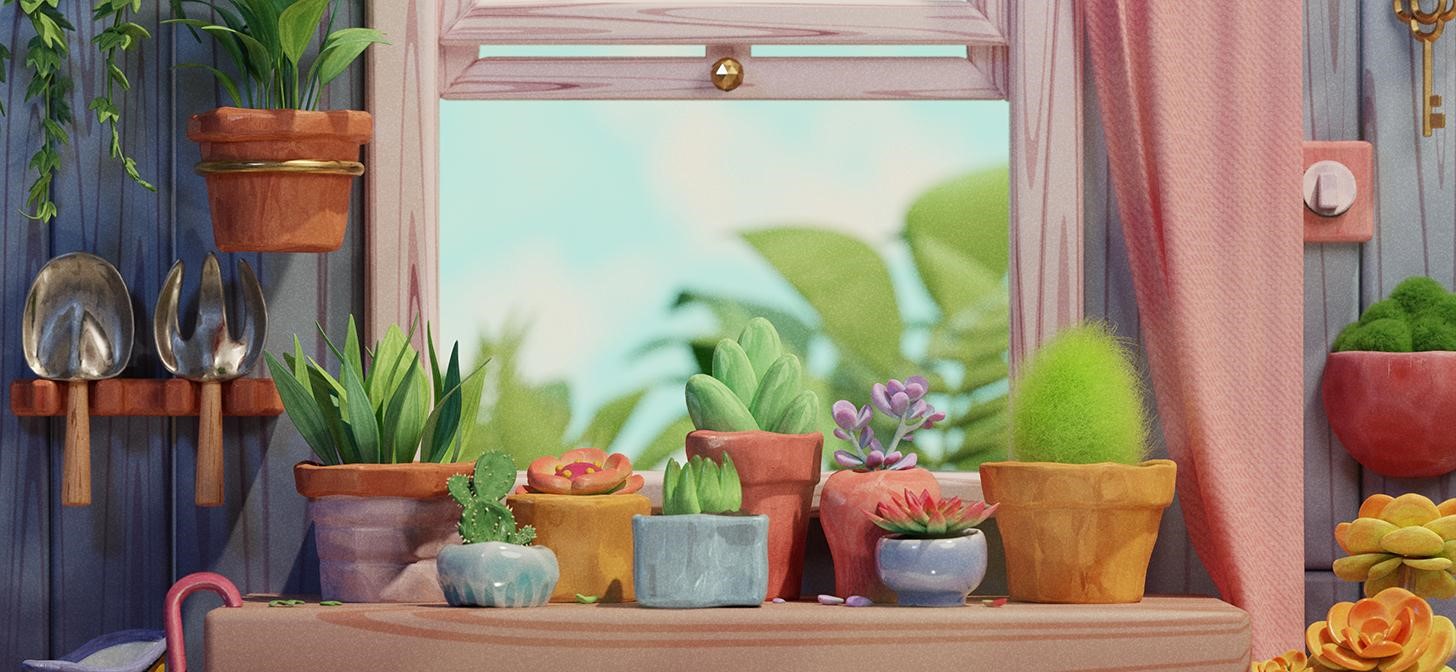
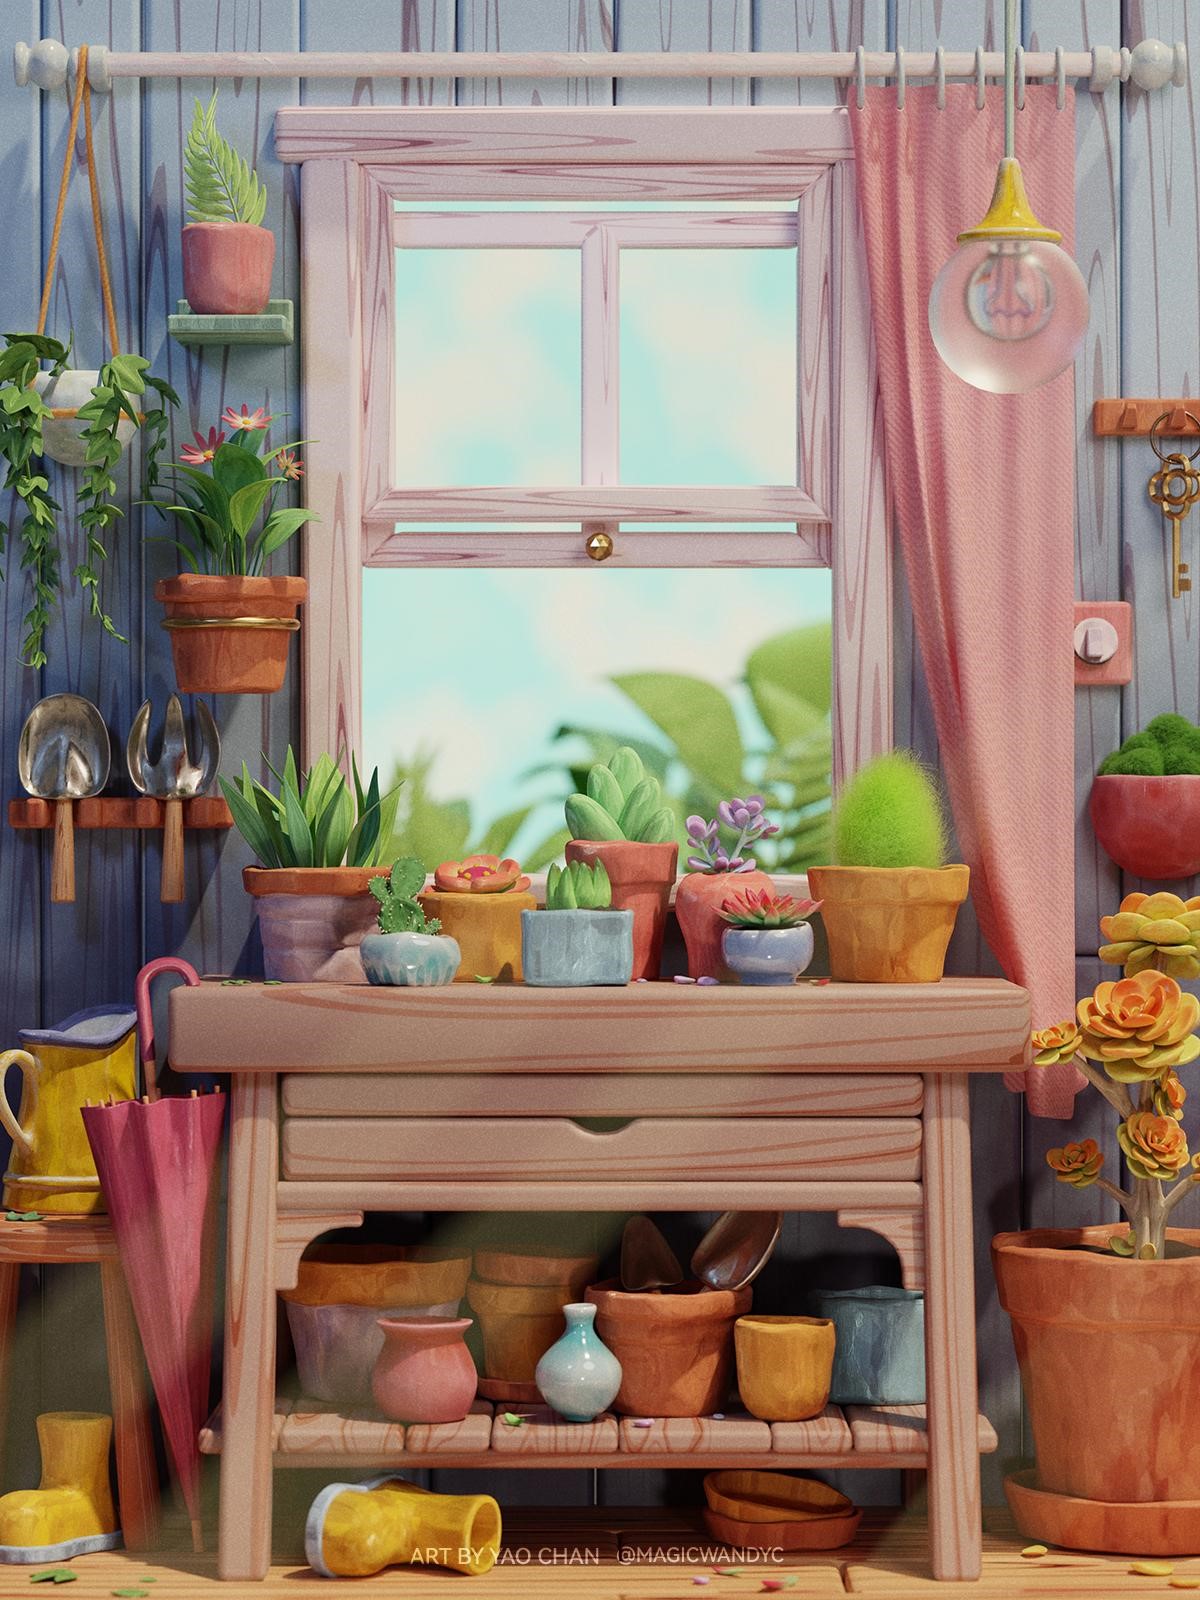
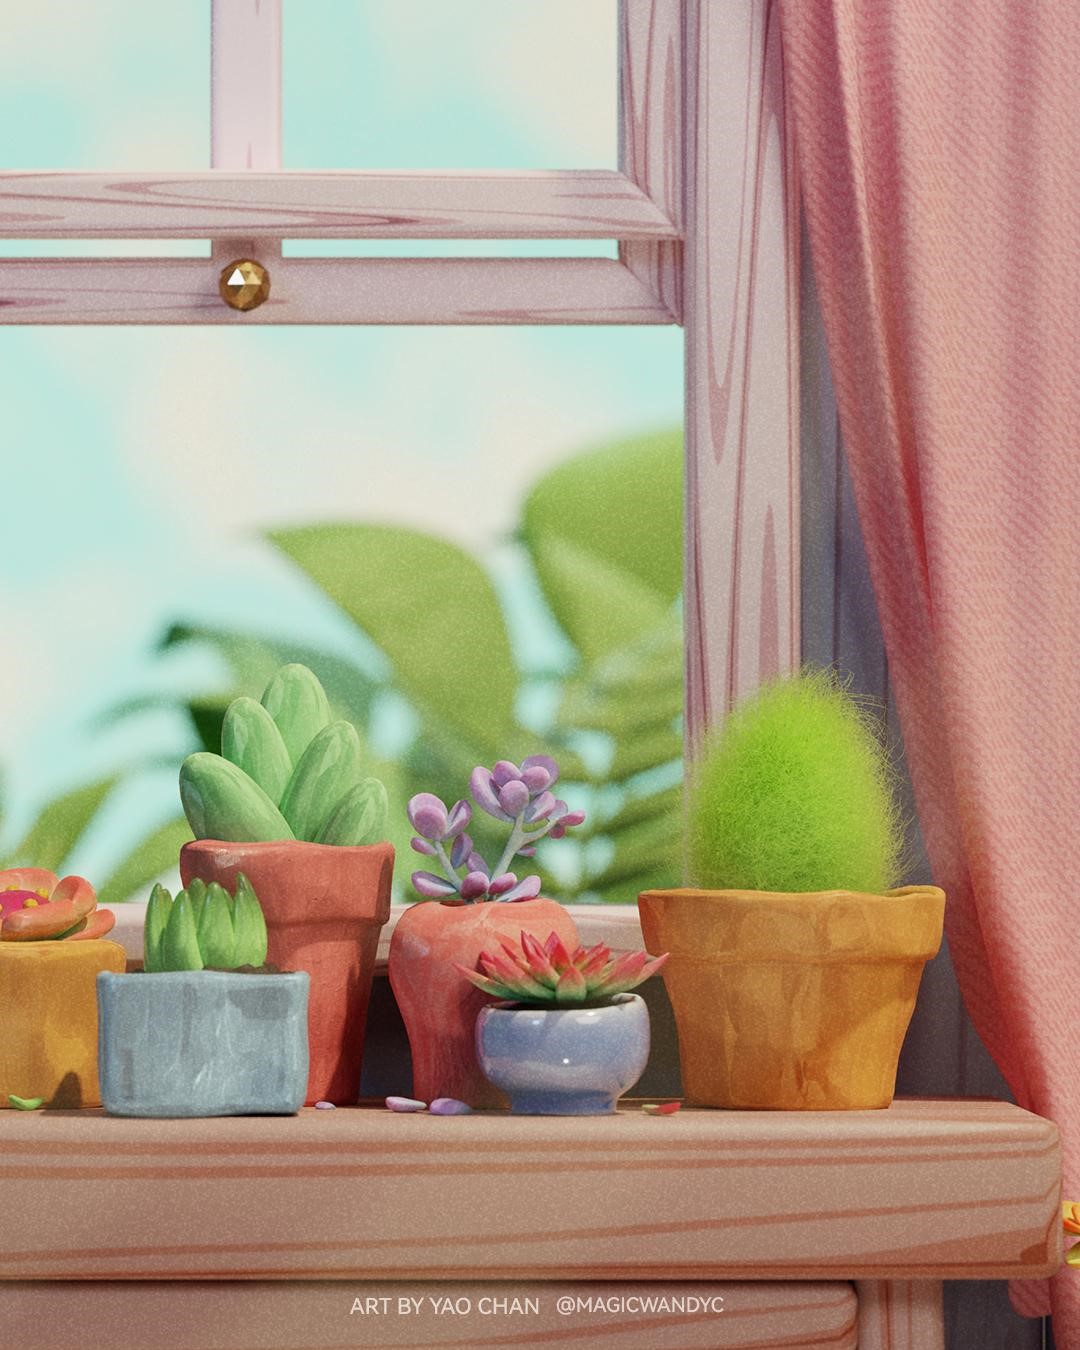
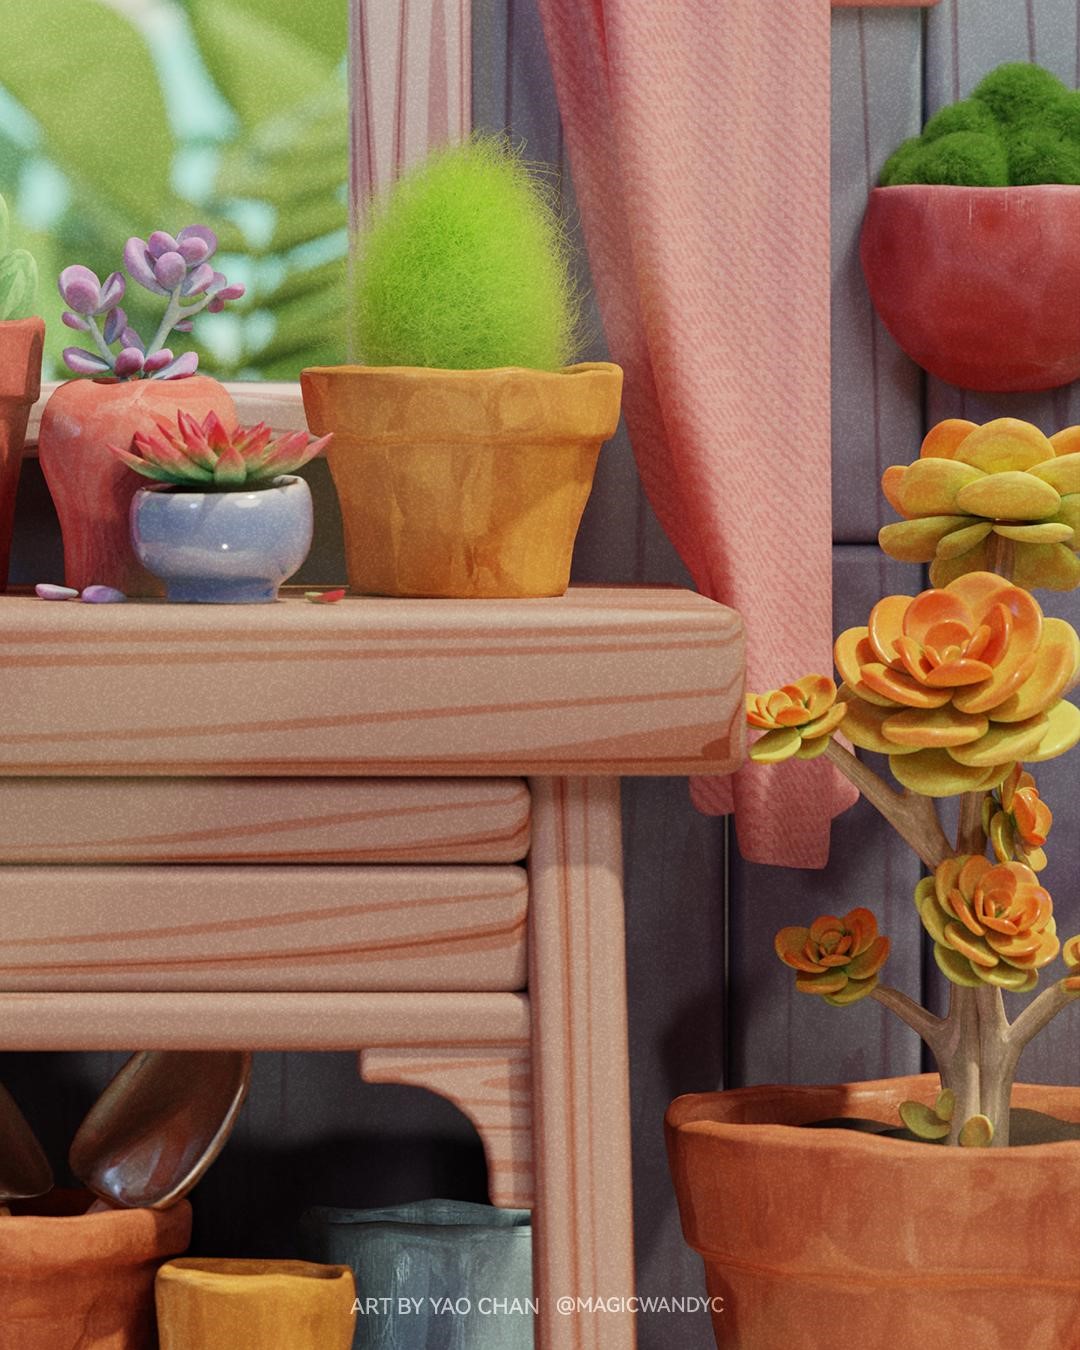
Recently, as the weather gradually warms up, everything is rejuvenating and flowers are blooming. I want to create an illustration that captures the warm and bright atmosphere of spring. My inspiration comes from a corner of my home where I have planted various vibrant and adorable succulent plants that I adore. There, pots and containers collected from various places are stacked along with neatly arranged gardening tools.
PROCESS
Modeling
Usually, before starting the modeling process, I sketch out my ideas to determine the content of my illustration in advance. However, in this project, I only decided to create a wooden table positioned by the window for placing potted plants from an eye-level perspective. This perspective allows the audience to immerse themselves more deeply in the environment depicted in the illustration, making it feel more realistic and relatable. With this basic idea in mind, I started to block out in Blender.
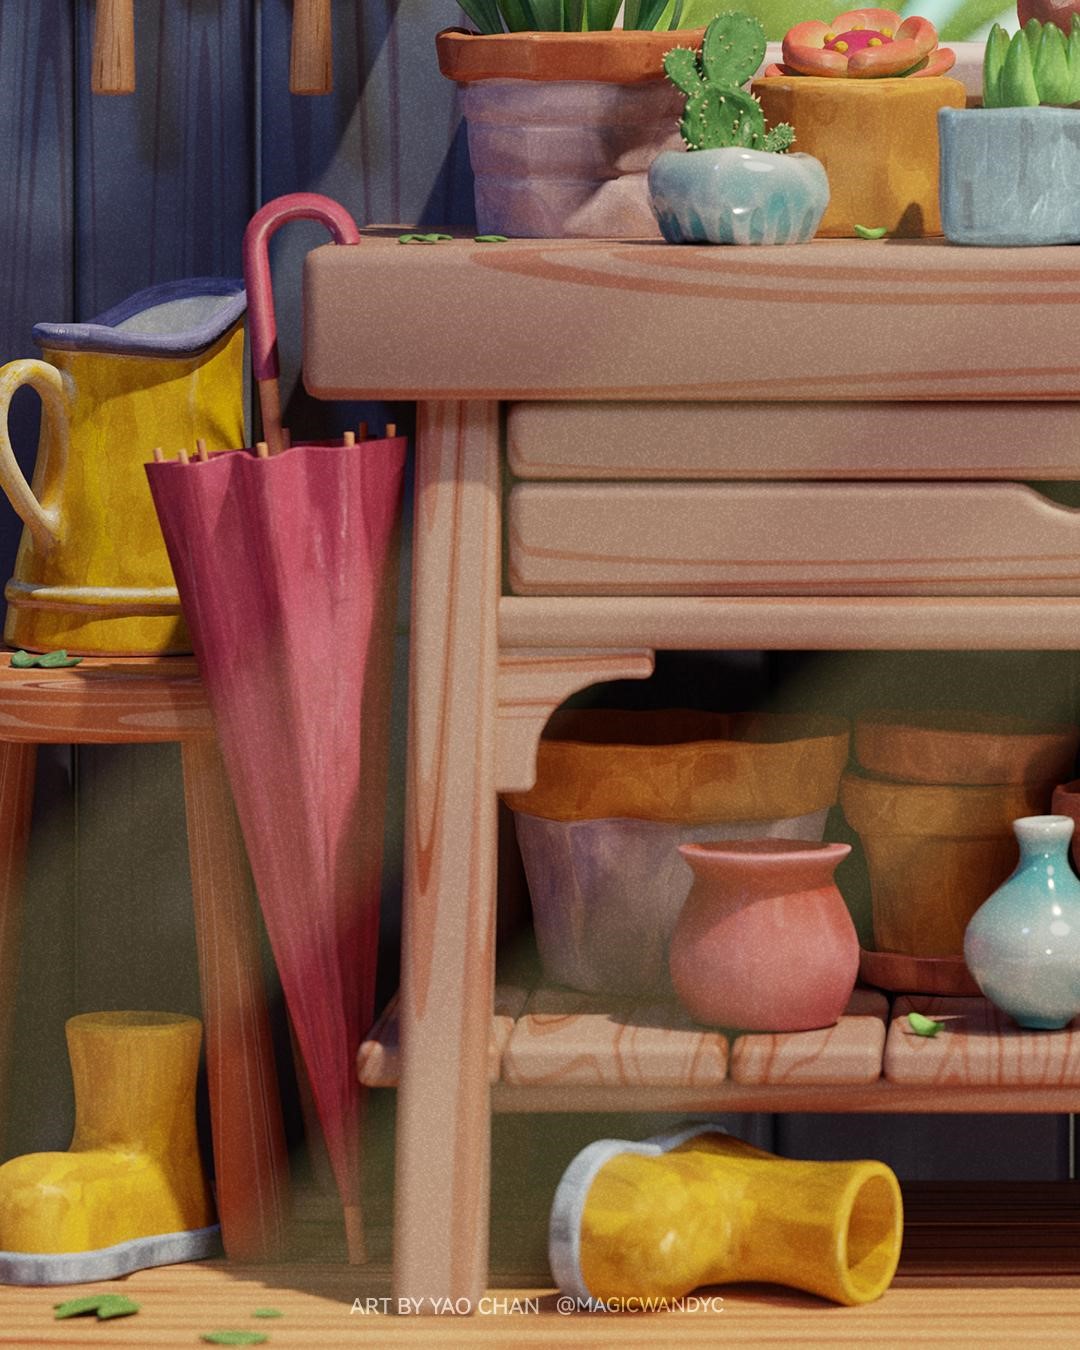
Since I aimed to maintain a simple and rustic style, most of the items in the scene were relatively simple to model. I just needed to focus on gradually enriching the content and details, imagining how I would arrange my favorite plants, store my unused pots and vases, and place gardening tools for ease of use.
I envisioned what kind of garden would be outside the window, where I would place my rain boots and umbrella when I came back from the garden, and similar scenarios. These kinds of imaginations helped me complete my illustration and imbue it with a more life-like atmosphere.
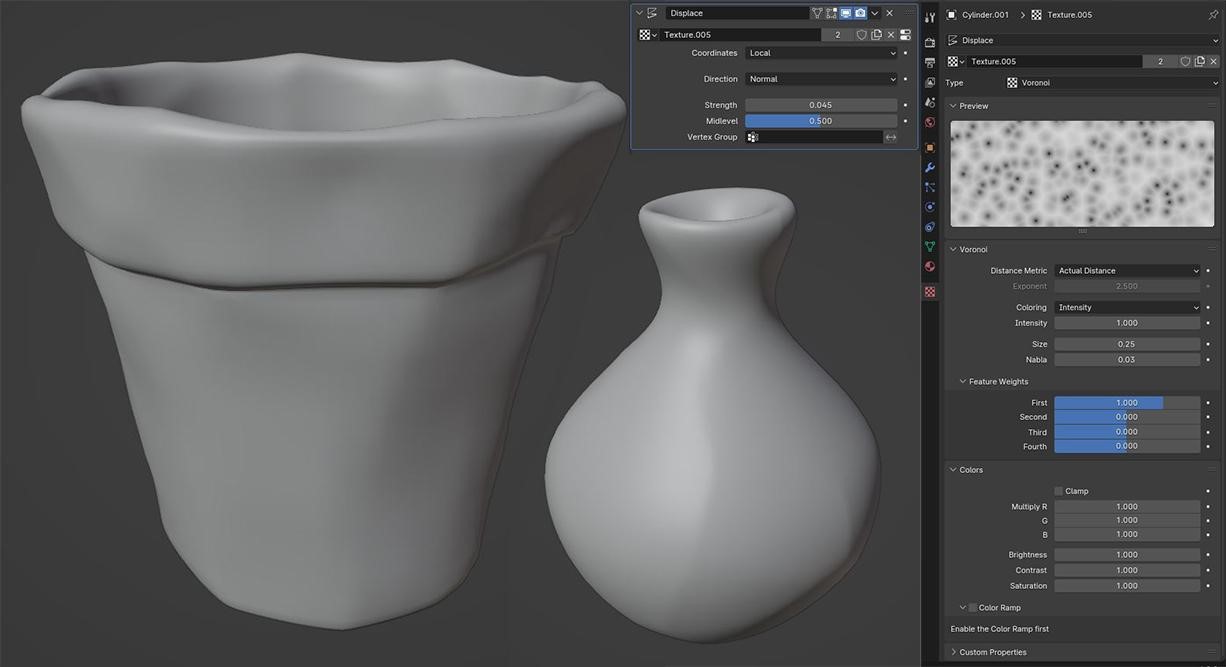
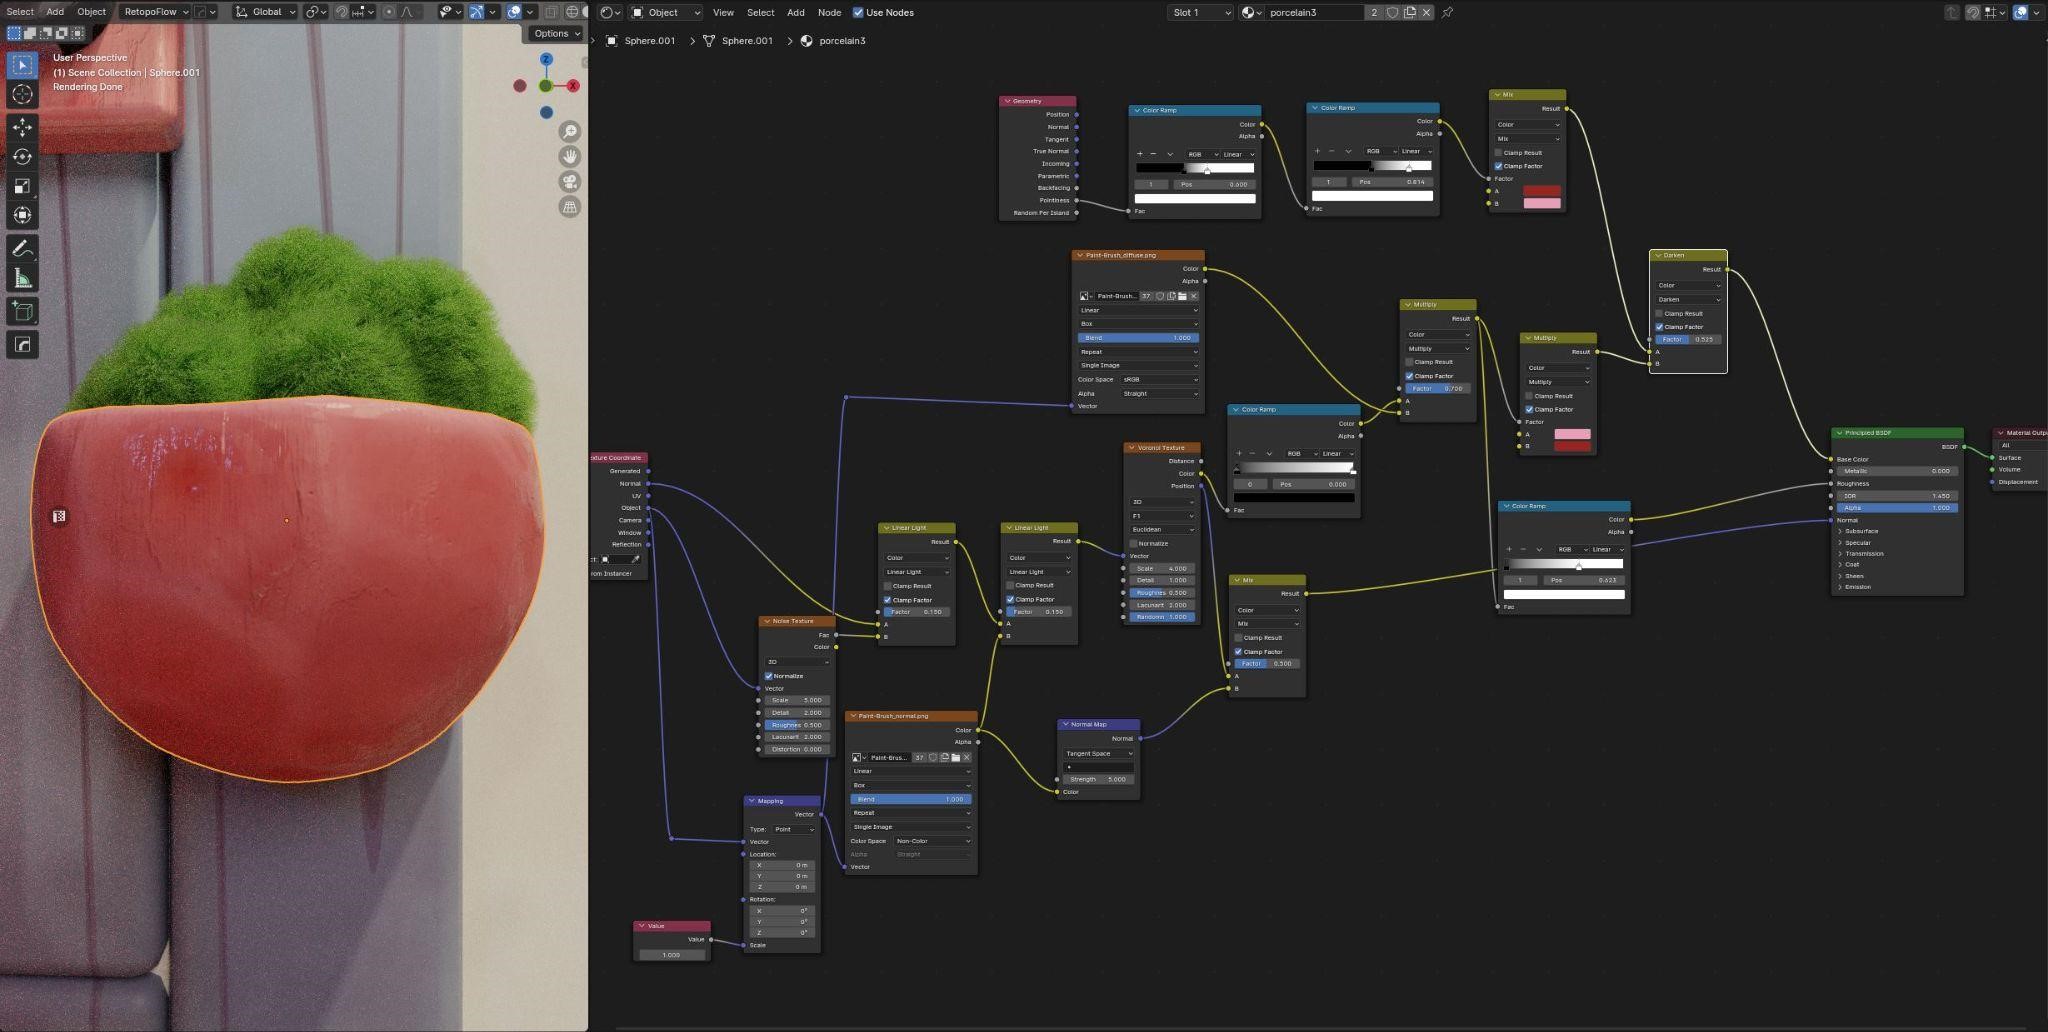
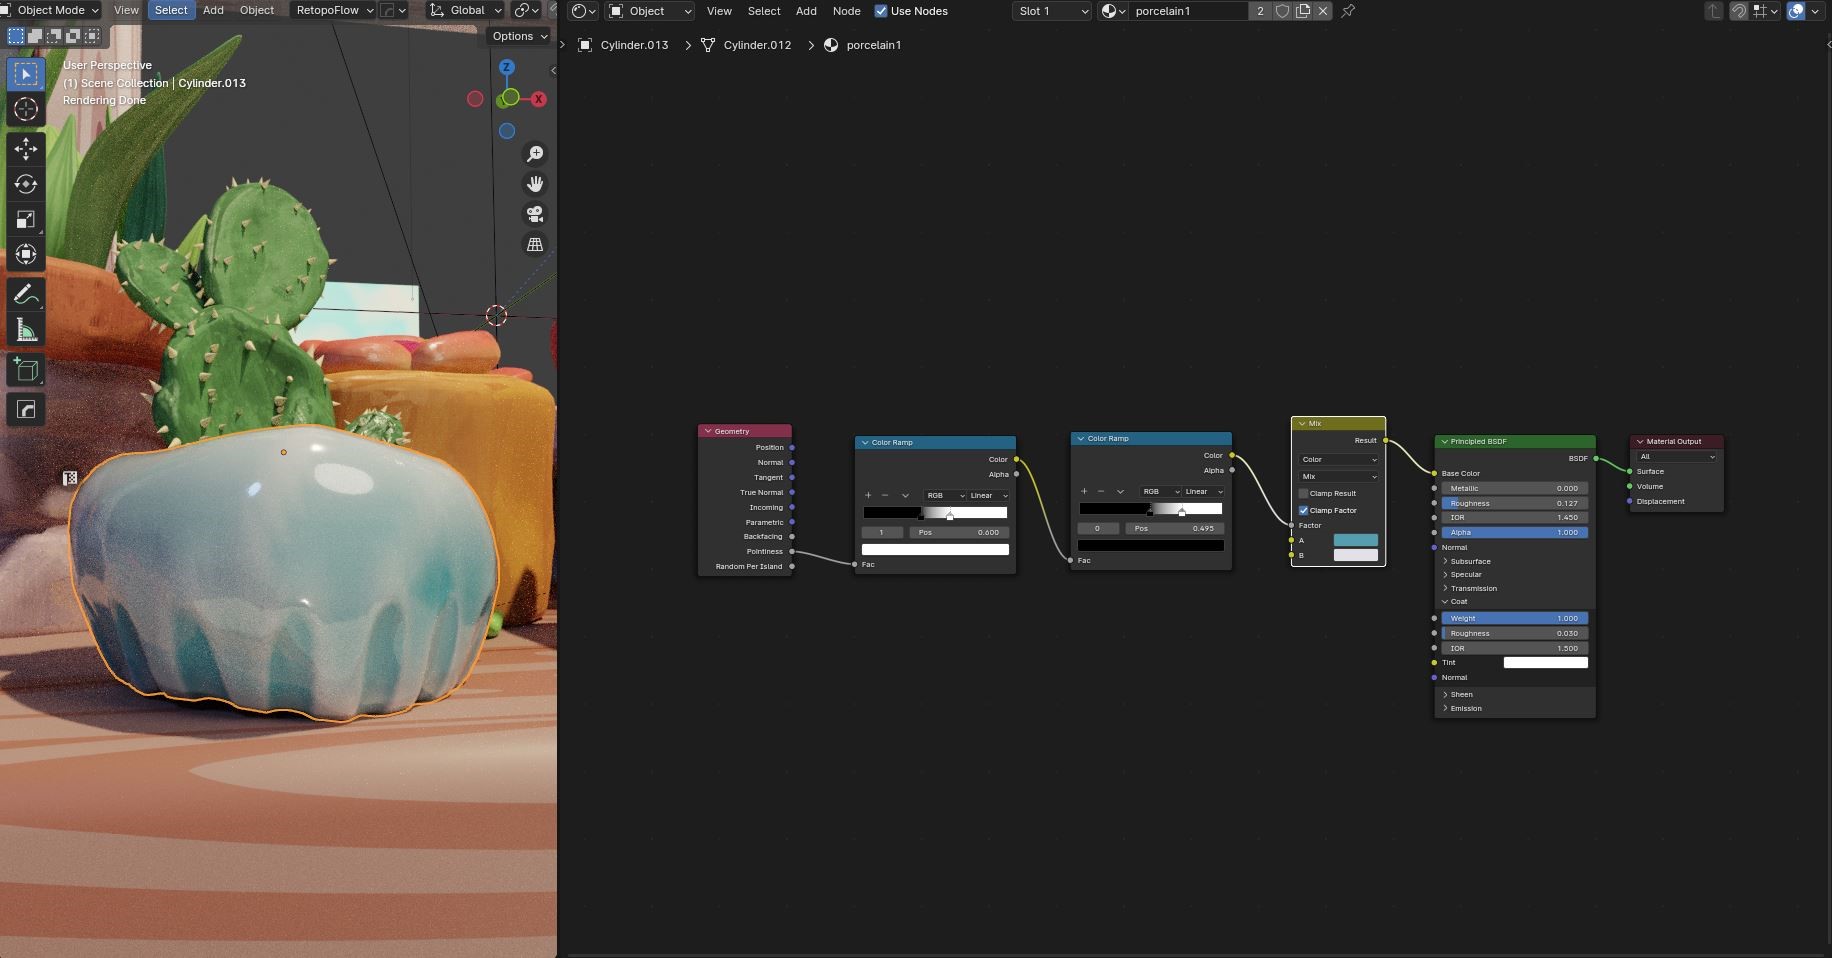
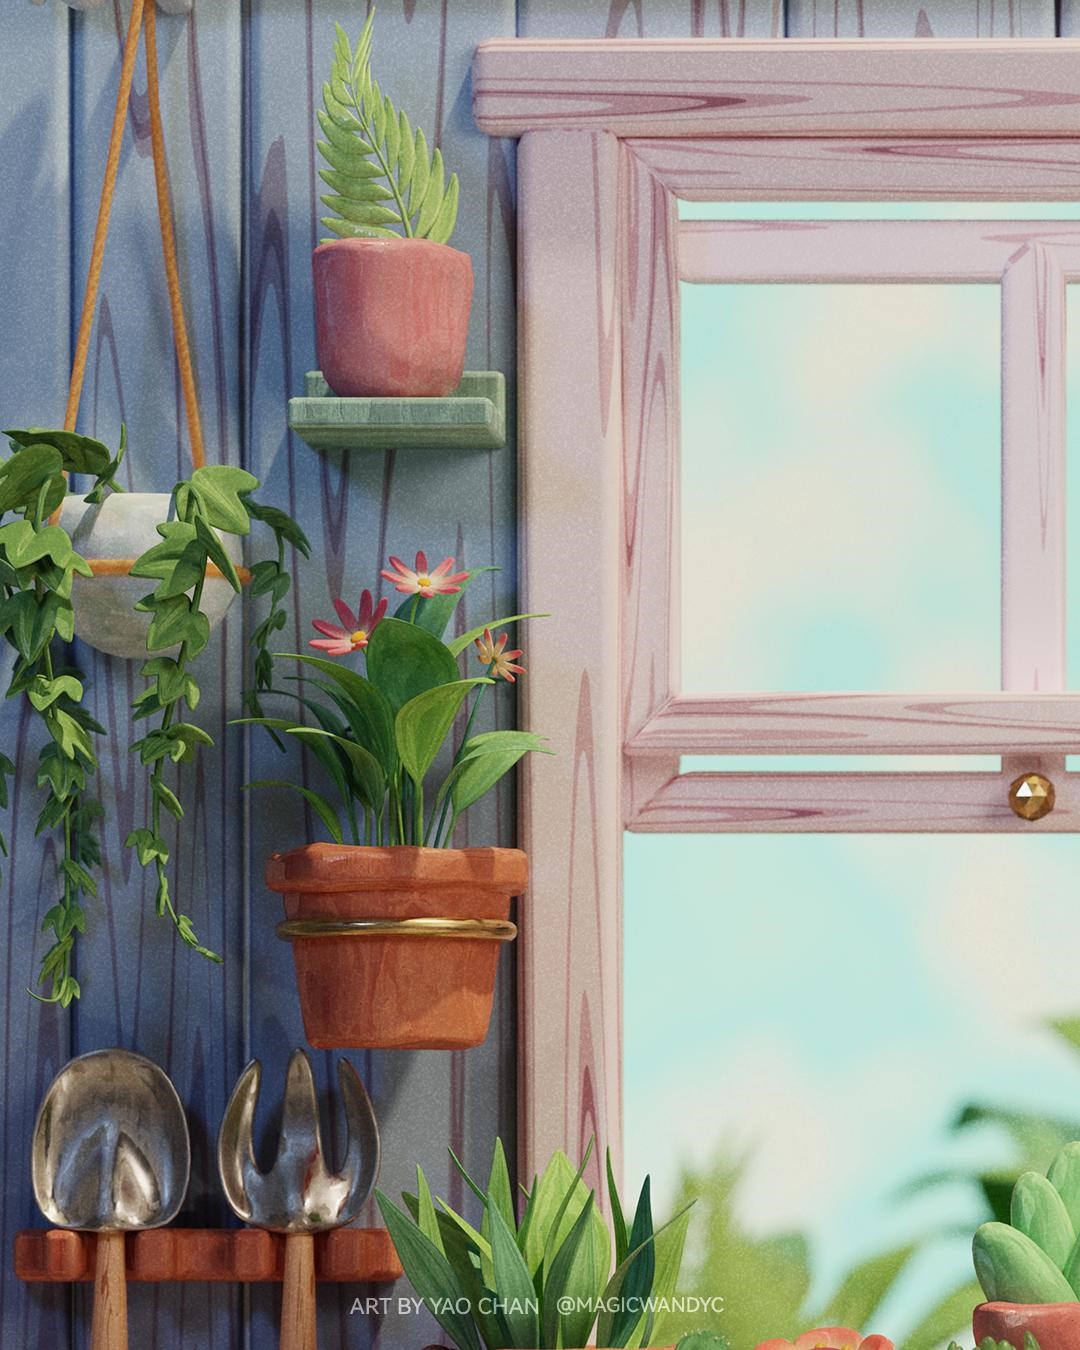
One important thing to note is that I wanted to use a hand-painted style for the textures so when modeling the vases and pots, I added the displace modifier and used a Voronoi texture to make the shapes more handmade to match the textures used later.
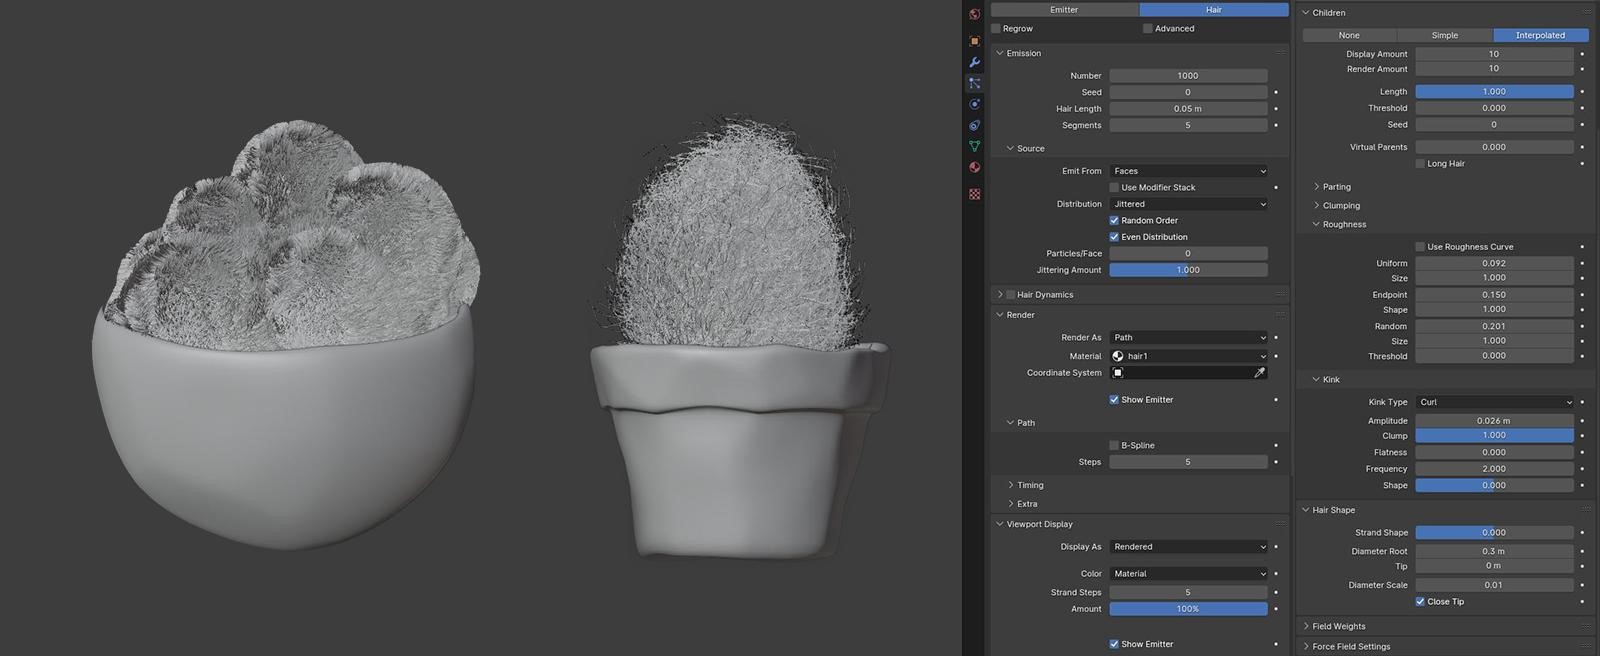
For fluffy plants like Kochia scoparia and mosses, I used hair from the particle system and played with roughness, kink, and hair shape under the children’s drop-down menu to achieve the effect.
Texturing
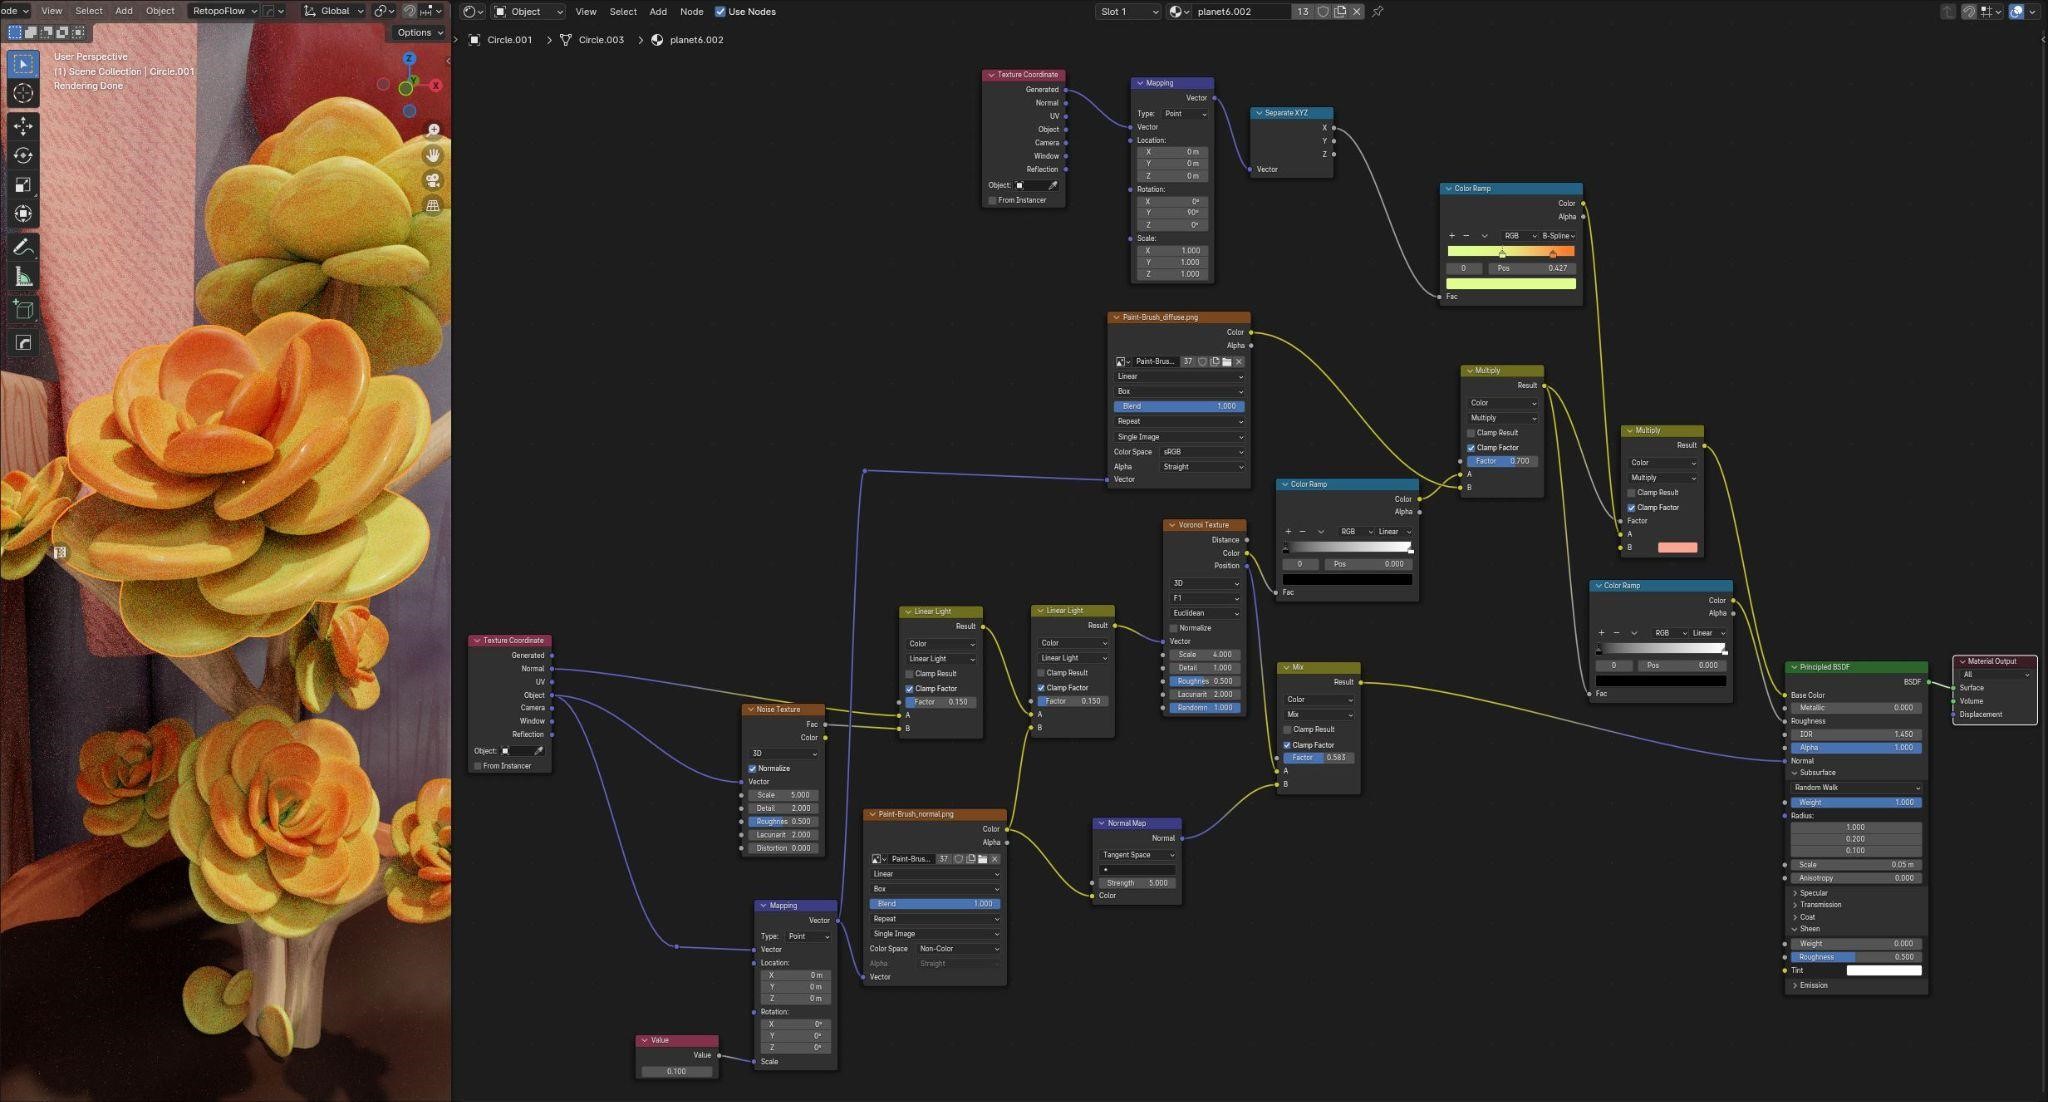
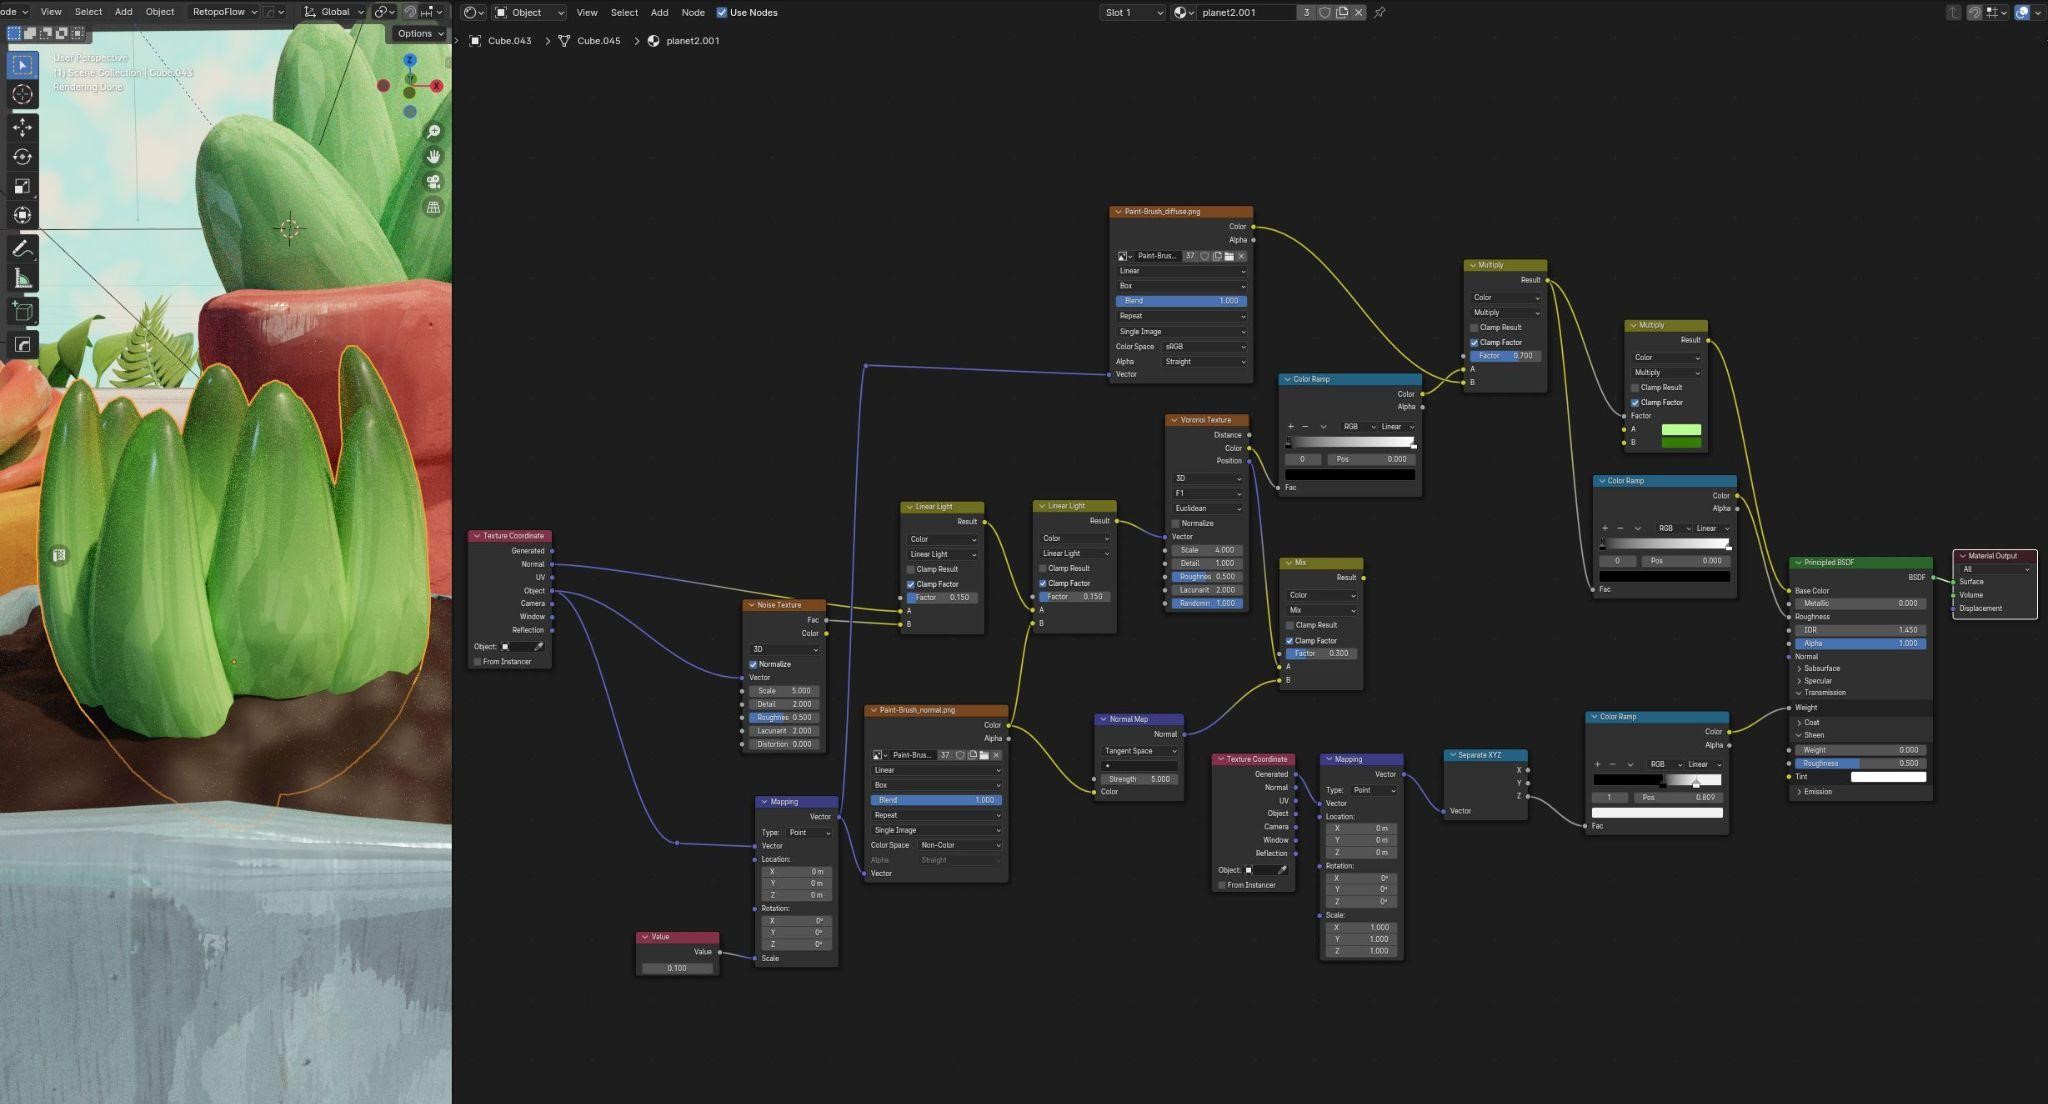
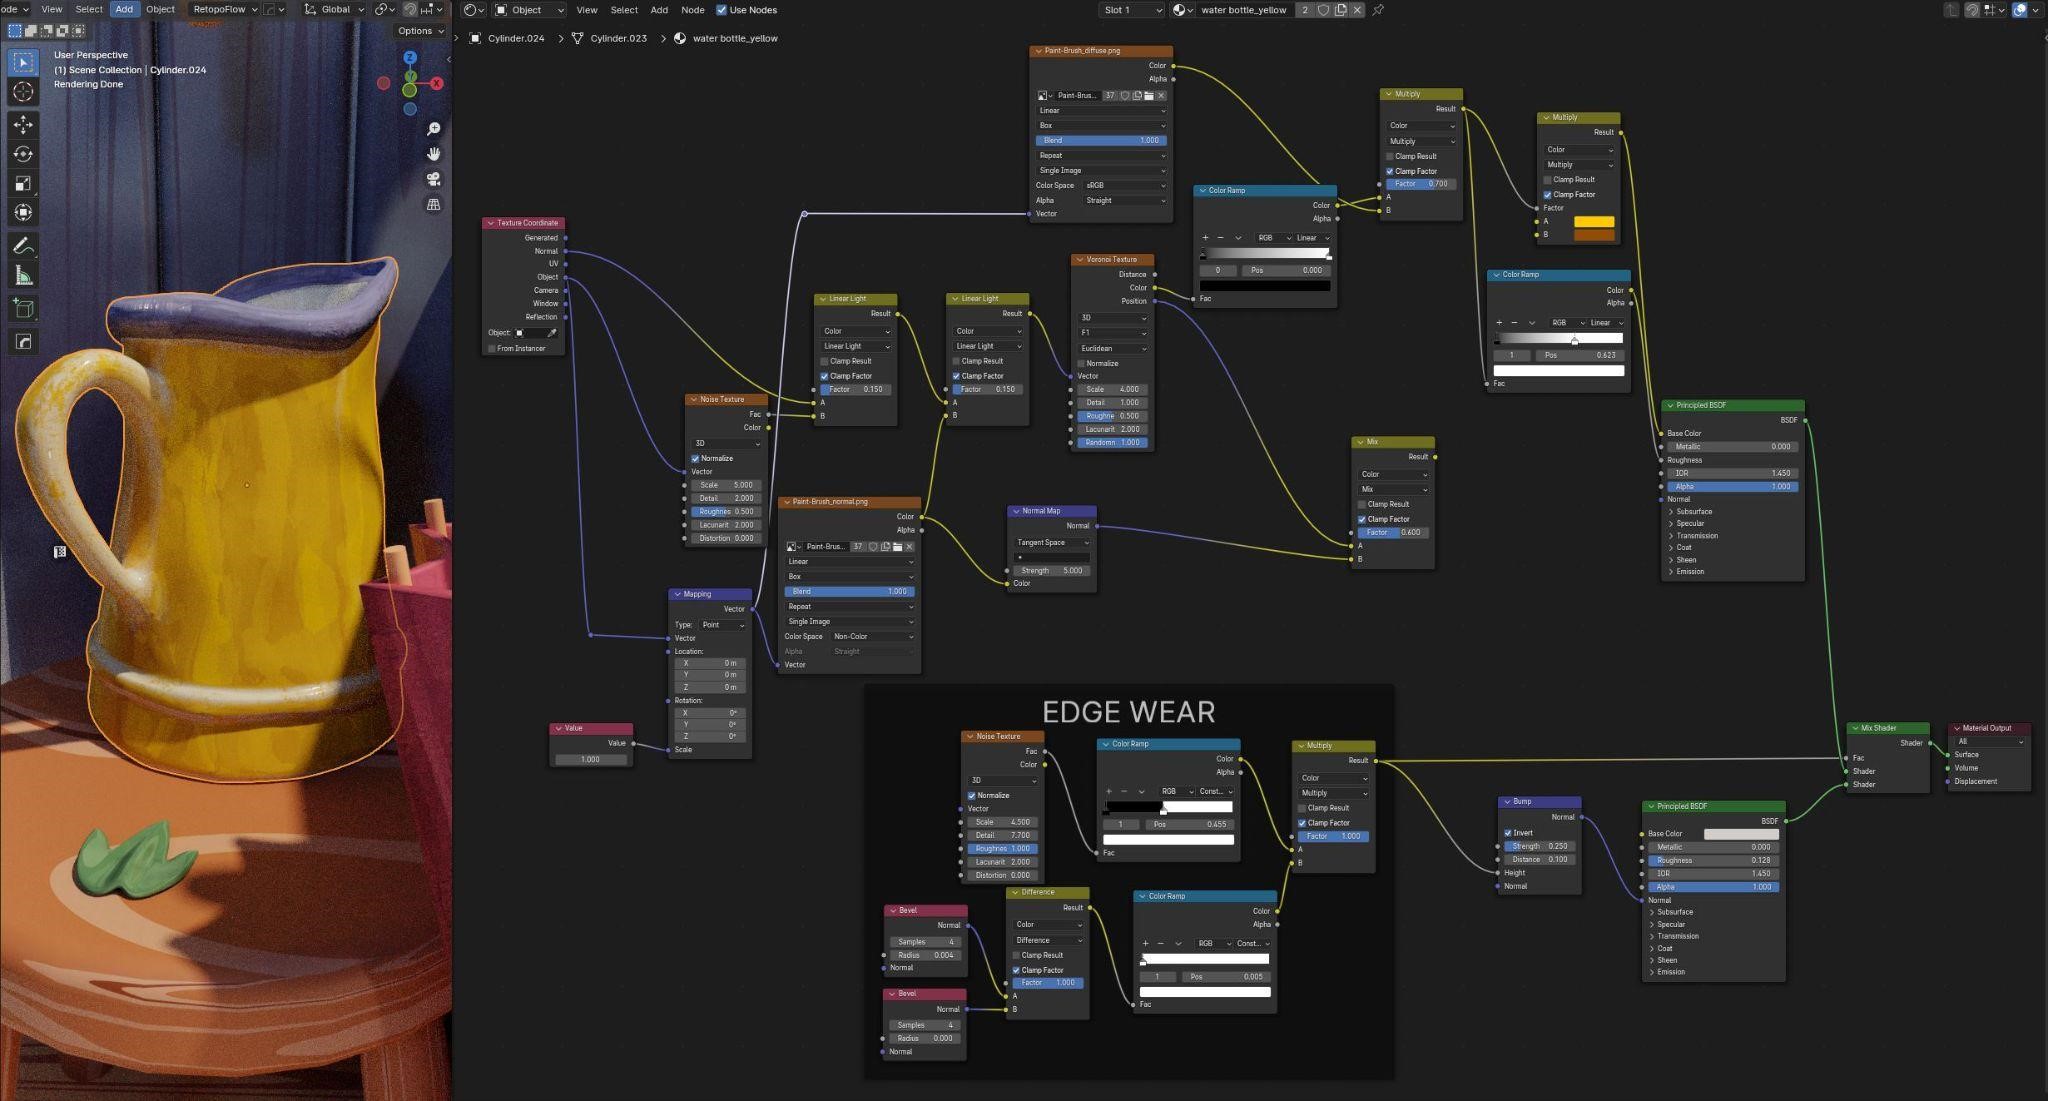
I used procedural textures throughout the scene to make the piece more stylized.
The hand-painted texture was learned from SouthernShotty’s tutorial. Usually, hand-painted textures are more difficult to make but this procedural texture is amazing and easy to use!
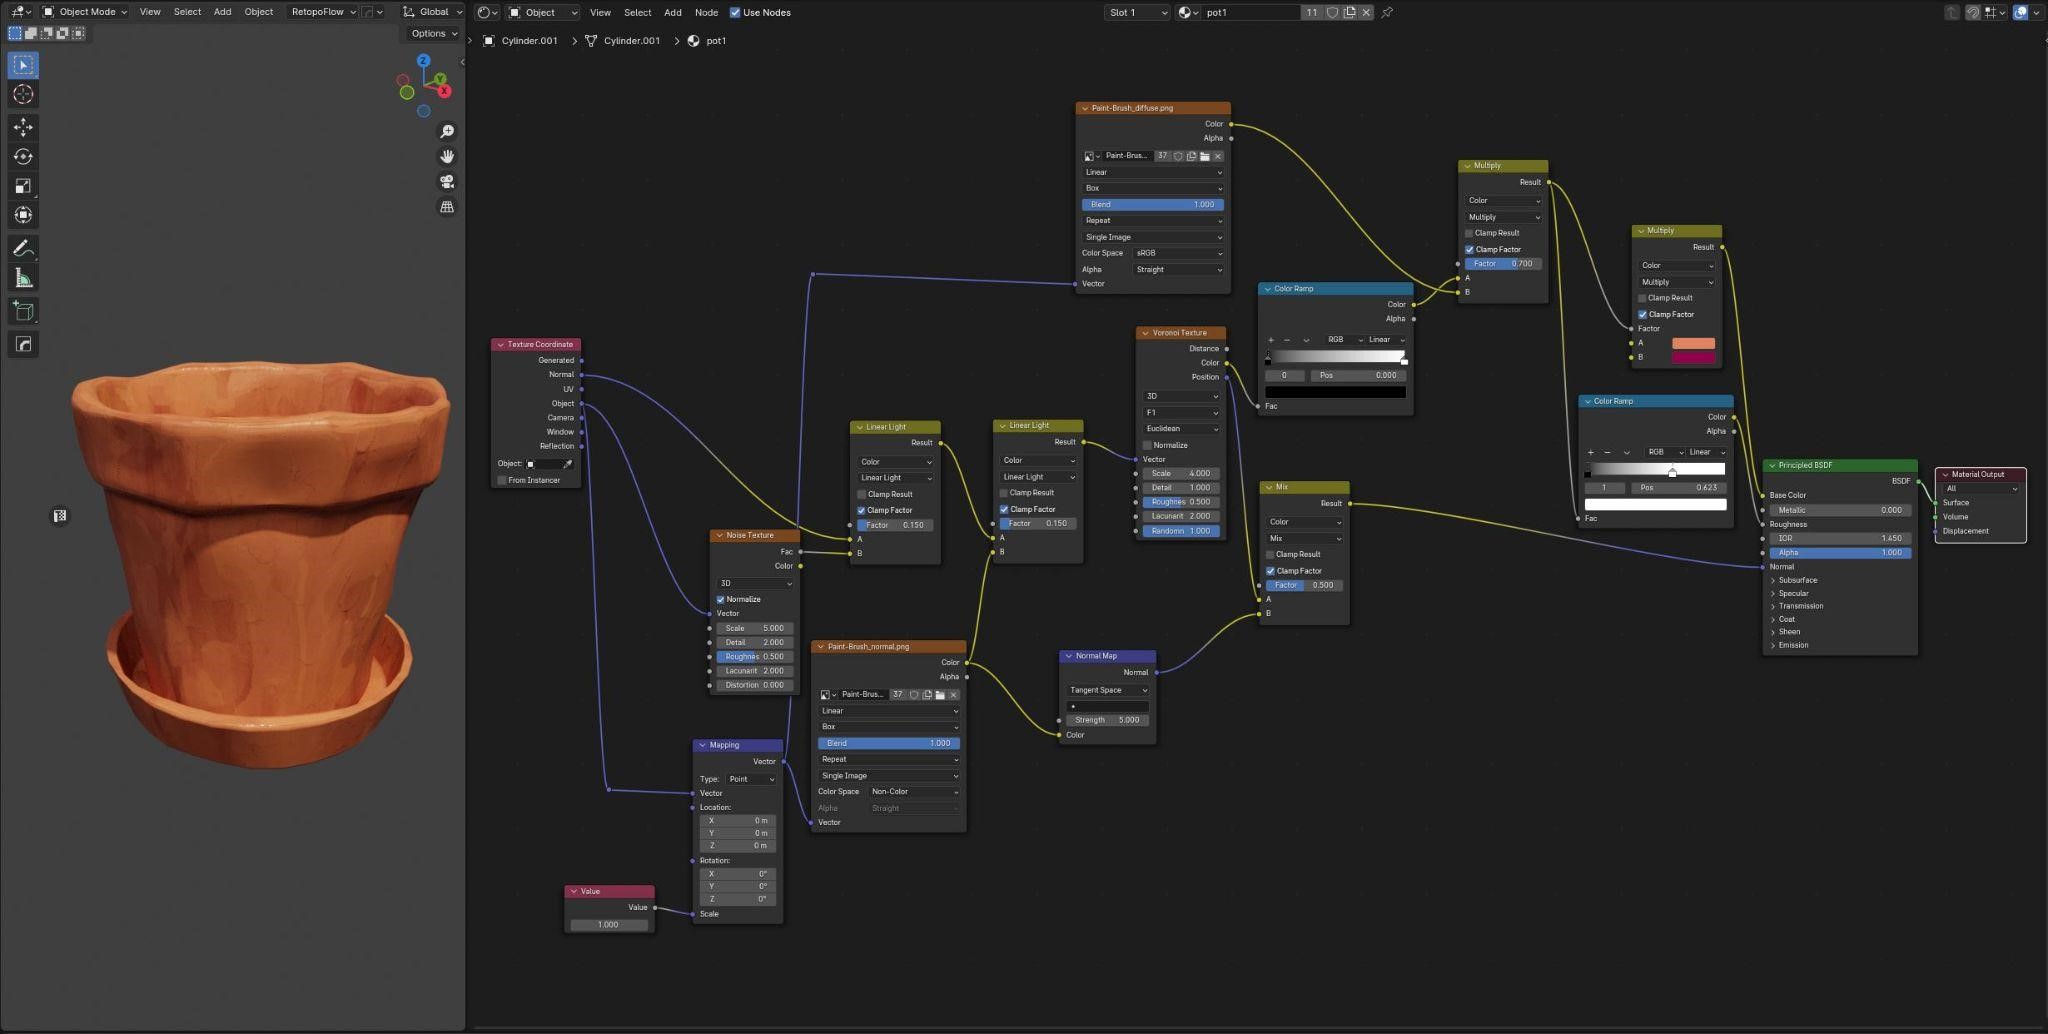
I used this hand-painted texture on most of the items in the scene and made different adjustments depending on the item, such as using the pointiness of the geometry nodes to highlight the structure of the flower pots and using gradient nodes to control the color and transparency of plants.
On the watering can and lamp, I added the effect of edge wear to give them a sense of use.
I used the “pointiness” node to simulate the material of ceramic flower pots.
Musgrave texture can be used to simulate wood grain on the walls, tables, and floor. In the wall texture, I added noise texture and gradient texture on top of the wood grain to give it a sense of age.

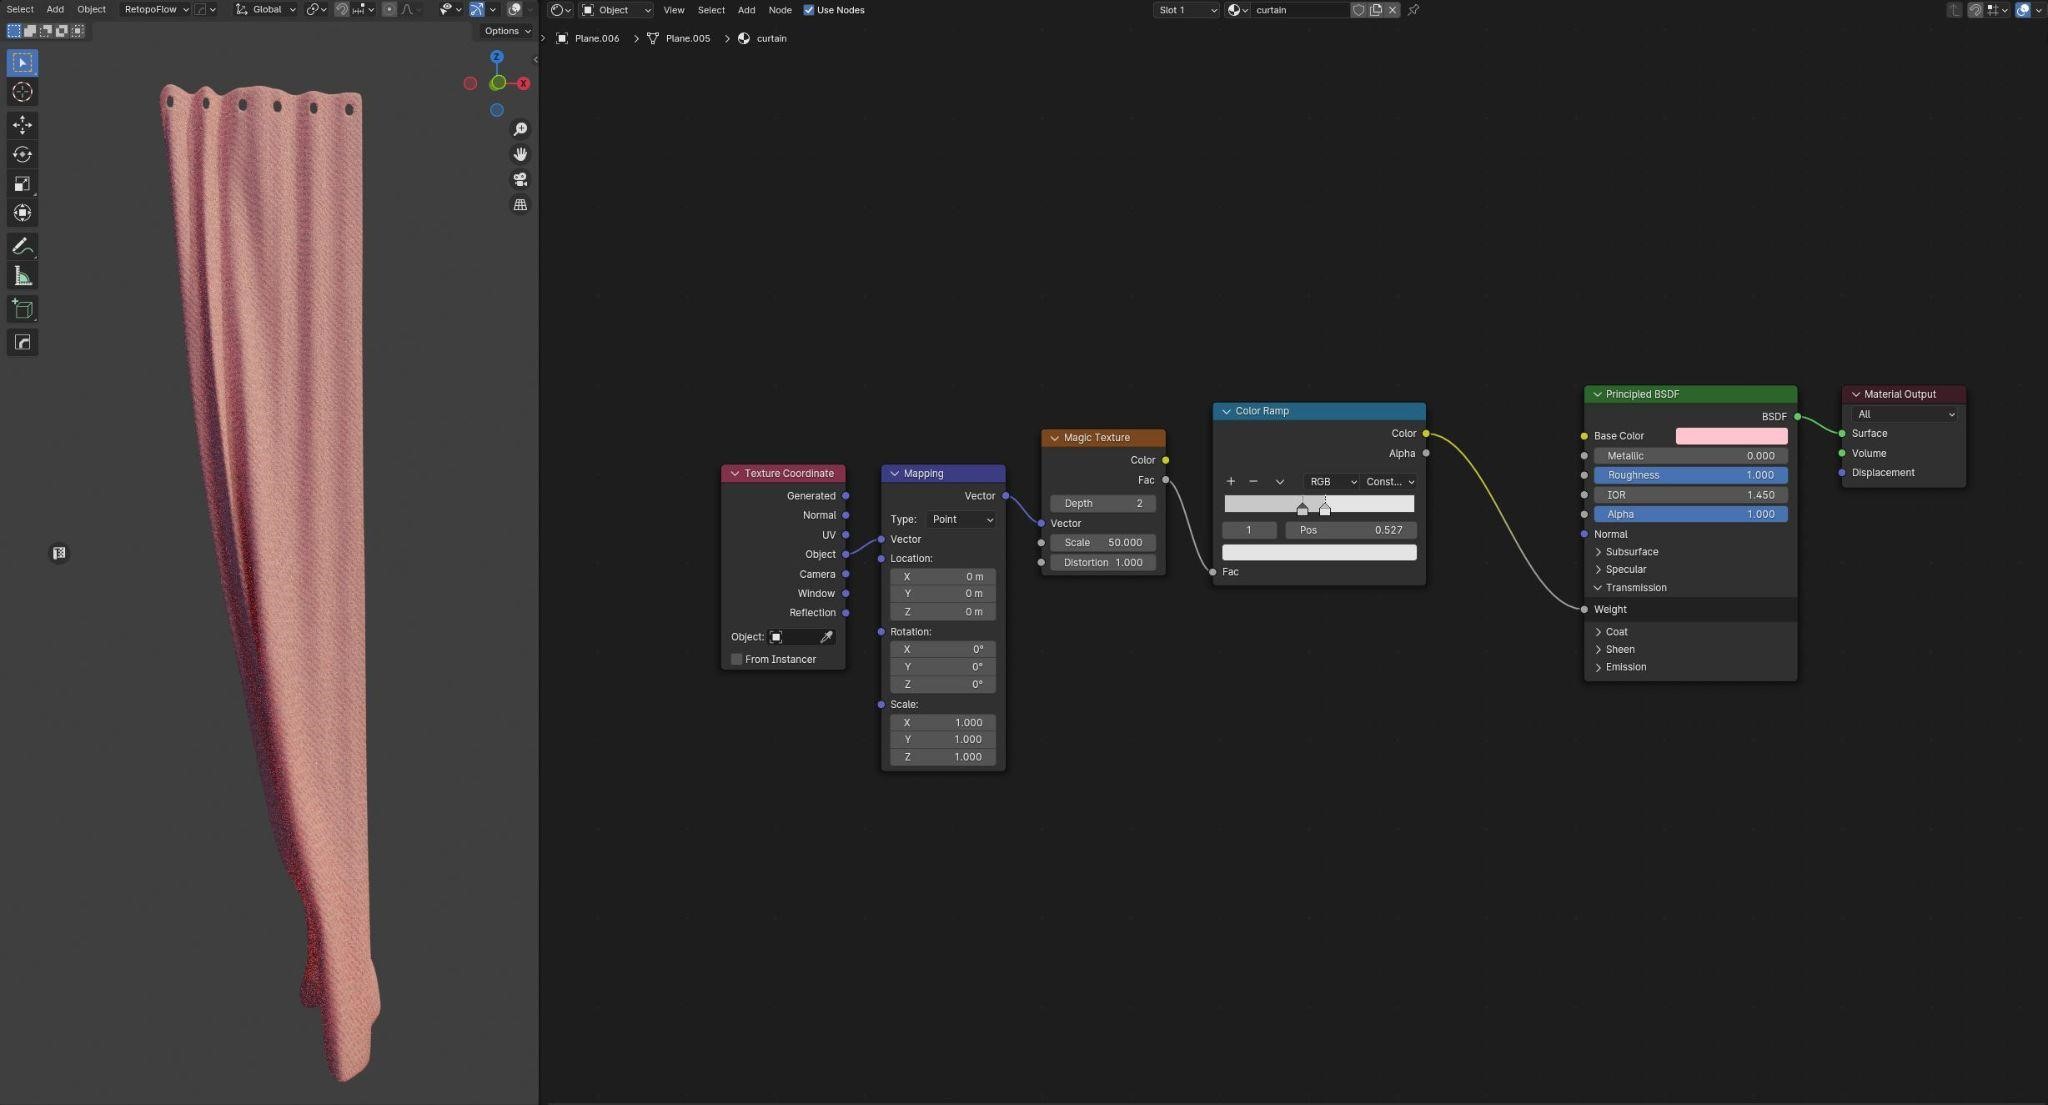
The texture of the curtains utilizes a simple Magic texture to adjust the transmission to show a slightly translucent fabric pattern.
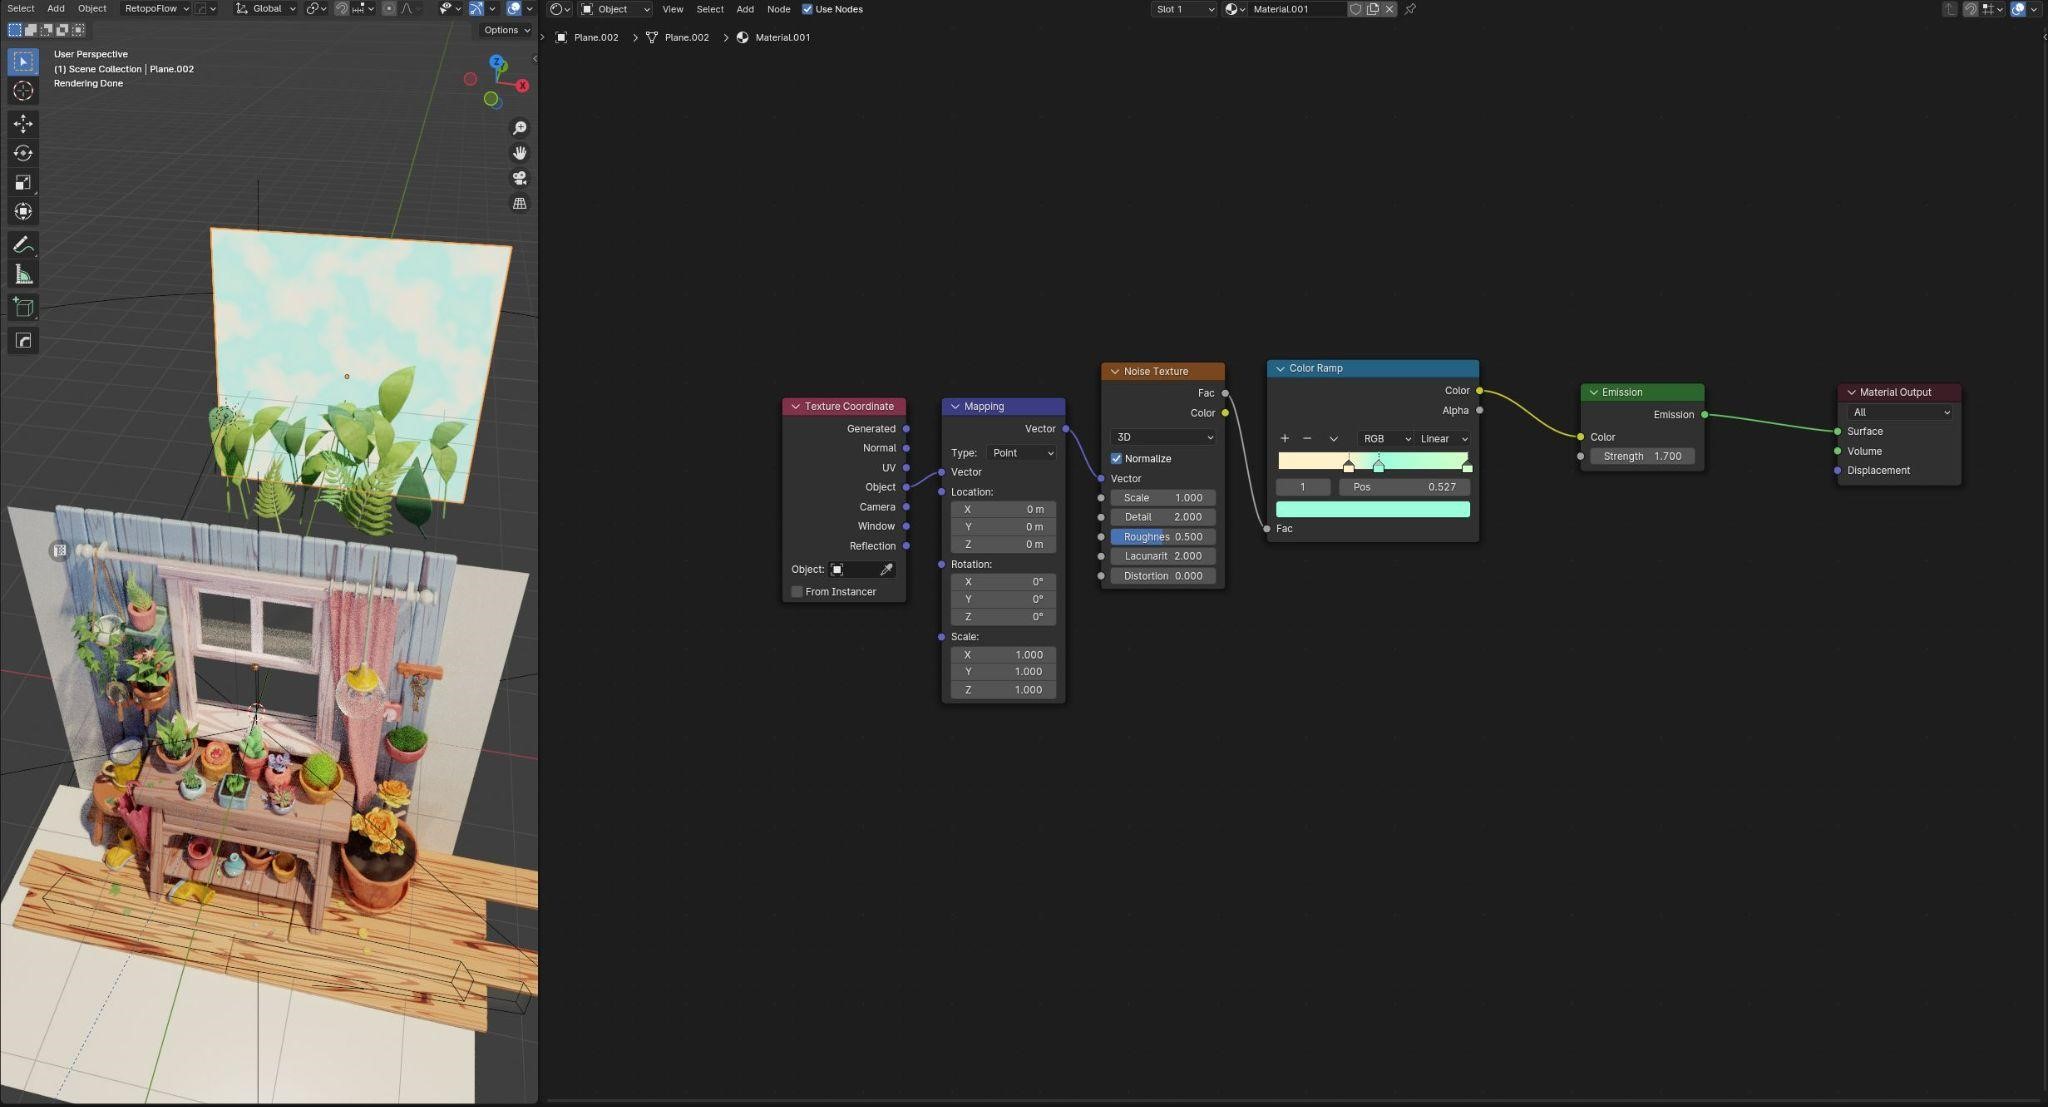
Since I used depth of field in the camera, the sky outside the window is just a plane with a noise texture.
Lighting
The scene lighting setup is quite straightforward—a sun light, a warm-toned key light, a cool-toned fill light, and an additional small light source to illuminate the area beneath the table.
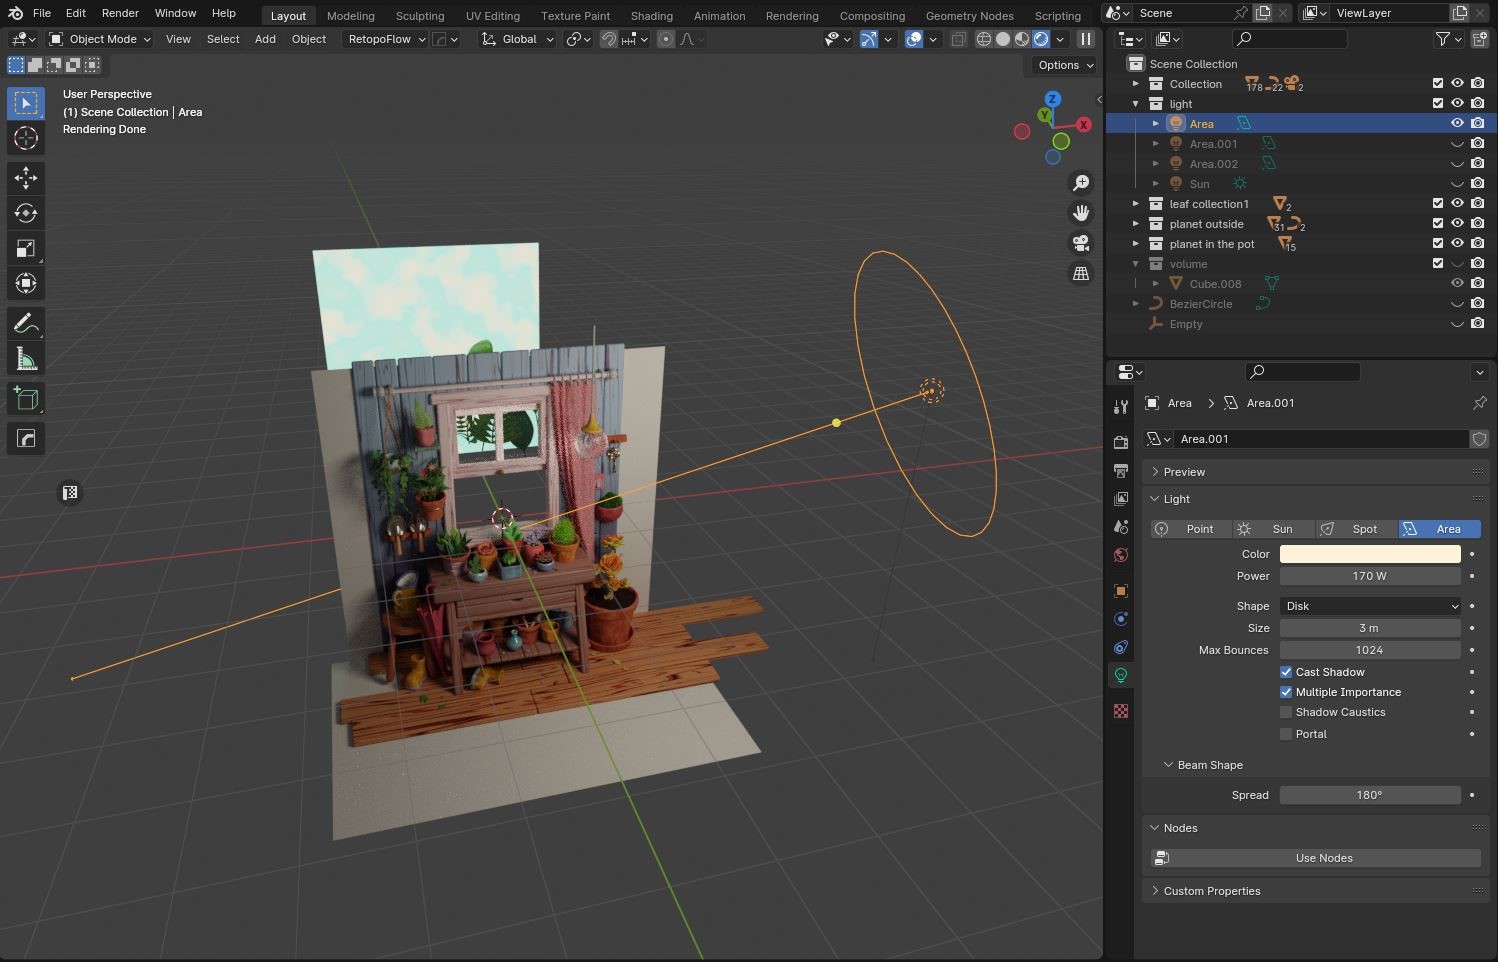
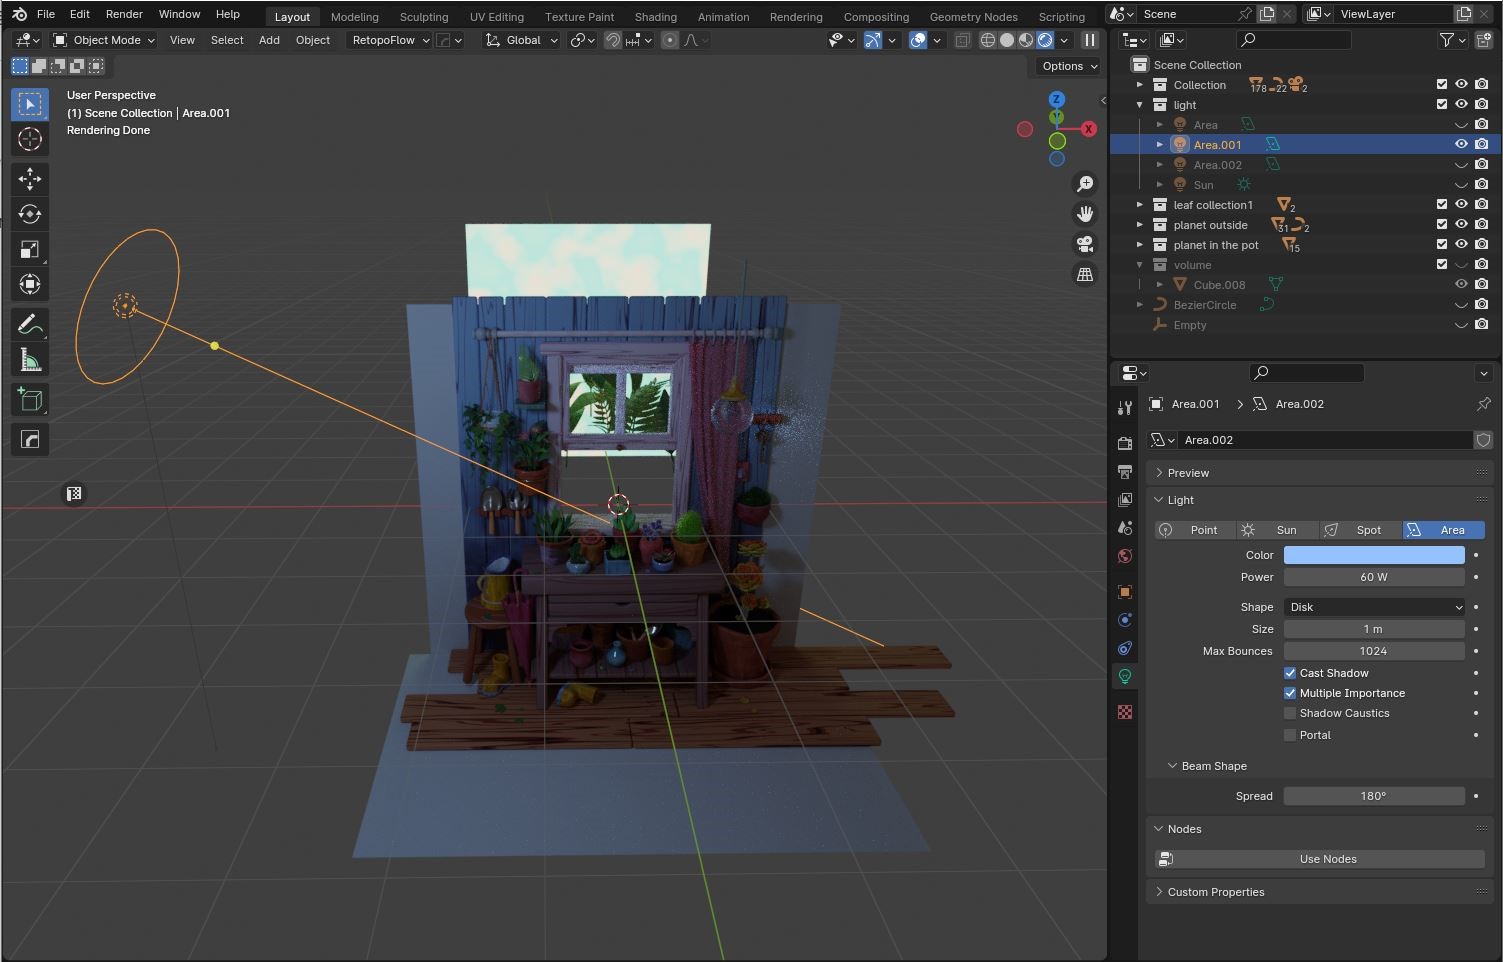
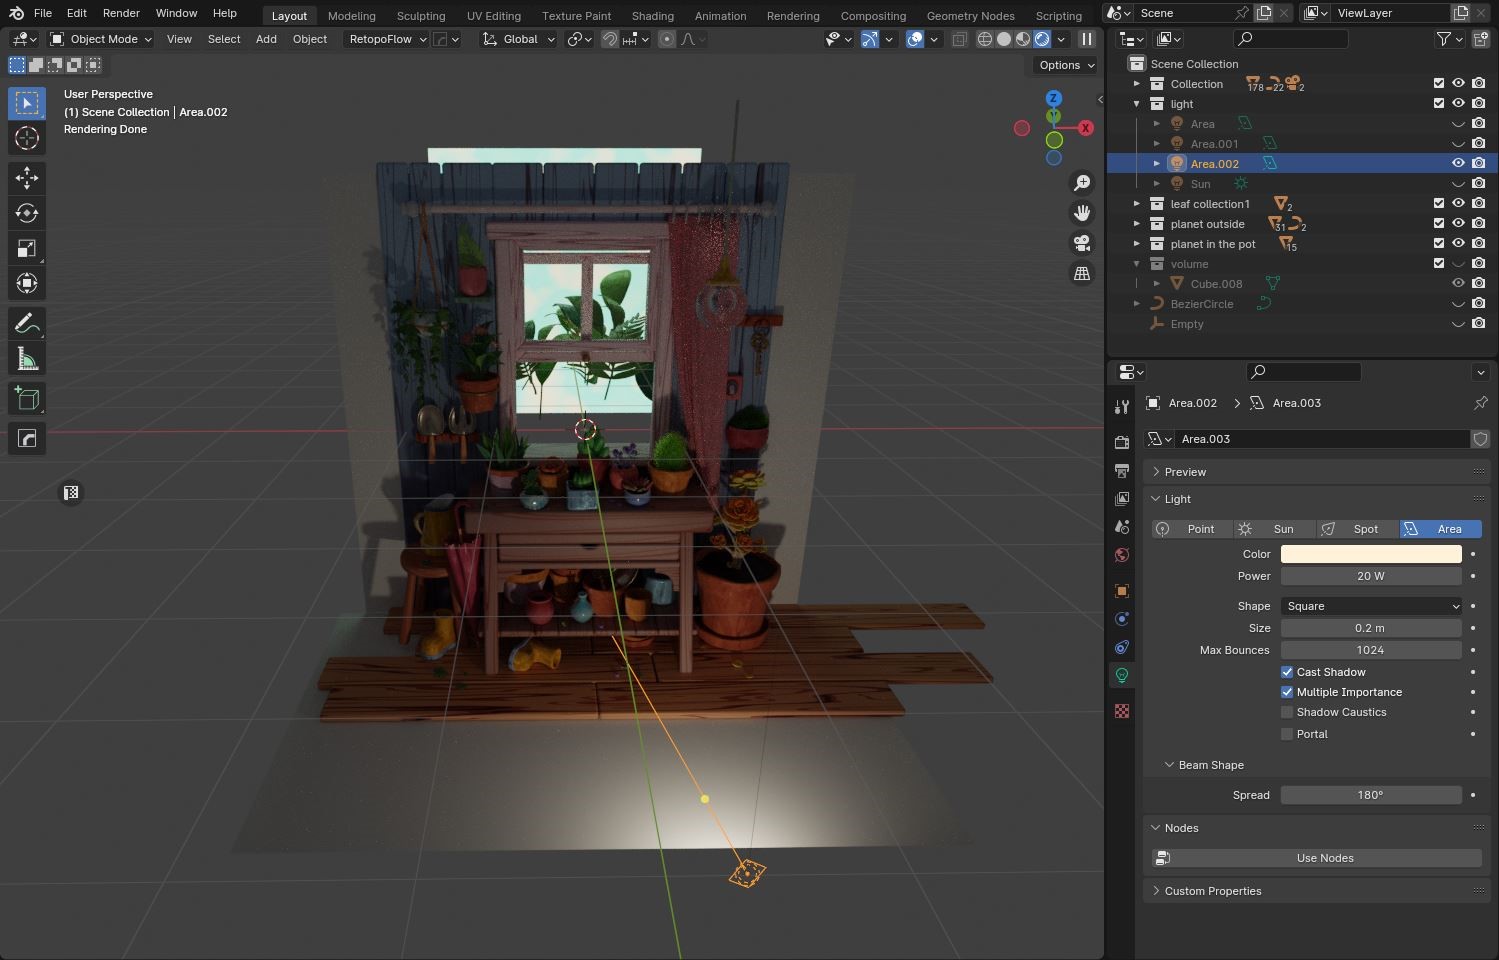
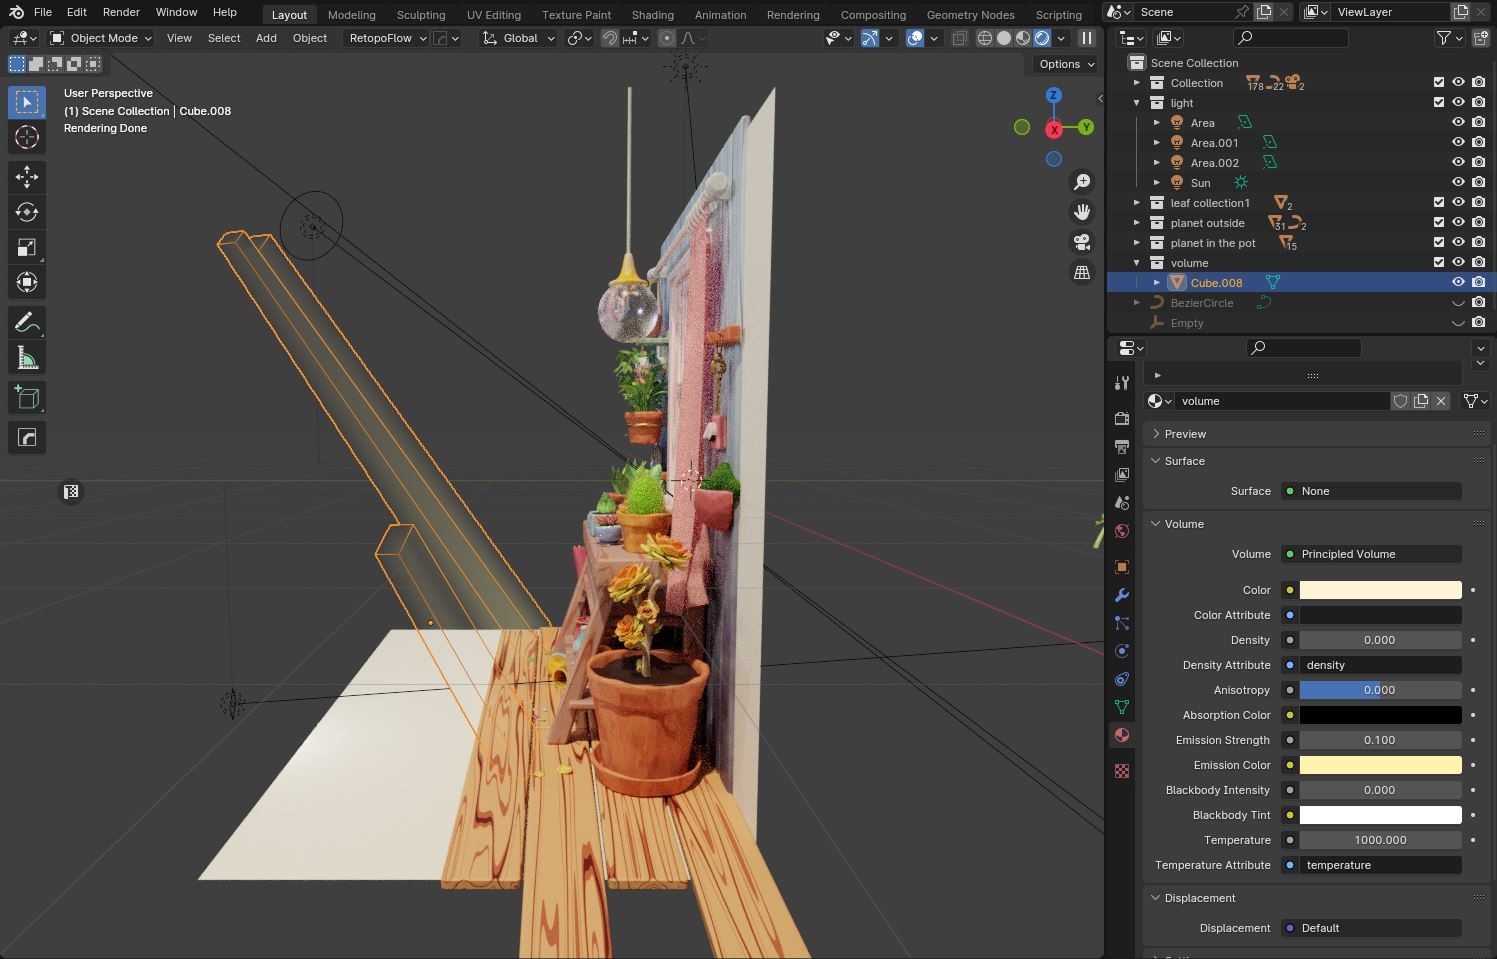
Additionally, I added a couple of volume lights in front of the camera.
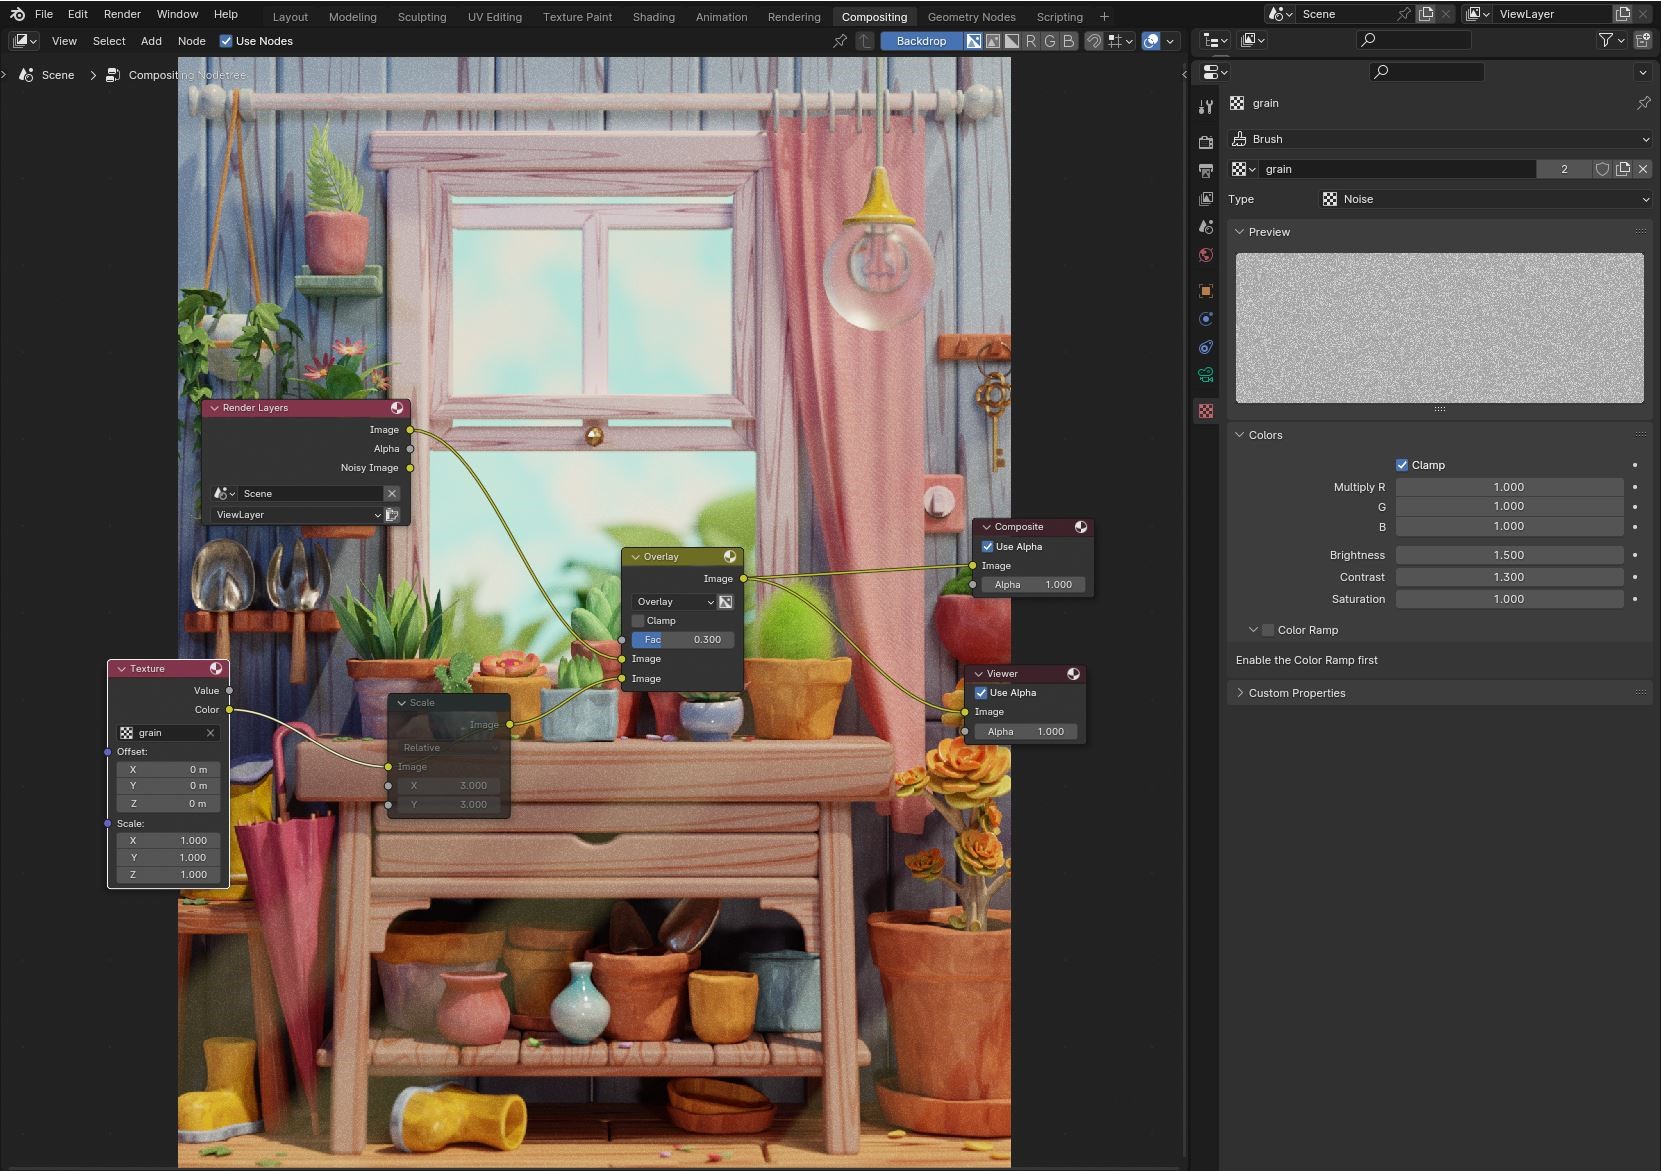
Compositing
To give the image a more vintage look, I added noise to the final rendered image in compositing.
A short capture of the stages in the process:
And that was it! Below is the final animation and renders.
RENDER: By the Window
Animation display:
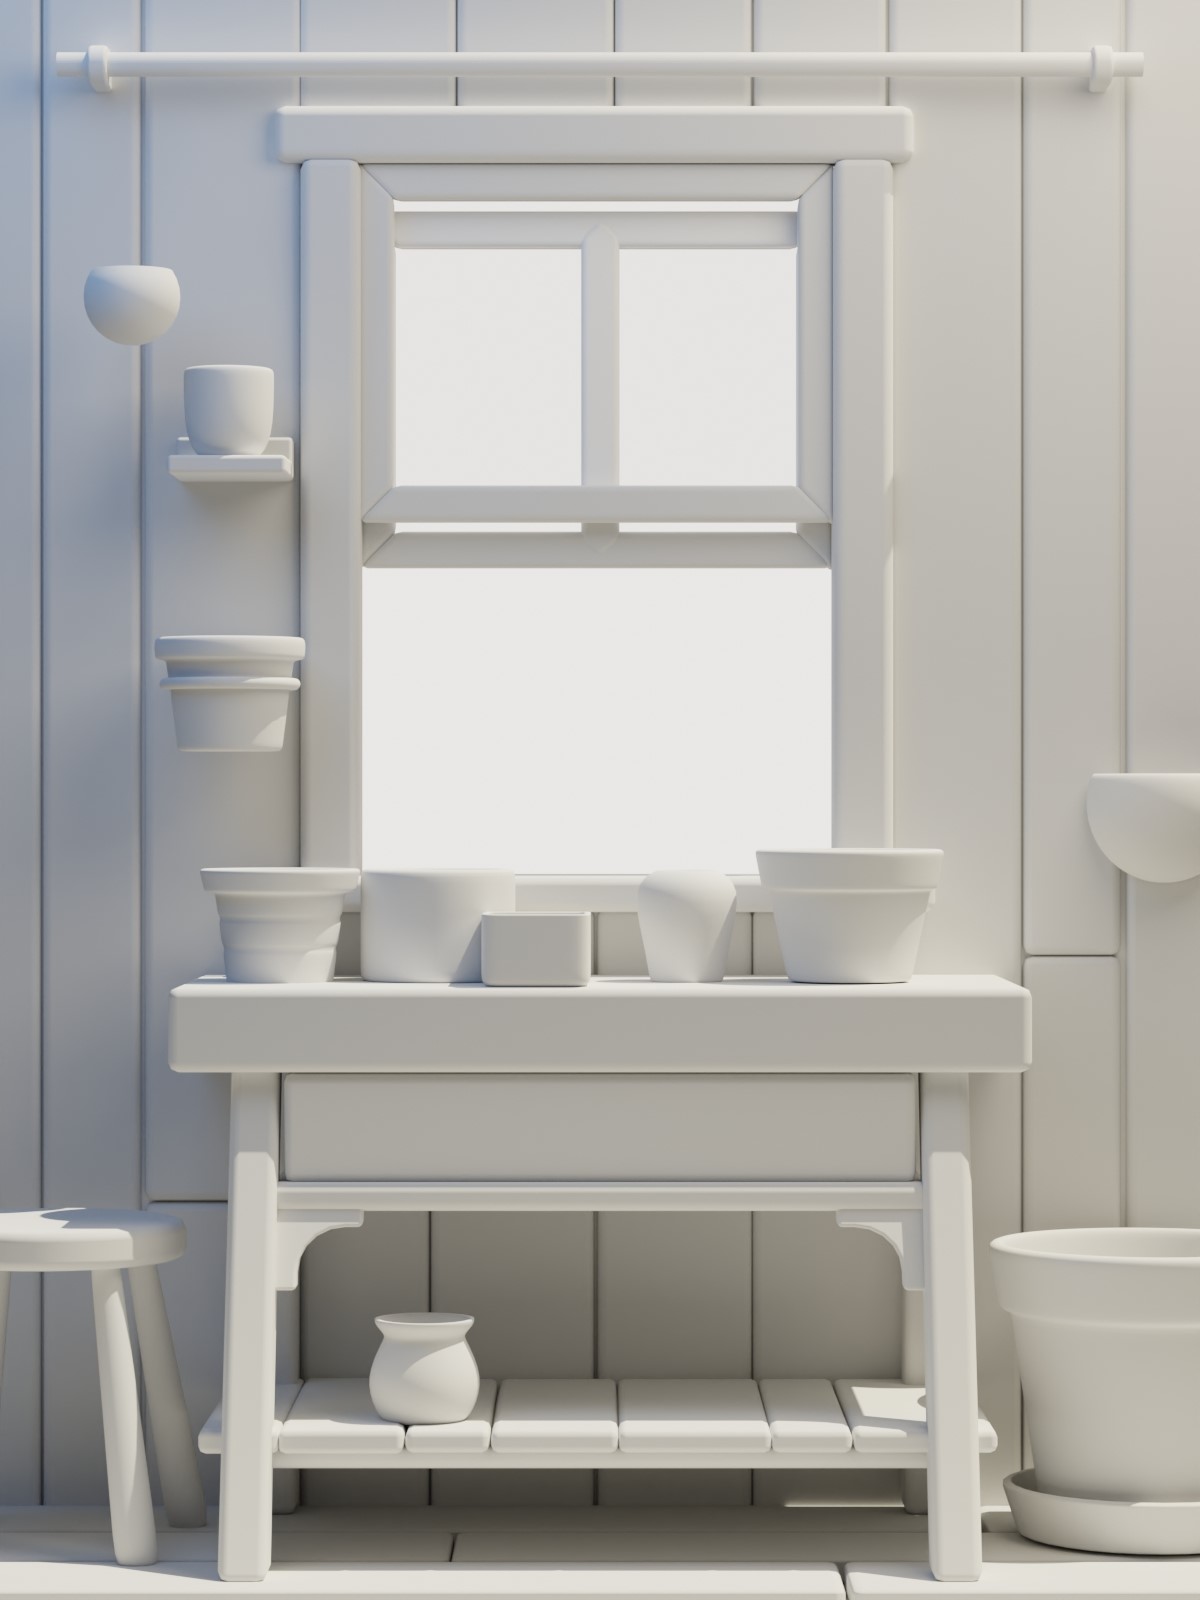
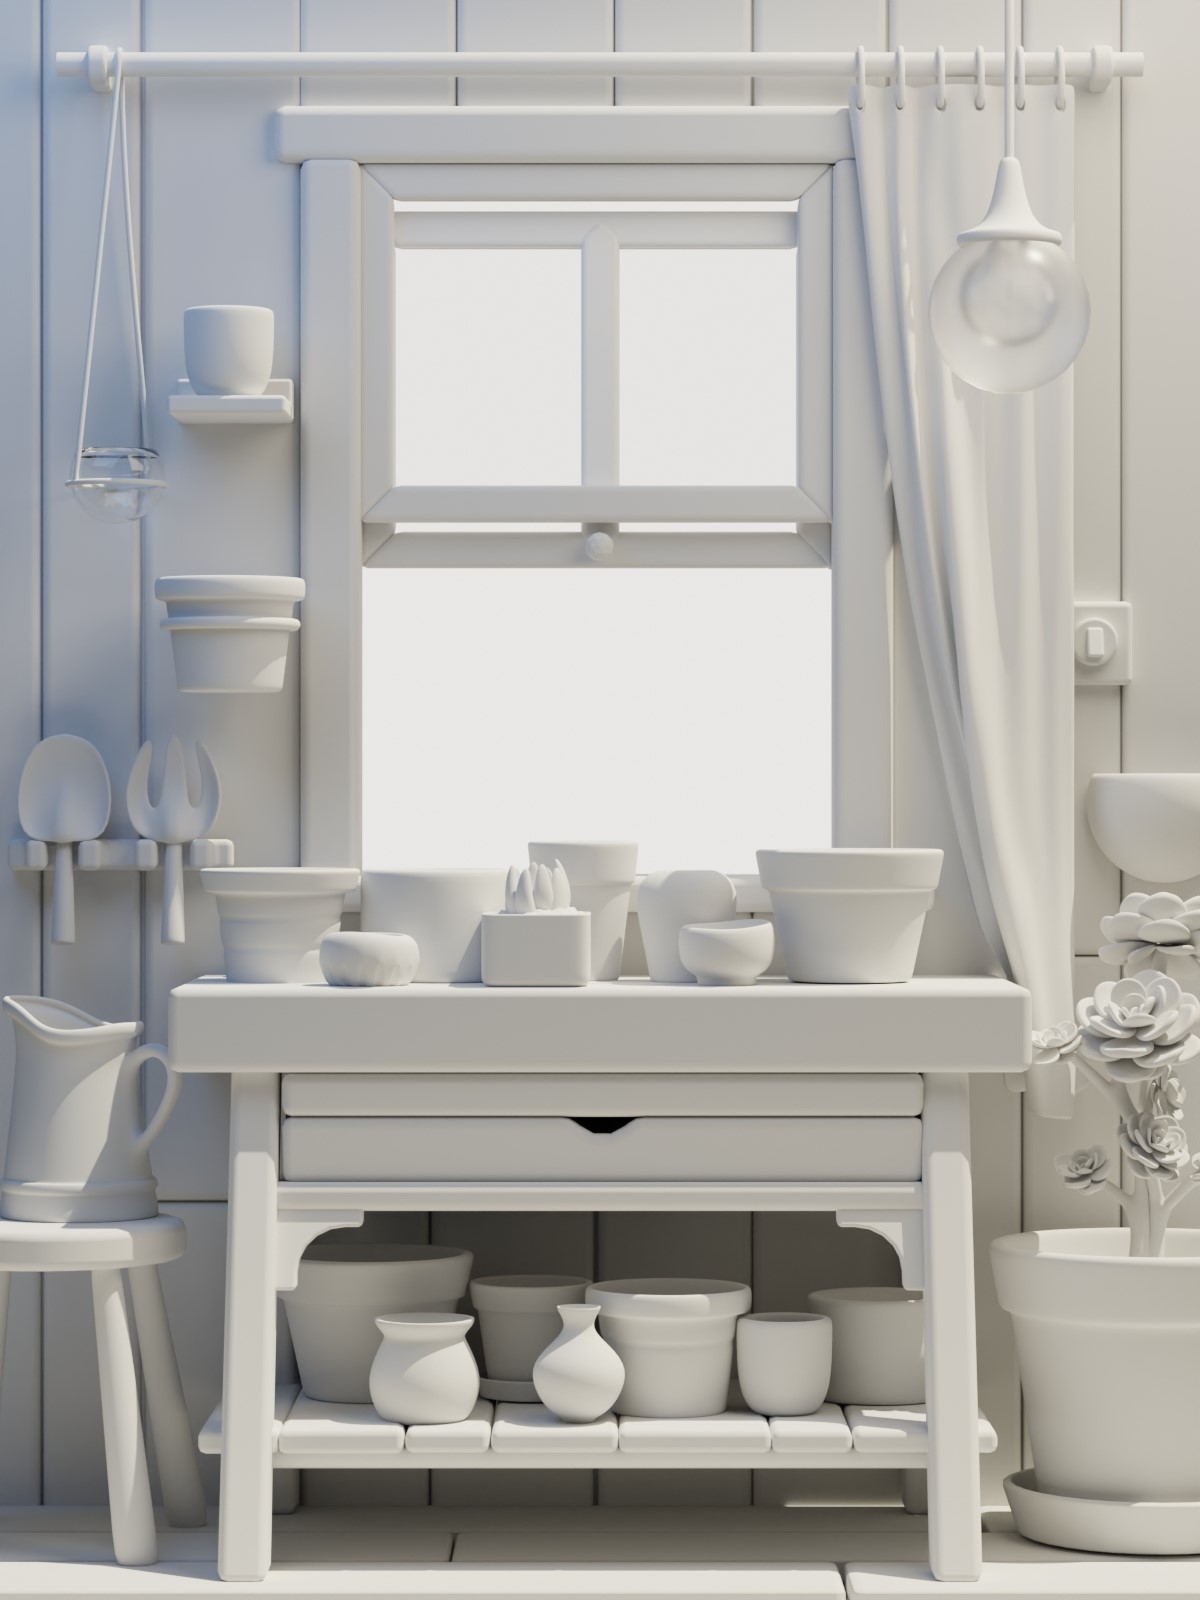
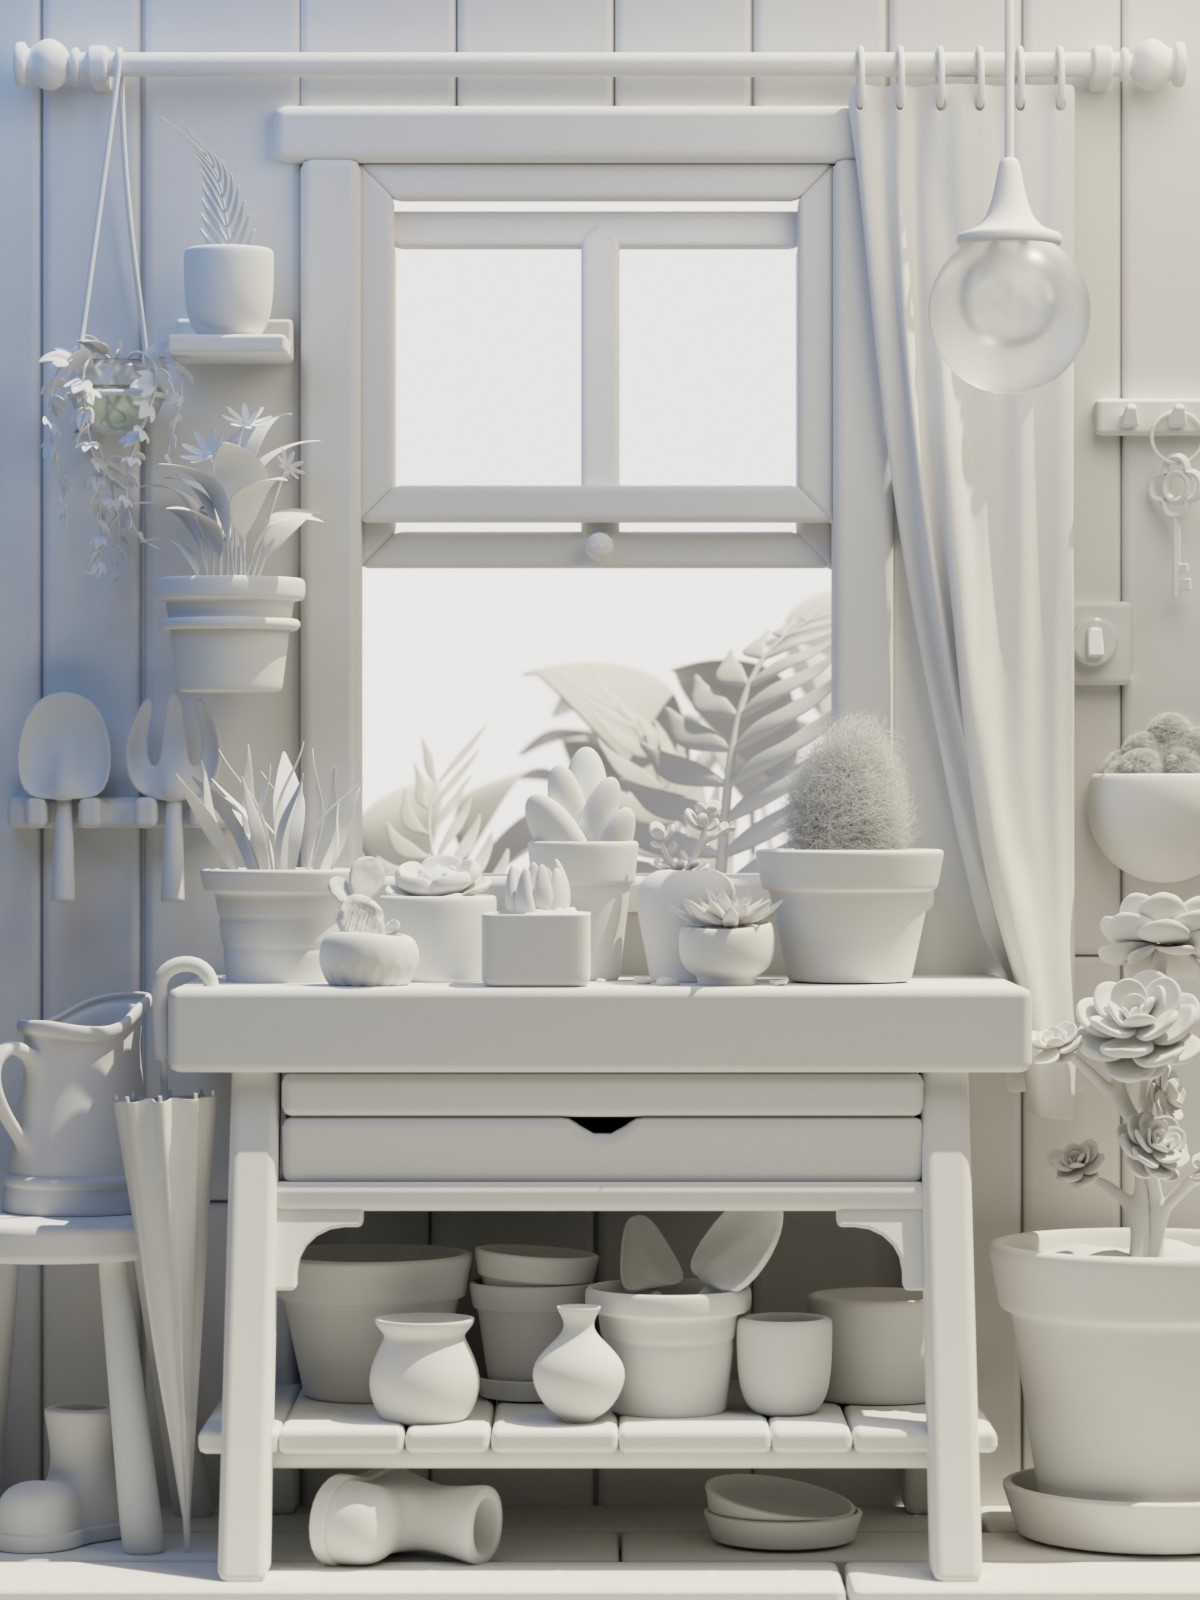
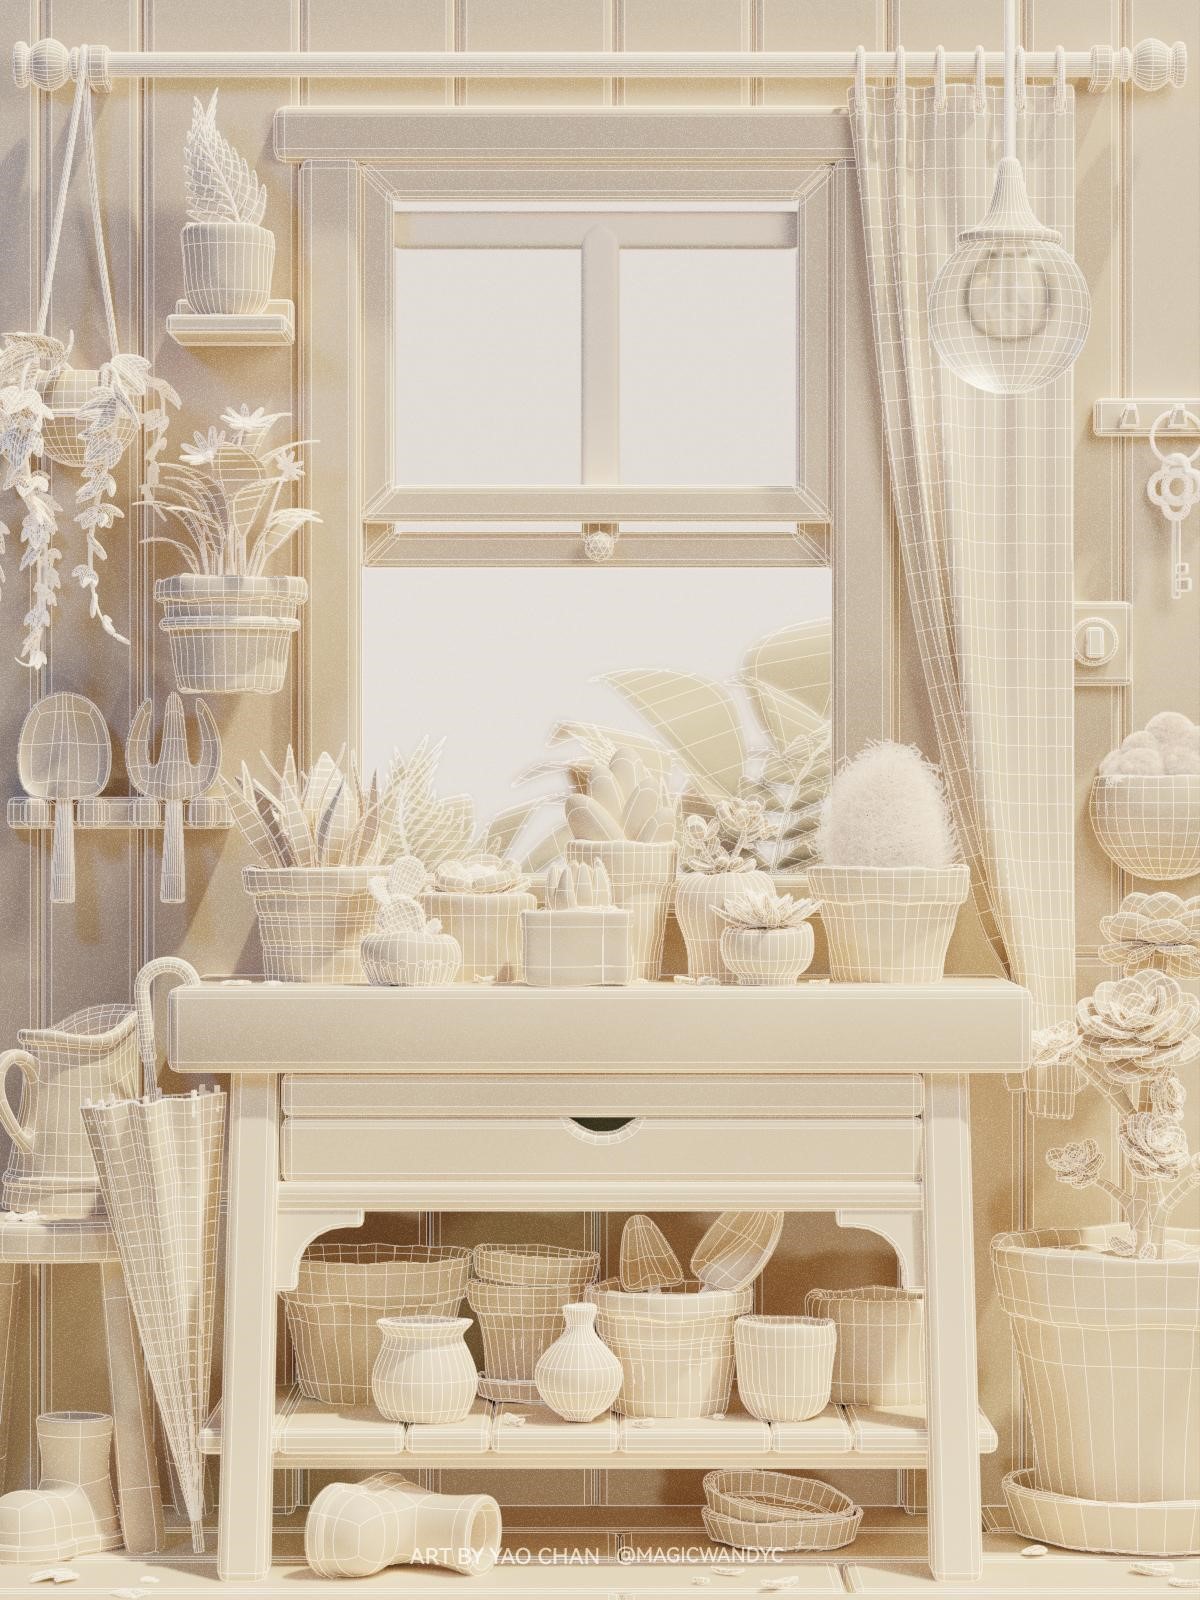
Clay & wireframe:
Details:
Thank you so much for reading this article. Have a great day!
About the Artist
Yao Chan is a 3D artist and UX designer from Shanghai. Her previous article on BlenderNation was, Summer Camp.


Very informative, it’s very nice to meet you! You do amazing work well done :D