Behind the Scenes: Realistic Natalie Portman Head Study
About
Hi. My name is Kevin Mucollari and I am currently an art student at the Athens School of Fine Arts. I consider myself a visual artist and for many years the medium I used was painting and drawing. Now I use also digital media.
Except working on digital 3D, I really like painting and drawing. 3D programs like Blender give me the opportunity to study the world in a different way than drawing. I also like reading papers with scientific information, like how light travels through skin etc.
Inspiration
This project started because I wanted a main character for an animation I wanted to do at the time. Working on the concept art of my characters I realized that the character I was drawing looked a lot like Natalie Portman. So I decided to create her portrait.
I used Blender 3D because it is free and as a student I could not afford any other 3D programs. But at the end I realized that it had everything I needed to complete my project. I really like Blender. I also used Krita to draw over my test renders so I could give notes to myself. I still use Blender and Krita.
Workflow
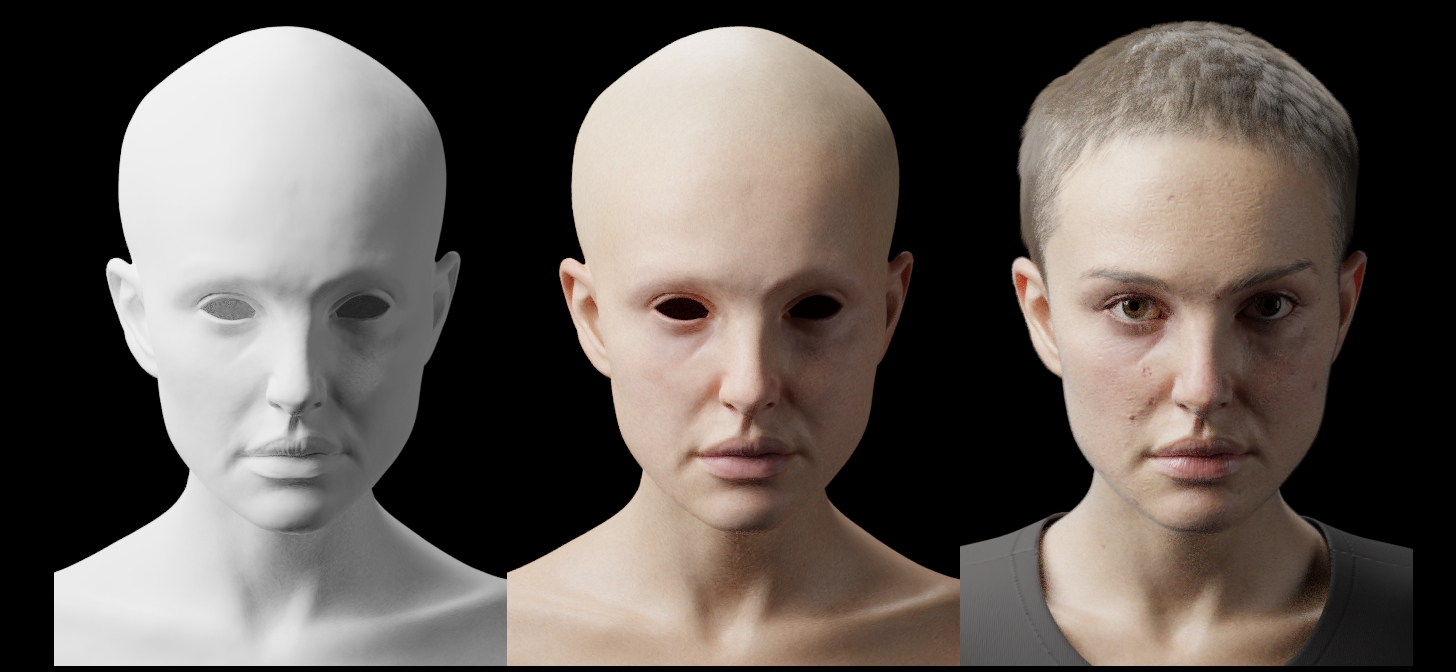
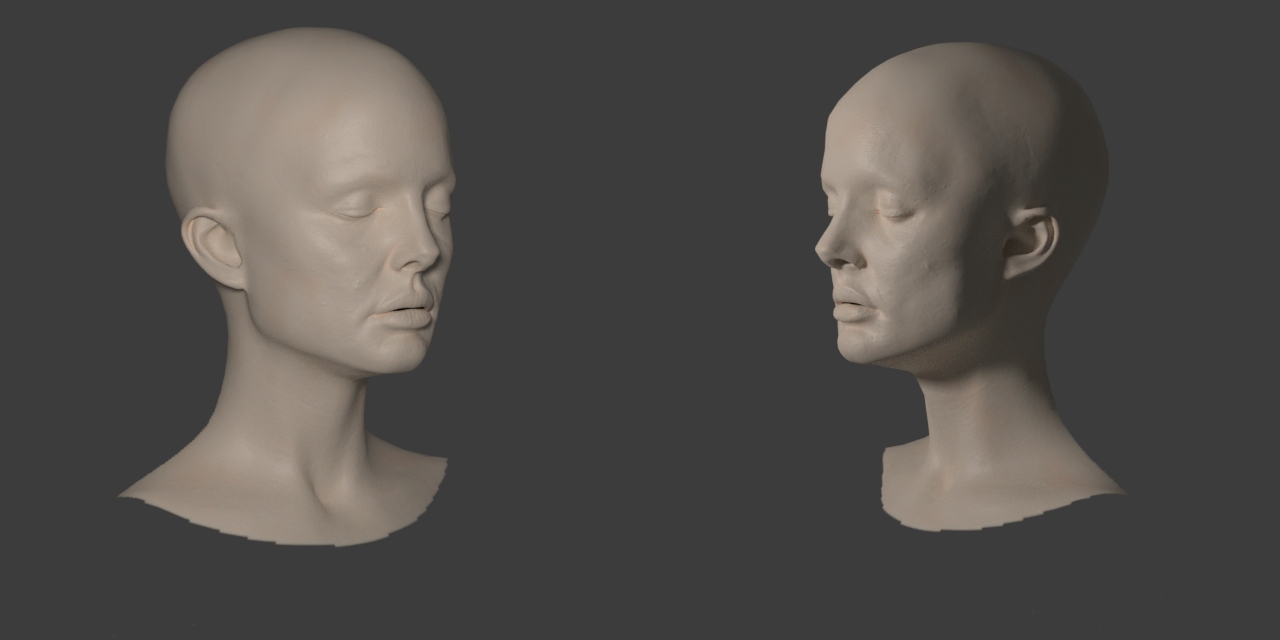
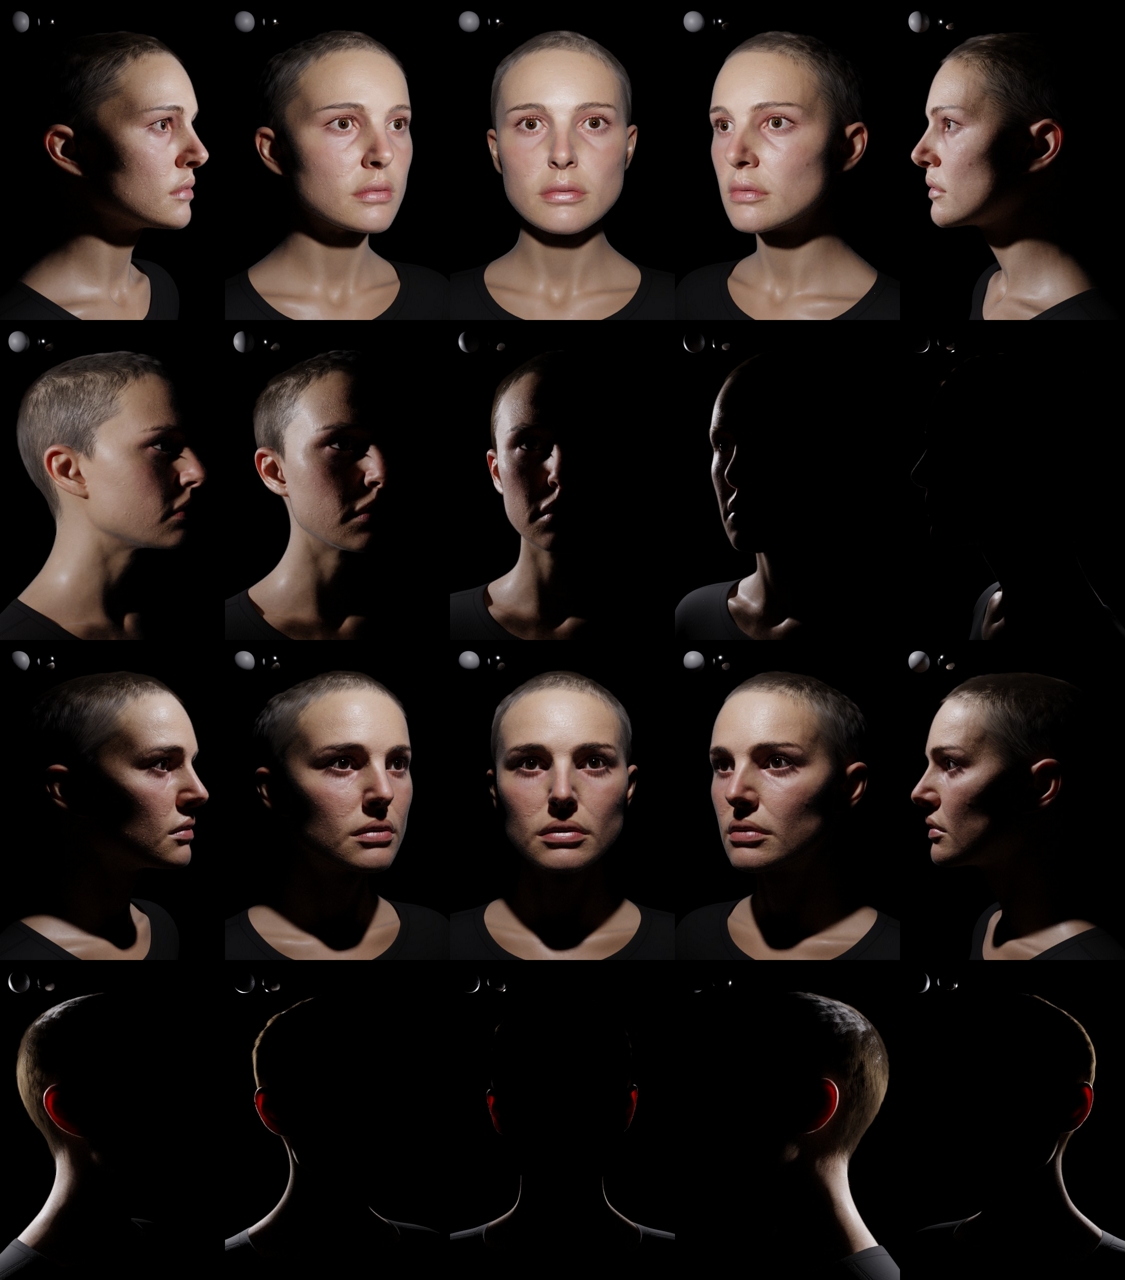
First of all I gathered all the reference photos that I needed. It was very useful that I found images of a life cast of her face. Then I started sculpting in sculpt mode using the multiresolution modifier. I find modifiers in Blender very useful because the keep my files light.
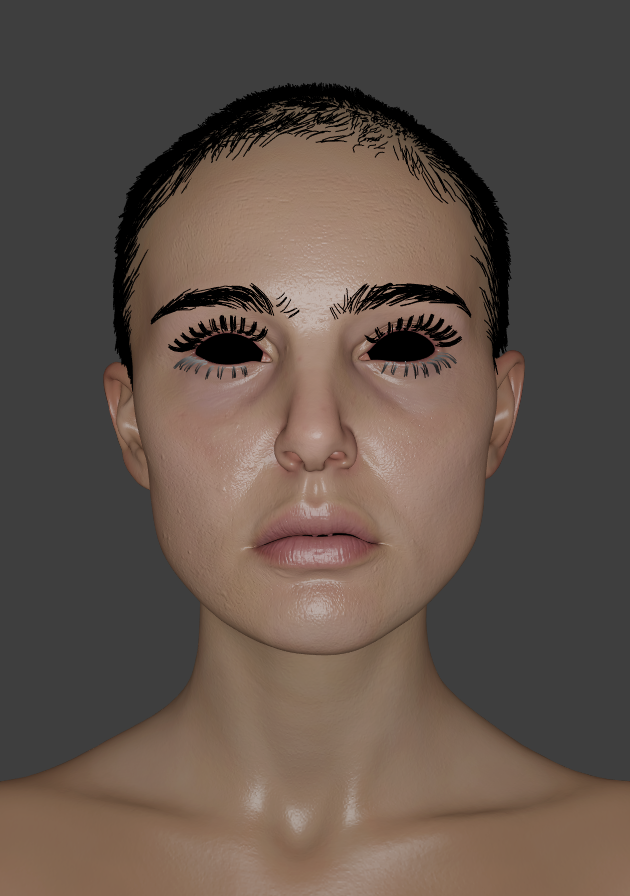
For the texturing I did not use any projections. Previewing my model in material mode (Blender Render) I handpainted slowly the bump and the albedo map. As reference I used some cross polarized photos that I found on the internet.
Then I created a skin shader and started doing test renders in different lighting scenarios. For the lighting I used some simple planes with an emission shader but also some area lights and some HDRI’s to test how my model reacts under different lighting conditions.
But, the process is not so organized actually. There are no exact steps, you sculpt then you add the materials, then you sculpt a little bit more and constantly you go back and forth. From bigger shapes to smaller details then back to the big forms. Here is a gif that shows the test renders from the beginning to end.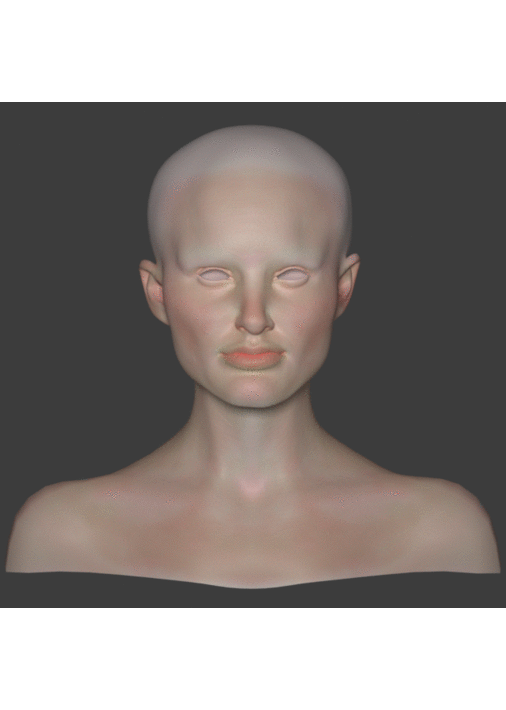
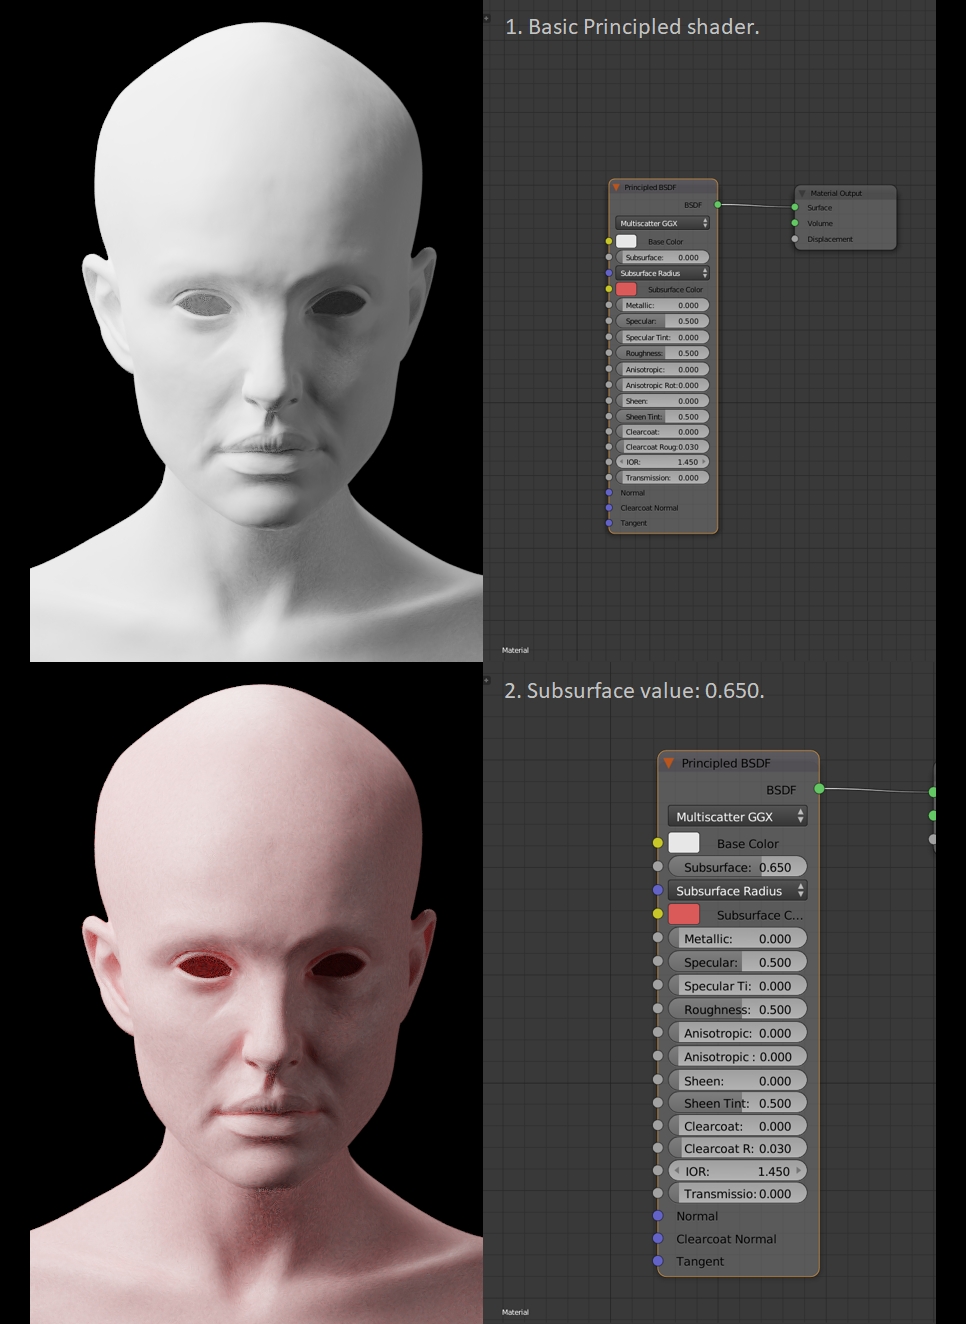
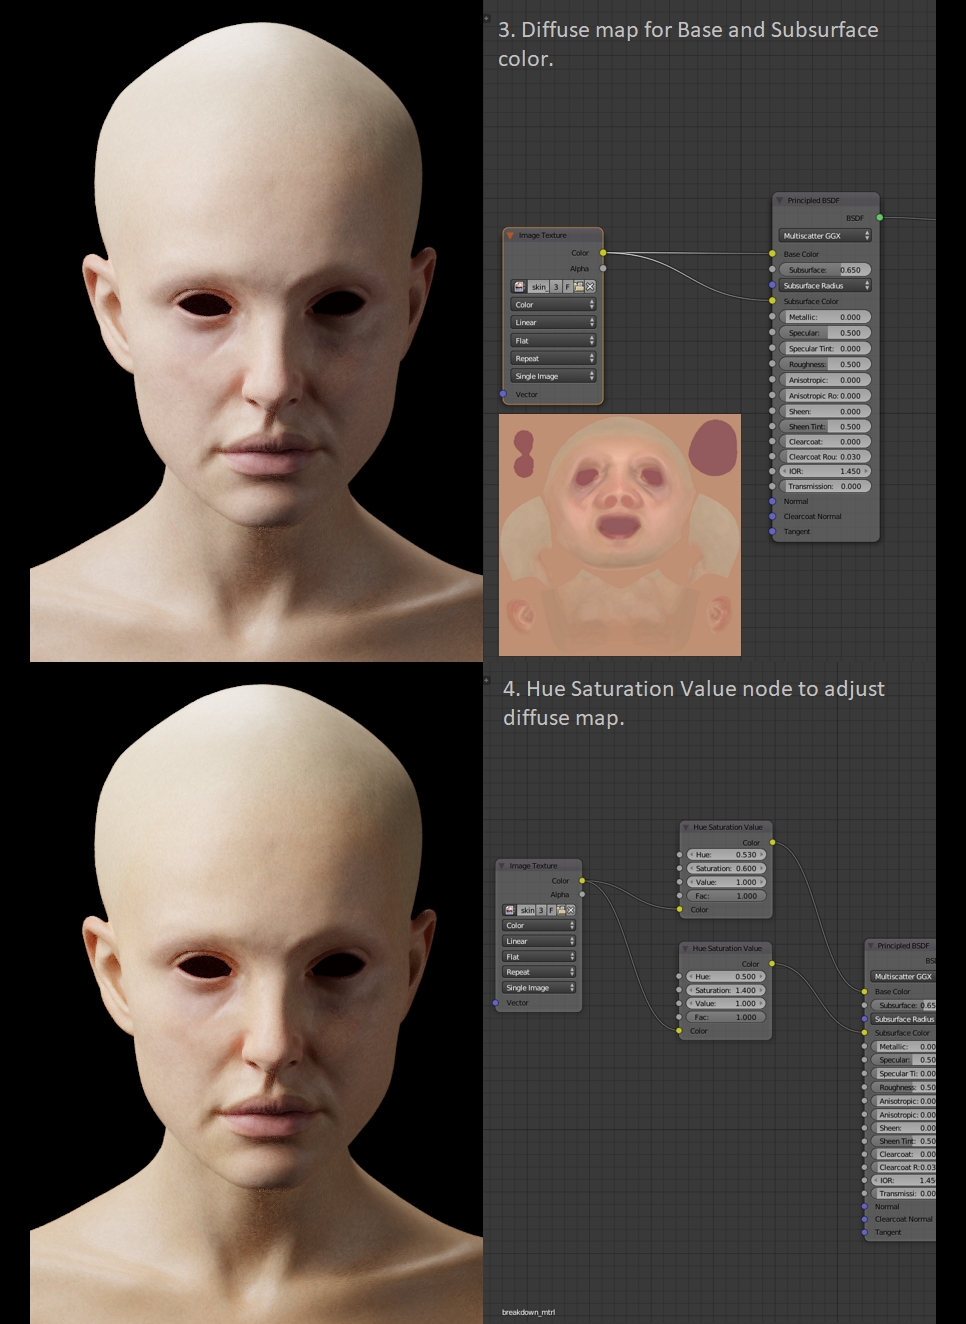
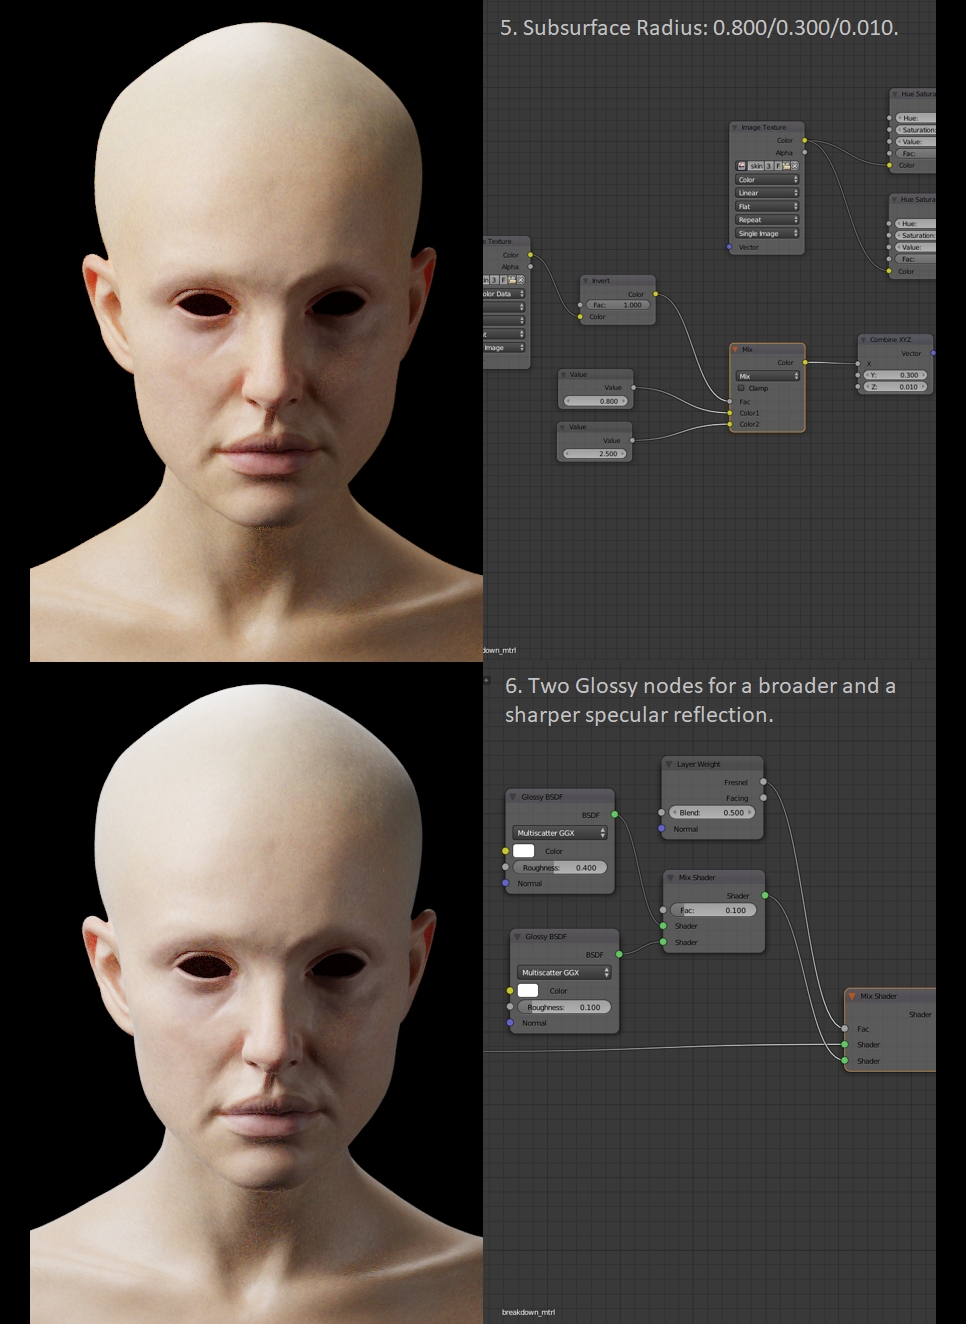
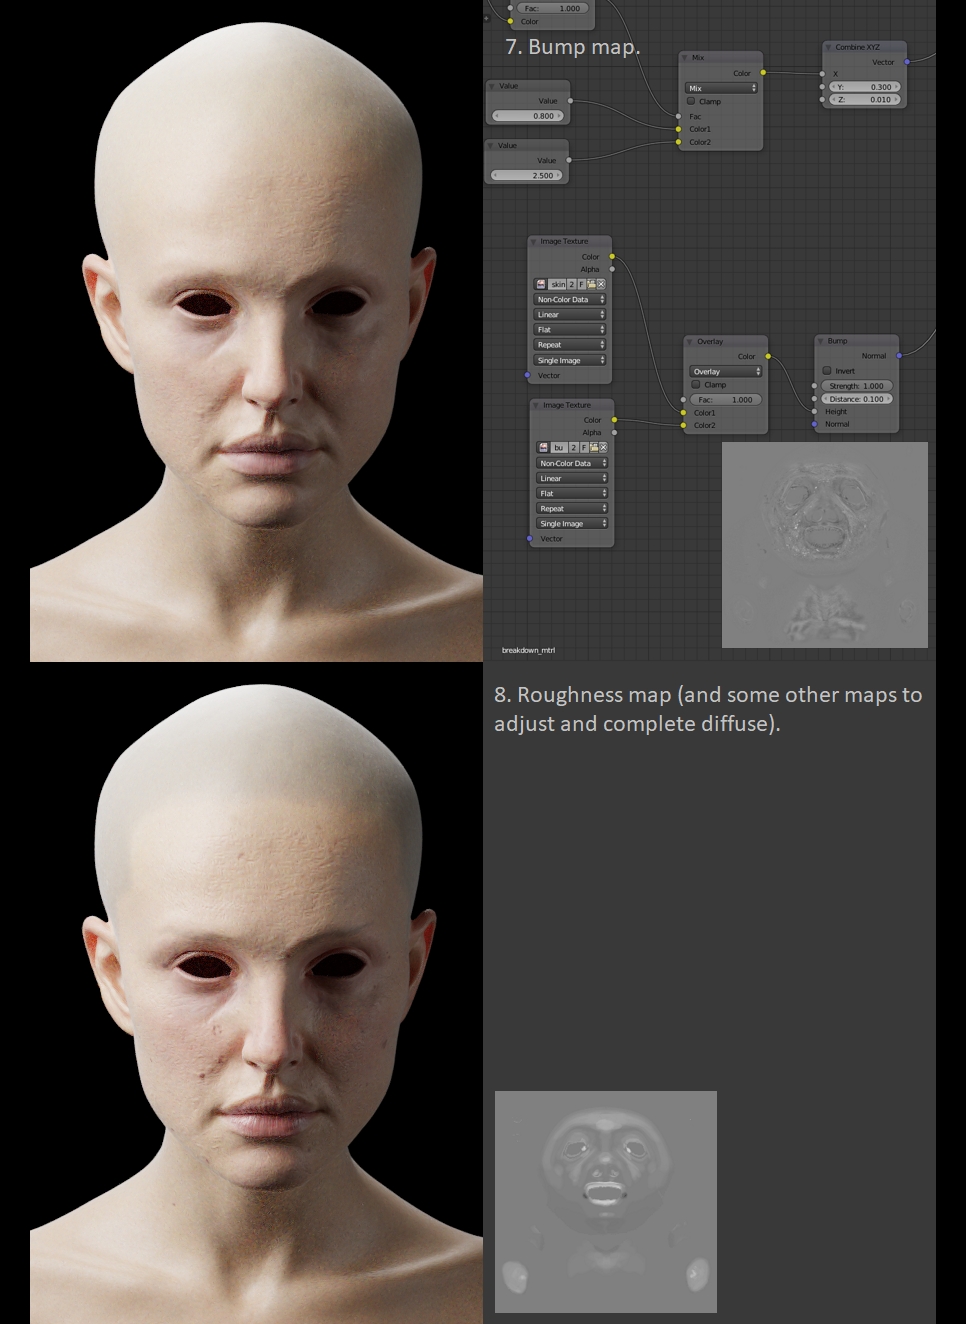
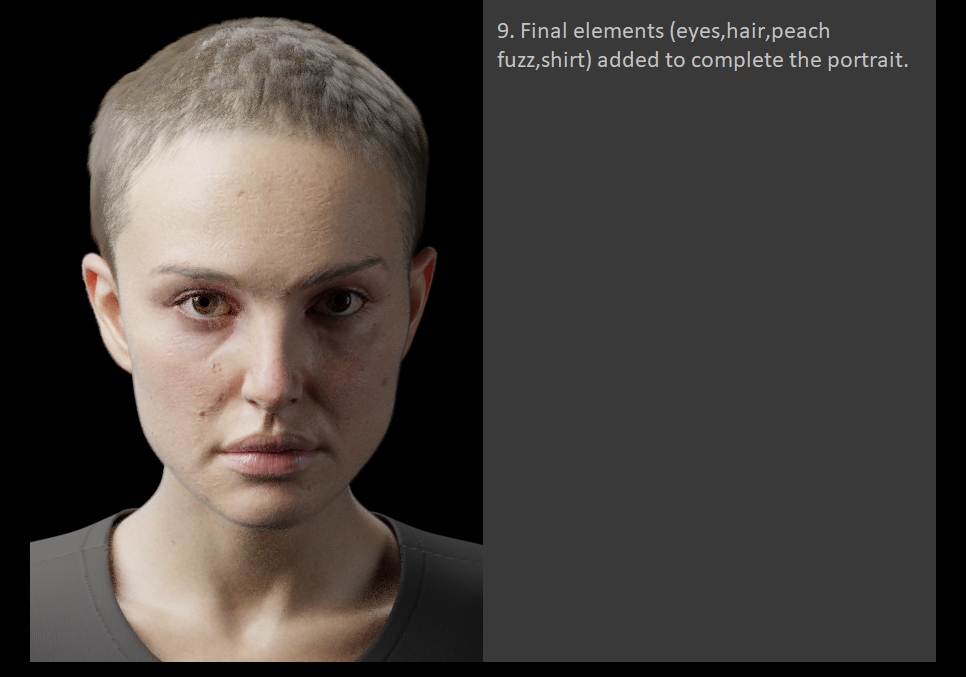
Node Setup
Conclusion
All in all, I learned many things during this project and I will continue working on it. I have already created a rig and some blendshapes. I also want to improve the quality of my maps because they are really low resolution right now, and certainly I want to improve her hair. Moreover I learned many things about Blender as well, because this is the first big project I created using it. I hope you like it!
About the Artist
 Kevin Mucollari, Visual artist


I can’t believe this is CGI… This is way better than most realistic CGI characters you see in movies (take 3D Leia in Rogue One). Incredible.
I’d love to have a look at an HD full-sampled render of this one
Not at all, if you comped this into actual footage, you’d be mortified.
Hair shader seems the weakest point to me, but clearly it was not the main focus
Powerful)
I saw some of your earlier posts with her . . . and this is simply incredible! Very well done. Hope to see more from you in the future. (Gal Gadot next? Hehe.) Outstanding quality!
Well done, very nice. The resemblance is very striking!
Thanks for sharing.
The face is extremely well done. The hair weaken the impression by the patterns you can see in there. Try mixing different hair layers.
Thank you very much for sharing! This is incredible breakdown.