Behind the Scenes of Smoking Kills
You may recall Paul Chambers from his work ‘Paper Island’ that was nominated for a Suzanne Award, as well as his tutorial about it. Today, he takes us on a tour of the creation of his latest work, ‘Smoking Kills’, where he used a combination of Blender, Inkskape, Marmoset Toolbag 3, Substance Painter, xNormal and Photoshop (whew!).
If you have any questions for Paul, be sure to leave them in a comment!
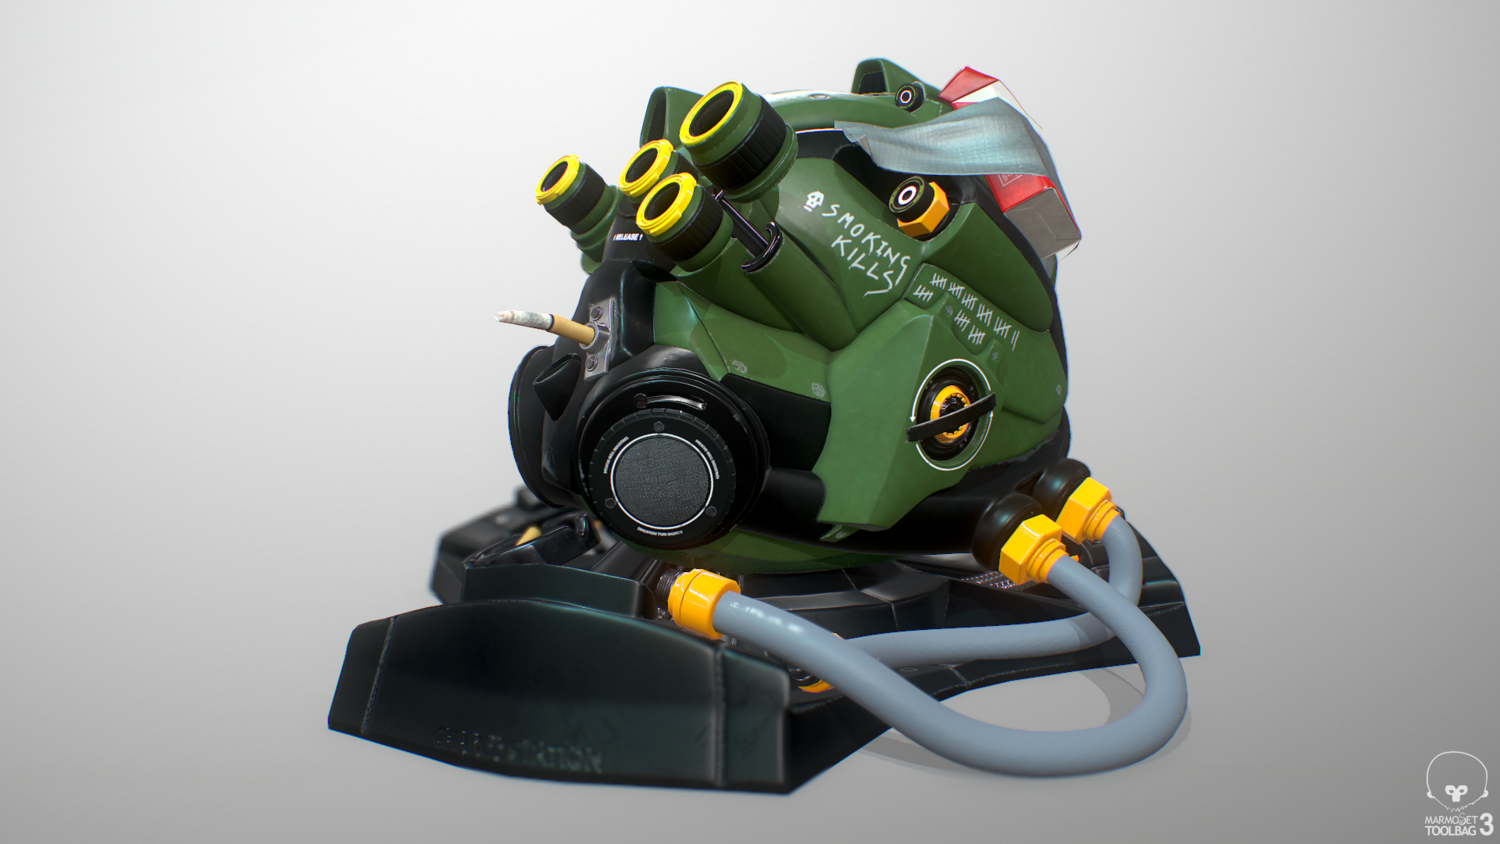
Hey there, I wanted to share my latest piece I call “Smoking Kills”. This was designed to be a real-time model optimized for Sketchfab. It was also my first opportunity to really dive into Substance Painter in a big way. A lot of Blender artists have been starting to use Substance Painter, and I feel that the two partner really nicely together.
Decal work was made in Inkscape, the terrific open-source alternative to Adobe Illustrator, and Photoshop. Still renders were made in Marmoset Toolbag 3.
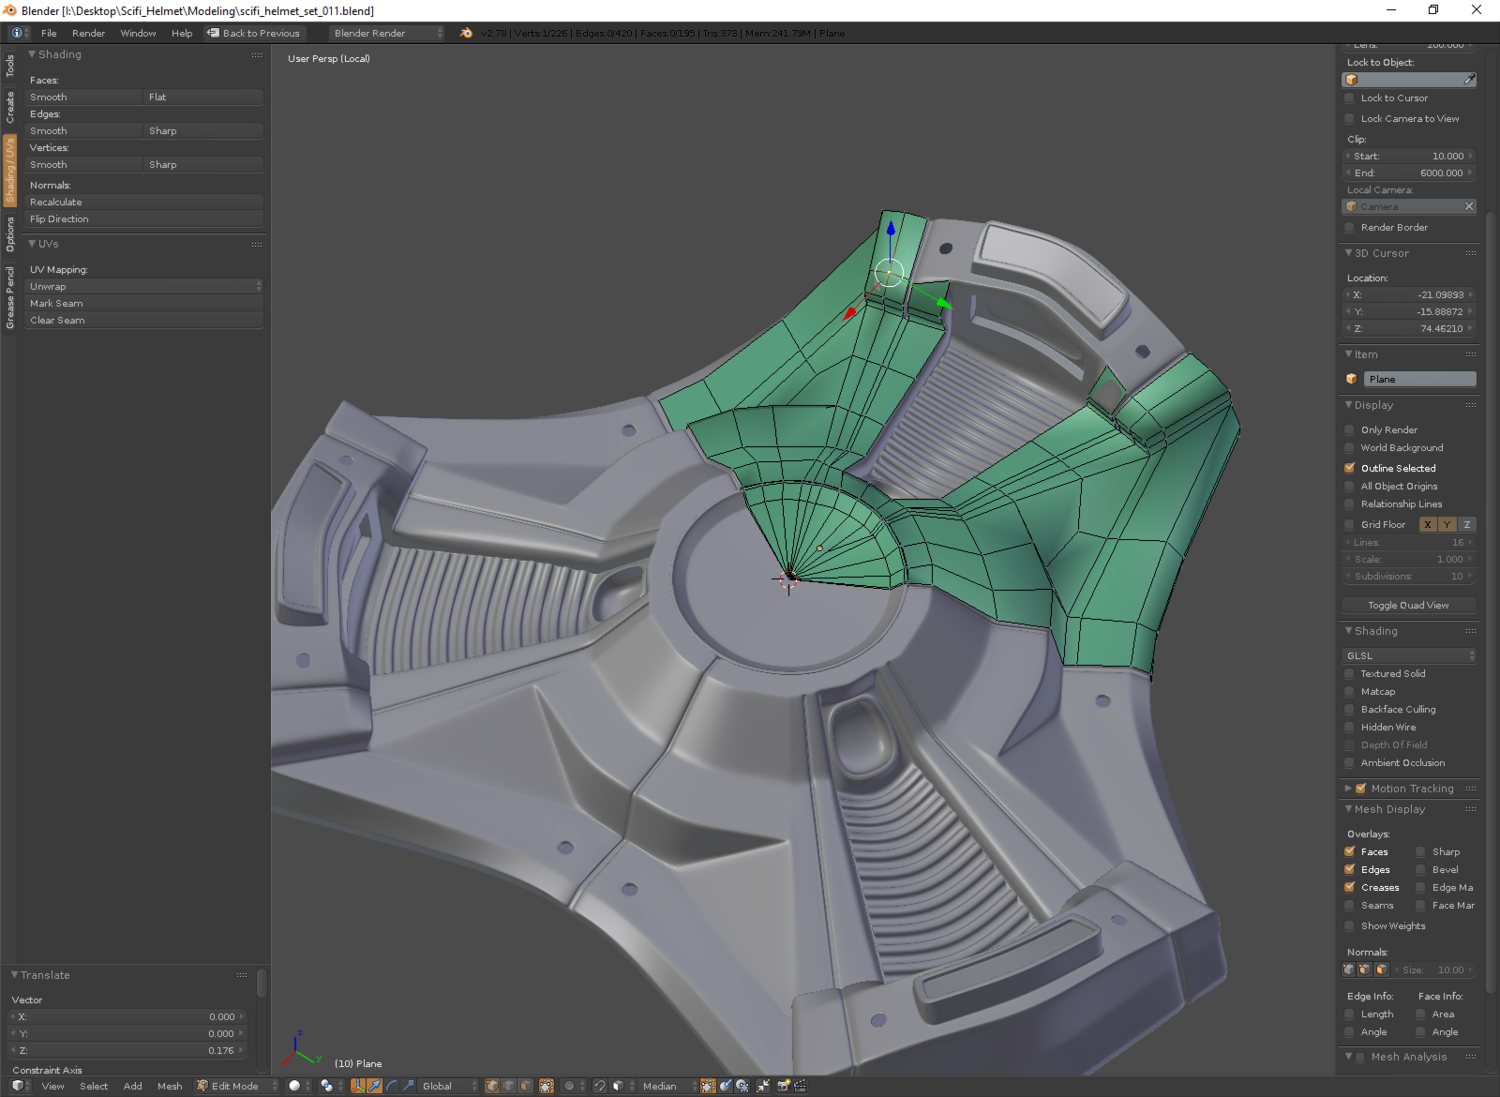
The project started out following Kent Trammell’s fantastic “Modeling a Sci-Fi Helmet” tutorial over at CGCookie where Kent uses a sculpting workflow to block out the main forms before re-topologizing the meshes into smoother panels. In Kent’s tutorial he keeps the meshes relatively high-poly and renders the finished result in Cycles.
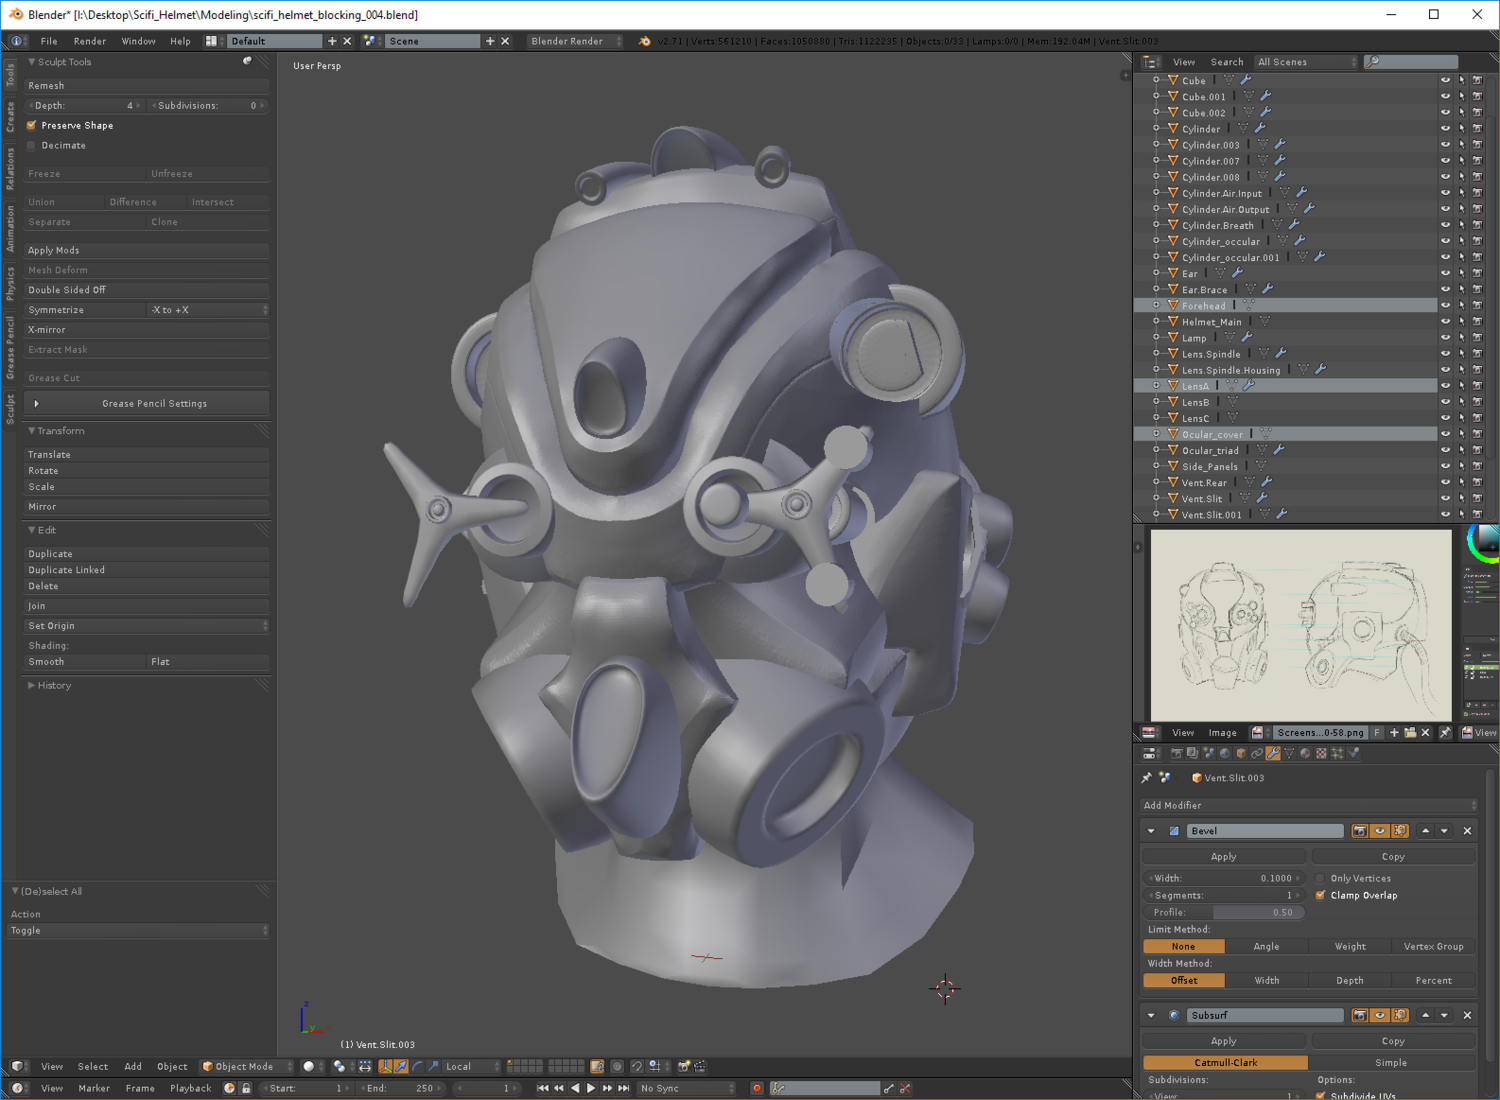
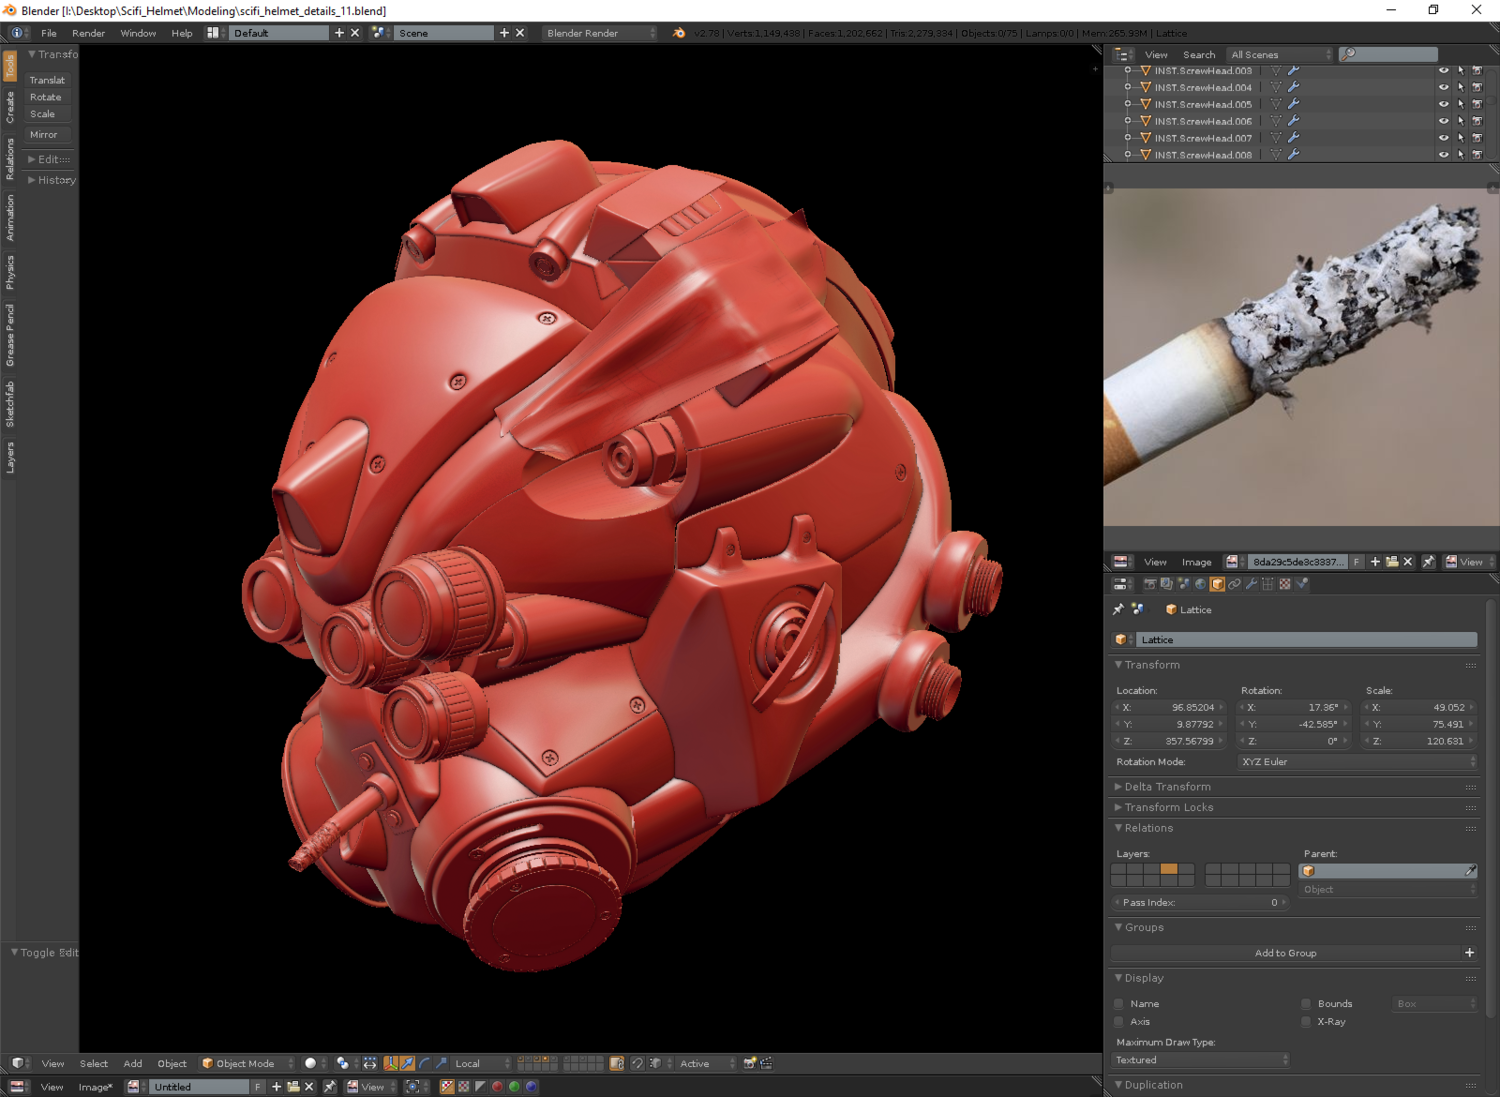
I decided to re-topologize a second time to make an even lower-poly mesh for real-time rendering and used a combination of xNormal and Blender’s own baking tools to bake the normals down from my high-poly mesh. I also used this opportunity to add some storytelling to my scene imagining that the owner of the helmet has “jerry-rigged” a modification so he can continue to feed his smoking habit while wearing it.
I used xNormal to bake textures more out of familiarity that anything else because I’d only used Blender’s Internal Renderer baking before, but once I discovered normal map baking in Blender Cycles also supports a “cage” mesh for more accurate baking, Blender once again gave me everything I needed.
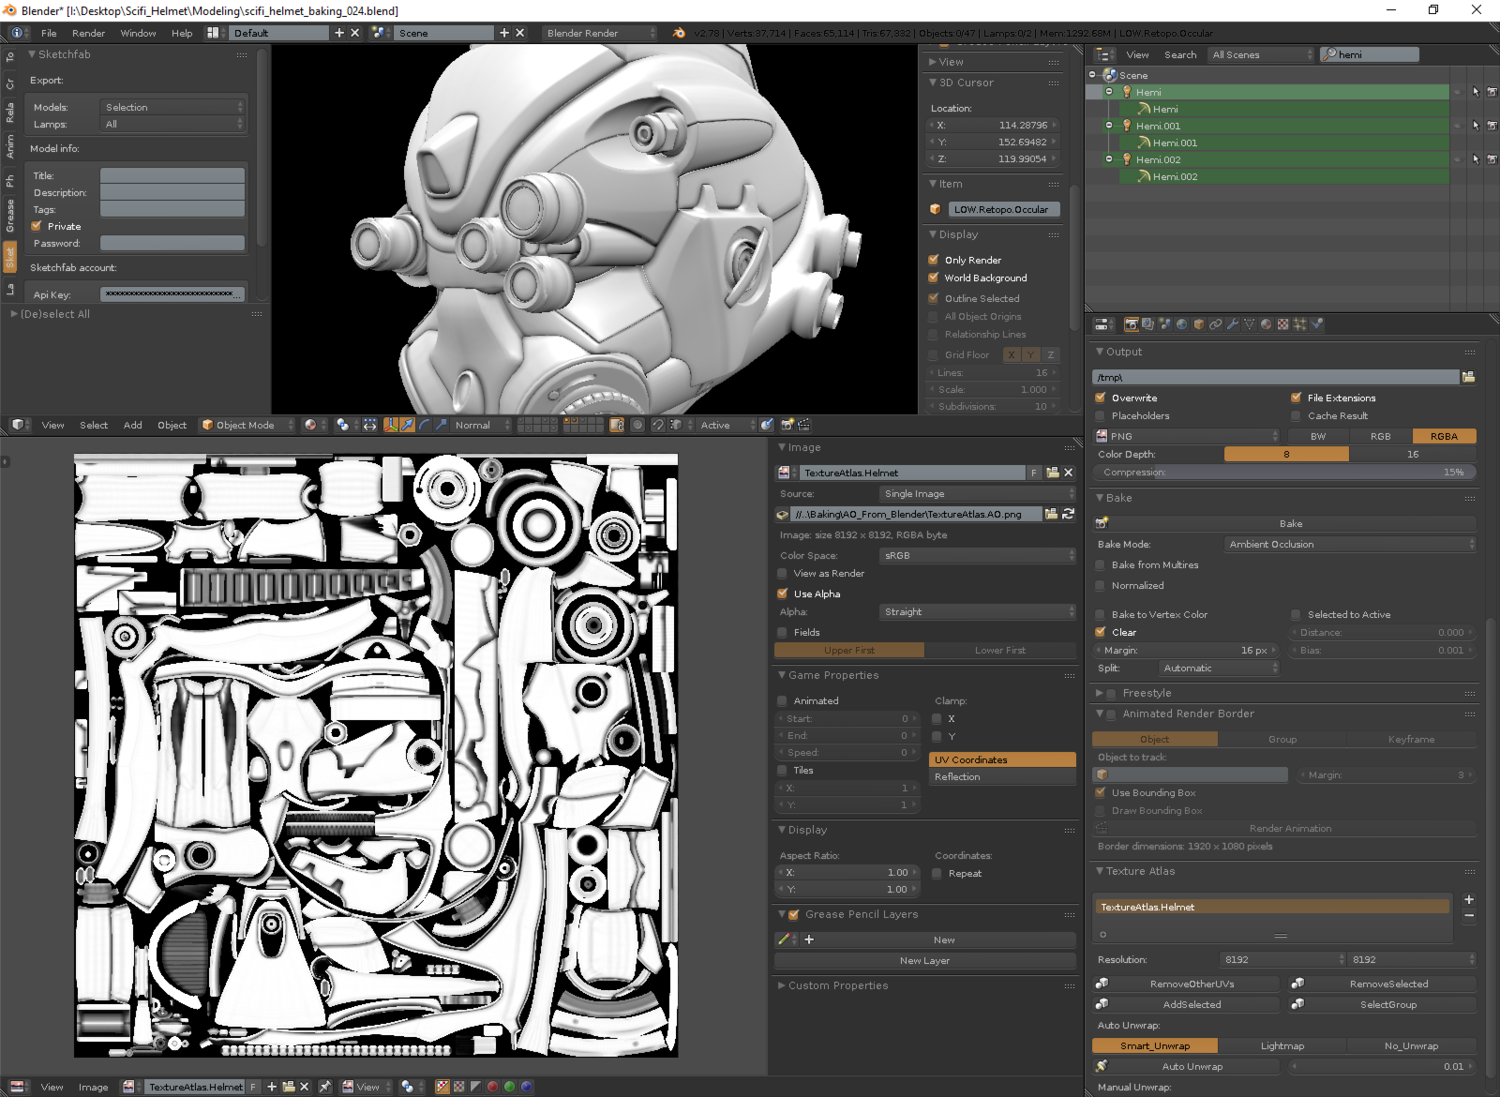
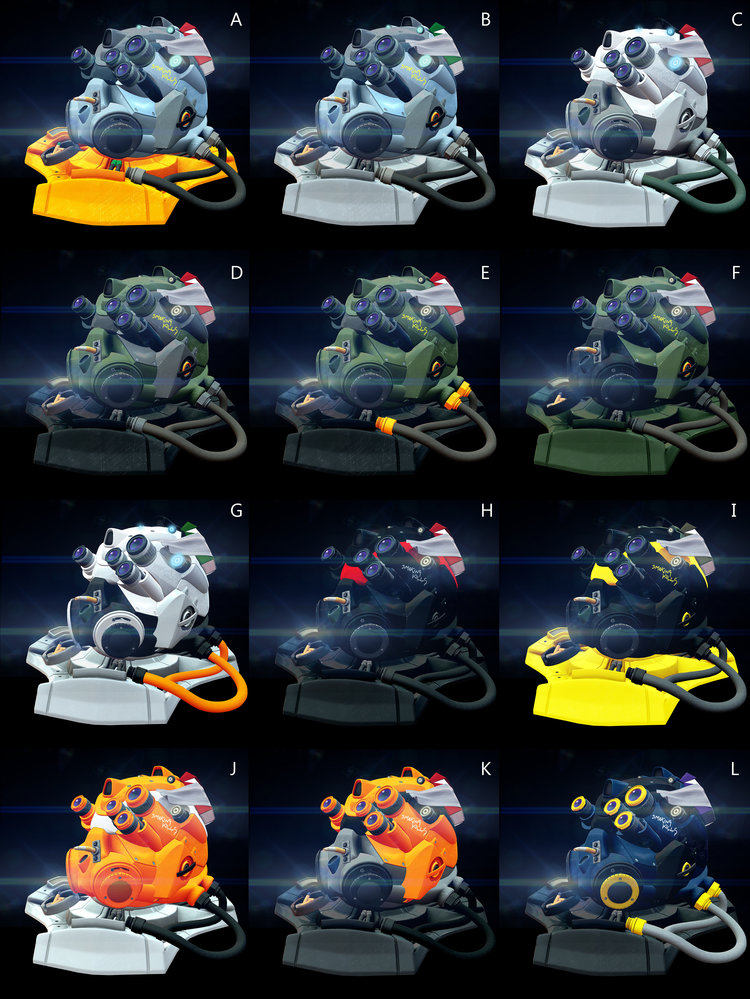
I also used Blender’s baking tools to bake out Ambient Occlusion maps. Once I had a normal mapped, AO mapped version of my scene I took a black and white render into Photoshop to try some “Paint Overs” to find a color scheme I liked. In the end, for my final model I ended up using a combination of two color schemes.
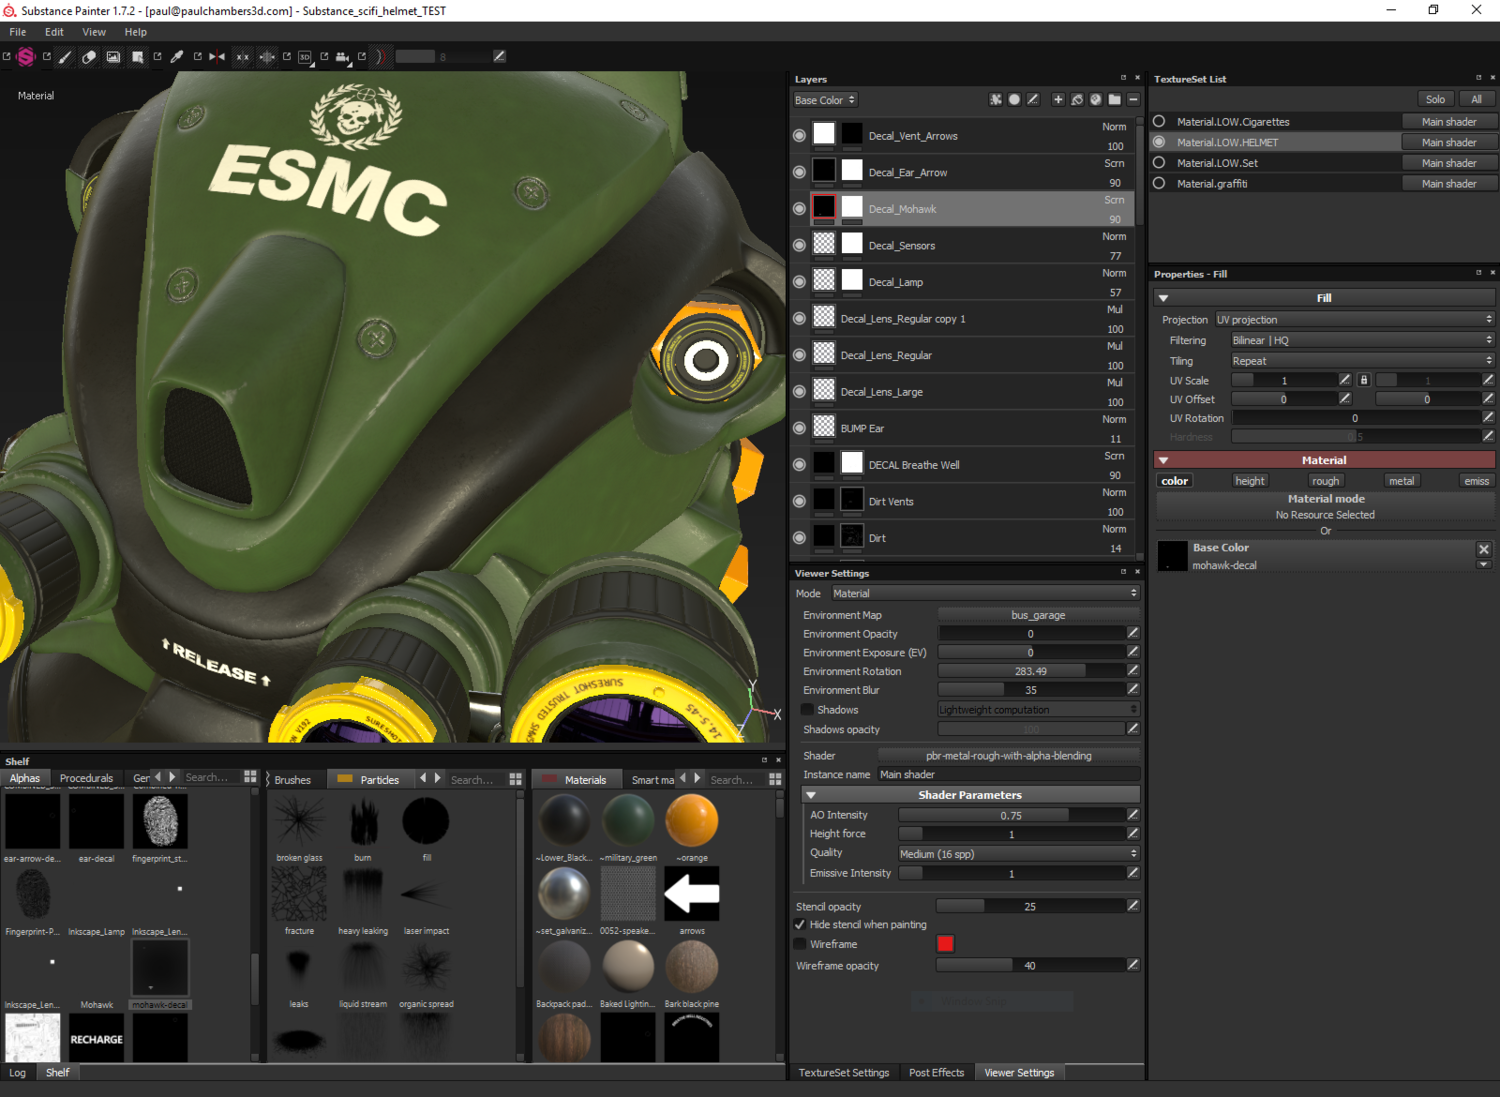
I was going to also bake out a material ID map to use for masking in Substance Painter, but I found Painter’s ability to paint per polygon and even UV island a great way to quickly mask out key areas. It’ll be great to see where Blender 2.8’s promise of a PBR viewport takes us.
Hope you enjoy as much as I did working on this project. For more behind-the-scenes check out www.paulchambers3D.com.
Additional links


