Behind the Scenes: Drainheart
INTRODUCTION
I’m Abraham Joshua, a 28-year-old 3D generalist and graphic designer hailing from the vibrant state of Tamil Nadu, India. My journey into the realm of digital art began immediately after I earned my degree in Animation and VFX.
At the tender age of 18, I dove headfirst into the freelance world, focusing on graphic design and motion graphics. It’s been a year since I embraced Blender 3.4, and it has been nothing short of a revelation. This powerful software has supercharged my creative quest, allowing me to materialize the intricate worlds that reside in my mind into tangible realities.
INSPIRATION
Drainheart emerged from the ashes of a failed project, a vision of a massive, overgrown drainage system with water seeping through enormous grilled holes in the walls. This is the essence of my love for 3D concept art: the freedom to experiment with shapes and assets guided by a single, powerful idea. For this scene, I didn’t conduct any reference research; I relied solely on the free assets available to me at the time. It was a process of discovery, shaping the structure and crafting a narrative that would breathe life into my final creation.
PROCESS
Block-out Phase I
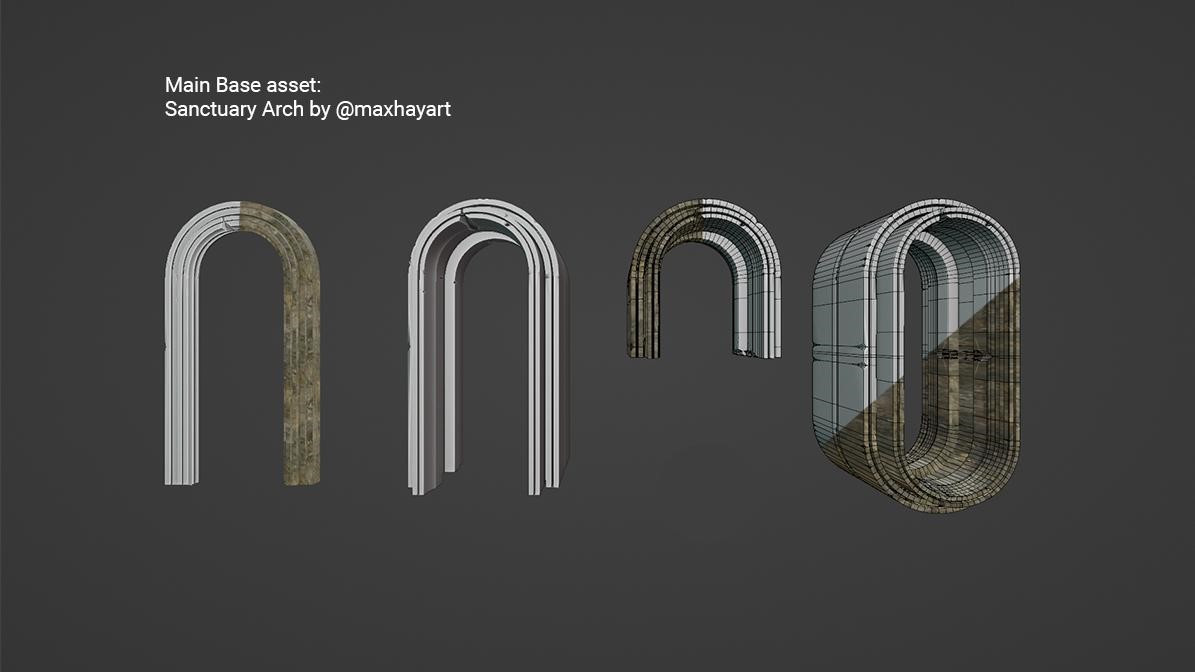
When conceptualizing the Drainheart scene, I needed a solid foundation for the overall drainage structure—a place where all pipes converged. To achieve this, I turned to an existing asset by the talented artist Maxhay.
The initial asset, a lean arch, served as my starting point. However, I had a specific vision: a rounded rectangular tube that would evoke the sense of an ancient, overgrown drainage system. Here’s how I transformed the arch:
- I scaled the lean arch, elongating it into a tunnel-like form. This adjustment laid the groundwork for the Drainheart’s central huge pit/space for me to populate later.
- Instead of creating the entire structure from scratch, I leveraged Blender’s mirror modifier to create the rounded rectangle that I need from the arch.
- The arch asset had a weathered, damaged appearance. These subtle flaws added character to the Drainheart, hinting at its long history.
- Additionally, I utilized the existing material data, further streamlining my workflow
Block-out Phase II
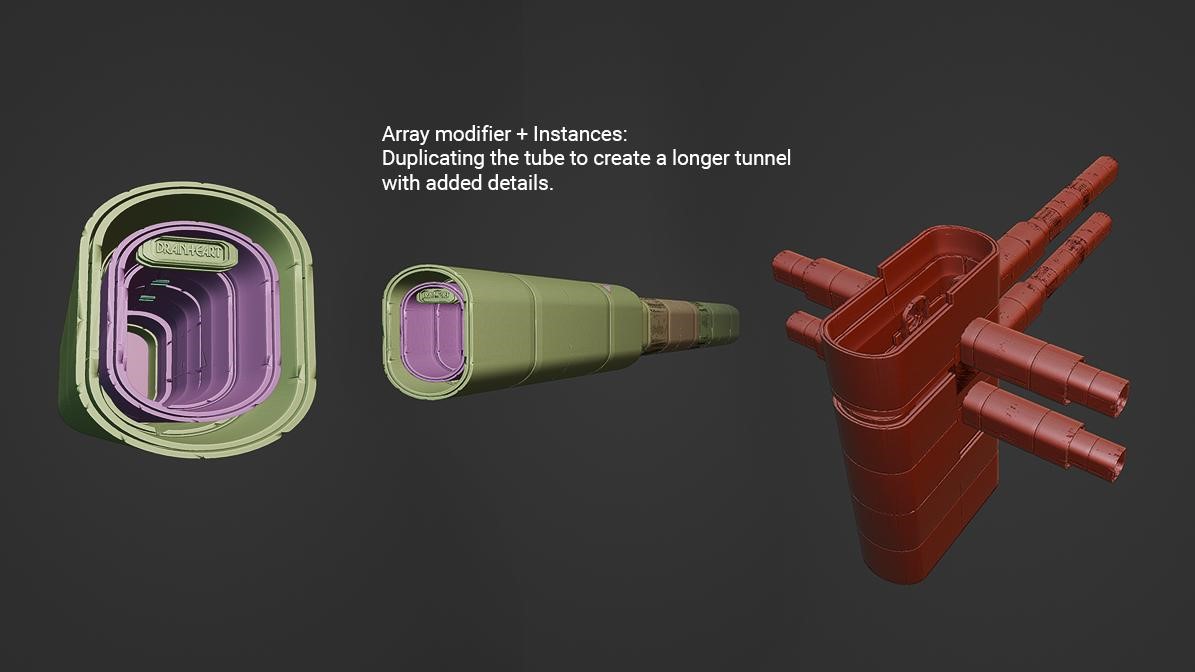
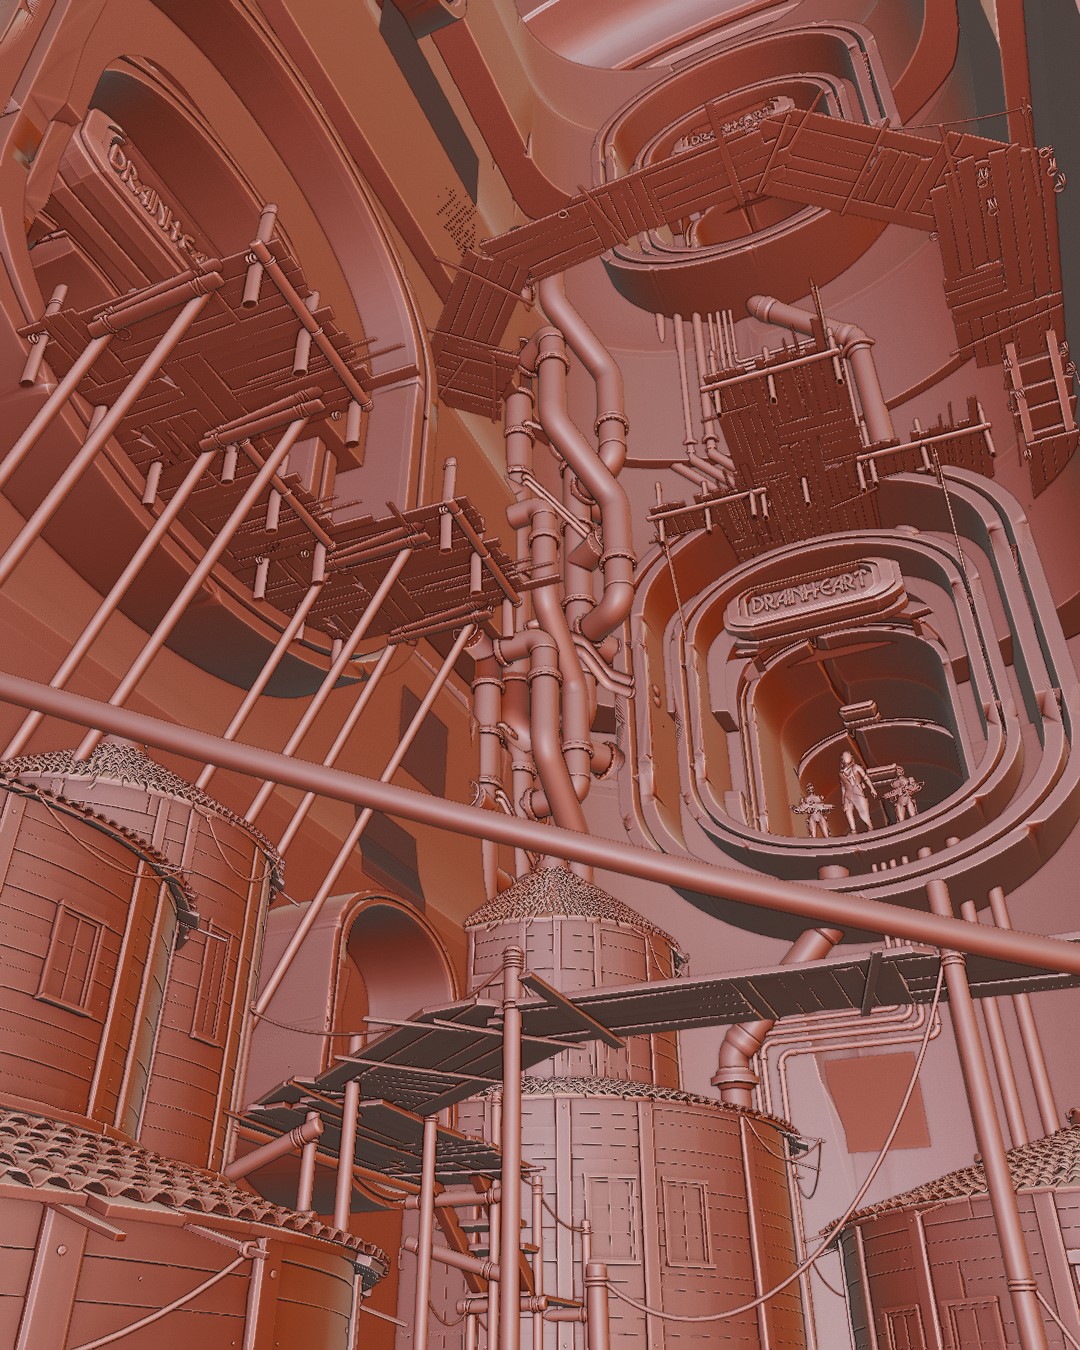
Now that the base object/drain pit was ready, I wanted to create exits for the pipes/tunnels. So, I leveraged the power of the boolean modifier to punch holes using custom cubes.
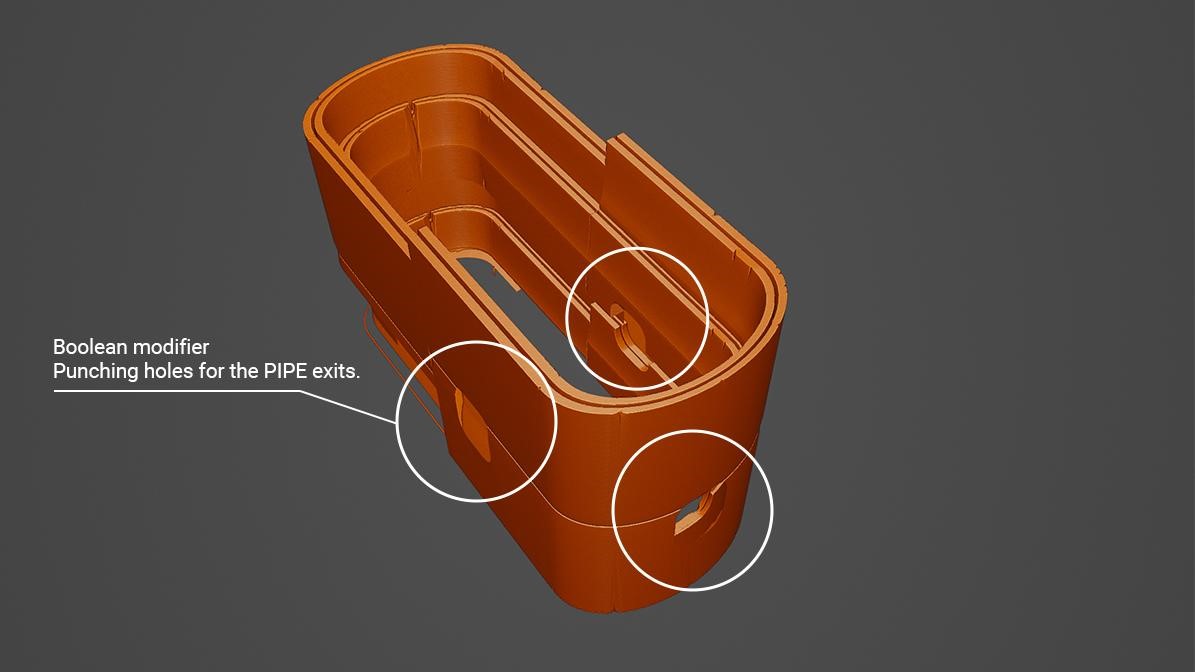
Then I used an Array modifier along with SHIFT + D (instances) on the punctured tube to create a tall structure and did the same to the tubes that are not boolean modified to create long tunnels that can be positioned at these holes to make it look like an exit and the entrance point into the massive pit.
At this point, the base structure of the environment reached a state that I envisioned so I proceeded to set up the camera before moving forward.
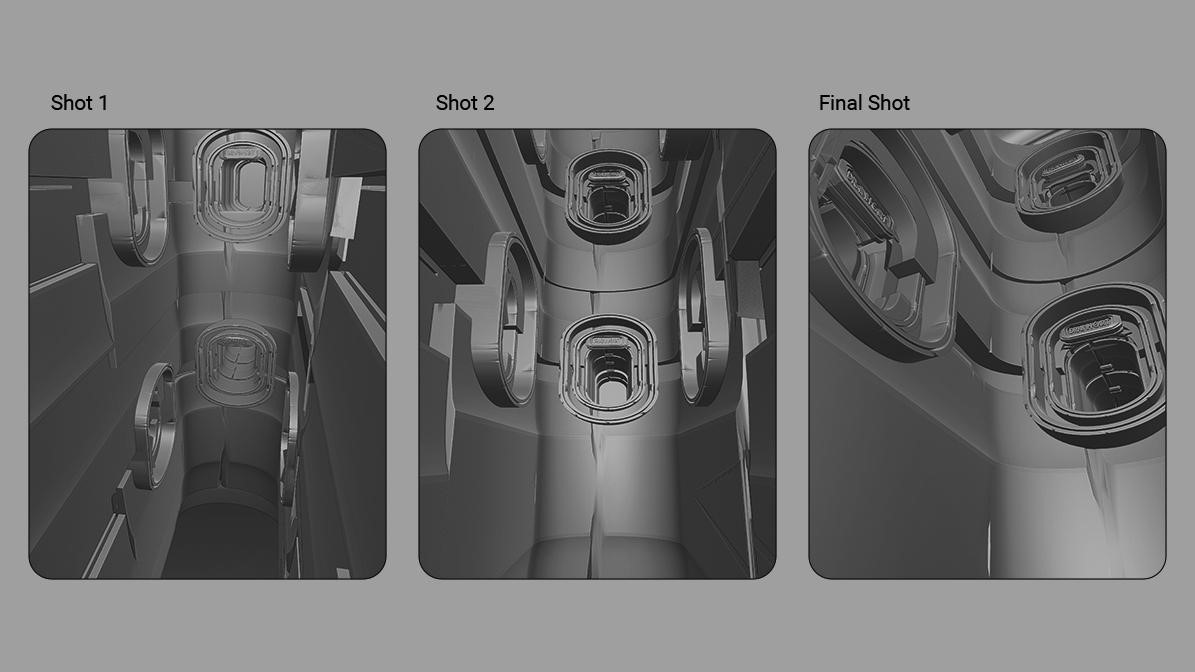
Composition Phase
In the creative process of 3D visualization, the camera is my most trusted tool within Blender. It’s through its lens that I determine two crucial aspects: composition and spatial limitation. A well-composed shot accentuates the hero element, drawing the viewer’s eye to the focal point of the scene. Simultaneously, I impose spatial constraints to enhance the sense of scale, which is instrumental in planning the subsequent detailing and lighting.
This phase of development is also when I weave the lore that complements the structure and scene. It was at this juncture that my concept evolved; what began as an overgrown drainage system transformed into a town cradled within an abandoned drainage pit. This subterranean town sprawls outwards through tunnels that ascend, connecting it to the world above.
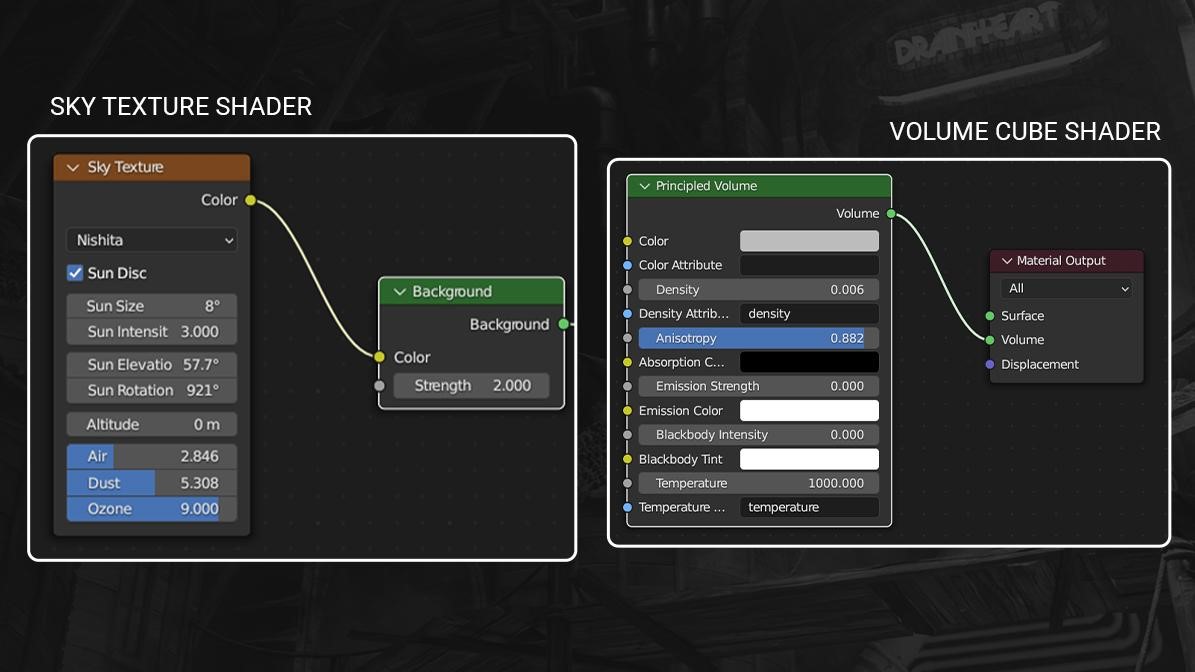
Lighting
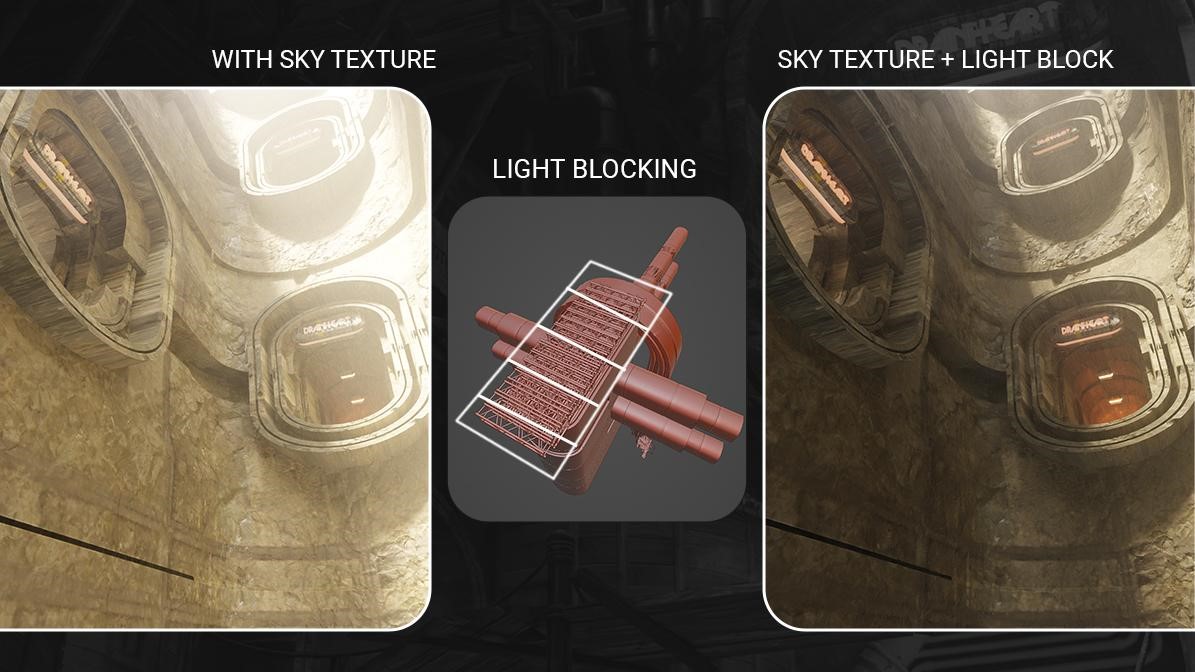
For lighting the scene, I used a simple approach which made use of Blender Sky texture nodes along with Principled Volume applied to a cube covering the whole scene.
Since the original light was too direct and strong, I added an existing truss 3D asset to fill the gap which was outside the camera view to create some interesting shadows and contrast to the ambience.
I also added some tiny cubes with emission shaders into the tunnels to add more interest to the scene. Moreover, I added a plane with a high emission value inside the far side of the tunnels to create a sense of extension to the scene.
Detailing/ Kitbashing
As I embarked on the creation of an underground town nestled within an abandoned drainage pit, I envisioned wood as the central architectural element. Its warmth and versatility would harmonize with the existing light and color scheme, infusing character into the subterranean landscape.
To achieve this, I meticulously sought out assets that aligned with my vision, which led me to KITBASH 3D Cargo free assets, the Dock Building.
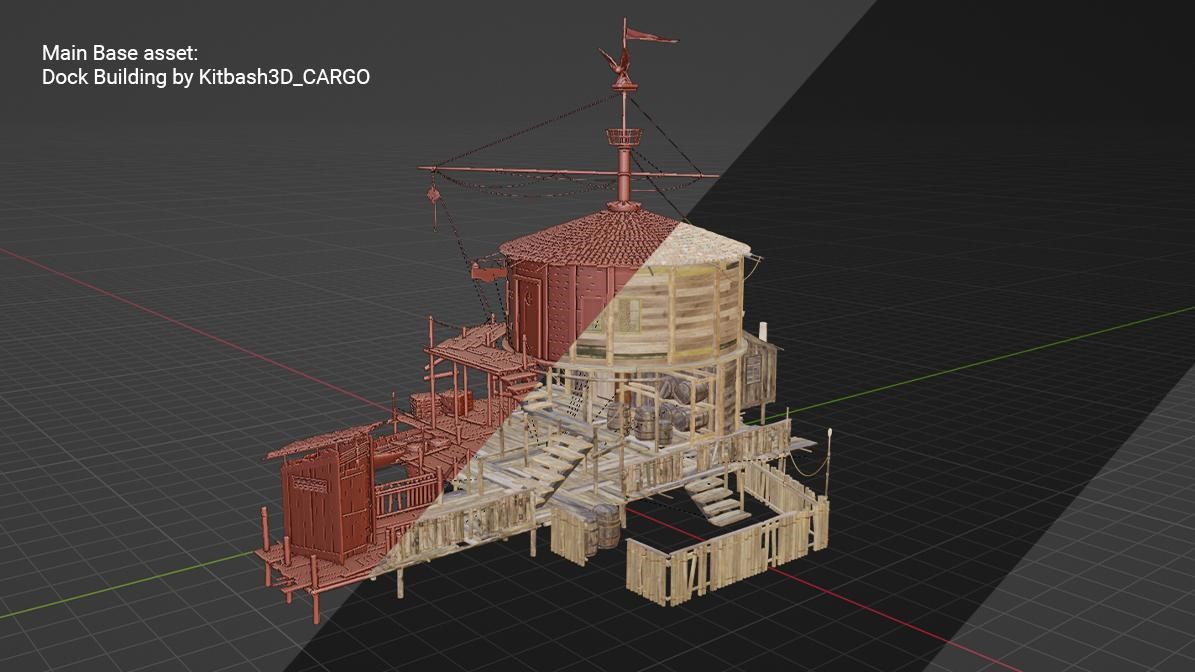
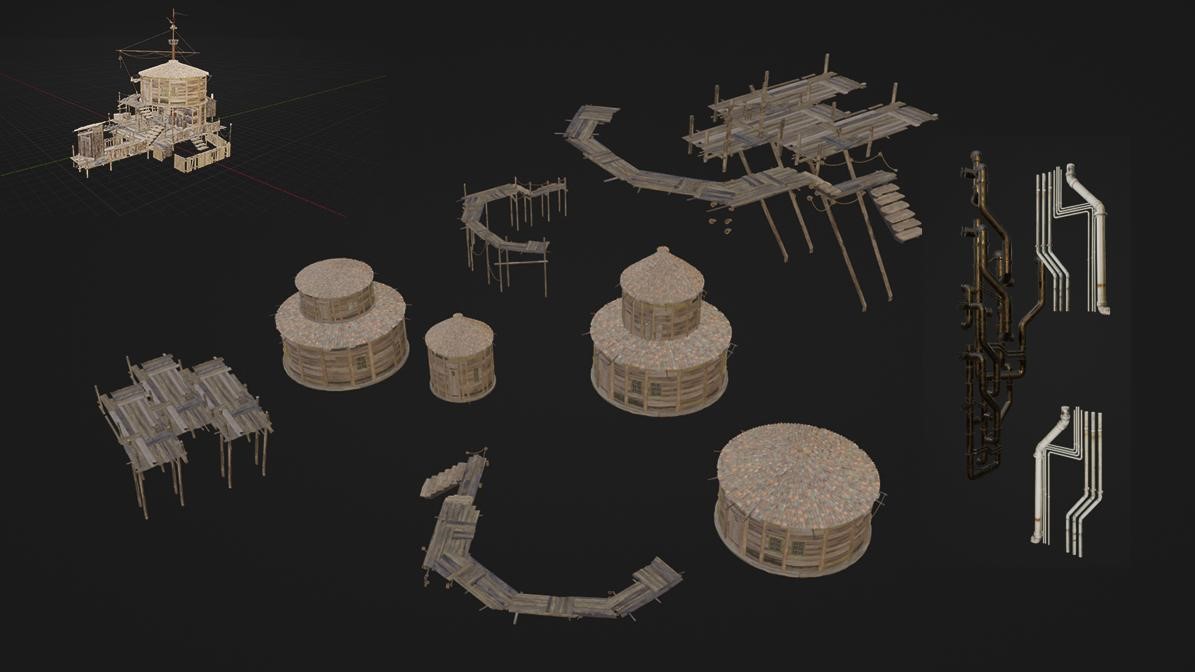
Then I began picking pieces apart from the model and modified the object using edit mode and made some duplication to populate the scene to make my own set of assets that were placed and adjusted along the existing layout of the scene.
Finalizing the Concept
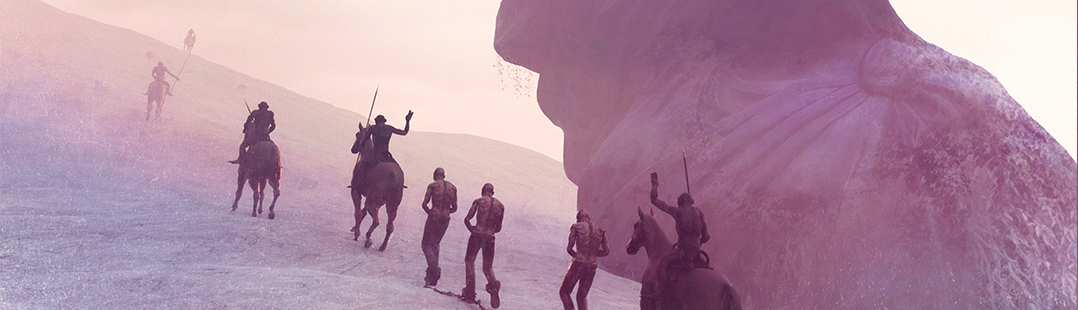
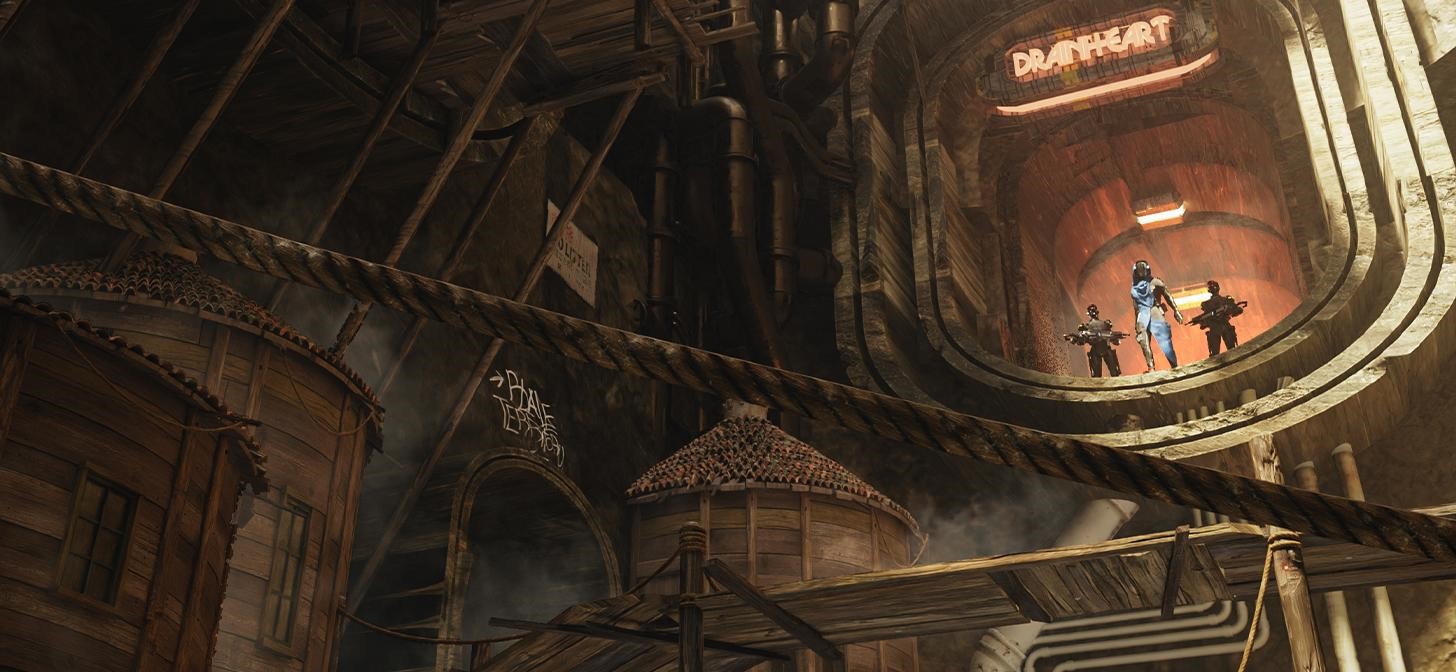
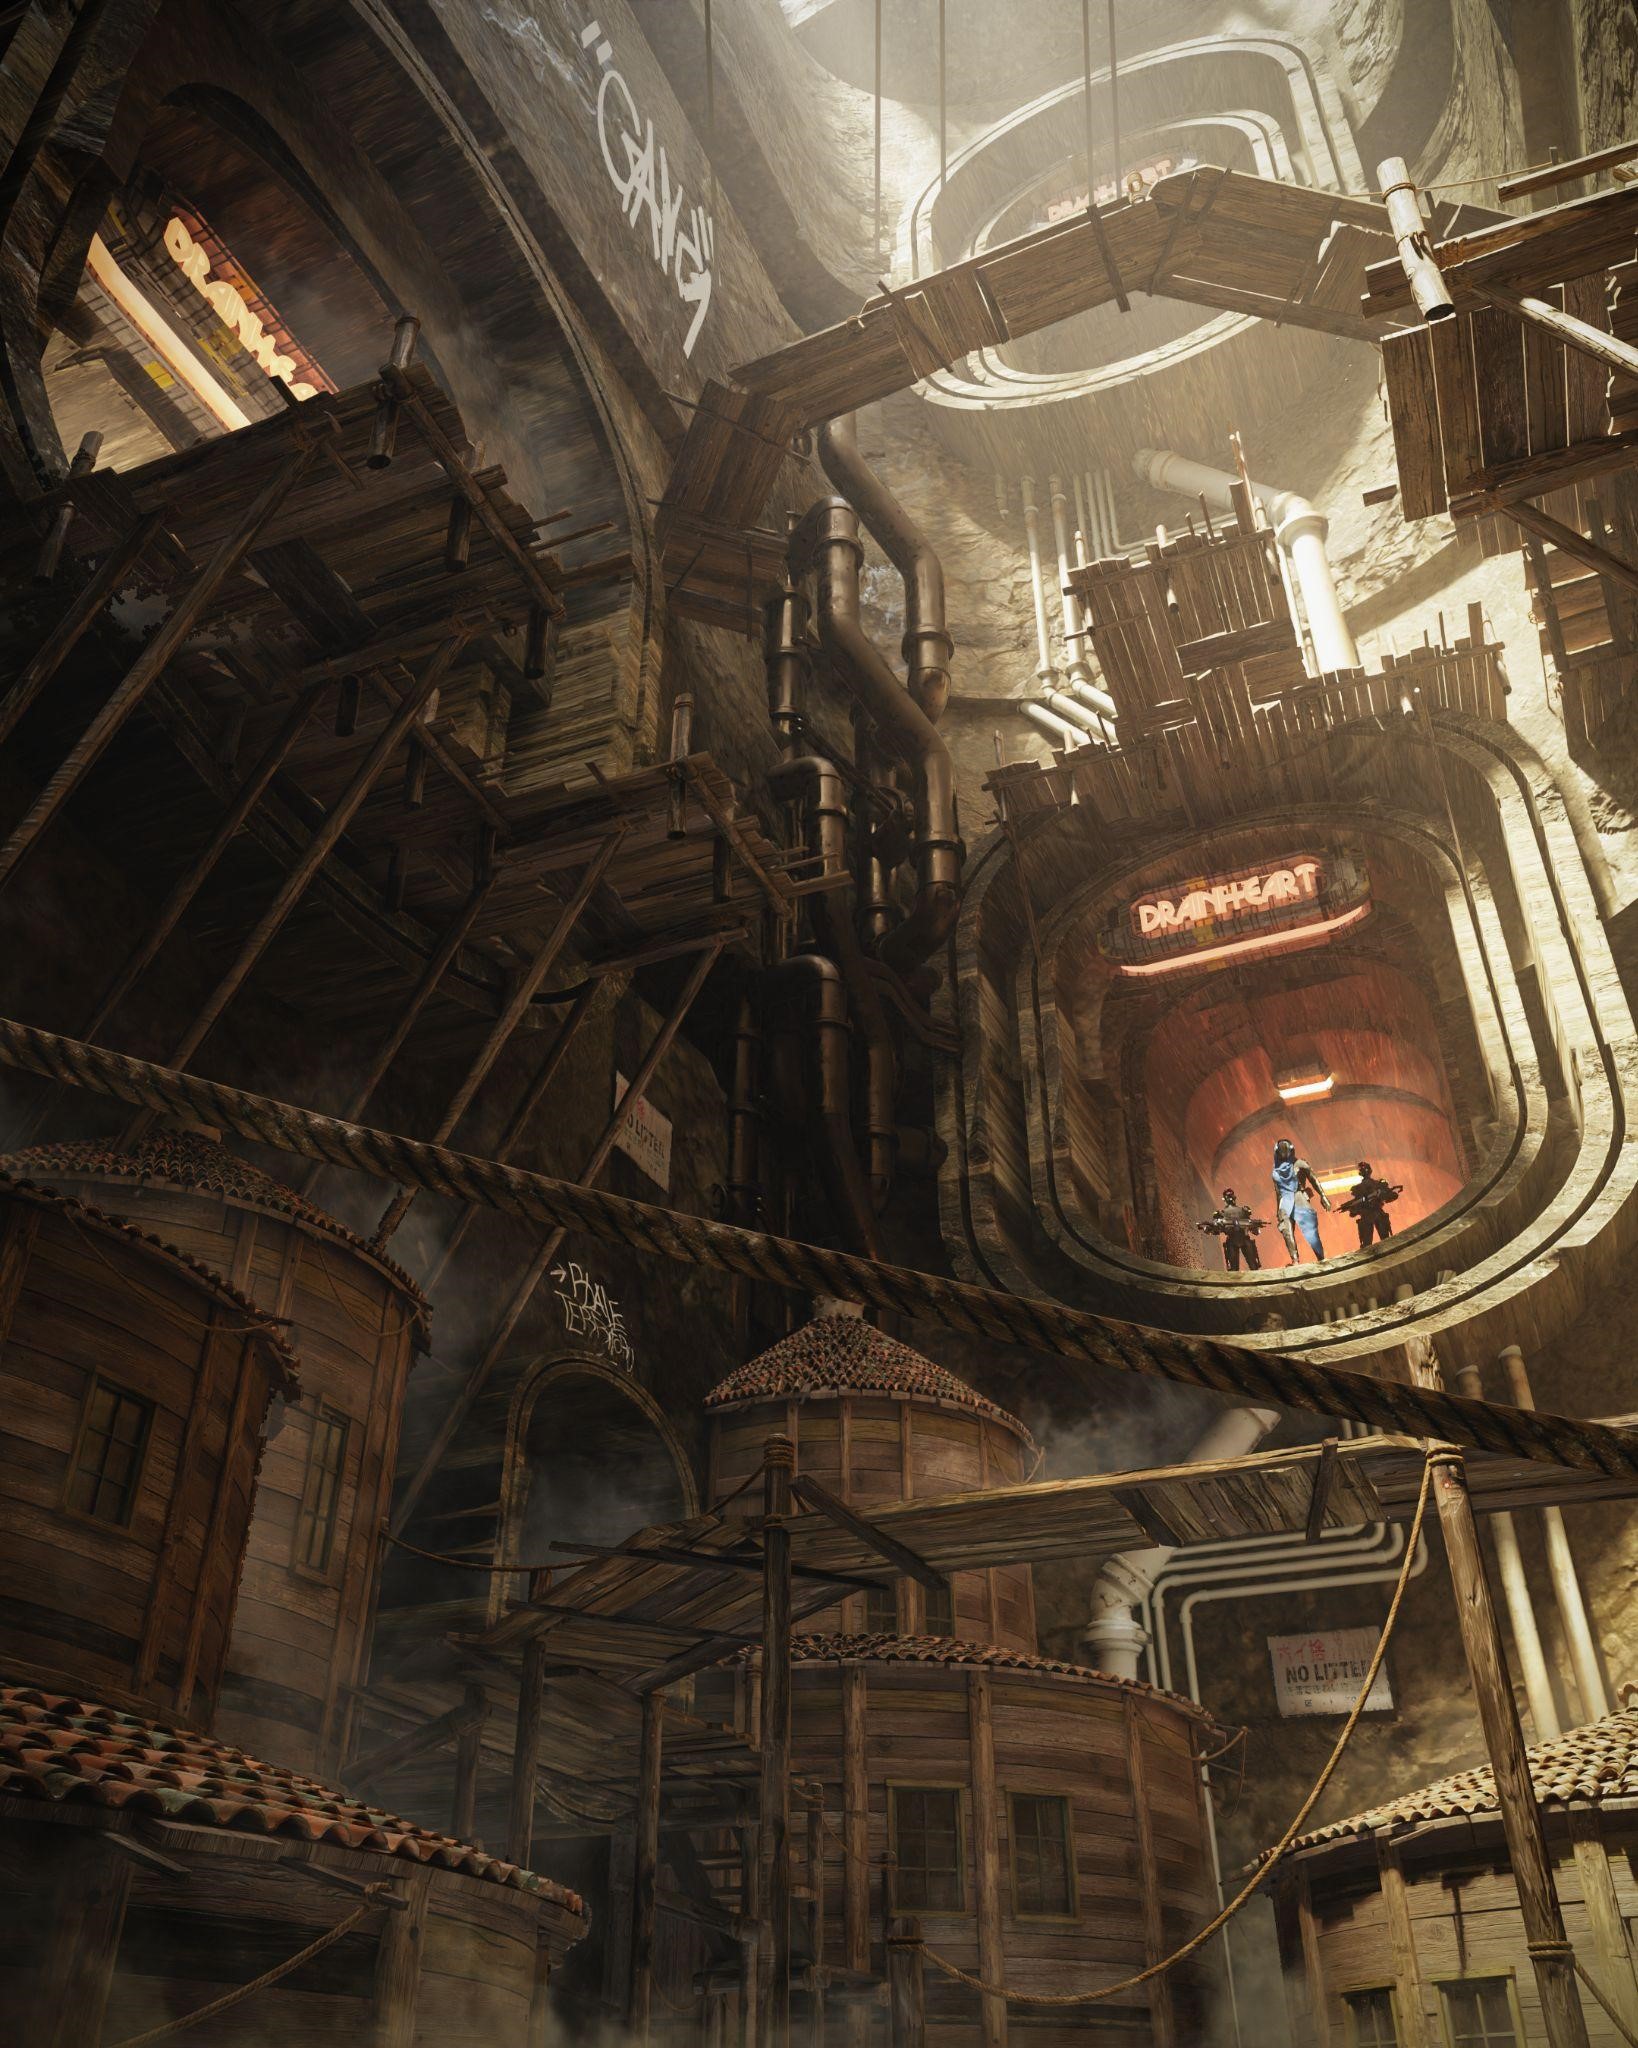
After assembling all the details and elements into the scene, I placed the characters in the central tunnel entrance looking over the city down their feet. I made sure the layout of the assets would evoke a sense that there is a deep and long array of wooden architecture sprawling with civilians and this is the tip of the city.

As such, the final concept of Drainheart is that it’s a town of ruffians and thugs sprawling with steam and loud noises of the gangs fighting each other and so, I used decals to add more graffiti and details to the scene along with brass pipes.
The character posed at the central entrance is a new cop/executioner of this forsaken town and he is at his first day of job with his towering clockwork guards, ready for anything that Drainheart throws at him.
RENDER: Drainheart
Thank you for reading this article. If you have any questions, please feel free to reach out to me through any of my social media accounts. Have a great day!
About the Artist
Abraham Joshua is a 3D generalist, graphic designer, and motion graphic artist from Tamil Nadu, India. He runs the Great Lyon Design Factory and freelances in concept art and 3D animation.