Behind the Scenes: Pizza (Geometry Nodes)
INTRODUCTION
Hi, I am Ken Liang from Kuala Lumpur, Malaysia. I studied 3D animation and VFX, and have 15 years of experience in the TVC/broadcast industry after which I transitioned into the games industry with 4 years of experience to date.
I was a Softimage XSI user who switched to Blender around 5 years ago due to the discontinuation by Autodesk. I was quite captivated by Blender’s non-destructive and procedural workflow, and have since focused my time and efforts in that area especially after the introduction of Geometry Nodes in early 2021.
INSPIRATION
One of my favorite hobbies as a 3D artist is to create CG food items. I think it is particularly challenging to create realistic CG food because we are so used to seeing them everyday that any little mistake which is present will immediately stand out to anyone. It is even more challenging to create them entirely procedurally, not just from the modeling aspect but the materials as well.
The reason for choosing food subjects is also partly because of my busy schedule. I find that these bite sized exercises (pun intended) are just nice for me to start and finish within a weekend whenever I have the free time to do it. The goal is to decide on something that is not too simple and meaningless to make, but also not too difficult that it would take longer than a couple of days to finish because I would more than likely not go back to finish it in the future, haha!
Some of my previous CG food attempts:
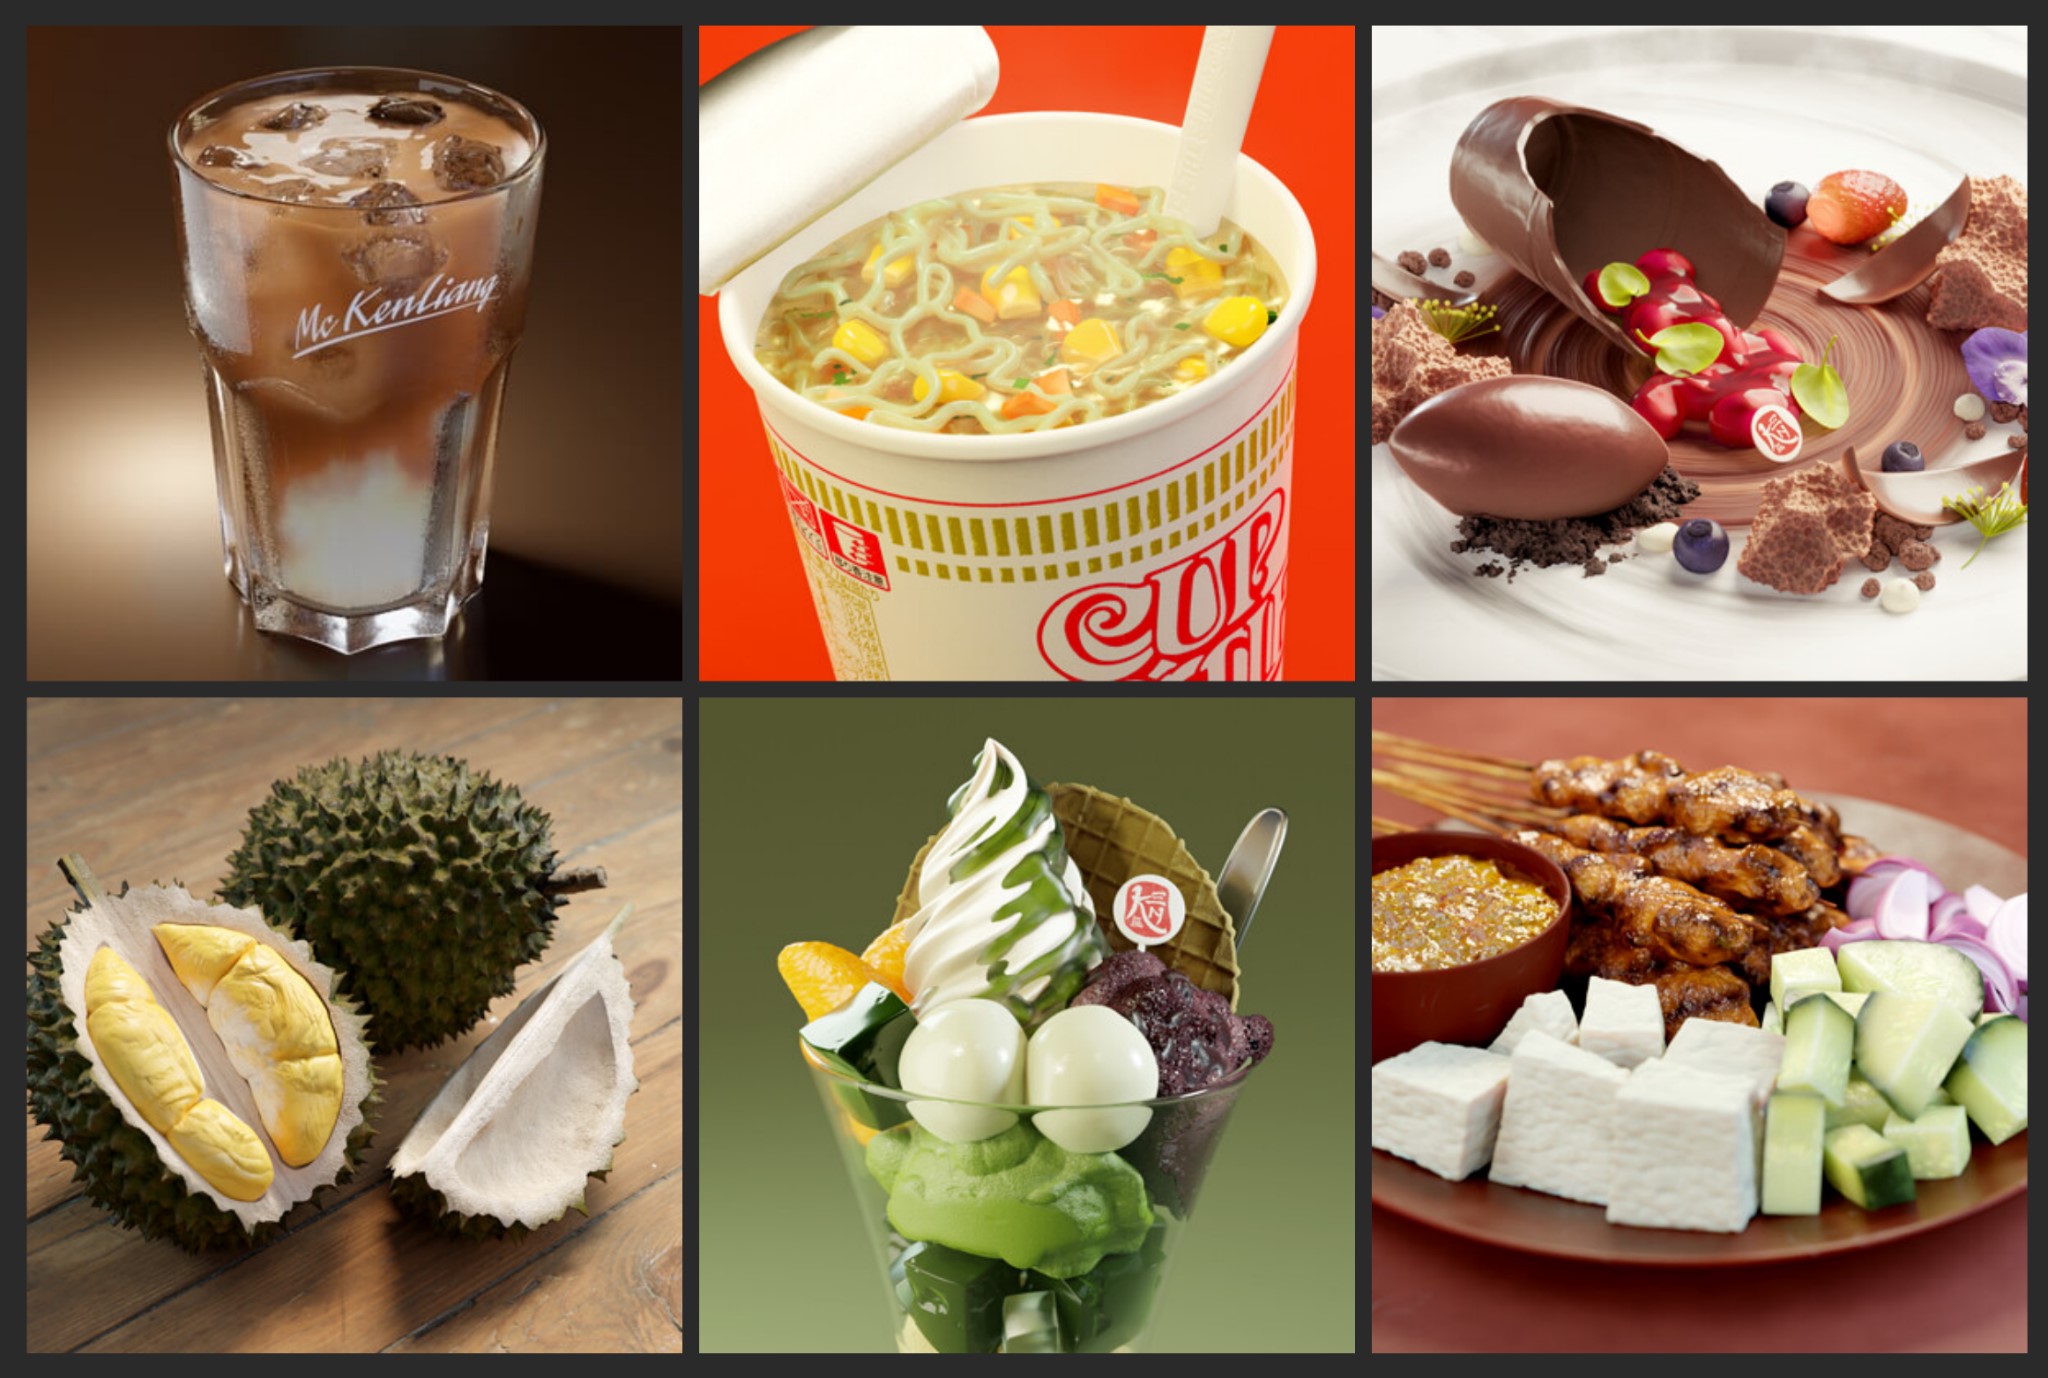
Food subjects usually come with variations. Take the donut, for example—it comes in various shapes, sizes, colors, flavors, and toppings. This makes for a nice exercise to practice planning the procedural generation to accommodate for all of those variables.
PROCESS
Software: Blender 4.0 (geometry nodes)
Rendered with Eevee
Pizza Generator
Before I started, I listed down all the adjustable parameters that I want for the pizza generator. It is better to have a clearer picture right from the start rather than building systems layer by layer as you go to avoid any complications. Without proper planning, some features that you want to add later in the process might require backtracking and modification of previous work which could lead to messy, badly optimized nodes.
Here are the main features I wanted for my pizza:
- Adjustable pizza size/radius
- Adjustable number of slices
- Adjustable crust thickness & width
- Toppings – Adjustable density, size, etc.
- Option to toggle only single slice
- Good to have: stretching cheese
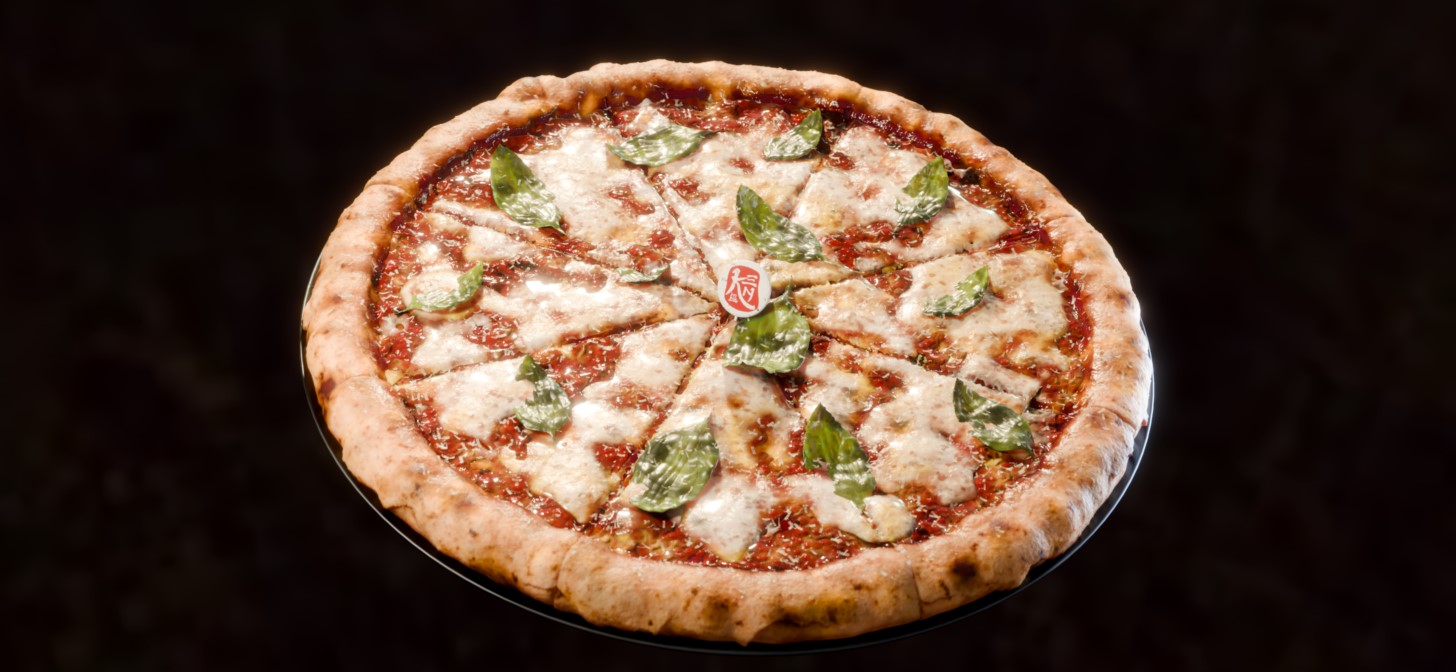
I chose the margherita pizza for its simplicity but the ultimate goal is to be able to swap out different sauces/toppings to mix and match different combinations in the future.
Modeling
The base pizza is relatively simple to make with a mesh circle and a few extrusion operations. The mesh is then converted into points, then into volume, and back into mesh to get the rounded and bumpy surface that a pizza bread would have. Additional details were added with displacements using voronoi and noise texture nodes to give it a ‘blistering burnt’ and oven baked look, most visible on the crusts.

As for the sauce and melted cheese, a smaller sized mesh circle is used to generate points which is then positioned onto the pizza using raycast. The points are then converted into mesh using the same technique for the pizza bread. The varying radius sizes for the points gives it a blobby result. It is then scaled down to flatten the height and smoothened using the blur attribute node to achieve the melted look and feel.

To create the basil leaves, I started out with a quadratic bezier curve and extruded it to one side using a float curve node to drive the shape of the leaf. It is then duplicated and flipped to complete the other side of the leaf. I used a simple remeshing algorithm to get an evenly triangulated surface on the leaf which I needed to generate the veins. To do this, I used the ‘Shortest Edge Paths’ and ‘Edge Paths to Curves’ combo, then trimmed the curves a little bit while blurring the positions at the same time to get that organic look instead of a circuit board finish. These veins are then used to drive the bumps on the leaf. They are finally curled a little bit before being converted into instances which will be used with the ‘Instance on Points’ node to scatter on the pizza. By using a repeat zone, I am also able to generate multiple variations of the leaf to be used as instances.

By now, it is just a matter of combining all of the components together to form the margherita pizza. As a finishing touch, I also added a layer of grated parmesan cheese on top.

Here’s a look at the entire node graph that makes the pizza:

Materials
When it comes to the materials, I used mostly voronoi and noise texture nodes to procedurally generate the surface of the pizza.

A highlight that I would like to point out is that I used the distance attribute from geometry nodes to help me blend the different materials seamlessly, most notably where the melted cheese and tomato sauce meets.
RENDER: Pizza (Geometry Nodes)


Please visit my ArtStation page for more demos of the pizza.
That’s all! Thanks for reading this behind-the-scenes article. I hope that you find it insightful and enjoy the read.
About the Artist
Ken Liang is a 3D generalist from Kuala Lumpur, Malaysia. He is currently working as Tech Art and Pipeline Director at Passion Republic.


Hi Ken Liang,
Surprised no replies, wonderful work, looks very tasty!
Adding a small amount of trailing stringy cheese, and possible slight pizza base roughness and colour variation for the lifted slice image may add the proverbial cherry on the cake? :)
Very impressed with your ‘previous CG food attempts’!
Kind regards,
David
Looks good but those Basil leaves are way too shiny. Compare to some pictures of a real pizza and you can see what I mean. The leaves don’t get shiny when cooked.