Behind the Scenes: Sheldon – The Electric Blue Gecko

INTRODUCTION
Hi everyone, I’m Masha Bazueva and I’m from Russia. I’m a 3D artist based in Rome, Italy.
I studied multimedia arts at The Academy of Fine Arts of Rome, and discovered Blender and 3D art for the first time there.
I followed a course about 3D modeling in an old program called ‘Think Design’ and then in another course, a teacher told us about an open source program called Blender. I have been caught by the magic of creating things in 3D and as I was a poor student, an open source program was the perfect choice for me. Since then, I have dedicated my soul to studying Blender and 3D art.
After graduating in 2016, I spent a couple of years in self-teaching 3D. When I was ready, I started freelancing and after a while, I got a job in a VFX studio here in Italy. Meanwhile, I also started collaborating with CG Boost as a Community and Challenge Manager.
At the moment, I’m a freelance 3D artist, teacher, and still working for CG Boost!
All in all, I have around 8 years of experience in 3D (writing this down makes me feel like an old lady).
INSPIRATION
I love animals in general, particularly reptiles!
In 2023, my daughter was born and I was facing (still facing) big changes in my life.
After challenging myself during pregnancy with my Fantasy Reptile project that was quite hard to make because of the little tree-like shapes, I was looking for a simpler but nice subject to work on while postpartum. That would be my challenge as a new mom: to still be able to find some time for 3D.
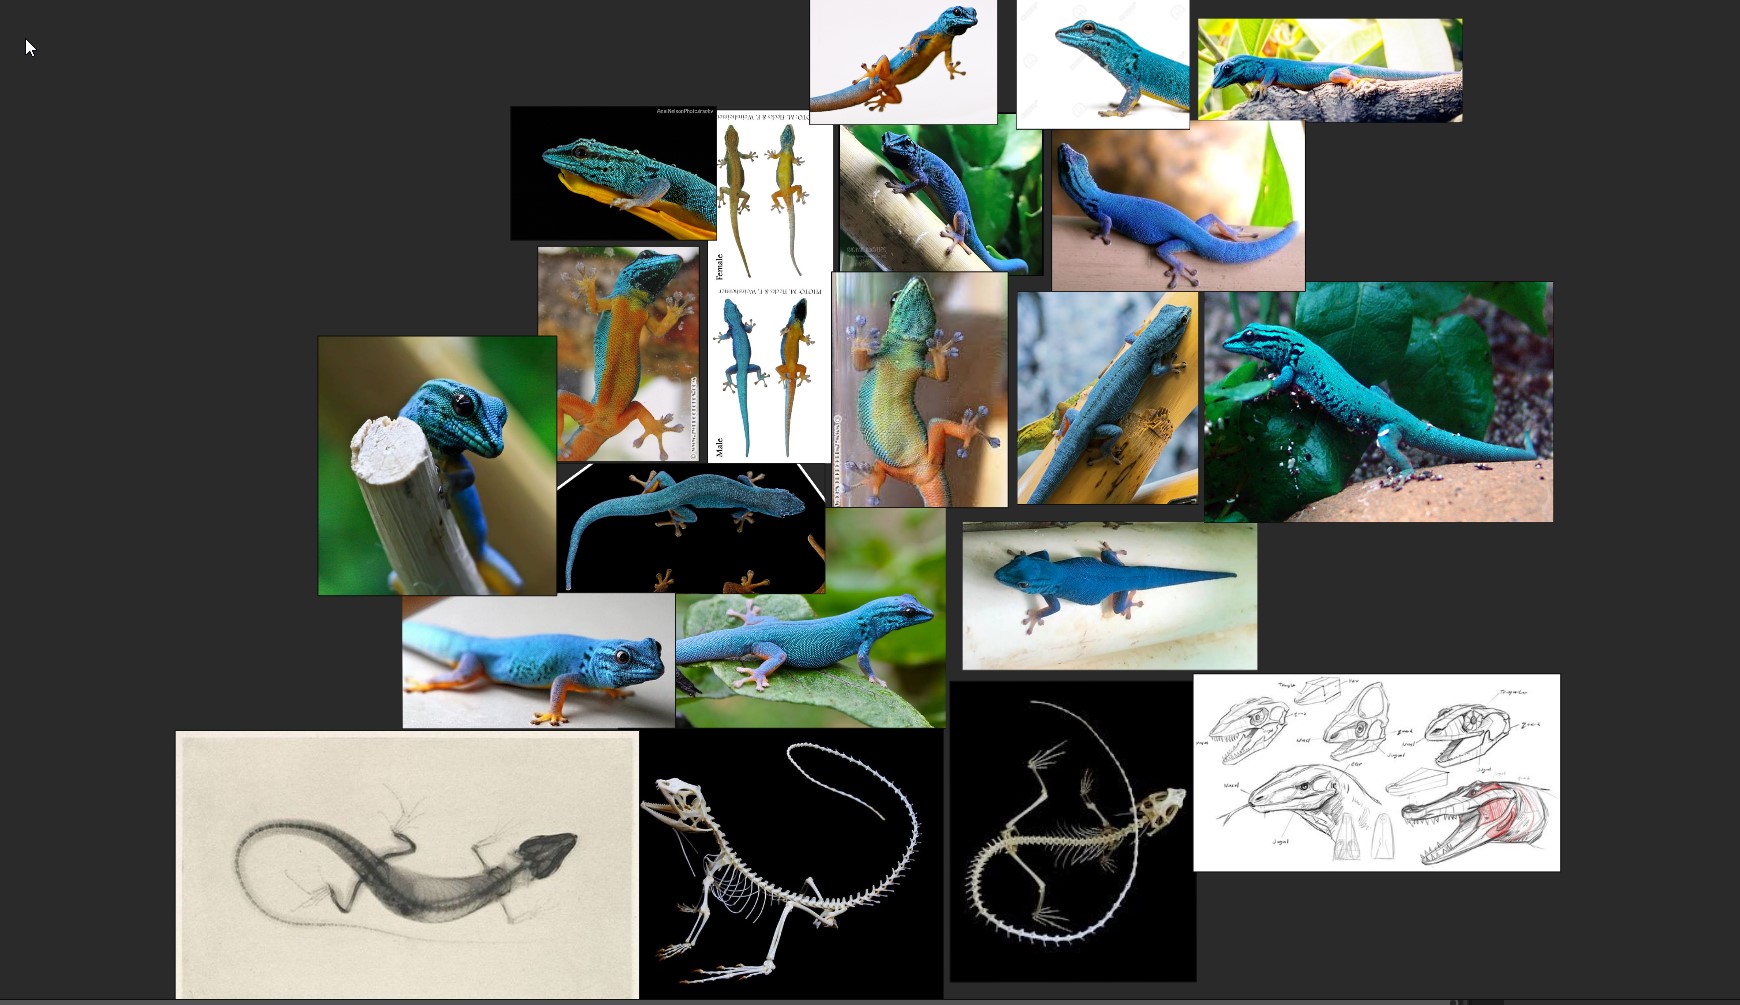
So as usual, I spent some days researching online about different types of reptiles and found this nice species: the electric blue gecko or Lygodactylus williamsi, with its fascinating colors. This guy is under protection because of being threatened by illegal pet trade activity, so I thought it would also be nice to give people an opportunity to find out about what’s happening to this species. It was the perfect subject for me!
Once I decided on the subject, I then spent some time collecting reference pictures and when done, I was ready to go!
PROCESS
My only tool is Blender, though I also use some built-in add-ons like Node Wrangler and Bsurface, and some external ones like Principle Baker.
Block-Out
I usually start the whole process by blocking out the basic shape. In this case, I made large use of simple edges and vertices with a skin and subsurf modifiers on top.
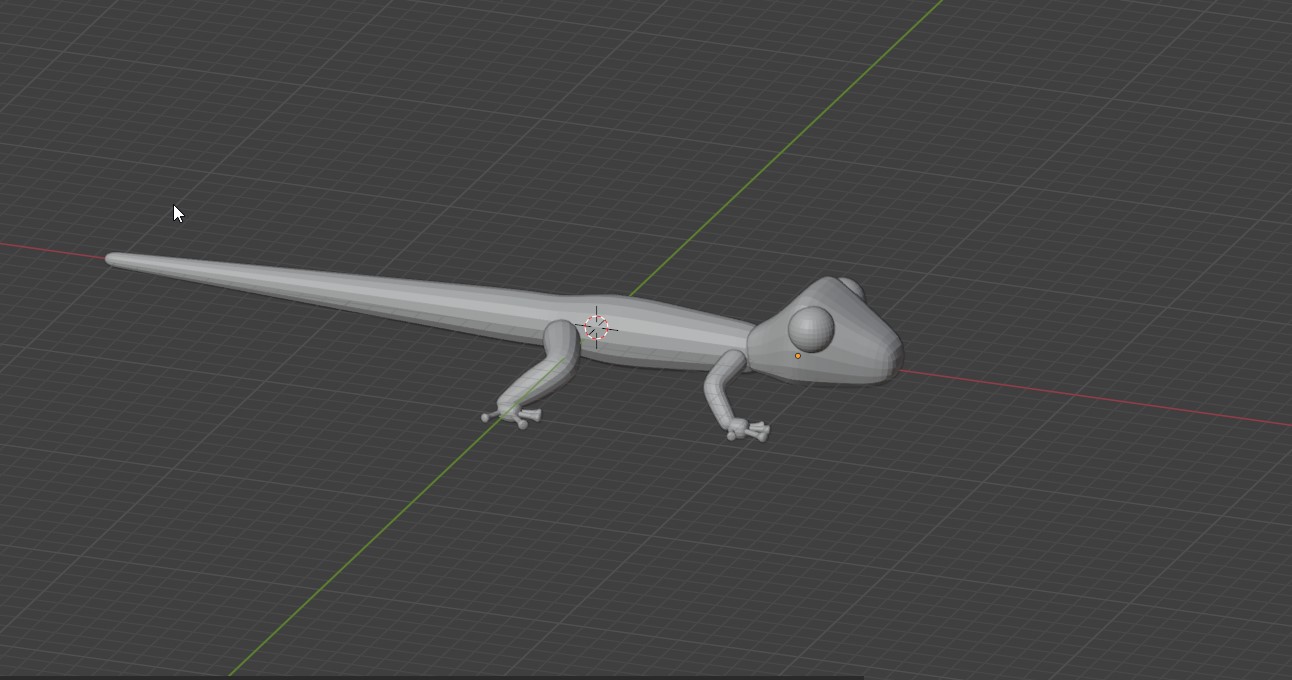
Sculpting
Once the basic shapes are ready, I start sculpting the basis. At this stage, I usually keep the different body parts separated, so that I can change the proportions if I want.
When you’re a beginner, you always tend to concentrate a lot on sculpting techniques, brushes, settings, and all the technical aspects. For me, the real progress happened when I understood that the main point of sculpting is understanding the subject shapes and structure.
References
References are the key; I always keep a PureRef file open on my second screen, with not just the pictures of the subject but also anatomical references. Understanding the body structure was really important, even if I was aiming at making something more cartoonish.
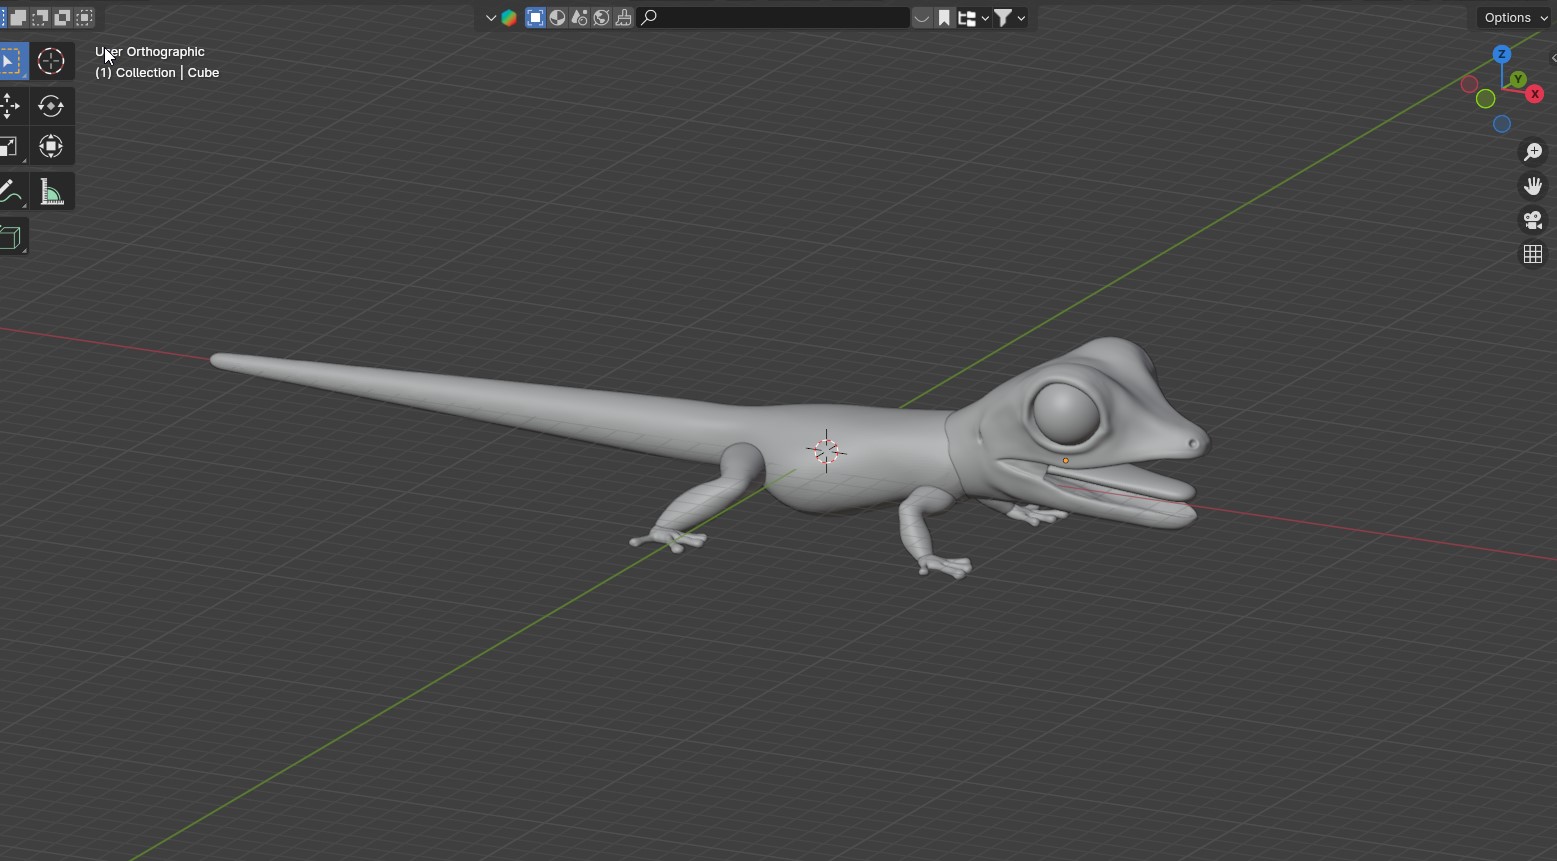
Detailing
Once I was happy with the proportions, I joined everything together and added some minor elements like nails. To make sure I still had some control over the different parts and could sculpt them without affecting the others, I used face sets.

With the main shapes complete, it was time to take care of the details. I hand-painted the skin details around the mouth using a mask and used a mesh filter to extrude the bumps. I sculpted the rest by using some alpha textures.

Texturing
After sculpting, I baked the normals and displacement maps, and switched to texturing.
My technique for this is using the displacement map to create a color base that will enhance texture details. Then, I mix variations of it using black and white masks. This technique is slower than painting directly with color, but it gives me more control over each color layer. Let’s suppose if at some point, I want to turn yellow into red without touching the other colors, then I can totally do this.
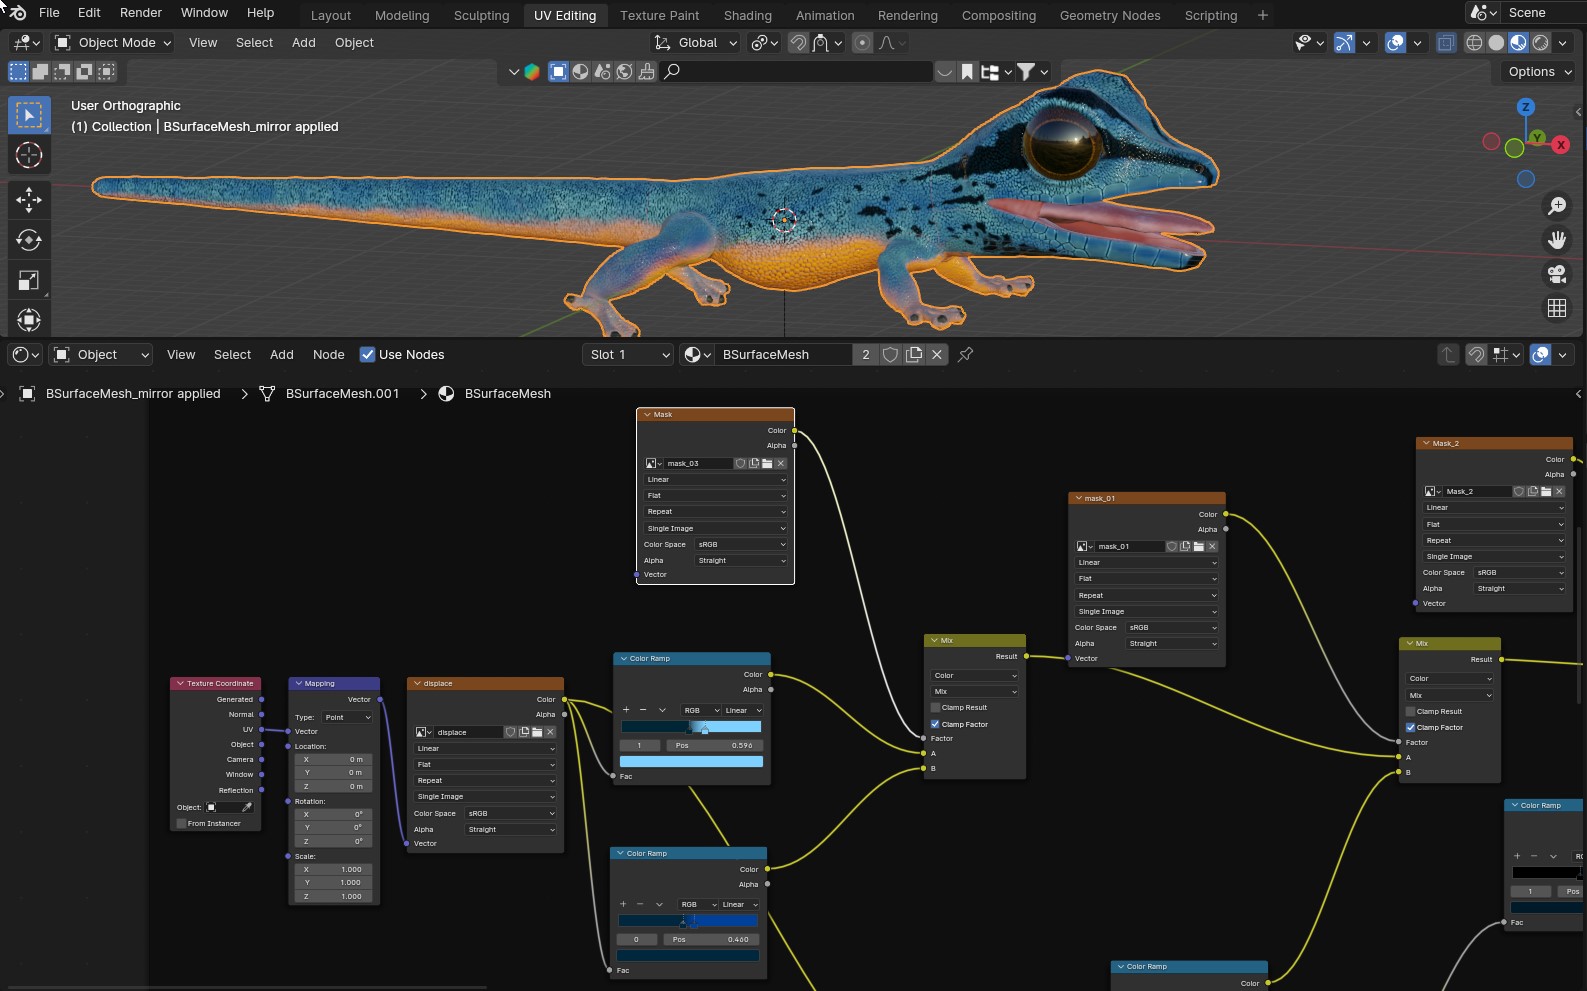
As for the sculpting in the texturing stage, observation is very important! An animal texture might seem made out of just two or three colors but if we observe carefully, we might notice multiple variations and shades that make it look truly believable.
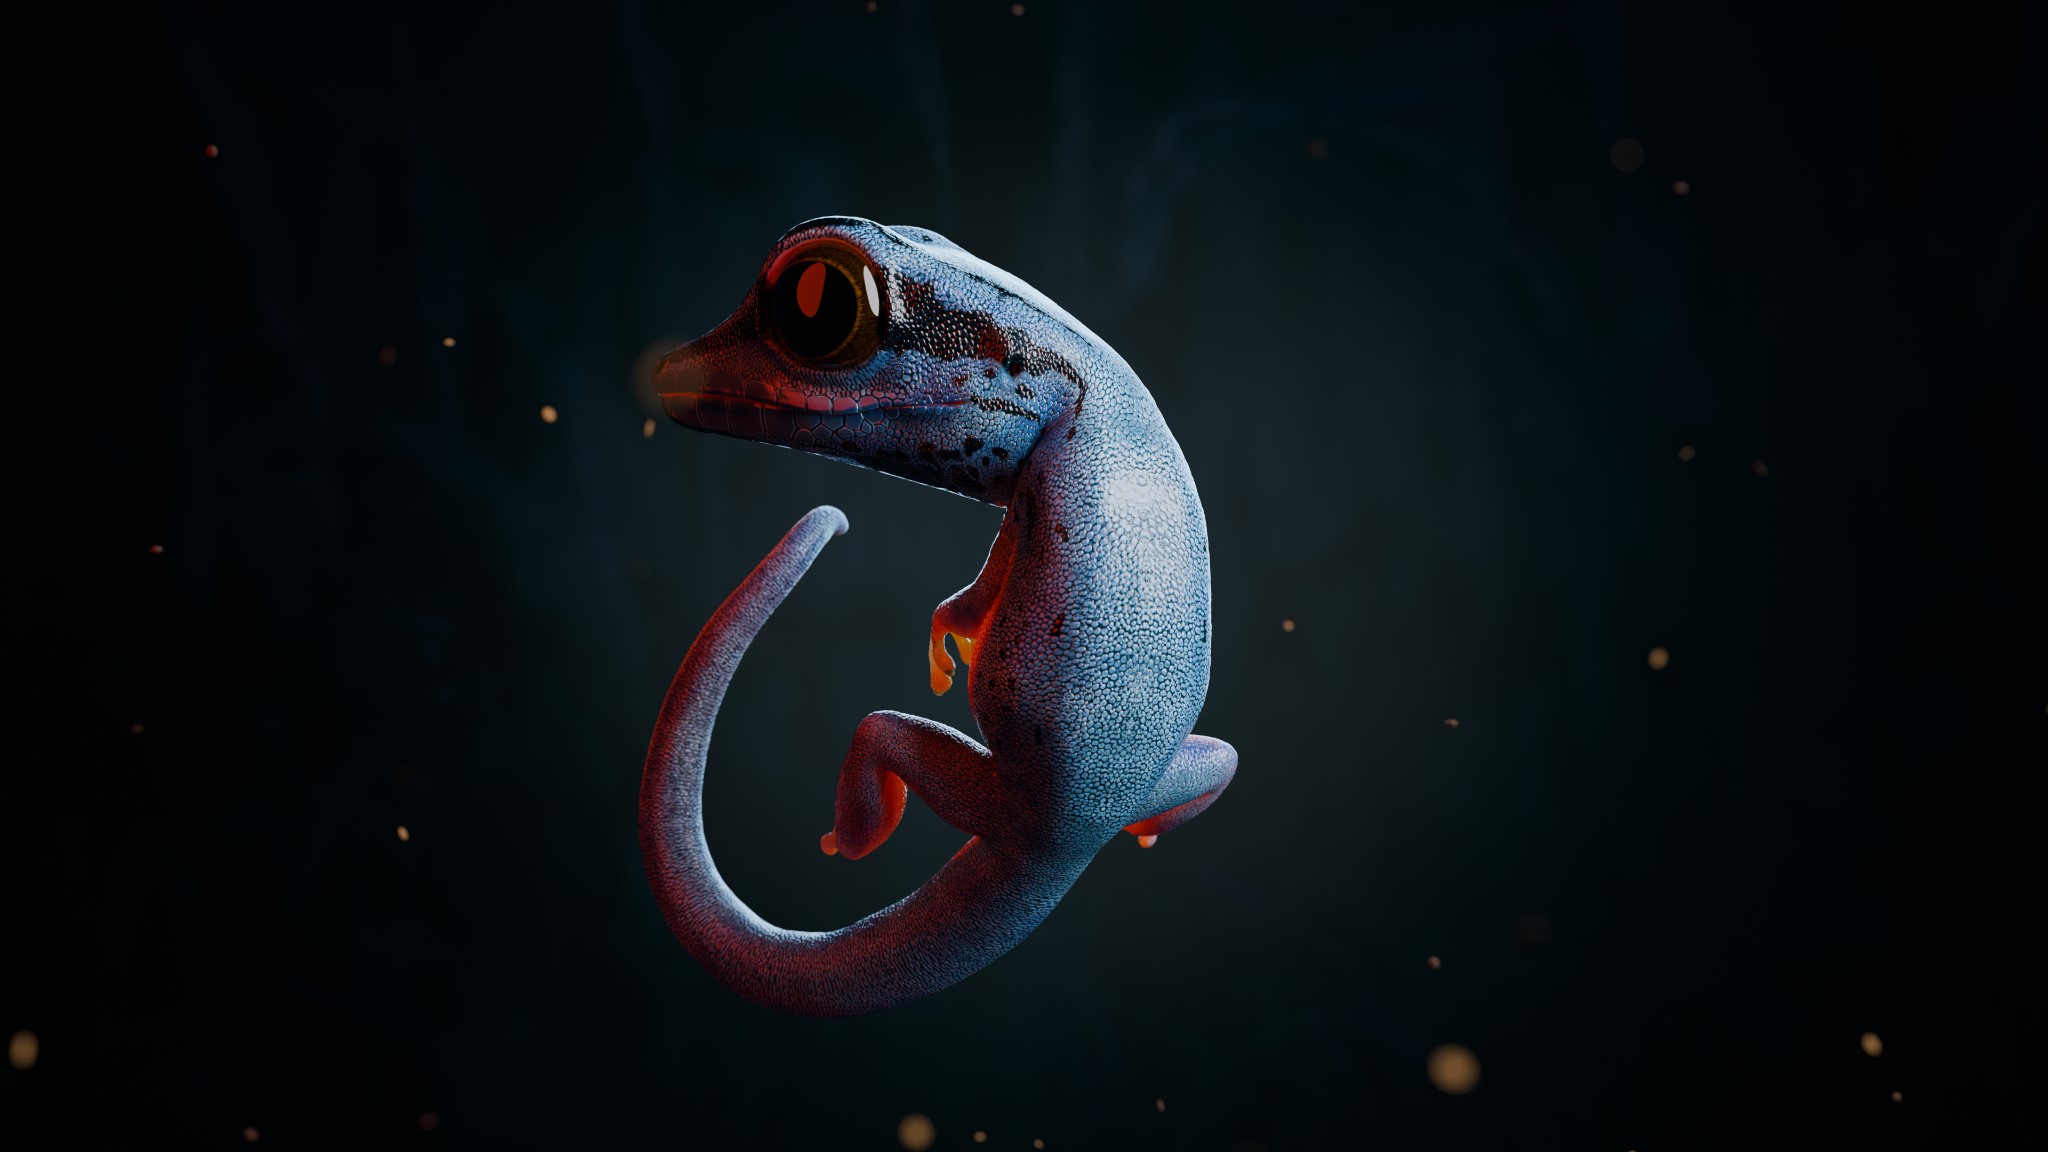
Set-up & Lighting
After completing the texturing, I made a quick rig, posed the gecko, and created a nice render setup.

I used a classic 3-point lighting setup with a rim light, a key light, and a fill light. As a background, I used an image I took from Pixabay which I illuminated with a round light so I could create a vignette-like effect.
As a final touch, I added some flying particles using the technique shown by Louis du Mont in this video.
Animating
Once done with the setup, I parented the subject to an empty and made a 360° turnaround. At that point, I thought it was a little boring, so I decided to make a simple animation and bring the little guy to life! To make the animation loop-able, I added a start keyframe to all the bones I wanted to animate and then copied it to the end of the timeline. In this way, no matter what I did in between, it would start and end in the exact same position.
So, once I finished the animation, I simply rendered out the sequence and I was done!
RENDER: Sheldon – The Electric Blue Gecko


Animation:
Close-ups:


Clay renders:


Thanks for taking the time to read this article; I hope you found it enjoyable! Feel free to ask questions on my social media. Have a nice day!
About the Artist
Masha, a Rome-based freelance 3D artist, specializes in sculpting, modeling, and texturing. She shares her expertise through Italian and English YouTube channels, and is a part of the CG Boost team.