Behind the Scenes: A Little Corner
INTRODUCTION
Hi, I’m Zichen Tang, or Async on most platforms. I’m a self-taught artist from Shandong, China, currently a sophomore and working on turning 3D into my future career. My passion for 3D goes back to my love for films. Therefore, I always want to create breathtaking visual impressions using 3D tools.
INSPIRATION
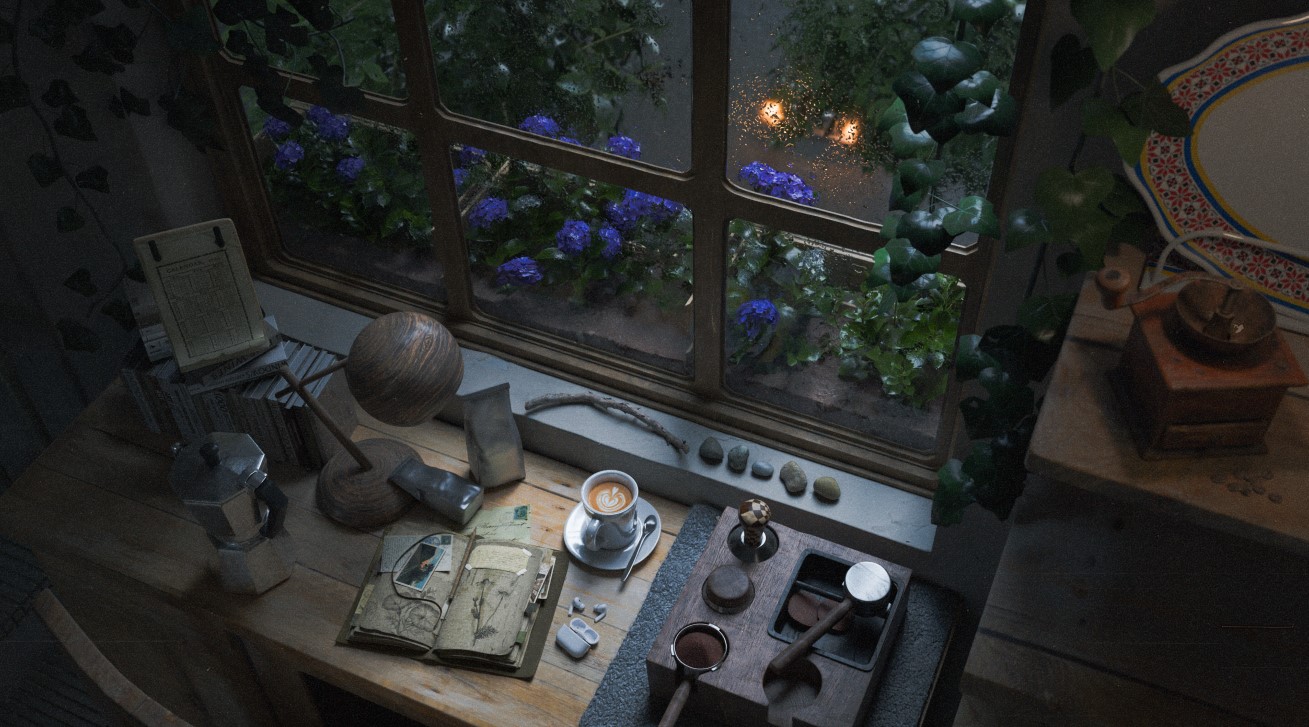
I always love the blue hour time in a day. I find light in this time incredibly gentle and soft and one day, I saw a vlogger film his workshop and it just clicked: “That’s the vibe I want!”
The vlogger is also a coffee and outdoor sports lover, and I think I can use it to add a sense of storytelling to the scene.
PROCESS
Software:
- Blender
- Substance 3D Painter
Add-ons:
- Gaffer (by Greg Zaal)
Block-Out
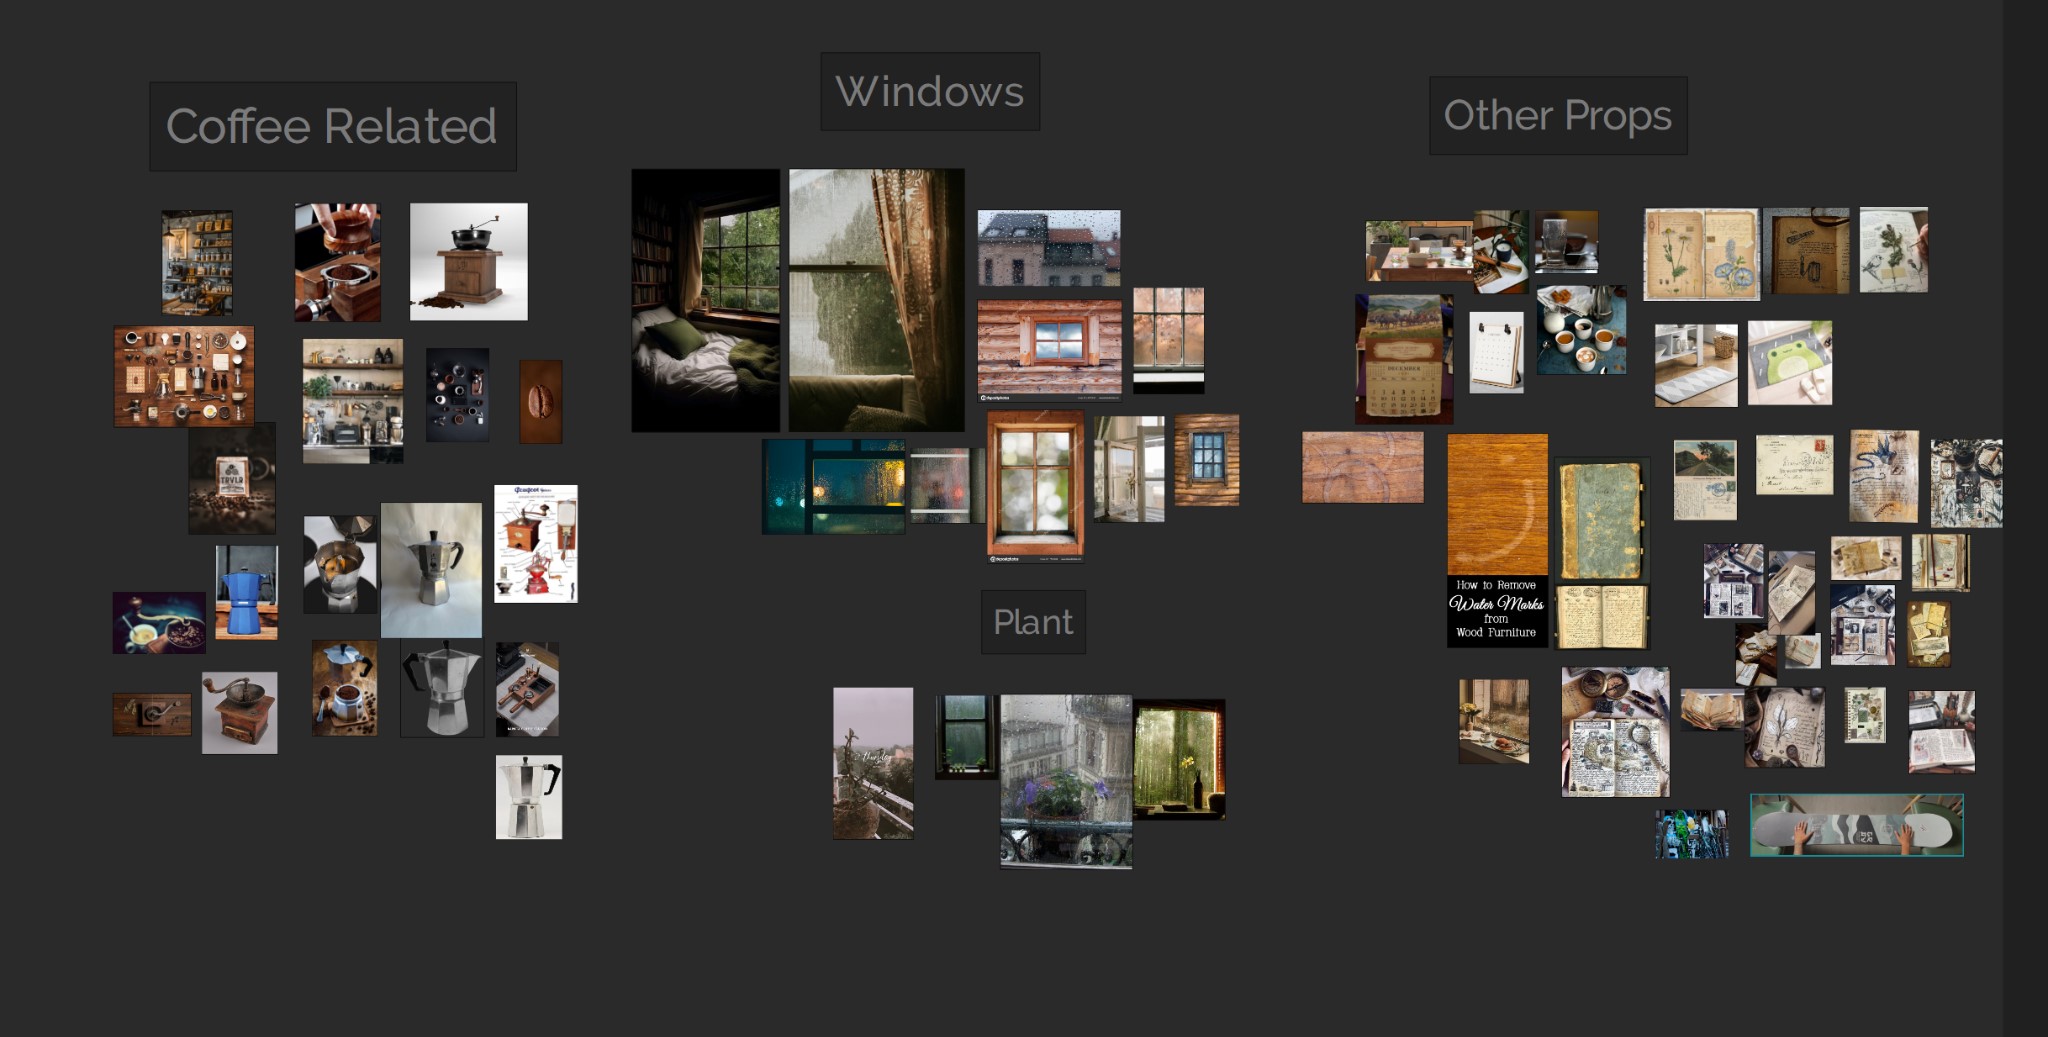
To start with, I gathered references online. They are from:
- That vlogger’s video
- ArtStation keywords search
- Shopping websites (for some props ‘cause the sellers showcase their products perfectly!)
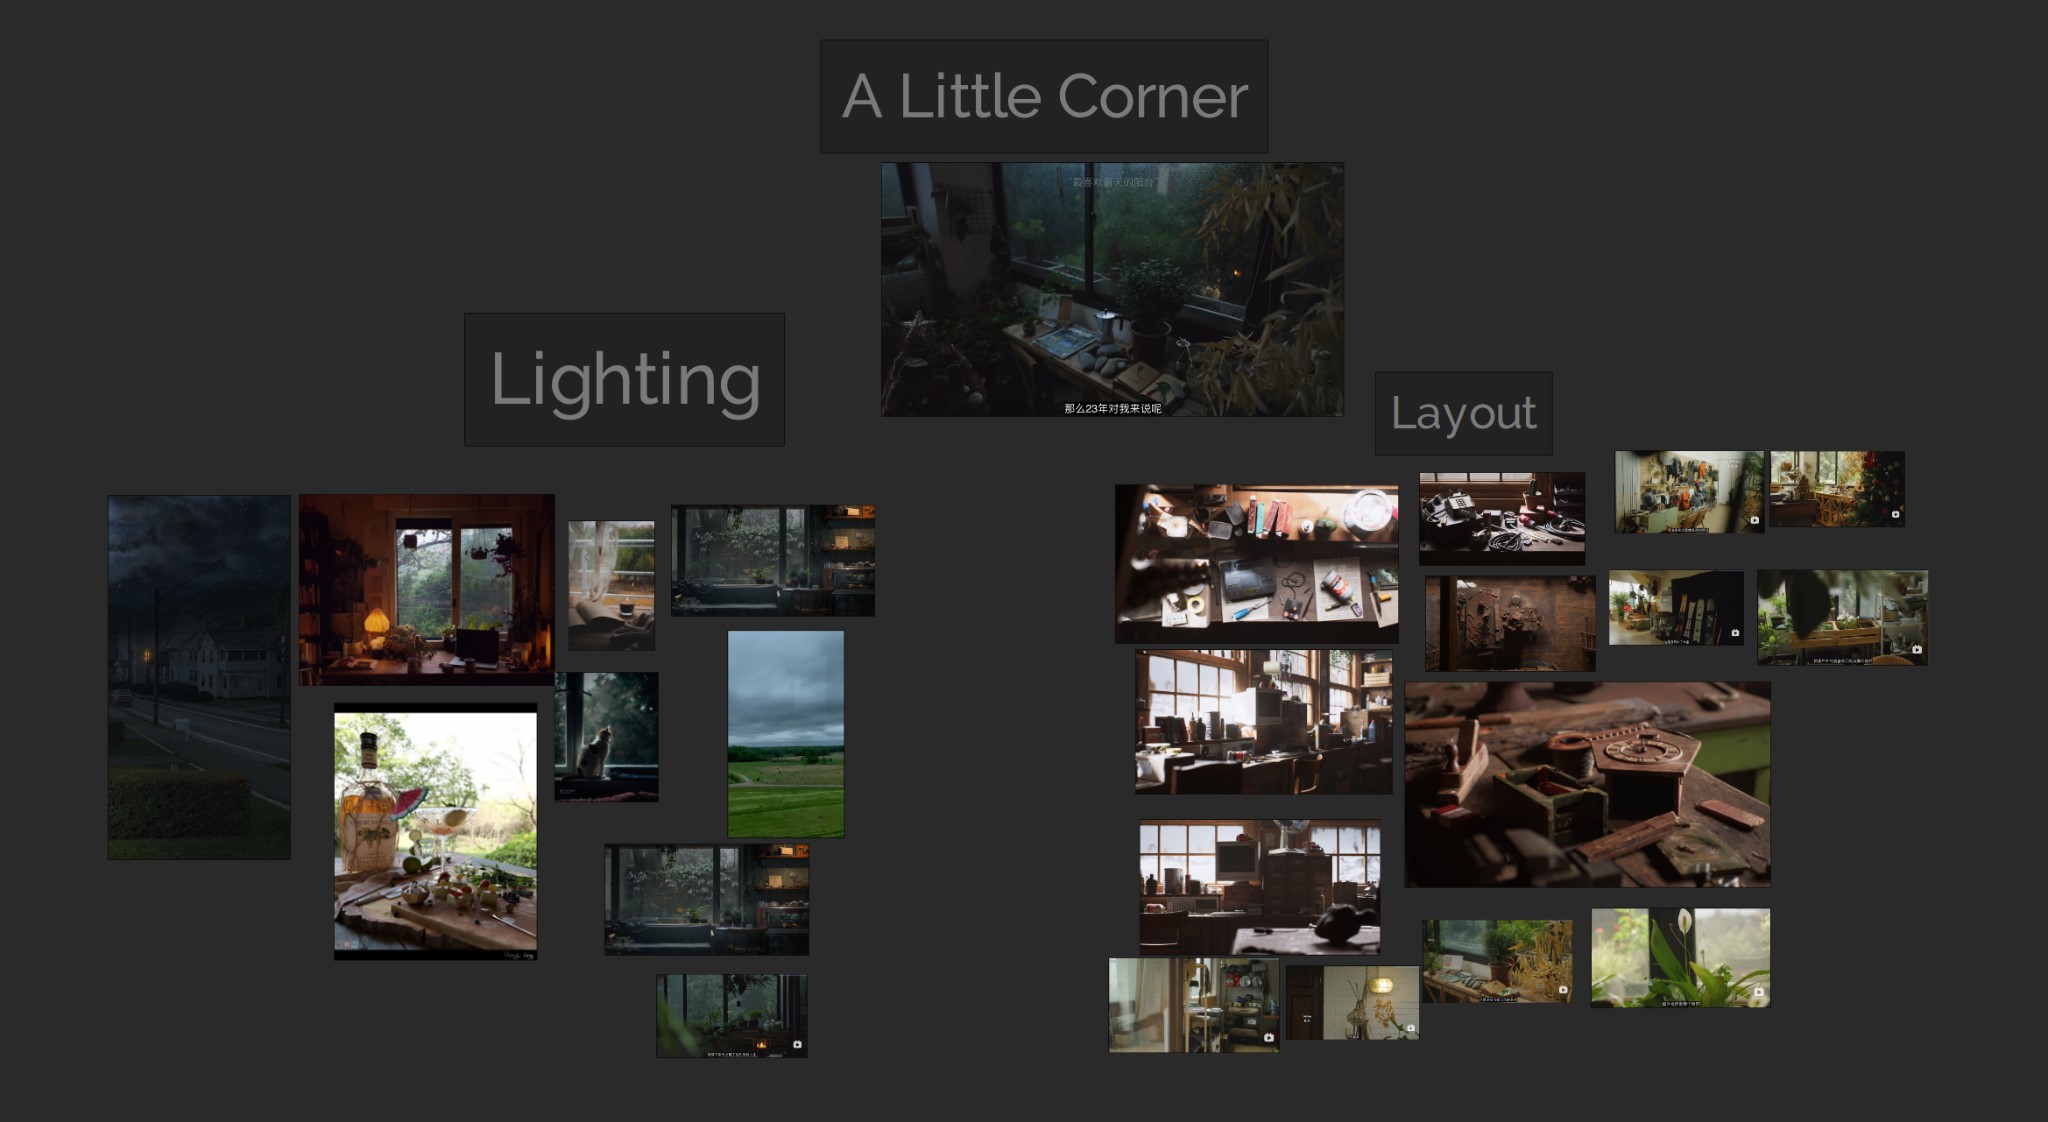
I always make sure the scene lighting is in sync with the layout because it is just TOO important (Sometimes, you work on delicate details but they just won’t show in the final render because of certain scene lighting logic you choose in the end.)
I tried different HDRI, different angles of the same HDRI, and different gobo after applying the main material in the scene.


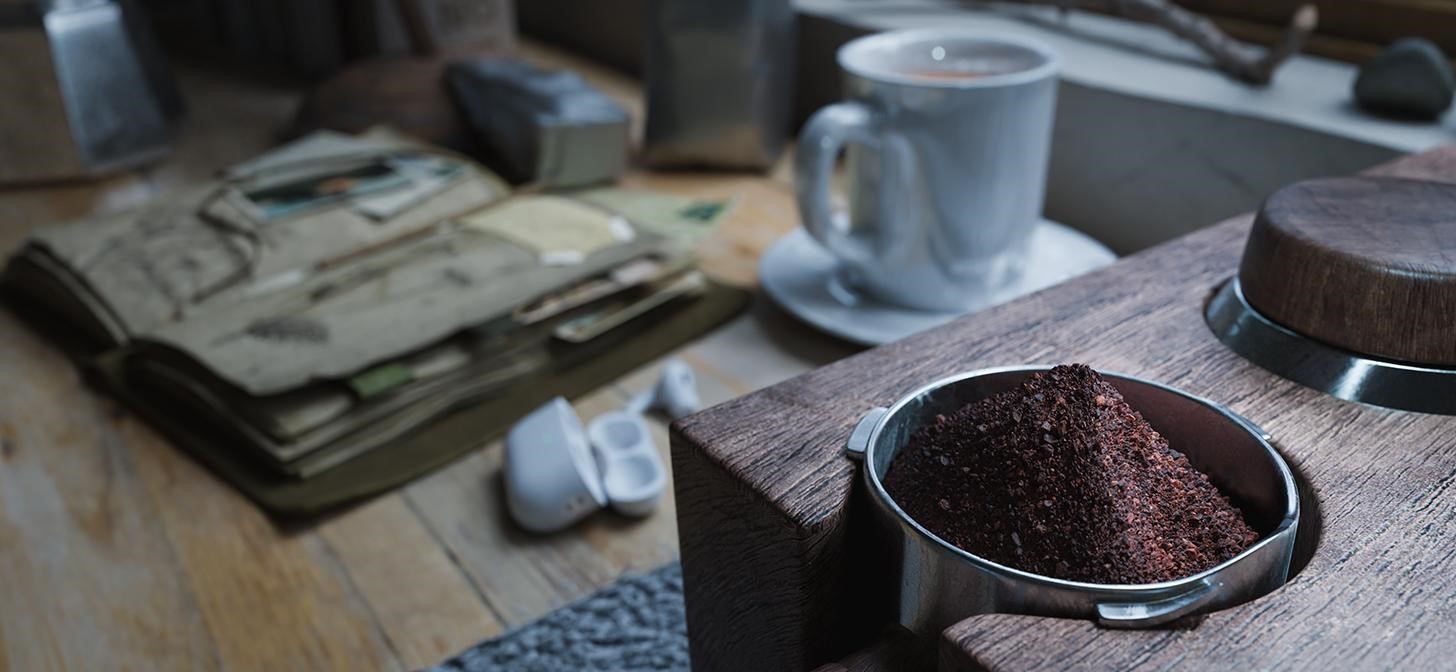
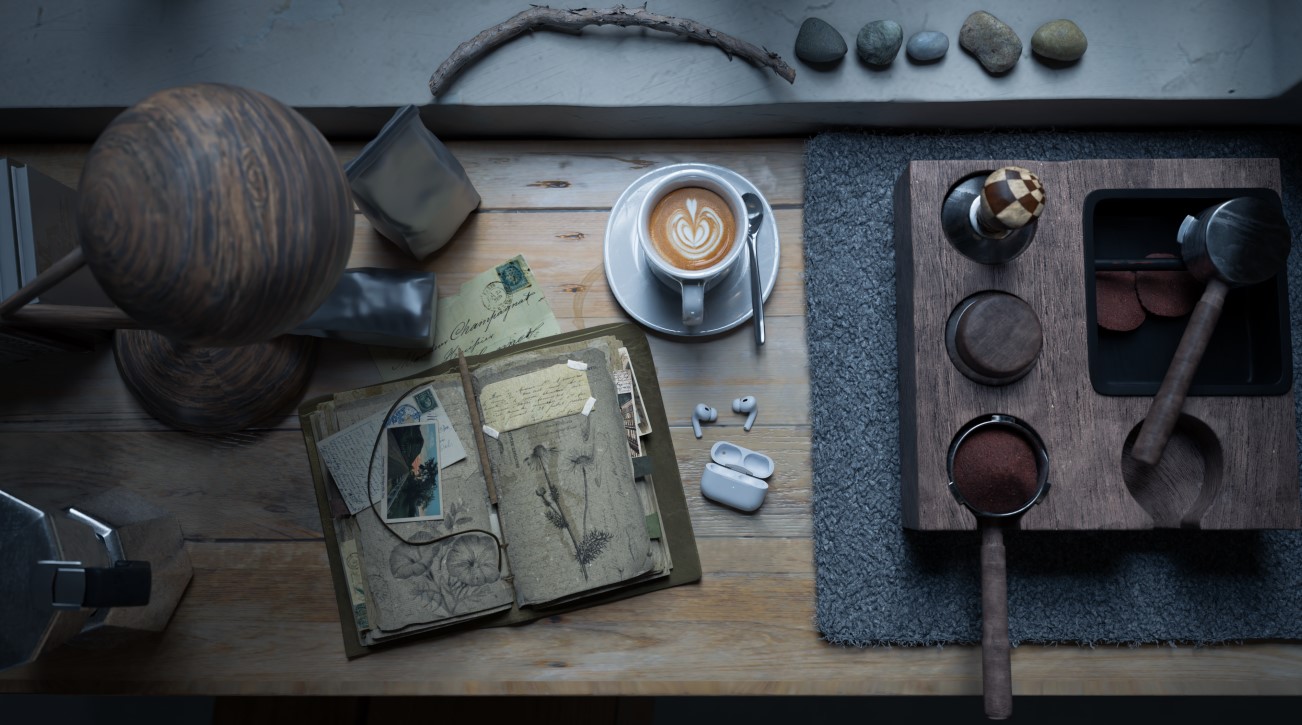
Modeling
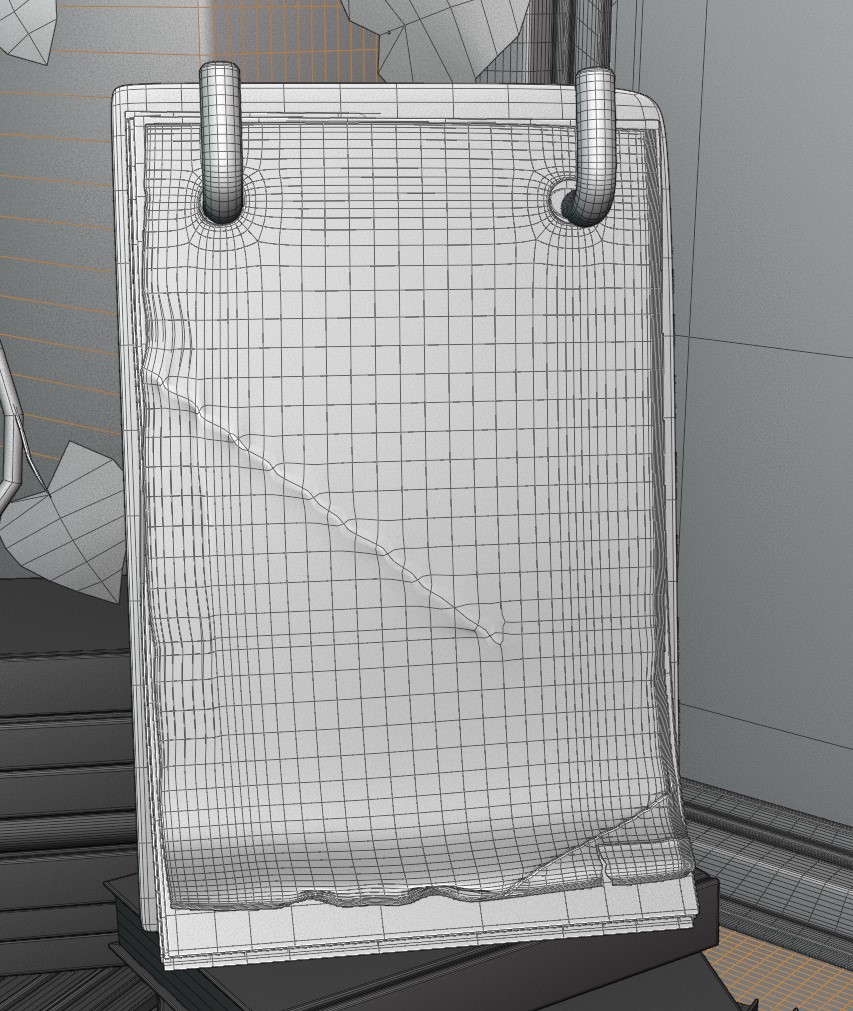
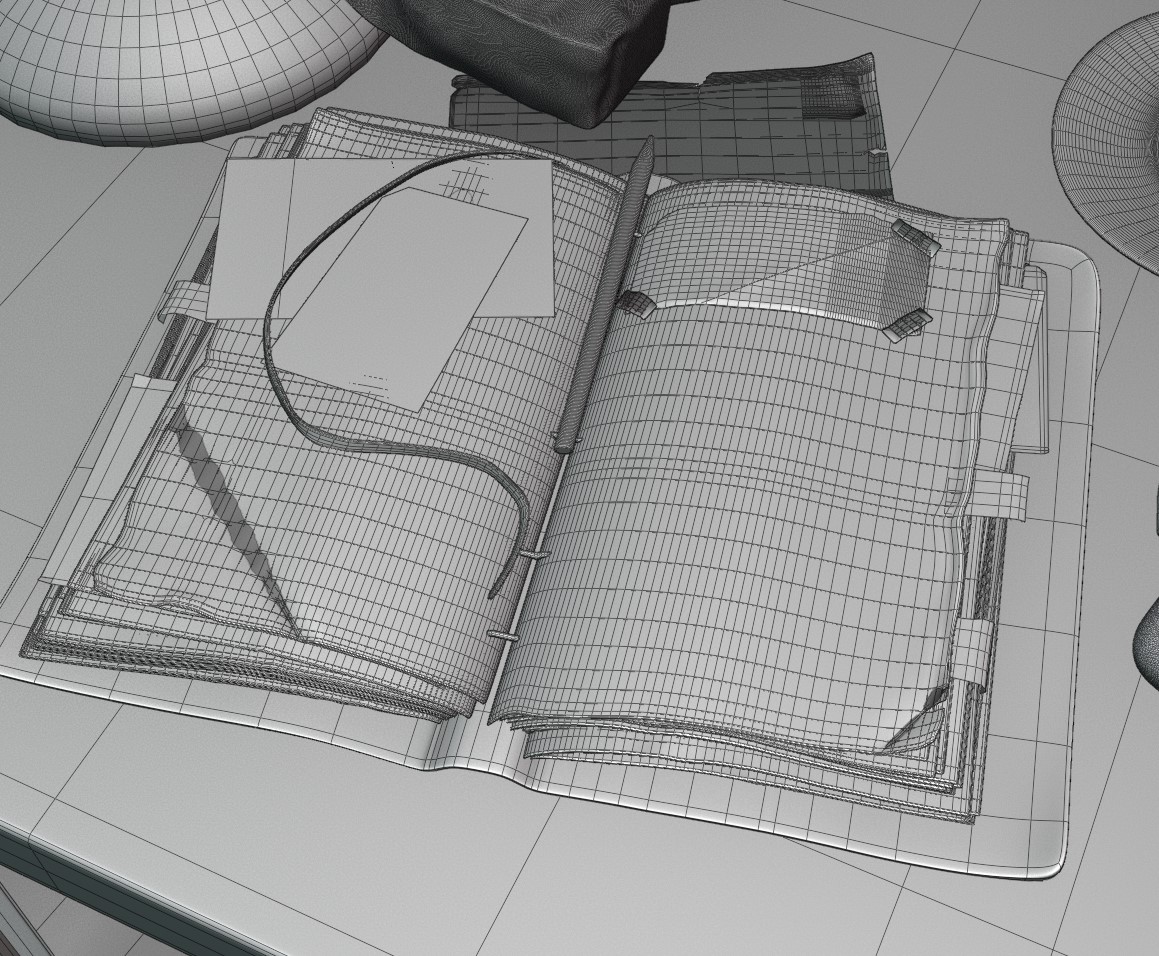
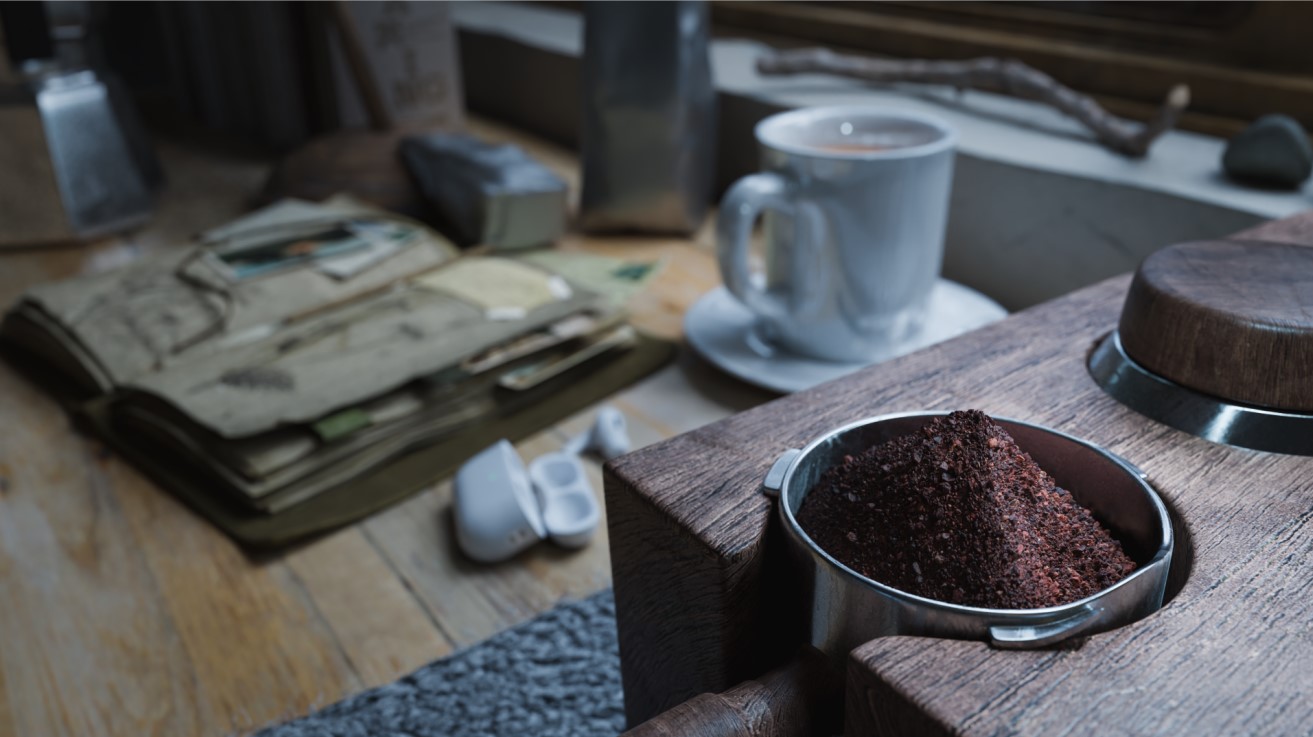
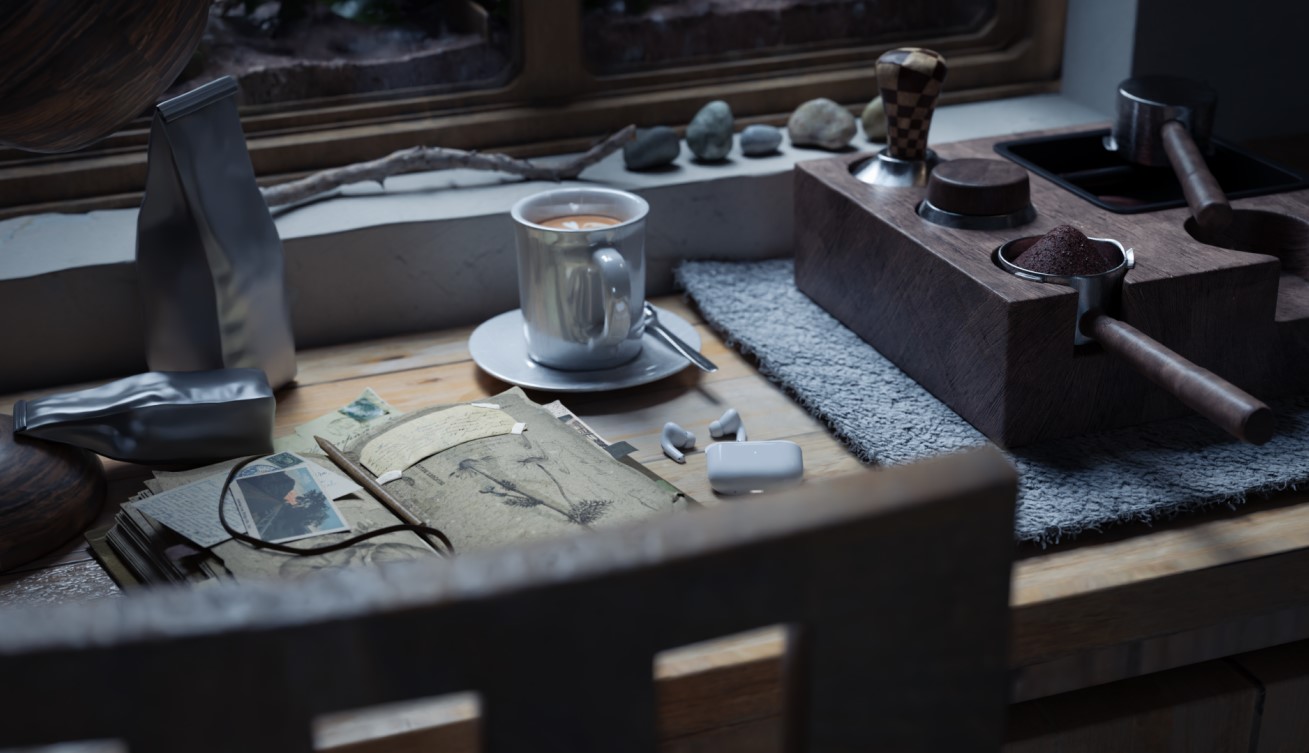
For the modeling part, I modeled the main props myself—coffee set, grinder, journal, window—and found other easy, general ones on CG trader. As I won’t deform or animate them, I didn’t care too much about the topology and even messed it up to create paper details on the journal and calendar (not sculpture, but just the knife tool and dragged it).

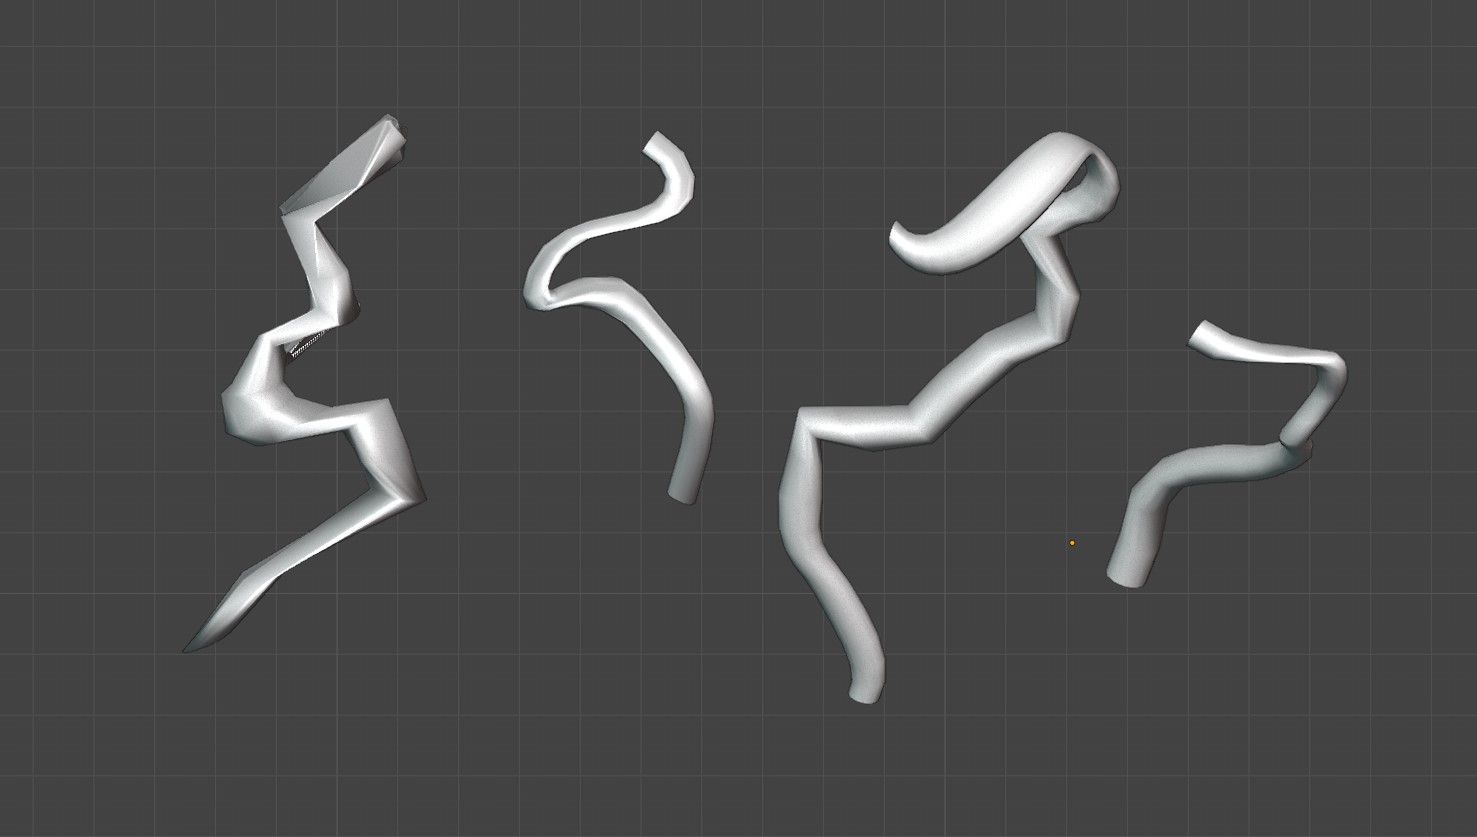
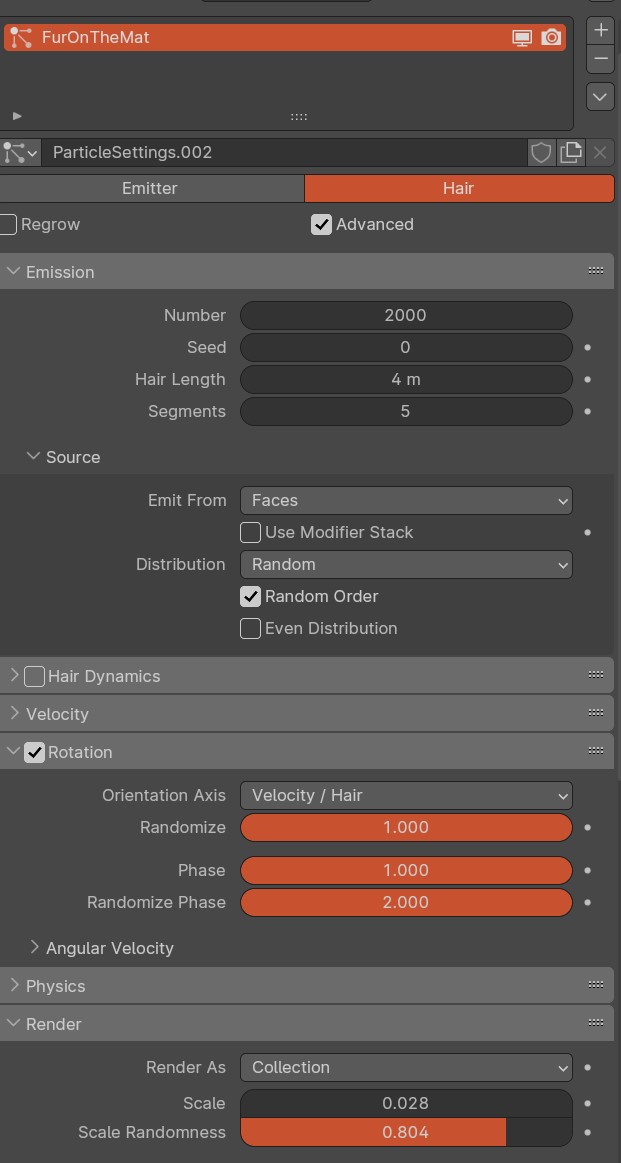
I wanted to add more realism to the mat, so I used the particle system and made some fur using curves. It turned out pretty good.

I also used some atlas from Megascans for the soil, coffee powder, and coffee beans.
Texturing & Shading
I textured the window frame and coffee grinder in Substance 3D Painter.
Unfortunately, they didn’t play some important roles in the last frame. I think I should arrange things better next time.

For the other props, I just went to ambient CG and Poly Heaven. It was the first time that I made a realistic scene, so it was not until I worked halfway that I realized that I needed a separate file and lighting setup for lookdev work. That’s something I learnt throughout this project.
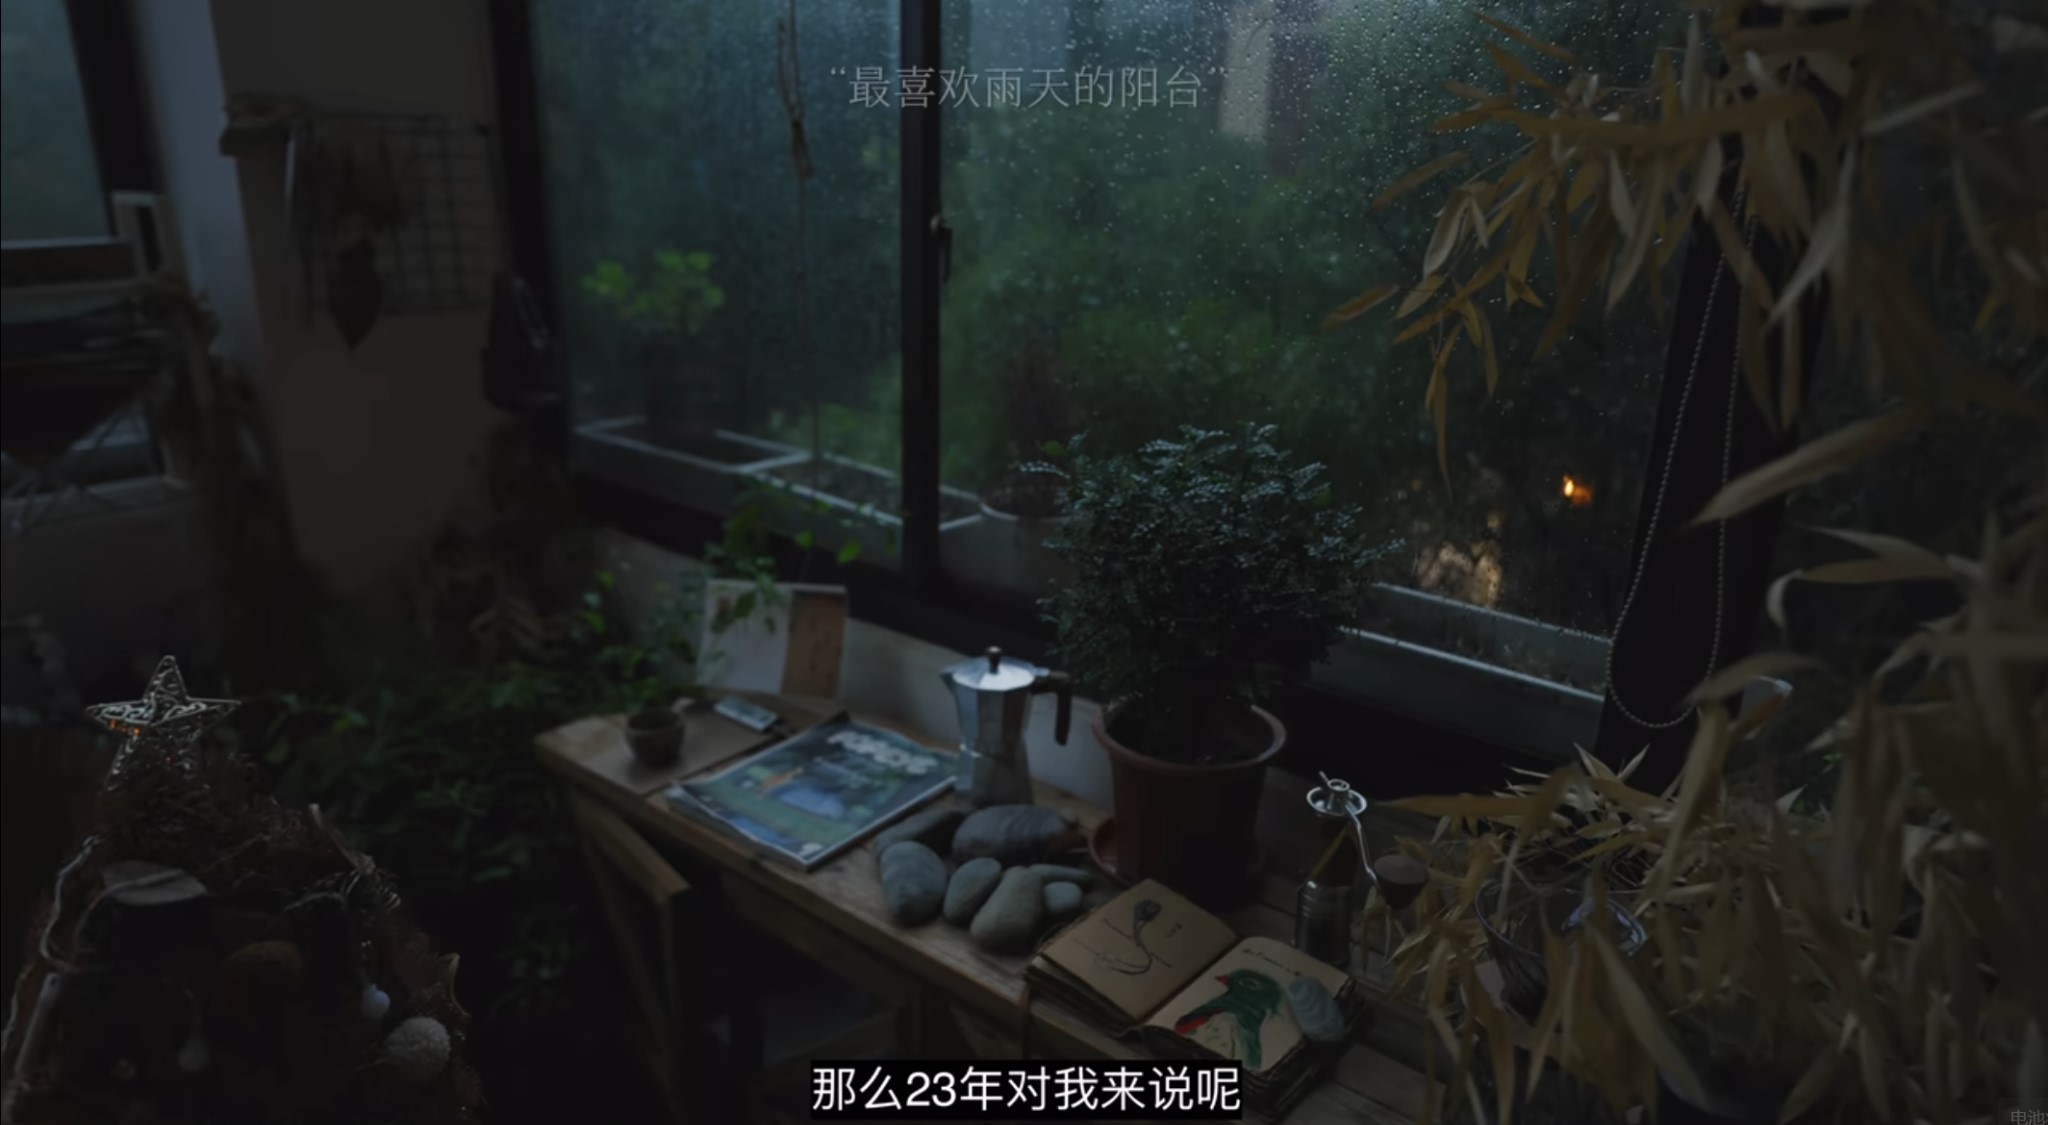
Also, many thanks to YouTuber Blender Viking who kindly shares his rainy window shader node group and a brief yet helpful tutorial on YouTube for free. Here is the tutorial:
Lighting
Lighting is the most tricky part in this project. At first, I found that when I lit the interior scene bright enough, the outside scene would become too bright. I thought it was the render setting or image format problem. Later, I realized that even on a rainy day, the sun IS still really bright and when you shoot against it in real life, the interior scene will indeed become underexposed. In the video clip, I bet the vlogger filmed with logs to gain maximum dynamic range and post-produced it afterwards.
So, I can either change the camera angle to not shoot against the window, or post-produce it afterwards. I did both and it turned out that the first option is better. Therefore, I only uploaded the not-against-window one.
Rendering & Post-Production
I basically covered this part in the lighting section. For color grading, I used Photoshop to bring out the blue tone even more and highlight the center of the image.
RENDER: A Little Corner
Thank you for reading! Feel free to check out and connect with me on my social media.
About the Artist
Zichen Tang is a self-taught 3D artist from China. He is currently trying to improve his skill set every day and is open to freelance jobs.