
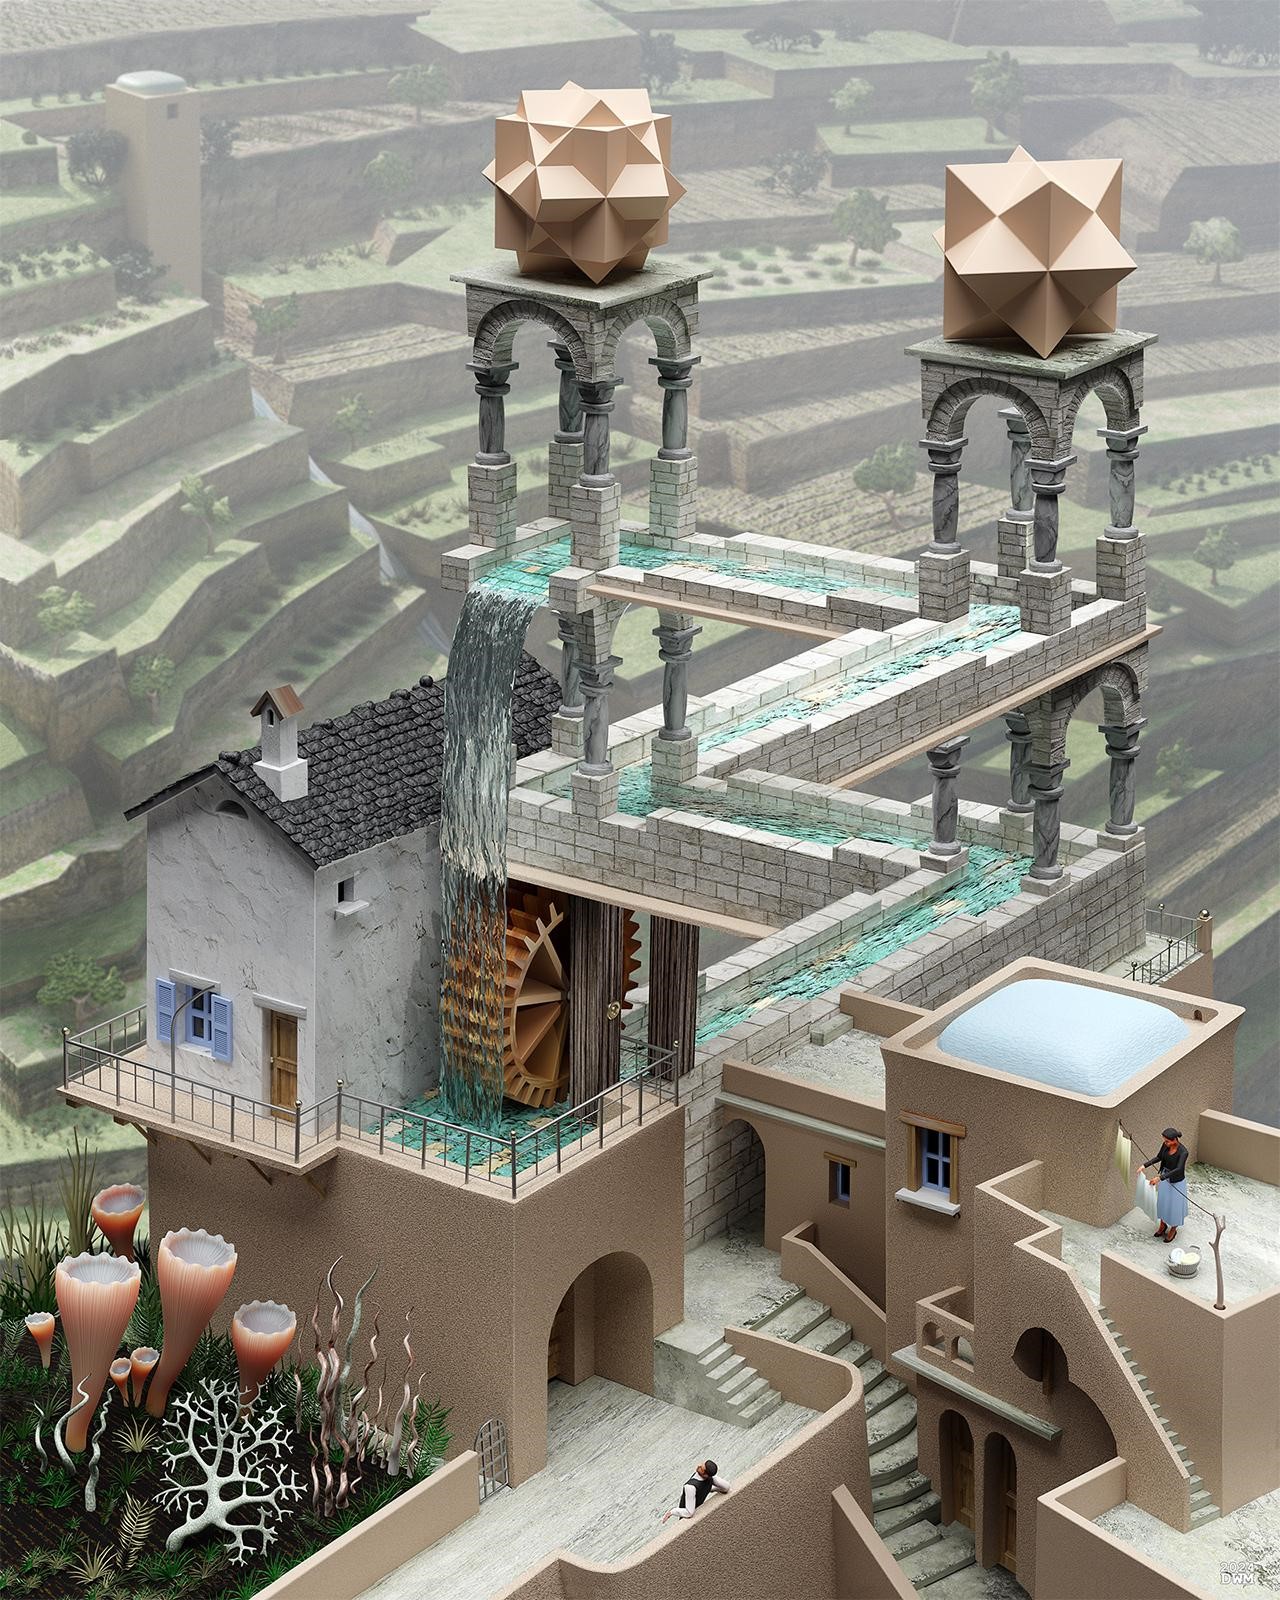
Behind the Scenes: Escher’s Waterfall
INTRODUCTION
Hi, my name is Dave Mennenoh. I live in SE Wisconsin with my beautiful wife Jacqueline and two boys, Kaden and Kian. I started doing 3D in its very infancy, with Sculpt 3D on the Amiga back in the late 80’s. From there, I moved to 3D Studio which eventually became 3DS Max. I used Max up until 2020 when I got laid off from events marketing due to covid. I turned to Blender only because it was free and for a long time, I missed Max. But, four years in, I wouldn’t go back. I’m a fully committed Blender guy now, and lucky me, I get to use it daily at work.
INSPIRATION
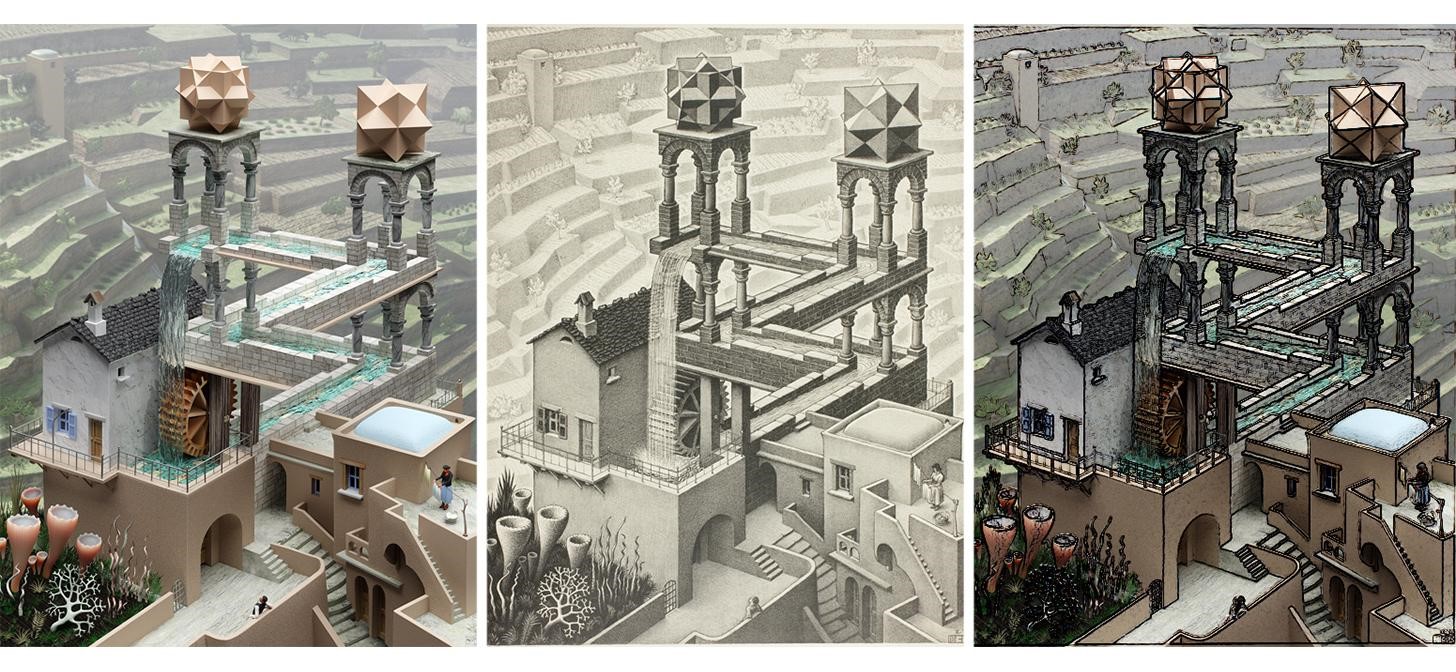
I’ve always been a fan of M.C. Escher, and so I decided to tackle some of his works in 3D. This is my third so far. I started with Relativity, then did Hand with Reflecting Sphere. I chose to do these because of a few reasons—for one, they are all doable in Blender and I thought they would look cool in color, and two, I believed it would be a challenge. I was not wrong. This one, however, was by far the most challenging of the three. More on that in a bit.
If you’d like to see the original, you can view it at the Art Institute of Chicago here:
PROCESS
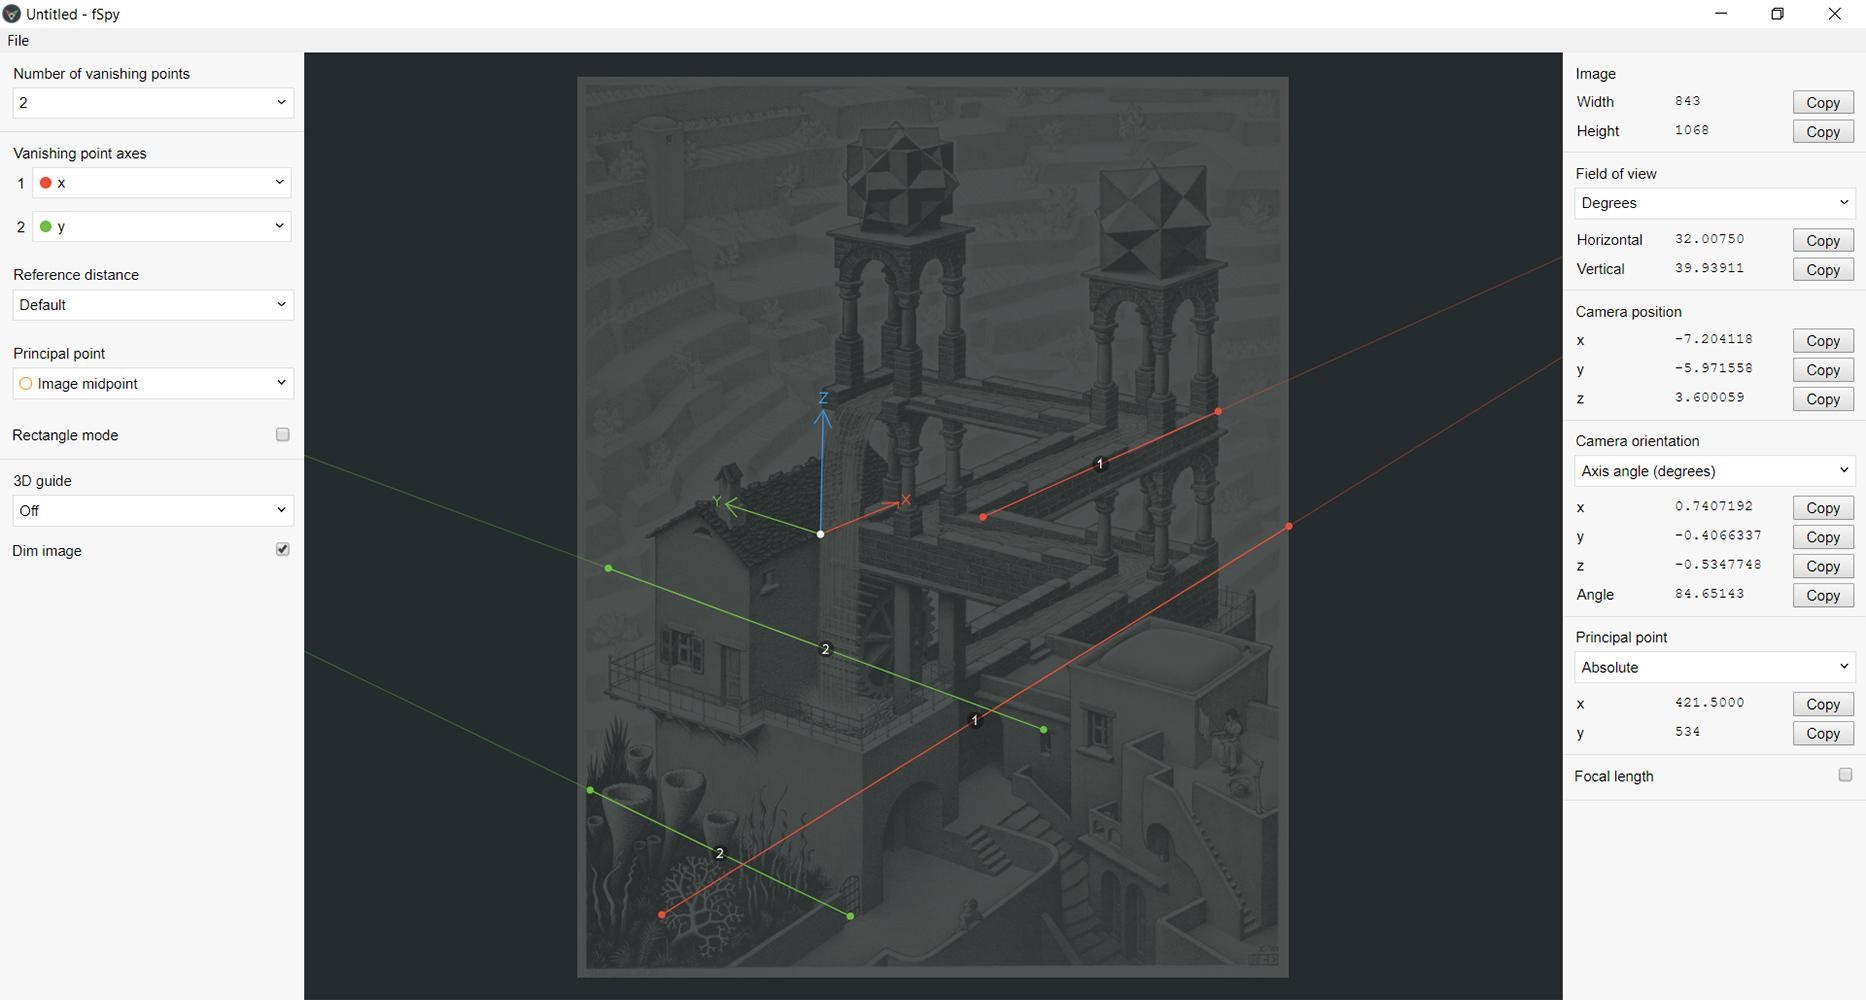
fSpy
For this, I begin with fSpy, because I’m looking to match the 3D environment to the original 2D one. You can see it in the header image of this article. In the third image, the one on the right, the lines of the original have been overlaid on the Blender version. fSpy is a free camera matching application that even has a Blender addon, and works on Windows, Max, and Linux.
Blockout and Modeling
After I’ve got a good perspective match, I can import the fSpy into Blender to begin the basic blockout process.
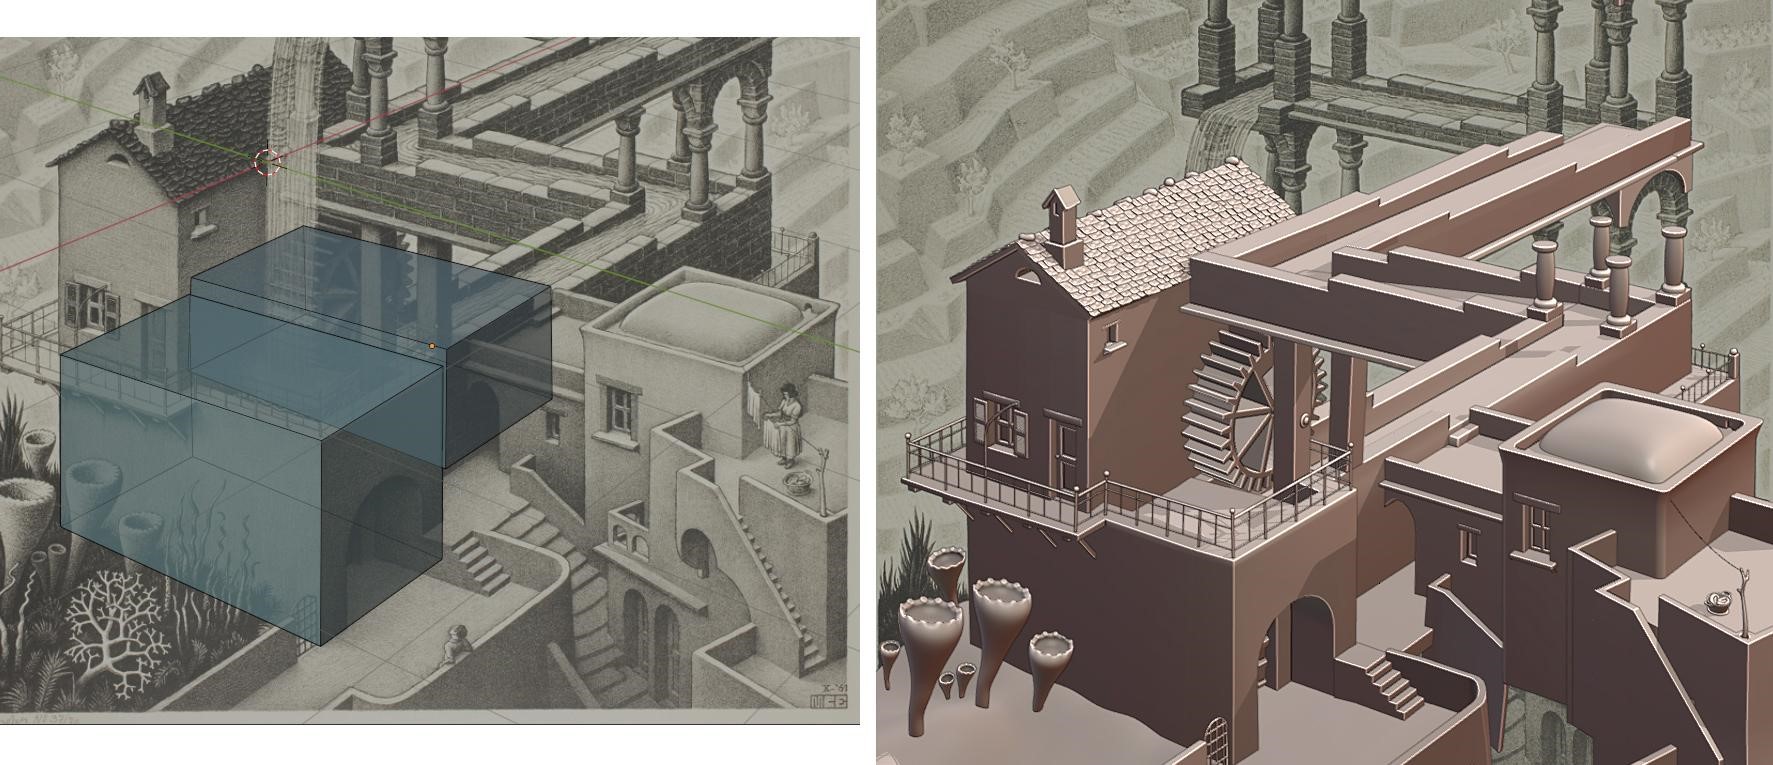
I start adding detail once an object is in place. I tend to add detail as I go instead of blocking everything and then going back to it.
It’s always interesting working on top of a 2D image like this. It can sometimes look like you’ve matched a wall, or other object, properly when it’s actually quite a way off. As a simple example, in the preceding image, the simple blocks on the left side look like they match the image pretty well. In reality however, the second block was moved up to match the wall edge instead of being moved back. This is a simple example but, as I’m mostly working in the camera view, it’s just something that I need to be aware of.
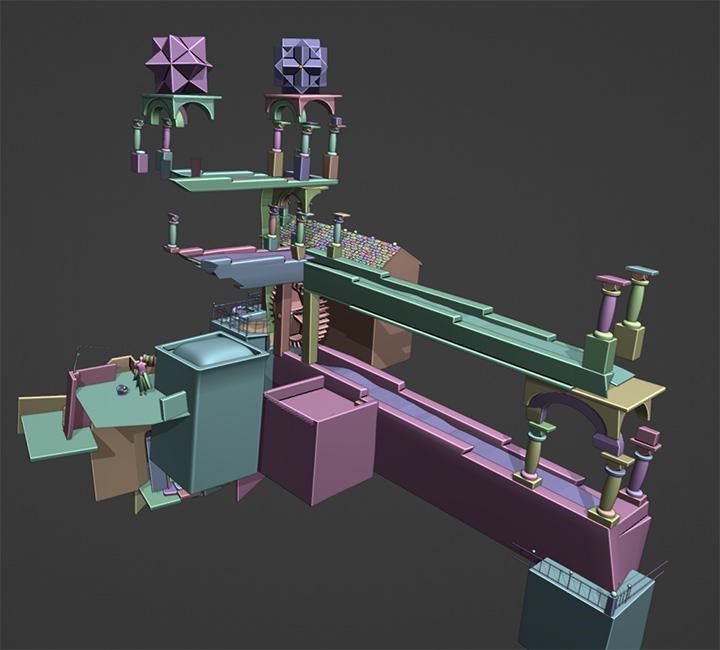
Impossible Geometry?
Relatively, Escher’s piece with all the stairs looks like it has impossible geometry. It doesn’t though—it’s a straightforward, fully euclidean model. Waterfall, on the other hand, has two connected Penrose triangles, aka Impossible triangles.
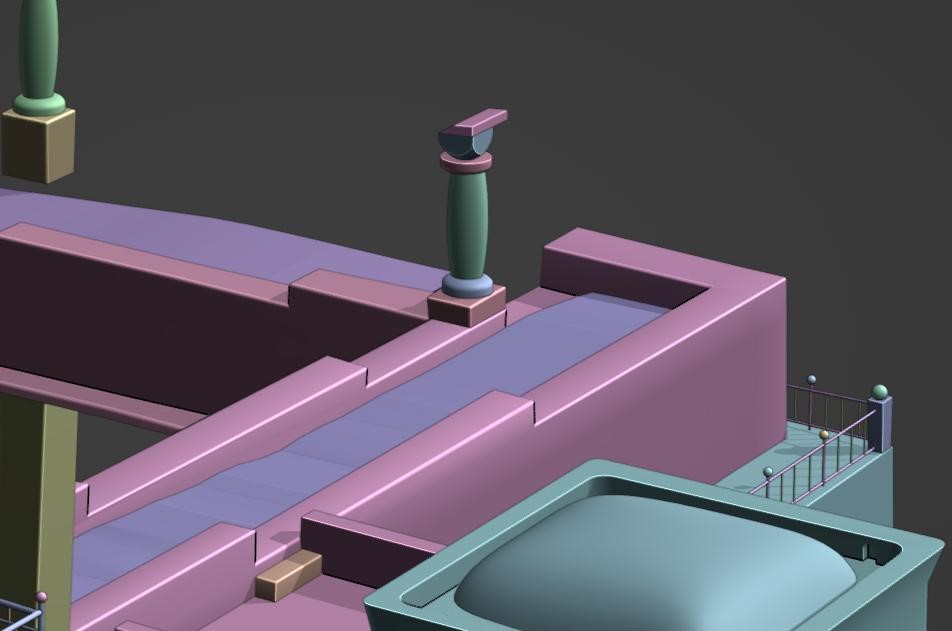
You can’t just model those in Blender—you have to fake it. You can see the disparity of the actual geometry here.
Here, you can see how the wall has to be cut away to match the edge of the other wall. This is because the upper wall is much closer to the camera, but still needs to be ‘behind’ the wall that is farther away.
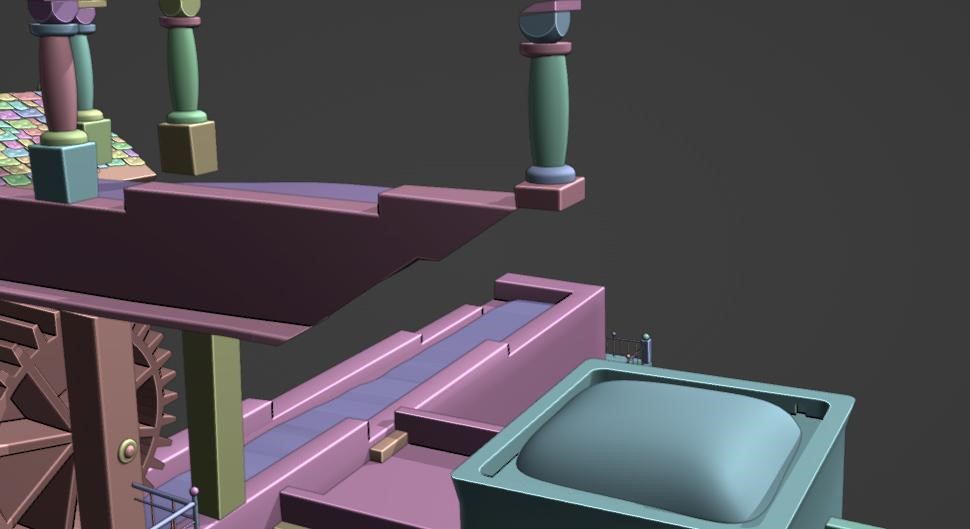
And then from the Camera view, everything looks like it’s supposed to.
The Background
I struggled for a bit with the background since there was just so much in it. In the end, I decided it had to be done right and modeled it all in Blender, camera matching the same as with the foreground. I did work the background in a separate blend file and composited the finals once the renders were finished. It was just too much geometry to try and combine the two into one file.
Here, you can see the wire overlaid onto the original, and a partial render.

I modeled the trees myself as they are pretty simple. But I used the GeoScatter Plant Library free addon for all of the other vegetation, as there’s just so much of it. The library has quite detailed models though and it was probably a little overkill, as the background grew to nearly seven million triangles. Not terrible but on my meager laptop, it was quite a slow render.
Materials
All of the materials are fairly simple, with no special shaders or anything. The only struggle I had here was deciding what colors everything should be. I decided on a fairly muted color scheme, trying to keep the focus on the water and main buildings. I also added a volume fog to the background to further offset the foreground and help it to feel more distant.
And that was all! Below are the final renders, hope you like them.
RENDER: Escher’s Waterfall

Thank you for reading my article, and I hope you enjoyed it! Feel free to ask questions on my social media. Have a great day!
About the Artist
Dave Mennenoh is a software engineer and aspiring 3D artist from Southeast Wisconsin, United States. He currently works by creating 3D training materials for the military, using both Blender and Unity.


Hi Dave – SUPER cool job!
On the process: i’m “simply” throwing the following, in the wind. I’m not presuming to improve or give any lessons :-)
For one, I had never heard of fSpy. But I had also *never* contemplated repeating so well well such a well knowing work. It seems to me that doing this sort of impossible objects is simplified with an isometric perspective, calling for an isometric camera (somehow, then the problem is to fake the rest of the landscape I suppose). Still, if you work on an original piece, it’s not too hard to do a Penrose triangle. I did a impossible object (one of these boxes cubes like you’d see in Esher’s Belvedere) to hold a pinewood trophy car… Long story short, I did this with two views, one with and without the forward edge. With Gimp I combined the two (that’s definitely NOT 3d, but that sure is easy make believe).
Anyway, congrats on the gorgeous render – good luck to you doing more
Cheers,
Arnaud