Behind the Scenes: The Kitchen

INTRODUCTION
Hey there, I’m Mobolaji Dele-Adelodun, a self-taught 3D artist from Nigeria.
My journey into the world of digital art began with a love for video games, especially those that allowed me to customize characters and vehicles. A particular animation by DreamWorks, ‘Flushed Away,’ further fueled my passion.
Now, I work as a freelance 3D artist, working with a variety of tools like Blender, ZBrush, Substance Painter, and Photoshop to bring my visions to life.
INSPIRATION
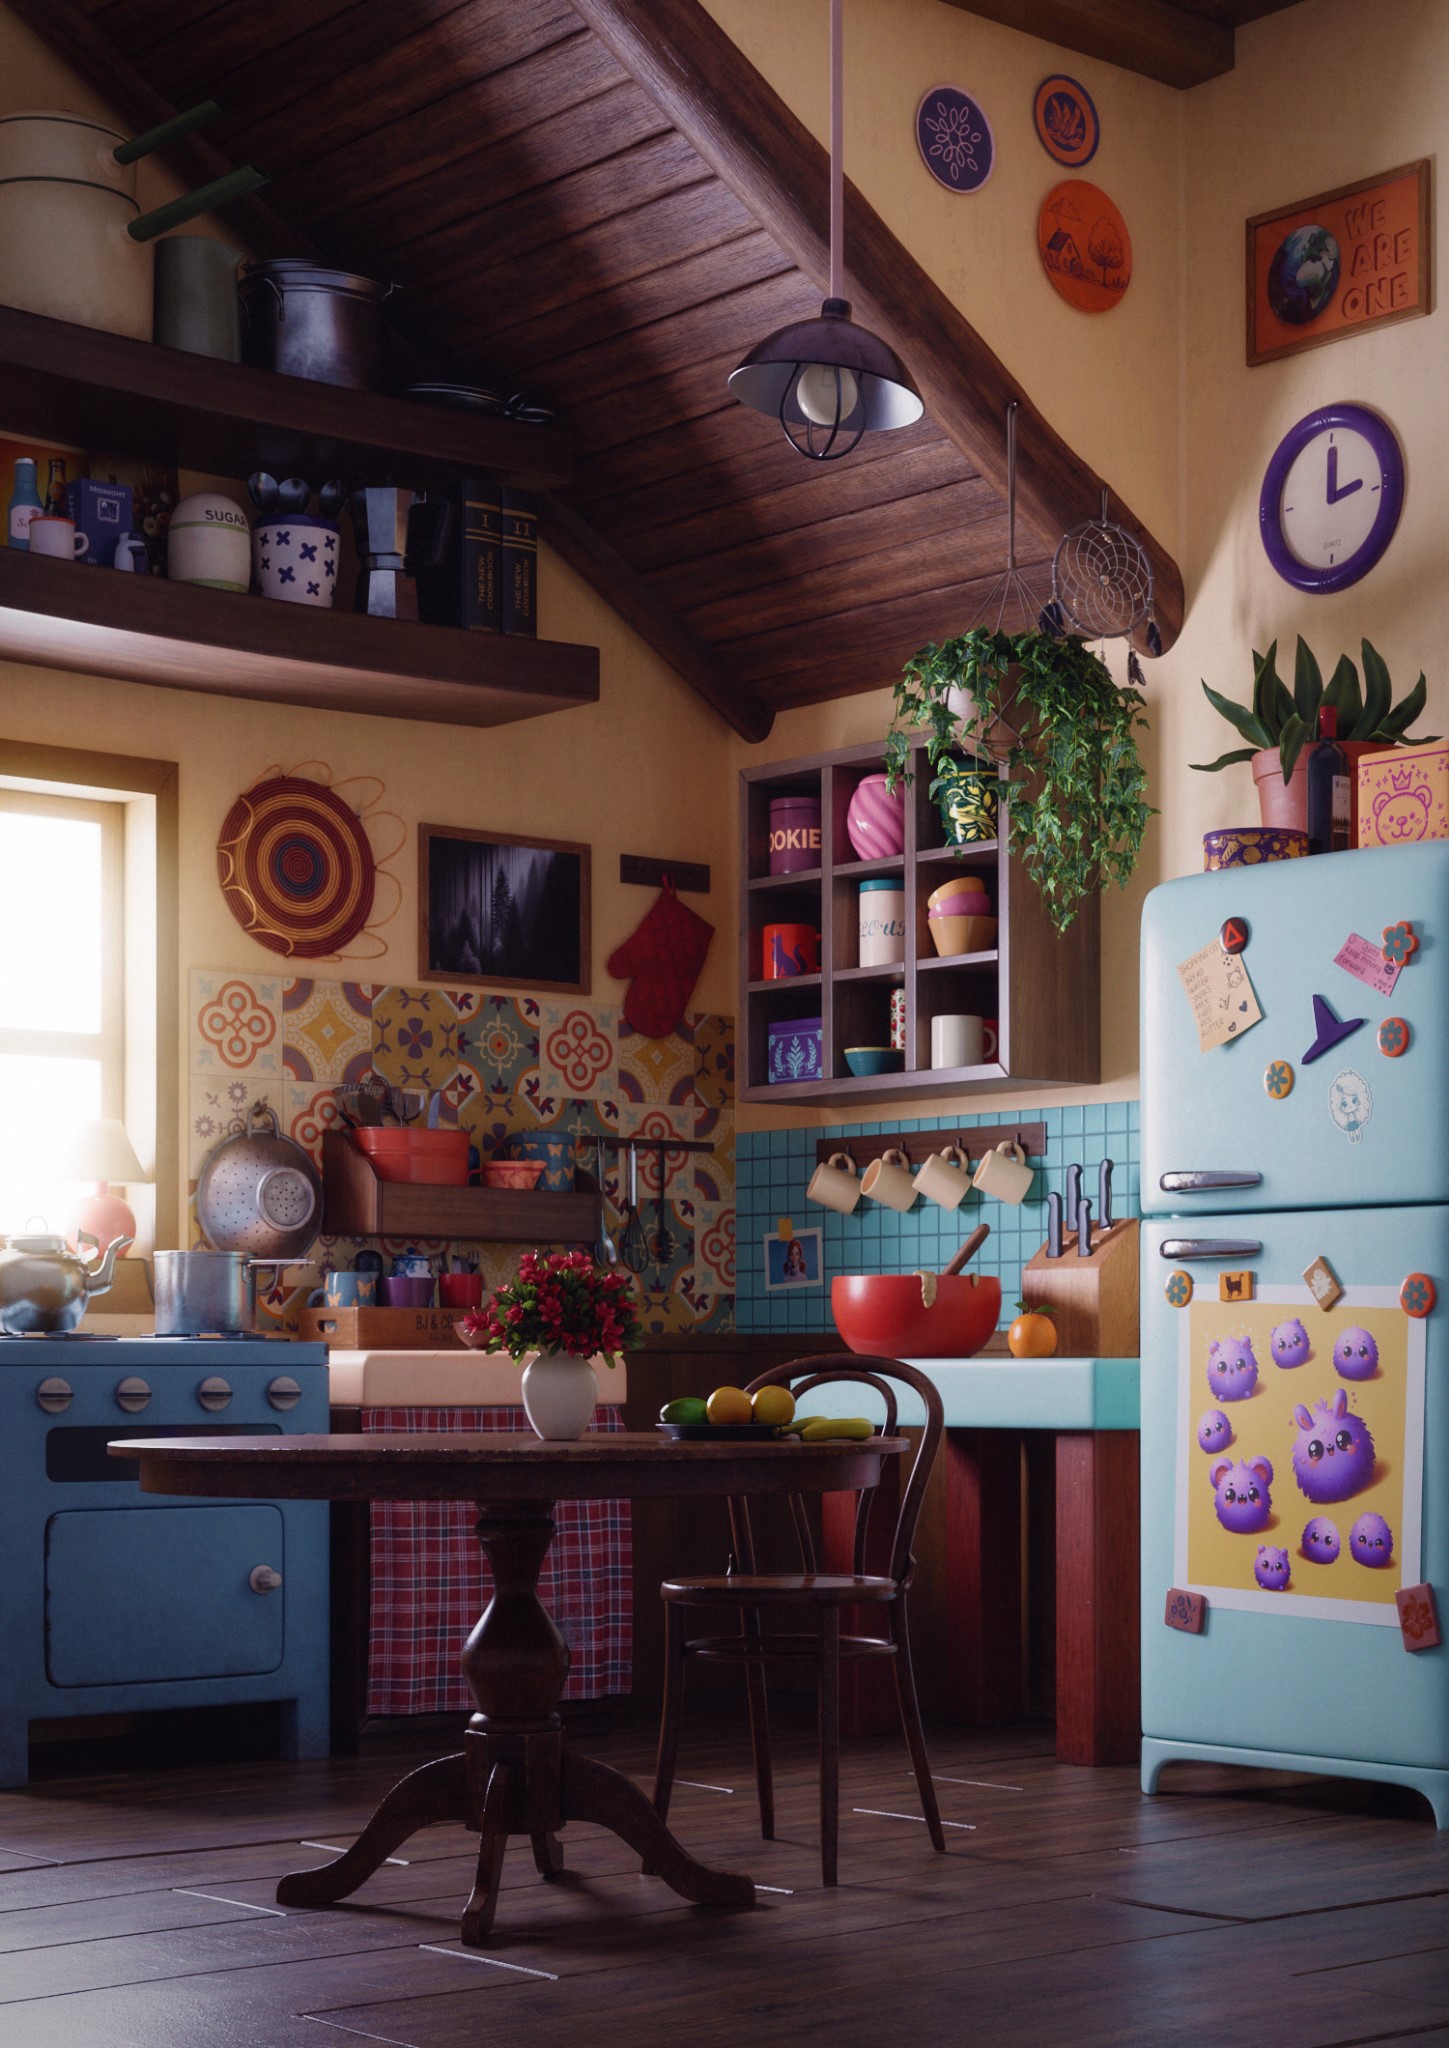
For this project, the idea was to create a colorful environment with a lot of props. When I found Nathasha Padrón’s concept art, it just clicked and it was exactly what I had in mind.

I’ve also been inspired by artists like Alex Trevino and Albert Valls.
PROCESS
Tools
- Blender
- Z-Brush
- Substance 3D Painter
- Adobe Photoshop
- Krita
- FSpy
- Pureref
Addons
- UV Square
- Textools
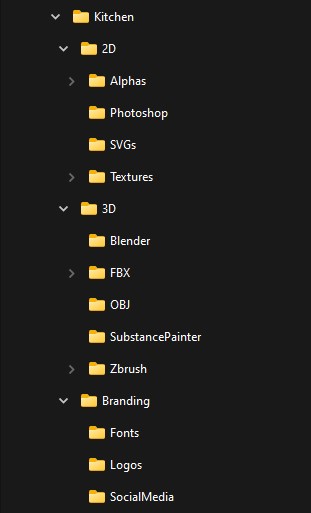
Folder Structure
Maintaining a well-organized folder structure is important for staying efficient and finding what you need quickly, which ultimately saves you time. This folder system will contain all the project files and it will make it easy to create a zip file when the project is done.
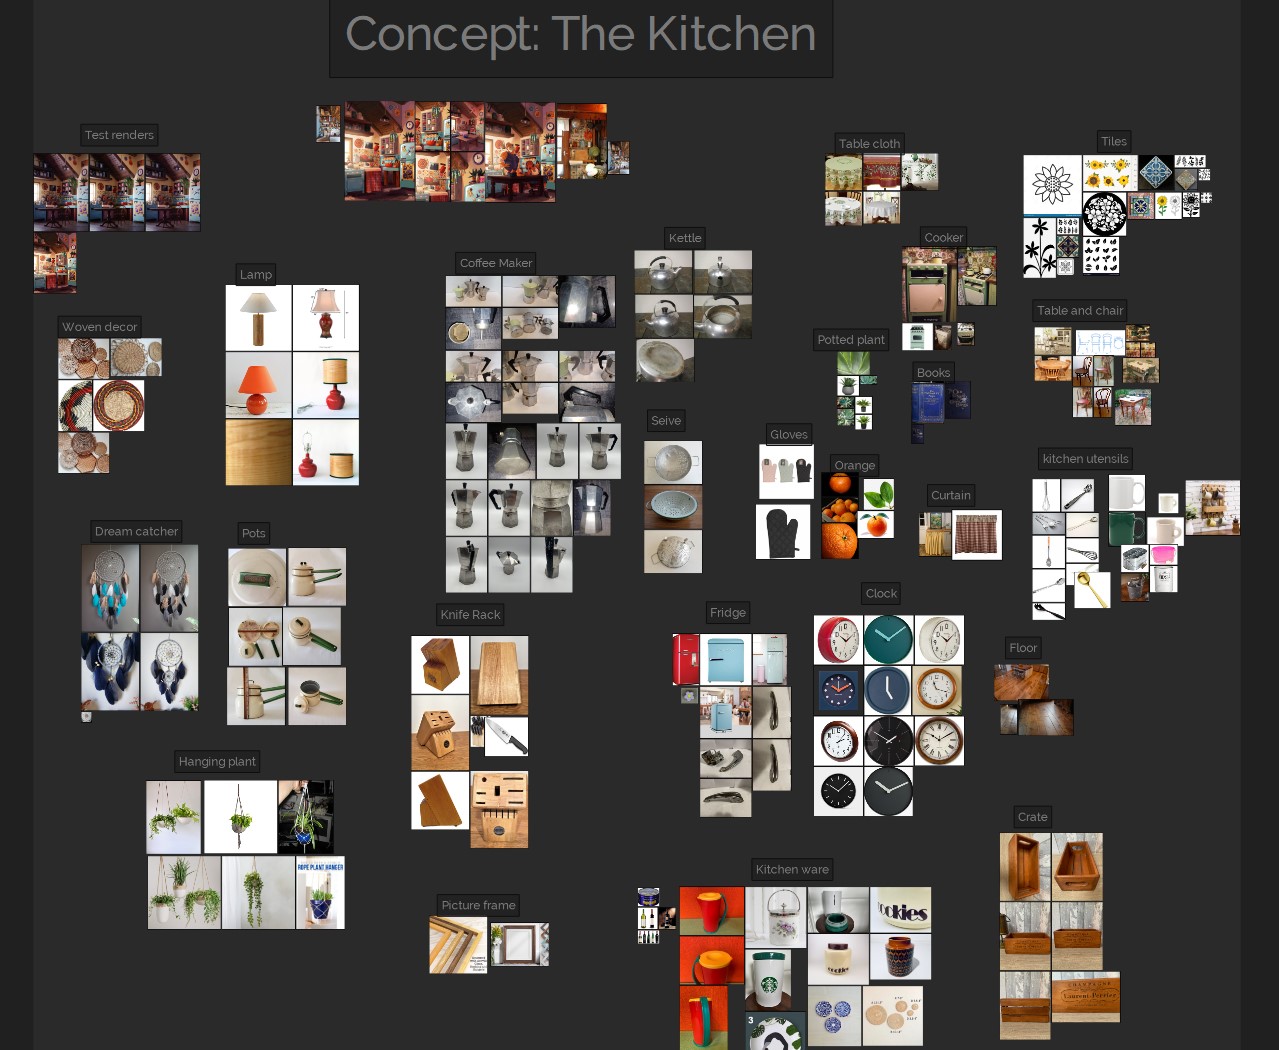
References
Before starting any project, collecting high-quality reference images is very important. It helps me to have a clear vision of what I want to achieve. Most of my reference images are obtained from Google Images, Pinterest, and shopping websites like Etsy because they usually have very high-quality images with dimensions. I use PureRef software to organize my reference images.
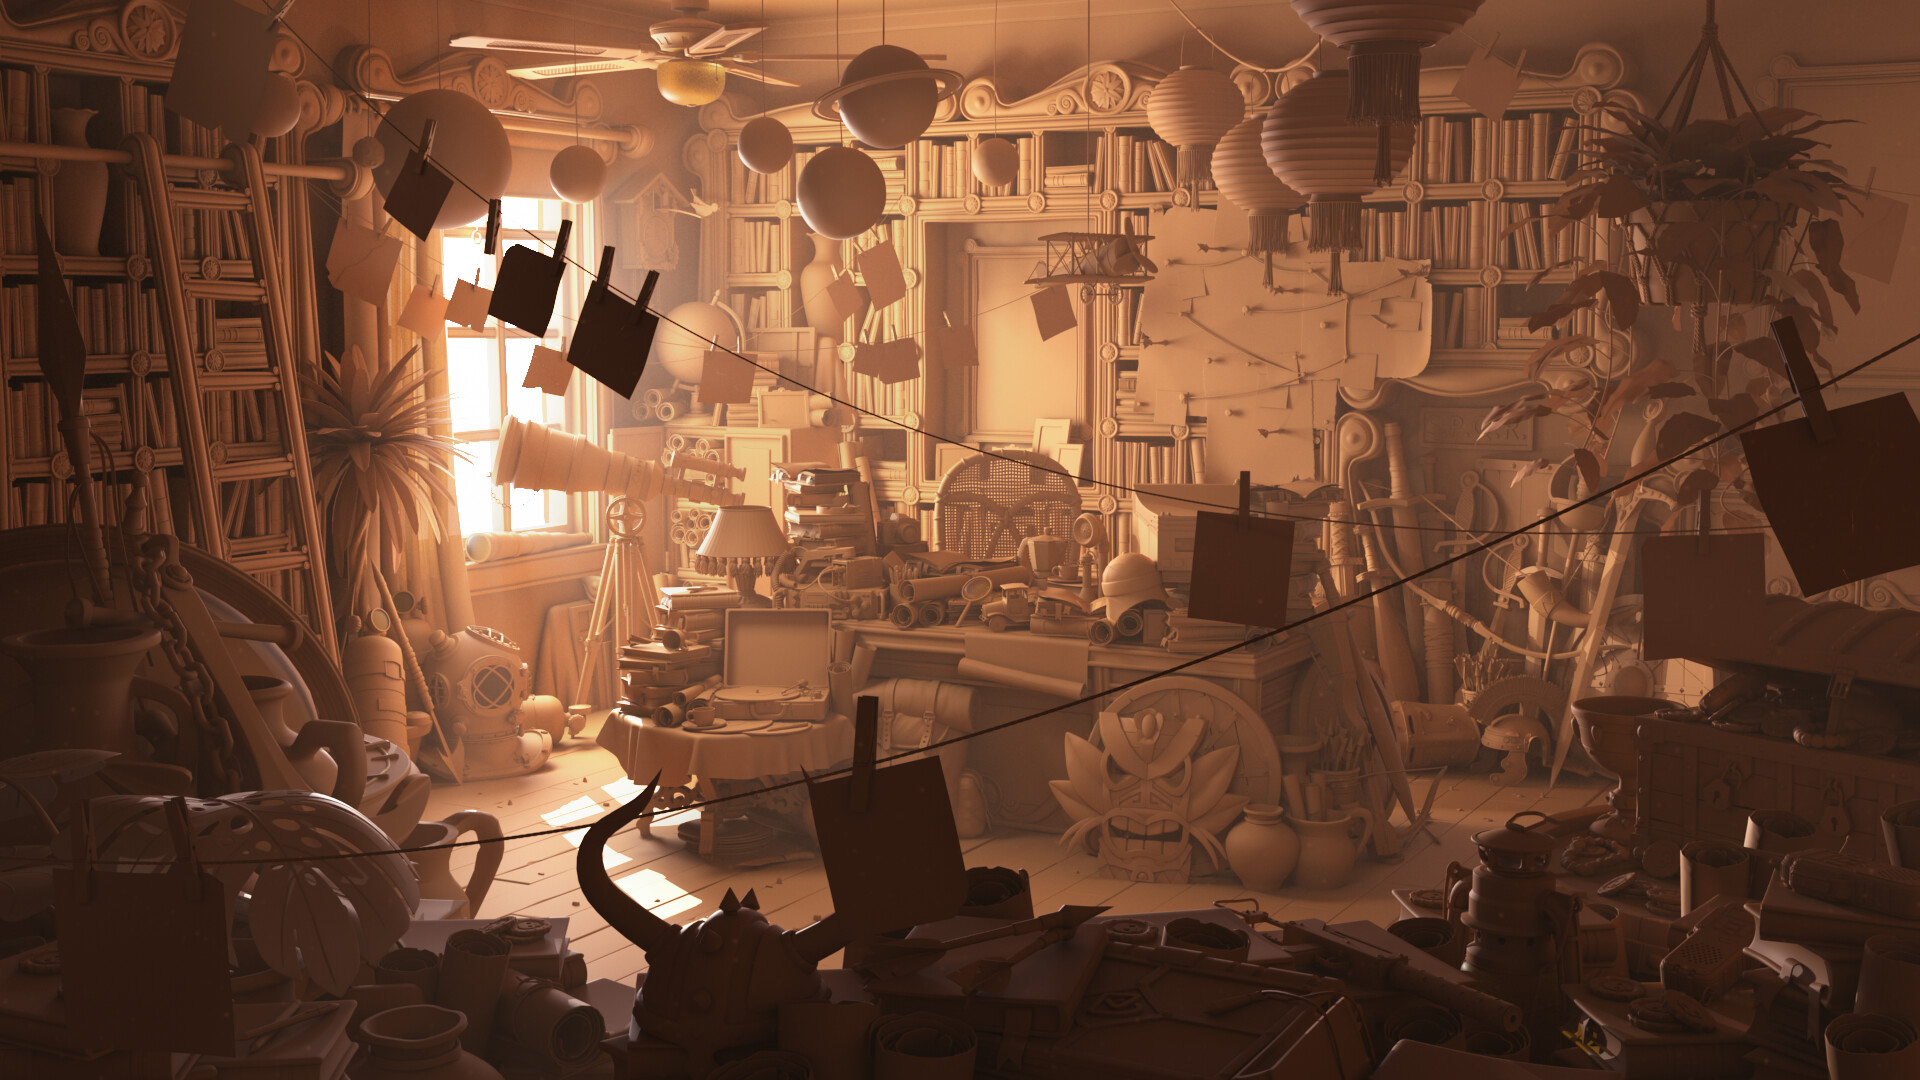
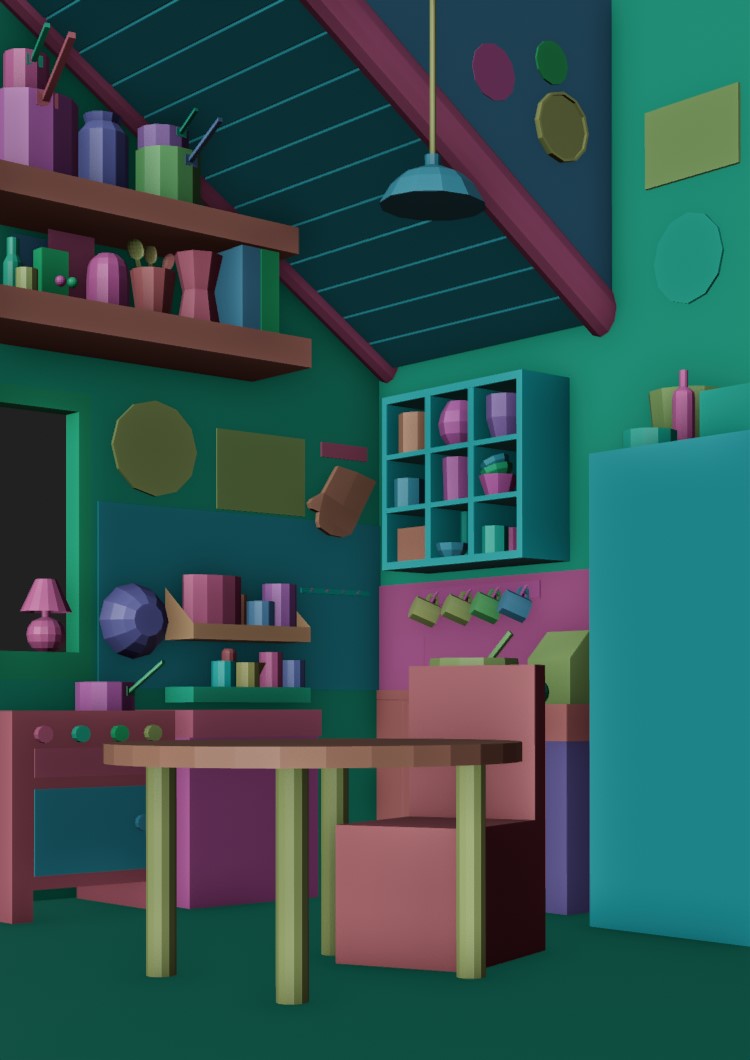
Block-out
I began by aligning the concept art with my Blender camera using Fspy software. From there, I started the block-out process by using primitive shapes. During this phase, I ensure that dimensions, proportions, and real-world scale are accurate. My workflow typically involves starting with architectural structures, progressing to larger objects such as fridges and tables, and then smaller items like books and kitchenware.
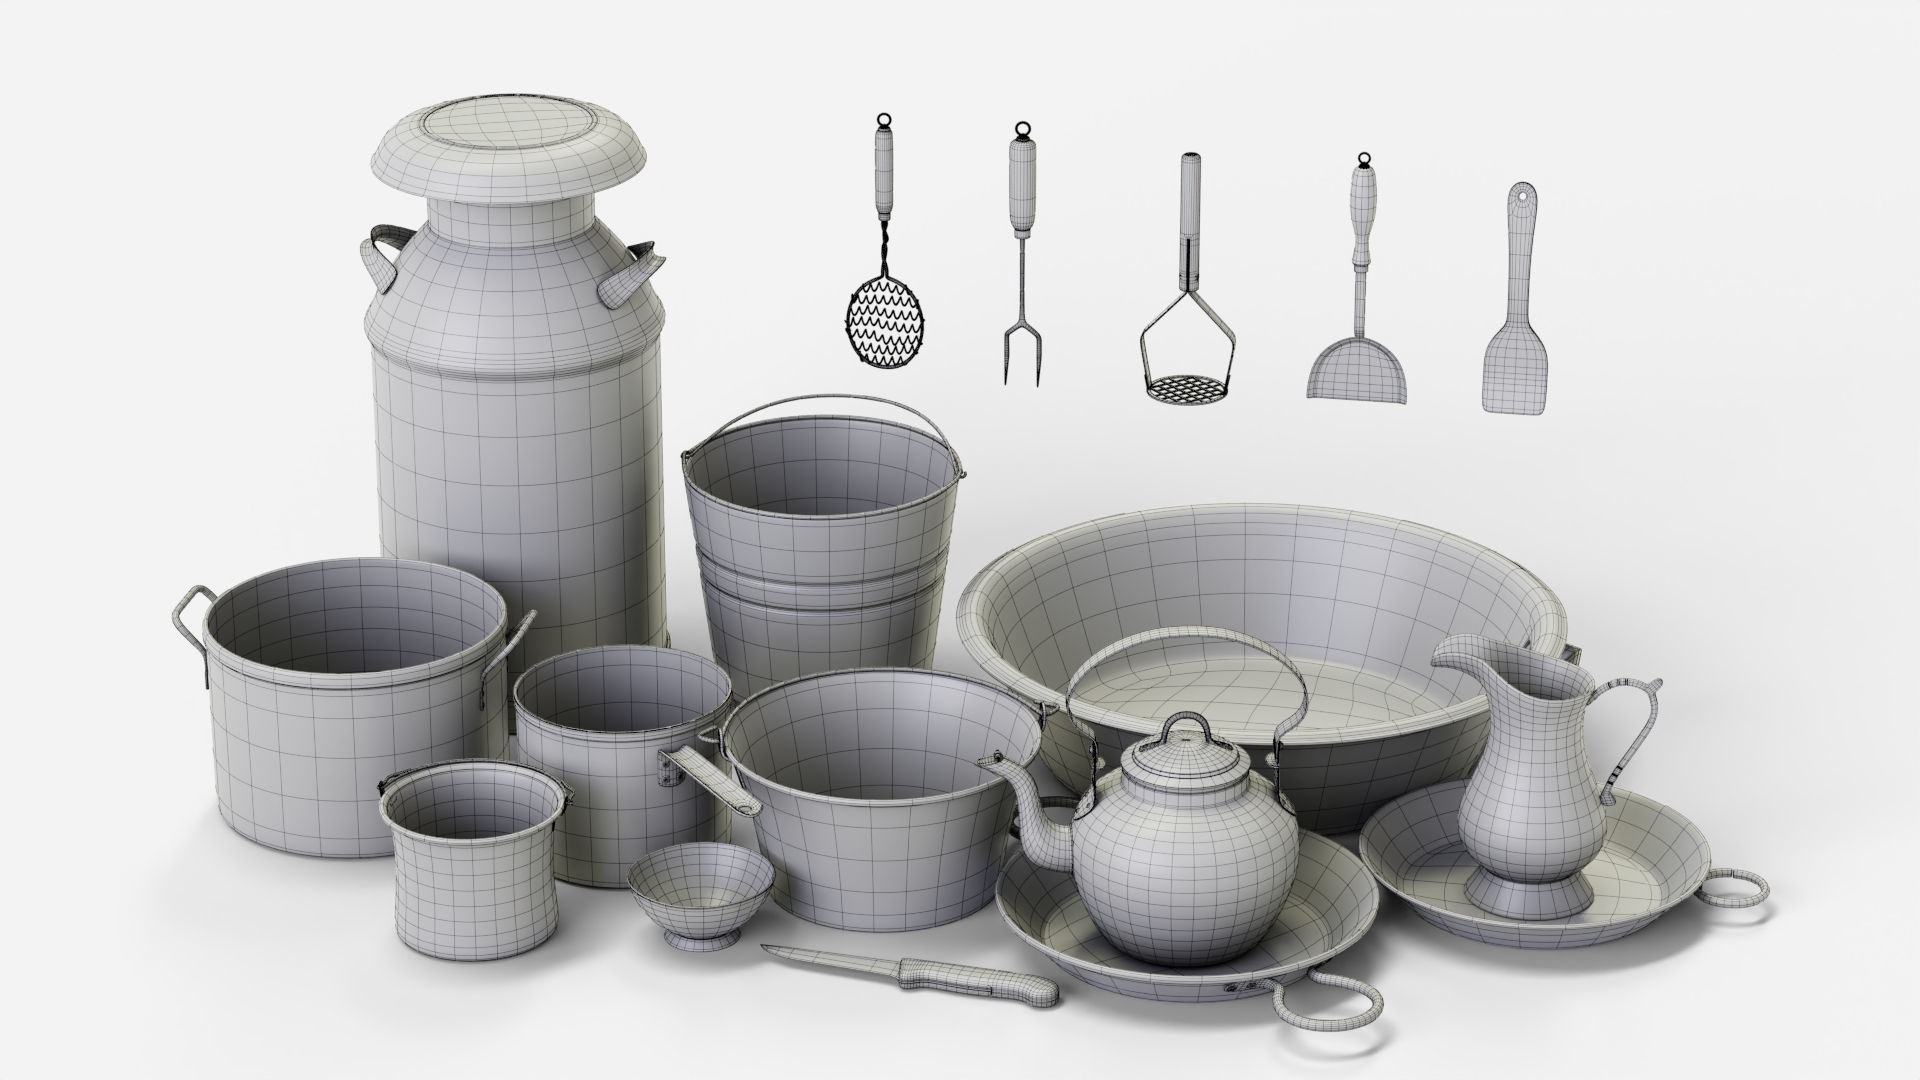
Modeling
I started by making the basic structures of the environment first. Then, moved on to creating the bigger and smaller objects. Most of the objects in the scene were easy to model, and I saved some time by using some 3D models from past projects. For things like the diagonal wood beams that needed more detail, I used ZBrush to sculpt them and add more detail.
Overall, I kept it simple by using basic techniques to make everything look good. The floorboards were separate objects so that they could be moved individually.
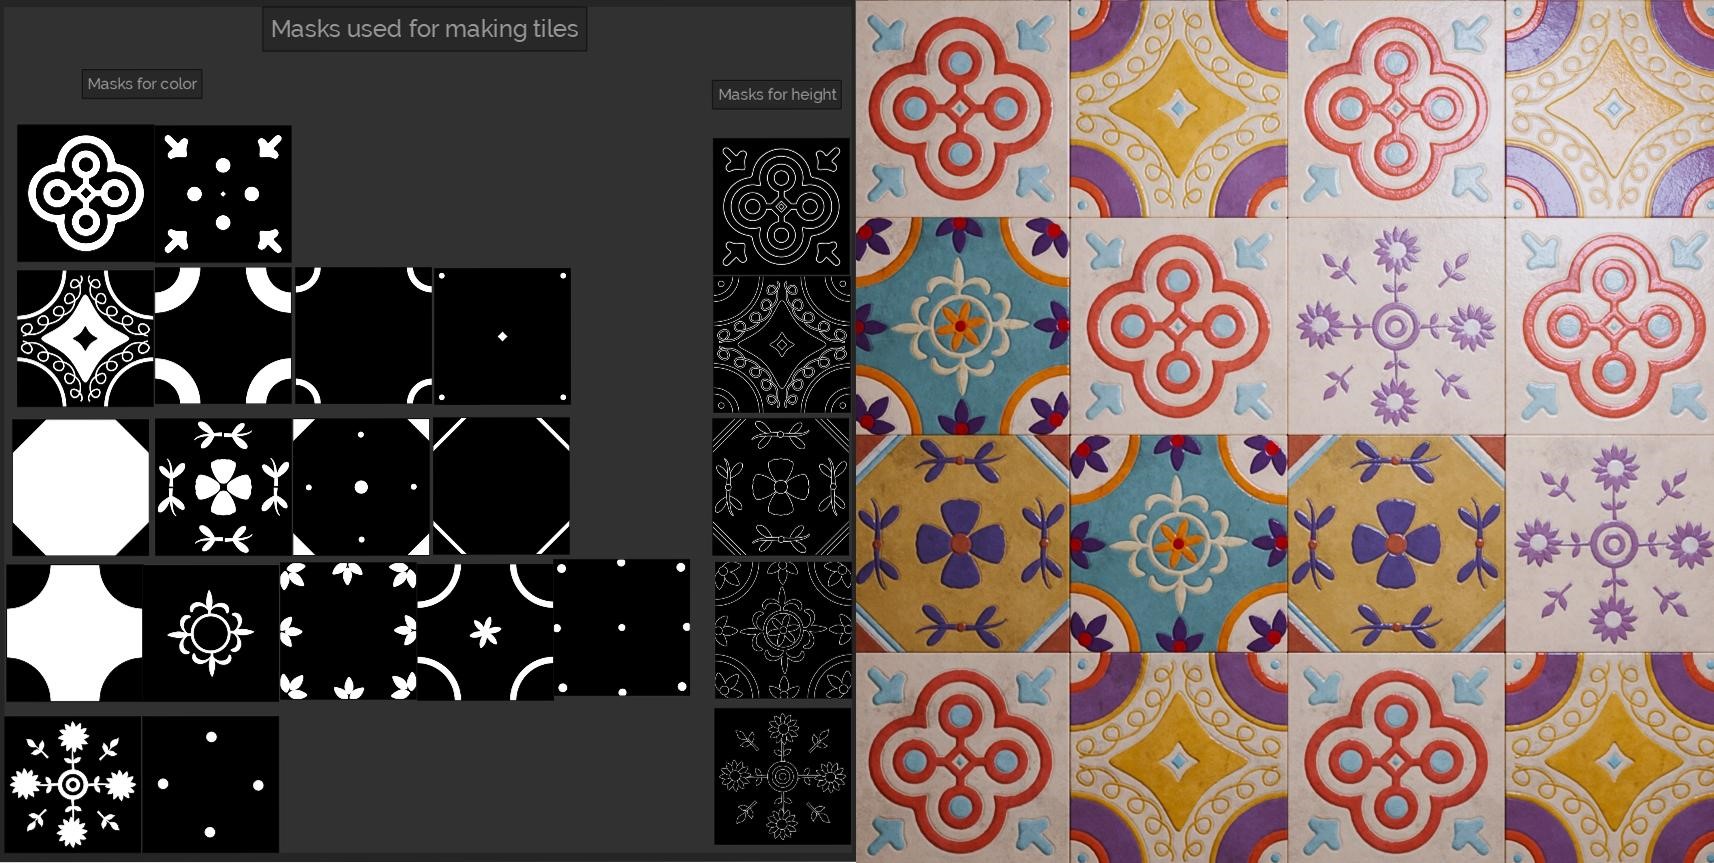
Tiles
I modeled the shapes for the tiles using Blender, and then I rendered them using an orthographic camera in the top view. I used a white emissive material against a black background to create masks, which will be useful during the texturing stage.
UV Mapping & Texturing
The UVs were simple and straightforward but the most important aspect was maintaining a uniform texel density/texture resolution on all objects in the scene. I used the free addon tex tools to help in achieving that.
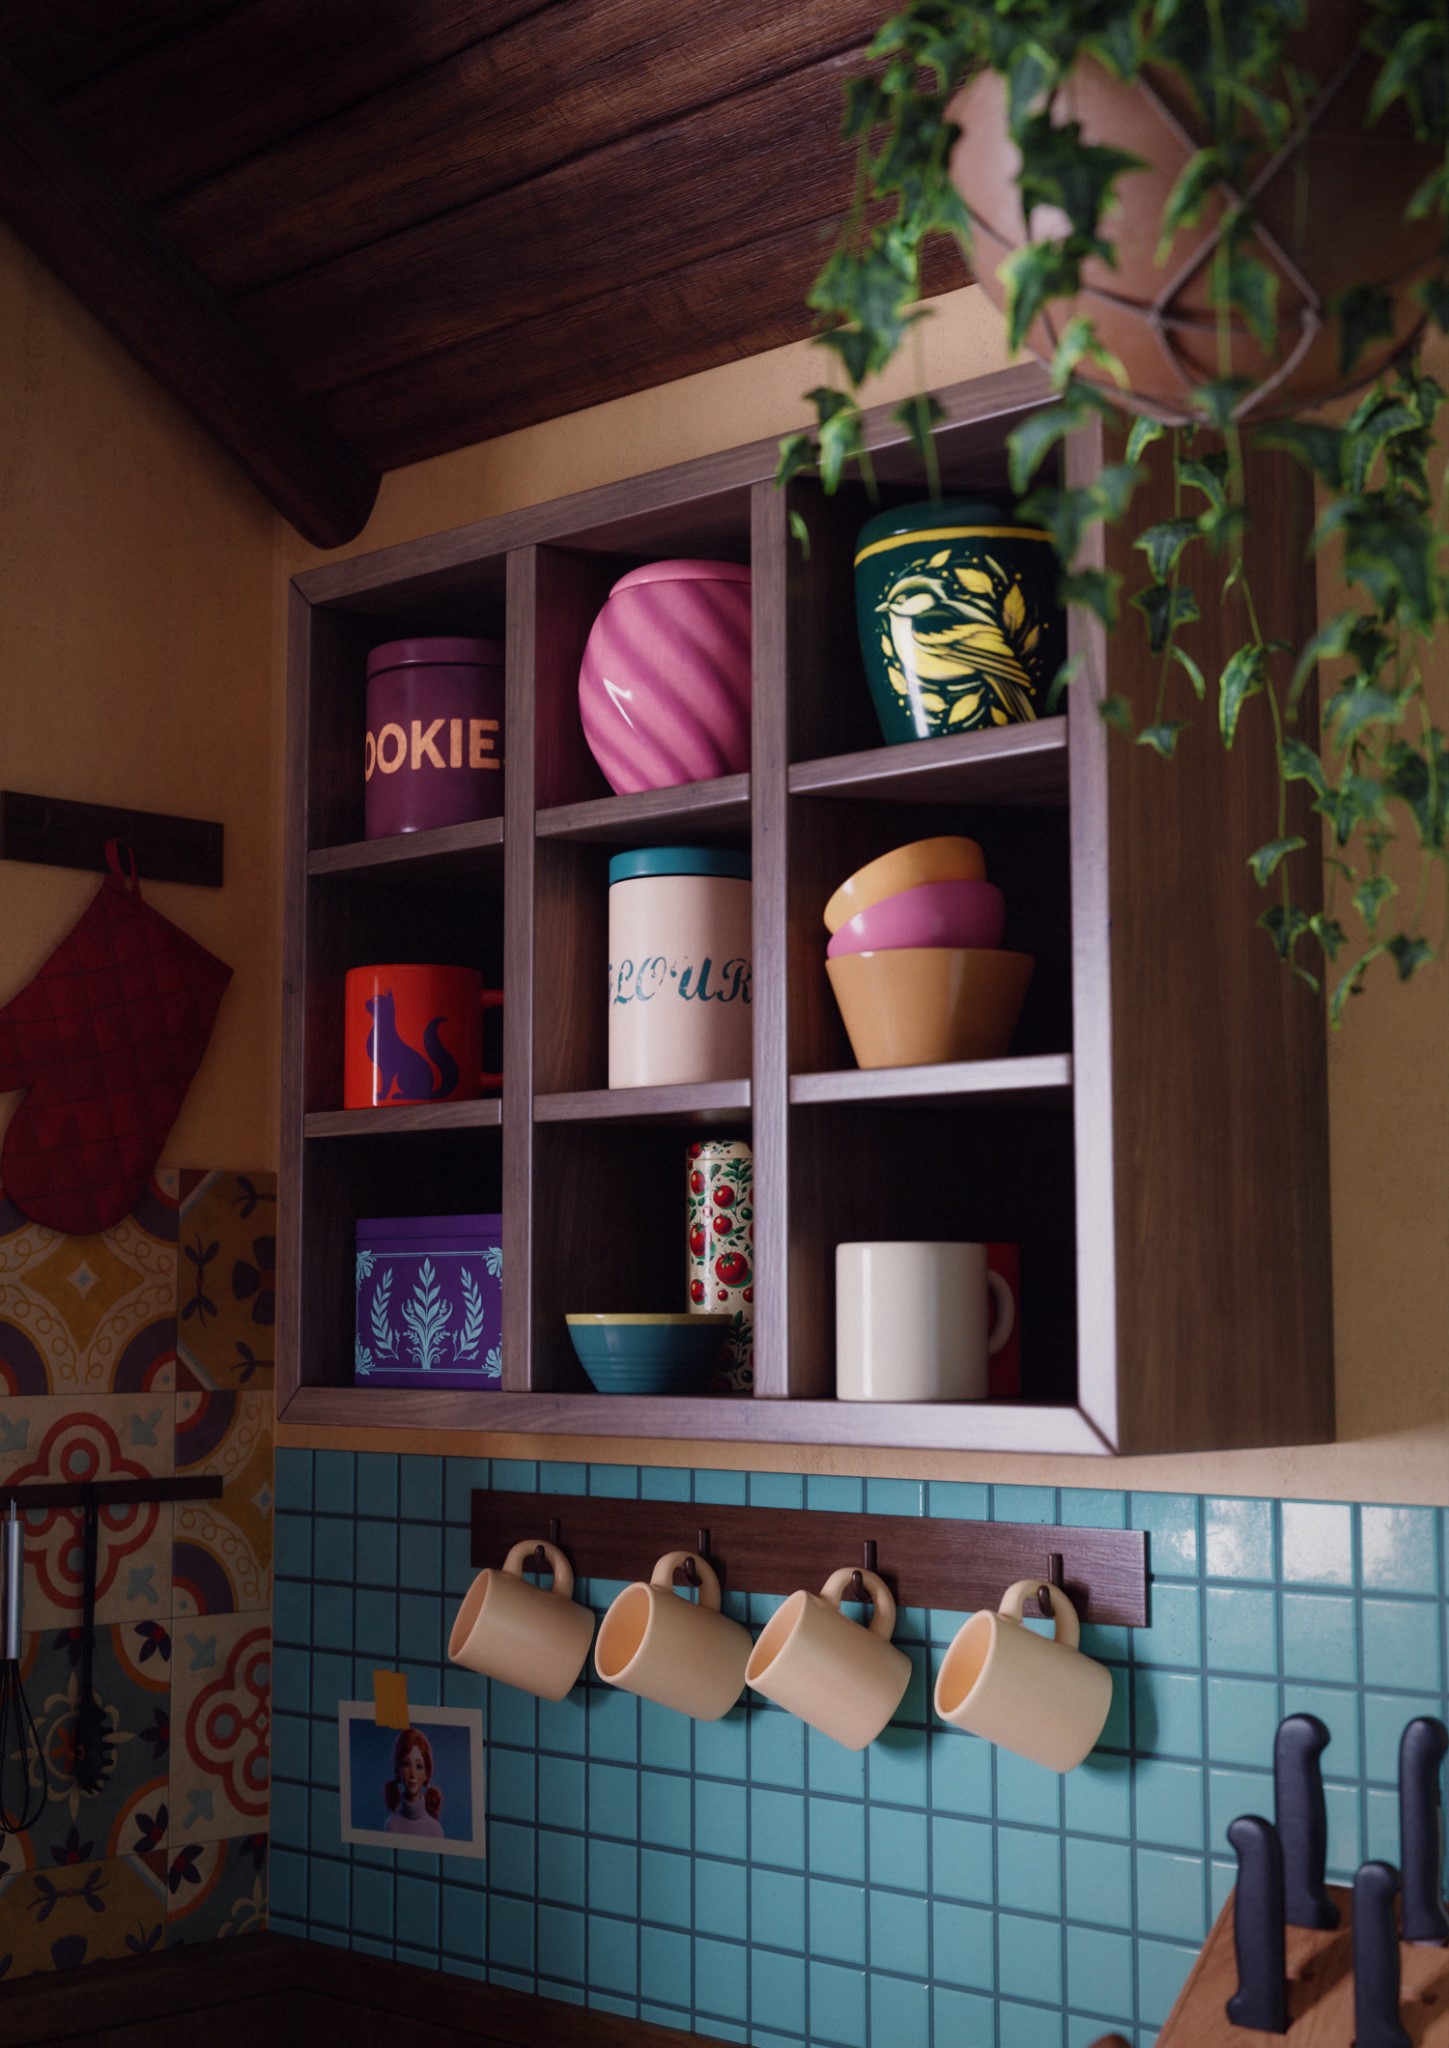
All texturing was done in Adobe Substance 3D Painter. The key thing I try to implement in my textures is variation: variation in color, roughness, and height map. I started by using Substance Painter preset materials before adding other layers to the material to make it more complex. Tiling textures were used for larger objects like the walls and the floor, and baked textures for the smaller objects.
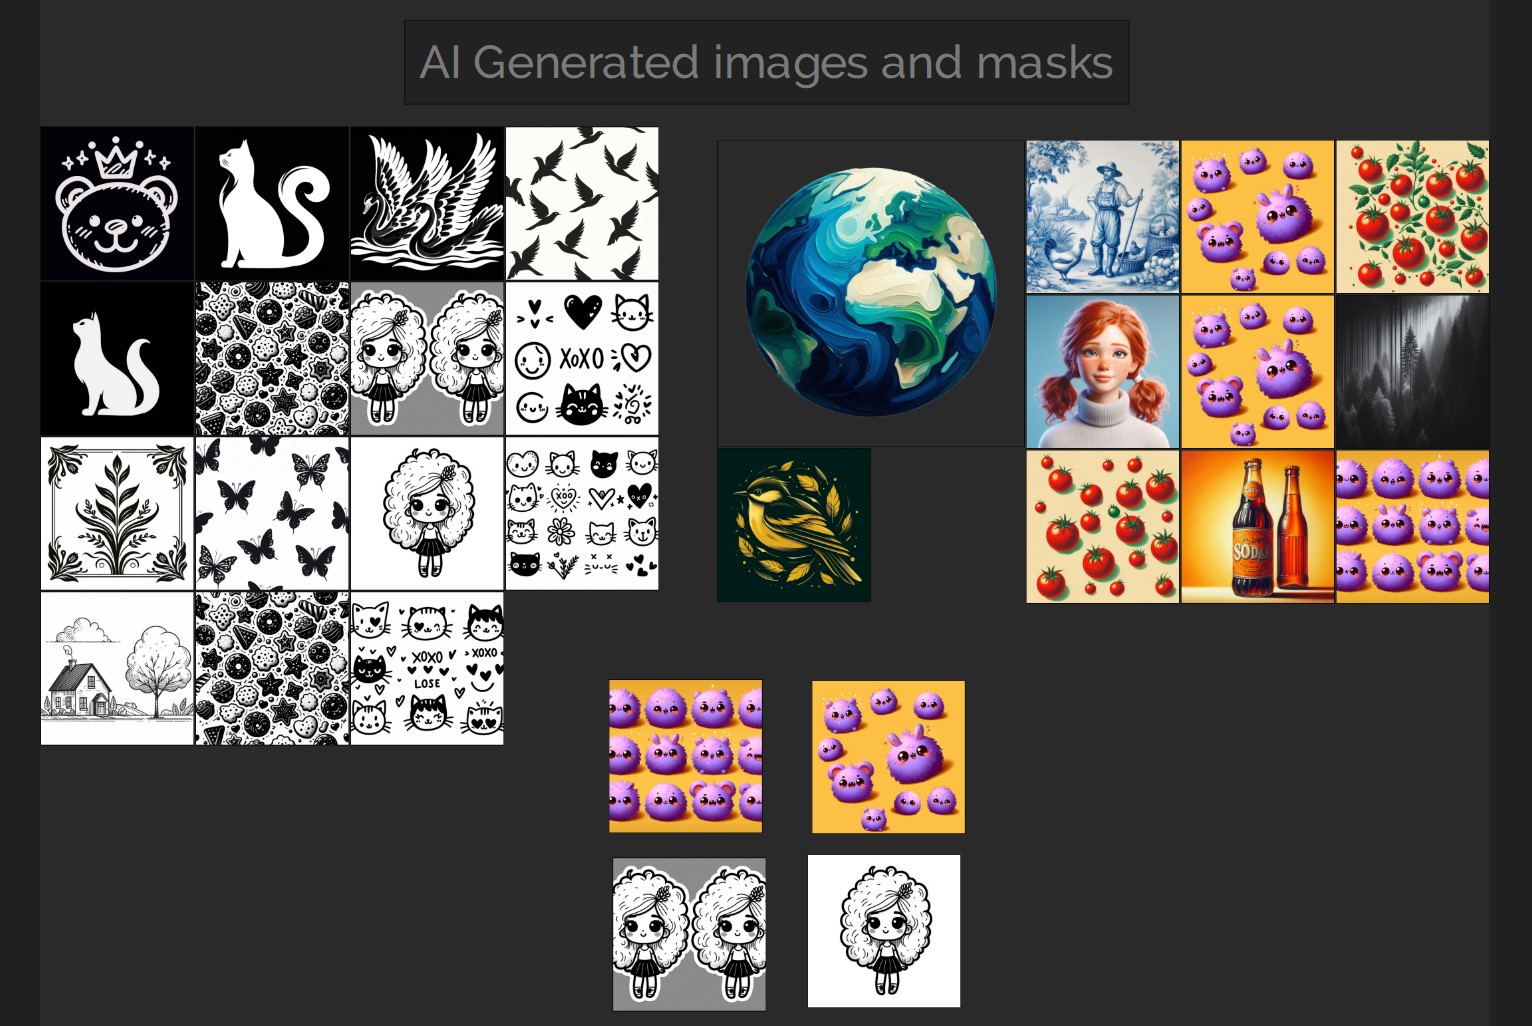
Artificial Intelligence (AI)
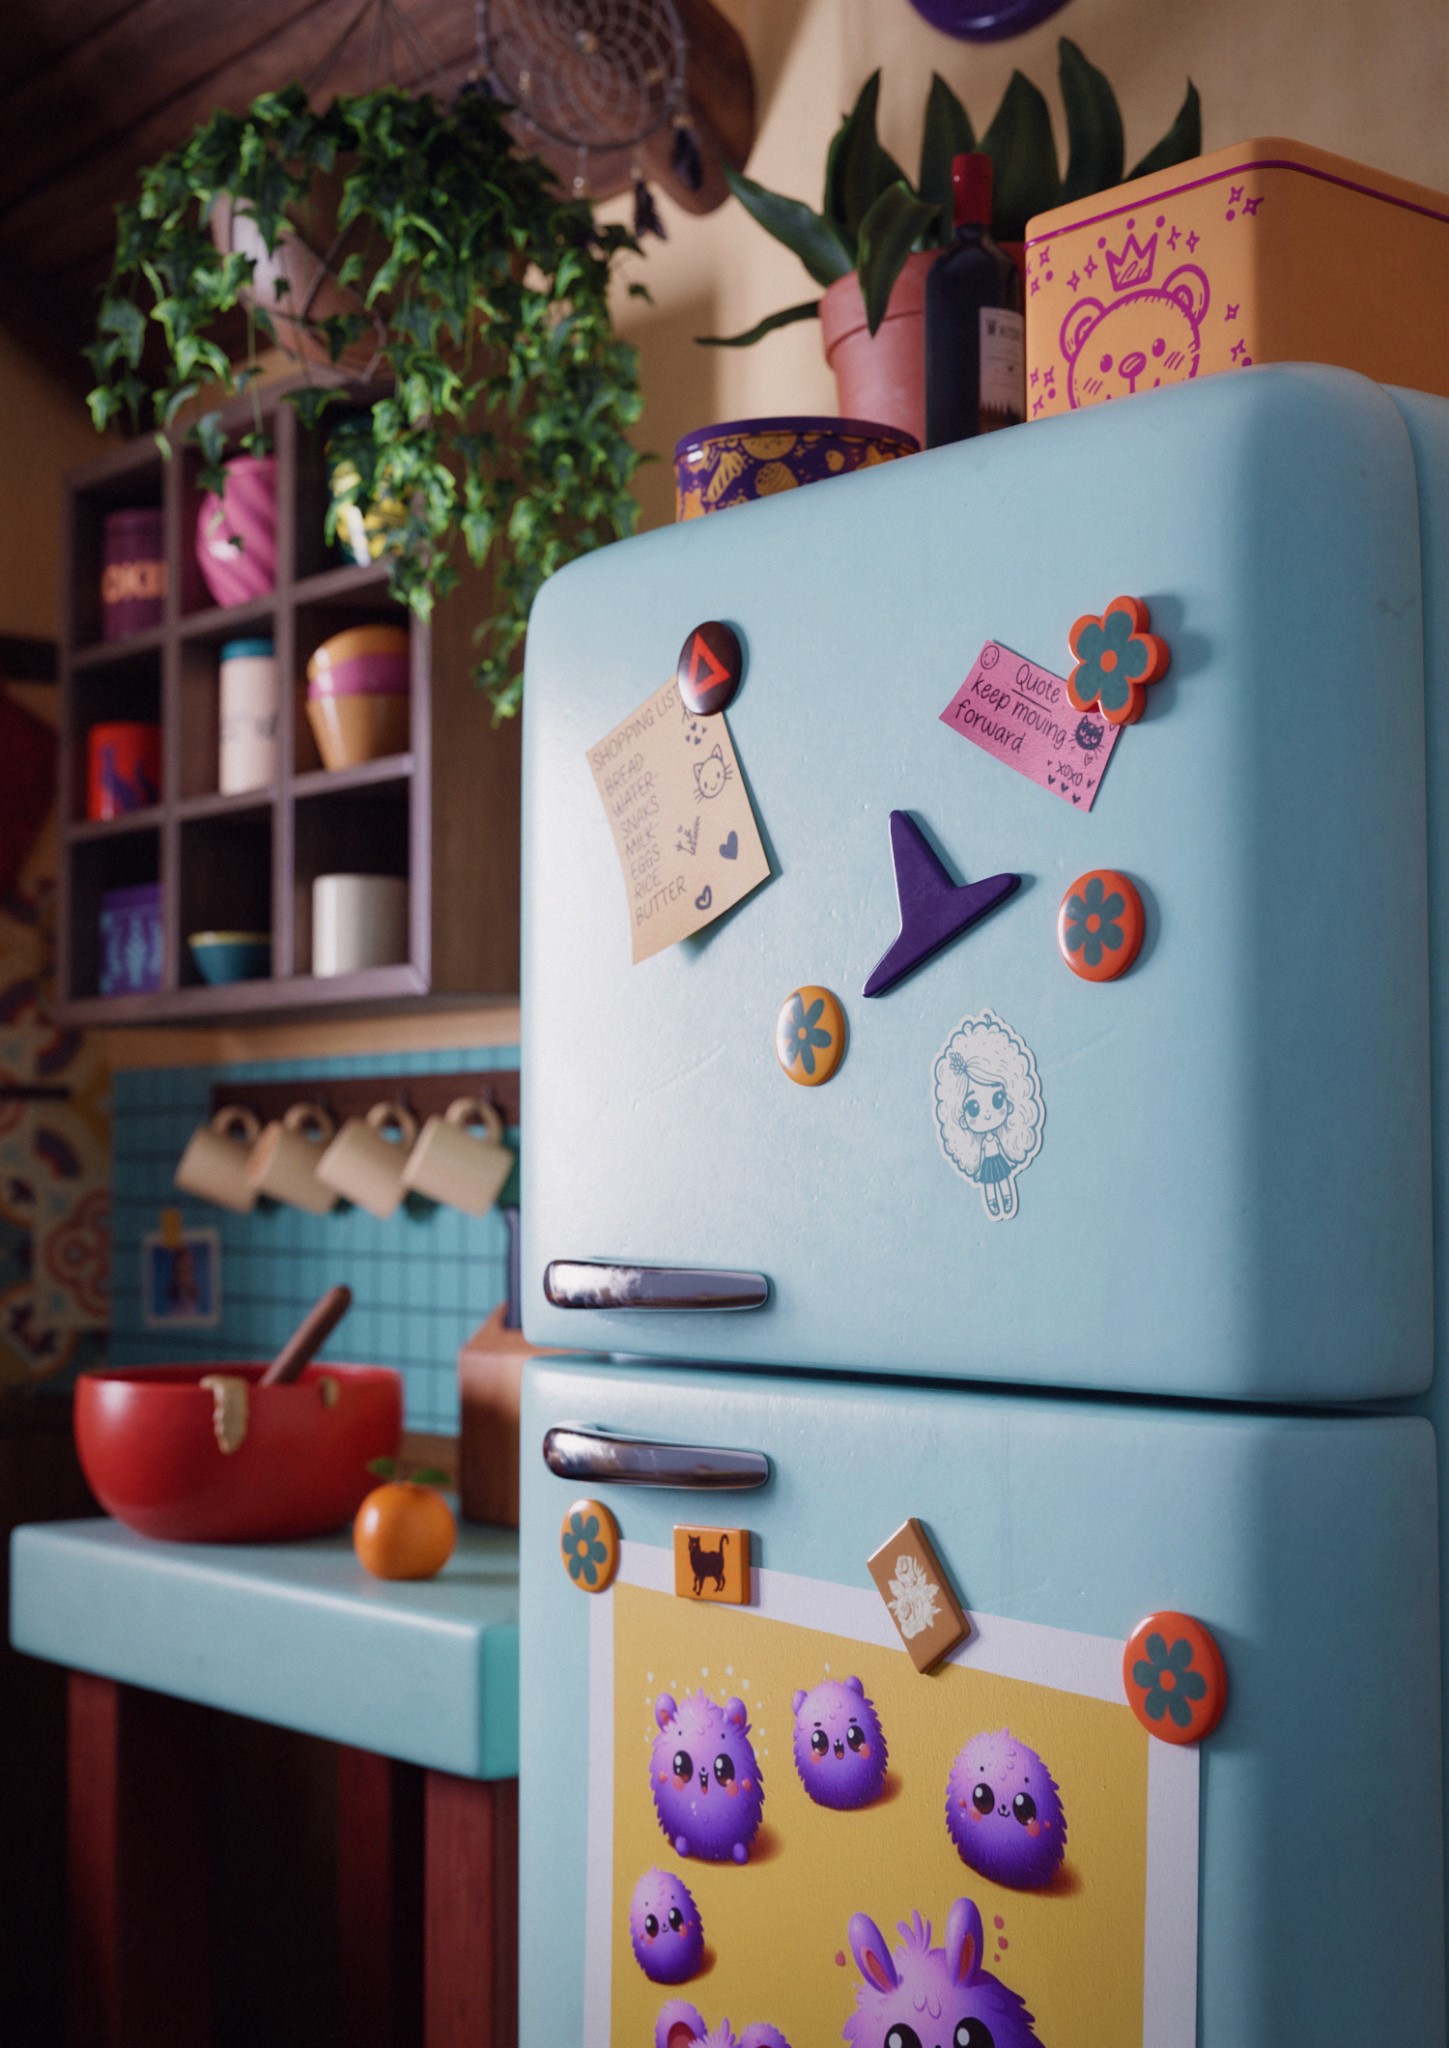
AI was used a lot in this project and it was essential in speeding up the process. I used DALL-E 3 through Bing’s image creator for creating textures and masks that would have been extremely difficult or time-consuming to create or find. I was happy with some of the images that were generated while I had to edit some in Krita.
A good prompt will include:
- A detailed description of what you want
- The colour scheme
- The art style
For example:
A house on the left side of the image, a tree on the right side of the house, and a big cloud above the house, in black and white and line vector art style.
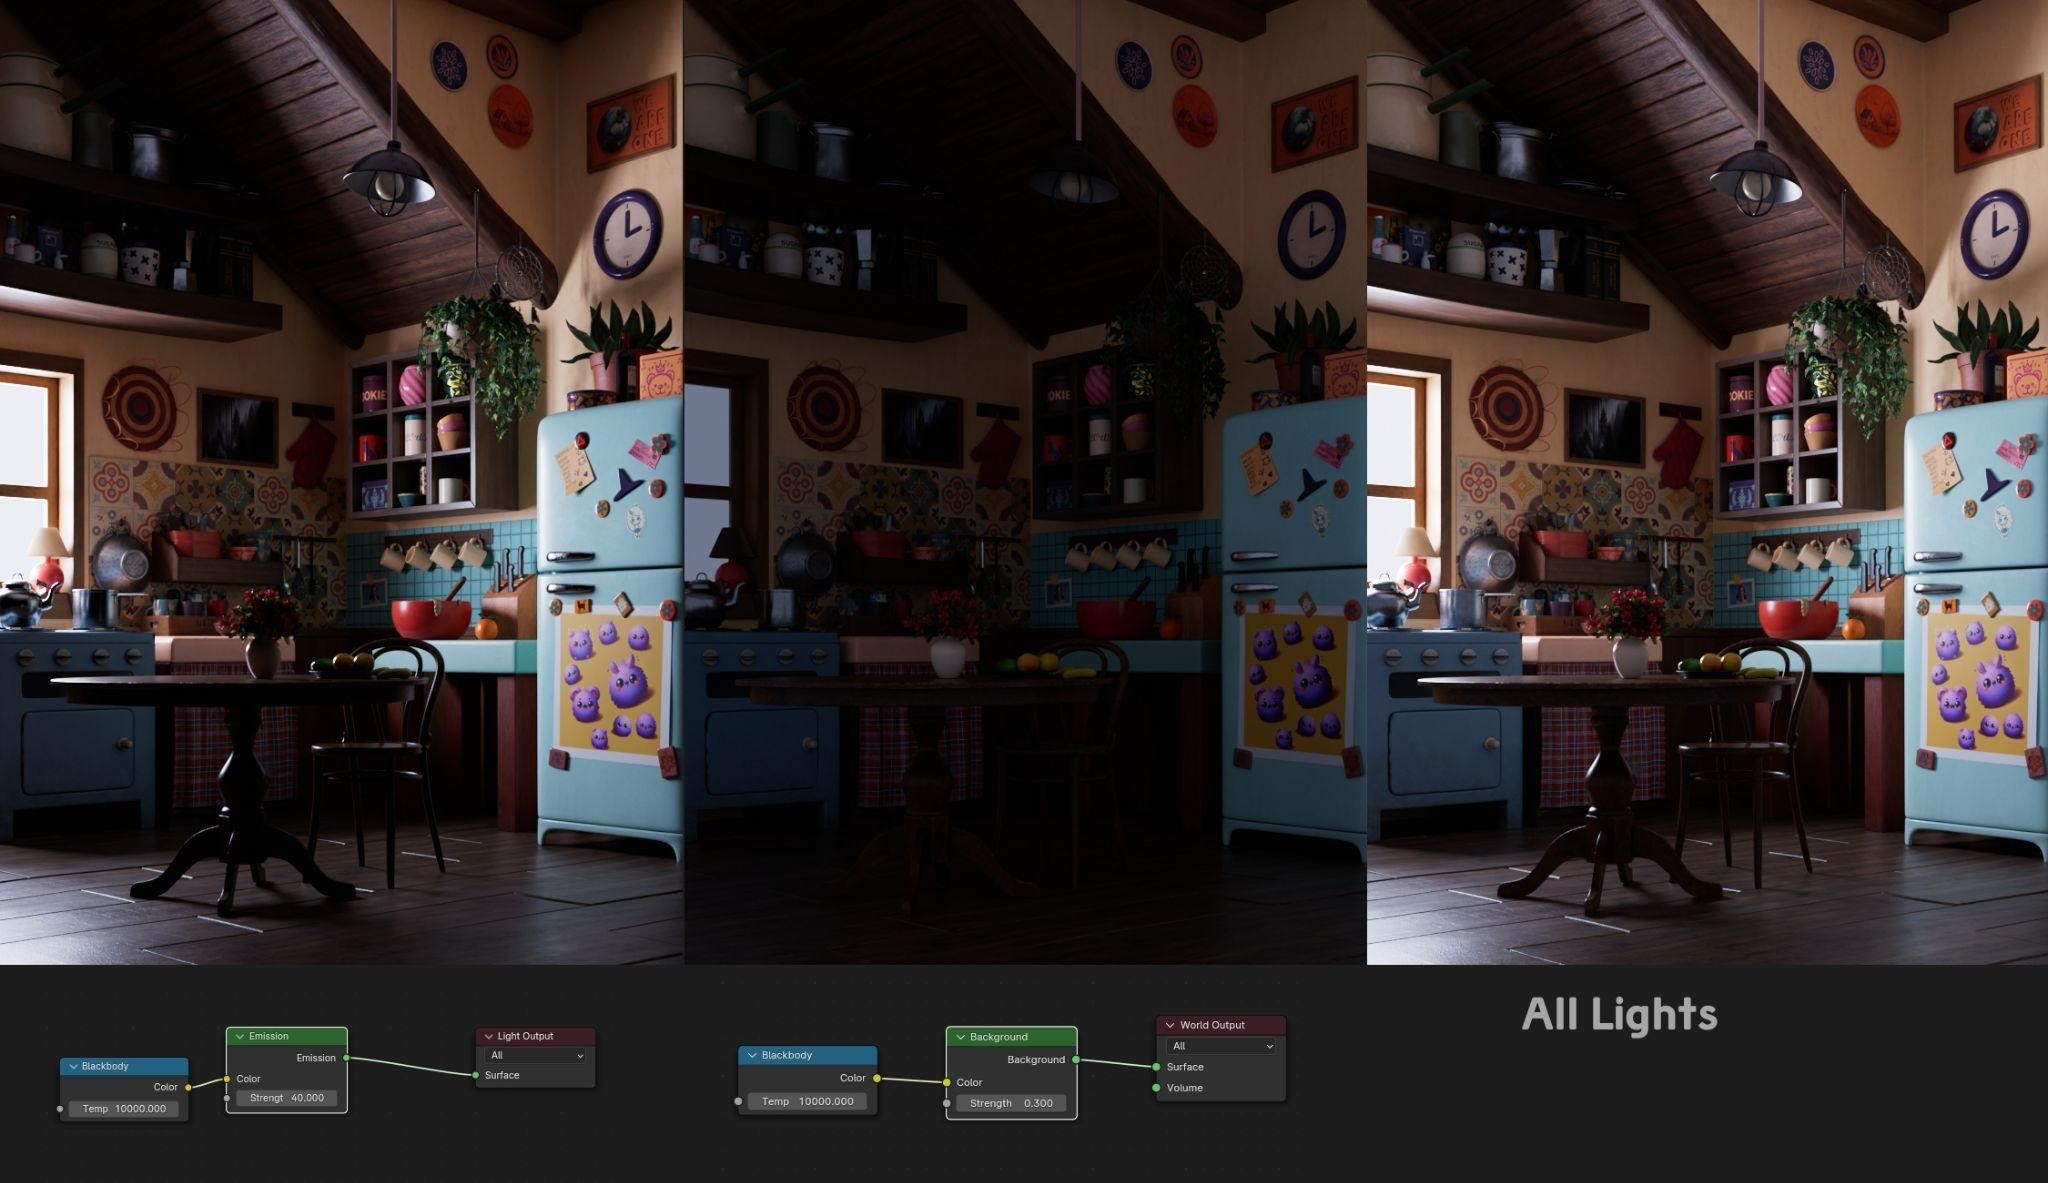
Lighting
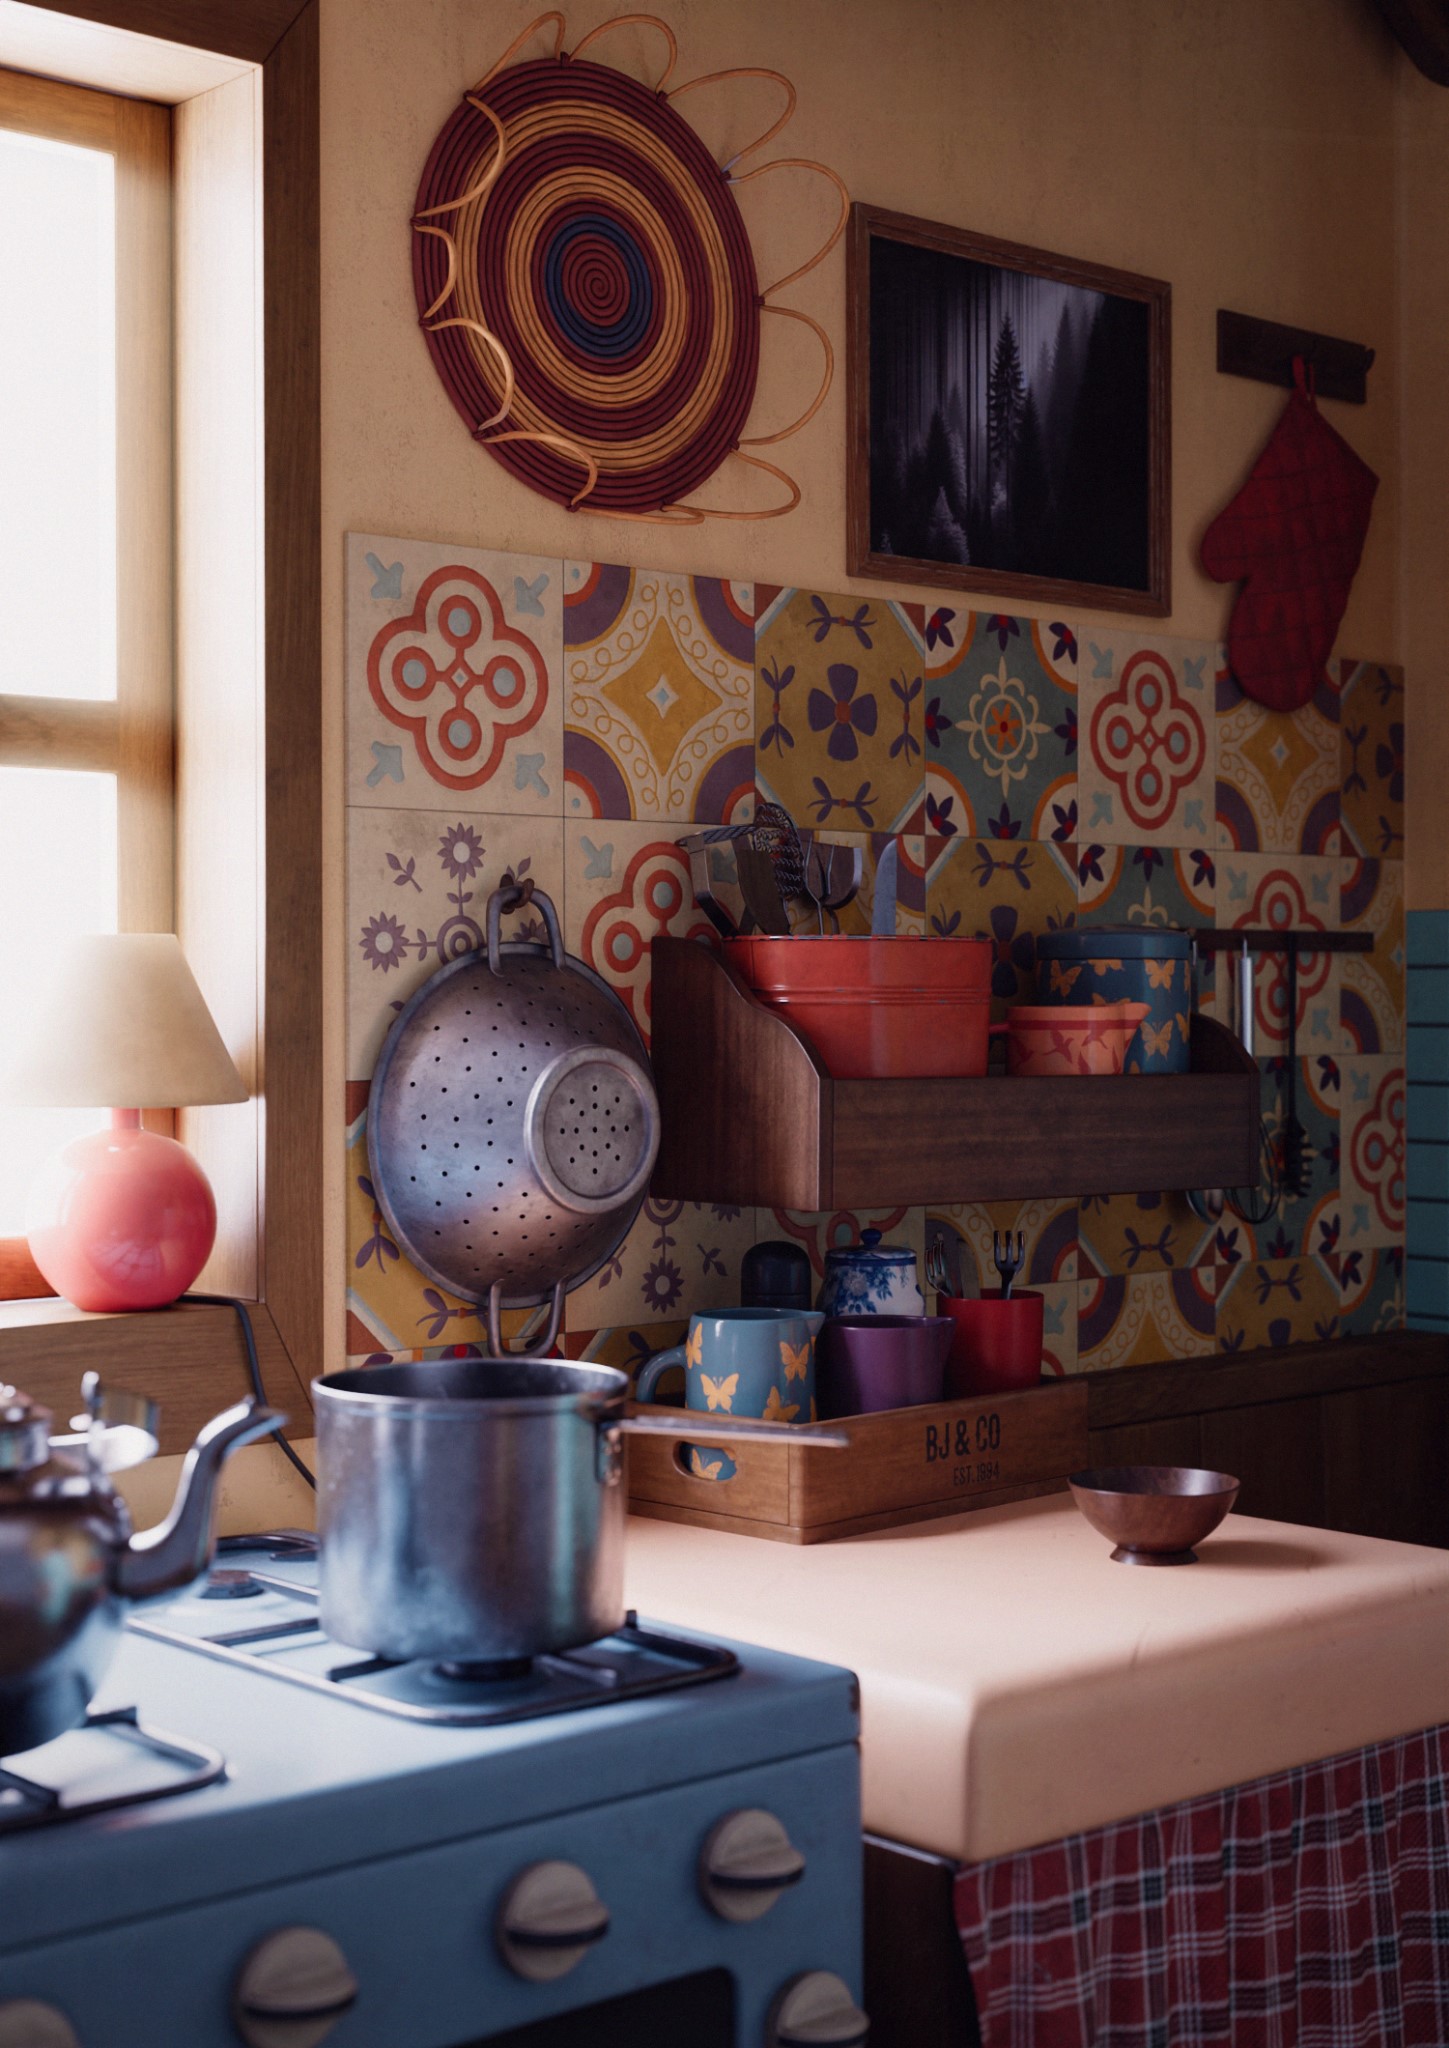
The lighting setup here is straightforward, relying on two sources. Firstly, there’s a soft ambient light coming from the world setting, set to a low intensity. Secondly, there’s an area light positioned at the window within the scene. Since there are no walls behind the camera, the ambient light fills the scene. Additionally, a plane with an emission shader was placed at the window, although it doesn’t directly impact the lighting; it will be utilized later to achieve a glowing effect from the window.
Rendering and Post-Processing
The Kitchen was rendered in Cycles with an image size of 1500px x 2120px at 3000 samples with the denoiser. In the View layer properties > Passes, I enabled the Emit render pass which was used to add the glow effect.
The post-processing was done in Adobe Photoshop. The camera raw filter was used to adjust the image. I did some colour corrections, raising the dark areas in the scene, and sharpening, and also increased the clarity and the vibrance of the image. Then I added a vignette, film grain, and LUTs (Color lookup tables).
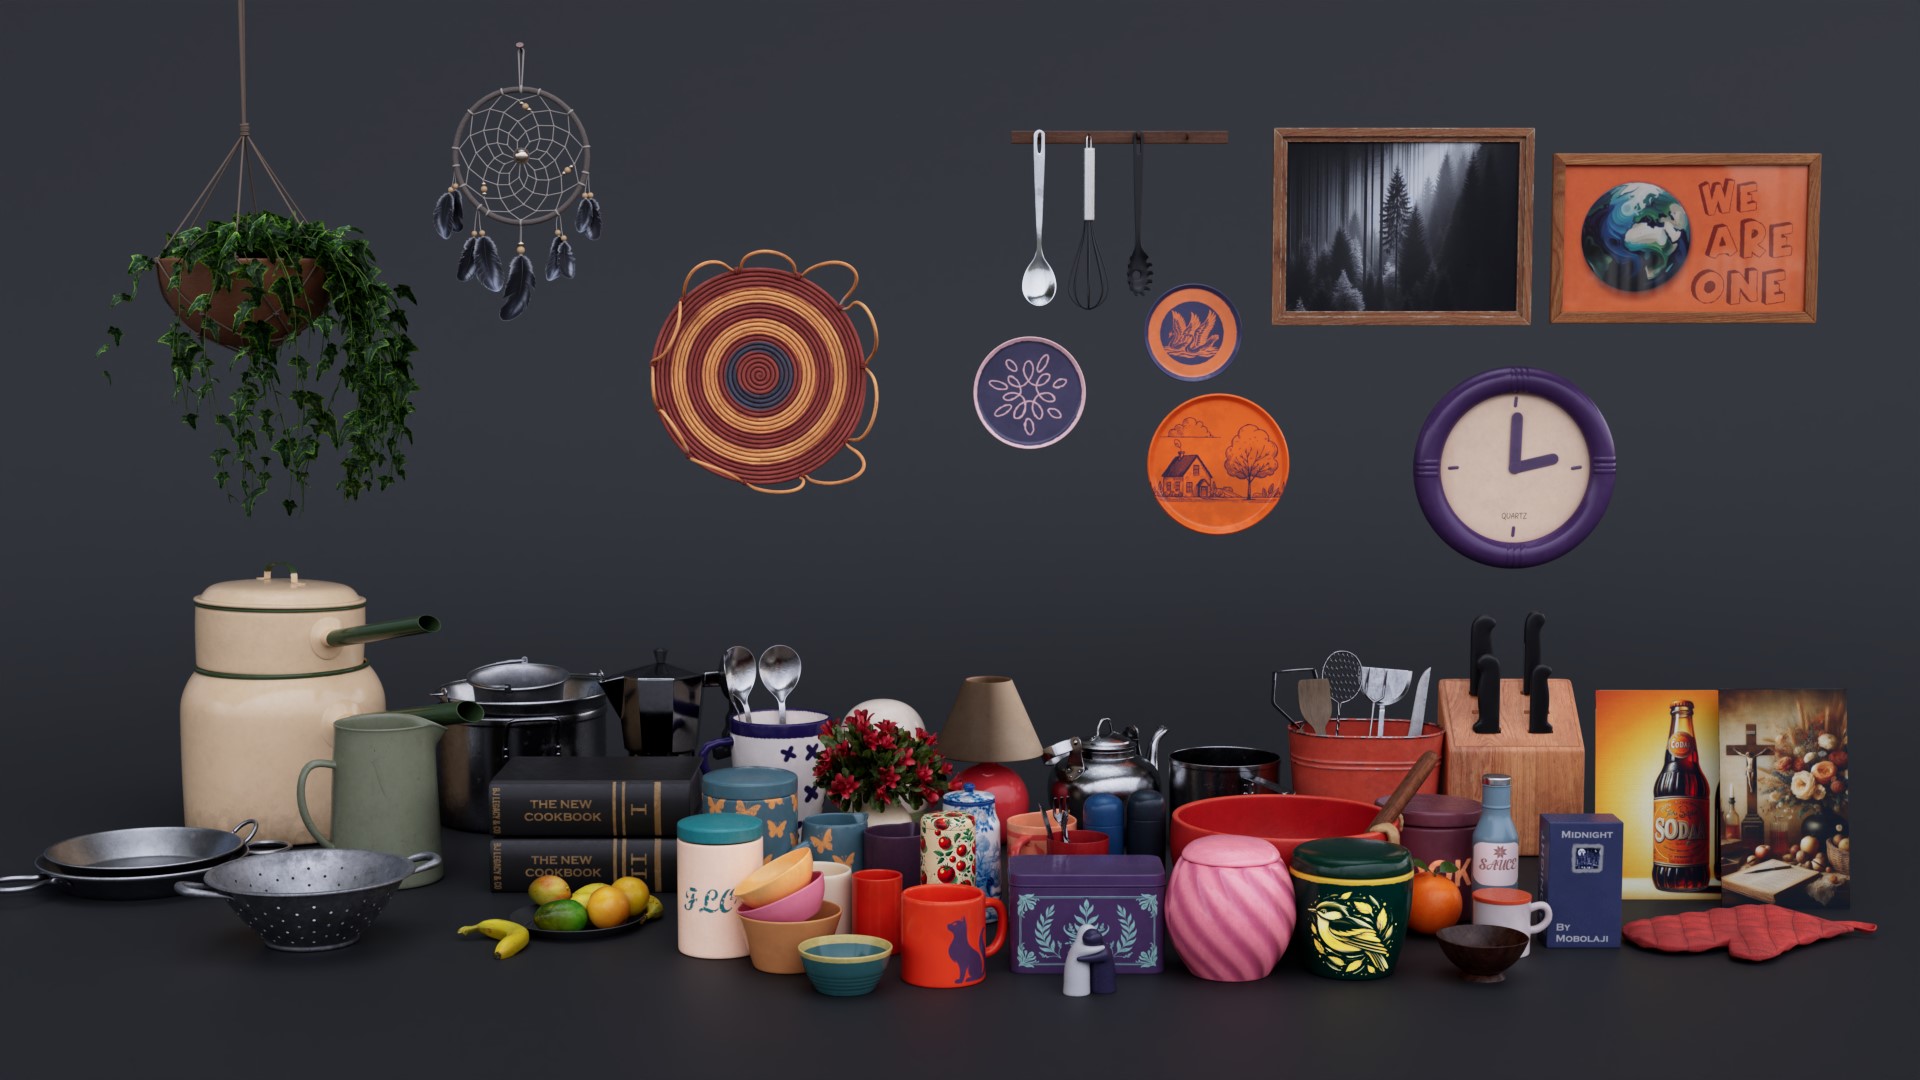
And that was all! Below are the final renders, hope you like them.
RENDER: The Kitchen
That was it! If you have any more questions, feel free to contact me.
About the Artist
Mobolaji Dele-Adelodun is a 3D artist based in Nigeria, specializing in props and environment modeling and texturing. He currently works as a freelance 3D artist.