Behind the Scenes: Wizard’s Library
INTRODUCTION
Greetings, everyone! My name is Polina, and I am a freelance 3D artist from Moscow, Russia.
My journey into the world of fun and creativity began in 2020 when I decided to quit my job in a bank to pursue the dream of becoming an artist. Drawing was always one of my favorite hobbies, so I learned Adobe Illustrator and even began to take my first commissions.
But, I got full creative freedom when I discovered Blender in 2021. For me, it became like a magic software where I can be the creator of my own world. So, I’m in love with creating cartoonish isometric rooms and am so glad that I can share my insights with you here.
INSPIRATION
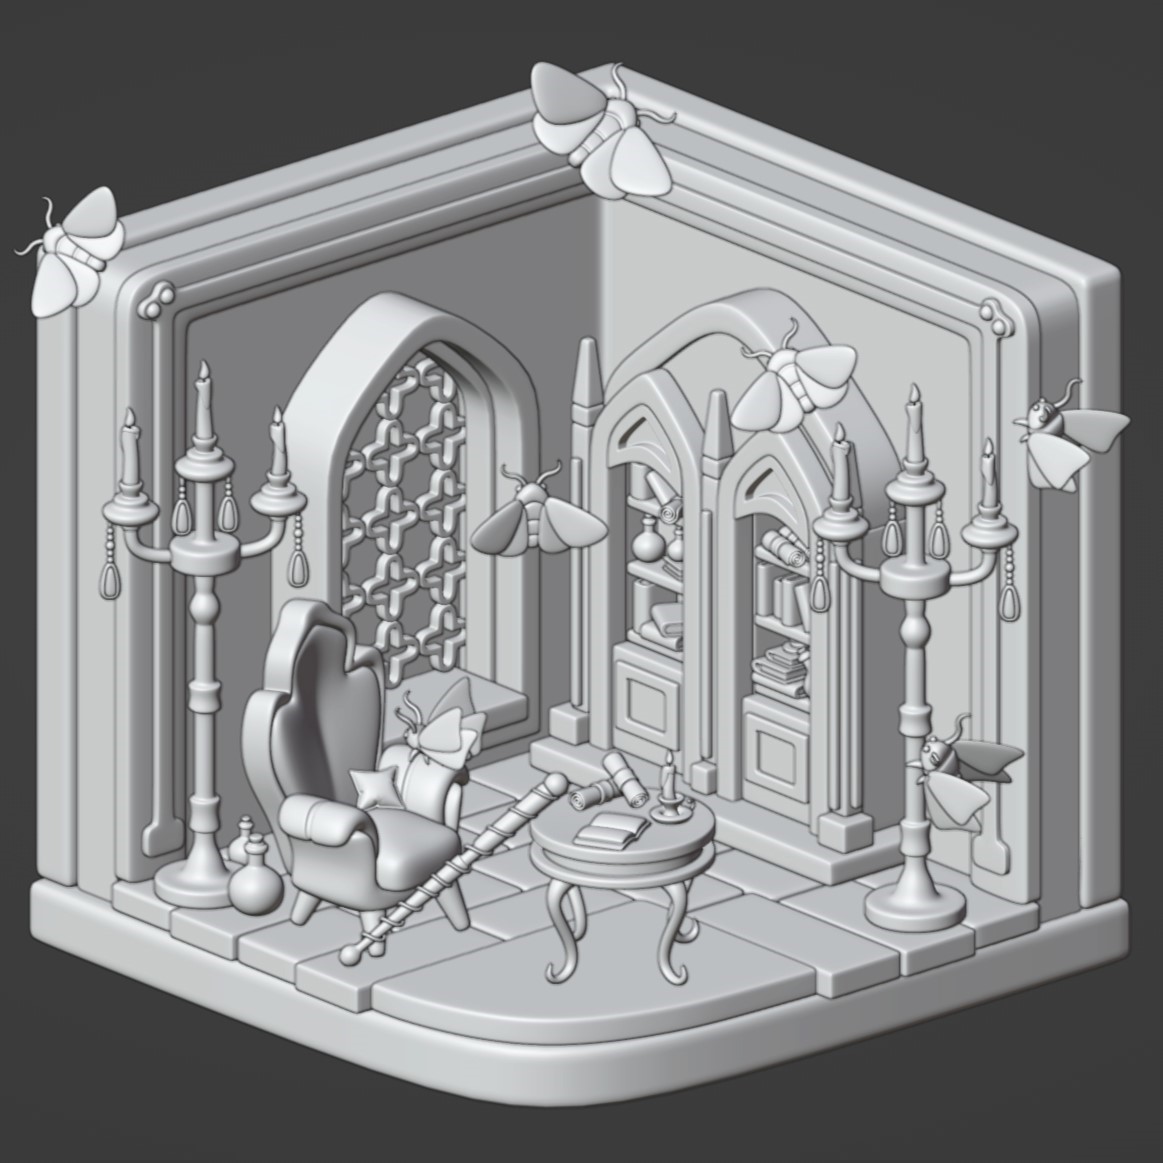
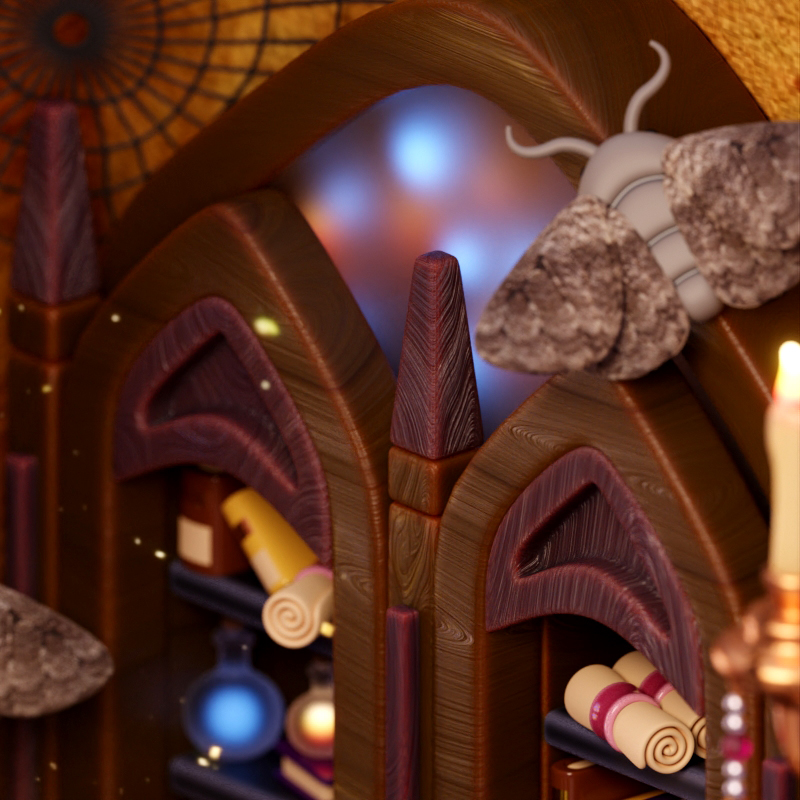
In October 2023, I decided to take part in an annual challenge for artists—Drawtober. One of the prompts’ themes was to create a moth-bitten library. I didn’t want to create something scary or dark for Halloween, so one of my main goals was to make the artwork a little spooky yet still cute and bright.
So, I started by thinking about the basics:
The form of the room
Since it’s a library, I thought it would be fun to design the external borders of the room as a book cover.
Who uses this room?
Halloween is a celebration of mystery, so I imagined a wizard who would spend time in his armchair in this library. Additionally, I could create some interesting magic artifacts that belong to him.
Theme and atmosphere
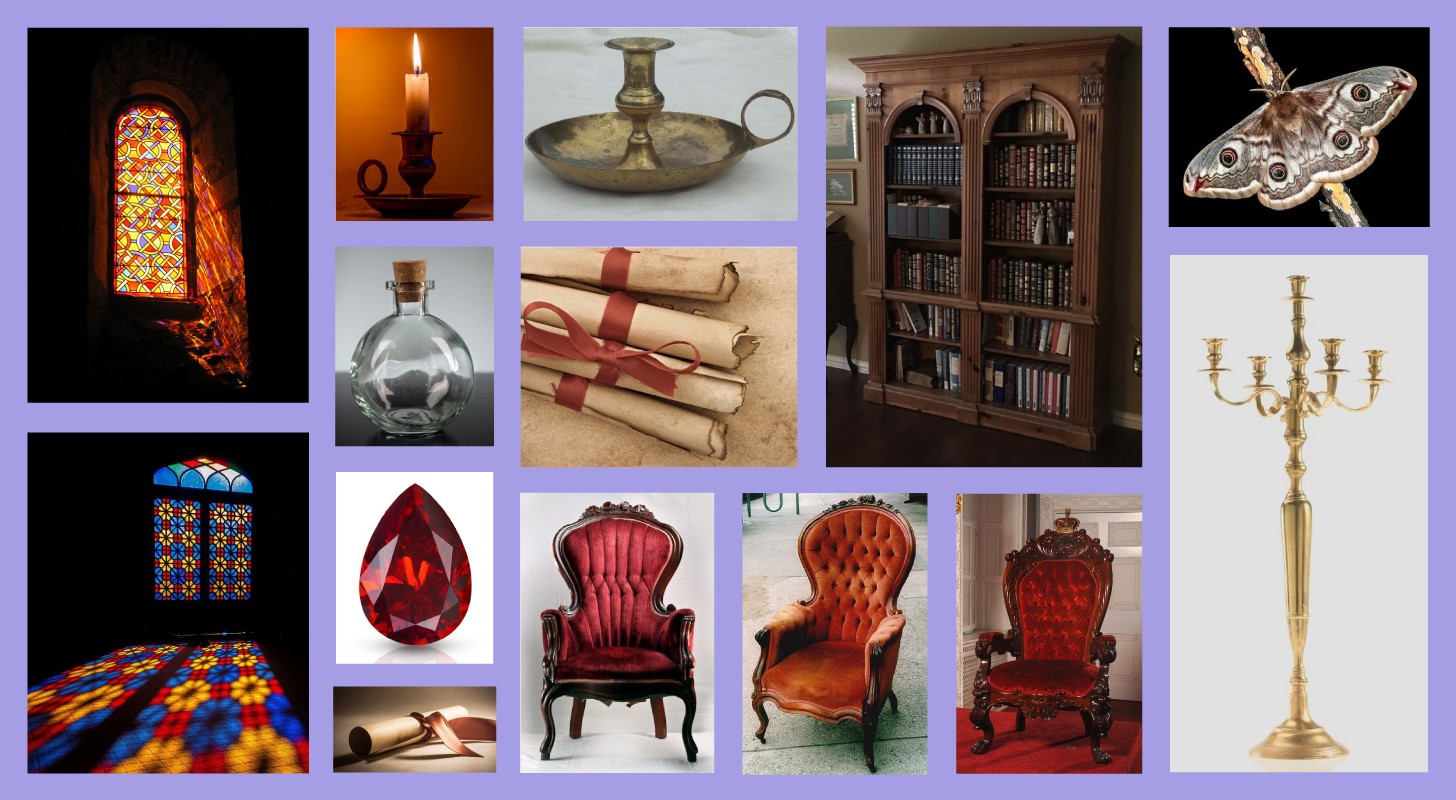
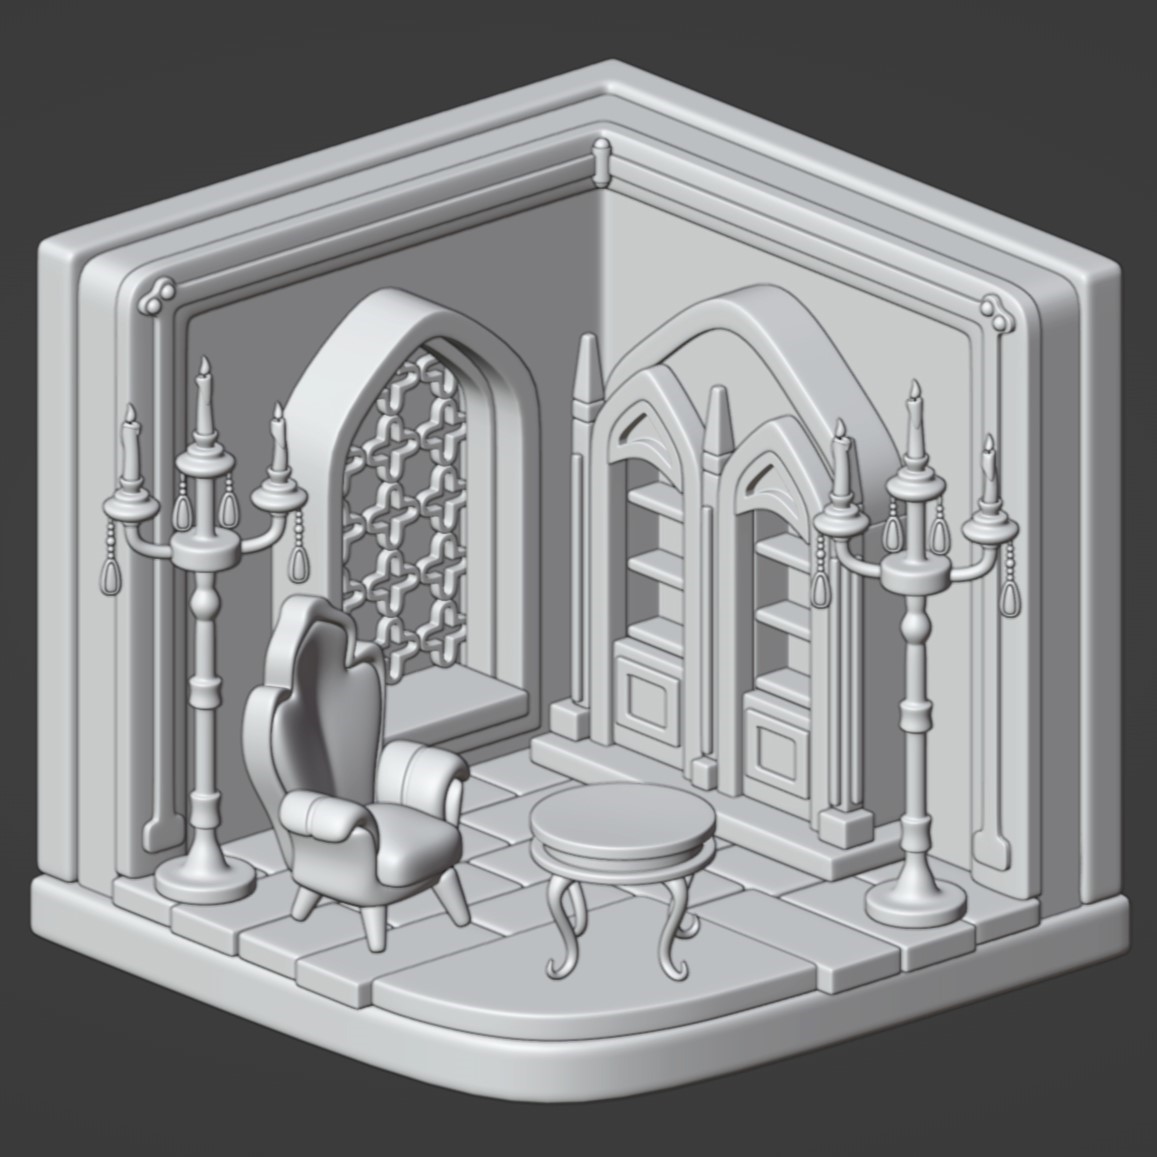
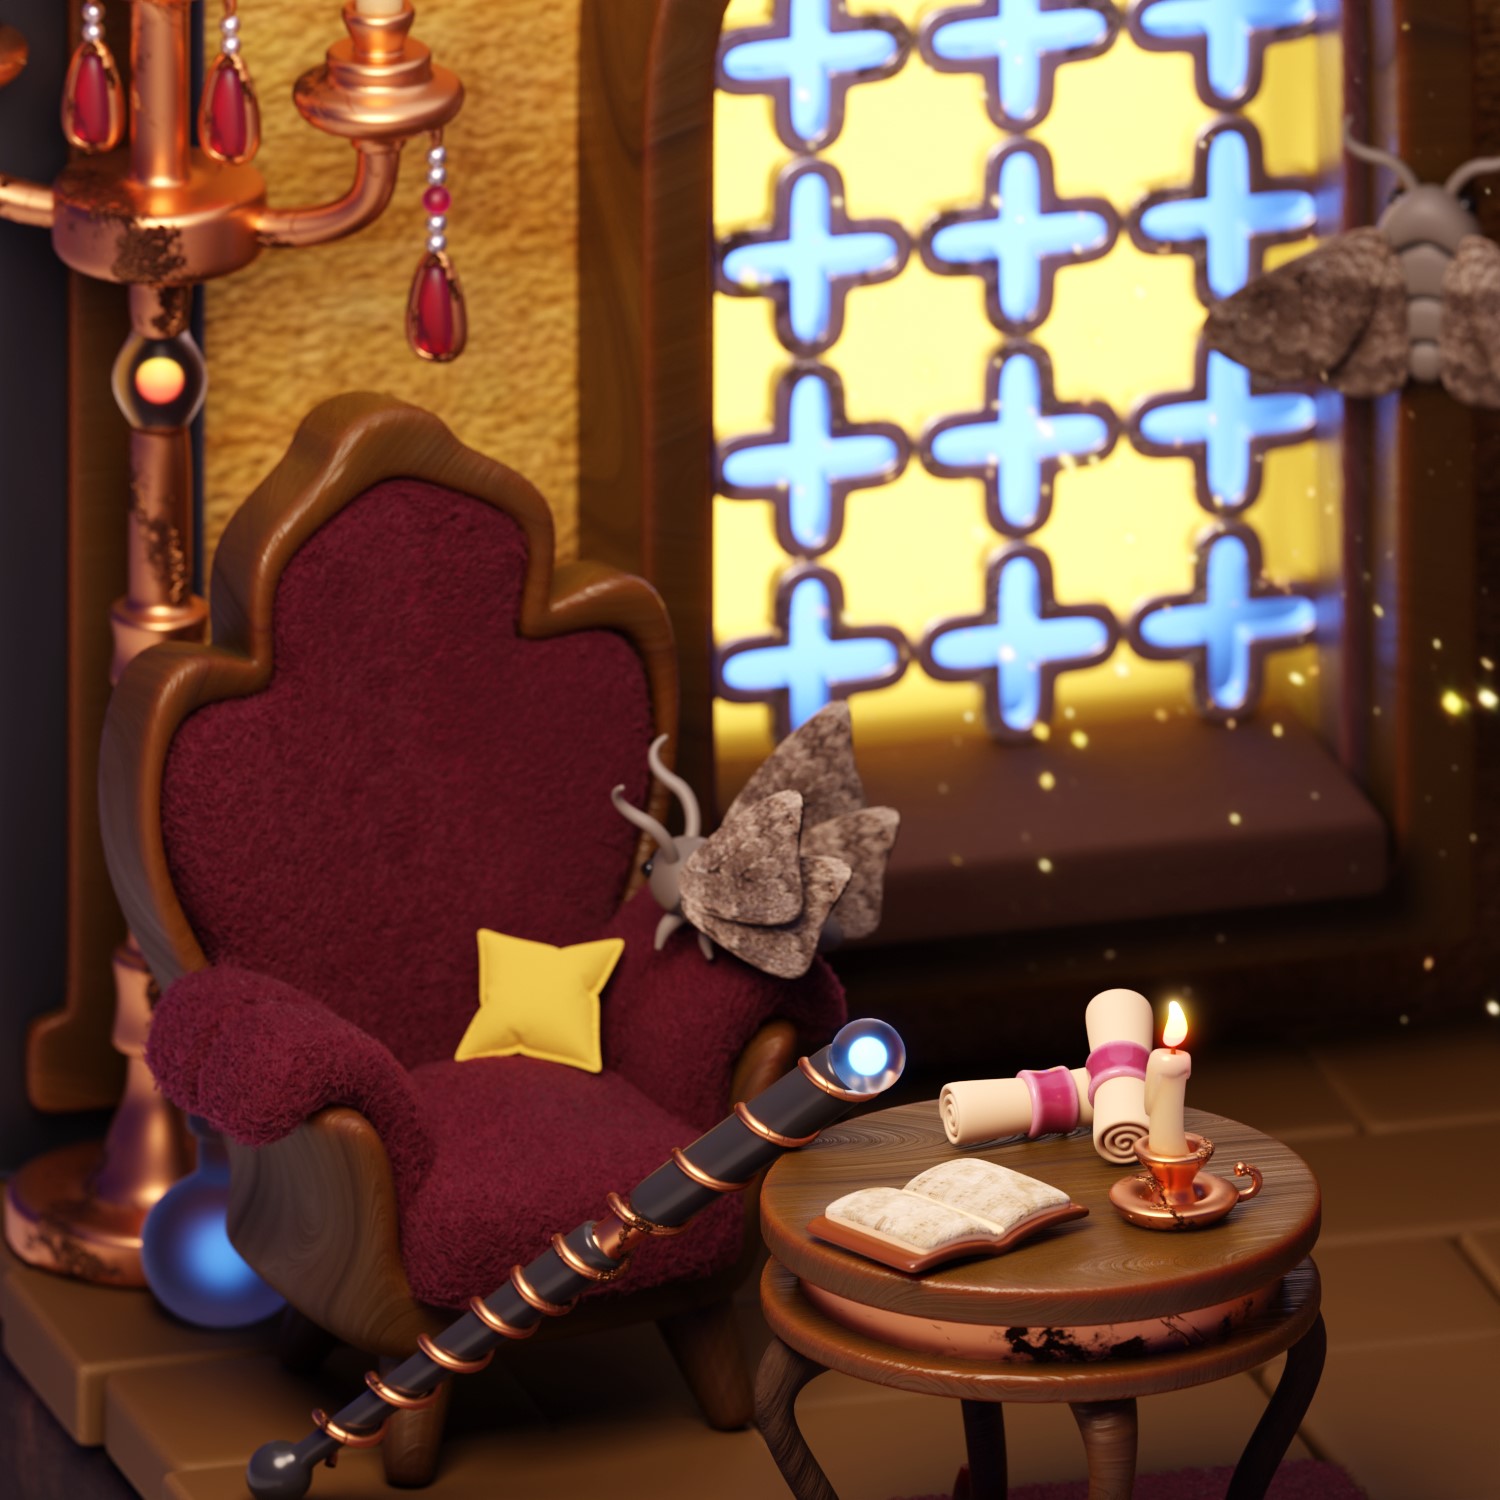
At that time, I had just rewatched ‘The Da Vinci Code’ and was inspired by Gothic architecture, so I decided to create something medieval. Bronze candlesticks, scrolls, Gothic windows, and a shabby carved armchair—all of these elements appeared in my imagination, and I began searching for references.
PROCESS
Computer Specs
- Processor: 13th Gen Intel(R) Core(TM) i9-13900HX 2.20 GHz
- RAM: 32GB
- Graphics: Nvidia GeForce RTX 4060 Laptop GPU
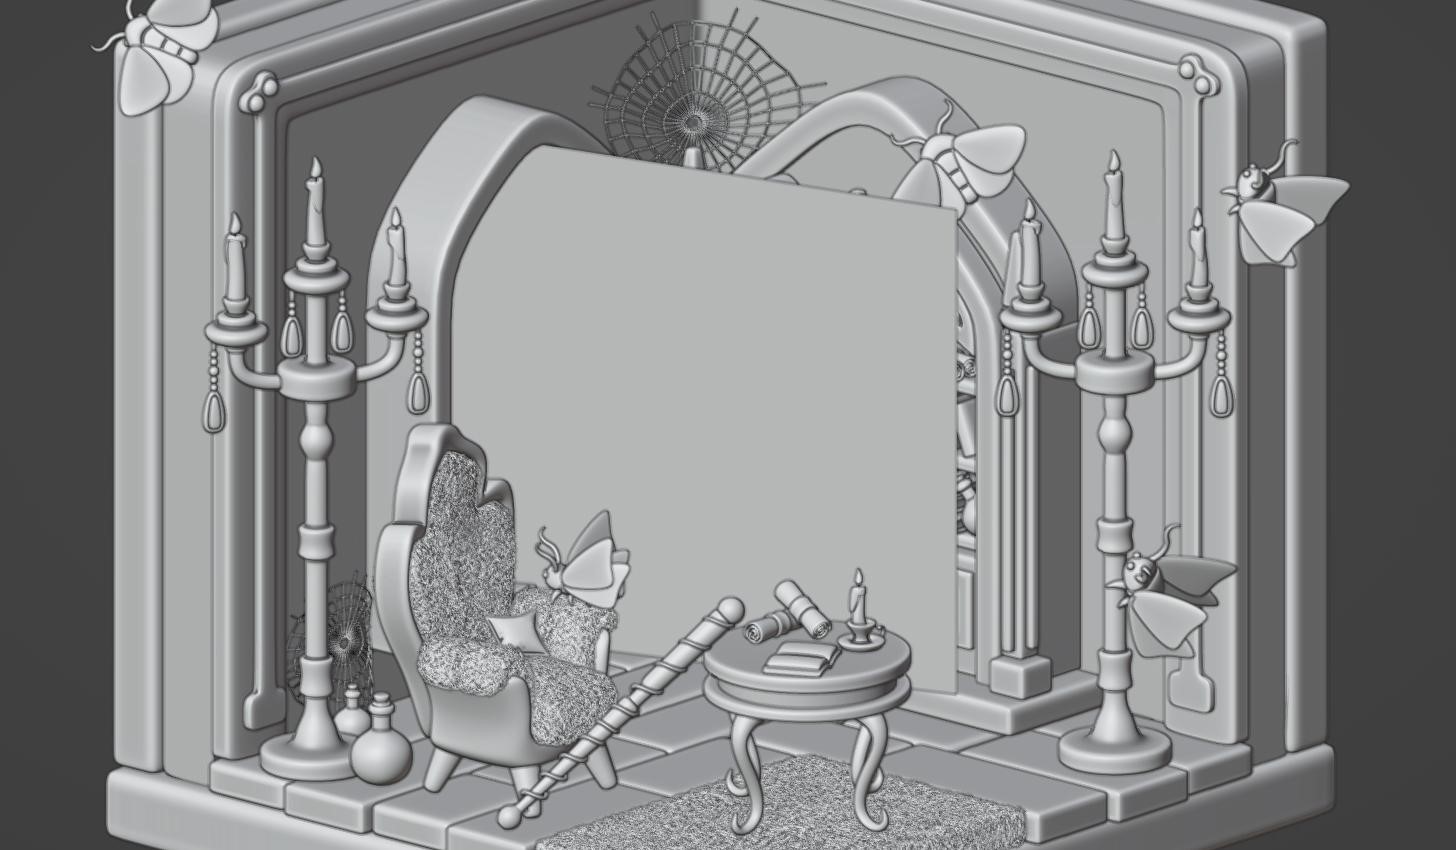
Modeling
In my work, I usually start by modeling the main objects and then focus on the smaller elements. So here, I began by considering the size and shape of the entire room and then started creating the big furniture.
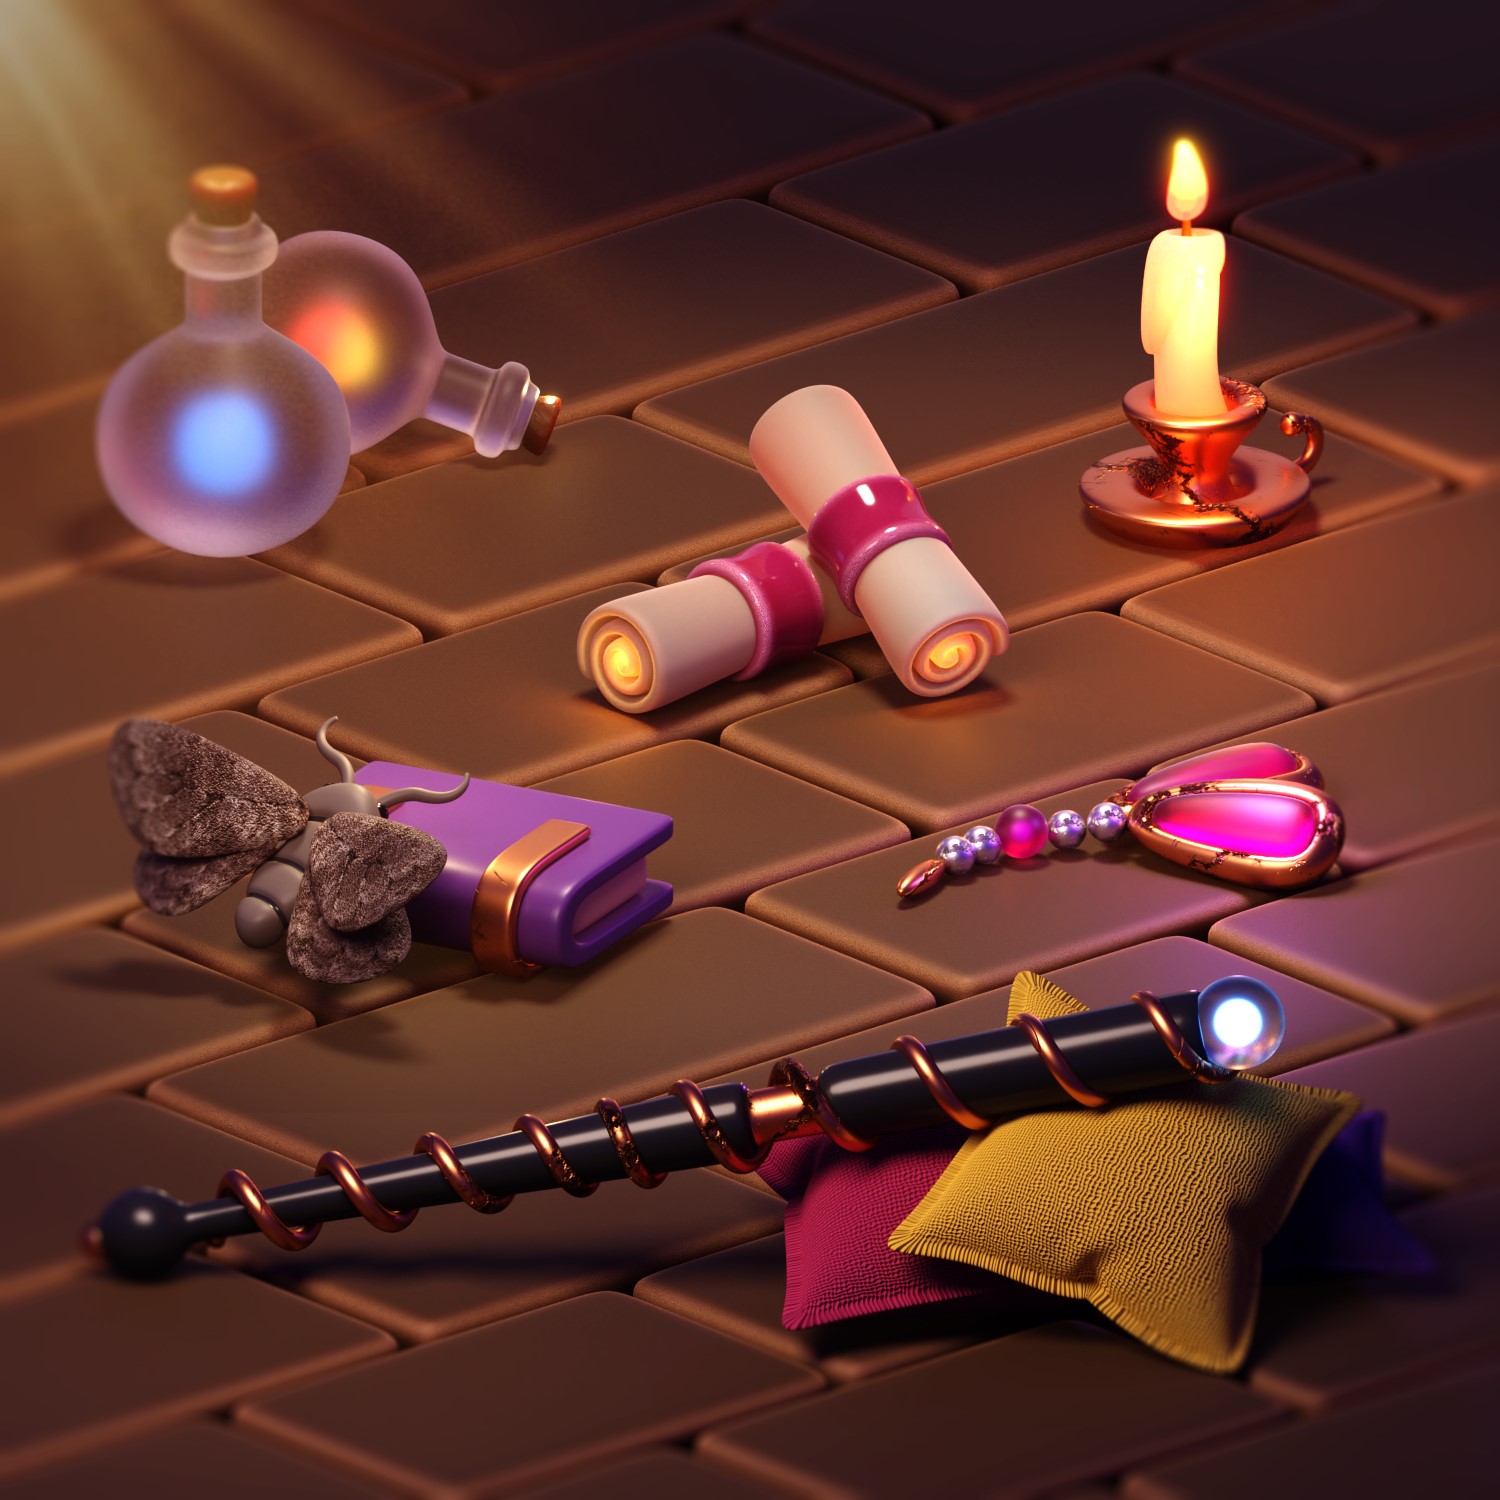
Once these main objects are completed, my favorite part begins—adding details! I love creating details; they tell stories and let viewers dive into the artwork, thinking or dreaming about something.
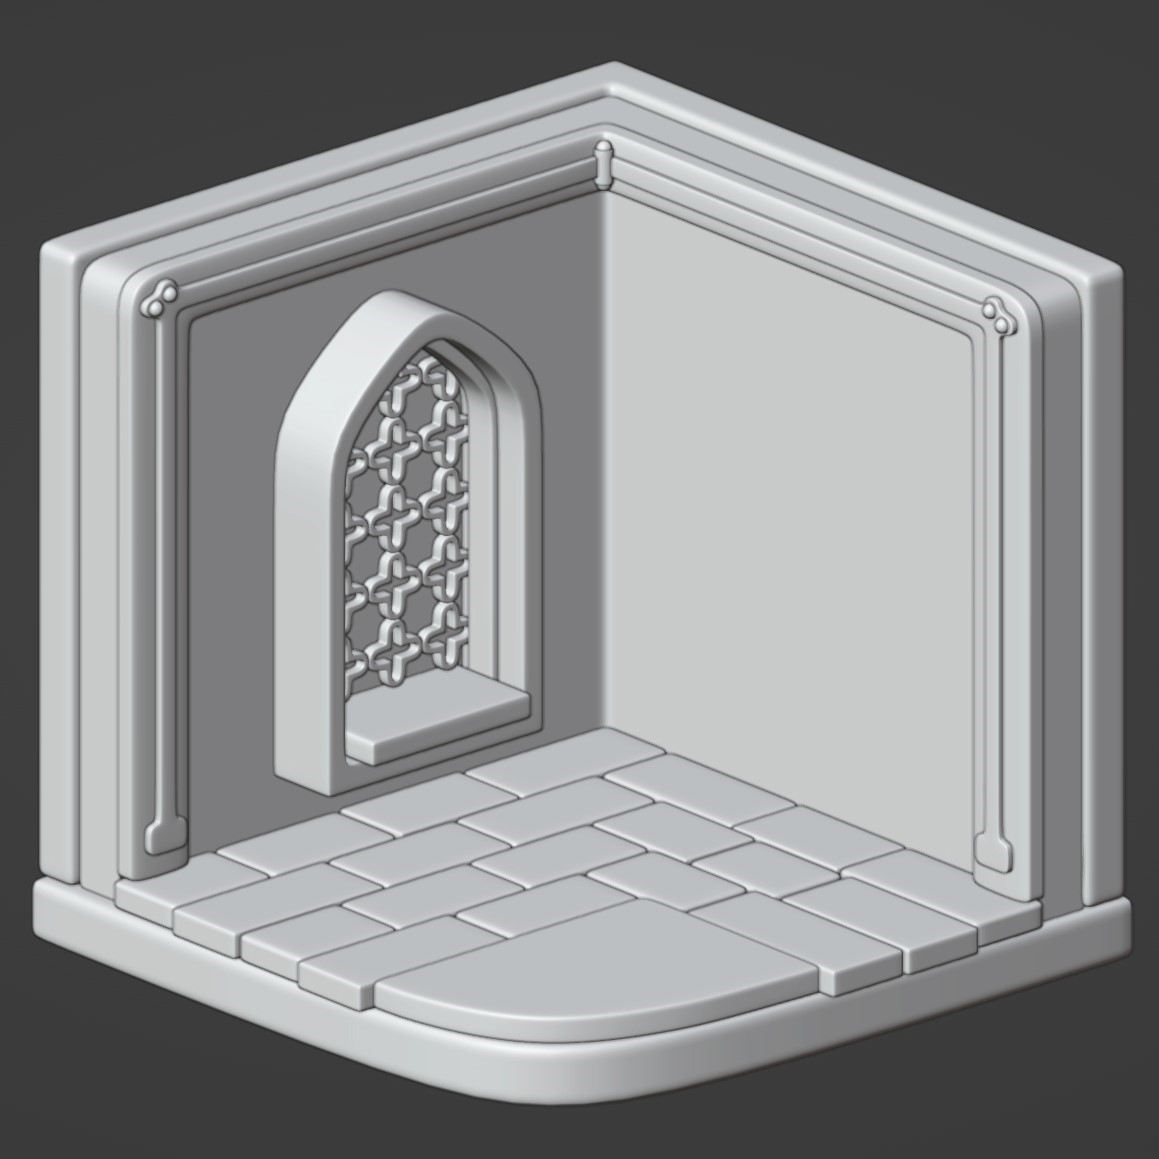

I begin to model most of the objects from the simple meshes by adding a circle or a plane.
Then I extrude the vertices so they repeat the form of the reference. After the basic modeling is done, I start changing the form by adding modifiers. For the smoothest shapes, I usually use these modifiers: bevel (2 segments, profile 1.00) and subdivision with level 2.

Lighting
I love to play with lights. So at first, I set up the main lights: a general big light for the entire composition, smaller ones to highlight the center of the room, and rim lights to create beautiful light borders, separating the room walls from the background.
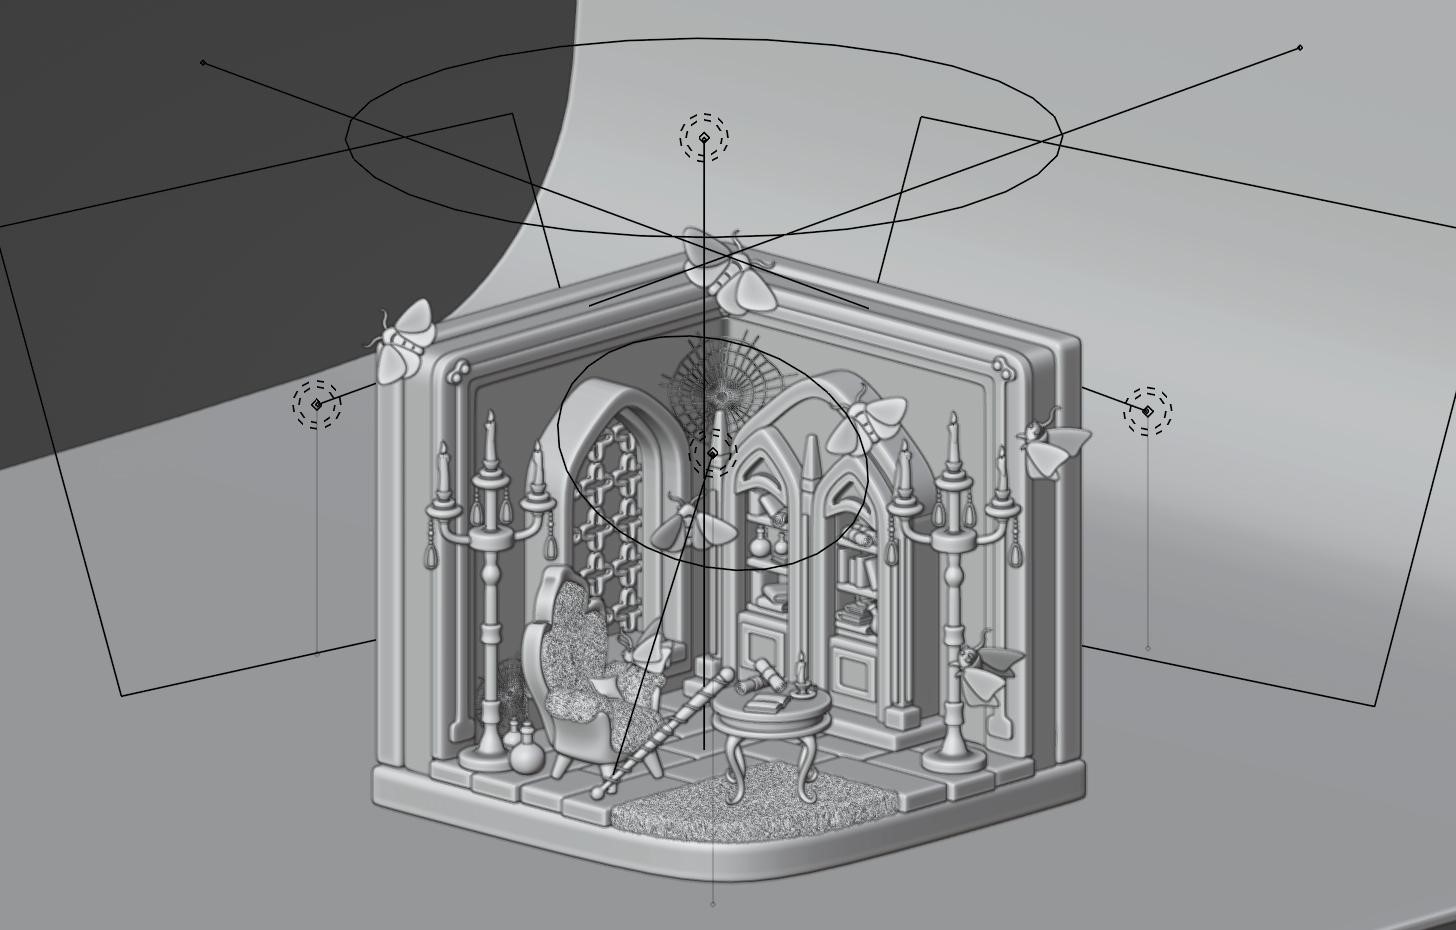
As this is a wizard’s room, I wanted to create a magical atmosphere with beam lights and sparkling flashes from the window.
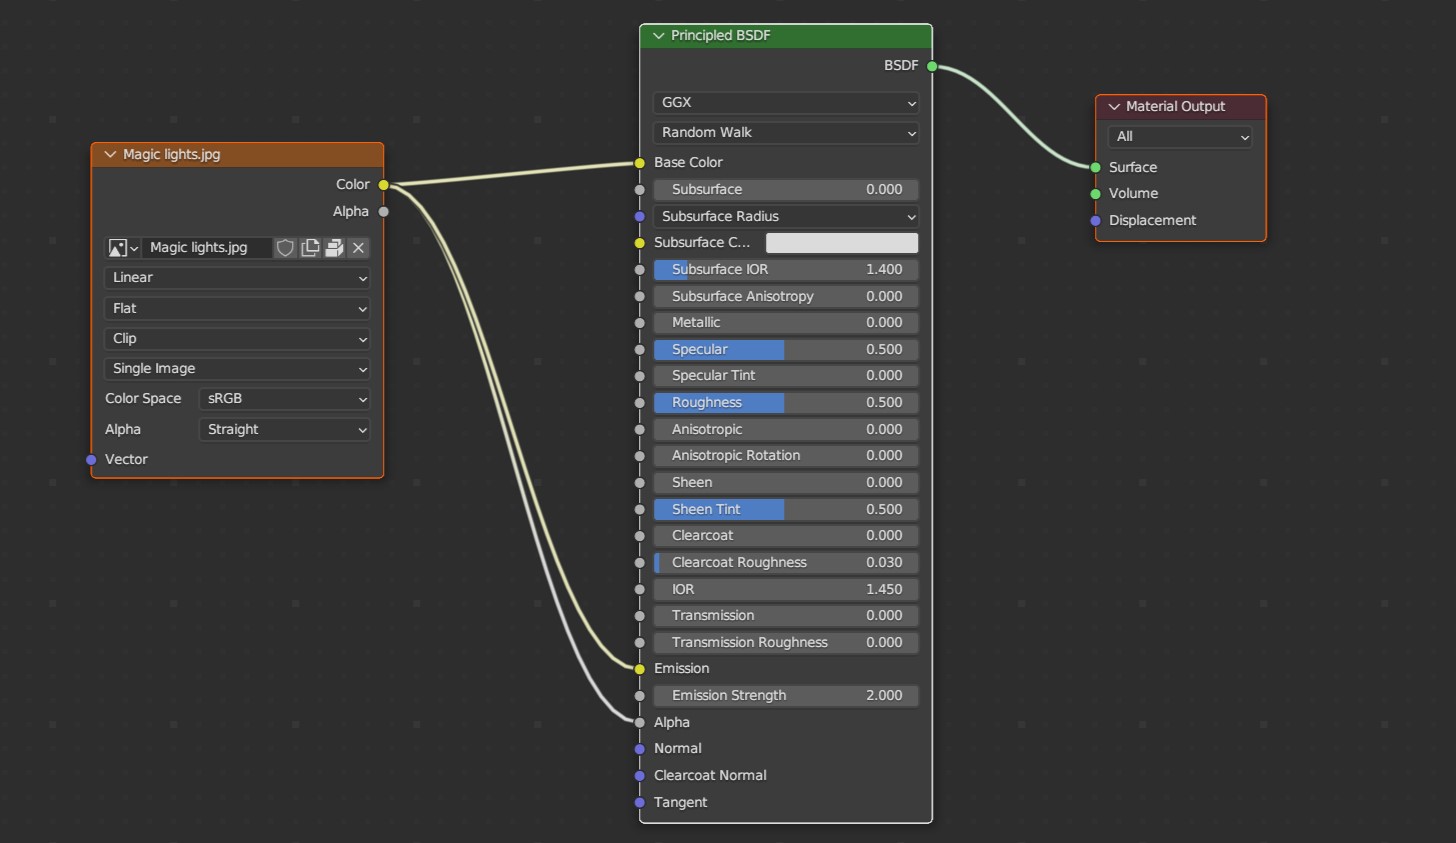
Usually, this is achieved by creating a mesh and adding principled volume, but this time I decided to use an imported image as a plane.
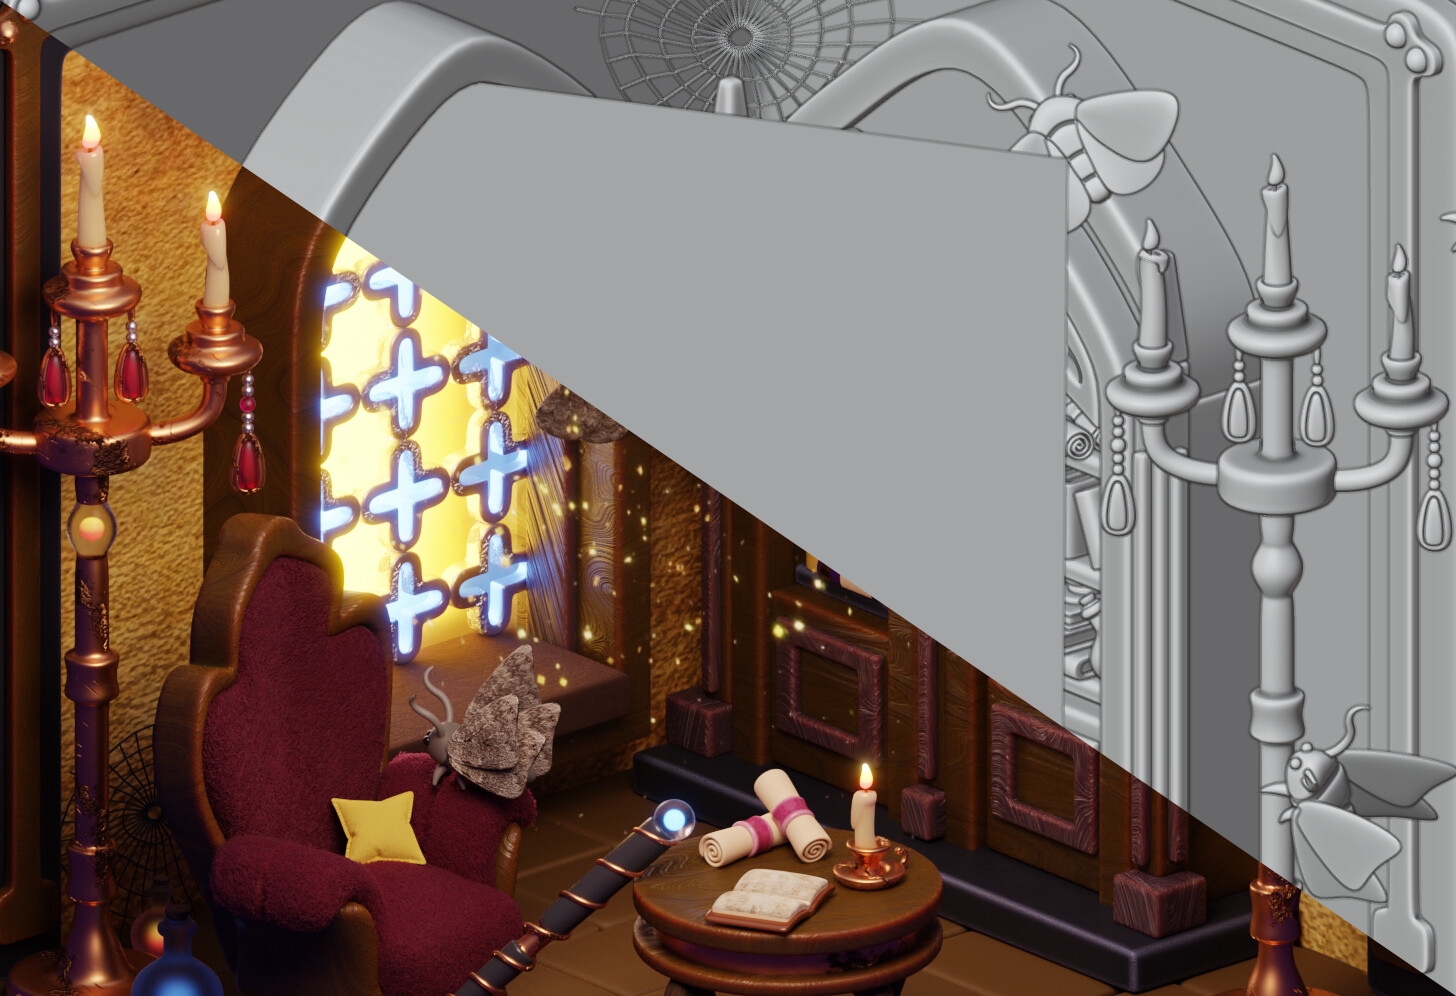
I added color to the emission and set the strength to 2.000. Also, since the image had a black background, I added color to the alpha channel to make it transparent.
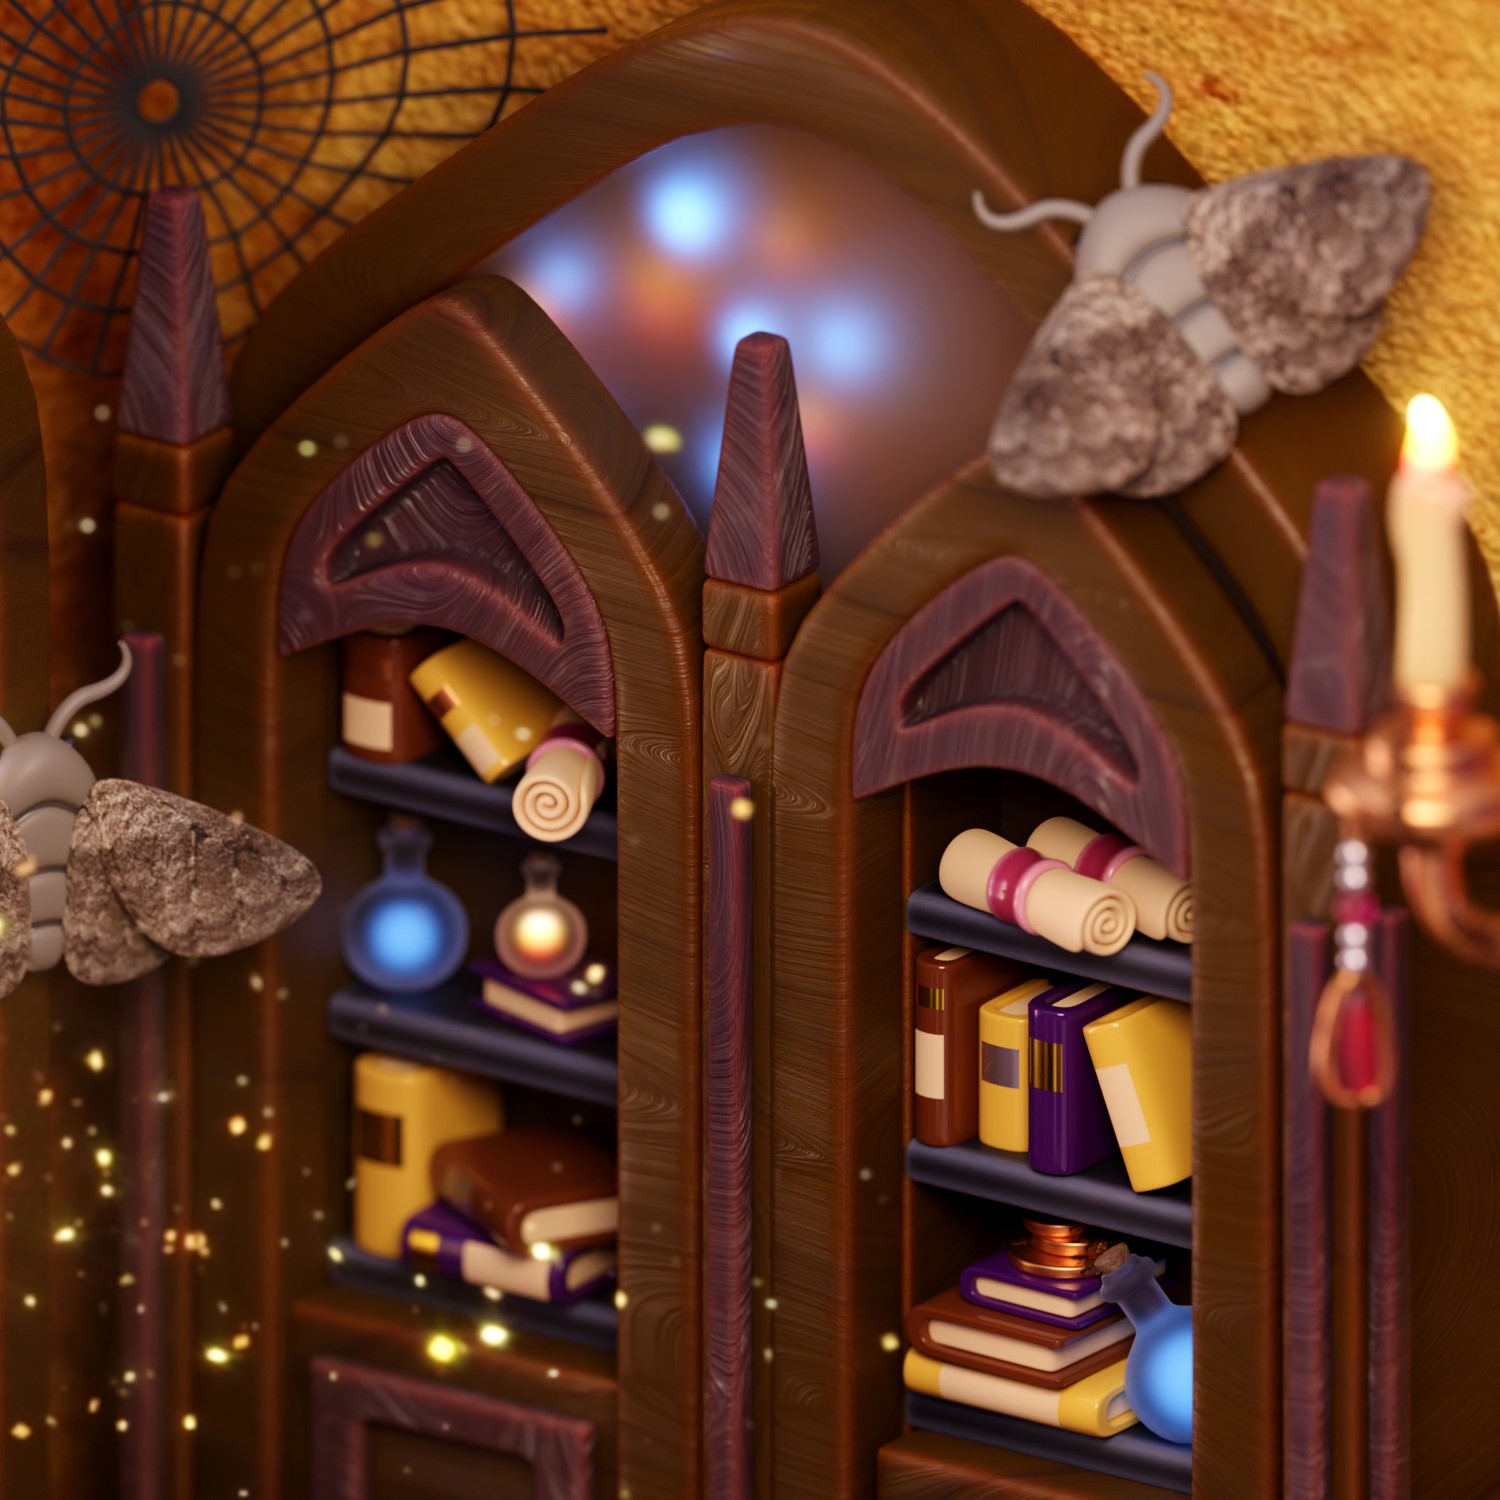
The next part of lighting is also one of my favorites: creating colorful light throughout the scene. Here, I added emission for candles, potions, and the power ball inside the magic wand. I also placed some lights inside the bookshelf, as if it were some kind of energy hiding behind the dark glass.
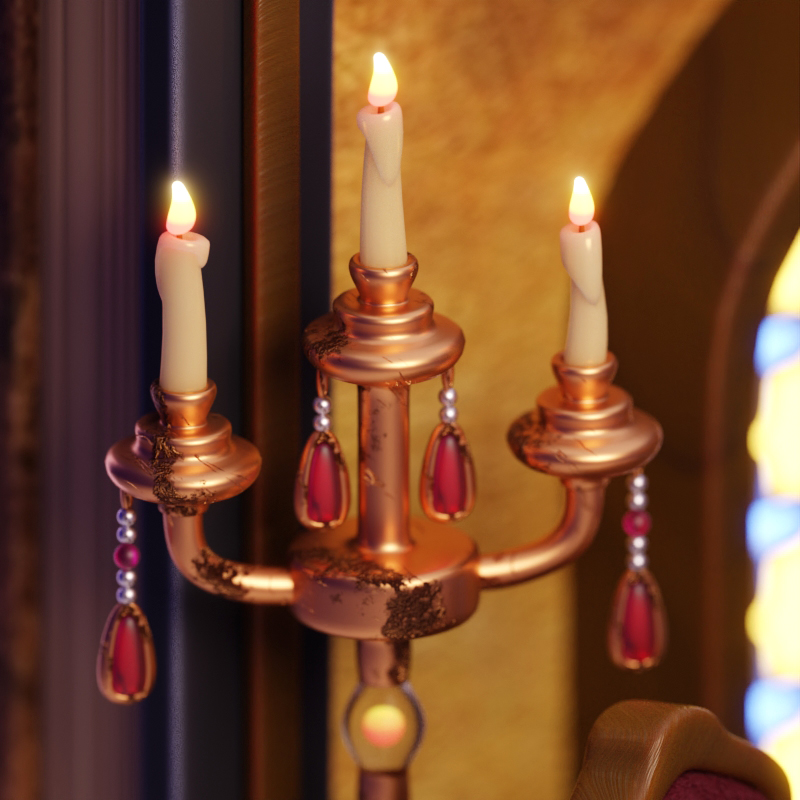
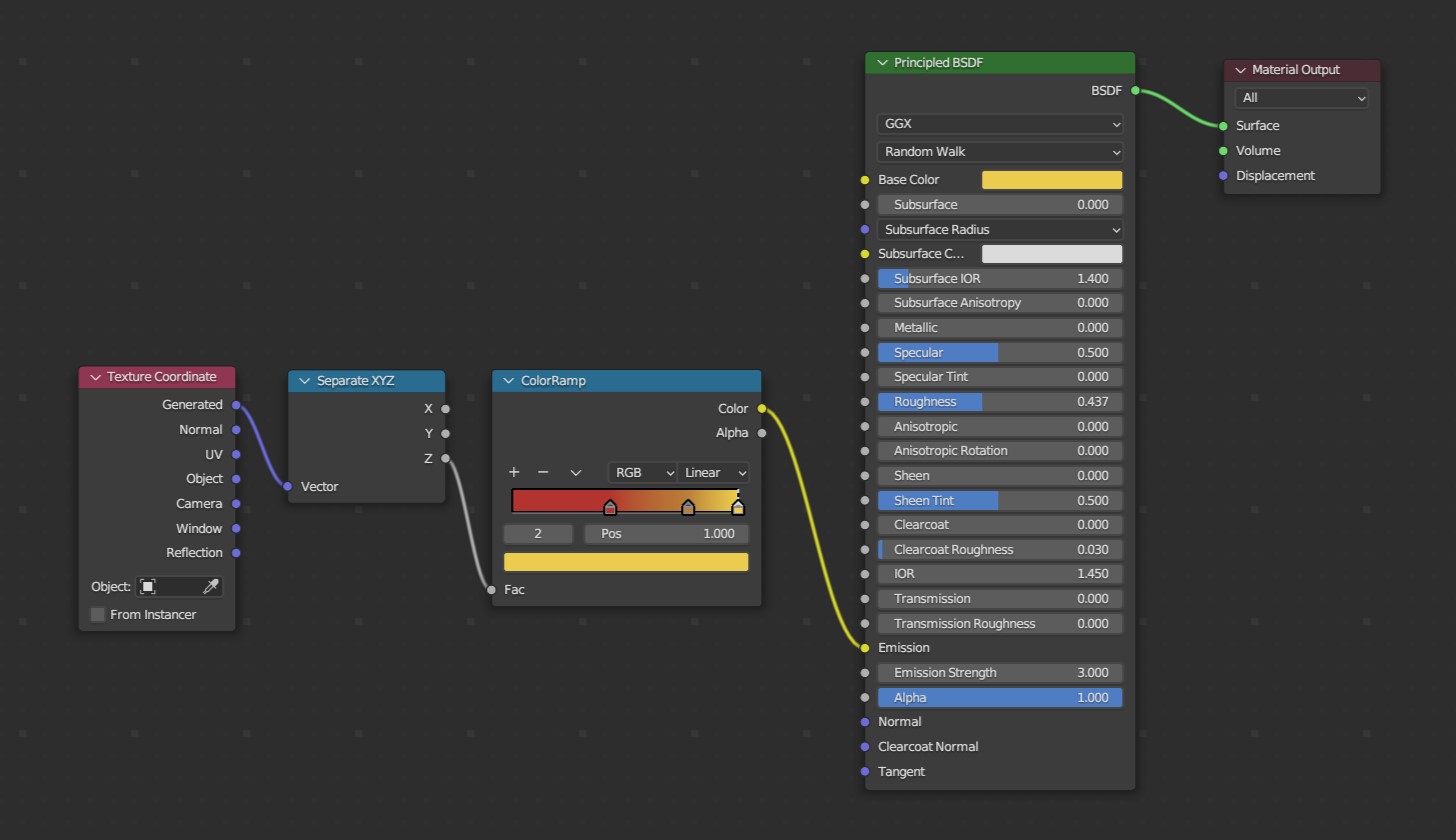
To make the emission more interesting and colorful, I used a Color Ramp.
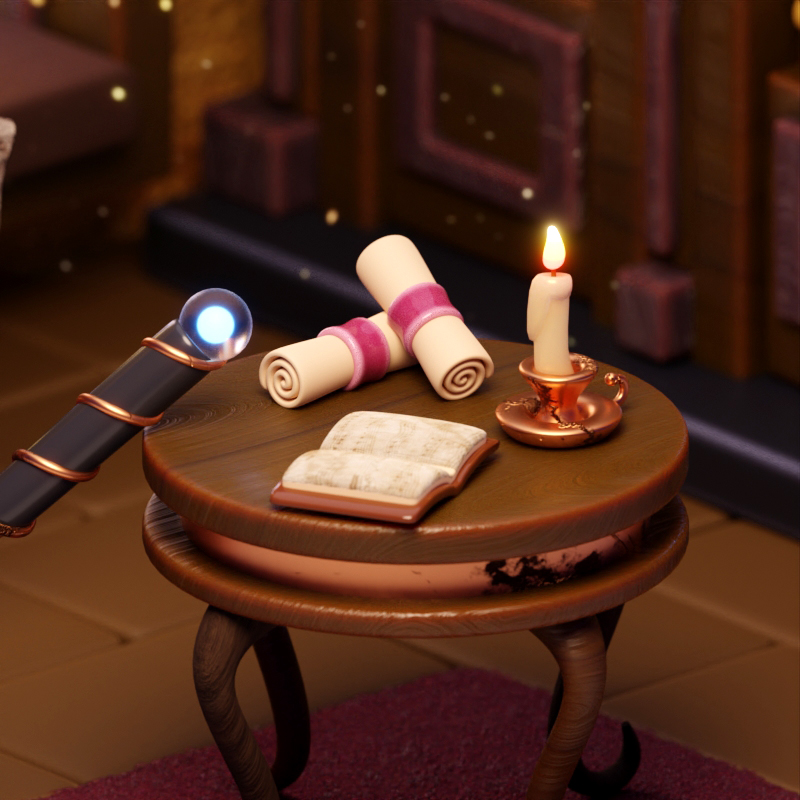
Texturing
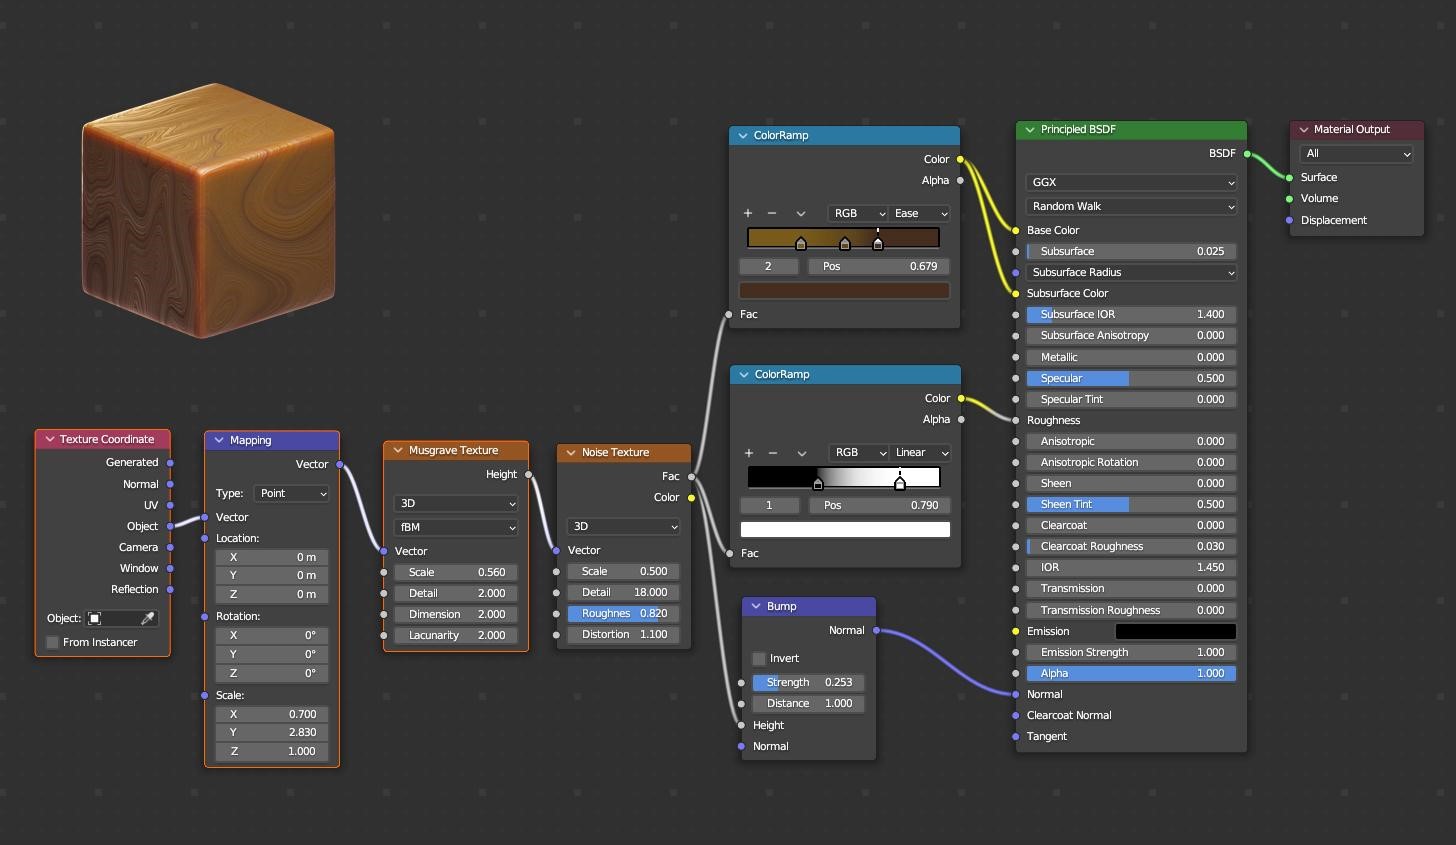
In the wizard’s library, the main material is wood, and I wanted the room to be filled with a magical atmosphere, so I added a noticeable radius of subsurface scattering to the wood so that it could let warm light from the window pass through it and glow from within.
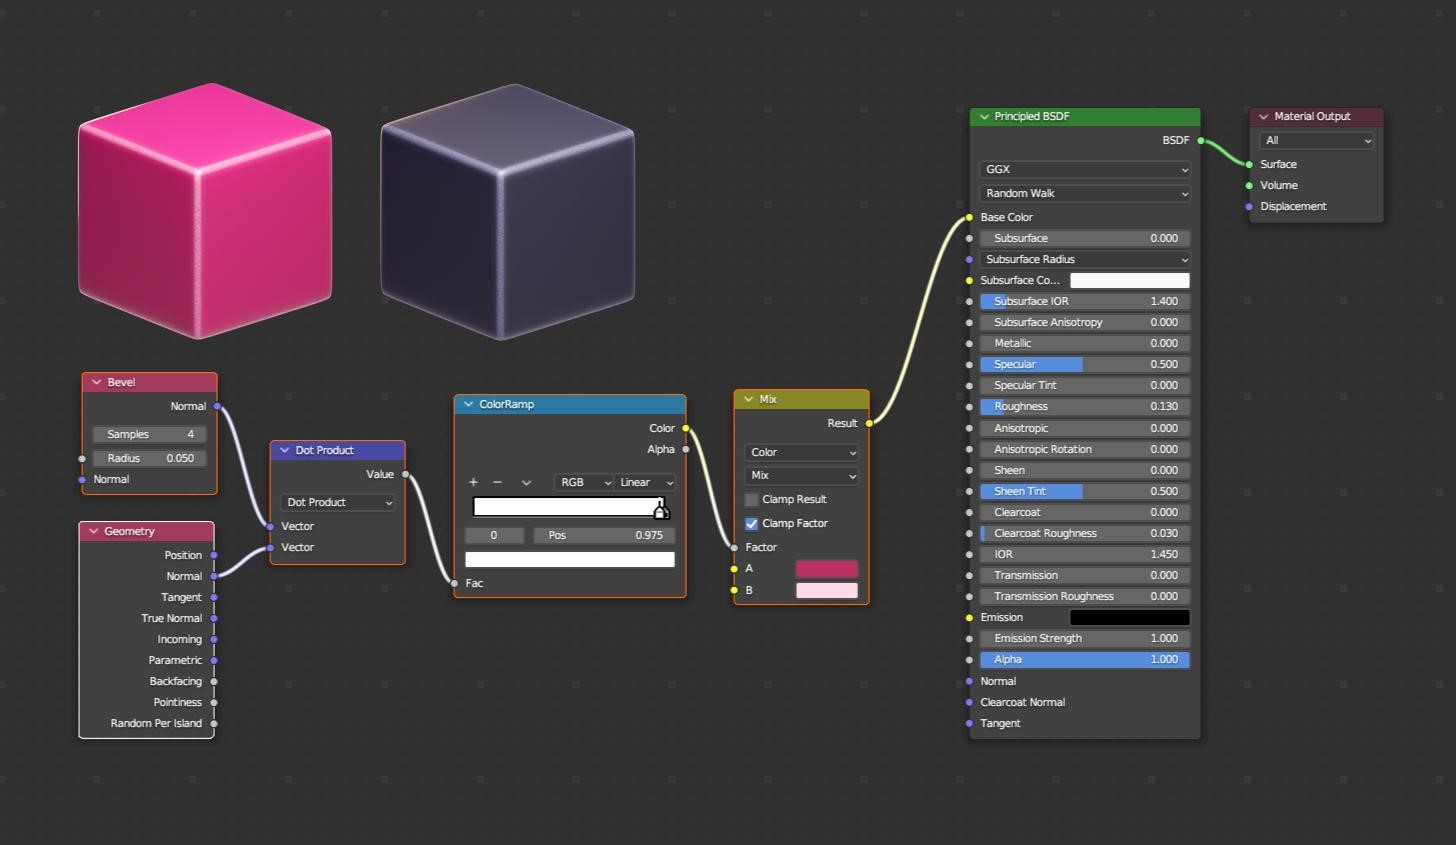
This library is old and has moths in it, so I decided to add some wear and tear to certain materials (such as the ribbons on scrolls, the base of the bookshelf, and the decorative panels on the walls) by using a combination of Bevel and Dot Product.
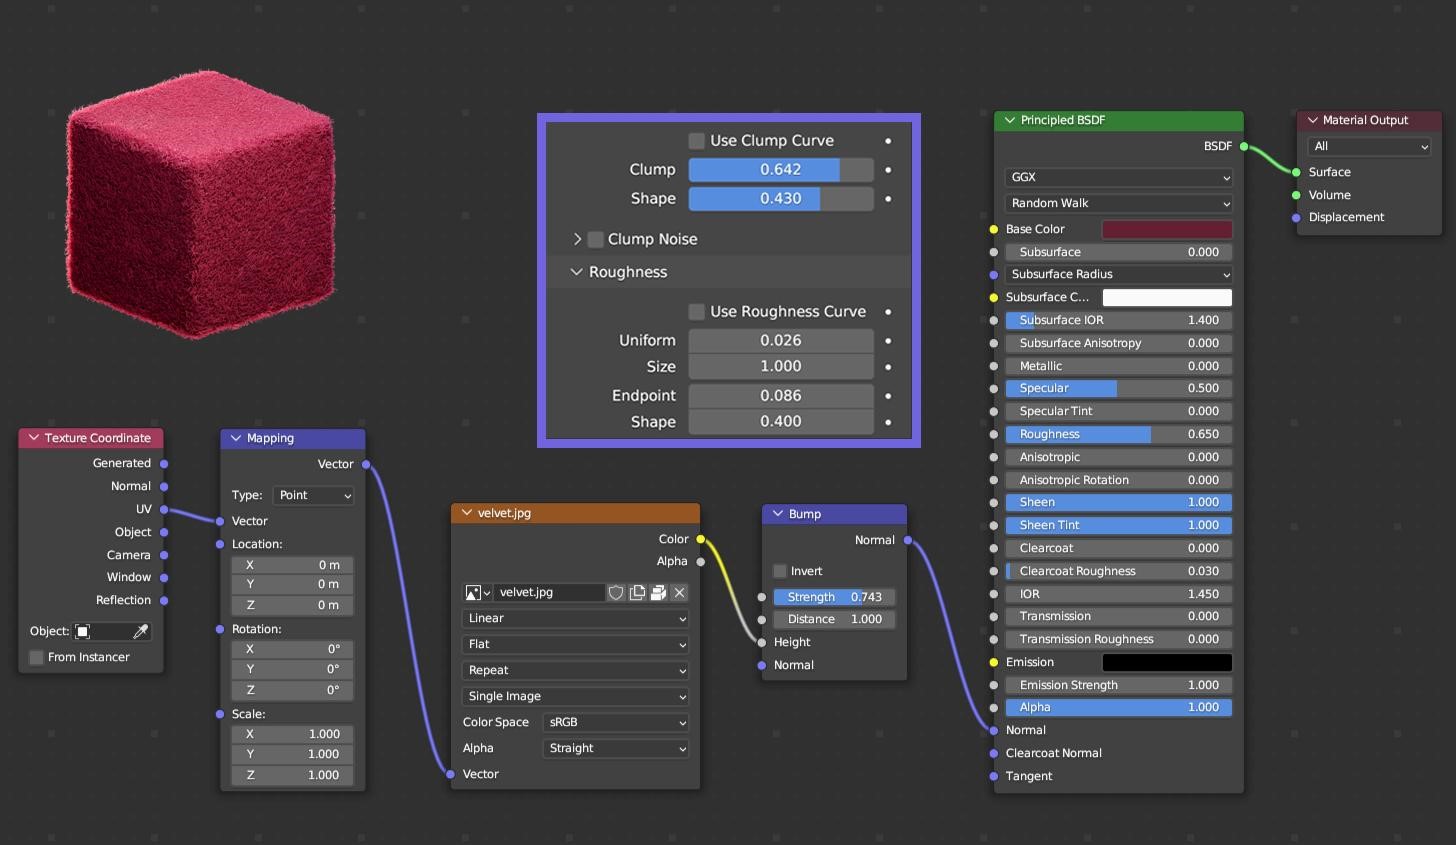
The armchair in the library is no exception. I wanted to show that the armchair upholstery had worn in places over the years. So, at first, I created a material simulating velvet. I used an image texture of real velvet and put Bump into the Normal to make unevenness.
In the particle system, it was necessary to show that the fibers were flattened and unevenly distributed too. For this purpose, I used Clumping and increased the values of the Uniform and End point parameters.
Rendering
So here is the final step—rendering. I usually use Cycles and an orthographic type of camera.
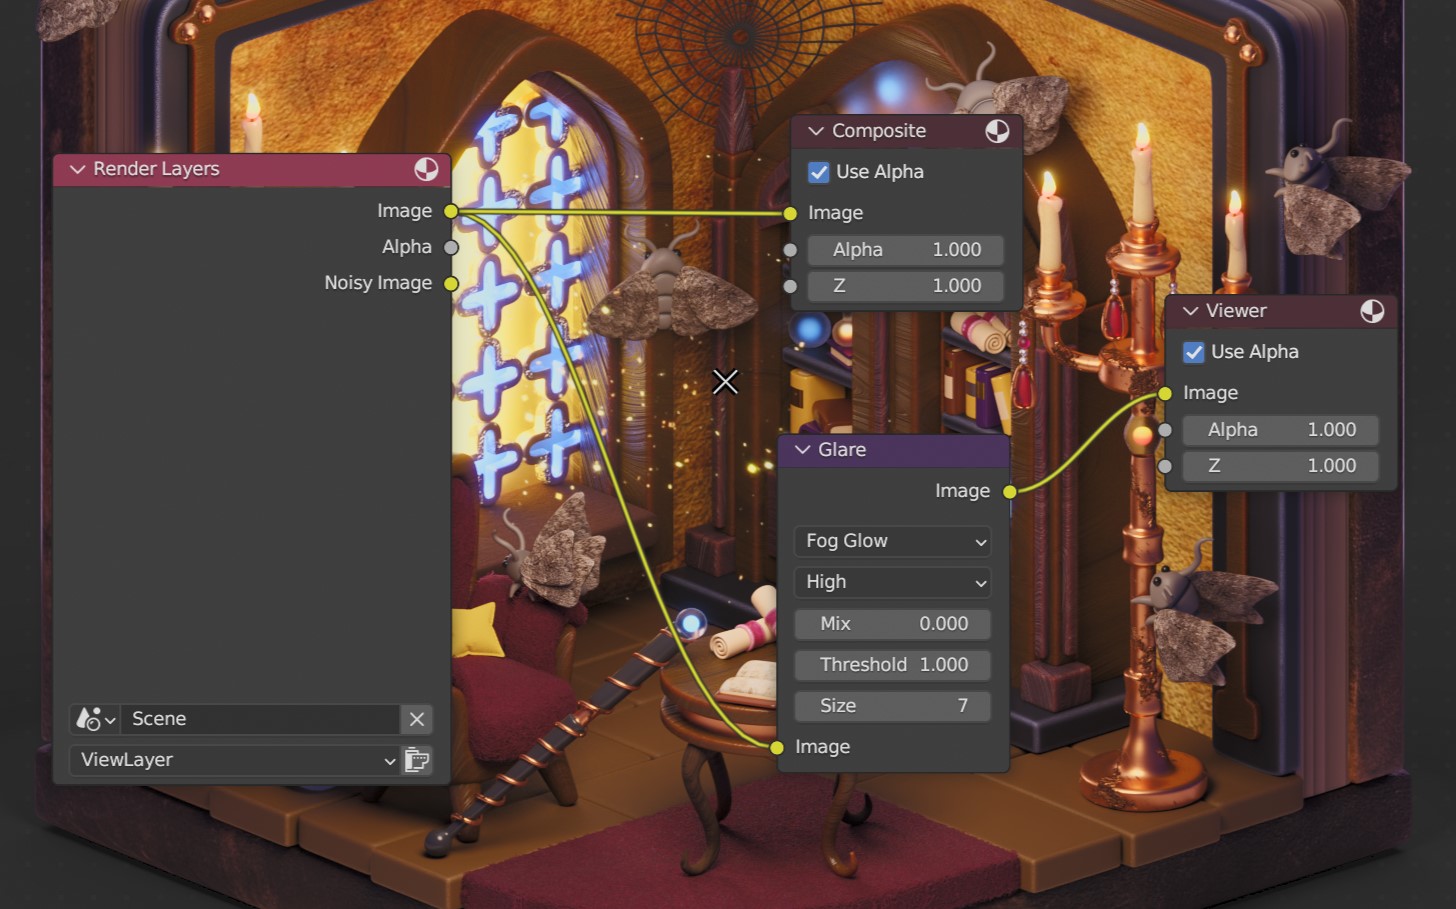
To add extra glow to the objects, I use Glare node – Fog glow in Compositing. Size depends on how much glow I want to add. Here, 7 was quite enough.
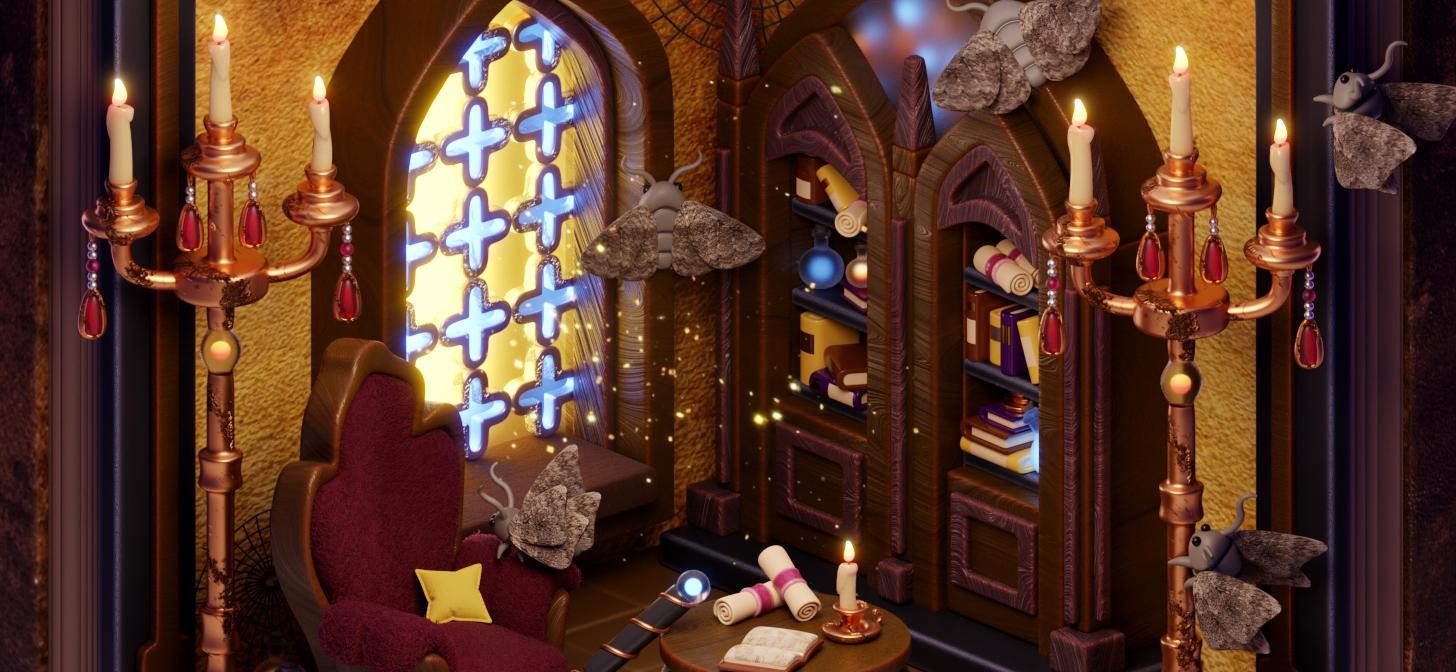
And that was all! Below are the final renders, hope you like them.
RENDER: Wizard’s Library
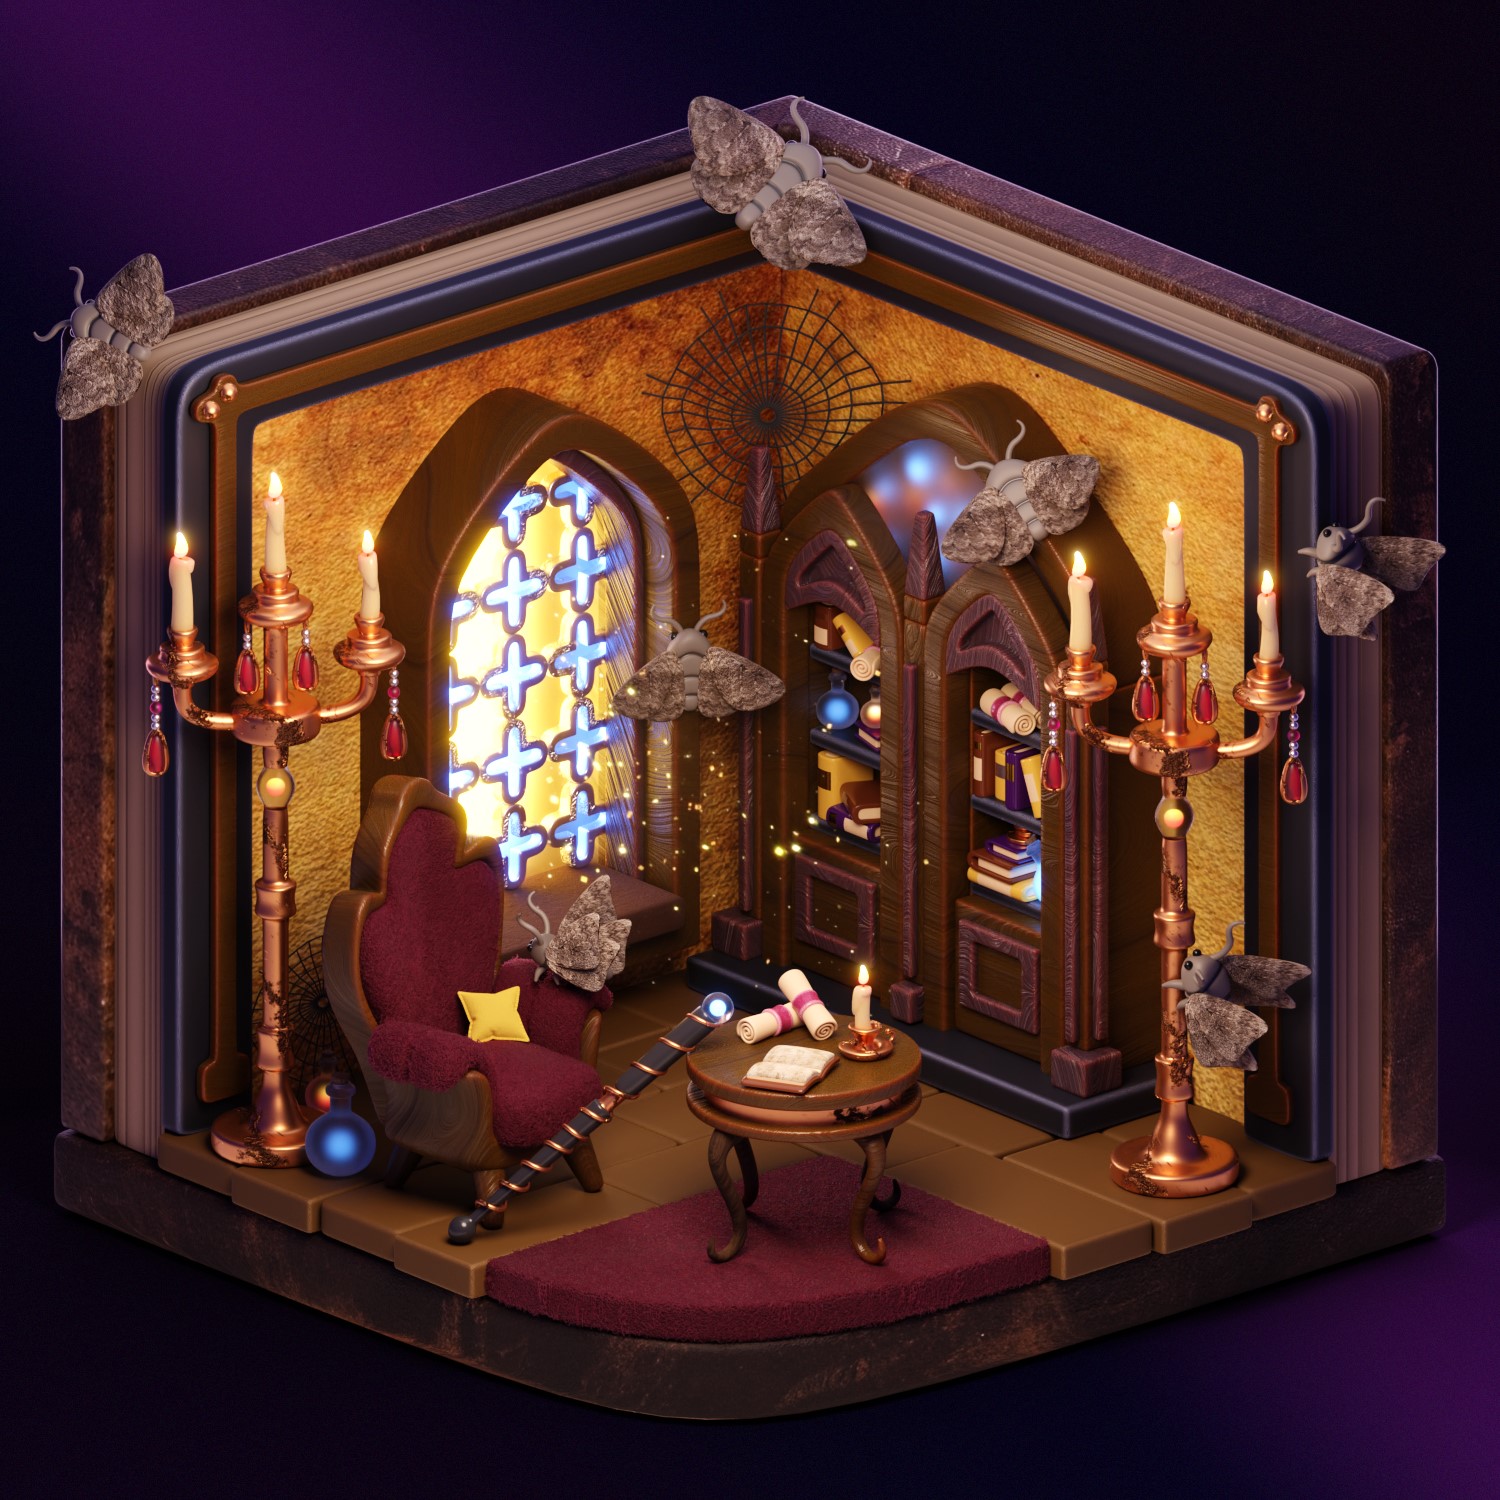
Thank you for your attention! I hope it was interesting :)
About the Artist
Polina Suvorova is a 3D artist who specialize in creating isometric art and cartoon characters. She is currently working as a freelancer.