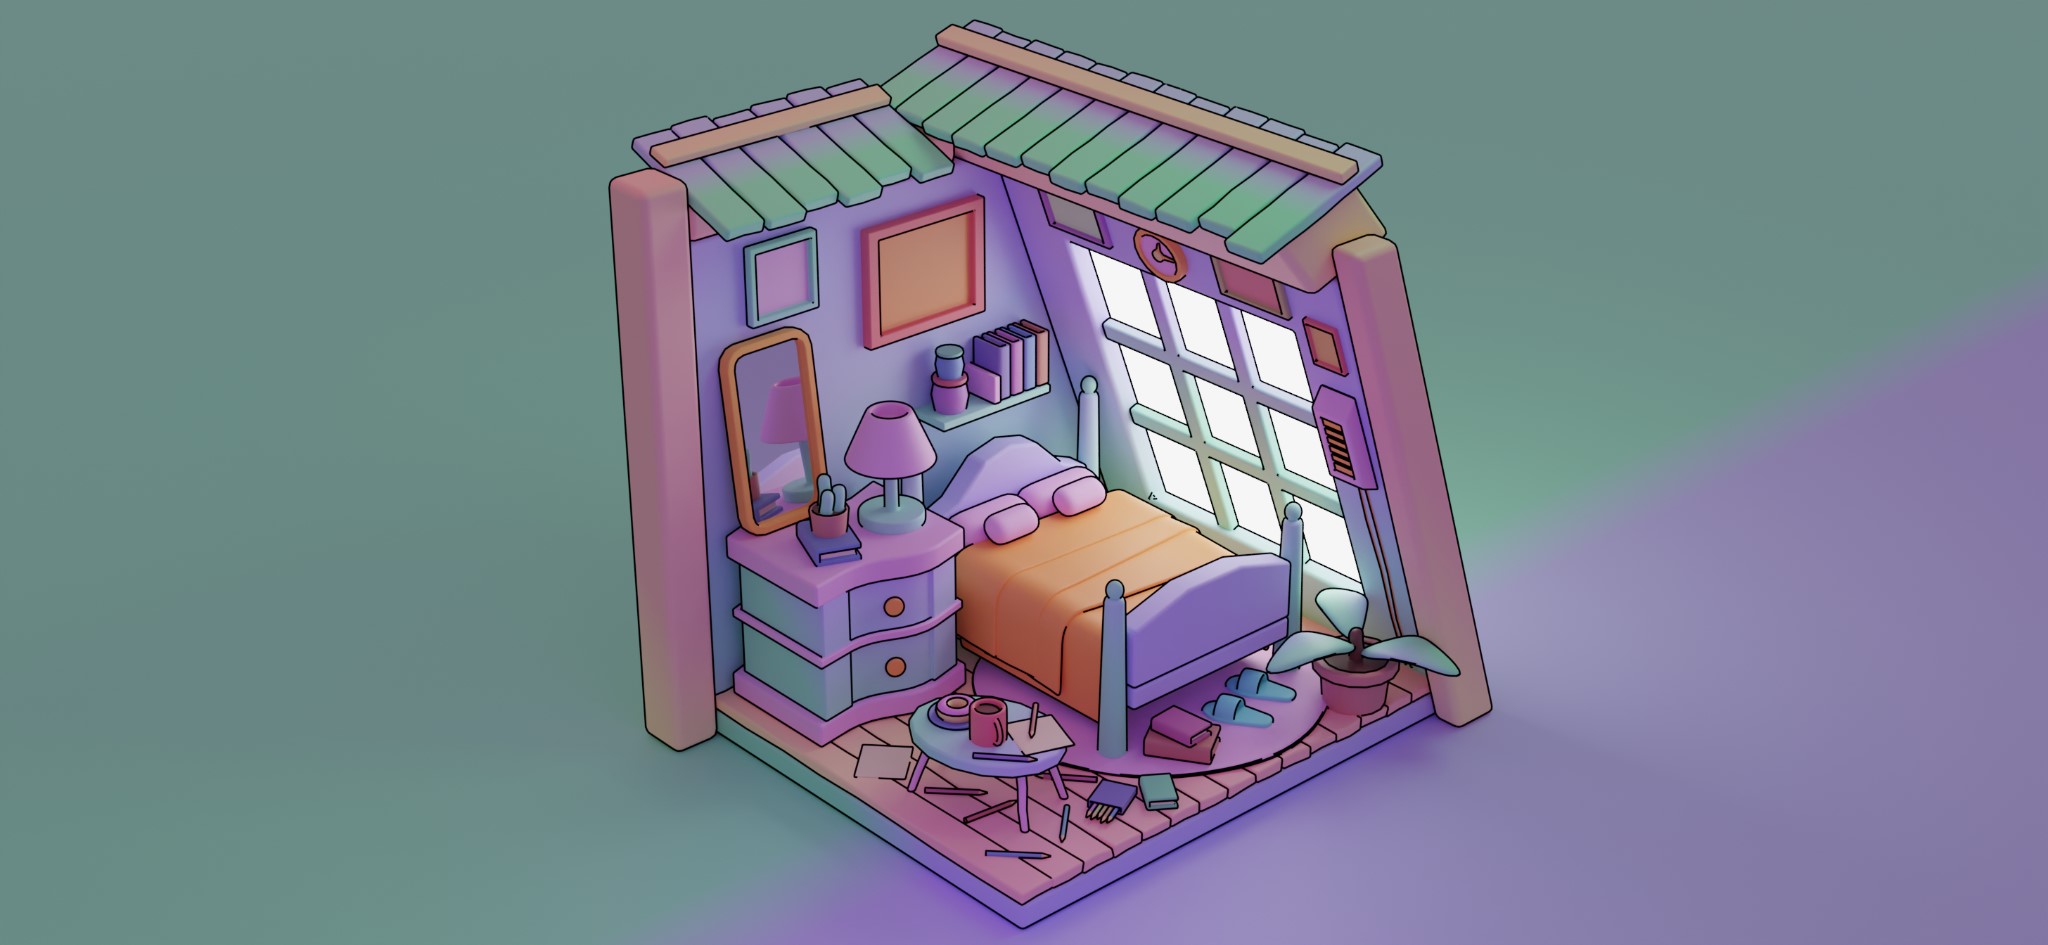
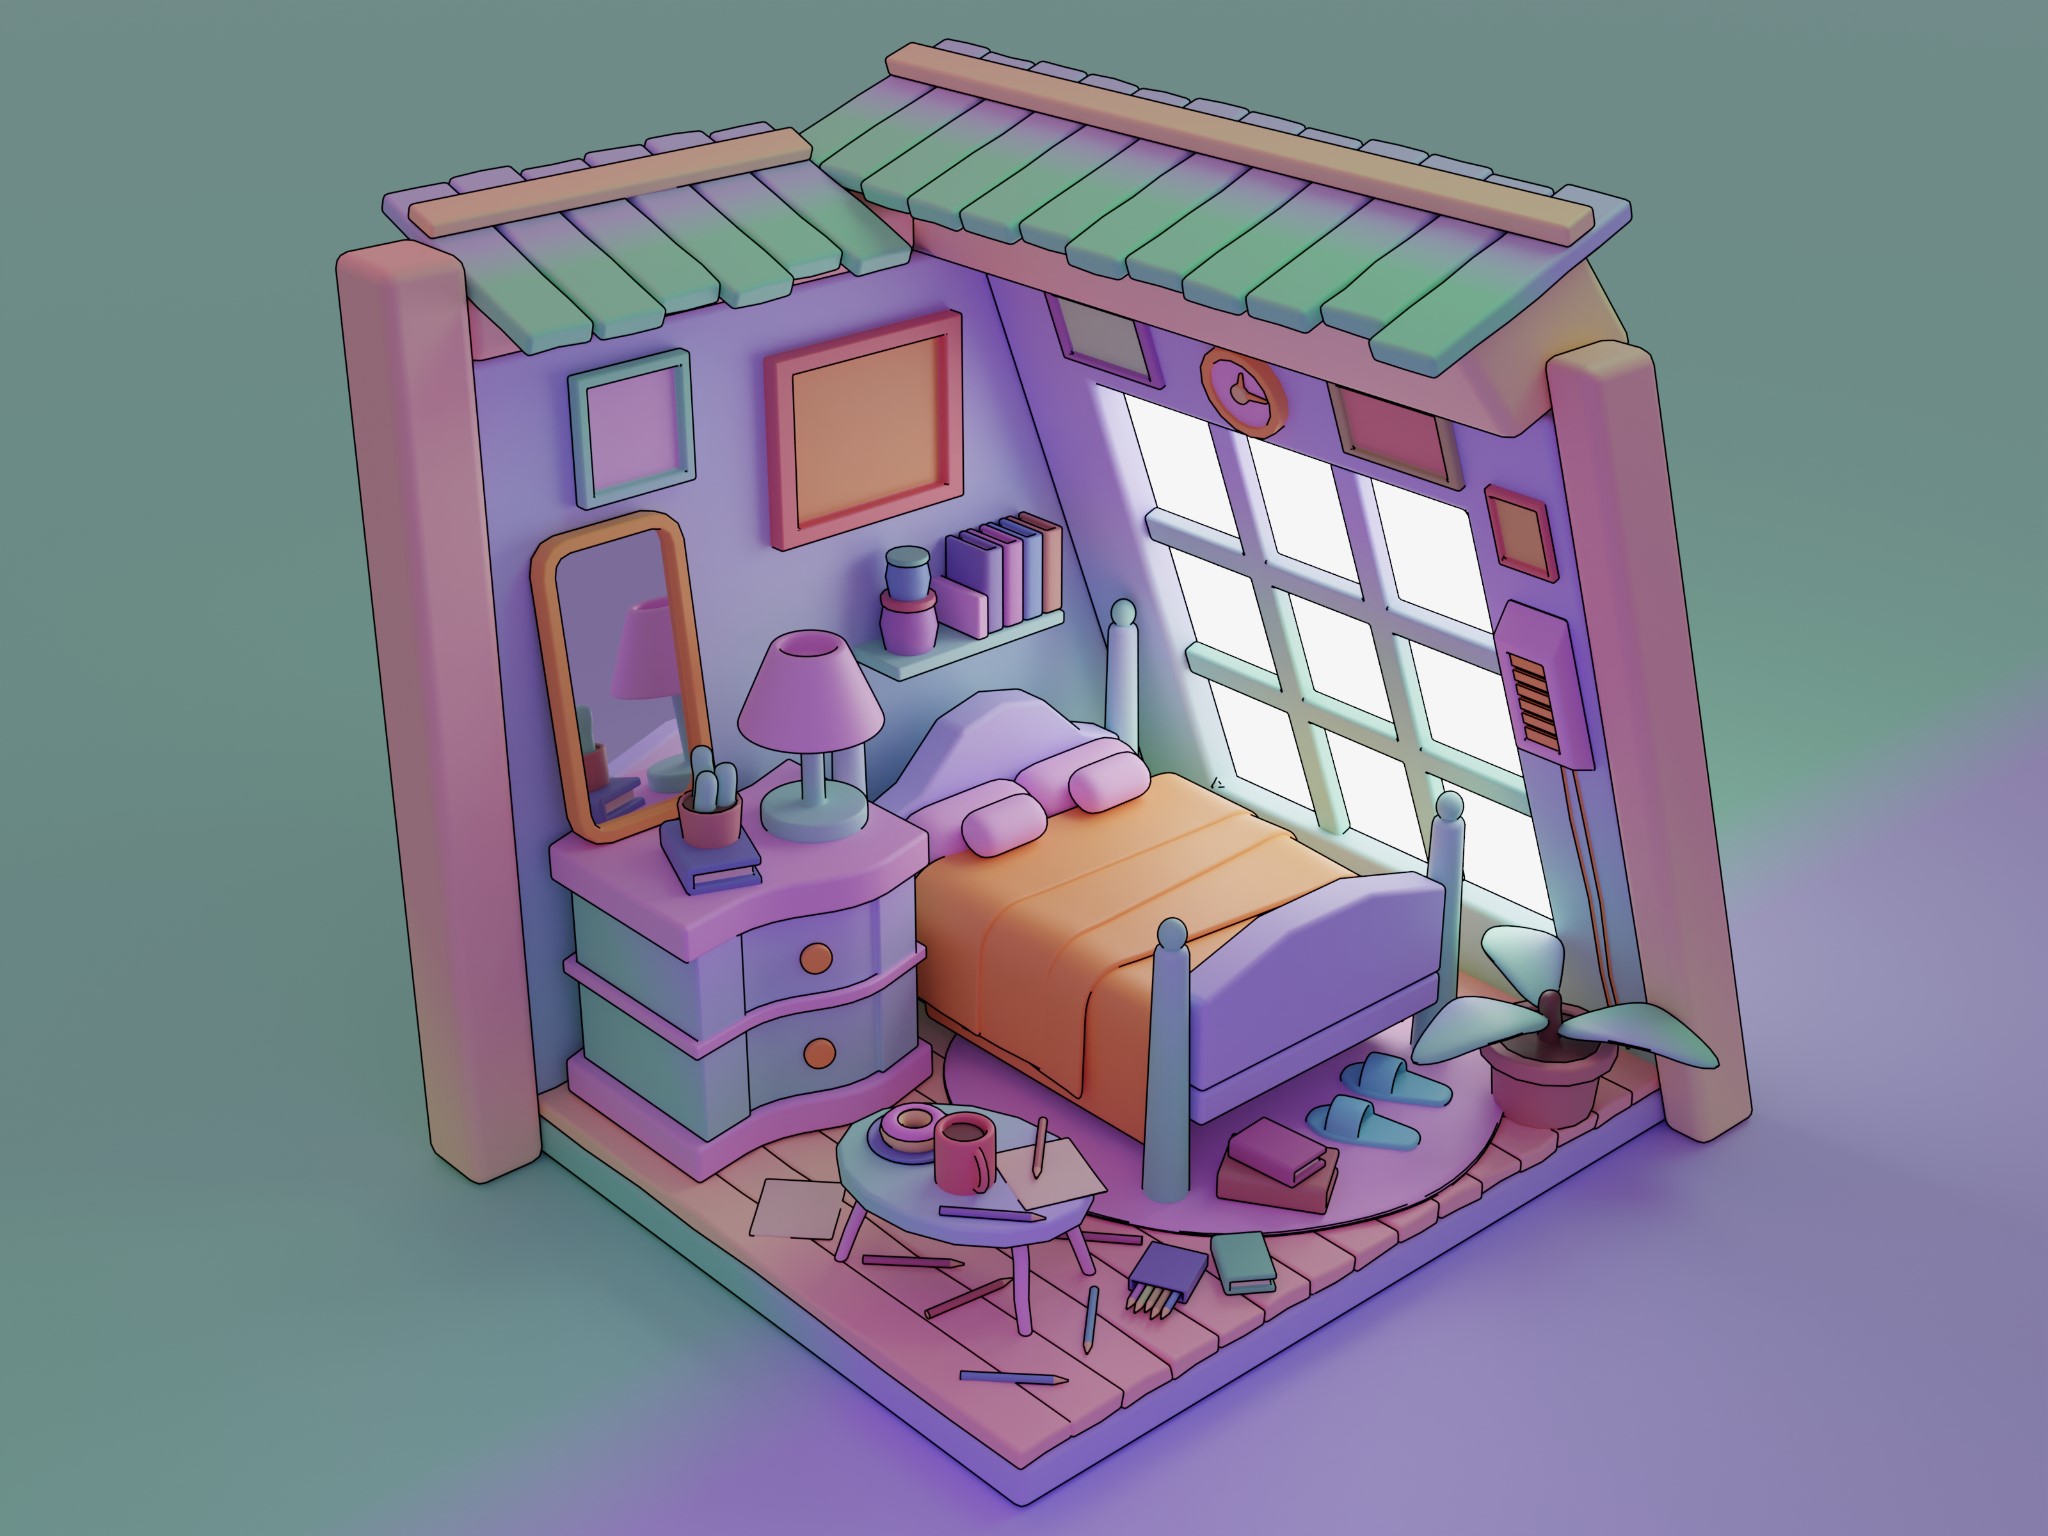
Behind the Scenes: Attic
INTRODUCTION
Hello everyone! My name is Heber Villalta, and I am a 3D artist, living in El Salvador, Central America. I started studying 3D about 4 years ago, for I love the 3D world. I am passionate not only about 3D and Blender, but also about teaching. I have a YouTube channel in Spanish where I teach Blender, and I like to share what I learn to help others in their growth.
INSPIRATION
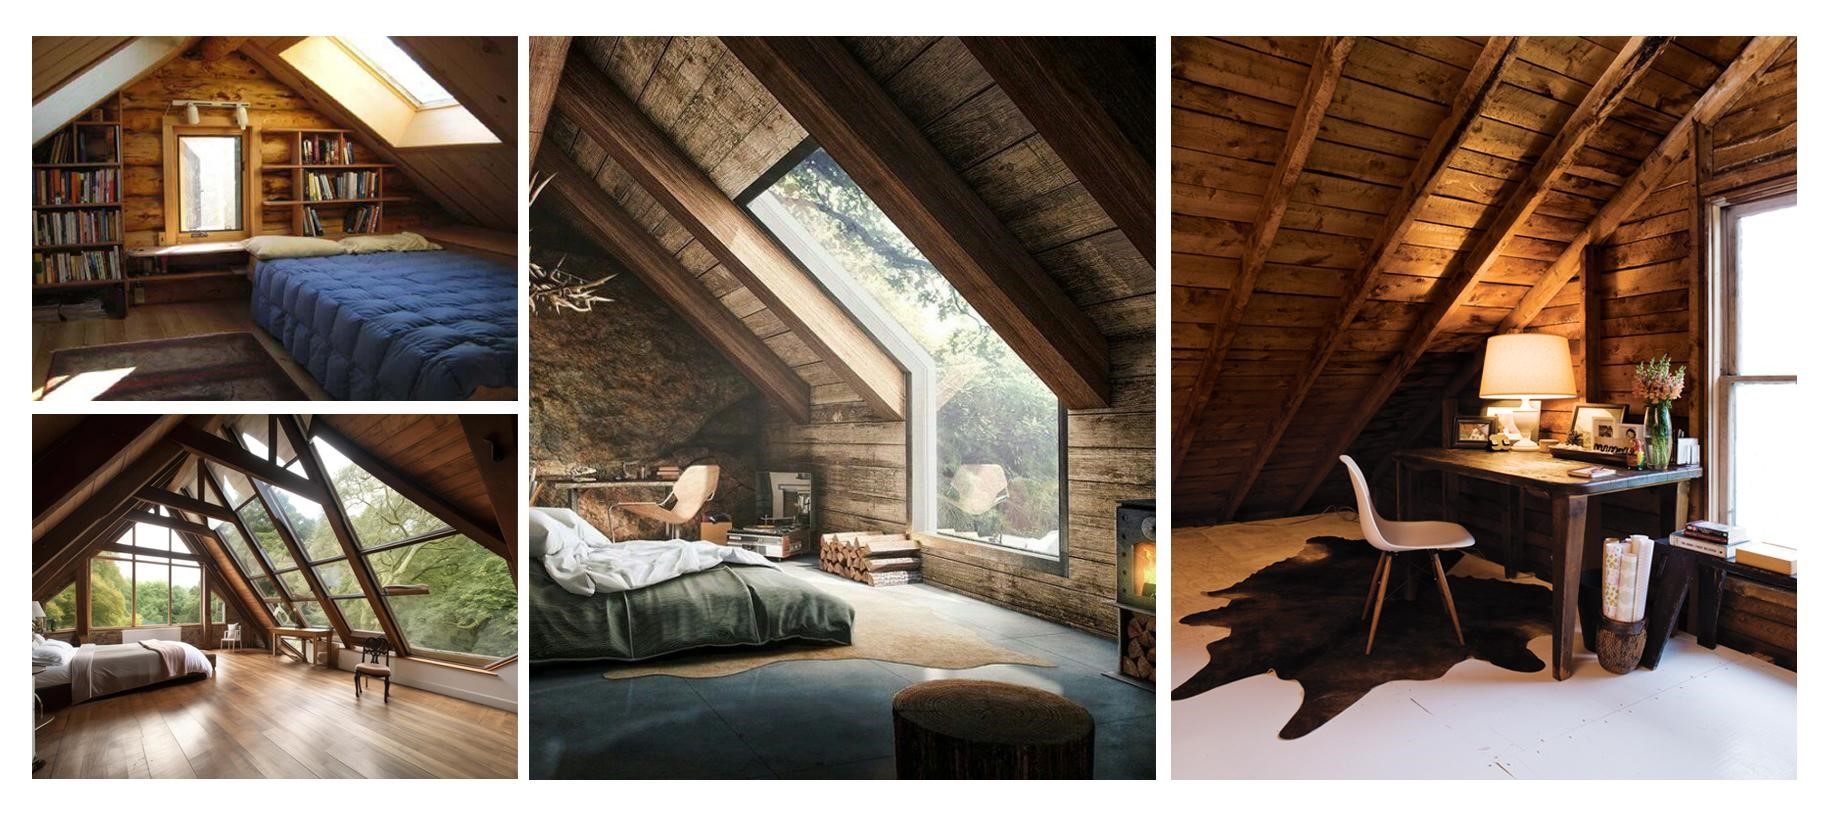
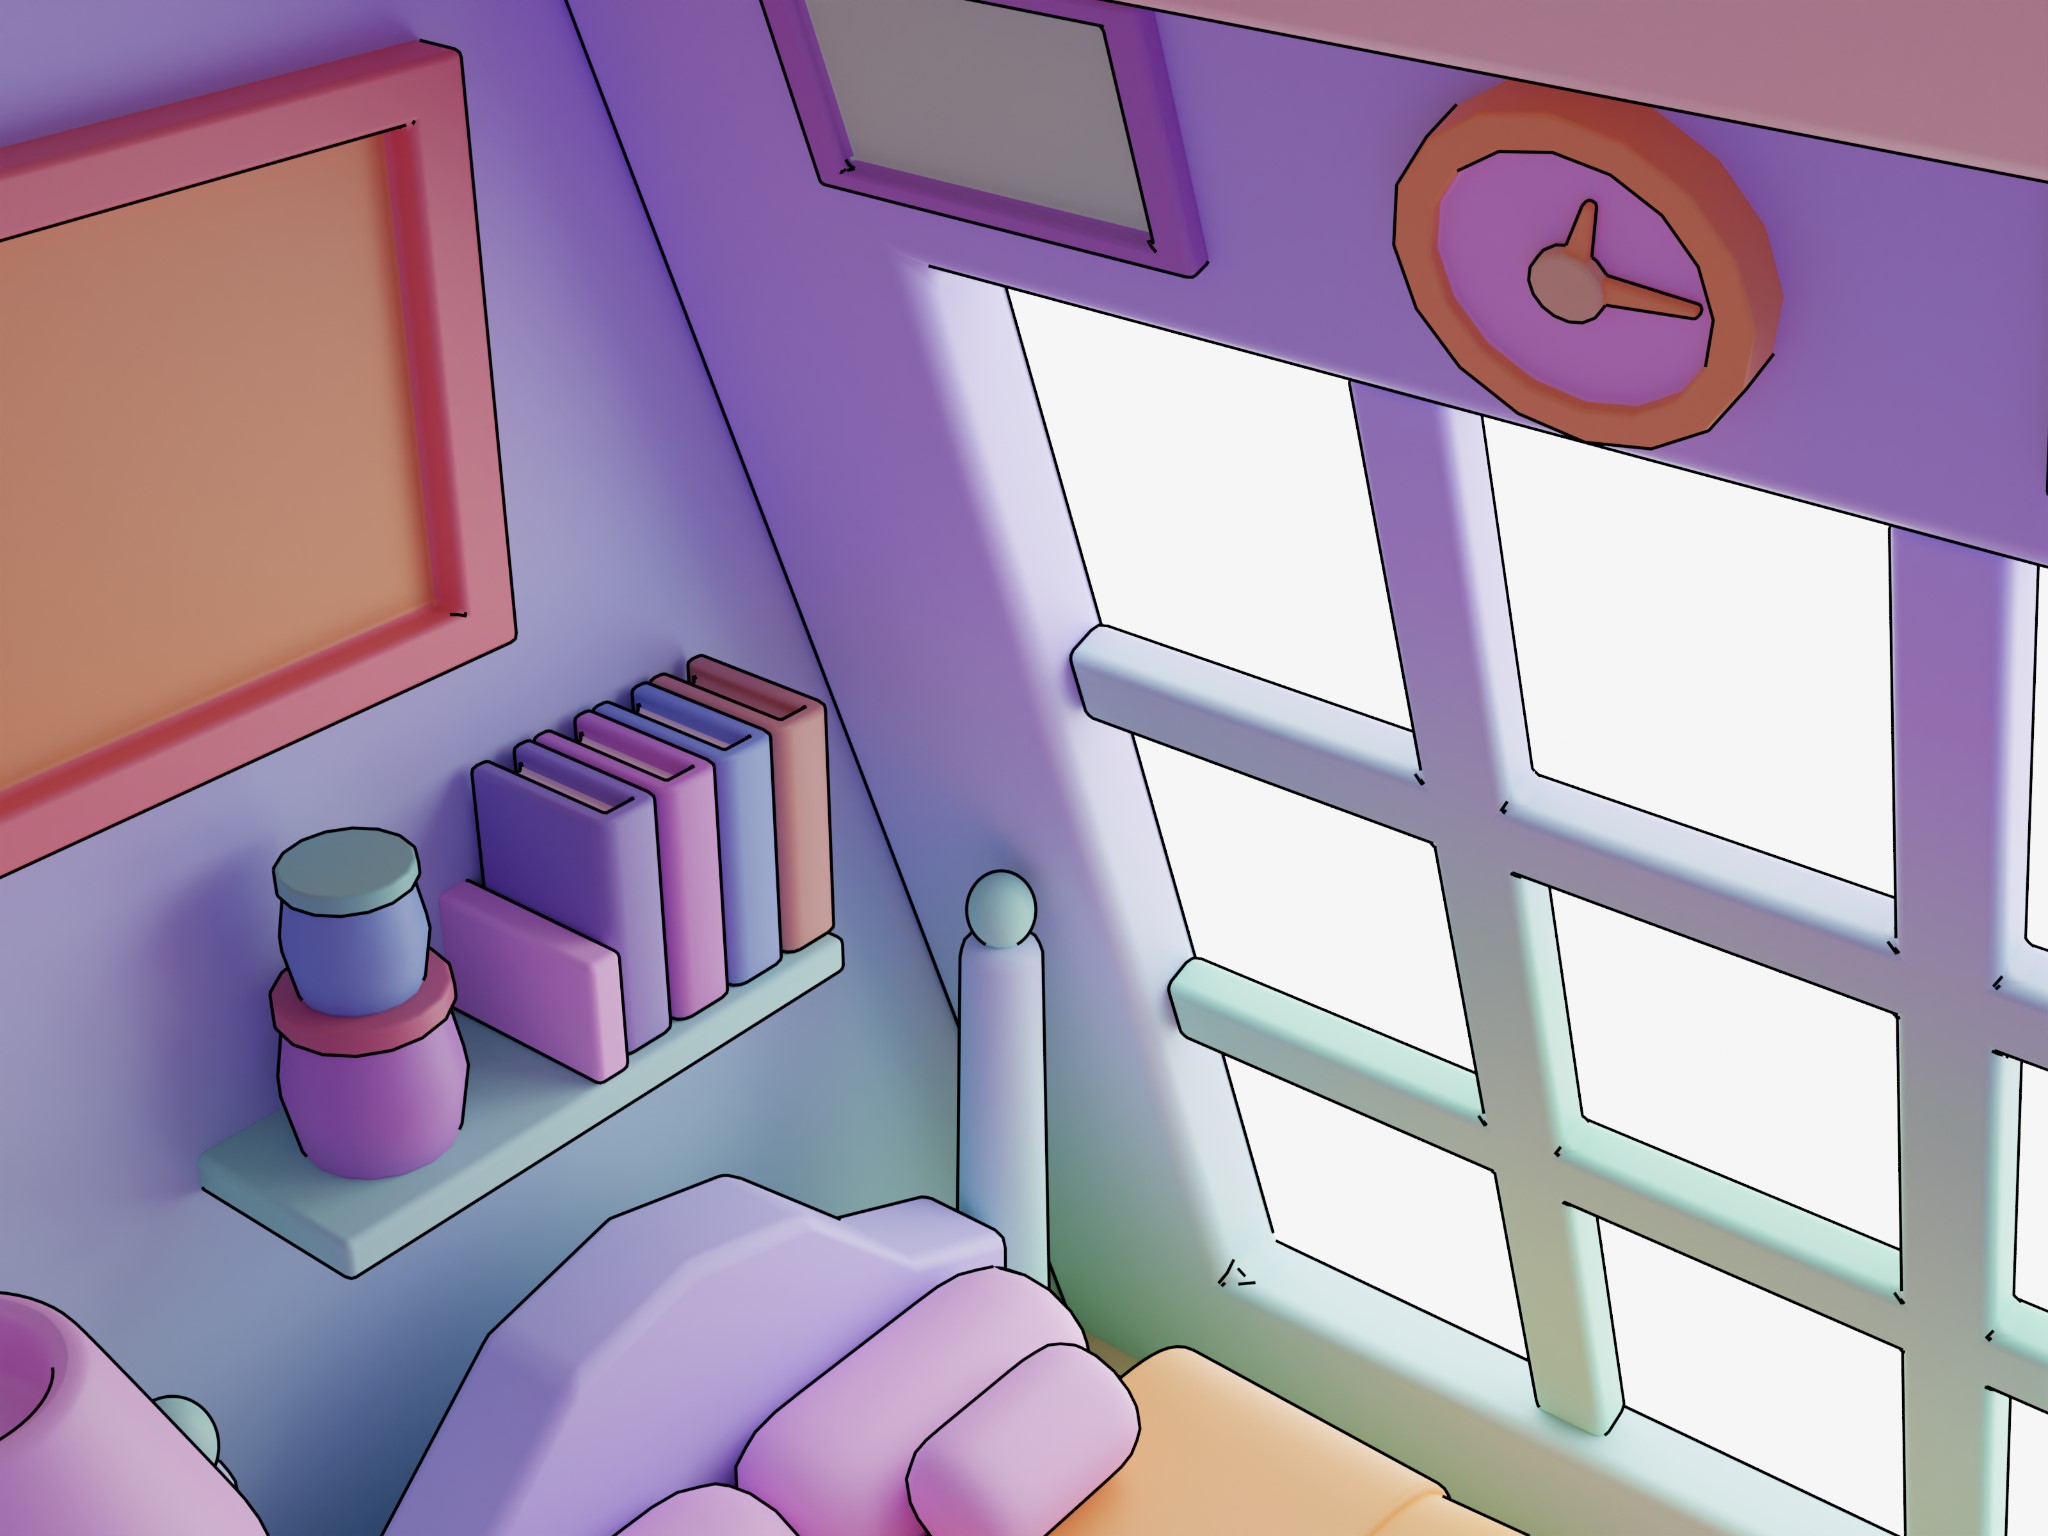
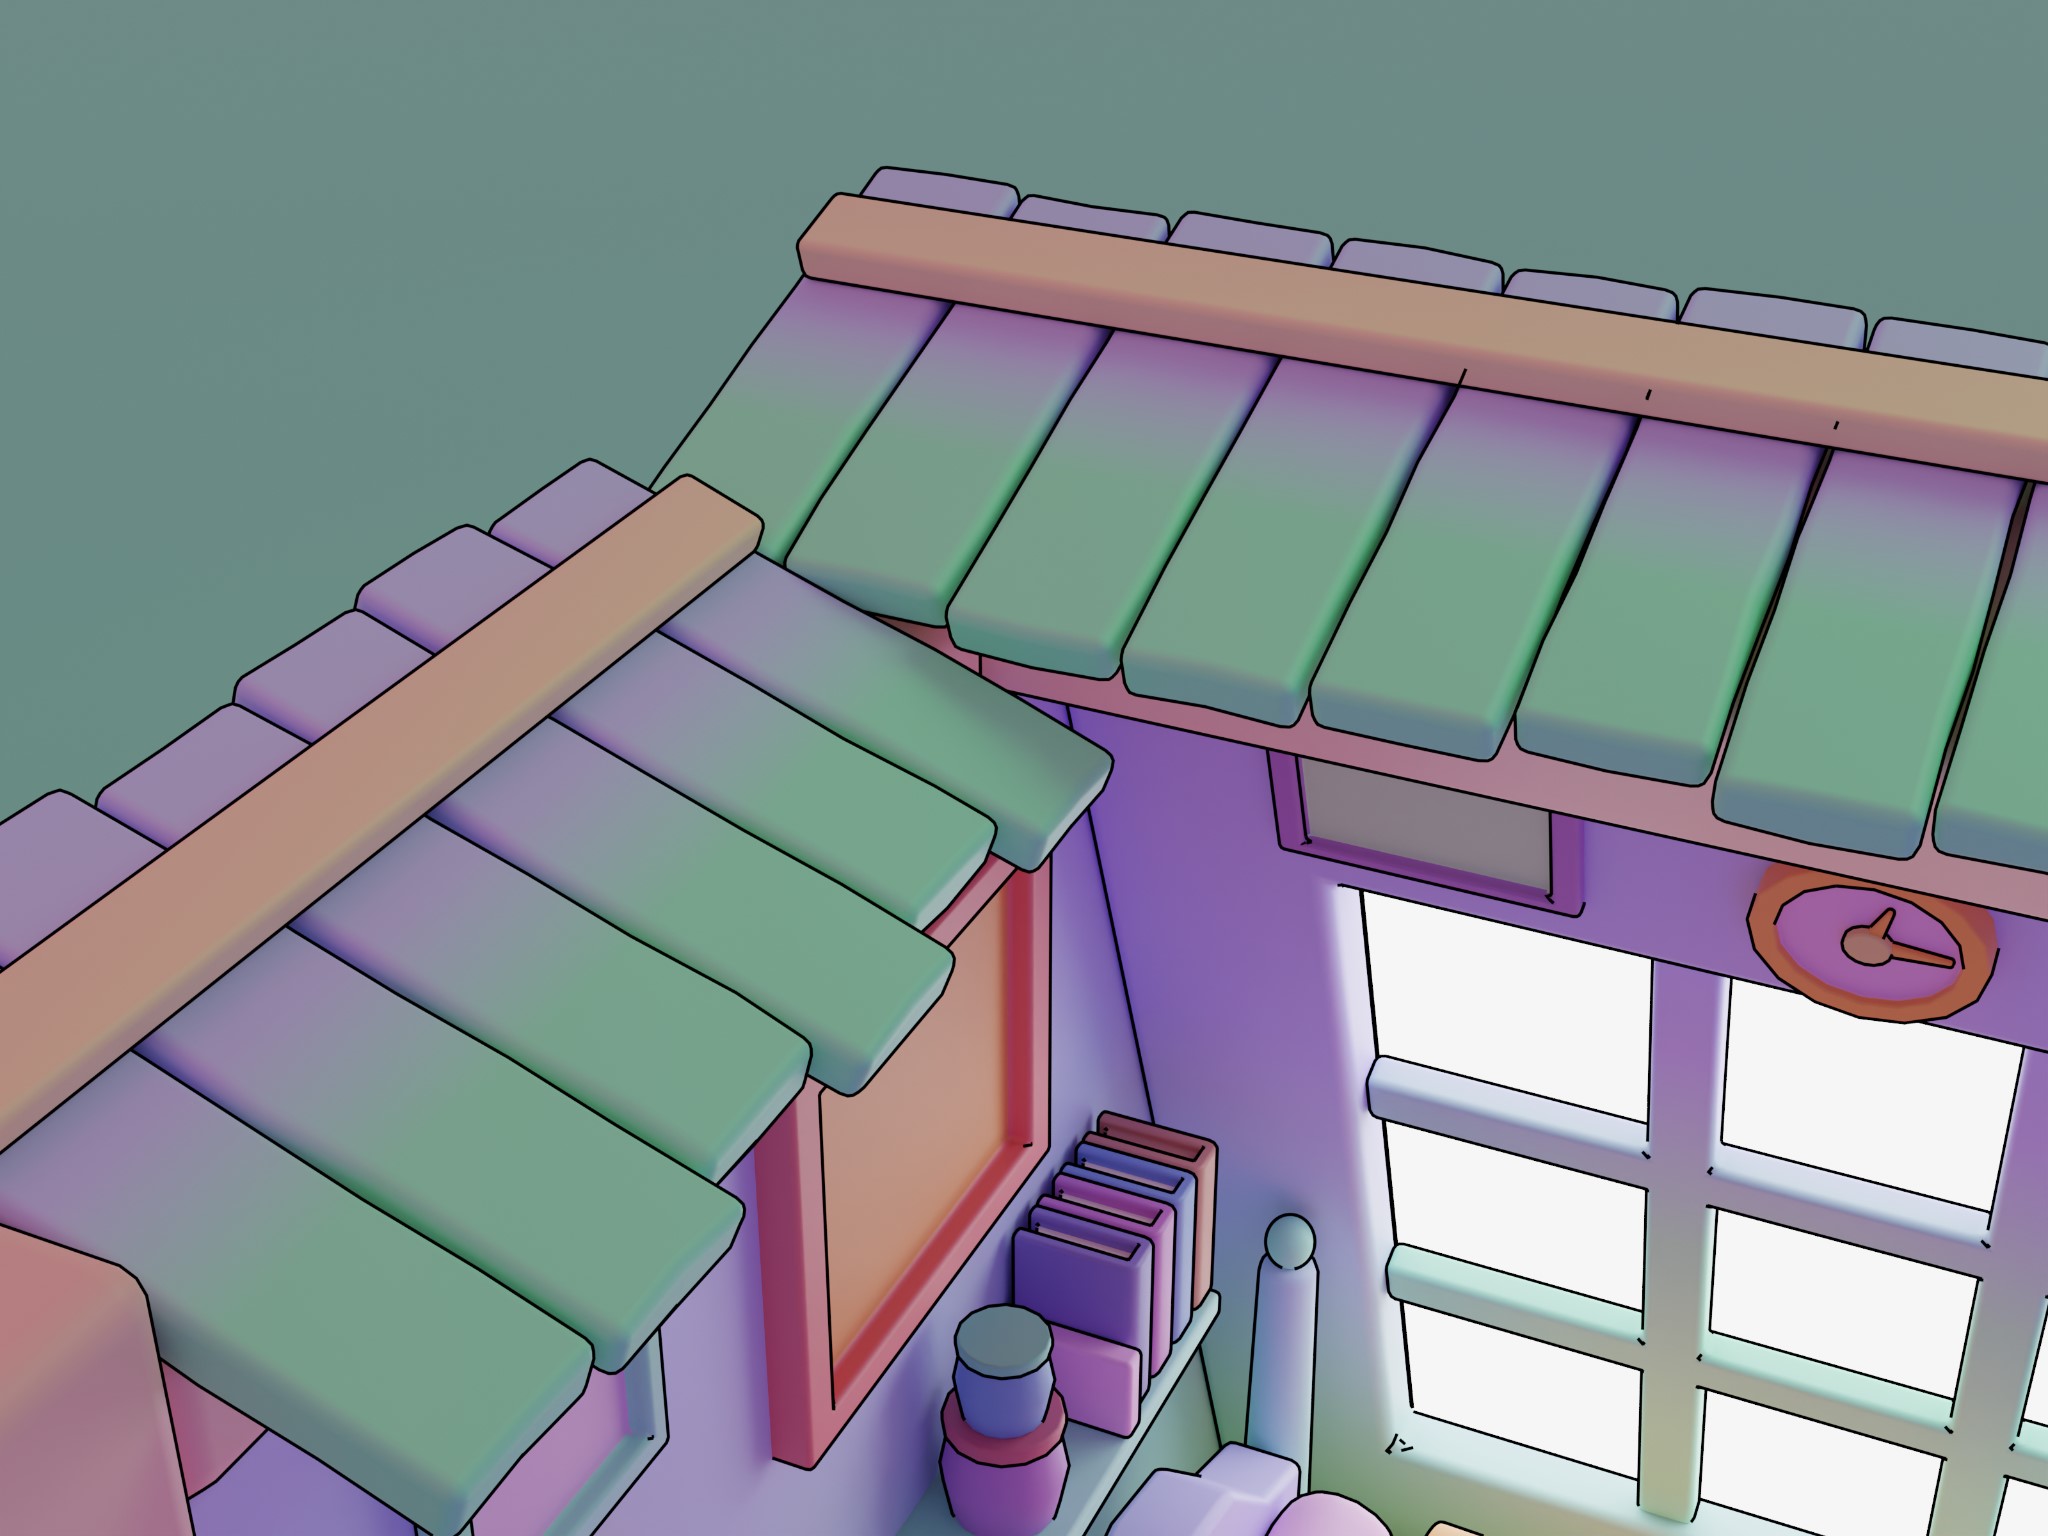
I like attics, and thought about a new scene to make. I wanted to do one with a different nuance, something like a children’s attic with a mix of cold and warm pastel tones where a tender atmosphere was reflected, cool and relaxed.
For my references, I used some images I found on Google about attics and I then made my own style.
PROCESS
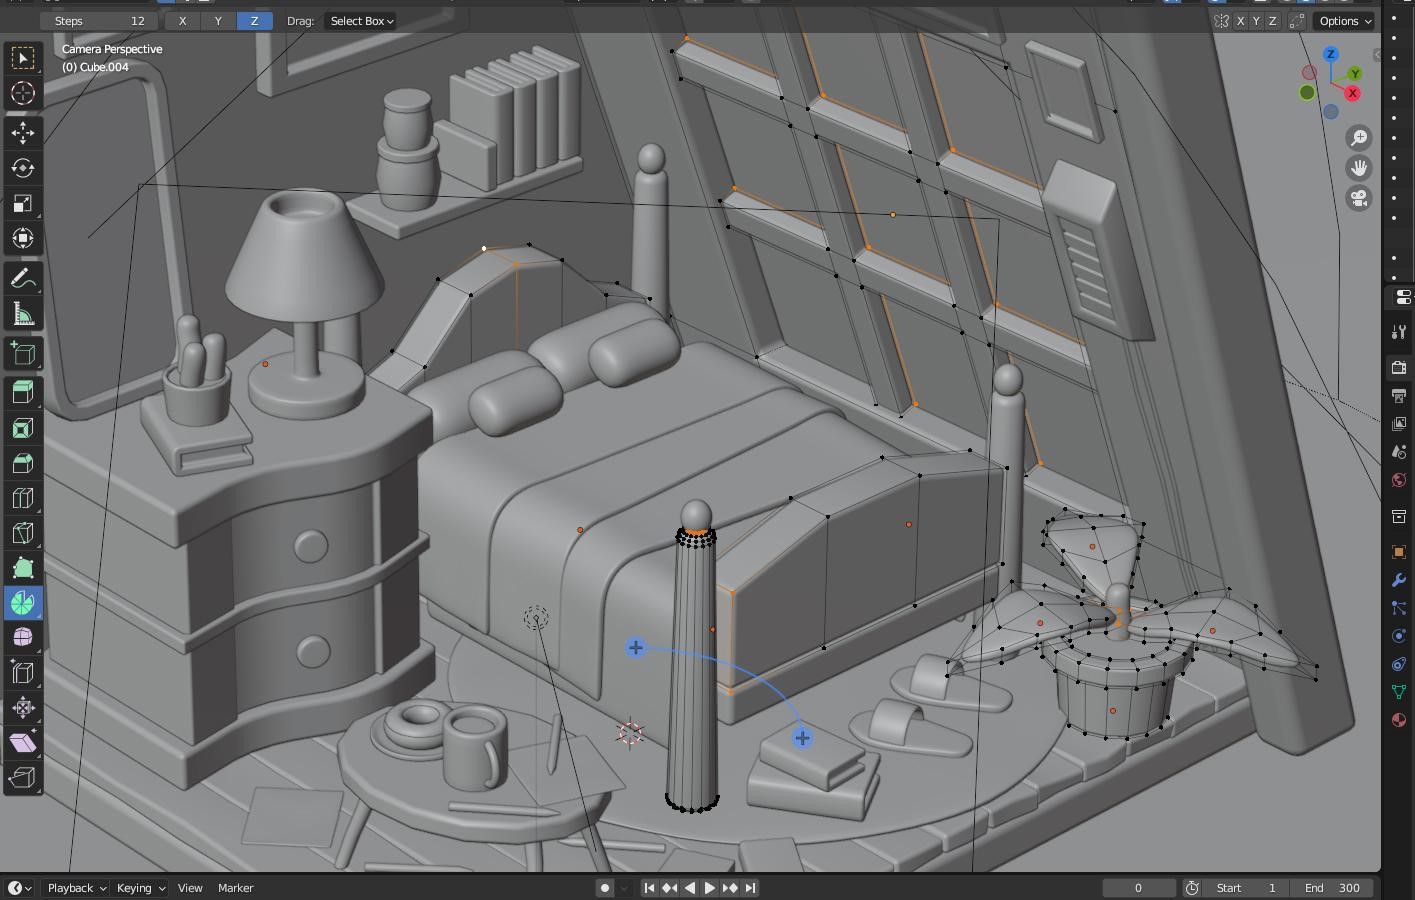
For the process, I used Blender 3.6.
Modeling
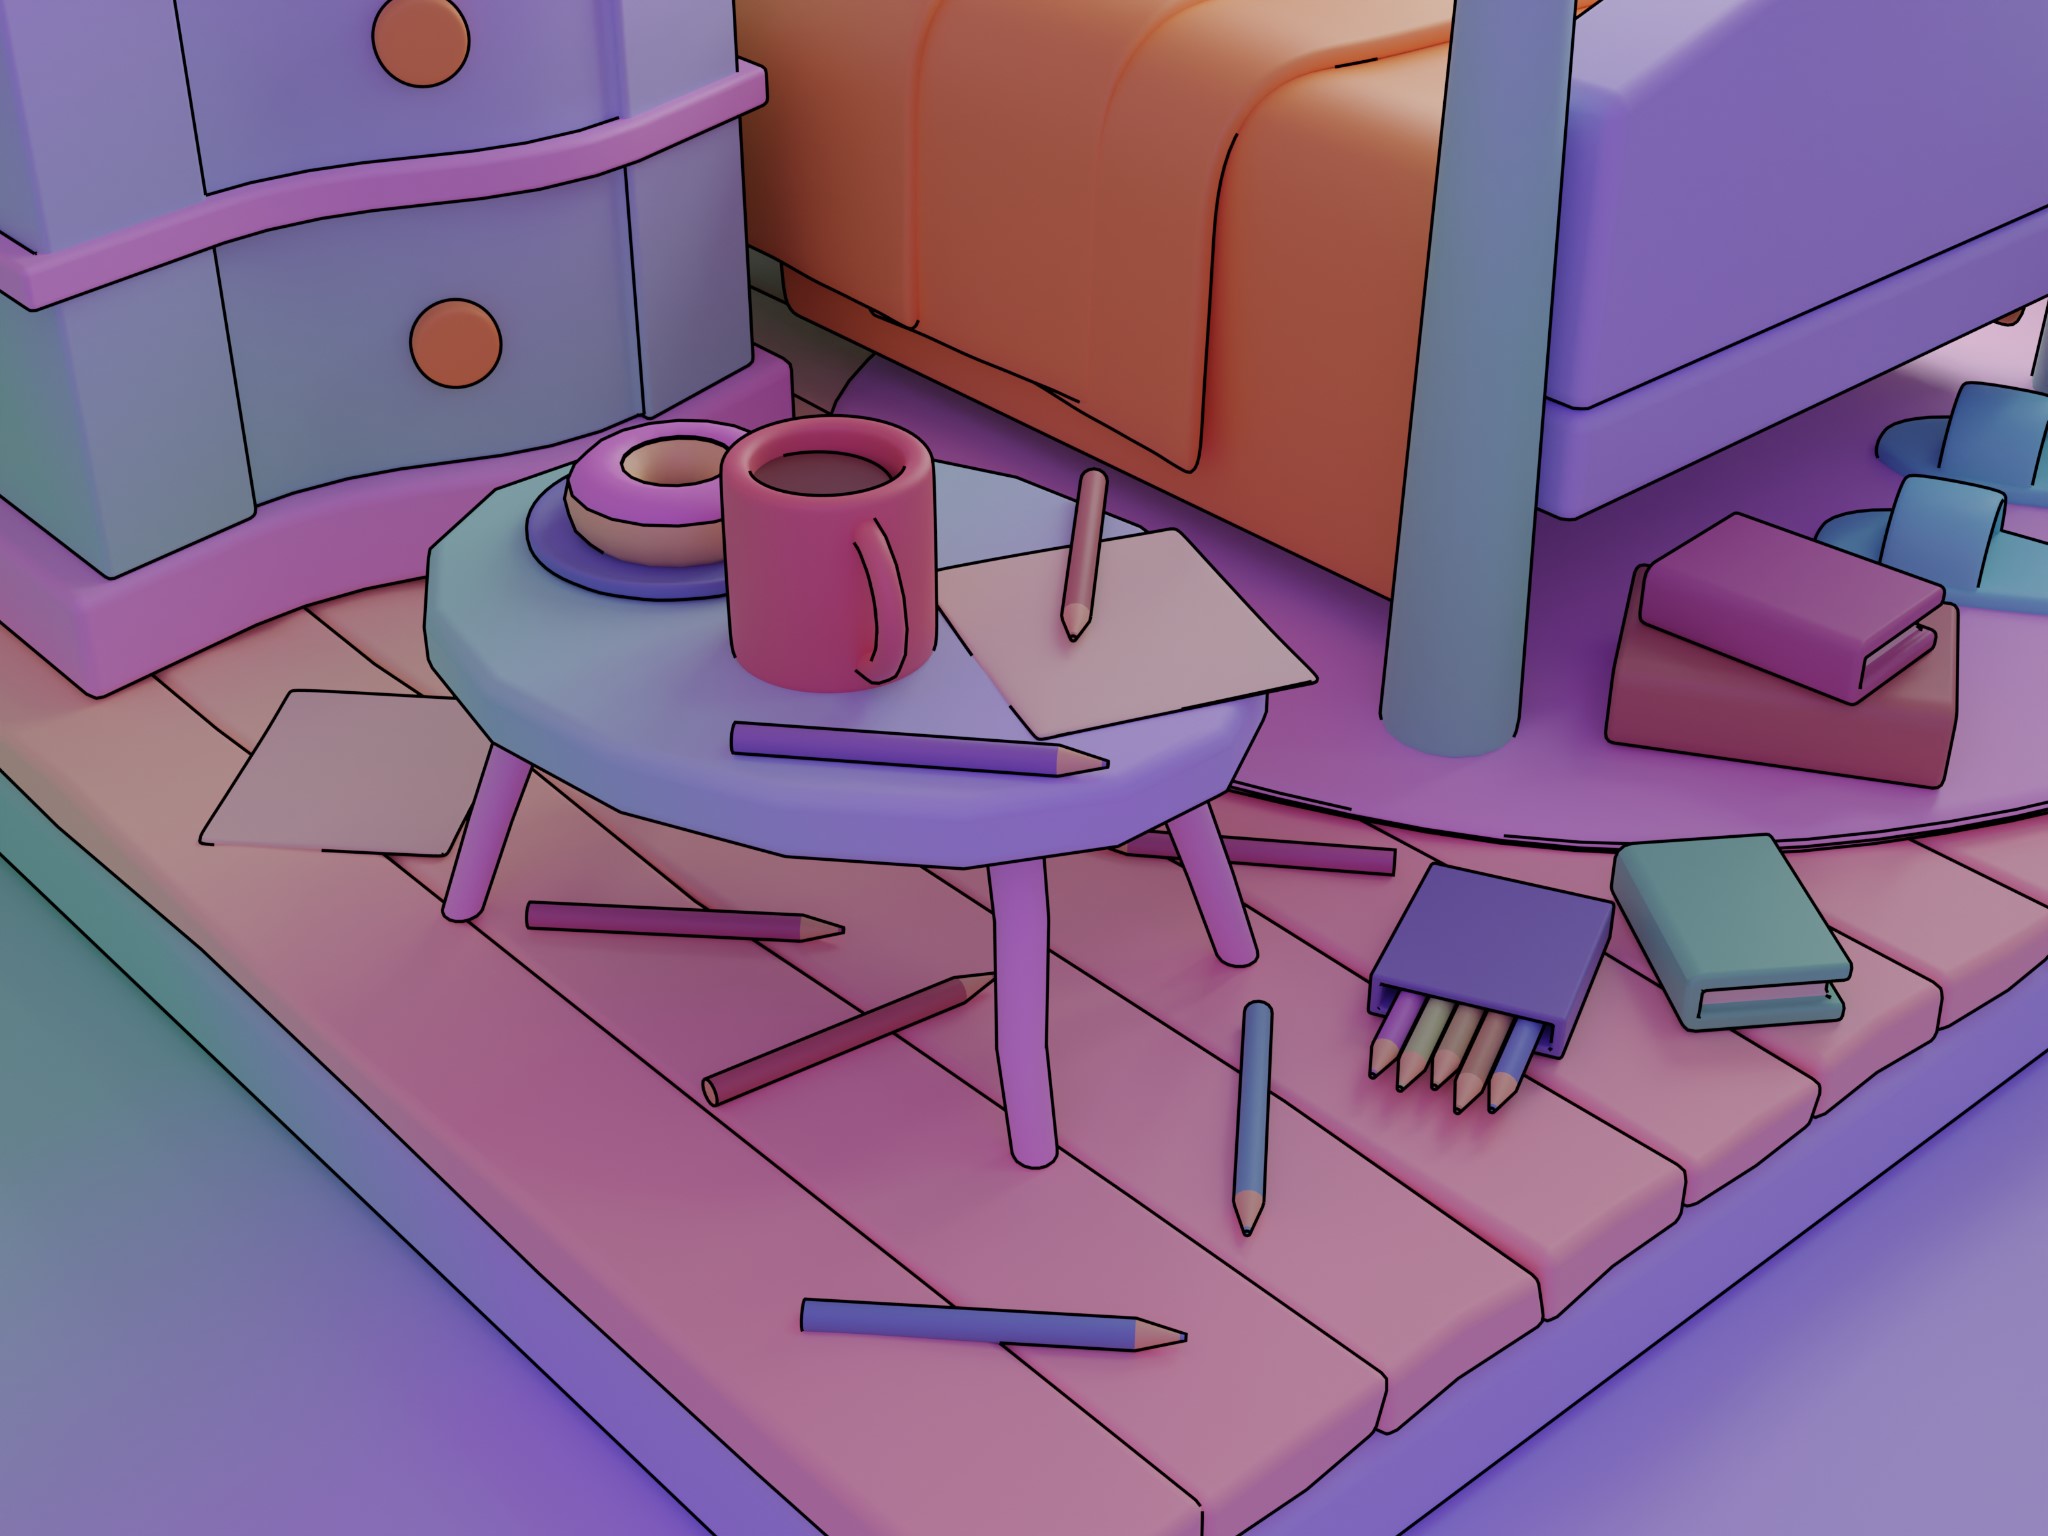
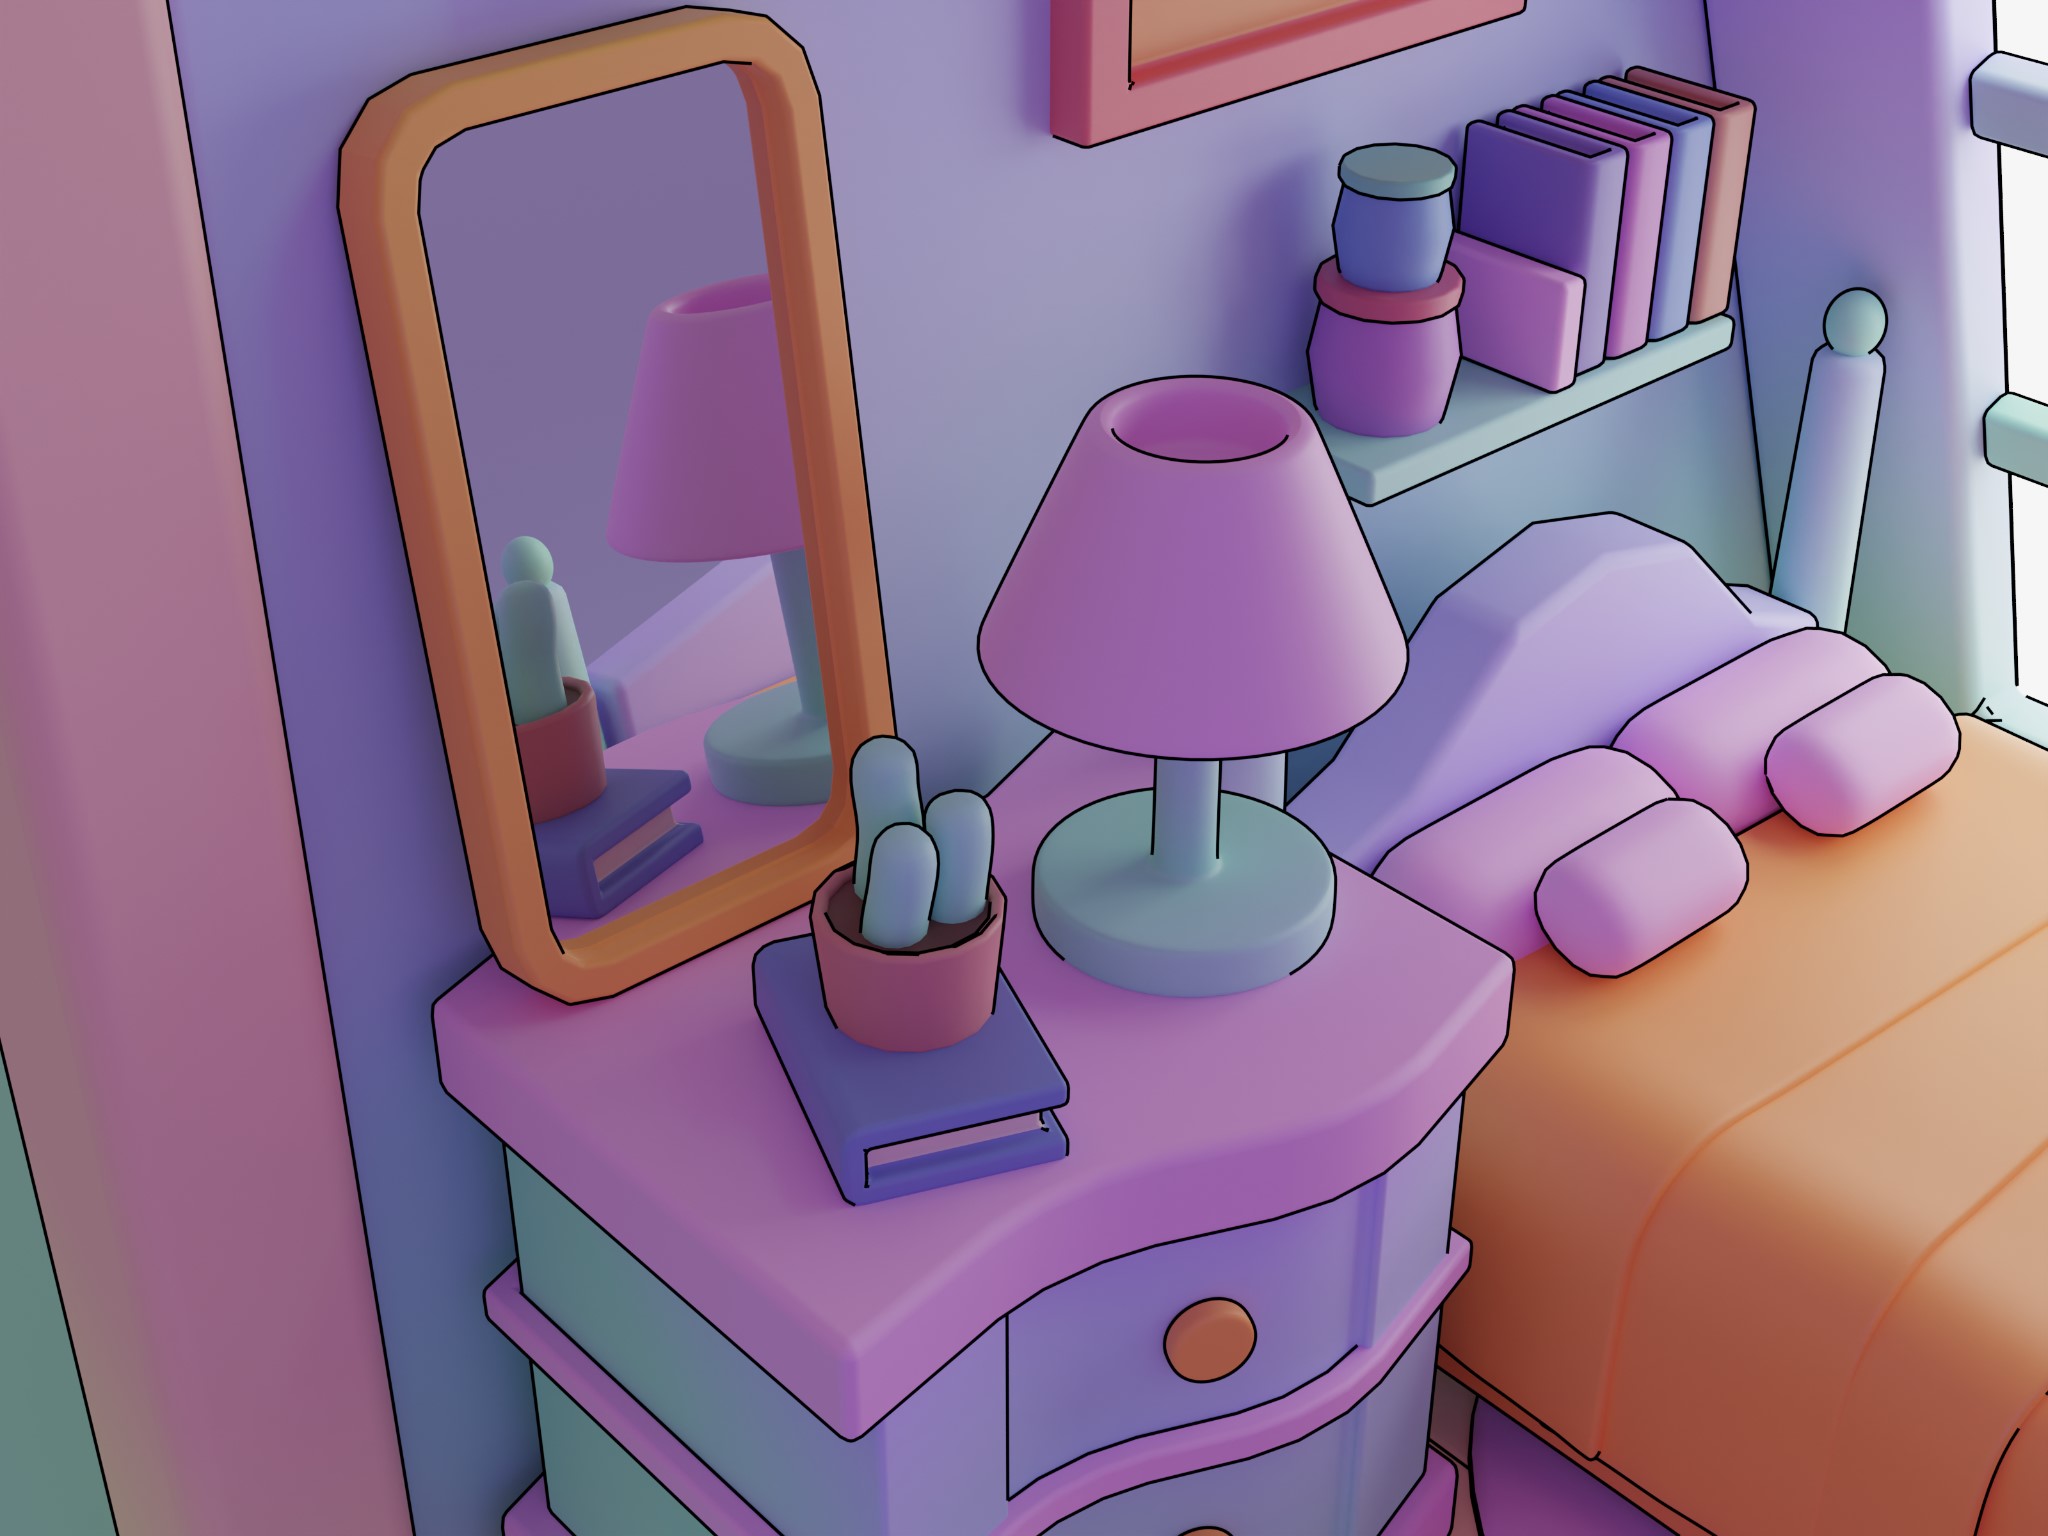
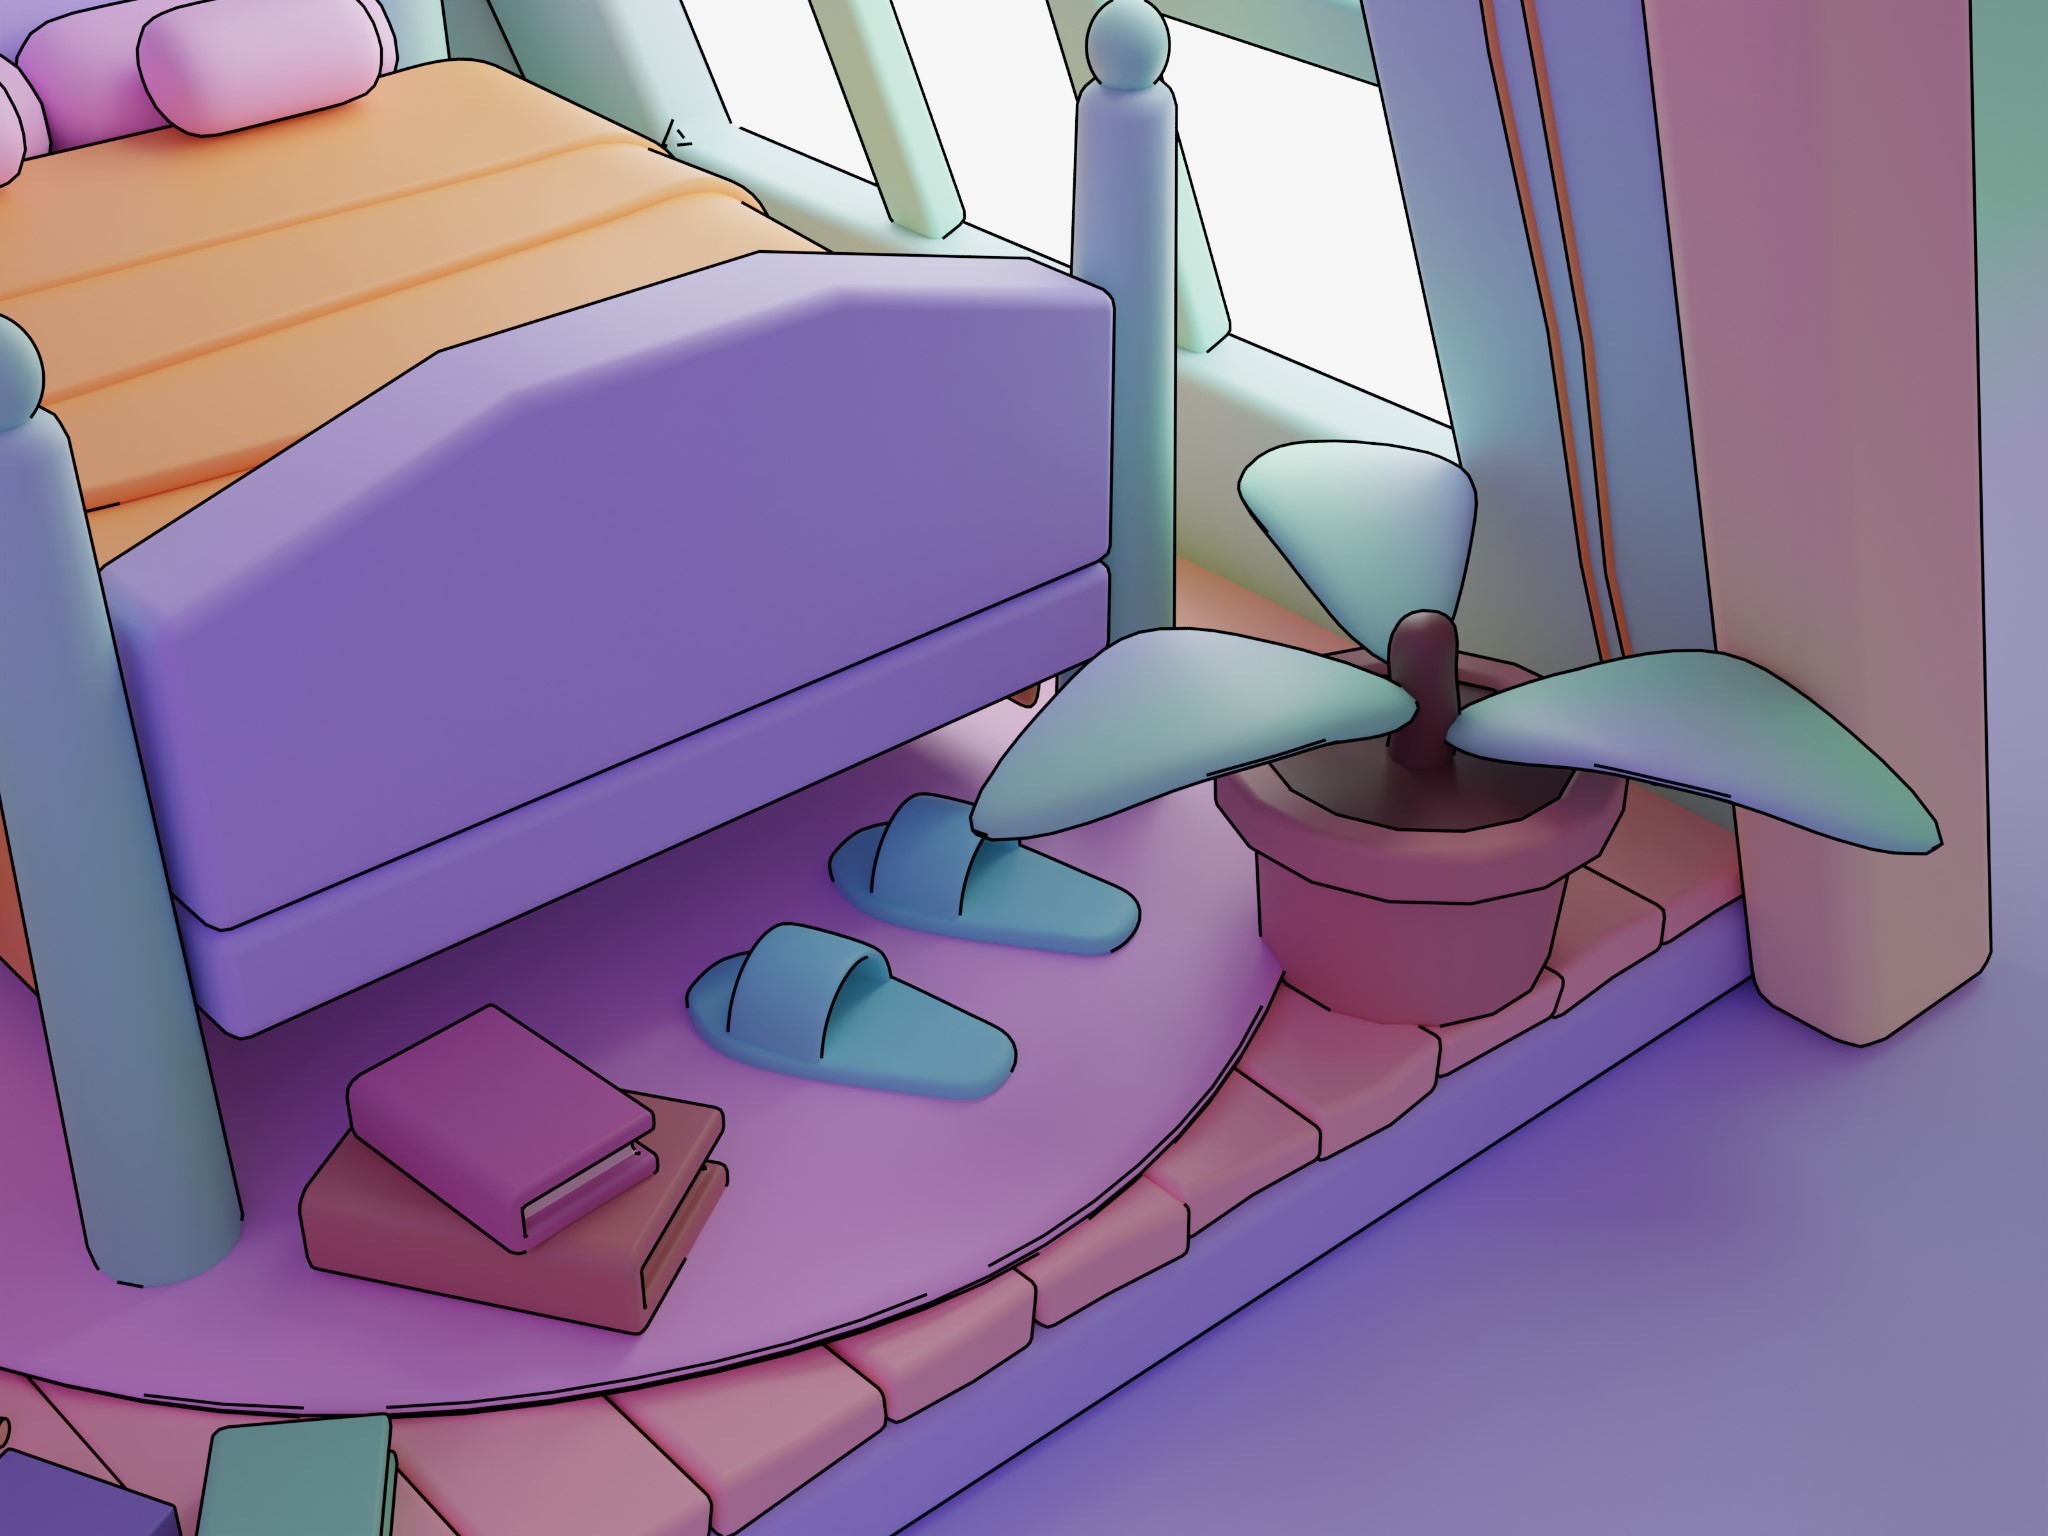
I did all the modeling with low polygons and I used Bevel modifiers and unapplied surface subdivision to give a thicker shape to each model.
Materials
For the materials, I used something simple, a mix of cold and warm pastel colors. I added a Color Ramp node and a gradient texture node with a mapping and texture coordinate to modify the rotation values. I applied the same process to all the objects, with different colors.

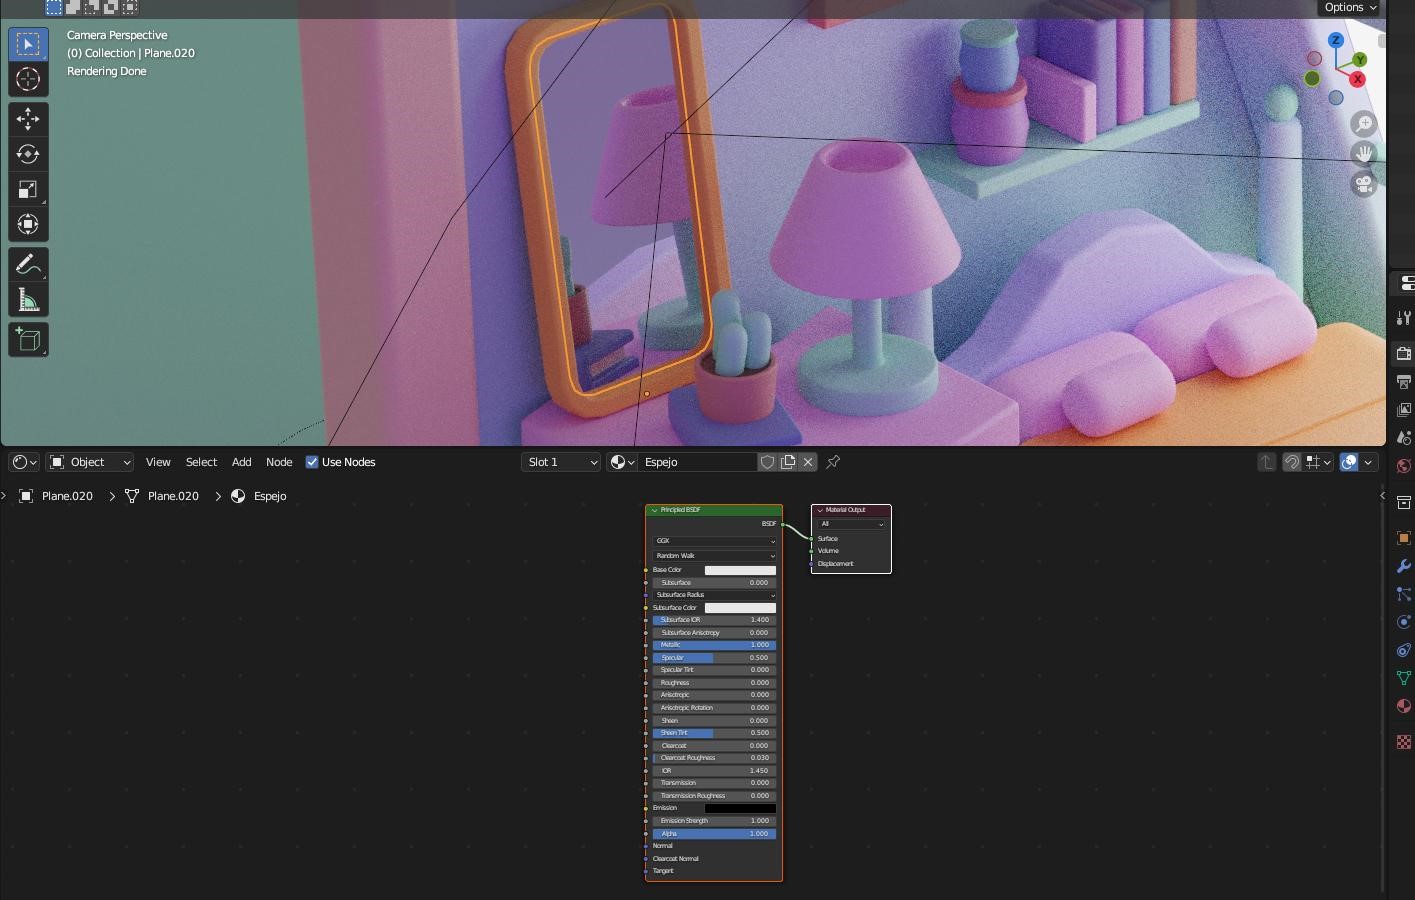
For the mirror reflection, I added a normal material with a metallic value of 1 and a roughness of 0.
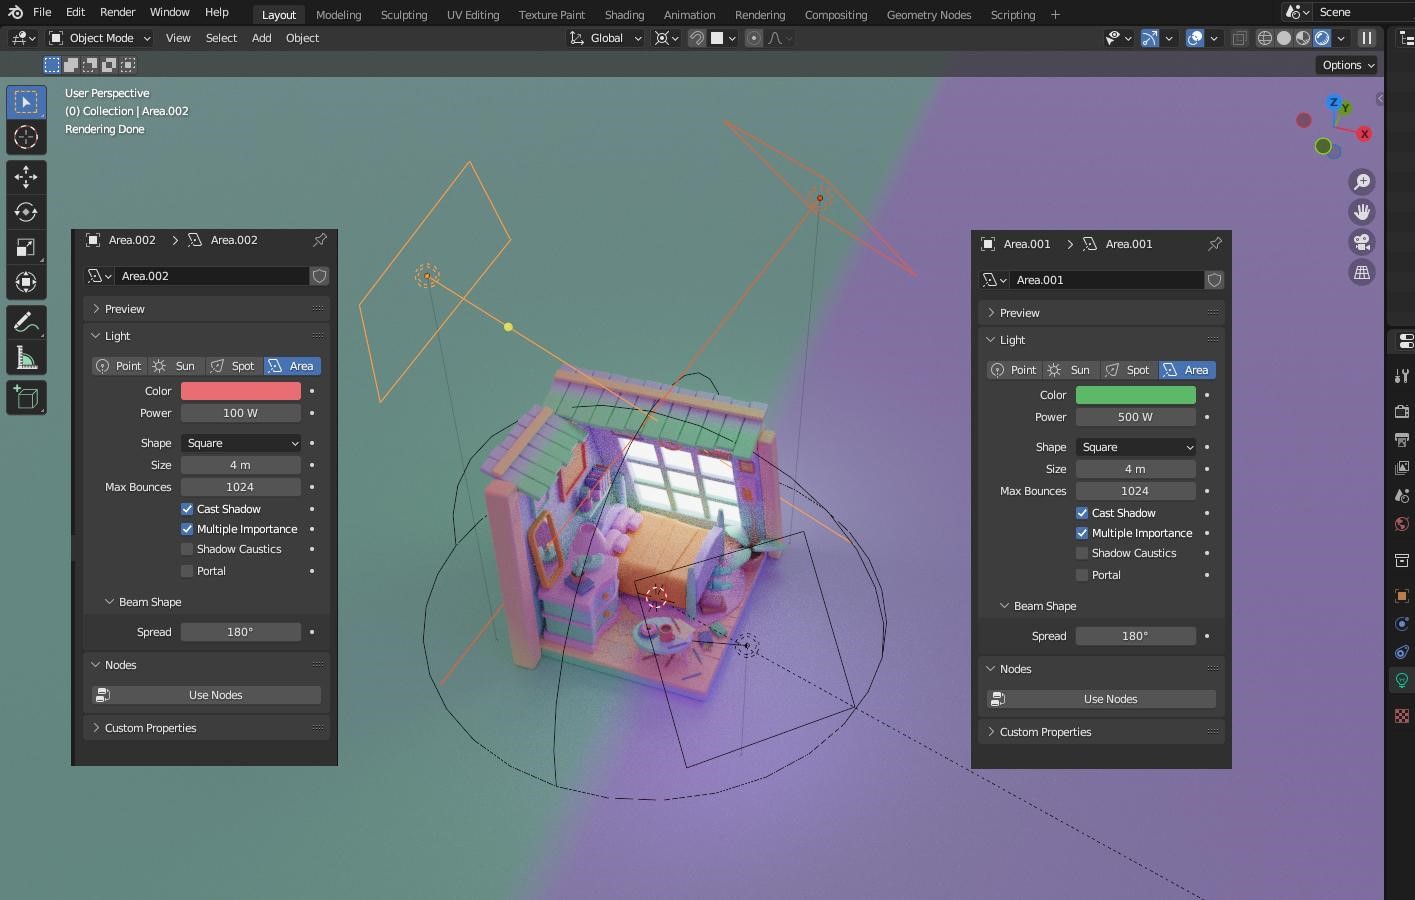
Lightning
For lighting, I added two area lights from the top to generate a soft light, and a color hue that matched the color palette of the scene.
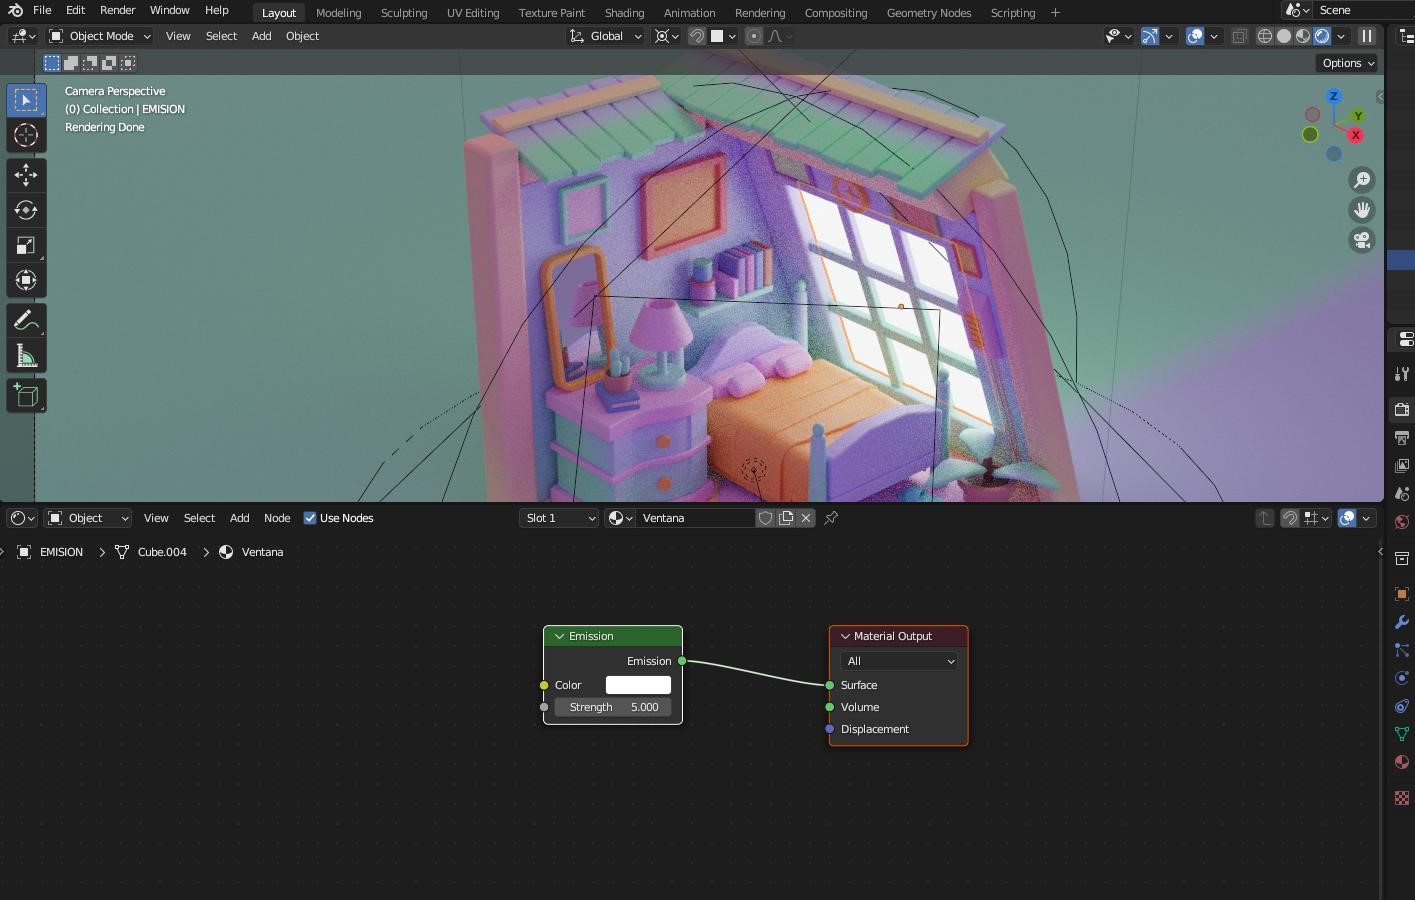
I applied an emission material to the window.
Animation
For the animation, I added a Sphere Empty in the center of the scene that is related to the camera. I configured the scene with 300 frames at 24 fps and added rotation keyframes in various frames to carry out the animation movements, and then added a linear interpolation.

Rendering
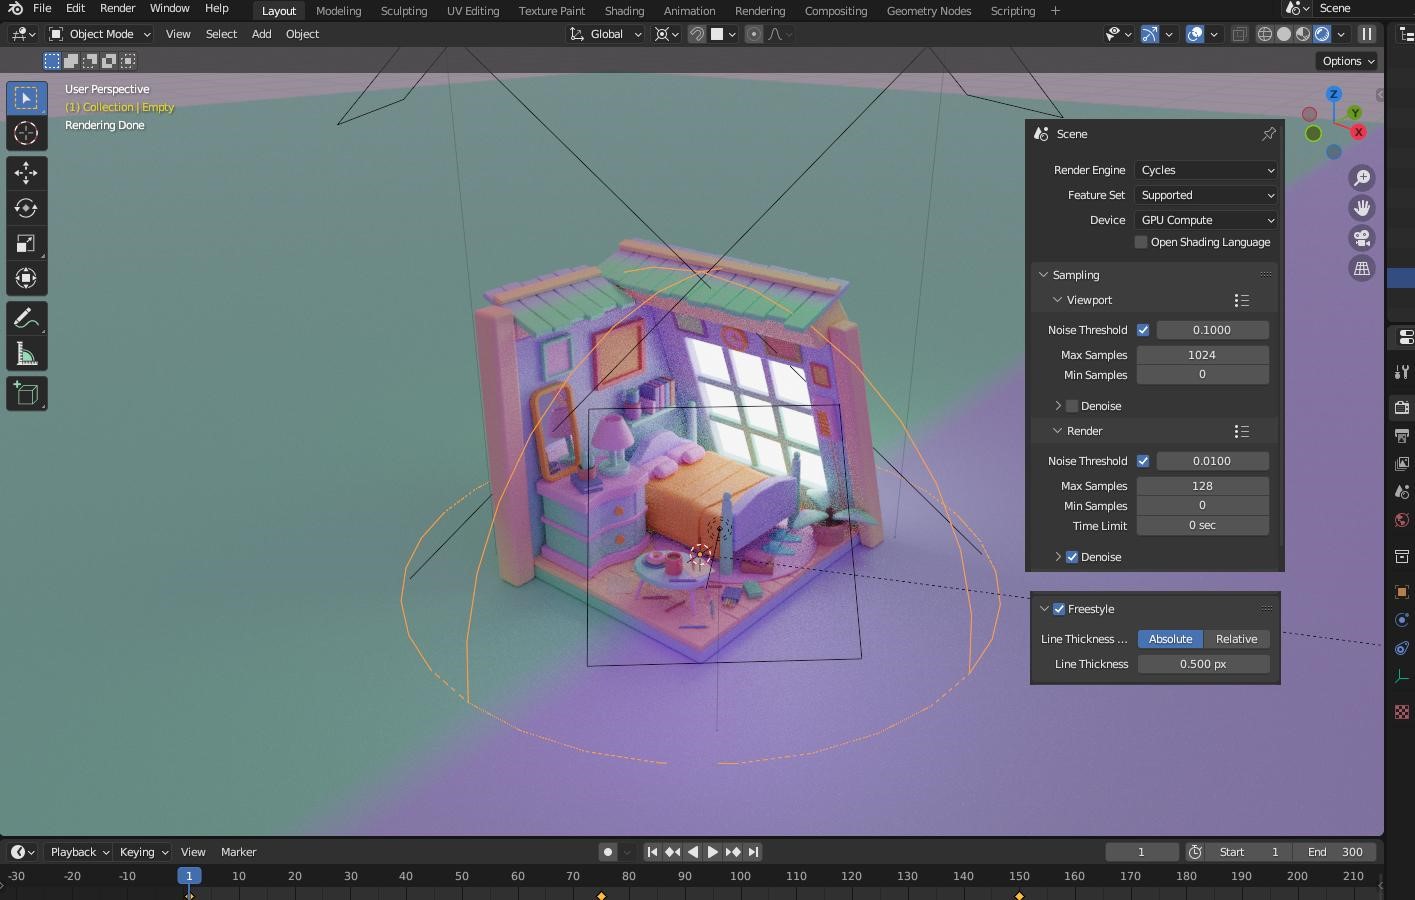
I made the render in Cycles with the max samples of 256. For the lines, I added a freestyle effect with a line thickness of 0.5 px.
And that was it! Below are the final renders.
RENDER : Attic
I shared a little animation of the scene as a short on my YouTube channel.
I hope you enjoyed this article, and I wish you a lot of success in this beautiful 3D world!
About the Artist
Heber Villalta is a 3D artist passionate about Blender, who lives in El Salvador, Central America, and works as a 3D freelancer on various projects.


So cool