
Behind the Scenes: Mech T-Rex
INTRODUCTION
Hi, my name is Jose Miguel Gordaliza. I’m a self-taught concept artist based in Spain.
Since I was a child, I have always been drawing, but about 6 years ago, I discovered by chance the art behind cinema and video games. I saw the artworks of concept artists like Dylan Cole, Jama Jurabaev, Romain Jouandeau, and many other great ones. I liked it so much that I told myself I wanted to do that.
I learned the techniques behind concept art and little by little, I improved my skills and later started to incorporate 3D into my workflow. I found Blender just before it was updated to version 2.8, and haven’t used any other software since then.
Above all, I love making environments, creating the worlds I imagine, always giving it a cinematic and photorealistic look.
INSPIRATION
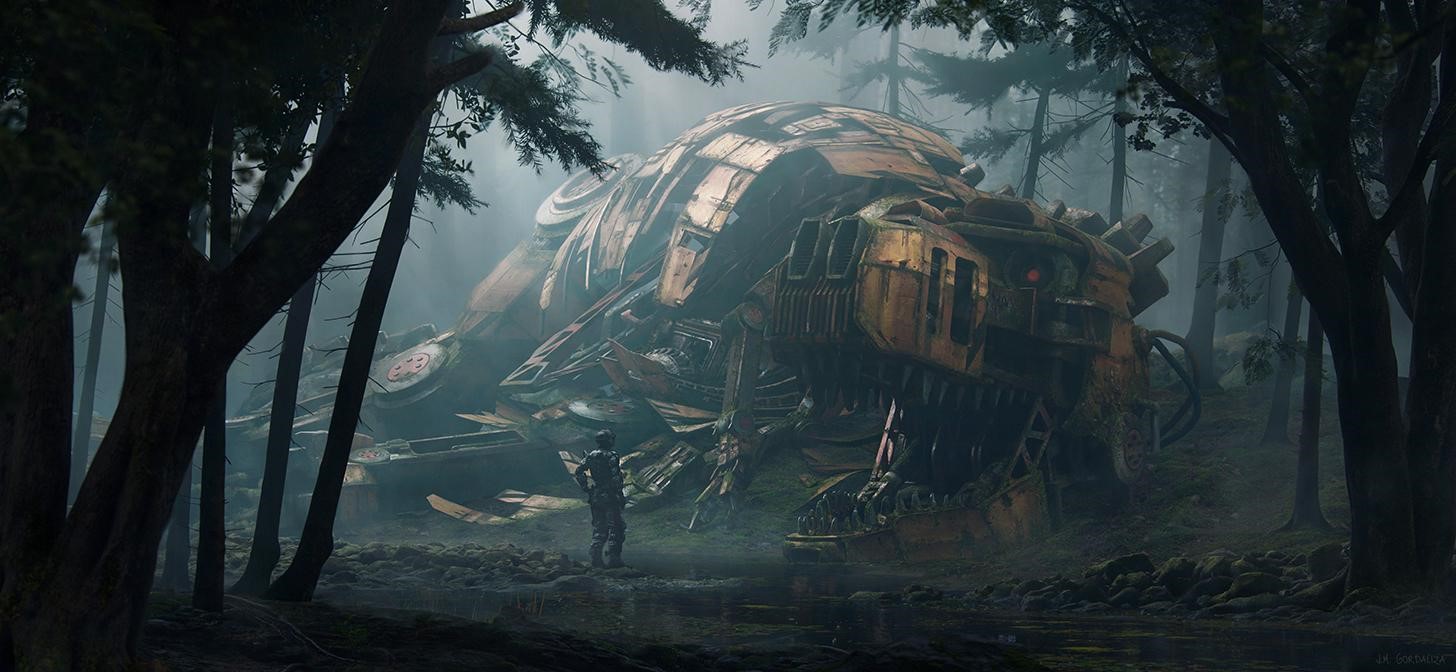
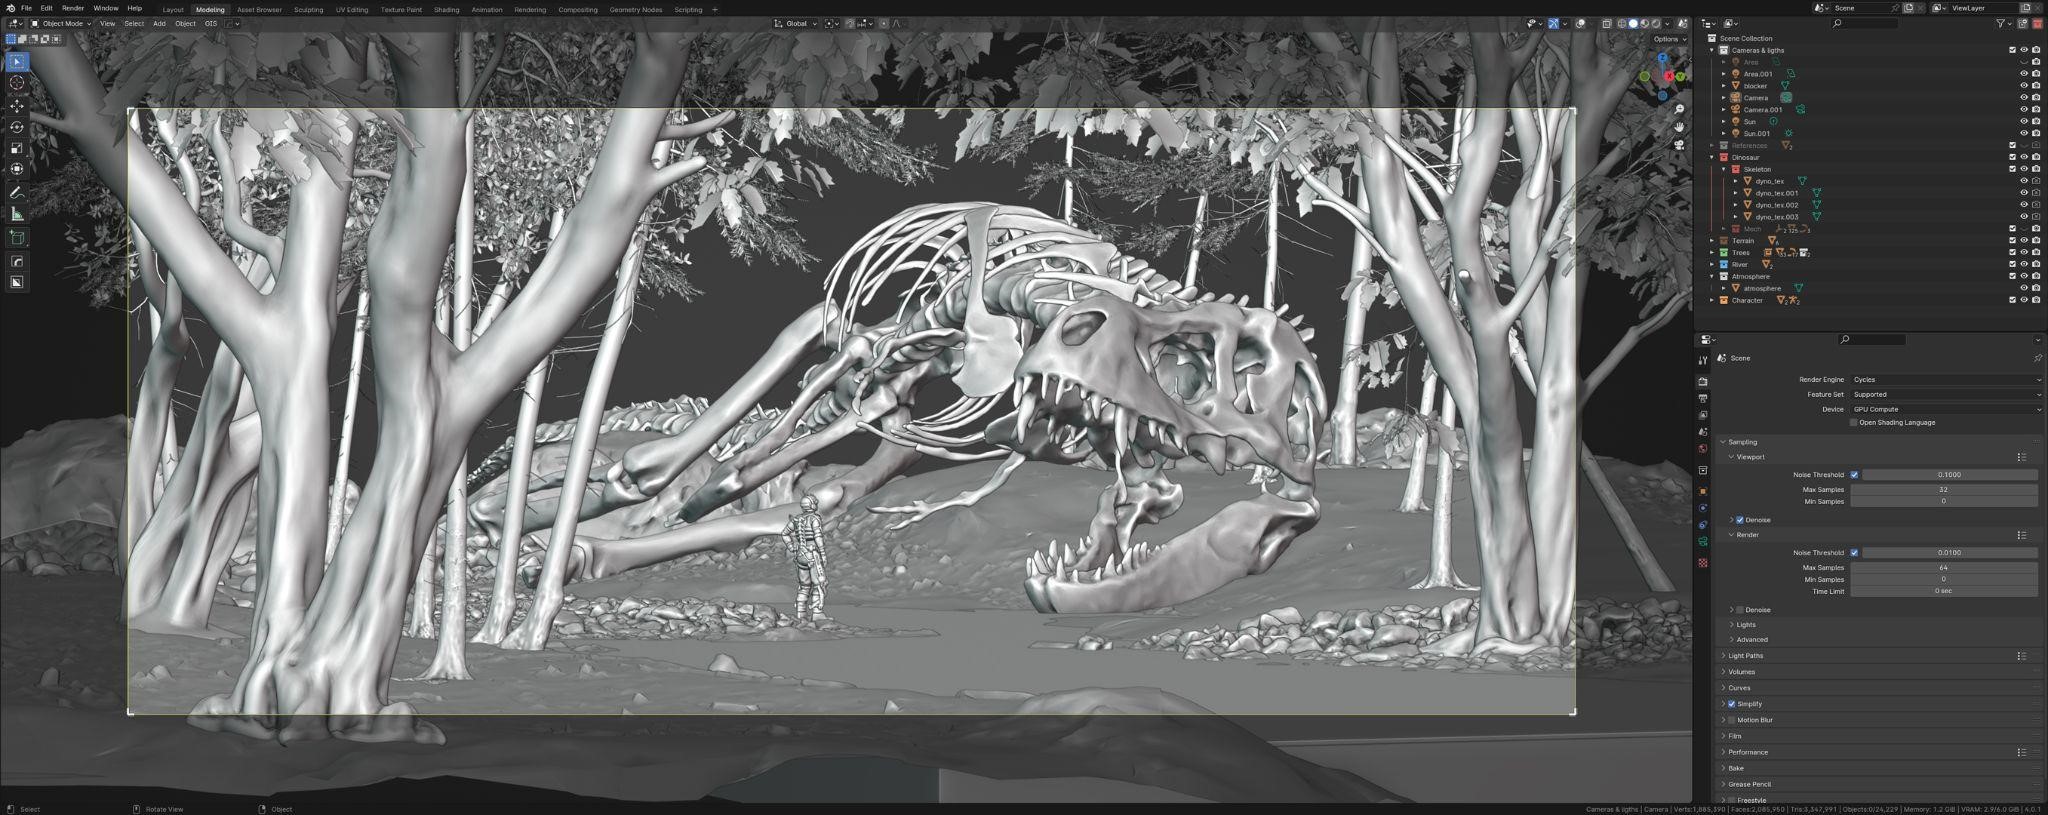
For this concept art, the idea was to create a futuristic robot but combine it with a past era which in this case, I chose the era of dinosaurs. The story shows a soldier who discovers the abandoned mechanical T-Rex in a lush forest. To give the feeling of abandonment, I had in mind to tell this story in an environment with a misty mood where vegetation had already taken over the dinosaur. I chose the T-Rex because everyone is familiar with the shape of the Tyrannosaurus, and the goal was to ensure that the idea of it still being a dinosaur was not lost when combining the 3D assets.
There are two artists who primarily inspired me—Gaëlle Seguillon, for her incredible concepts about dinosaurs, and Xiangzhao Xi, for his brilliant concepts about abandoned robots.

PROCESS
Preparation
Before jumping into Blender, I started by gathering some references to guide me in the process. These provided me with valuable information about shapes, textures, lighting, etc.

Assets 3D
Usually, I tend to design and model my own assets almost entirely, always depending on the scene I have in mind. But in this case, I decided to build the T-Rex by combining some of the pieces from Markom3D’s Kitbash set:
For the environment, I used some trees and terrains from Polyhaven.
Building the scene
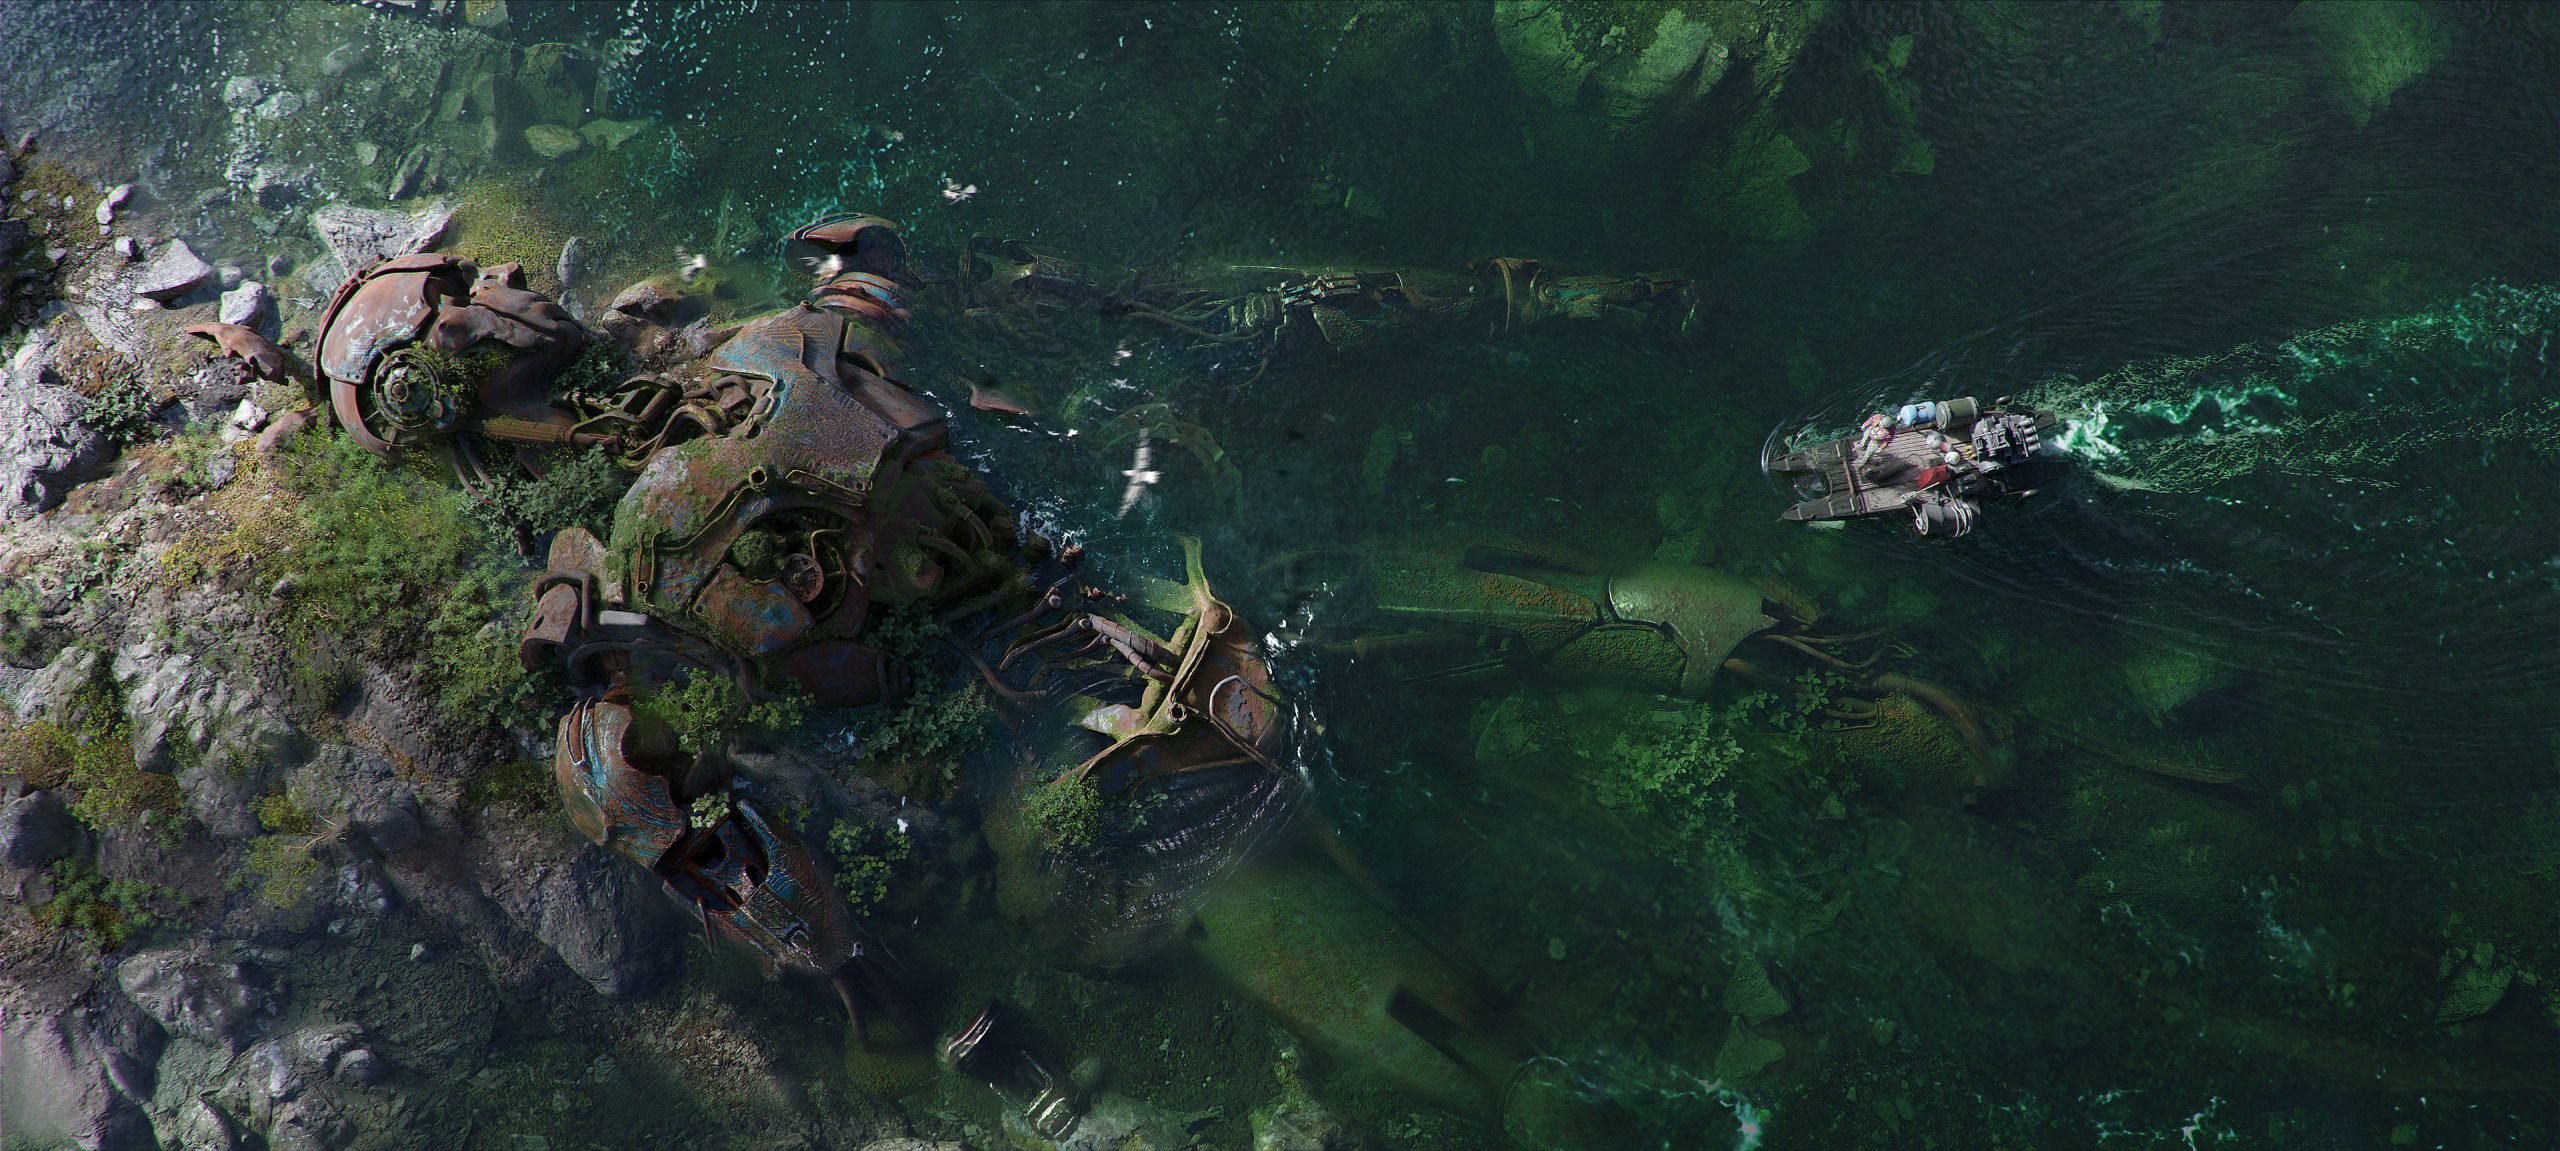
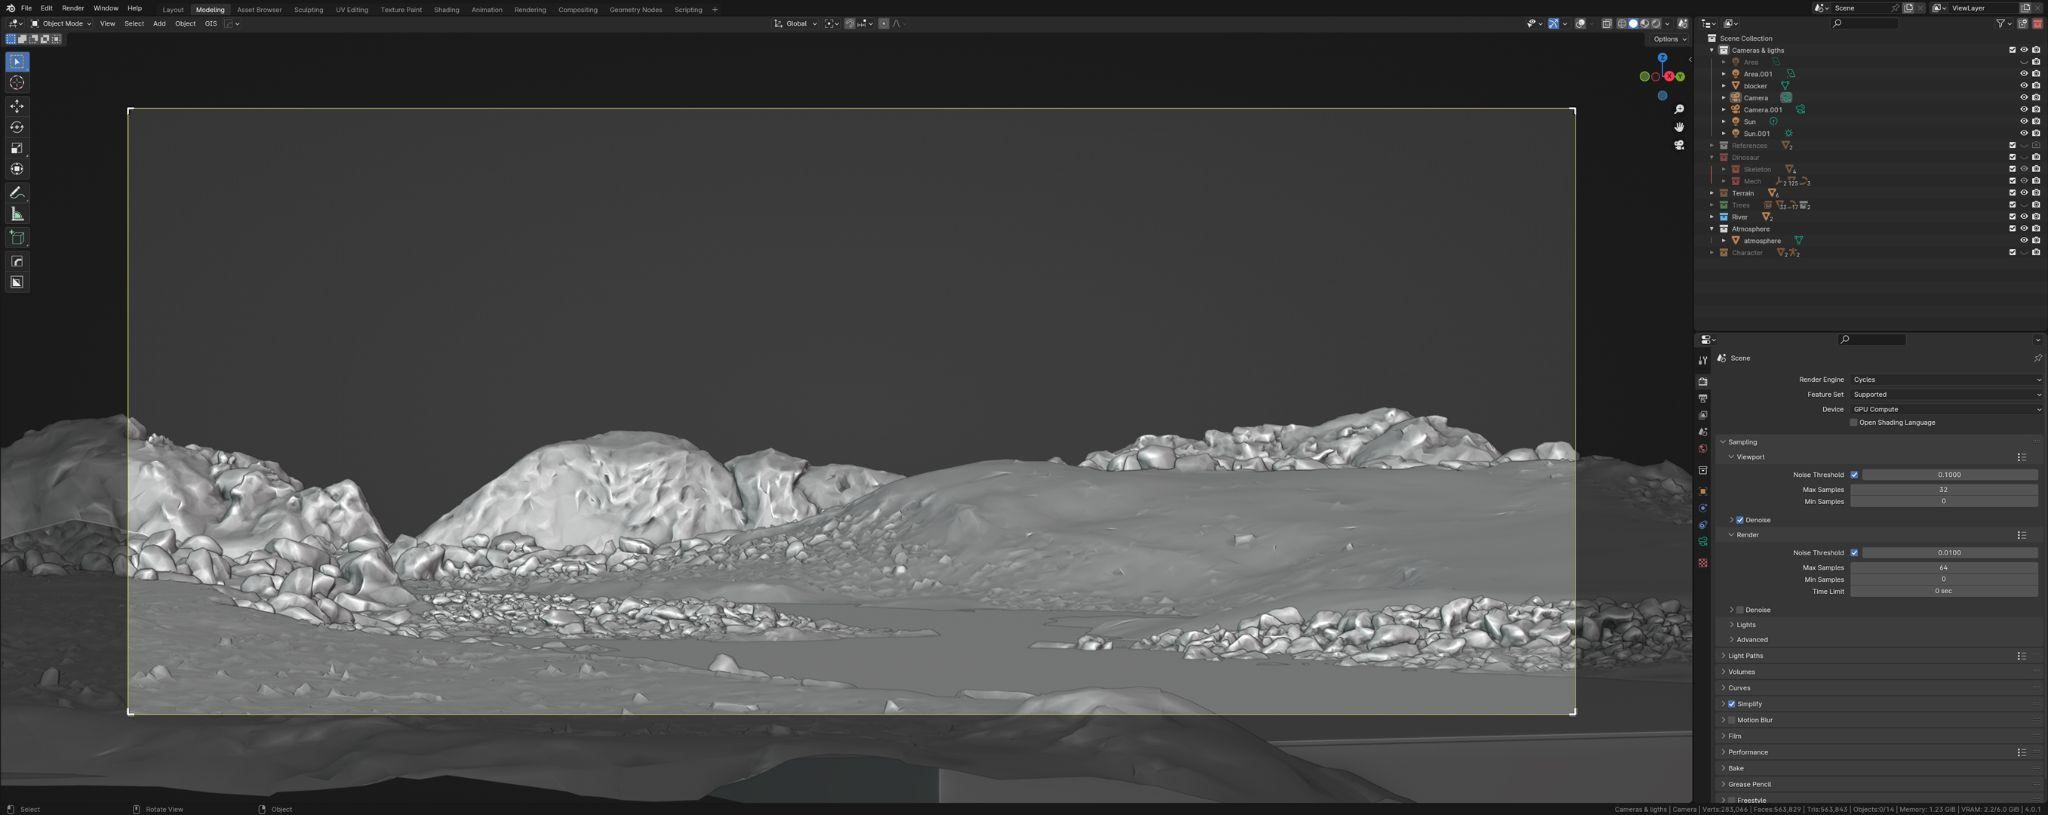
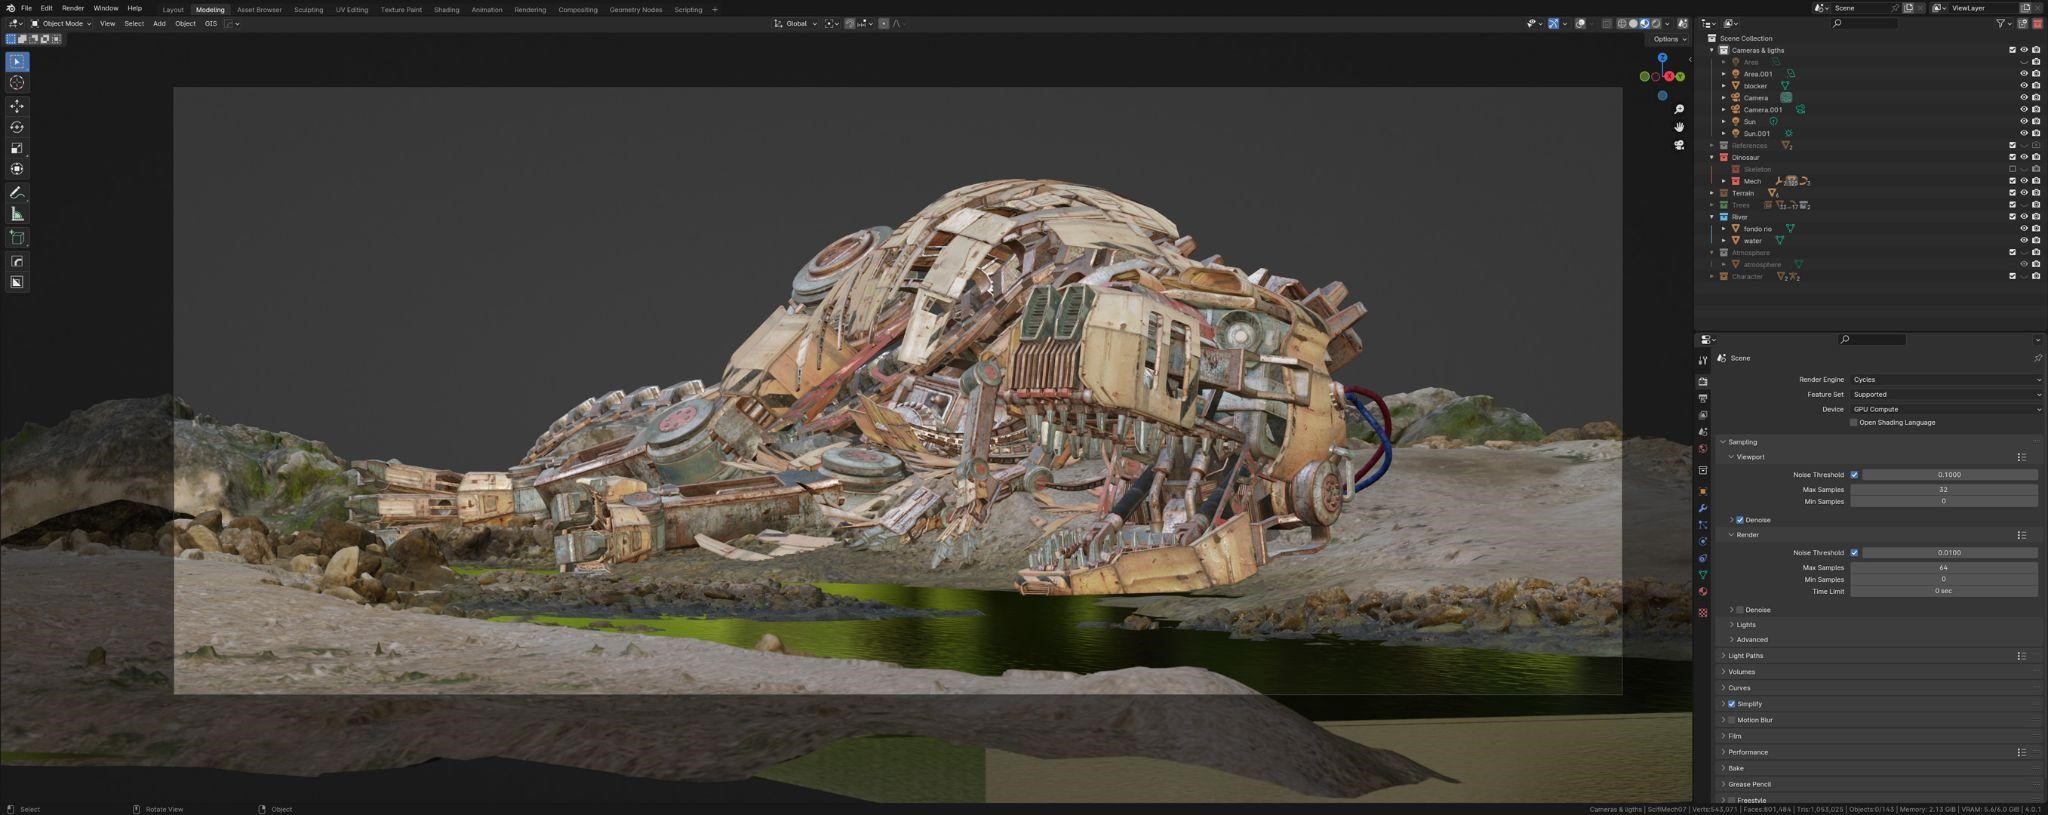
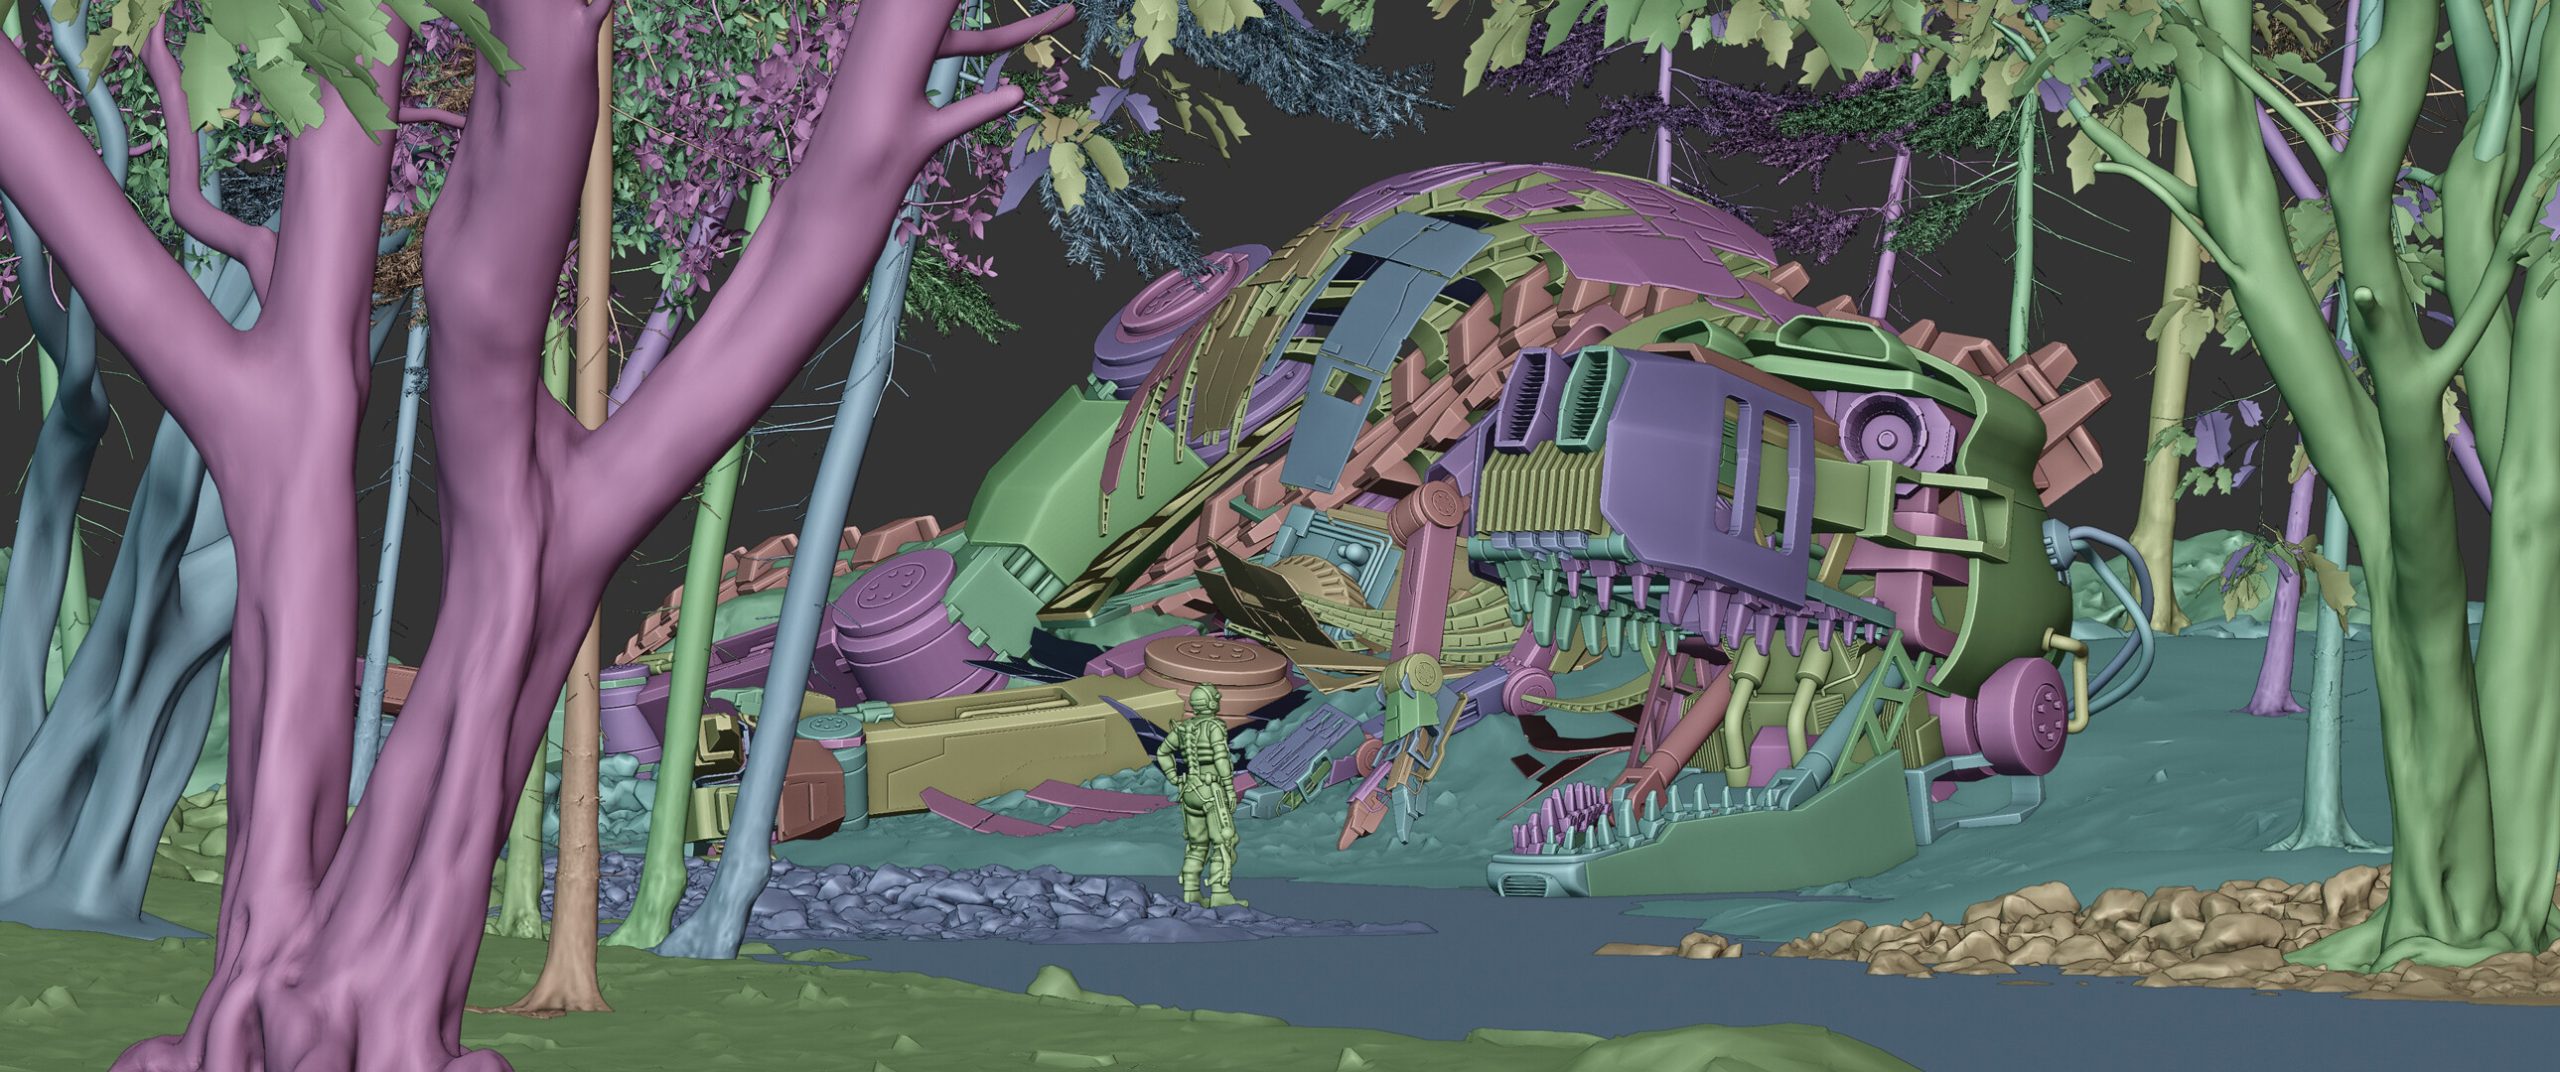
The first thing I did was to build a terrain for the project, so I arranged some terrain assets to create a sort of clearing on the riverbank, where the dinosaur would be situated. With the terrain resolved, I chose a camera to establish the composition.
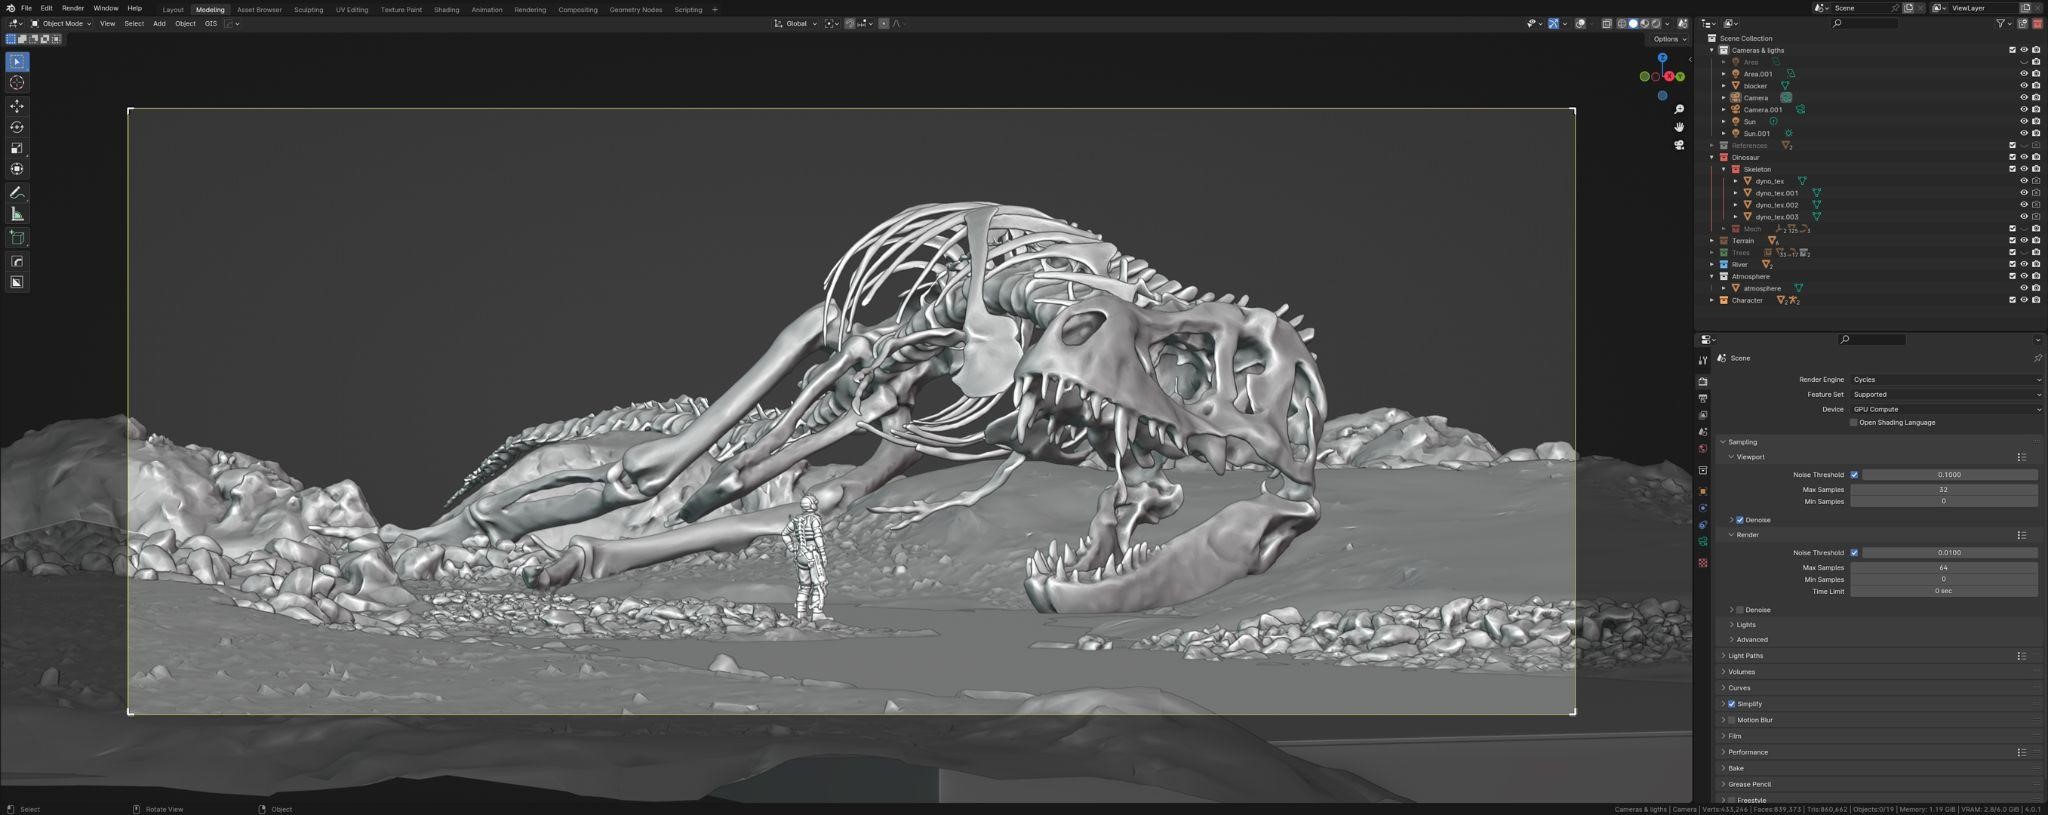
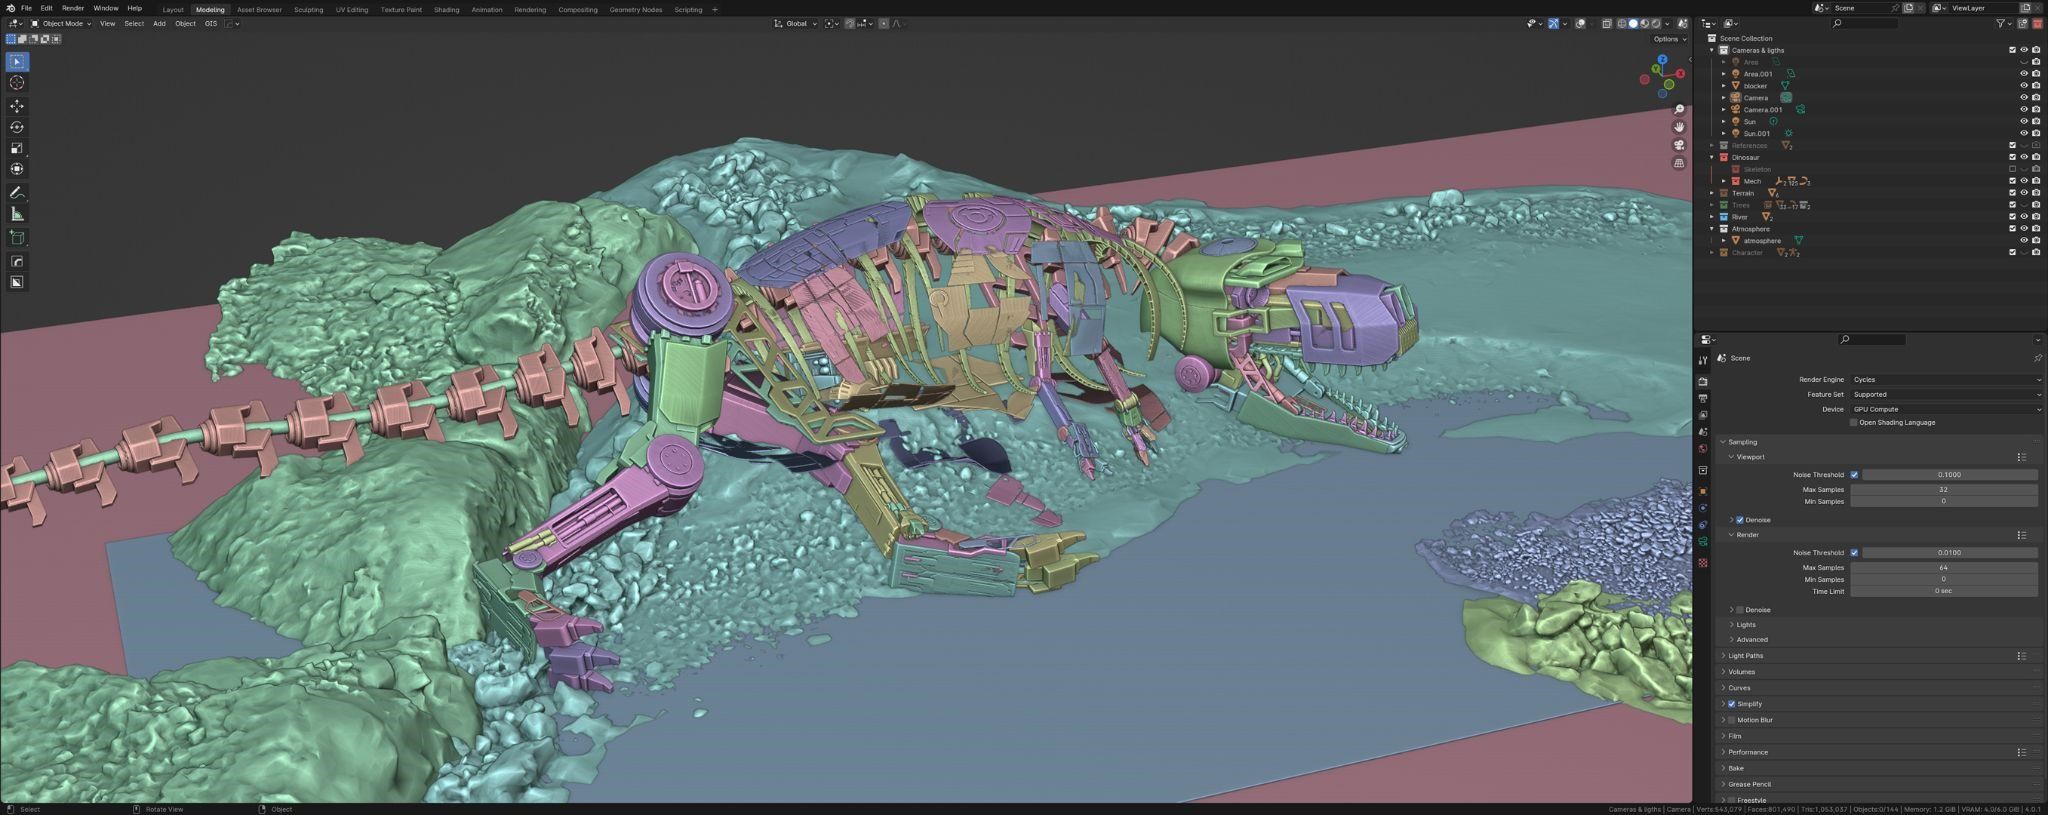
To create the design of the robotic T-Rex, the first thing I did was to use a Tyrannosaurus skeleton model as a reference, which I downloaded from Sketchfab by Rigsters:
I modified and positioned the skeleton on the terrain in such a way to create a good composition. The story was supposed to focus on the character’s discovery of the dinosaur, so I came up with the idea of placing the character to face the head of the T-Rex, observing the grandeur of the robot. That would be my focal point. Of course, I used the rocks and the river as leading lines to guide the viewer’s gaze towards that point.
The next step was to integrate some trees to further enhance the composition and add depth to the scene.
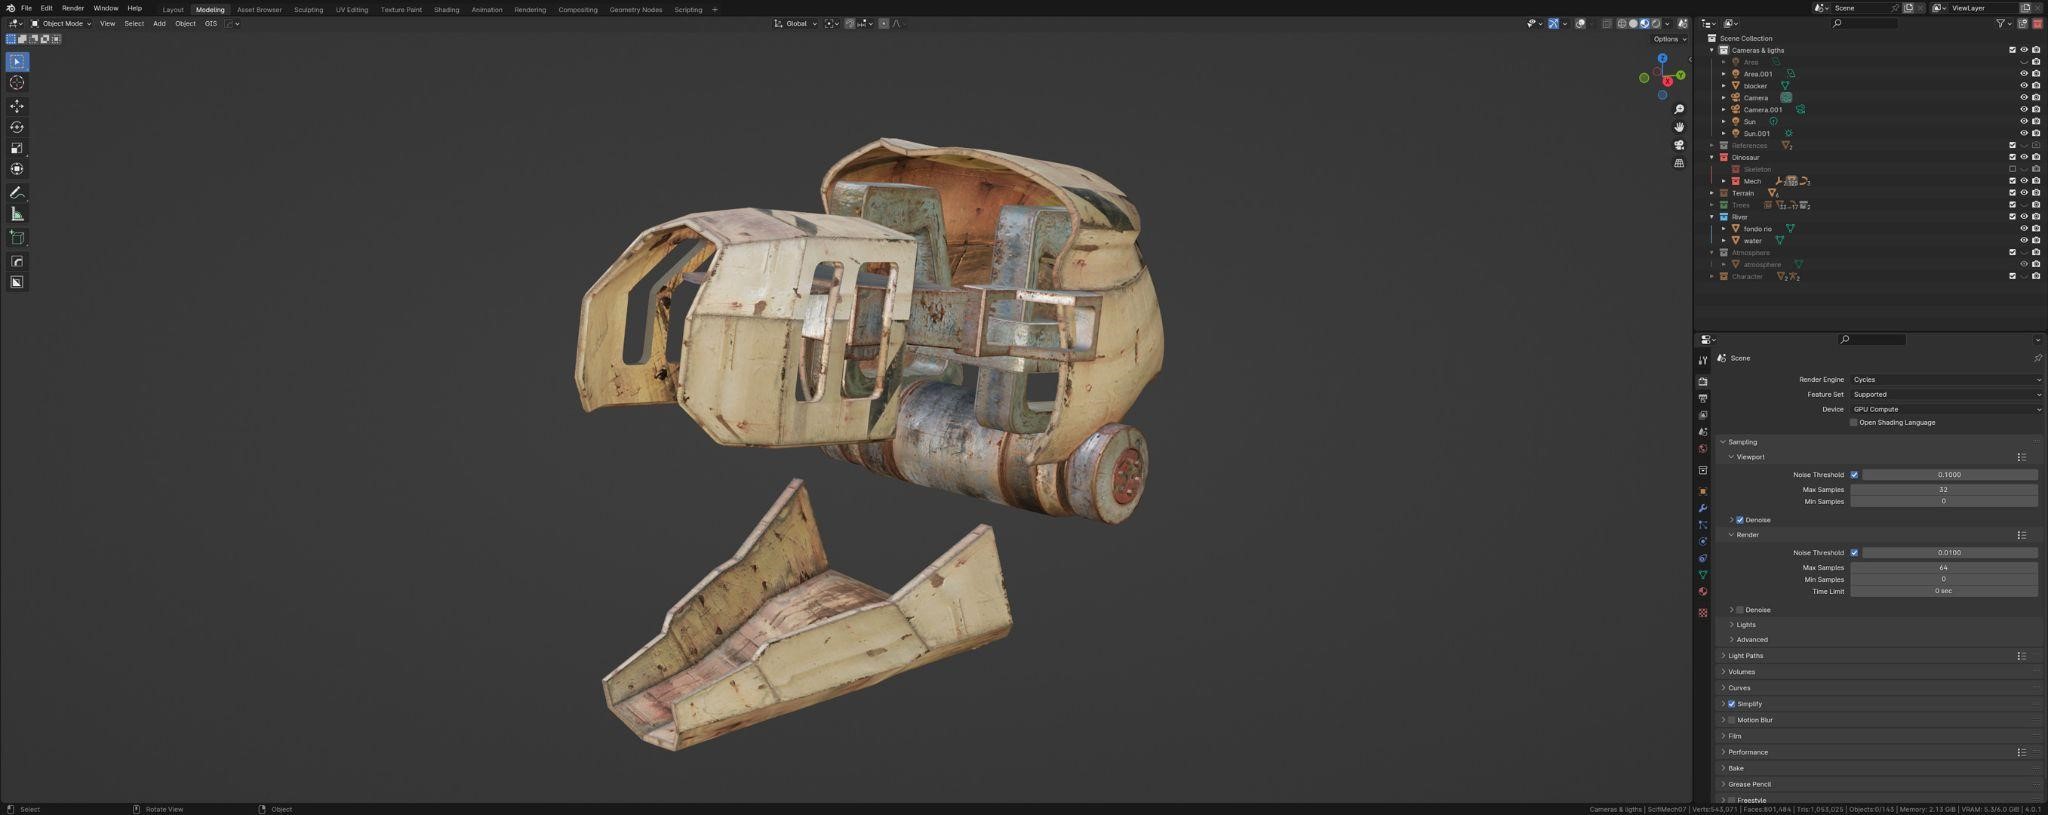
Now it’s time for the design of the T-Rex. As I mentioned, I would only use the skeleton as a reference, meaning it wouldn’t appear in the final render. However, it was very useful as a guide to place the pieces from the Kitbash set.
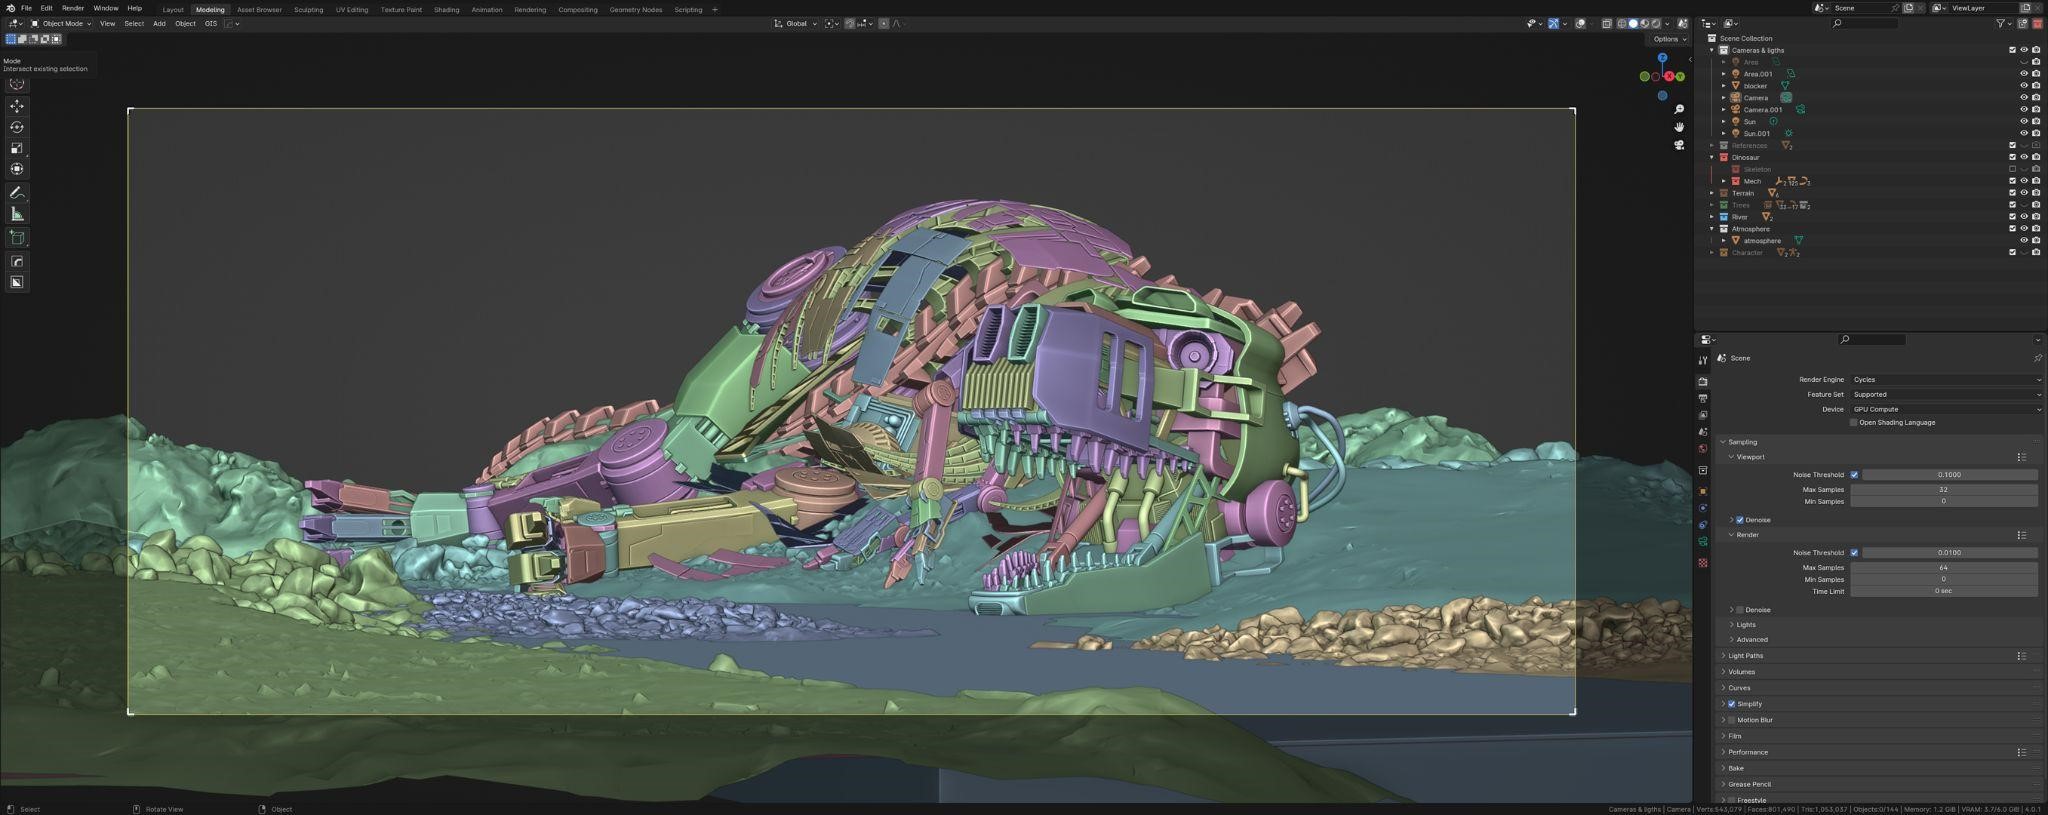
So, I placed these pieces, adjusting their scale if necessary, always with some coherence, blending an internal mechanical structure resembling a skeleton with outer shells that would define the dinosaur’s skin to some extent.
Texturing
The terrain and trees already came with textures, so I focused on the dinosaur. To texture the T-Rex, I wanted the pieces to appear weathered and rusty, with an orange tone to contrast with the atmosphere of the environment. To achieve this, I used an addon that I recently discovered, called DreamUV.
This addon allows you to automatically adjust the UVs of objects to the texture so that the worn edges are reproduced following a grid provided by them (texture atlas). So, using Photoshop, I created two textures following the same pattern.
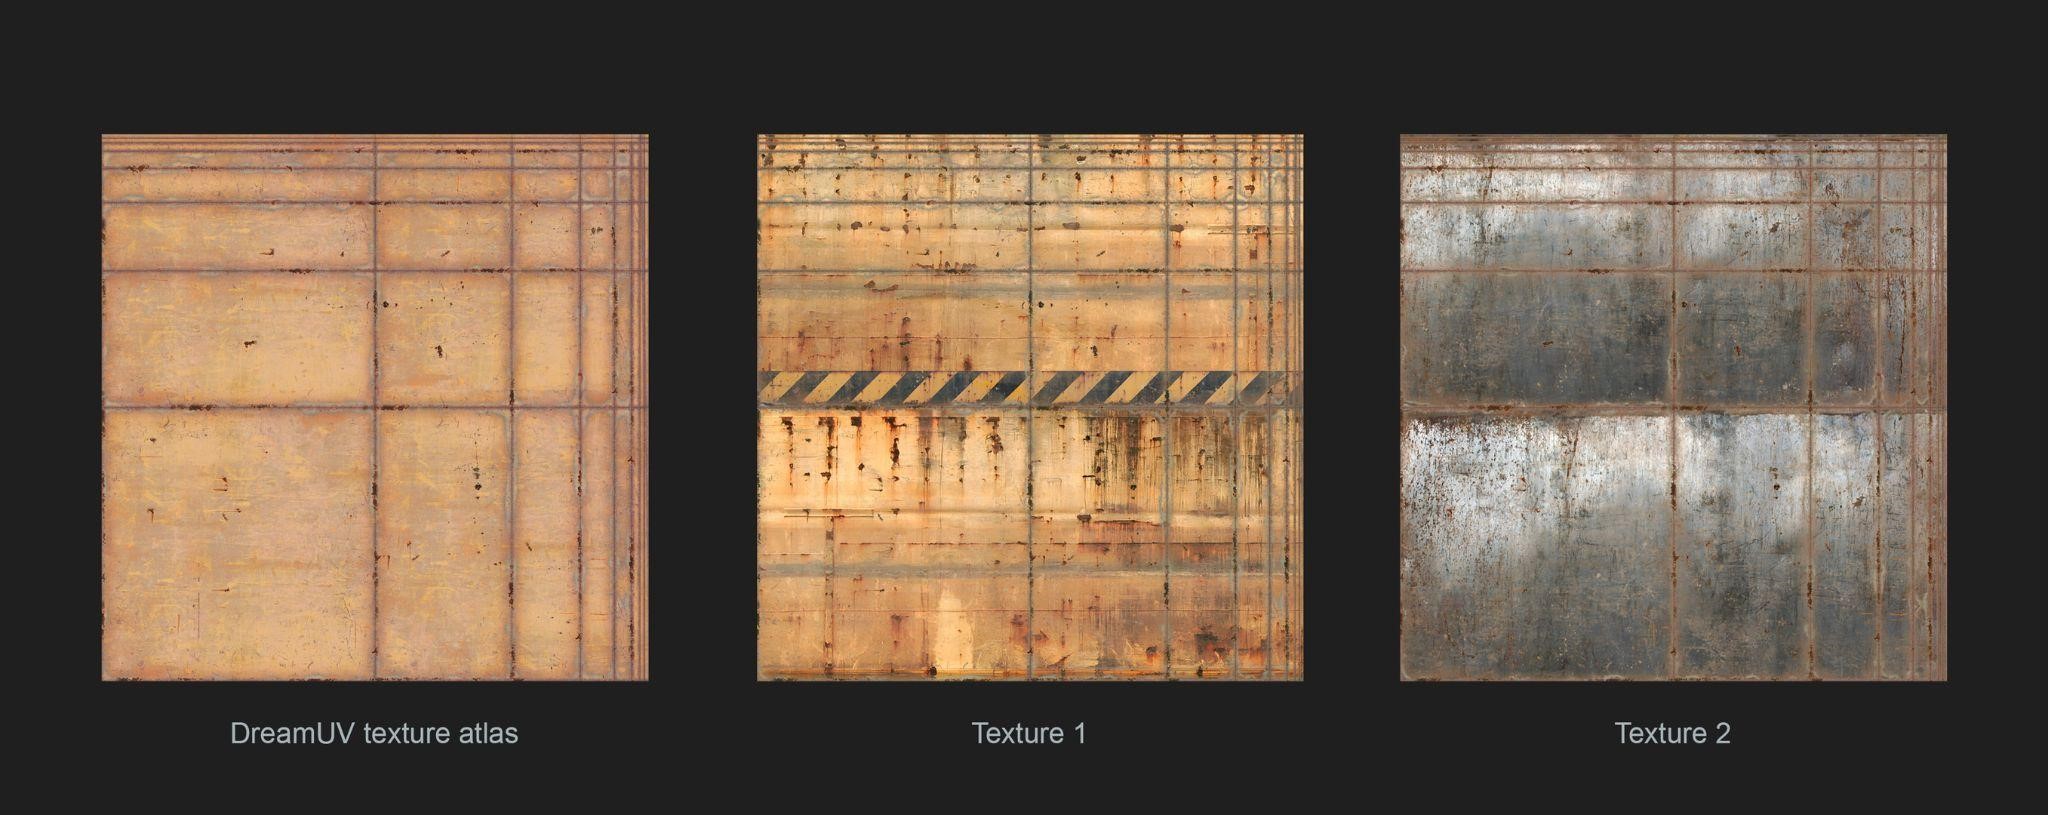
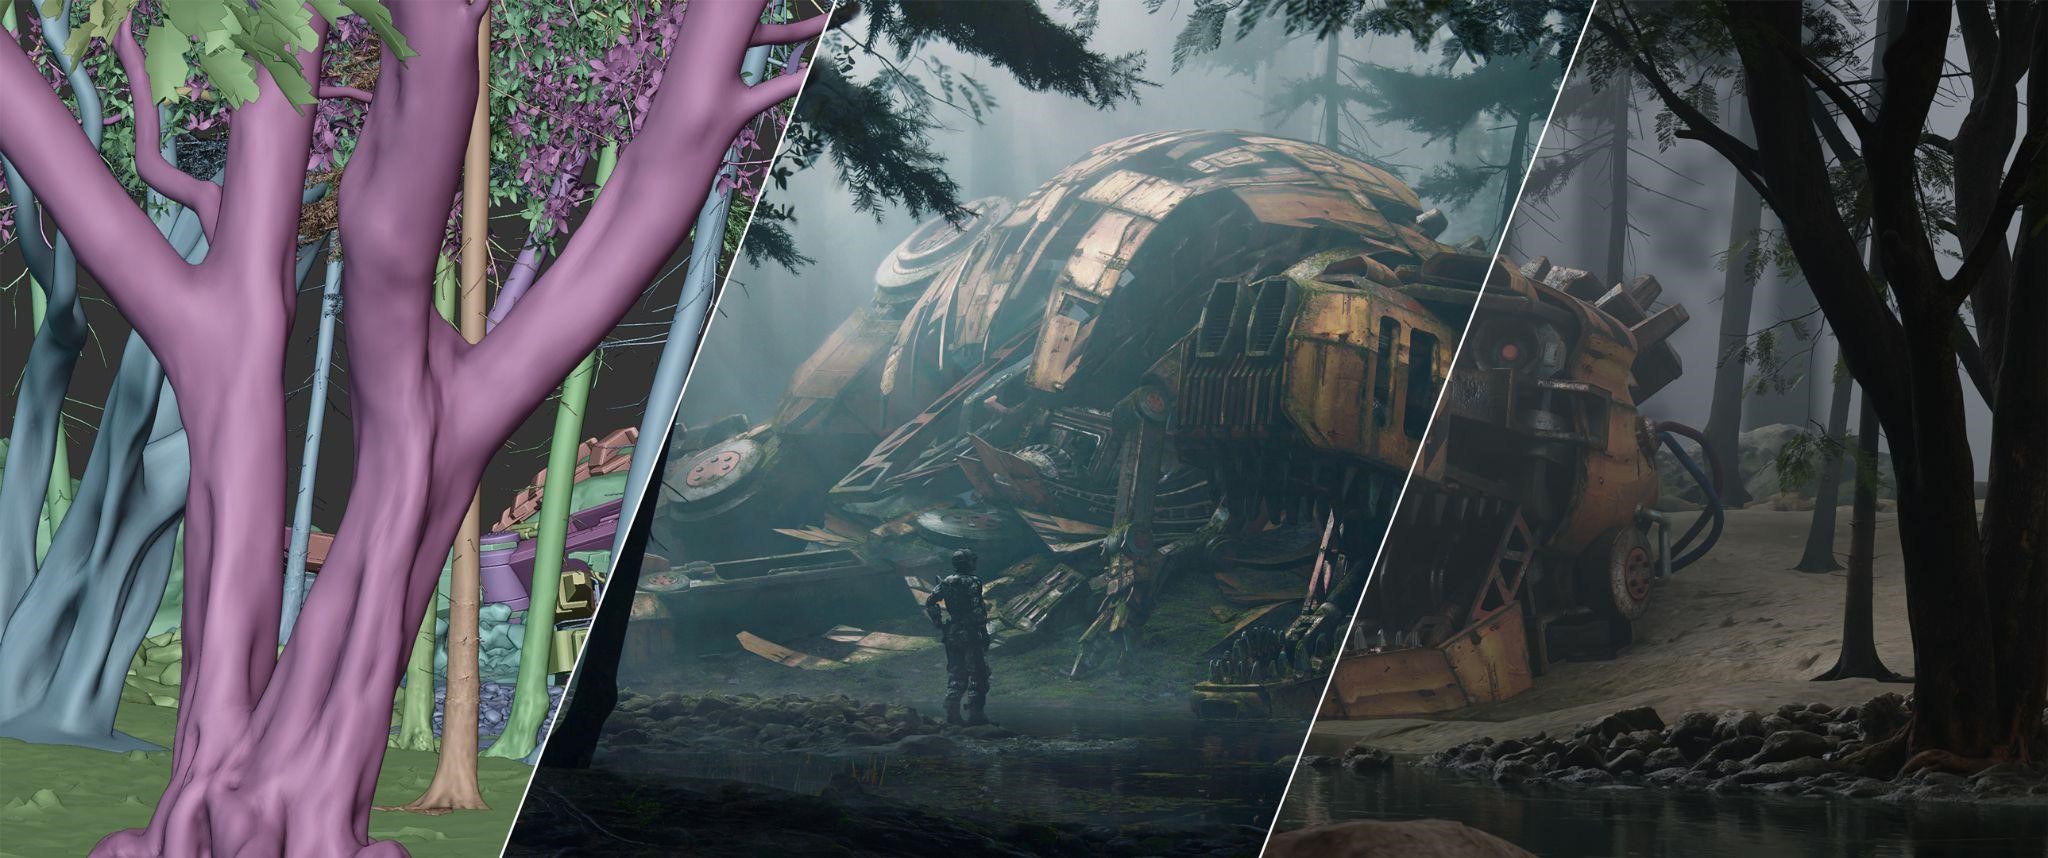
As you can see in the following image, the textures are applied and the edges of the pieces appear worn and rusty.
And this was the complete result:
Lighting
The idea for this project was to give it a misty and mossy mood, with the light playing a significant role in the composition. I used three lights—a sun and point light as “key lights,” and an area light as a “fill light” at the back of the dinosaur’s head, all complemented by a cube with volumetric shader.
Post-processing
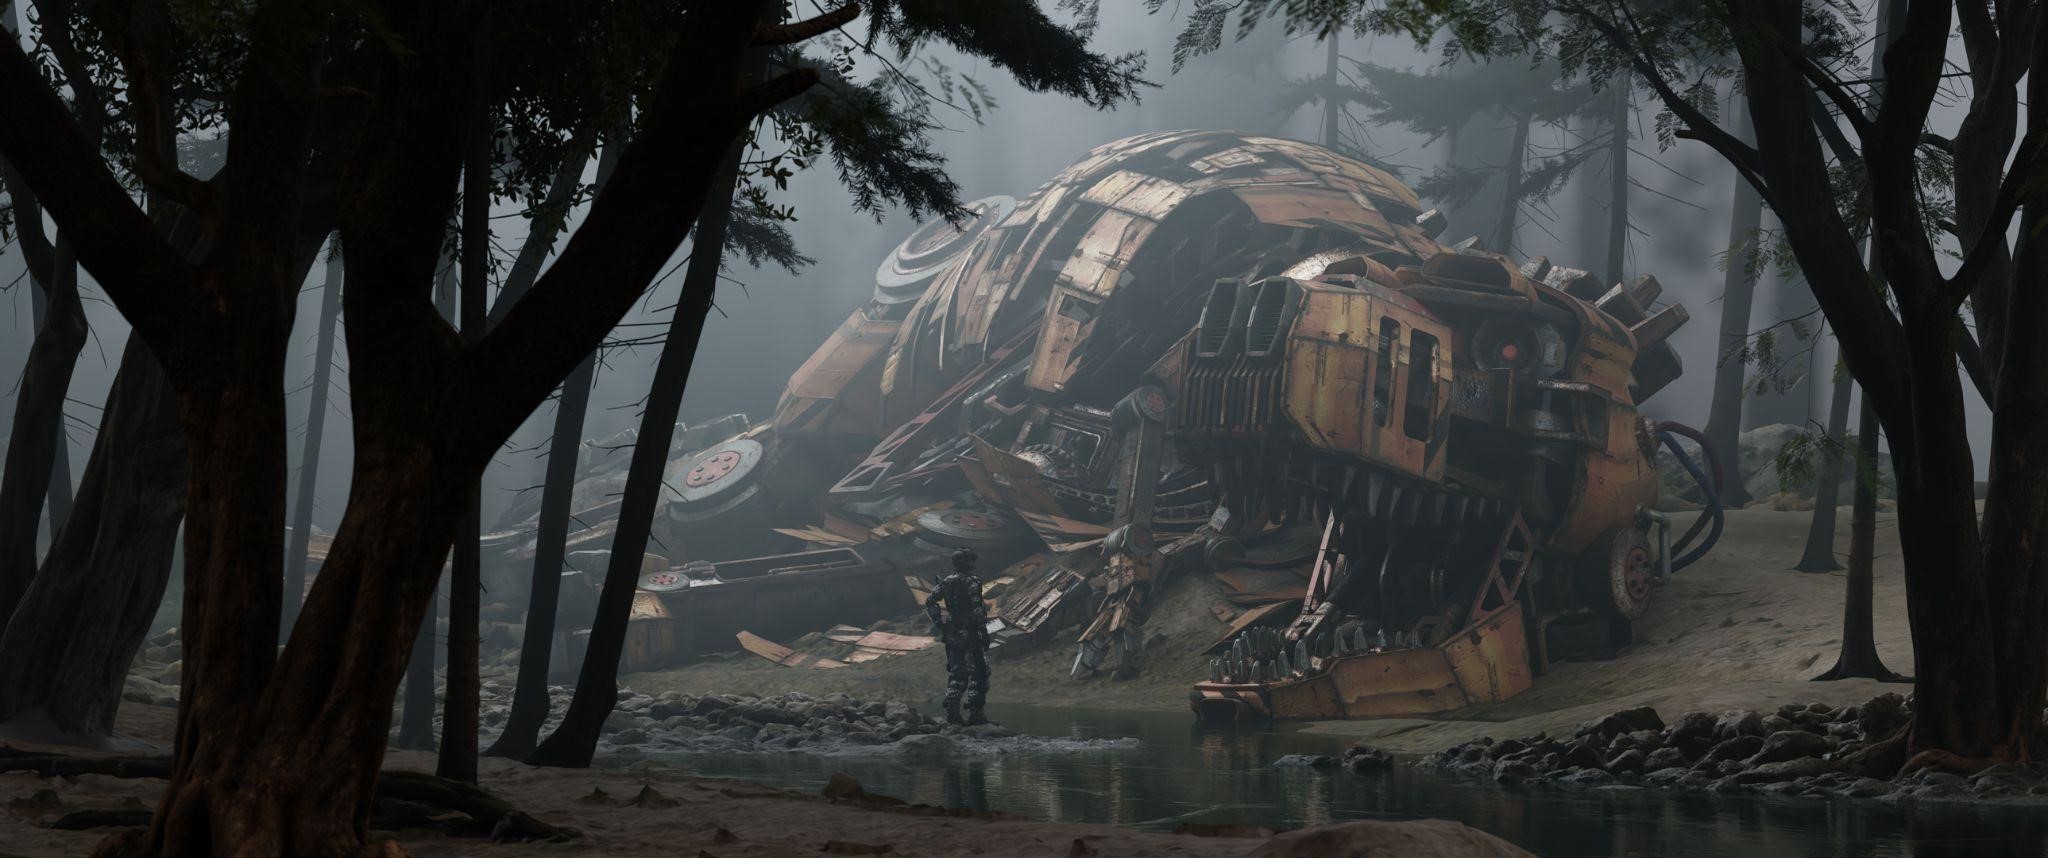
And here is the final render straight from Blender:
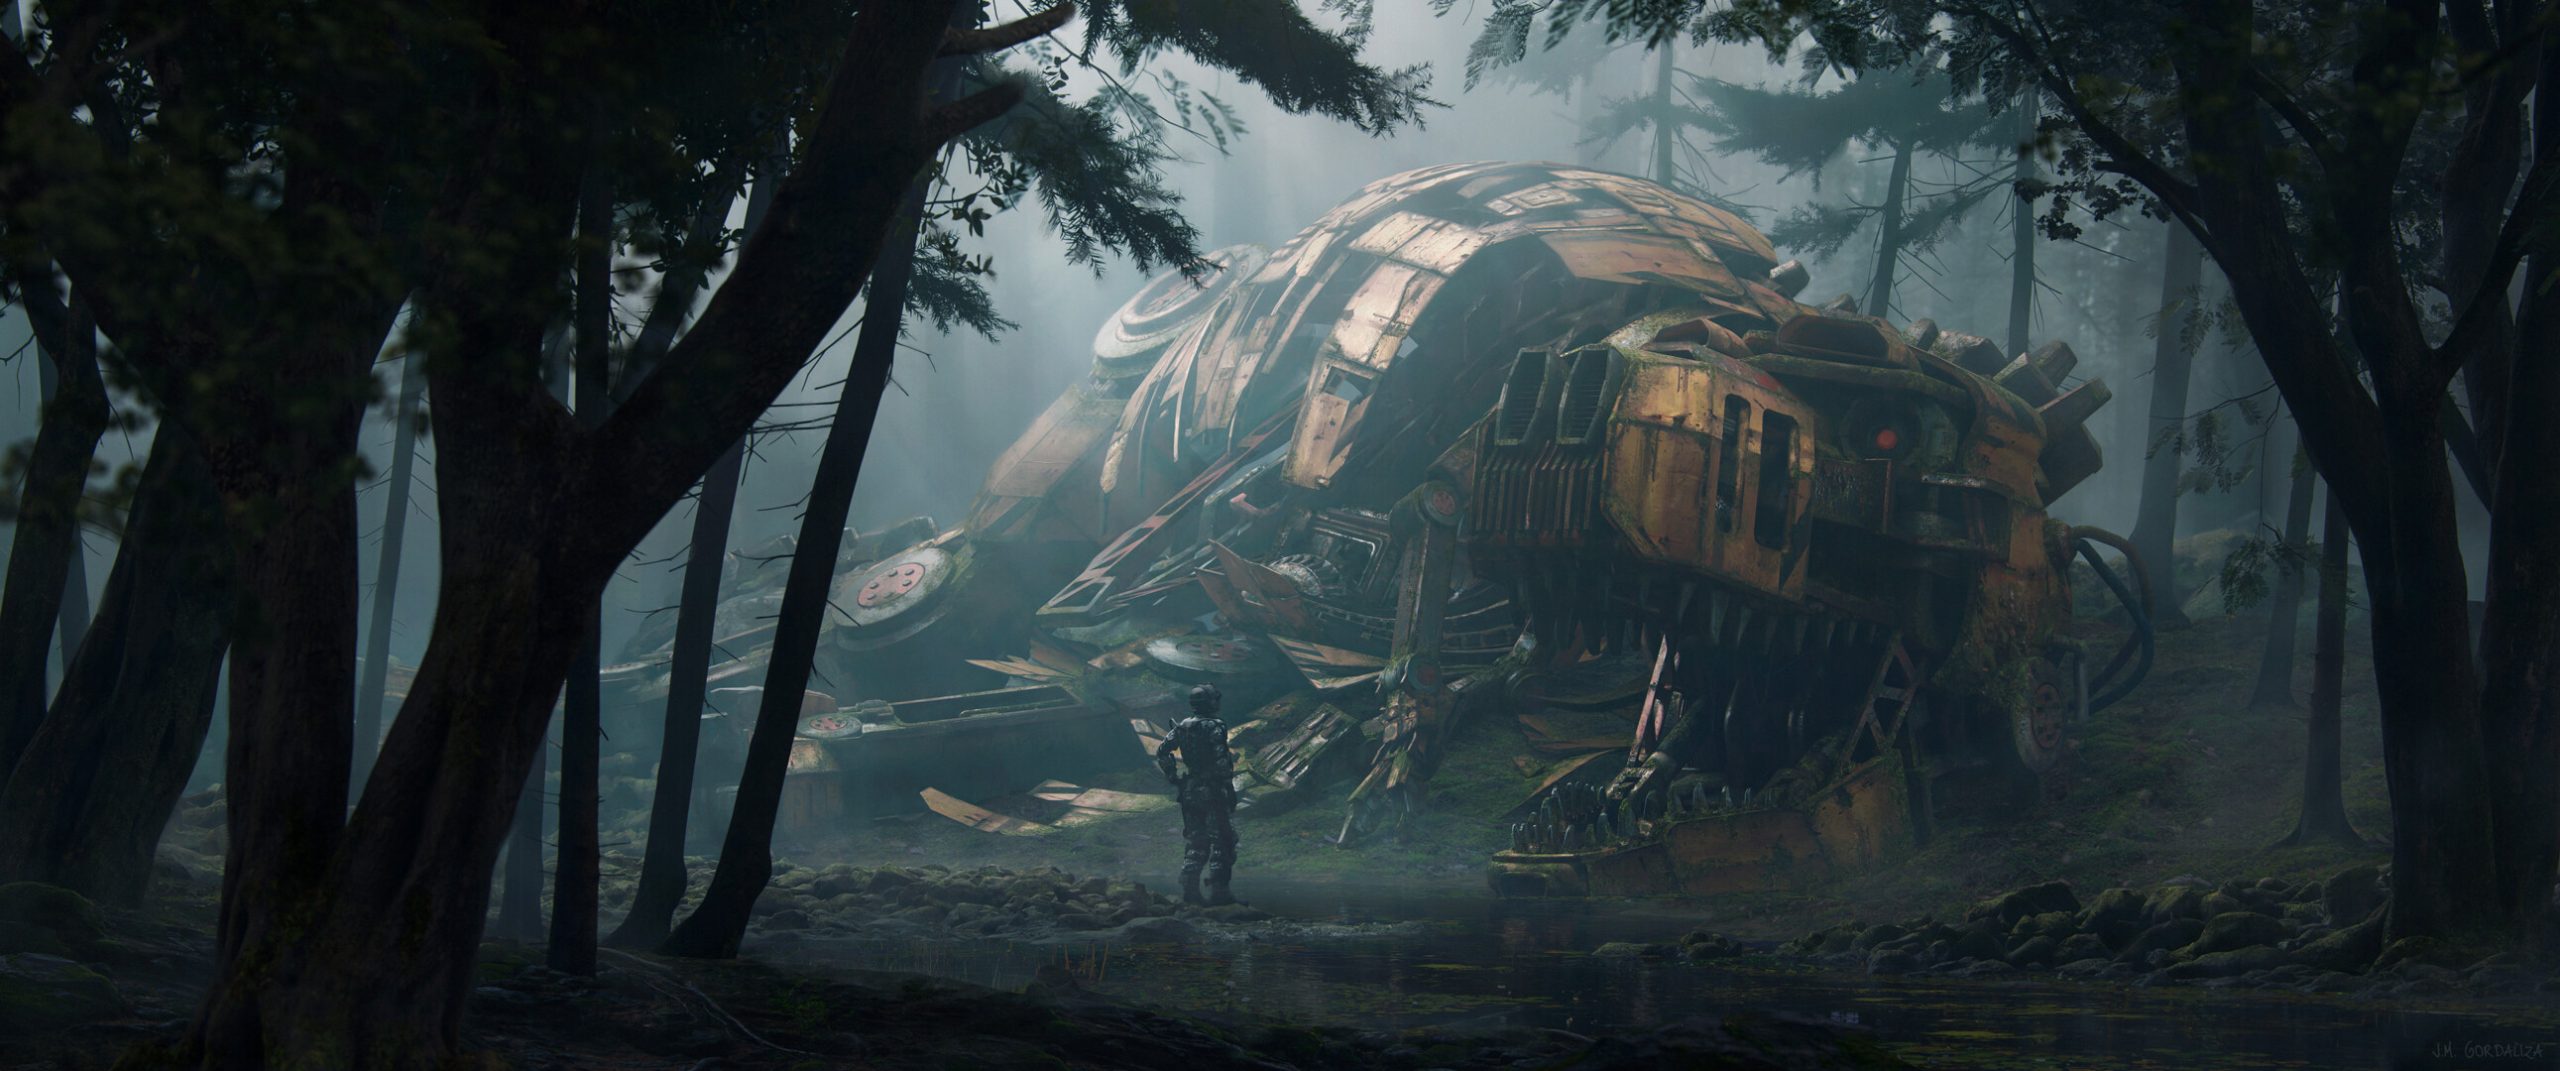
In Photoshop, I applied photobashing and paintover techniques mainly to create a more mossy terrain with green vegetation, in addition to the final color-grading and cinematic look.
RENDER : Mech T-Rex


Thank you for your time, I hope you enjoyed reading this article and learned something new! Have a nice day!
About the Artist
Jose Miguel Gordaliza is a self-taught concept artist based in Spain, specializing in environments and passionate about the art behind cinema and videogames. His previous article was Steampunk Station.


Congratulations. Inspire work!