
Abandoned Render – A.I. concept to final render

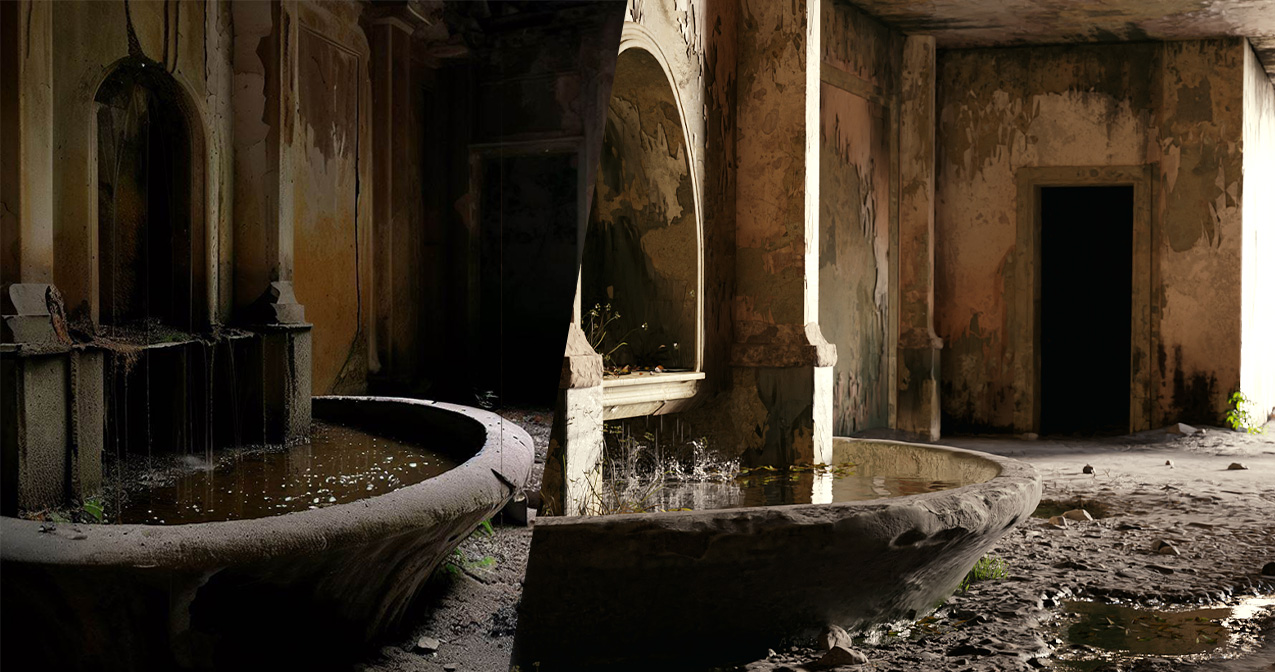
Andre’ Janse van Vuuren shares a Behind the Scenes of a recent project. What I like about his approach is that he used AI as a startingpoint to generate concept art to work from.
I was inspired the other day by scrolling through Facebook and seeing a few images generated by someone about abandoned Victorian water features.
These images/concepts inspired me to practice shaders and texturing again, trying to improve and reach photorealism.
I started by generating a bunch of Ai images using Bing image creator, till I landed on an image that looked somewhat challenging and fun:
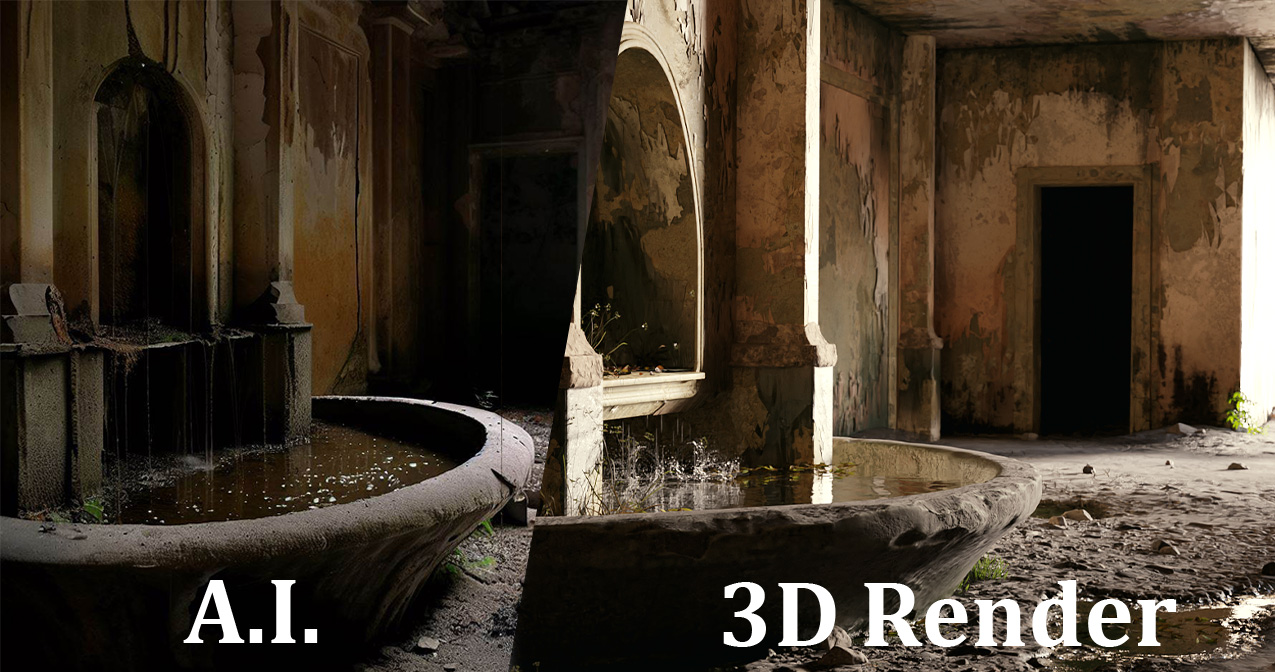
I attempted to use Fspy to triangulate the camera, but currently Ai doesn’t quite nail perspective yet, so I just gave up and tried my best to manually position the camera. Ended up moving it quite a lot.
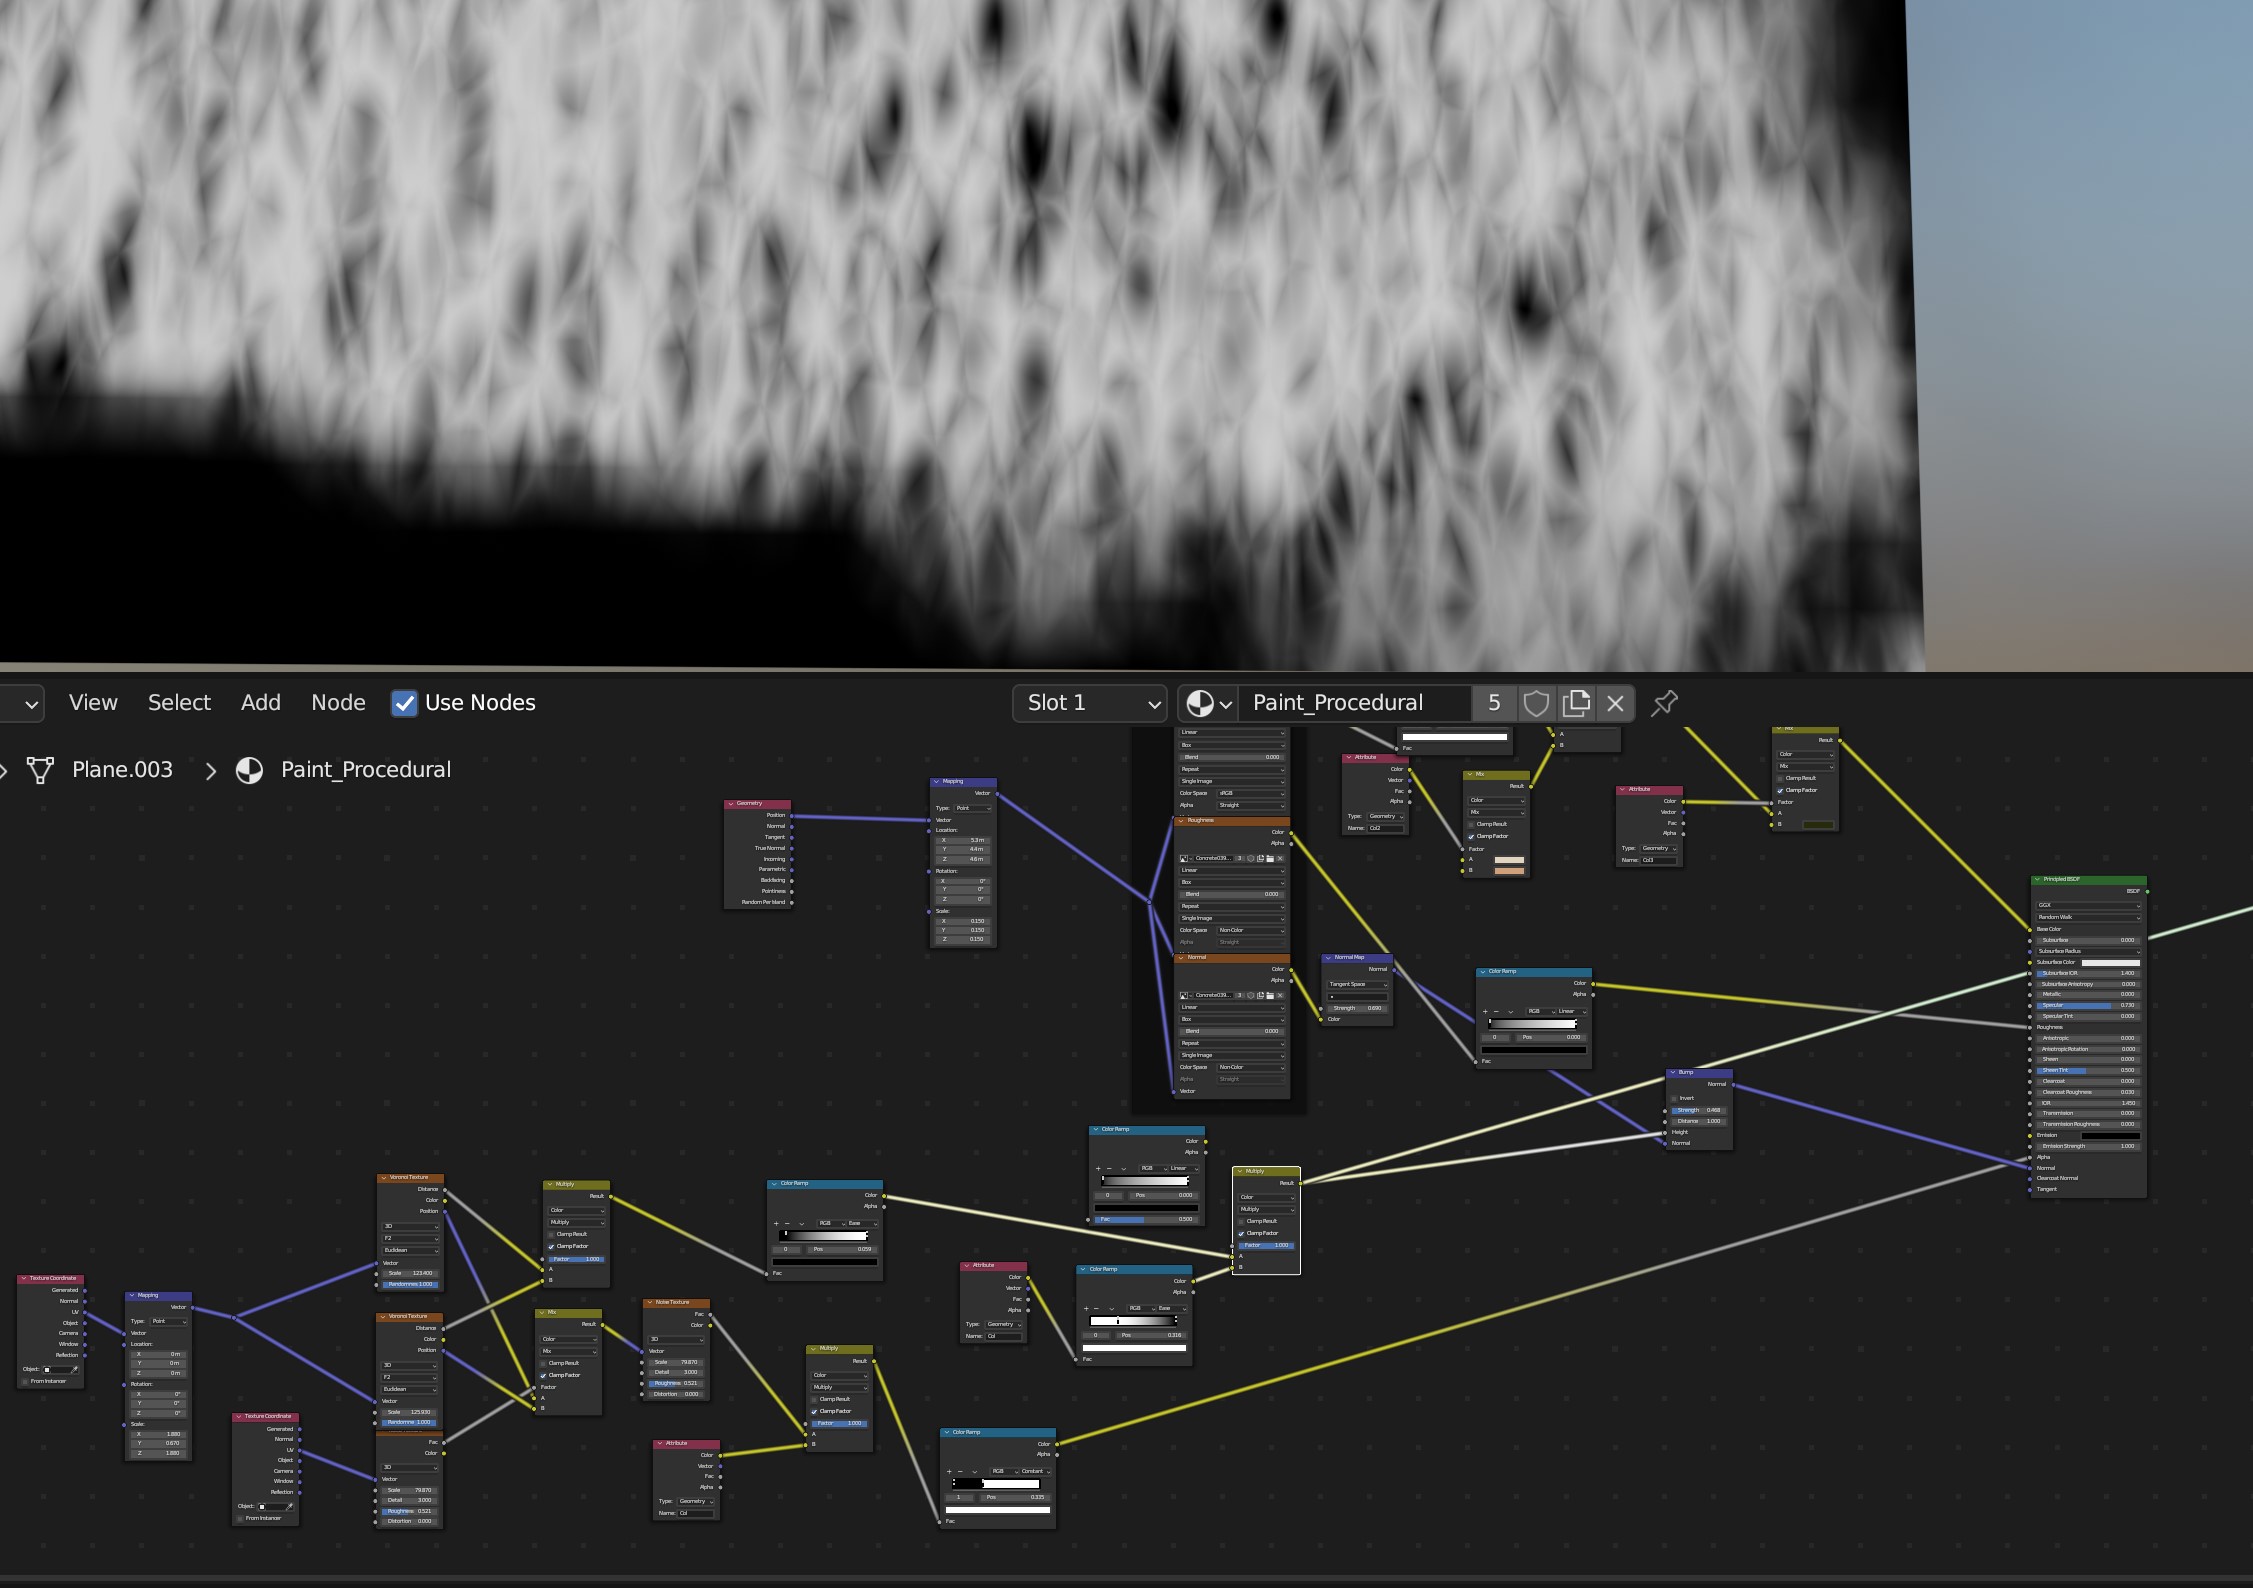
The two biggest challenges were the floor texturing and the wall/paint shaders.
I used a bunch of procedural textures for the wall, mainly two layers of Voronoi layers (set to color output) to get that crackly appearance and a lot of vertex colors to define where the paint alpha needs to be:

For the floor, it was a nightmare, it involved 5 vertex color inputs and a bunch of materials from Poly Haven, Ambient CG, and Megascans. Here is a screenshot of the nightmare:
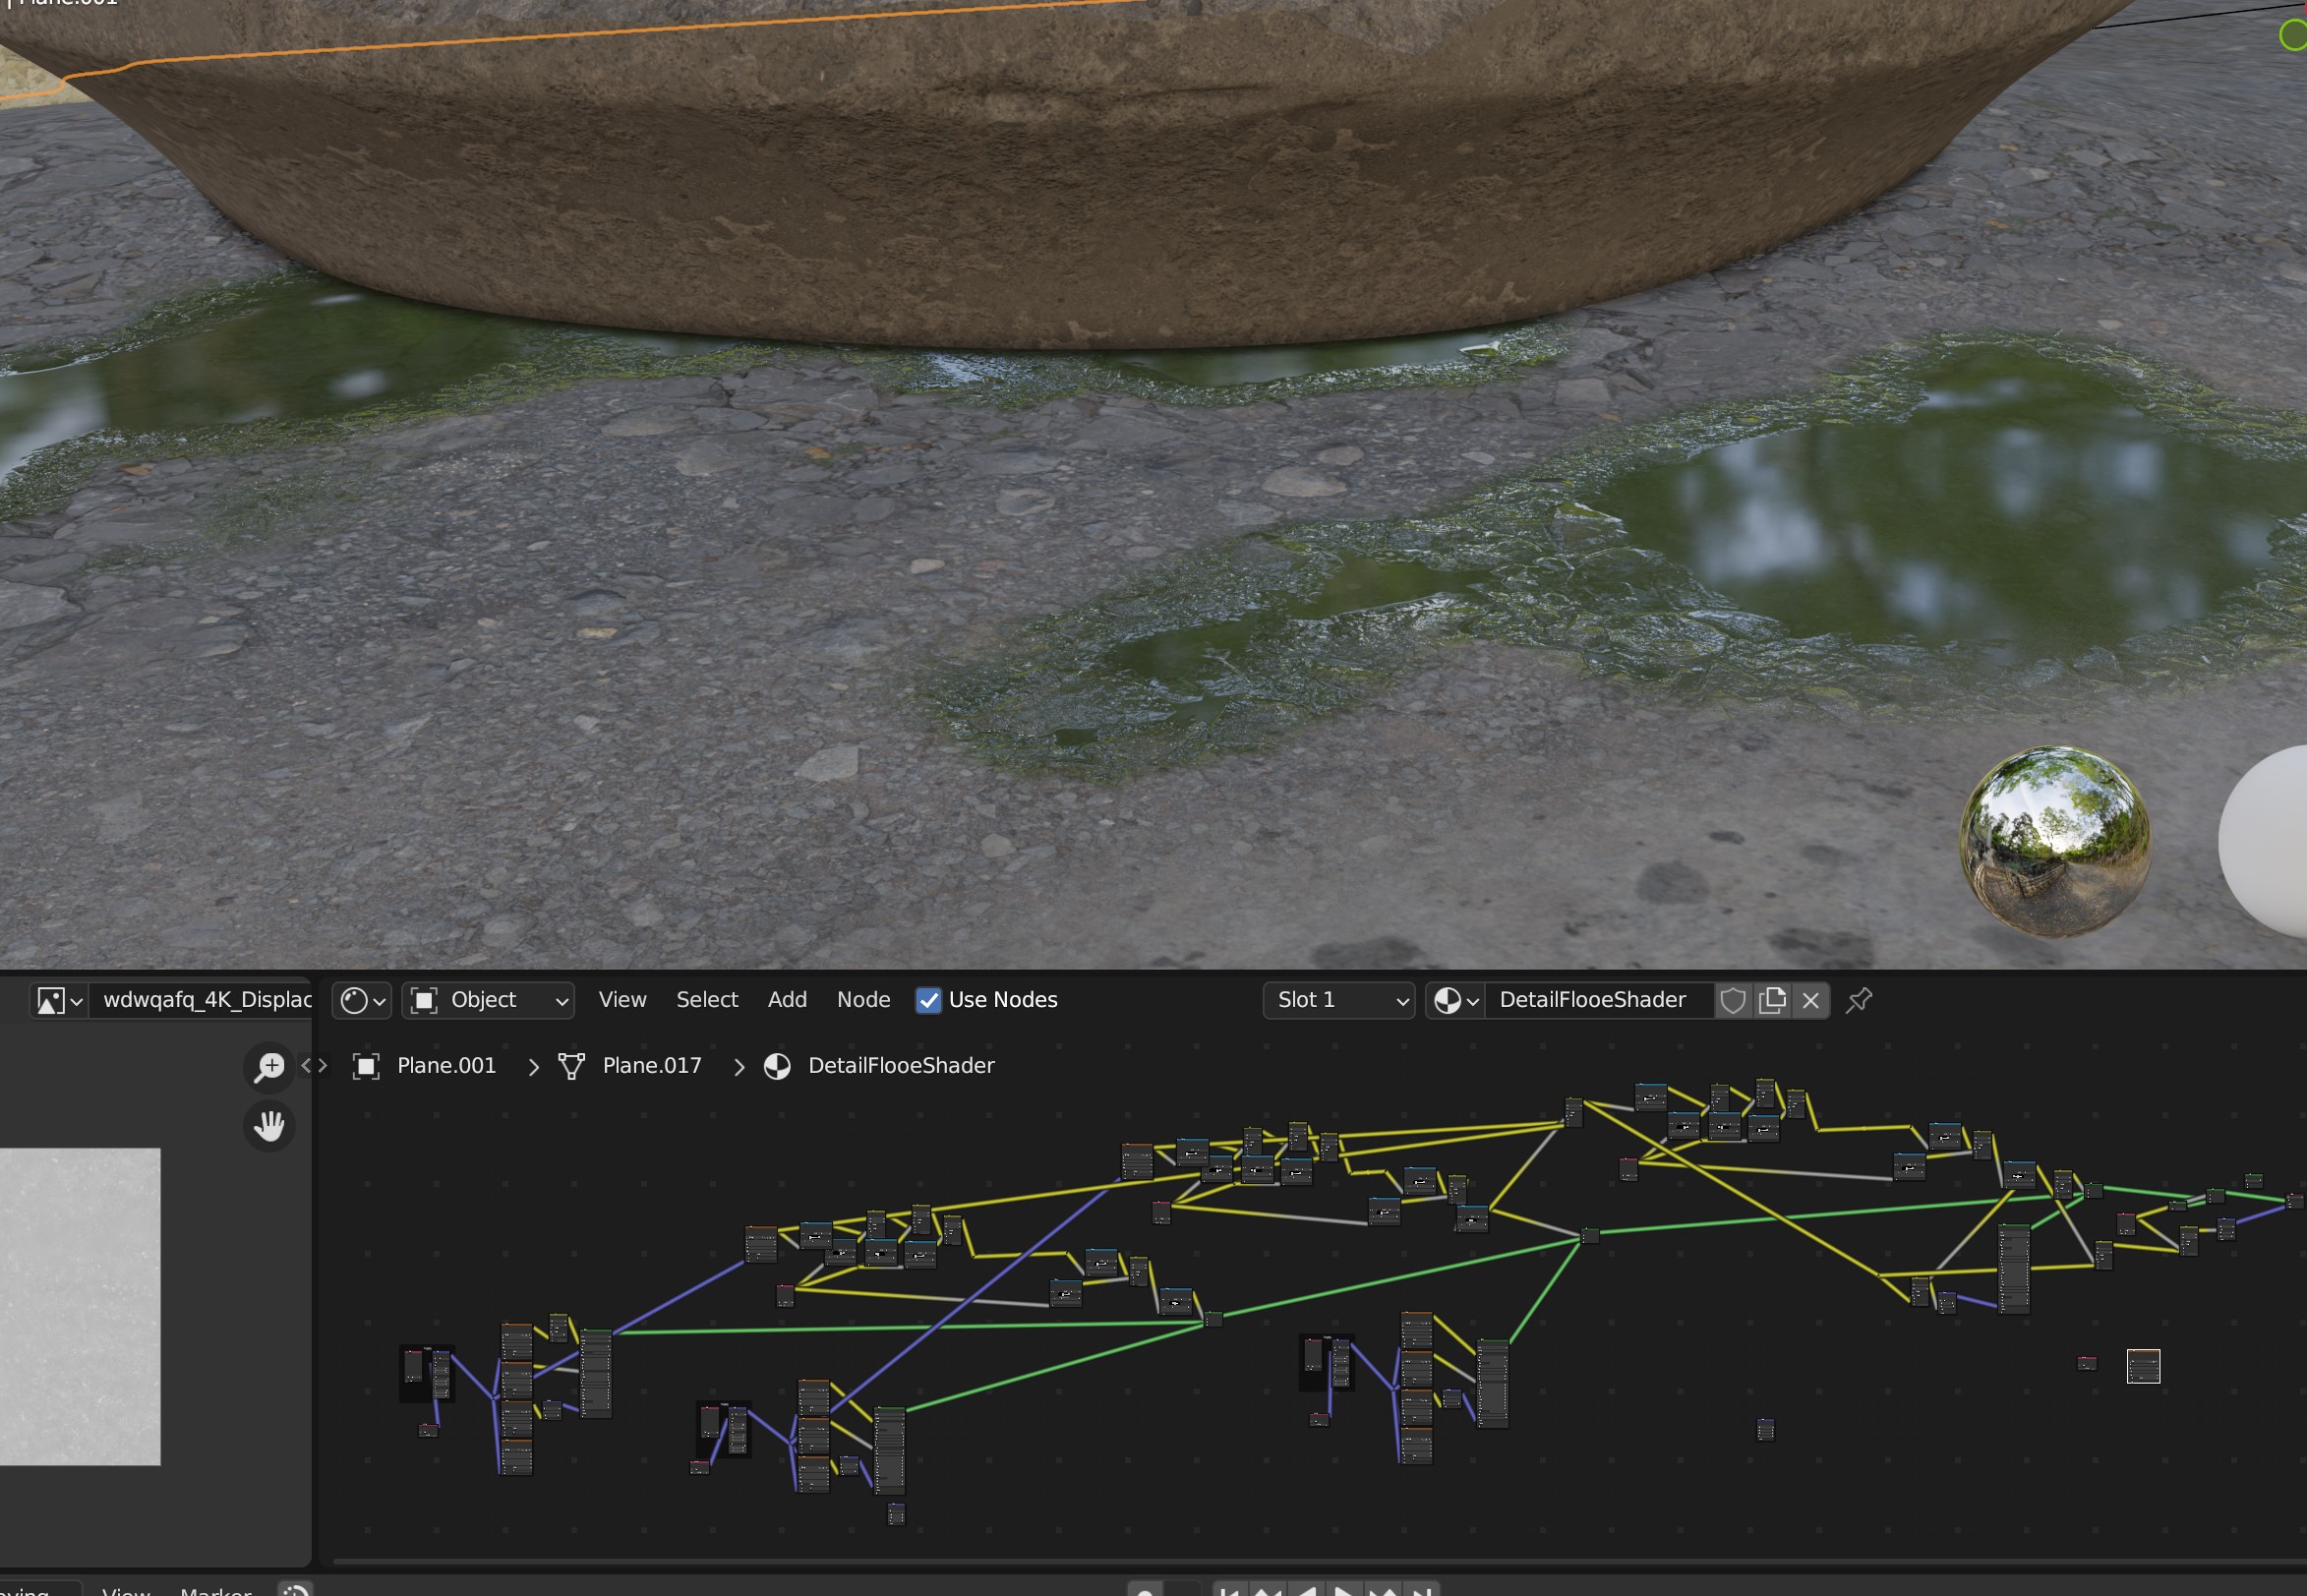
I originally intended to use micro displacements, but it was a slow and tedious process, so I opted to bake the shader down into multiple 4K texture maps (mainly Color, Roughness, Height, and normal map) – the height map was used with a standard displacement modifier.
The downside is I lose the ability to tweak the shader and I won’t have detail closer to the camera. I did find a solution to the detail problem by subdividing the floor mesh closer to the camera. Not ideal, but it worked :)
With the two main problems out of the way, it was bog-standard PBR materials from there on out. The majority of the textures used were from Ambient CG – I find the textures there to be neatly named and nicely compressed.
I did use Eevee quite a lot, after baking probe lighting (Gi + Cubemaps) It looked eerily simular to Cycles. This sped up a lot of guessing work and shader tweaks:

In the end, the render took about 4min per frame on an RTX 3090.
For the colors to pop, I tried using the compositor and PhotoShop, but it just felt artificial. I ended up using the built-in image editor on my Samsung phone. Easy, fast, and the pre-sets are really useful!
Final render with other passes:
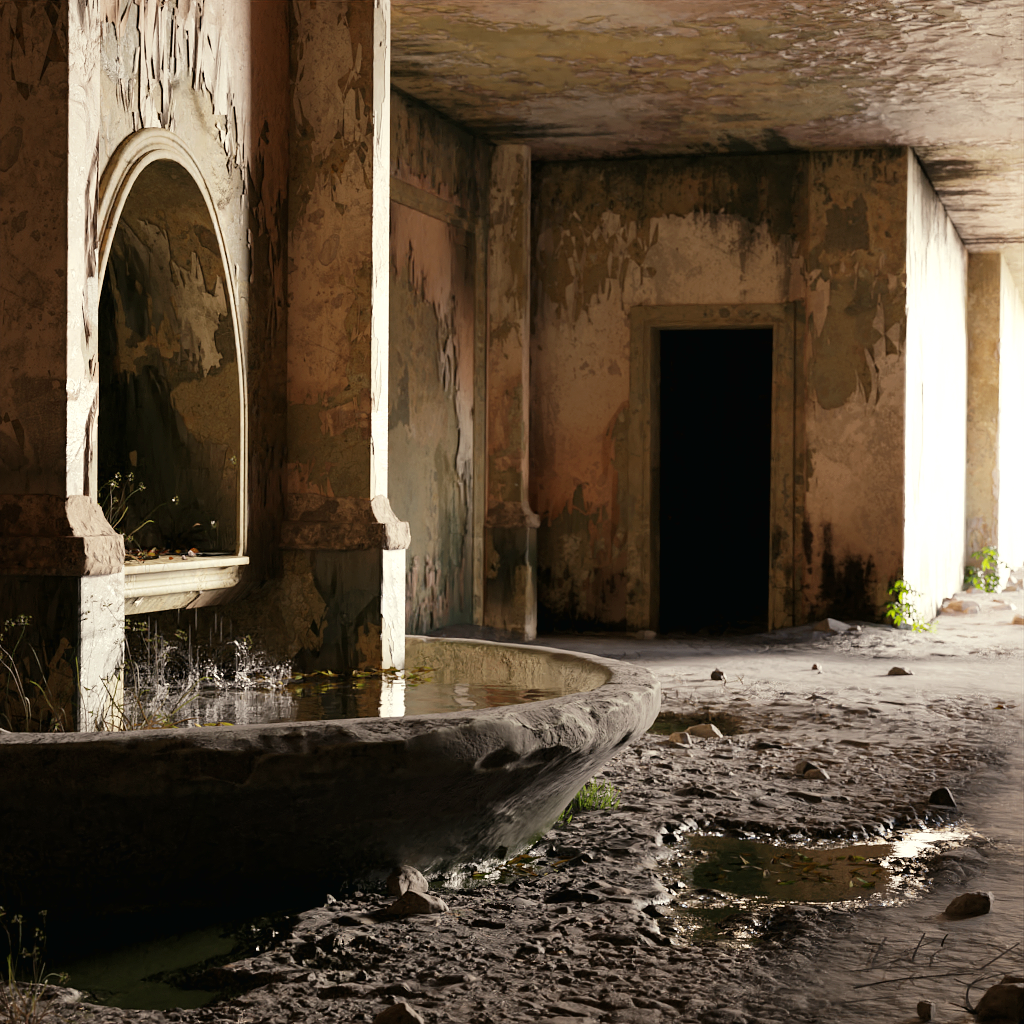
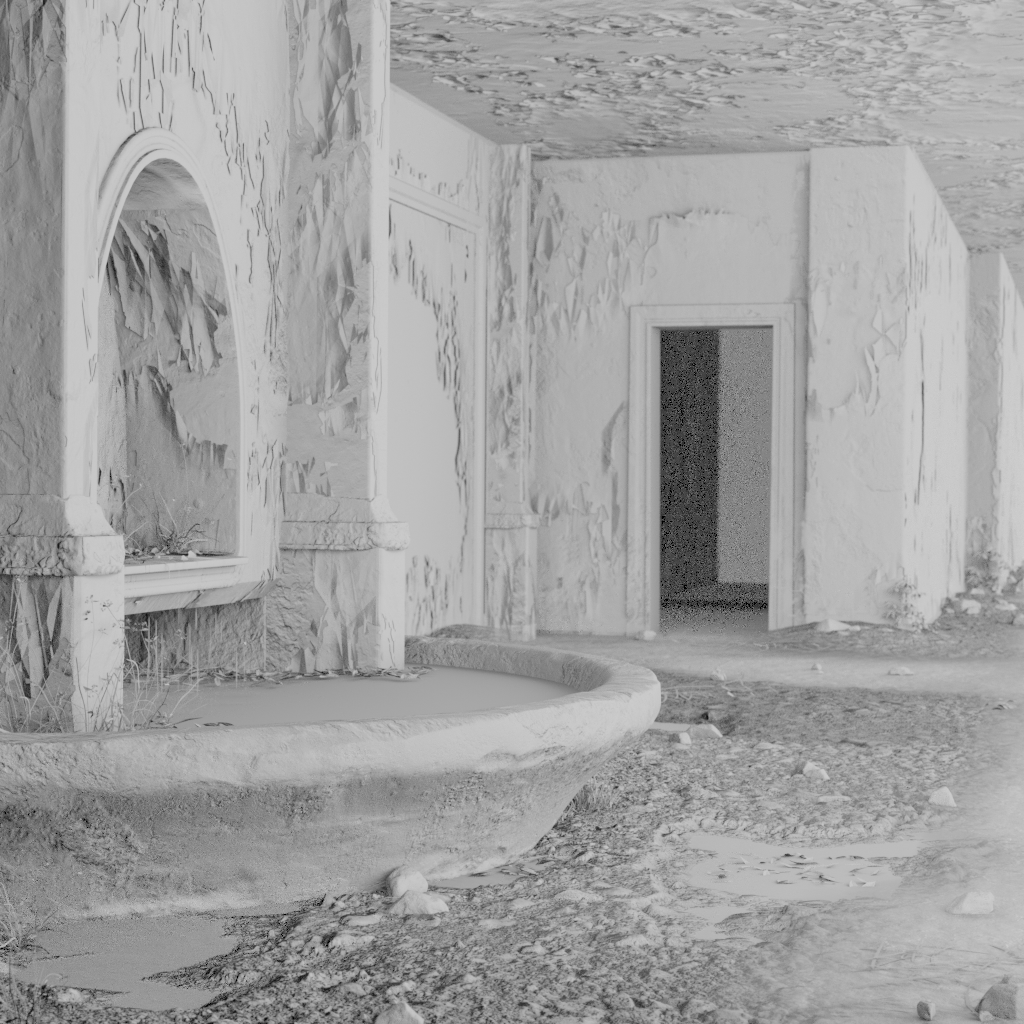
Hope you enjoyed a bit behind the scenes! I’m a bit spite I didn’t do a timelapse :/
About me: 3D generalist in the VFX industry for roughly 5 years- I make silly games and sometimes large-scale projects in my free time.
Not much to show, but if you want to check out my socials:
Cheerio!
Andre’

Are people thinking it’s good to become an Ai printer?
The creative process, brainstorming, is what’s most fun about 3D art and what differentiates artists from asset hoarders… Because then it’s just modeling… that’s when they don’t get ready-made assets and want to be called an artist…
Creativity is what differentiates Artists from asset hoarders….
3D is becoming a game like LEGO, Puzzles…
I don’t want to discuss it, but since it’s been made public, it’s subject to comment.
Have a 3090 for that…
The problem is that people will stop thinking about delegating this process to Ai, and with that we will only have more of the same, because Ai doesn’t create, it just generates images from others available on the Web…
Have you ever wondered if this image is from some photographer that Ai stole from the web and didn’t even receive credit for it?
Creating we all know that Ai doesn’t create… Ai stole it from somewhere Ok?
It’s something to think about…
Have a good day
In general, I’m not a big fan of generative AI. In this case though, I don’t think this is any different from using concept art you find on the web to base your project off.
I will stand my ground on the first comment- it’s the same principle as buying a photo reference packs on artstation to base your environment off. Yes Ai does use other people’s photos, but it gives a unique result. I’m not going to deny that it’s wrong, but it is wrong to use that as an end result and call it your own work. Re-creating it as an environment practice, and trying to improve on that – I consider that fair. It’s essentially reference.
hope you’ll understand:)
In this specific case I also think about it, it was just an image like any other found on the Web to use as a reference…
But as I mentioned, why not take a photo and give credit to the 2D artist, Phografo, who was kind enough to make it available…
But that’s it, it was just a reflection
Have a nice day, thanks for the feedback