
Behind the Scenes: The Nautilus And The Devilfish
INTRODUCTION
Hallo, Blenderheads! My name is Philipp Dirksen and I am a biologist from Germany. Among my “too” many hobbies is dabbling around with Blender. I am happy to highlight some of the steps of my latest personal project, a scene from Jules Verne’s book, Twenty Thousand Leagues Under the Seas.
INSPIRATION
When traveling, I like to listen to audiobooks, and the last one was Jules Verne’s Twenty Thousand Leagues Under the Seas. What can I say, I love this story, both the original and it’s various adaptations! It has so many strong themes resonating with me, most prominently among them the wonders and awe of science and technology, contrasted by the beauty and diversity of nature. And of course, it features an awesome submarine, Captain Nemo’s “Nautilus.”
While many people know Harper Goff’s Nautilus design from the 1954 Disney movie, with it’s monster-like appearance and Victorian interior, I wanted to recreate that submarine like Verne described in his book. And that version is much more plain and functional.
PROCESS
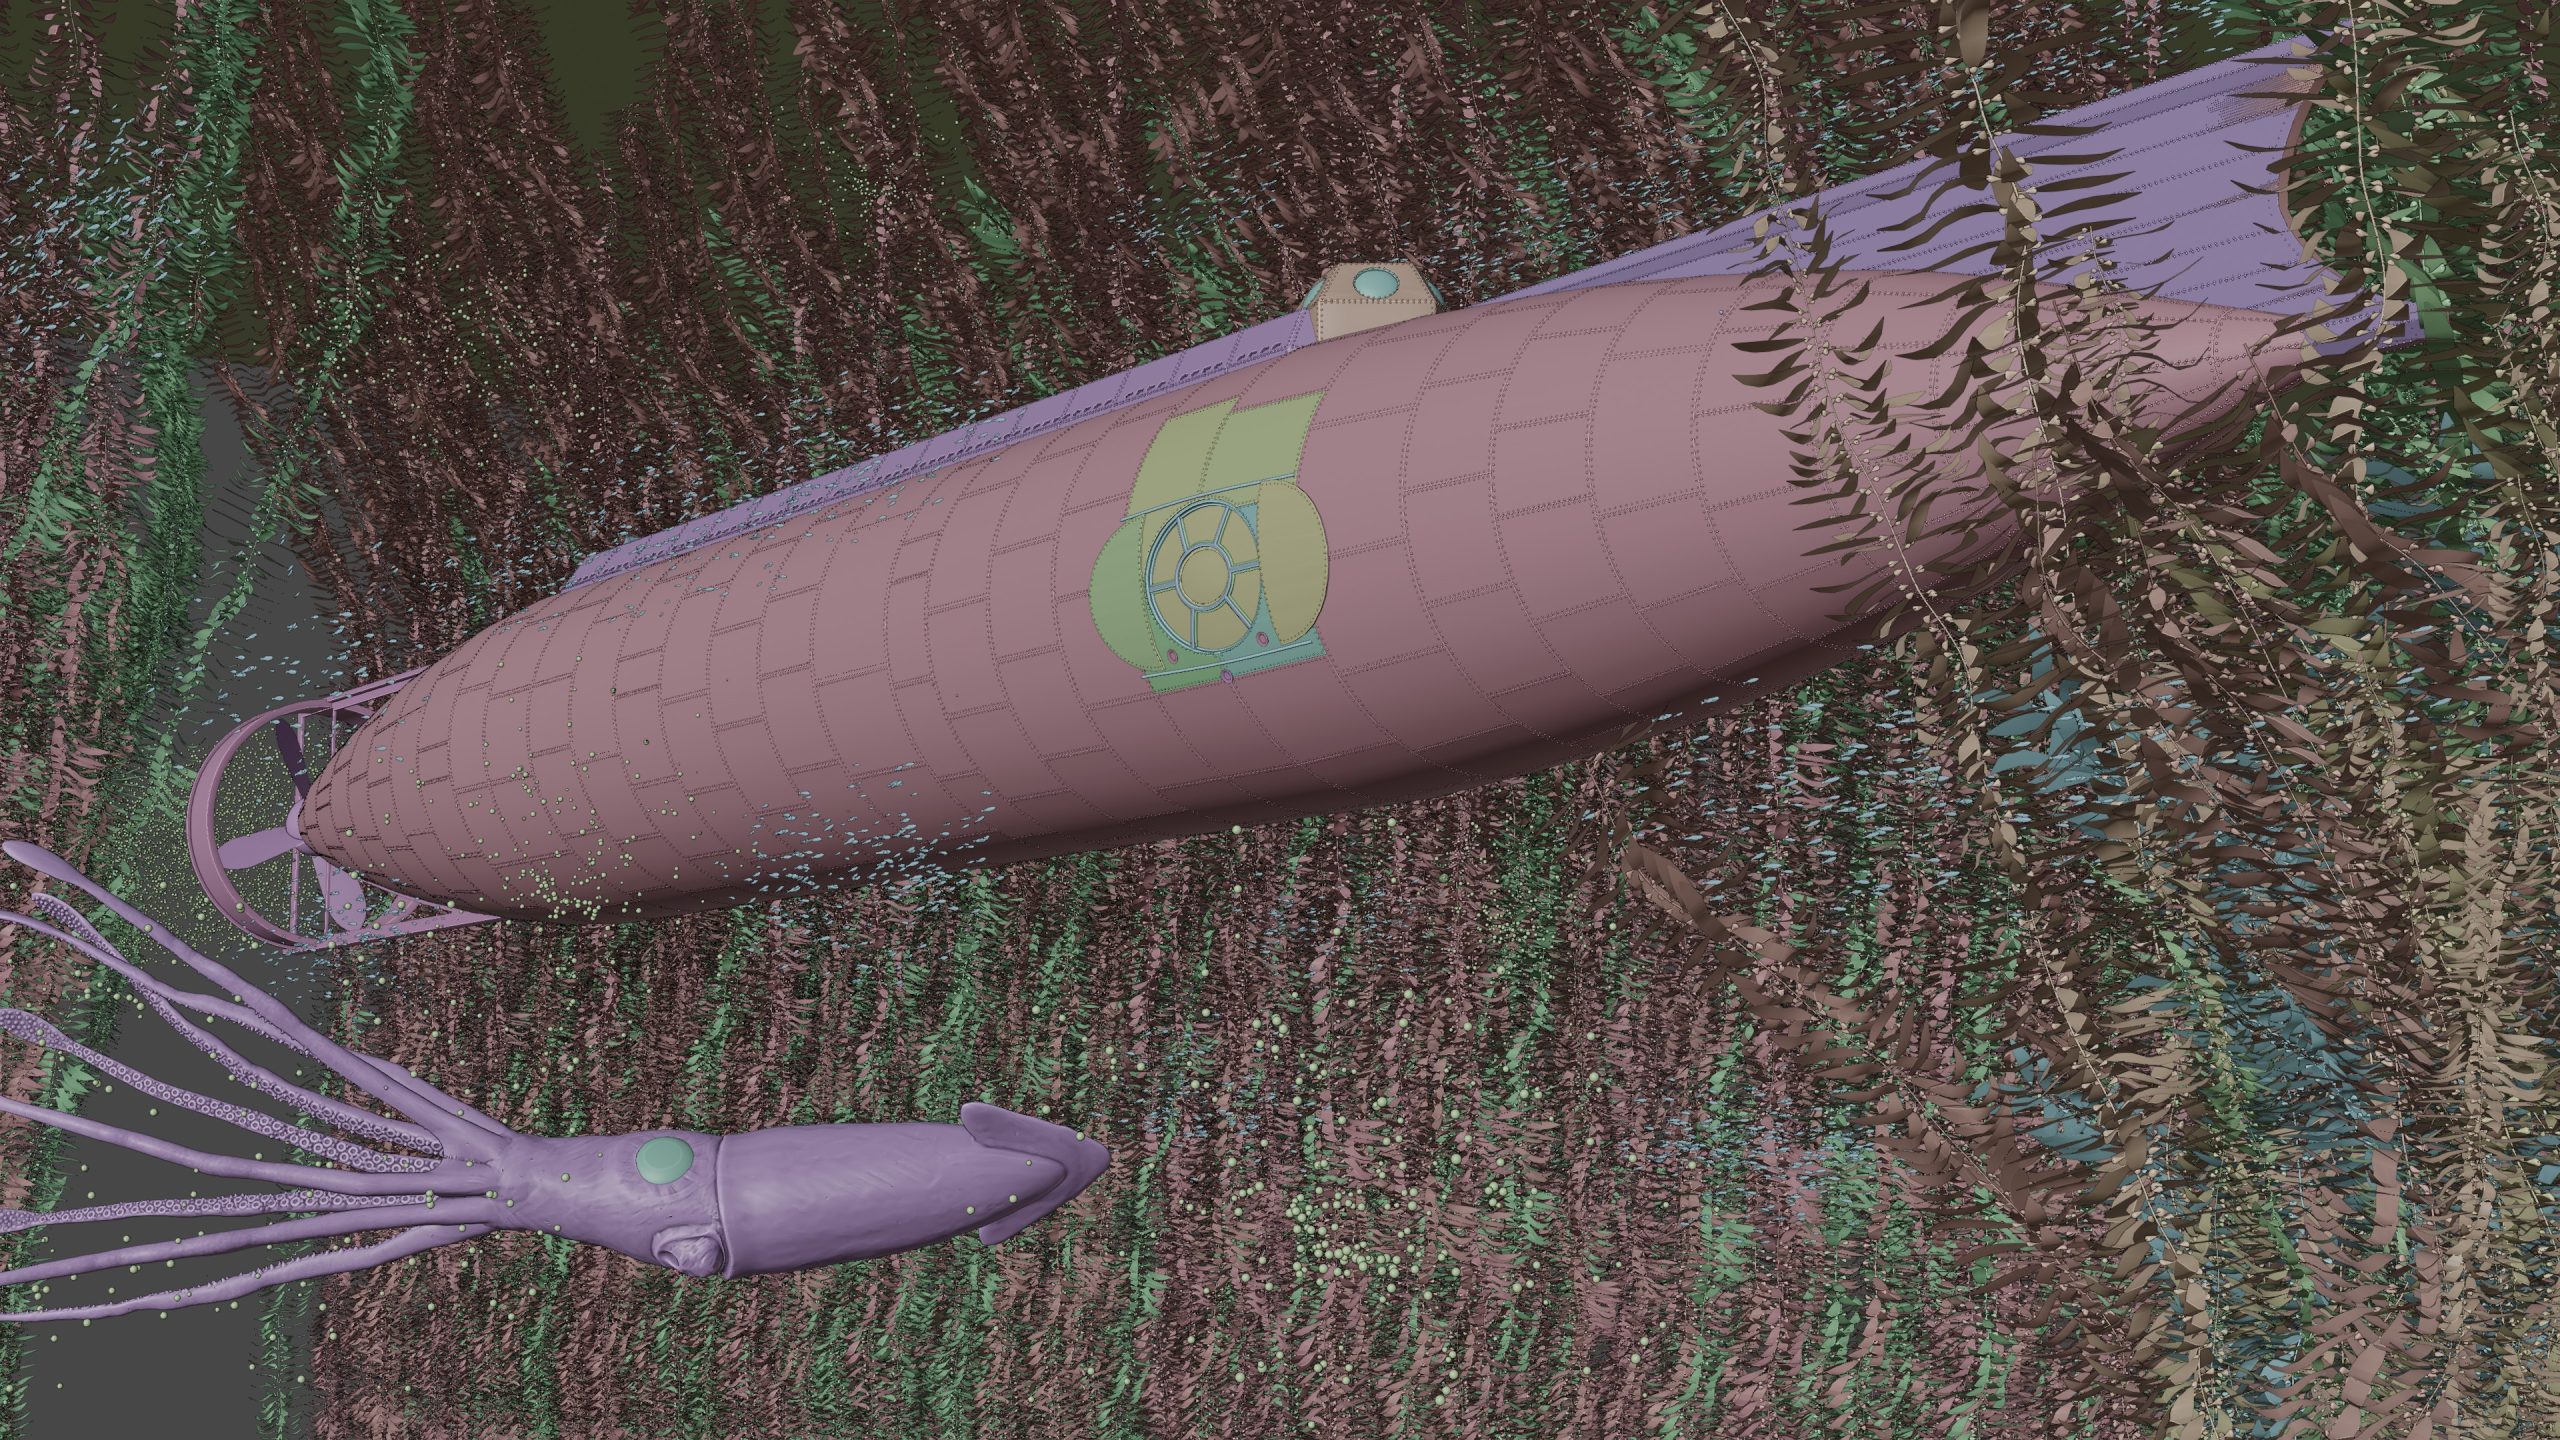
The Submarine
Here, Professor Aronnax, are the different dimensions of this boat now transporting you. It’s a very long cylinder with conical ends.”
Twenty Thousand Leagues Under the Seas, Chapter 13: Some Figures
This was to be a relatively quick project. I generated the basic shape of the submarine by simple hard surface modeling. As it will be submerged later, I could get away with a few details.

However, while the surface of the Nautilus is described as being perfectly smooth, that would artistically not be very interesting. Let’s do some hull panels instead!
For this, I chose a geometry node approach. I duplicated all the objects that needed paneling, split the edges where the panel lining should be, and applied the following geometry node setup, followed by a simple bevel. Note that while most of the hull panel mesh is a single object, some panels around the big window have been separated. This was necessary, as the window opening is cut into these separated panels by a boolean modifier and this would lead to glitches.

The Kraken
What!” Conseil put in. “Squid, ordinary squid from the class Cephalopoda?” “No,” I said, “devilfish of large dimensions. But friend Land is no doubt mistaken, because I don’t see a thing.” “That’s regrettable,” Conseil answered. “I’d like to come face to face with one of those devilfish I’ve heard so much about, which can drag ships down into the depths. Those beasts go by the name of krake”
Twenty Thousand Leagues Under the Seas, Chapter 18: The Devilfish
I created the “devilfish” via sculpting, starting with a handy YouTube tutorial by Ryan King Art, but following a more realistic approach using references from the Giant Squid, Architeuthis dux (which actually is no kraken, shame on me…).
For the tentacles, I used the snakehook brush to draw a single tentacle out of a cube, shaped it, and added details. Then I multiplied it with an array modifier around the squid’s main body, and joined and remeshed both together. Finally, I added a simple armature to be able to pose the tentacles for the final shot.
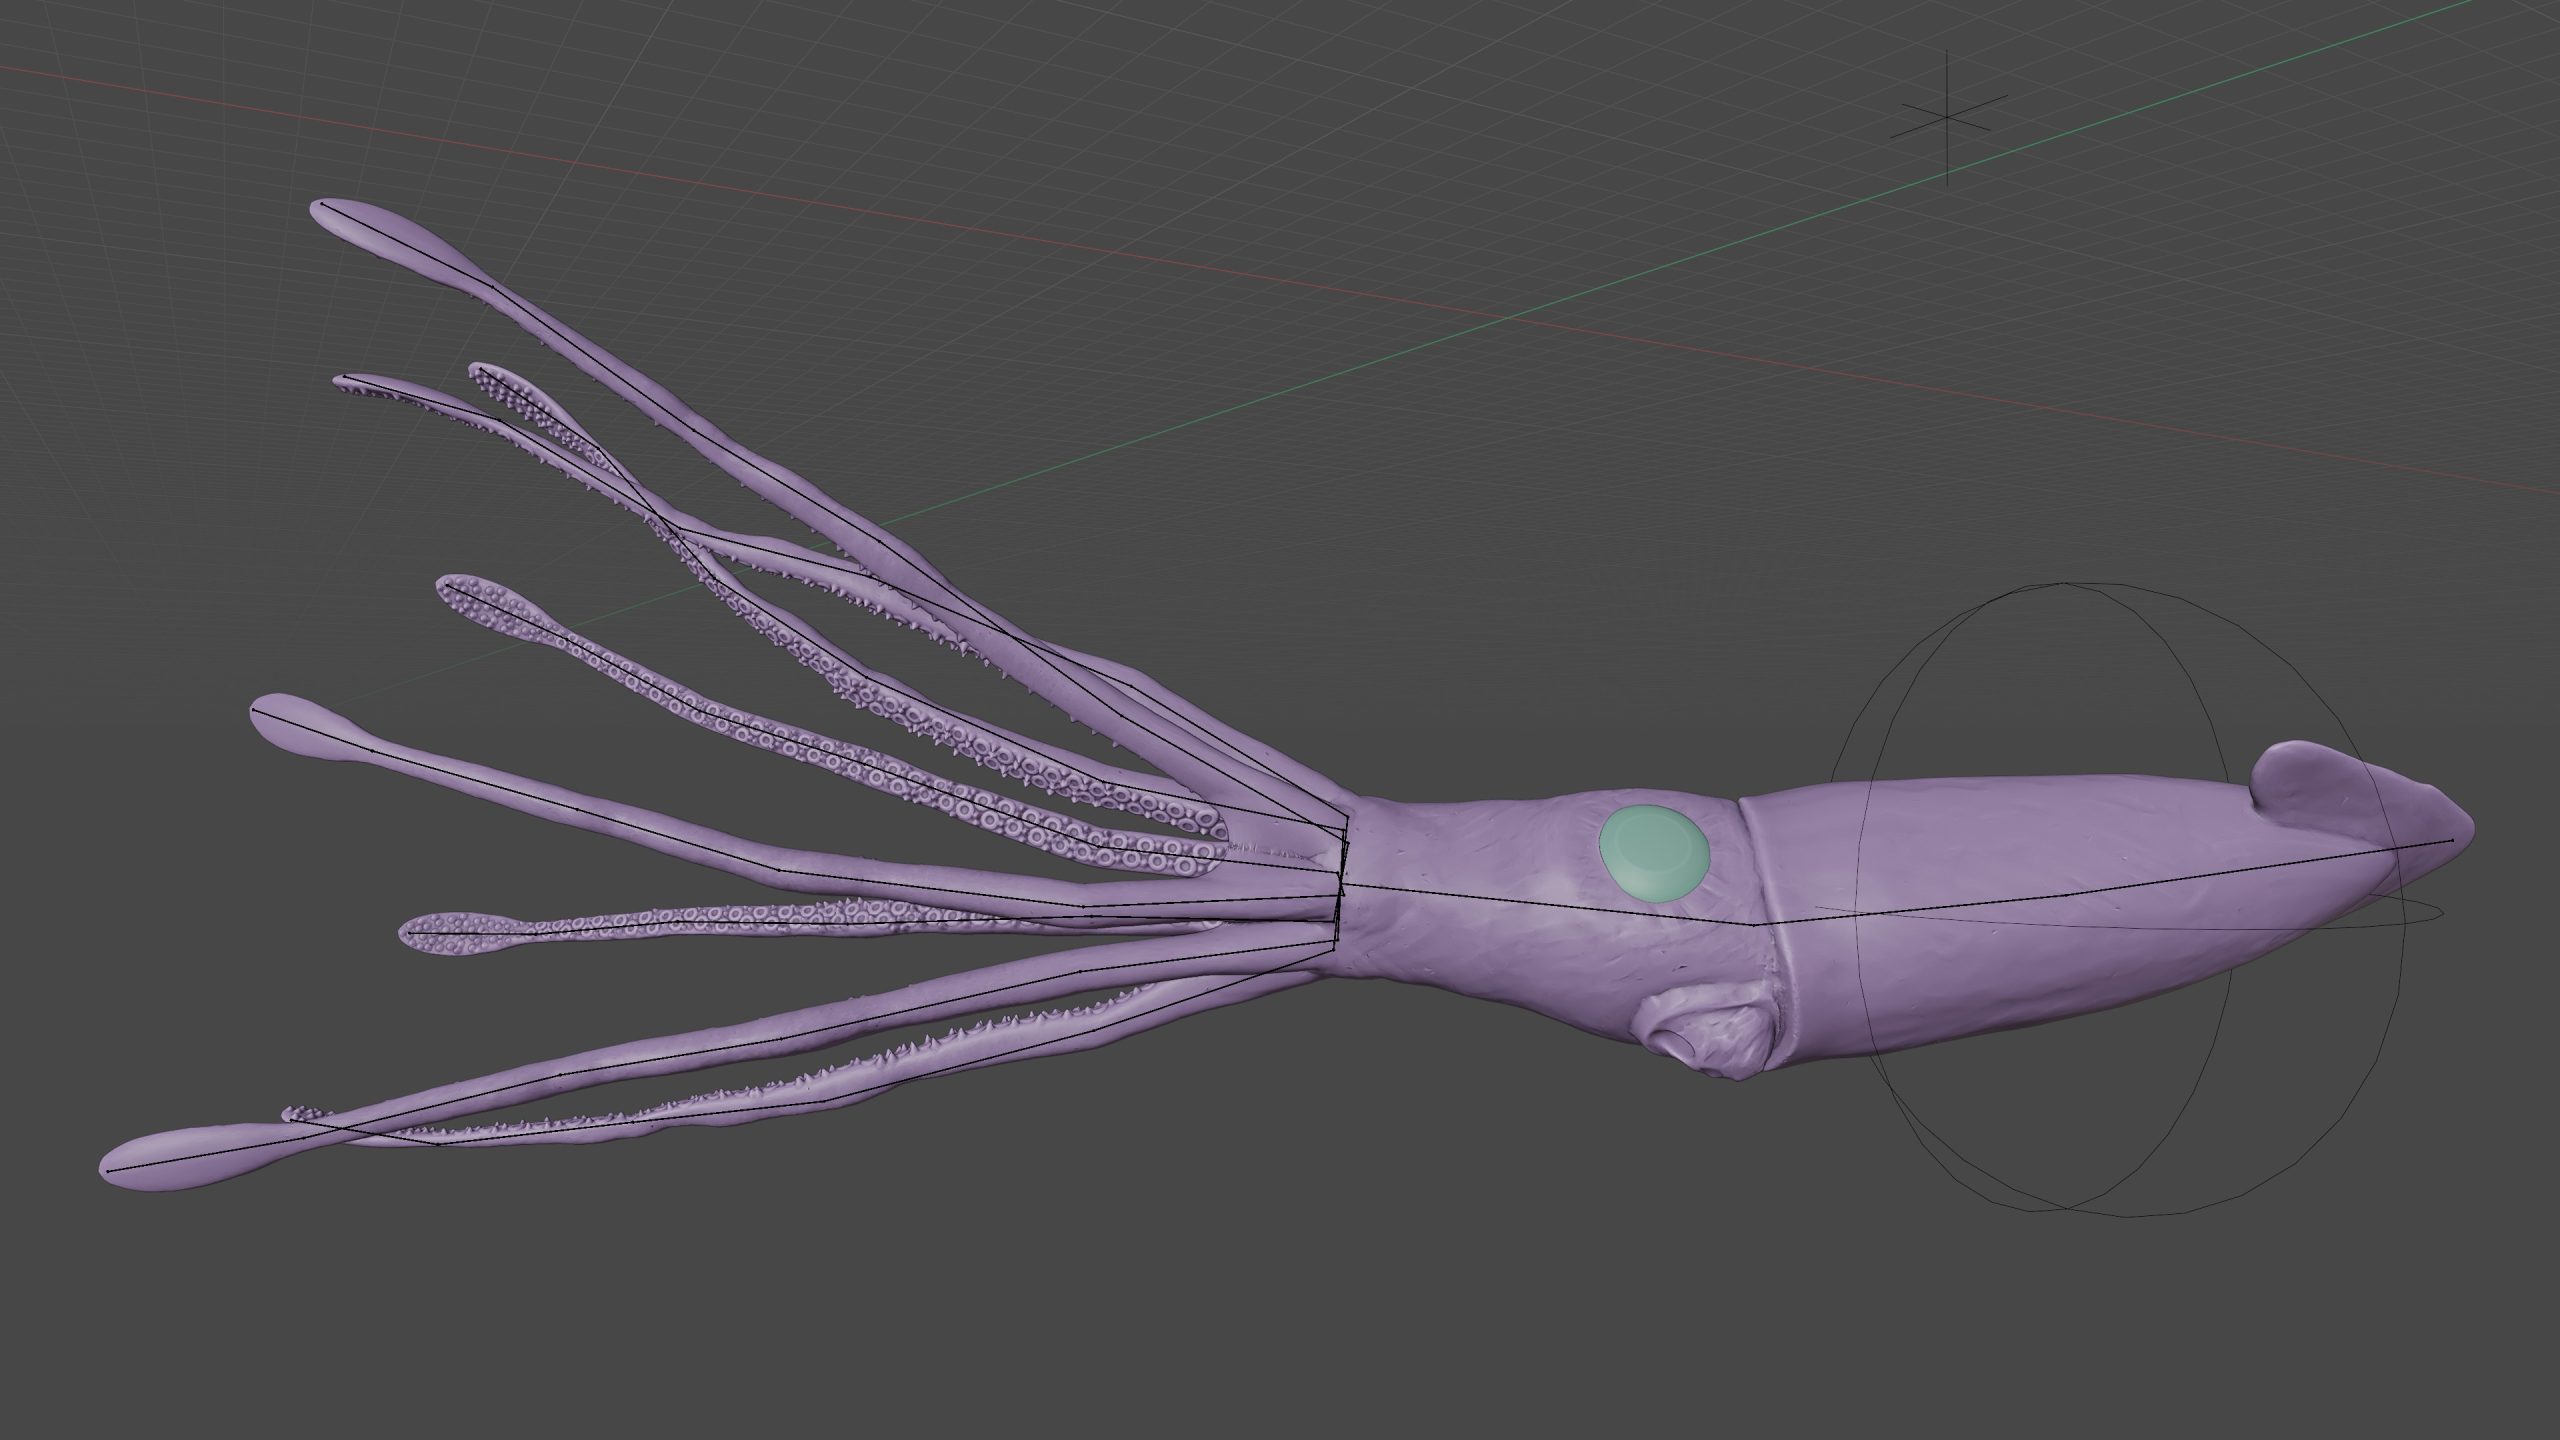
The material is a simple procedural material. It amazes me time and time again, how red these squids are in reality.

The Kelp Forest
There high underwater cliffs reared up, straight walls made of craggy chunks arranged like big stone foundations, among which there gaped black caves so deep our electric rays couldn’t light them to the far ends. These rocks were hung with huge weeds, immense sea tangle, gigantic fucus—a genuine trellis of water plants fit for a world of giants.
Twenty Thousand Leagues Under the Seas, Chapter 18: The Devilfish
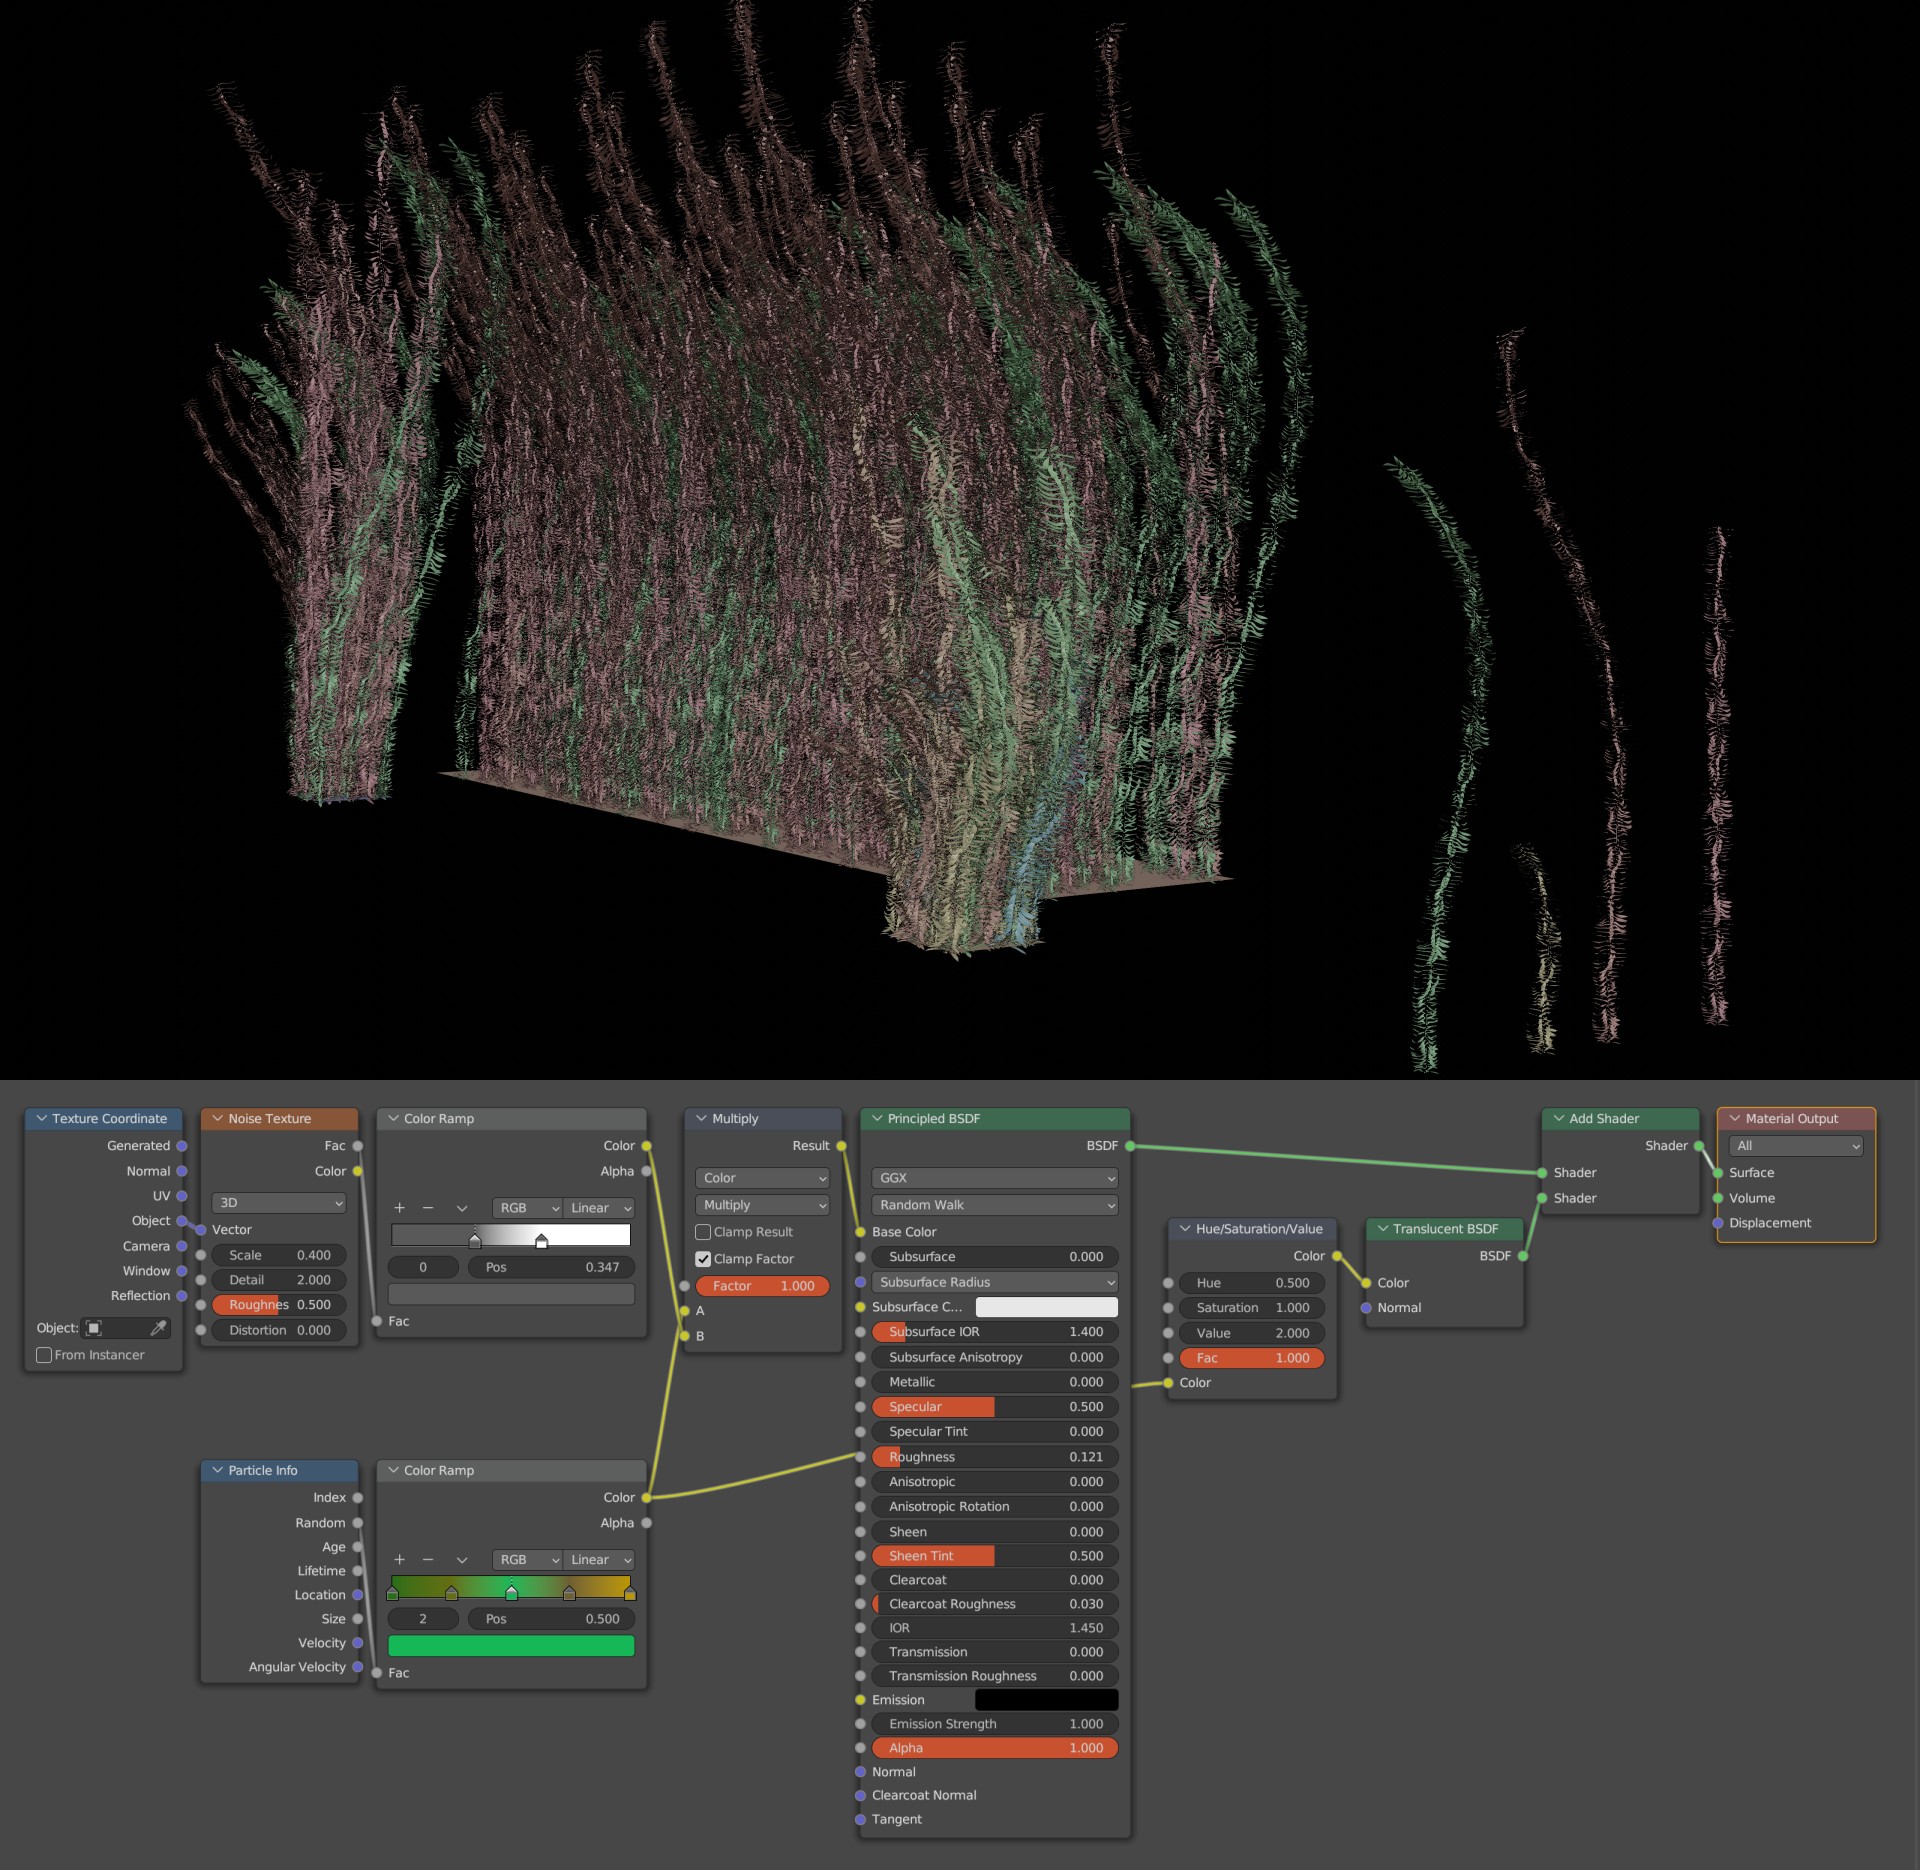
Blender as a tool is not only a joy to work with (most of the times, anyway), but it also boasts an amazing community where expertise is readily available. So how do you make something as specific as a giant kelp forest? Easy, YouTube has a tutorial, this time by Kev Binge!
I modeled some kelp stalks, twisted them with the simple deform modifiers in “bend” and “twist” modes, and spread them left and right of the submarine using particle systems.
The shader is nothing special but due to the noisy underwater mood, it works well enough.
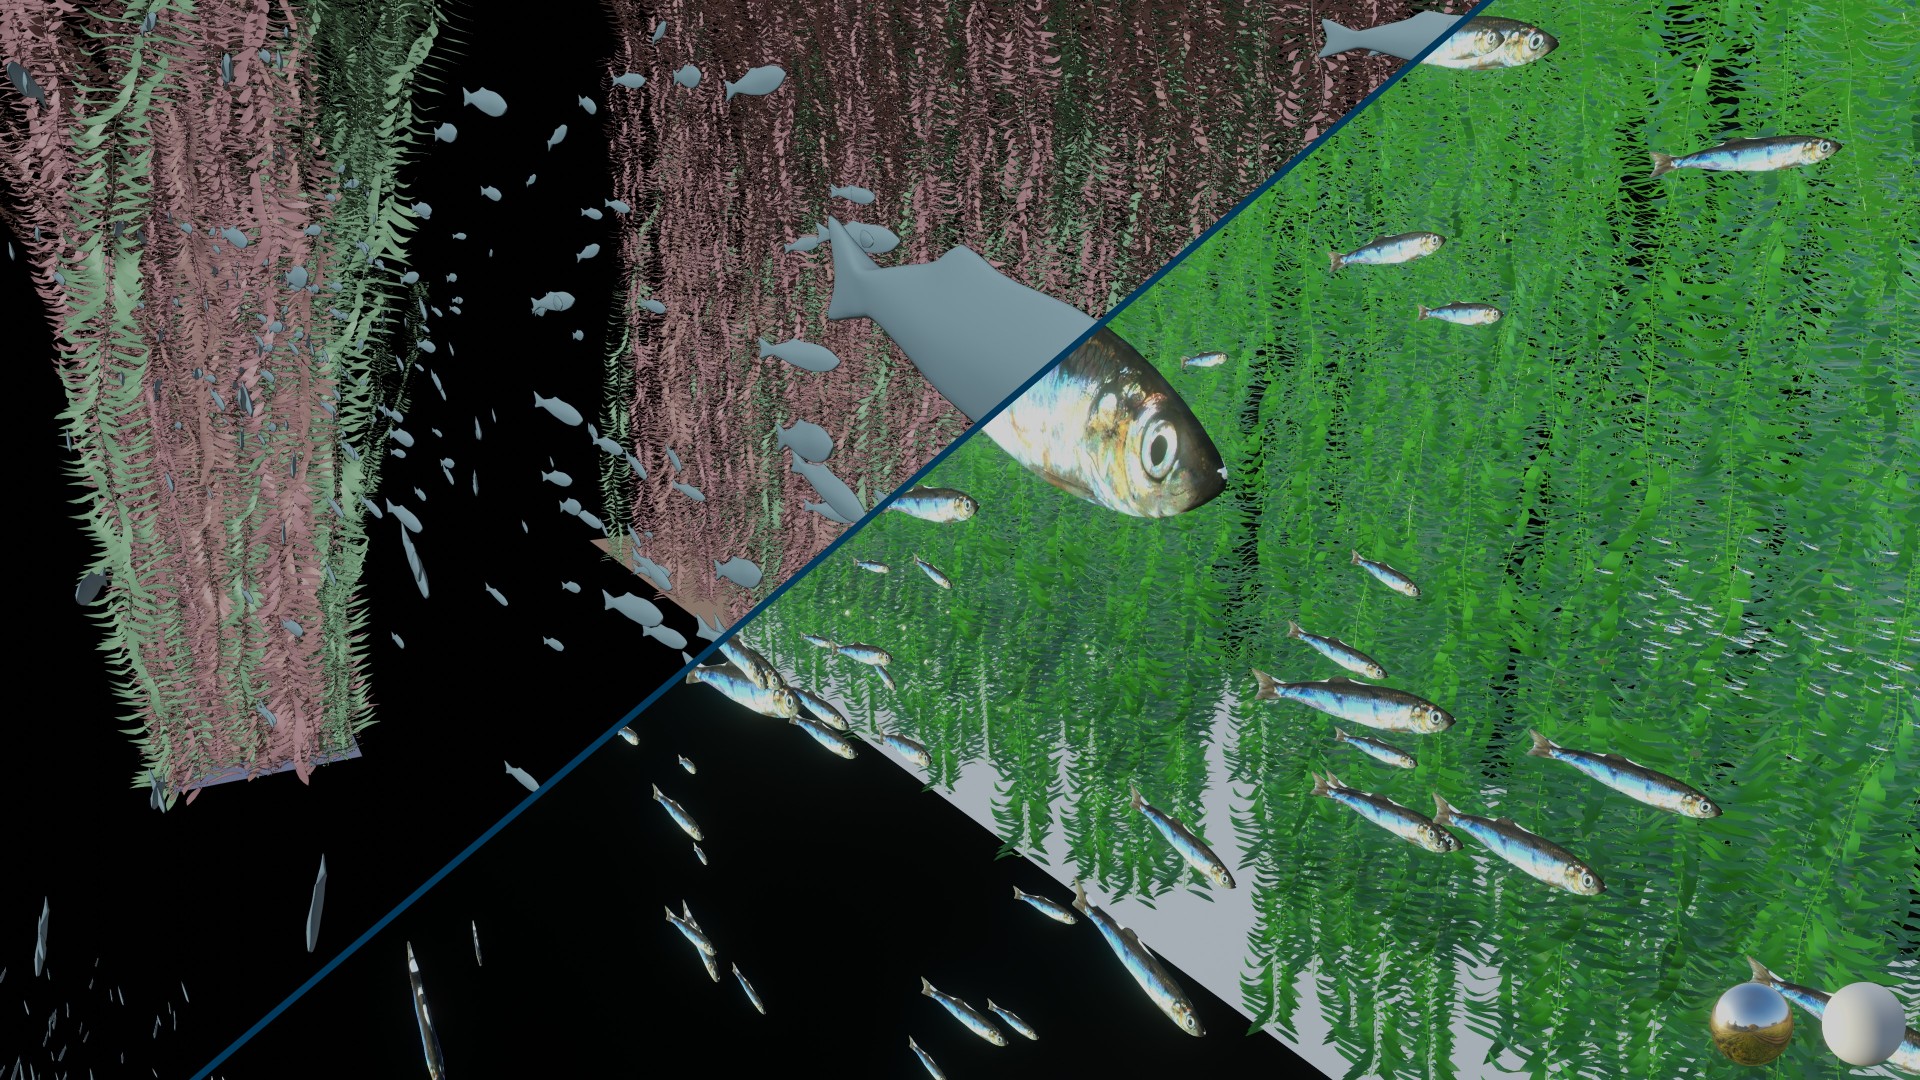
The Underwater Environment
A dense kelp forest is supposed to be teeming with life. So, to add a bit to this feeling, I spread particle systems with bubbles and fish all over the scene.
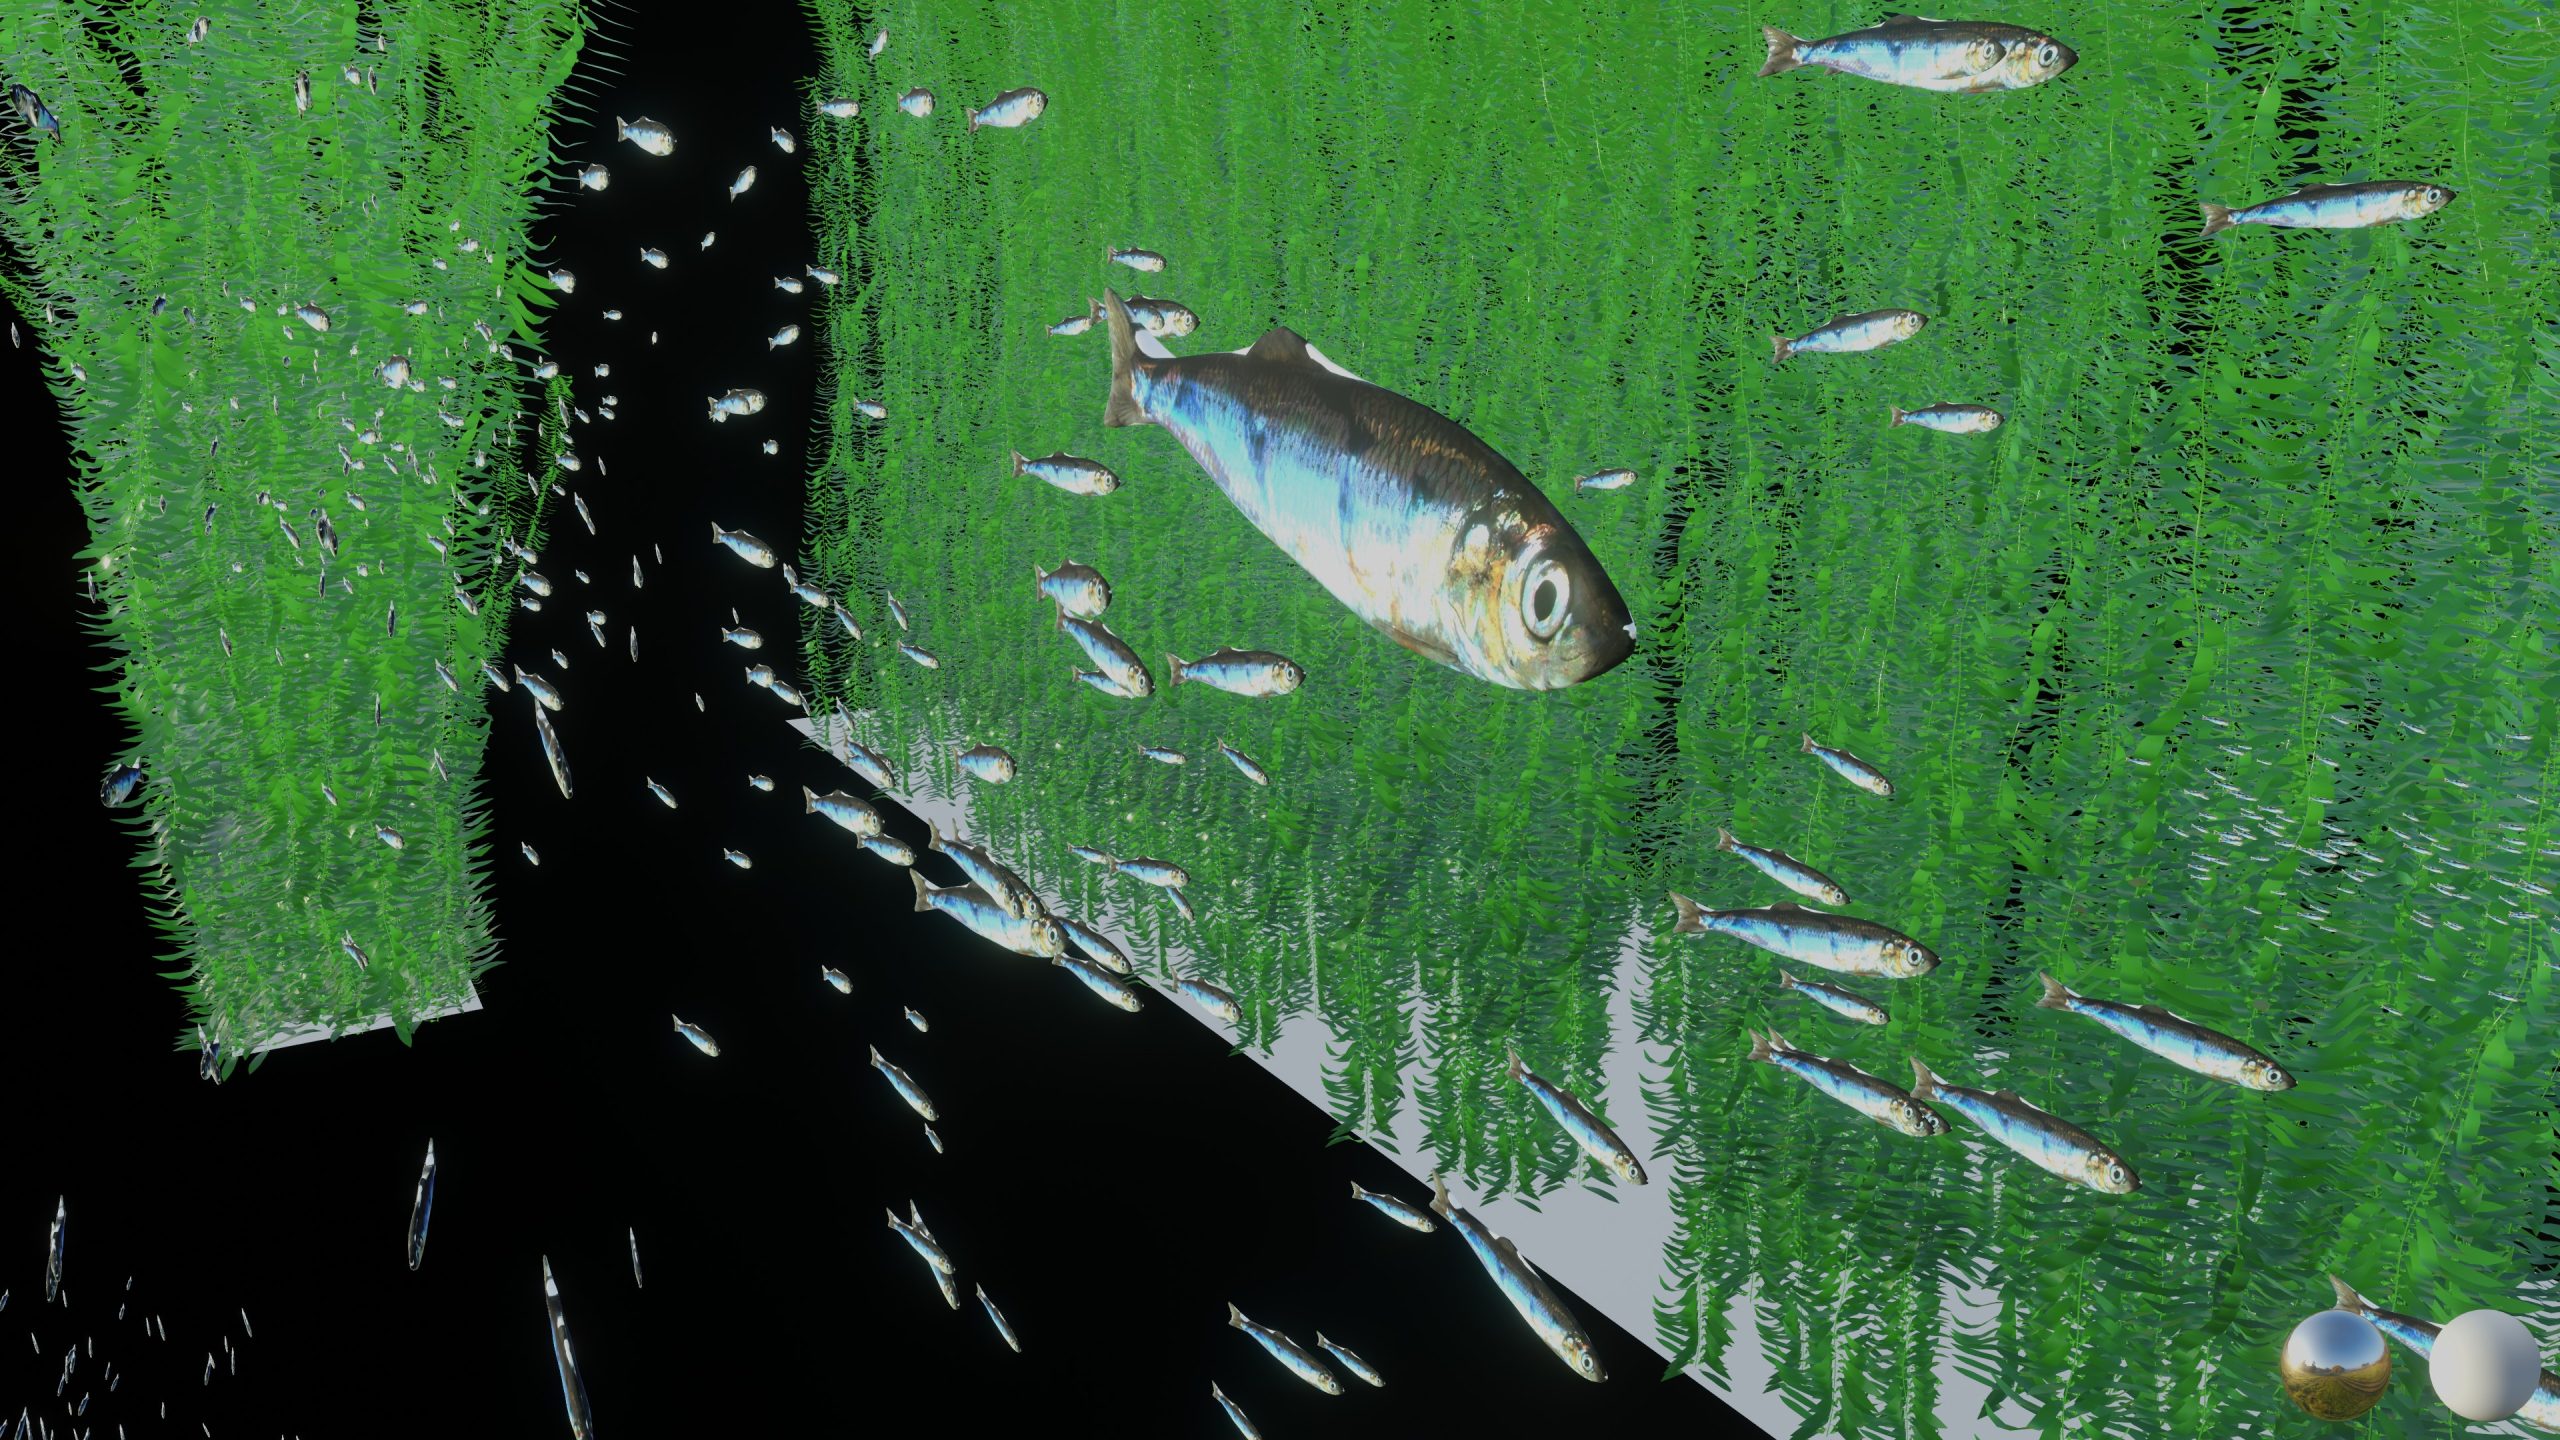
The bubbles were modeled from simple spheres with a glass shader. For the fish, I searched FreeImages.com for an image of a herring, imported it using the “import images as plains” addon that ships with Blender, traced its outline using the knife tool, and gave it a little bit of thickness.
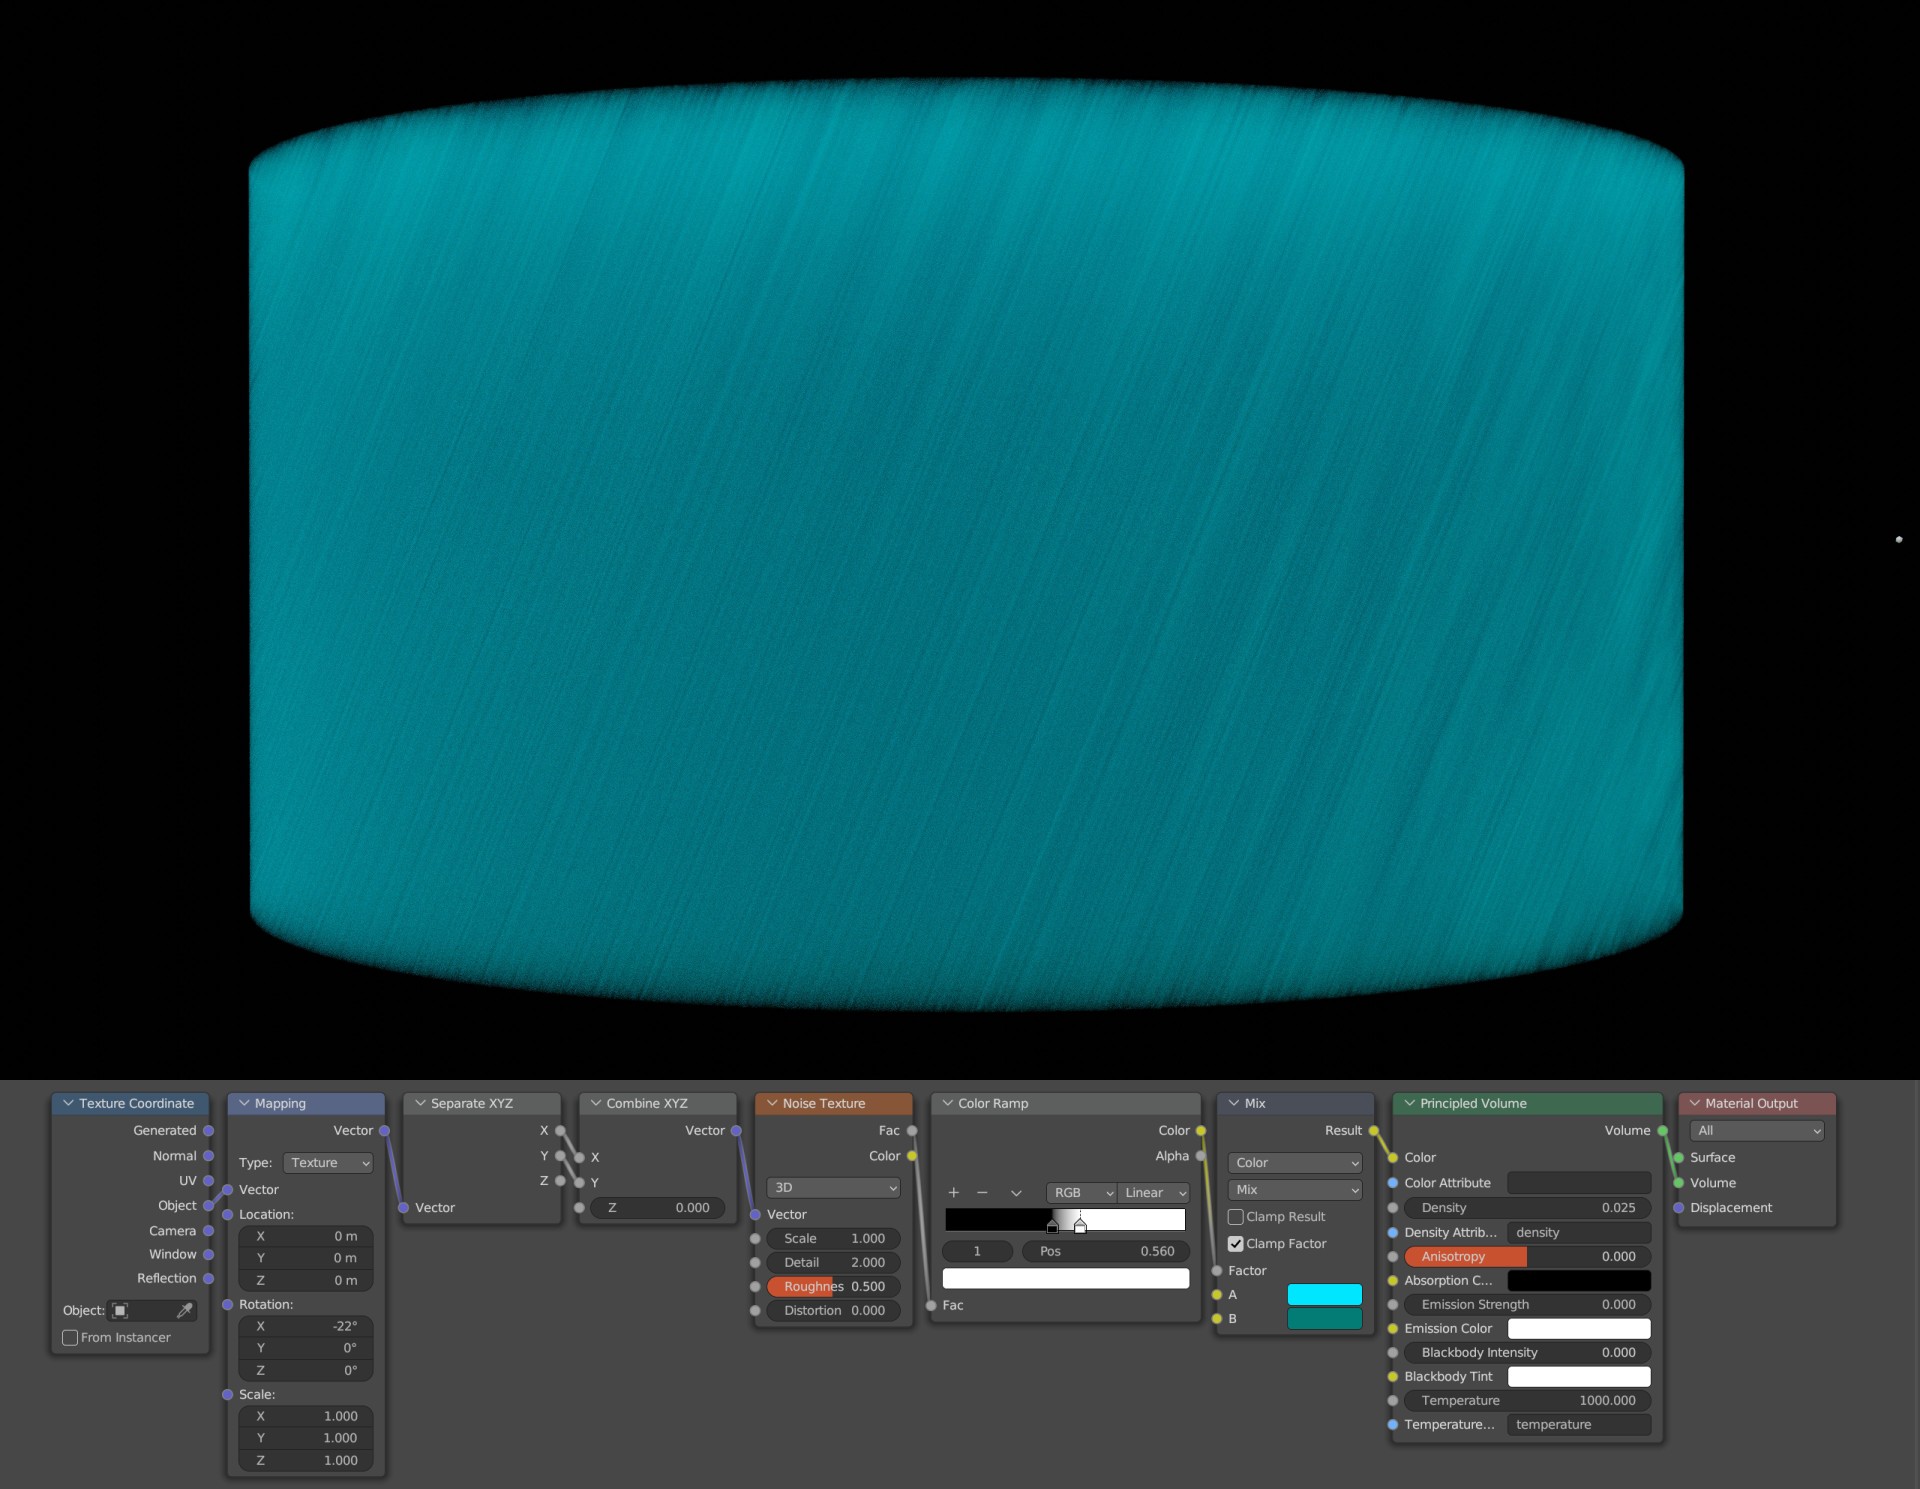
There is one key ingredient to most underwater scenes: caustics or godrays, which are beams of light that shine through from the surface of the water (In the book, the submarine is supposed to be 1800 meters below the surface, where it would be pitch dark but for the lanterns… never mind me…). A simple way to fake these kinds of caustics was to vary the color of the water volume mesh by removing the z-component of a noise texture (for beams that are continuous in the z-axis), rotating this a bit and using it to drive the shader color.
Now all components are ready, but if one were to render it now, the volume would drown out all the light and the image would be pitch black. Good, that the submarine is supposed to have bright lanterns at its stern, as well as around the window. Adding many additional lights to give the environments more depth (greenish from the top, blue light from the bottom) also helps a lot.
Post-Processing
This is a scene immersed in a dense volume, which invites one of the CG artist’s nastiest enemies: noise. Even at 4k render size and 4096 samples, the noise was very prominent in the strong lantern lights.
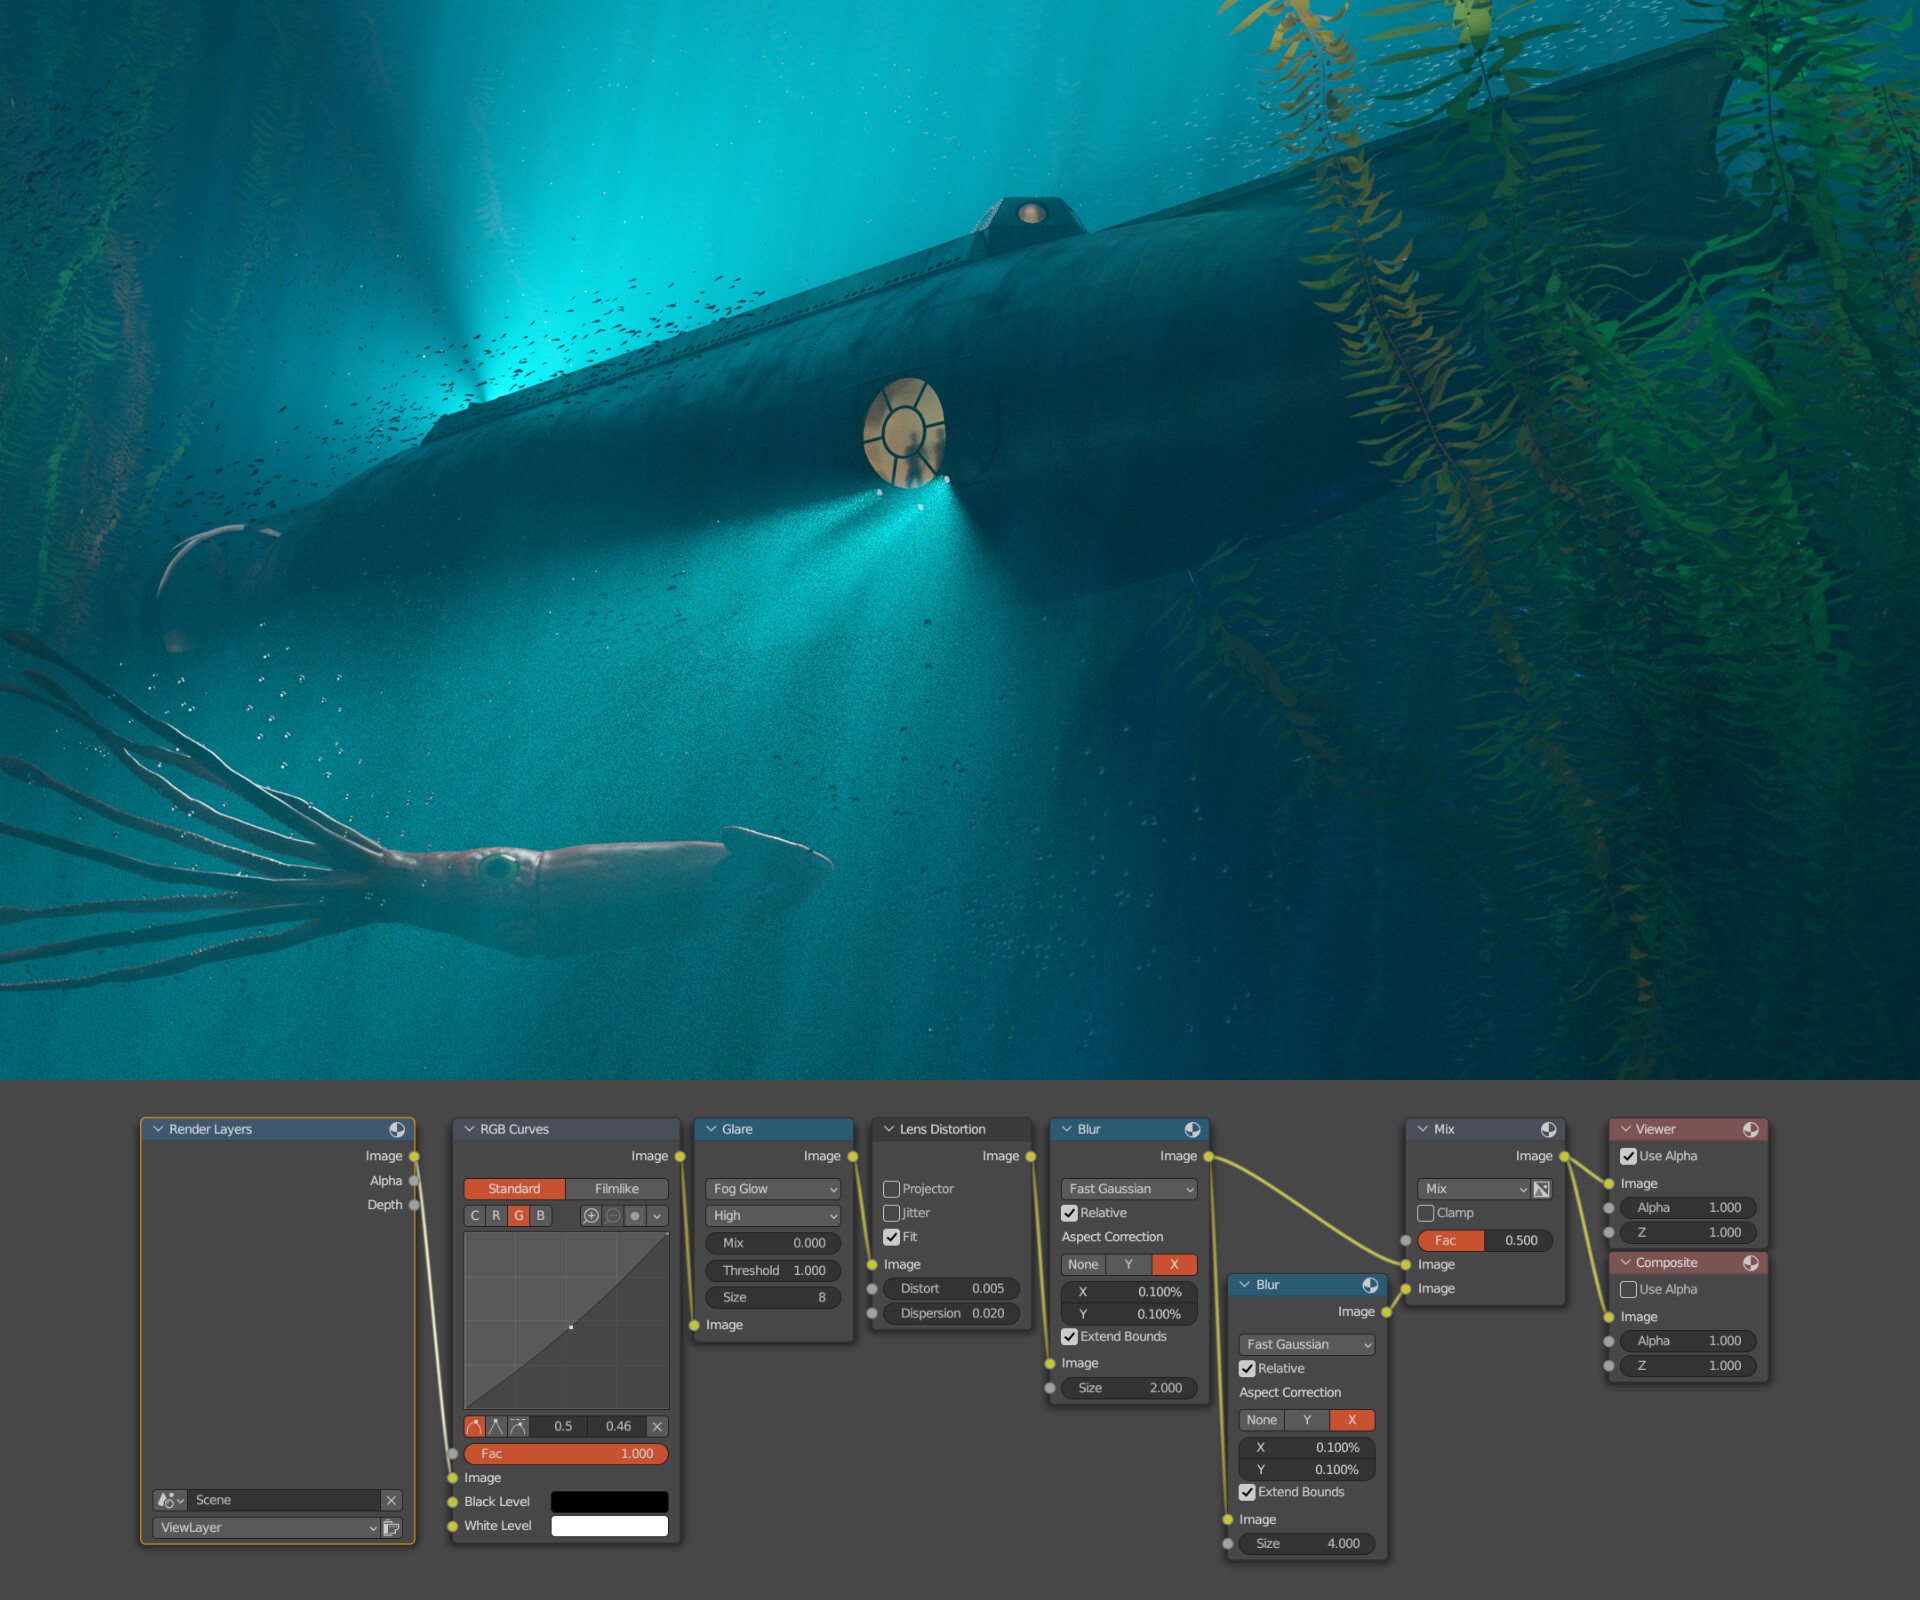
My solution to this was to use the noise as part of the image mood. Water is normally not clear and many small particles float around. By blurring the image quite heavily at the end of the post-processing workflow, the noise becomes much more like marine snow, and actually adds to the composition. In addition, the sharp lines of the submarine blur nicely, reinforcing the impression of a heavy body of water between the camera and the subject.
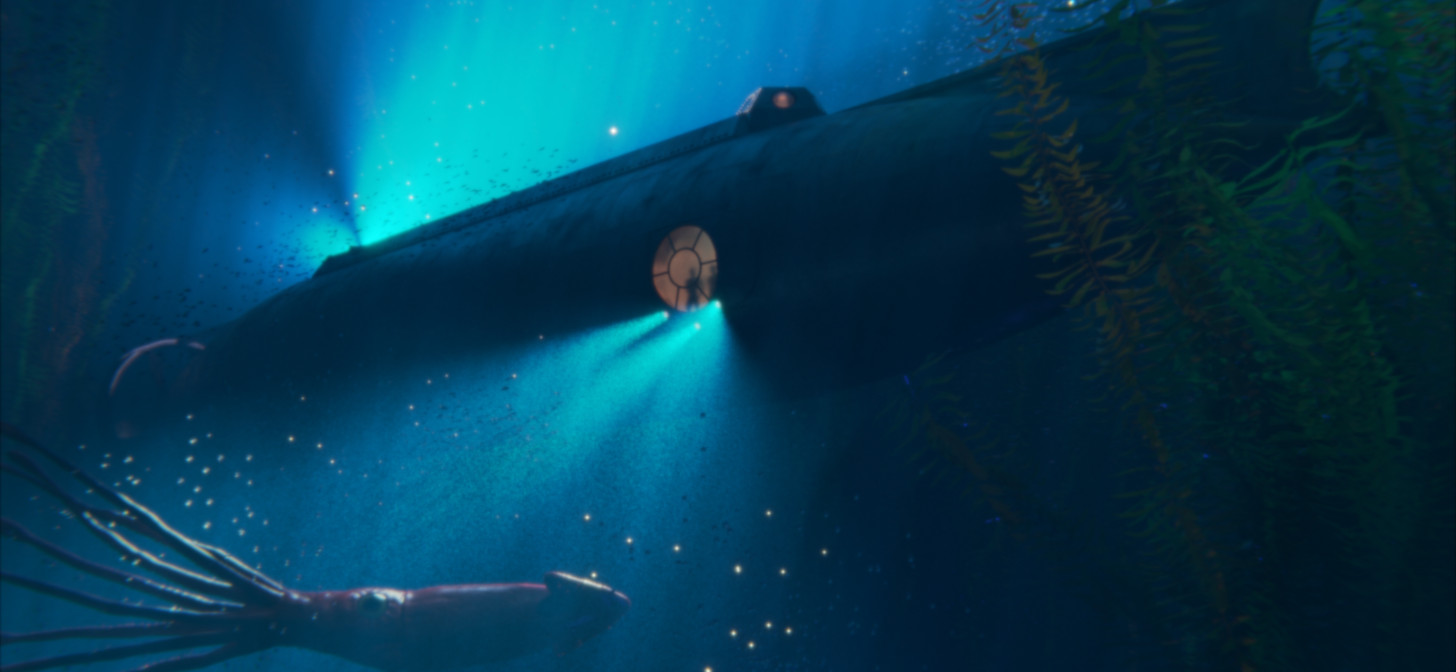
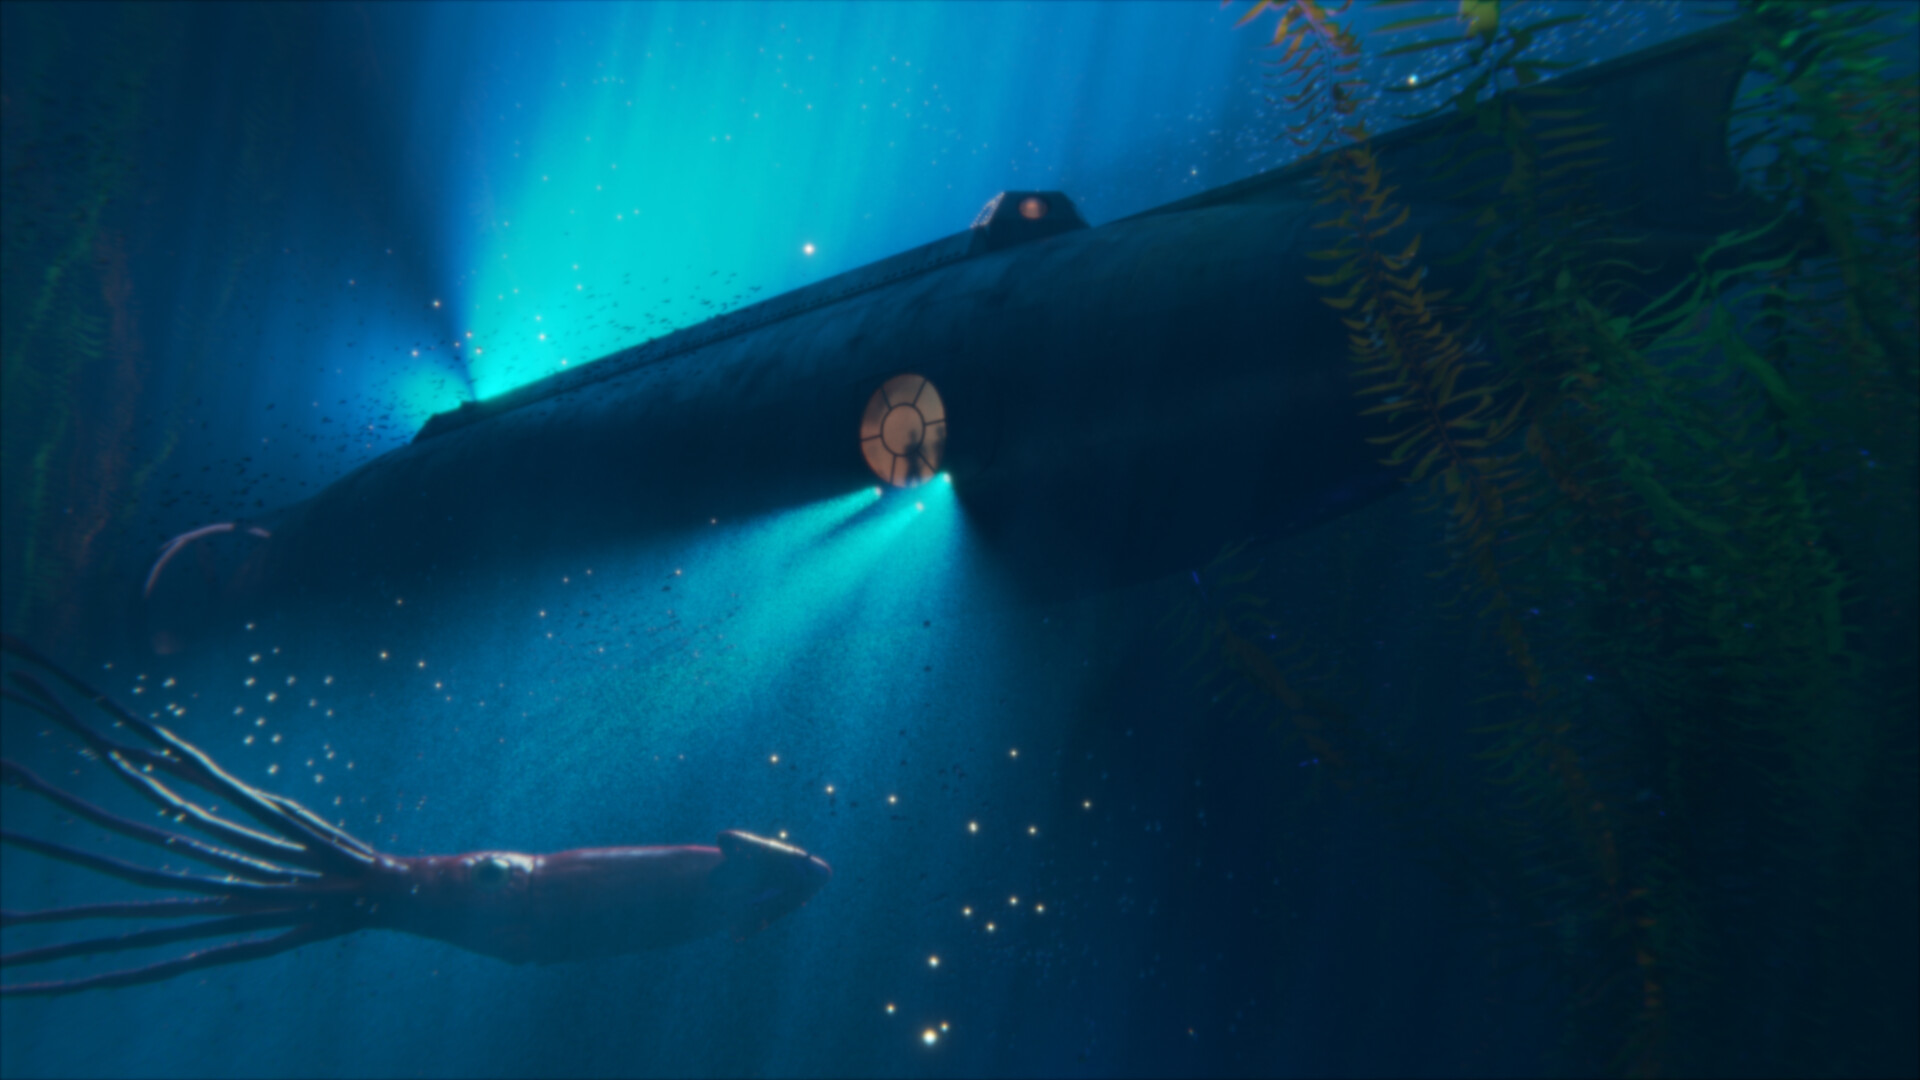
And here is the final result. Let me know what you think of it!
RENDER : The Nautilus And The Devilfish

Thank you for all the support. Feel free to ask any questions, and if you like my work, follow me on social media. Have a good day!
About the Artist
Philipp Dirksen is a Blender hobbyist from Germany.


Great work. I like it