Behind the Scenes: Heavy Industrial Fans
INTRODUCTION
Hello, I am Petr Vetecnik, a 41-year-old 3D and 2D art enthusiast from the Czech Republic. I started my 3D journey with Blender version 2.8, primarily learning from YouTube tutorials. My main focus is on hardsurface modeling and texturing, but I also like sculpting, creating simple animations, and using Blender’s geometry nodes for procedural creations, among other things.
In my workflow, I prioritise Blender as my primary modelling tool. Also, I use Substance Painter, Unreal Engine, and Krita.
INSPIRATION
My inspiration for this particular case came to me when I was learning and trying out how to simulate papers in a wind. When I saw flying papers, I got an idea that I could model a fan as a source of the wind. Adding pipes and cables came naturally as it all started to take on an industrial look.
PROCESS
Flying papers simulation
To create the papers, I used subdivided planes with three different textures to get some colour variation. I applied soft body physics to these planes and created a wind simulation.

Wind Blown Papers Simulation Using Soft Body – Blender 2.9
Props
As for the main prop, I modelled a fan, which I duplicated a couple of times to create a basic composition for the scene.

Then, I added pipes, cables, and chains to give it an industrial feel. All of these elements were created using Blender’s geometry nodes. This approach allows for the rapid generation of various variations and easy adjustments because the props are procedural. This demonstrates the huge power of Blender’s geometry nodes.

Procedural chain and pipe in geometry nodes:

Texturing
For texturing, I used an almost universal material, “Rusted Peeled Paint,” which I created in Substance Painter for almost everything.

Metal Smart Material – painted metal (3) – substance painter | anchor points
Lighting
Here, I decided to use complementary colours to make the scene more dramatic. The scene was lit using a combination of point and rectangle lights with a red and green tint.
As a final touch, I created flickering light on the ceiling, adding even more drama to the final animation.

Flickering toplight:

For information on creating a flickering light in Blender, you can watch this video:
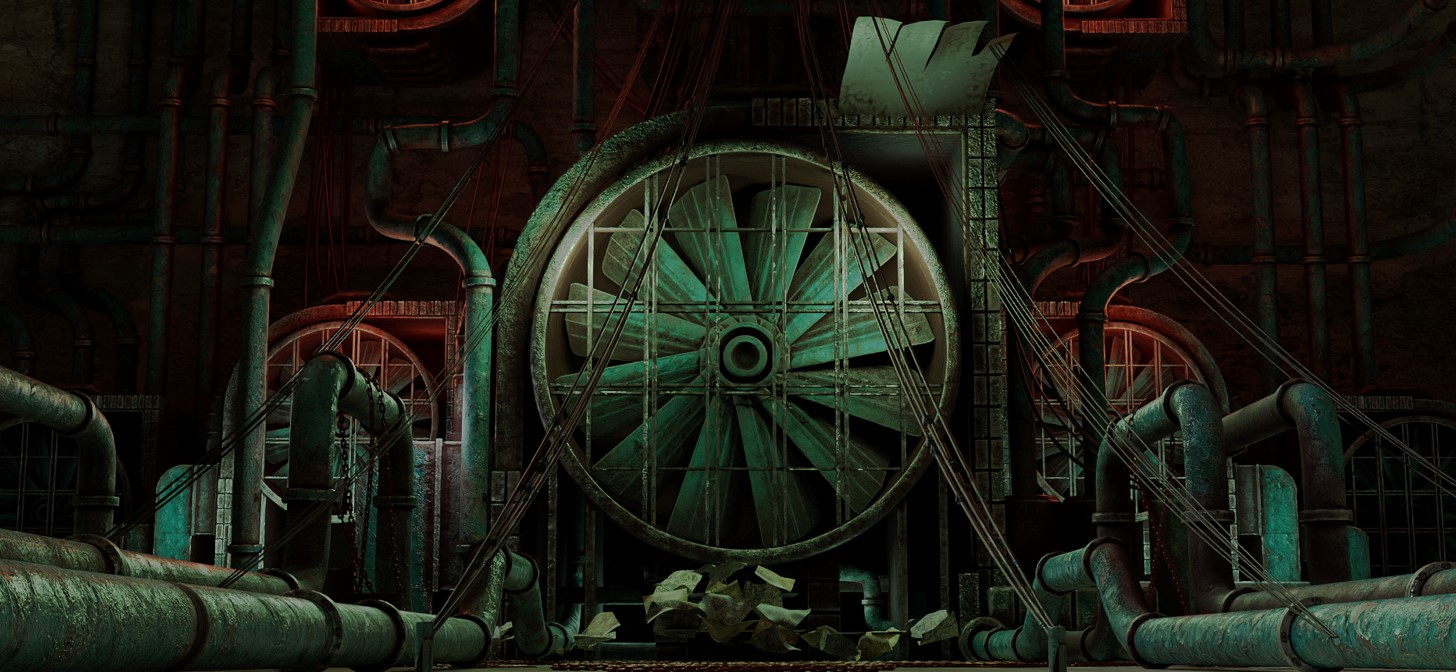
RENDER – Heavy industrial Fans


You can view animations of this work on my ArtStation page:
Thank you for your time. I hope you enjoyed the article.
Have a nice day!
About the Artist
Petr Vetecnik is a 3D generalist from the Czech Republic, currently working in the UPP VFX studio in the virtual production department.


